11 Fixes for “Failed to Create Java Virtual Machine” Error
To this day, Java is a popular programming language. It may be outdated, but over time it has not lost its popularity and usefulness. It is still under active development and is used by many developers. Changes and improvements to the language are developed regularly, making it easier to compile and run Java-based applications.
What is Java in simple words?
Java is a widely used programming language that can be used on a variety of operating systems and devices. It has many applications including web development, mobile applications, desktop applications and server side programming.
Java creates a virtual machine (VM) to run code written in that language. If something goes wrong with the data or code that the Java Virtual Machine is processing, the Java Virtual Machine may fail to start.
What is a Java Virtual Machine Error?
A Java Virtual Machine error, often referred to as a JVM error, is a type of error that the Java Virtual Machine generates. This error usually indicates that the computer cannot read or understand the code.
This error can occur for various reasons, including when the computer does not have the necessary updates installed or is incompatible with Java. It is extremely important to understand how to fix a problem with the JVM if you encounter it while using a computer.
Over the past few days, we have learned that some customers are seeing the error message “Failed to create the Java Virtual Machine”. According to our research, the problem usually occurs when the user tries to run a Java-based program.
What causes the “Failed to create the Java Virtual Machine”error?
There are several conditions that will lead to this issue:
- Java is executed with incorrect arguments or options: When you run a homemade program or try to open an open source application known to cause system instability.
- Java global maximum heap memory not enough: One of the most common causes of this problem is an attempt to run a Java application with a maximum heap memory size greater than the one specified in the system variable.
- Administrator credentials are required for the Java executable and/or program: This can happen with applications that require administrator access to function properly.
If you are trying to figure out how to fix the “Could not create Java Virtual Machine”issue, this article will provide you with some proven solutions. Below is a list of solutions that other people in a similar scenario have used to solve their problems.
For best results, try the solutions below in the order they are offered until you find the one that works for your particular situation.
How to fix Java virtual machine error?
Here are solutions to fix Java Virtual Machine errors:
- Adding _JAVA_OPTIONS to system variables
- Opening java.exe with admin rights
- Reinstall Java
- Fixing bugs with code
- Editing the Eclipse.ini file
- Check compatible Java version
- Update the Path and Java Home Environment variables.
- Check launch arguments
- Check Syntax
- Check memory allocation
- Increase RAM allocation for JVM (Java Virtual Machine)
Let’s consider each solution separately:
Solution 1: Adding _JAVA_OPTIONS to System Variables
Most affected customers were able to resolve the issue by changing the Java system variable named _JAVA OPTIONS to Xmx512M. This effectively determines the maximum memory heap size for Java globally.
This will eliminate any error messages because the maximum heap memory size defined in the system variable is greater than the maximum heap memory size set in the Java startup application. Several customers with the same issue have stated that after following the instructions below, the issue was completely resolved.
To increase the global maximum heap memory size, add the _JAVA OPTIONS element to your system variables as follows:
1. To open the Run dialog box, press the Windows key + R. Then, to open the System Properties page, type sysdm.cpl and press Enter.
2. Click the Advanced tab and select Environment Variables on the System Properties page.
3. Click New in the Environment Variables field (under System Variables).
4. Set the variable name to _JAVA OPTIONS and the variable to -Xmx512M in the New System Variable panel, then click OK to save your changes.
5. For the changes to take effect, close all previously open windows and restart your computer.
6. Open the program that was previously giving the error “Failed to create the Java Virtual Machine”the next time you run it to see if it works correctly.
If you’re still getting the same error message when you run the program, try adding the Java Recycle Bin path to an environment variable, which might be “%\USER PATH\Java\jdk1.6.0_39\bin”.
Solution 2 – Opening java.exe with administrator privileges
Several people with the same problem have been able to solve it by forcing the main Java executable (java.exe) to open as administrator.
After applying this update to both the main Java executable and the program executable that displays the error message, several users reported that the issue was resolved.
Here is a short description of everything:
1. Navigate to the Java installation location in File Explorer. We will need to navigate to the main location of the Java executable (java.exe).
By default, it should be in the Program Files/Java/*JRE build version*/bin folder. Depending on which Java runtime environment you are using, the exact position will vary.
2. Select “Properties”from the context menu by right-clicking on the java.exe file. Then under the Compatibility tab select “Run this software as an administrator”and check the box (under Settings). To save your changes, click Apply.
3. Repeat the procedure by right-clicking the application executable (which caused the error): Application > Compatibility > Run this software as an administrator.
4. Check if the problem notification is resolved by running the program.
Insufficient administrator rights can also cause a problem with the Java Virtual Machine. As a result, some users may need to grant Java administrator rights.
Users can grant Java administrator access on Windows 10 by following the steps above.
Solution 3: Reinstalling Java
In some cases, the problem occurs because Java was installed incorrectly or because its installation got corrupted over time. As a result, after completely uninstalling Java, we will reinstall it at this point. For this:
1. To enter the Run prompt, press the Windows key + R and type “Appwiz.cpl”or go directly to the control panel.
2. The Programs and Features screen will appear after pressing Enter.
3. Scroll through the list of installed applications on the Programs and Features screen until you find Java.
4. To remove it from the system, right-click on it and select Remove.
5. First uninstall the main Java installation, and then all additional Java installations, including updates and other versions.
6. Restart your computer after removing all software.
7. After reboot, go to this page and download the latest JRE.
8. Check if there is a problem.
9. If the issue persists, go here to obtain and install the latest JDK.
10. If you are already using the JDK, consider upgrading to another version or removing the JRE that comes with it.
Solution 4: Fix bugs with code
This error can occur for various reasons, including if there are certain errors in your code. We will look at some of them here.
Remove the hyphen: Some users reported that replacing the double hyphen “-“in their code with a single hyphen “-“fixed the issue. Consider the following scenario:
Change code:
“sony@sony-VPCEH25EN:~$ java –version
Picked up JAVA_TOOL_OPTIONS: -javaagent:/usr/share/java/jayatanaag.jar
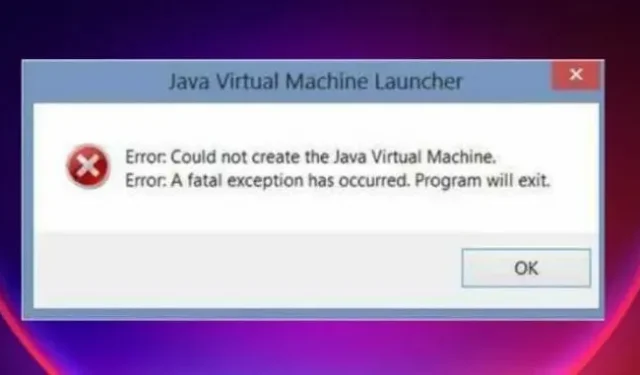
Unrecognized option: –version
Error: Could not create the Java Virtual Machine.
Error: A fatal exception has occurred. The program will exit.”
TO
 “sony@sony-VPCEH25EN:~$ java -version

Picked up JAVA_TOOL_OPTIONS: -javaagent:/usr/share/java/jayatanaag.jar

Unrecognized option: –version

Error: Could not create the Java Virtual Machine.

Error: A fatal exception has occurred. The program will exit.”
-Djava.endorsed.dirs=”C:\Program Files\Apache Software Foundation\Tomcat 8.5\endorsed”
Make sure the “-vm”entry is added above the vm arguments in your eclipse.ini file. Otherwise env vars will select JVM V6.
If you are using Ubuntu, you should be aware that only Java 8 is supported. As a result, the third approach will be used. Install the old version of Java after uninstalling the current one.
Solution 5: Editing the Eclipse.ini file
To solve this problem, we can make changes to the Eclipes.ini file. We have broken it down into different issues as there may be several issues with setting it up that need to be addressed. Choose the one that best suits your situation.
Reduced memory usage
1. Using notepad, open the Eclipse.ini file in the Eclipse folder.
2. Look for a line that looks like “-Xmx256m”(it could be -Xmx1024m or -Xmx 512m).
3. Now, depending on the RAM installed on your computer, change the default amount to a more reasonable number and add the version number. Consider the following scenario:
 -Xmx512m

-Dosgi.requiredJavaVersion=1.6

OR

-Xmx512m

-Dosgi.requiredJavaVersion=1.7

OR

-Xmx512m

-Dosgi.requiredJavaVersion=1.8
4. Remove the number “256m”from the line “-launcher.XXMaxPermSize”.
5. Check if the problem exists.
fiddling around
1. Remove the following lines from your file, if possible.
-vm P:\Programs\jdk1.6\bin
2. Also change the following lines.
set -Dosgi.requiredJavaVersion=1.5
TO
set -Dosgi.requiredJavaVersion=1.6
3. Also over “-vmargs!”line, try adding the following line.
-vm C:\Program Files (x86)\Java\jre6\bin\javaw.exe
4. Also use the following line to refer to JVM.dll.
 -vm

C:\Program Files\Java\jre7\bin\client\jvm.dll
5. Replace “-vmargs”with the path to javaw.exe in the Eclipse file. Consider the following scenario:
 -startup

plugins/org.eclipse.equinox.launcher_1.3.0.v20120522-1813.jar

--launcher.library

plugins/org.eclipse.equinox.launcher.win32.win32.x86_1.1.200.v20120522-1813

-product

com.android.ide.eclipse.adt.package.product

--launcher.XXMaxPermSize

256M

-showsplash

com.android.ide.eclipse.adt.package.product

--launcher.XXMaxPermSize

256m

--launcher.defaultAction

openFile

**-vm “c:\Program Files\Java\jdk1.7.0_07\bin\javaw.exe”**

-Dosgi.requiredJavaVersion=1.6

-Xms40m

-Xmx768m

-Declipse.buildId=v21.1.0-569685
6. You can also try adding the following line at the end to see if that helps.
 -vmargs

-Xms40m

-Xmx512m

-XX:MaxPermSize=256m
7. Also see if removing the following lines from eclipse.ini solves the problem.
-XX:+UseStringDeduplication
-XX:+UseG1GC
If the problem persists, you can try erasing the eclipse.ini file, which seems to have solved the problem for some people, but creates a backup beforehand in case you need one. Also, before starting Java, make sure that all power-hungry applications are closed to ensure that sufficient resources are available.
Checking for JDK corruption
1. To launch the Run prompt, press Windows + R and type cmd.
2. Check if the following command returns an error.
c:>\ java -version
3. If a problem occurs, completely reinstall the JDK.
Solution 6 – Check the compatible Java version
When the code is compiled in the IDE, the message Failed to build the Java Virtual Machine is displayed. This is because the IDE is not compatible with the version of Java installed on your computer.
Check which versions of Java your IDE supports. Then determine which Java is installed and compare it to the supported version. Install the correct version if it is not already installed.
Solution 7 – Update Path and Java home environment variables
On Windows 10, Java options set in environment variables can result in the error Failed to create Java virtual machine.
1. Open File Explorer.
2. Copy and paste the following into the address bar explorer shell:::{BB06C0E4-D293-4f75-8A90-CB05B6477EEE}
3. In the left pane, select Advanced system settings.
4. Select the “Advanced”option from the drop-down menu.
5. In the System Variables section, select Environment Variables and then New.
6. Enter _JAVA OPTIONS in the name field.
7. Enter -Xmx1024M in the path/value field.
8. Click OK.
9. Restart the application.
You should also double check that the correct path is provided for the Java SDK.
1. Navigate to C:\Program Files in File Explorer\Java.
2. Open the folder for the JDK version you want to use.
3. The path to the folder must be copied.
4. Variables in the environment (see previous steps).
5. Select JAVA HOME from the system variables menu.
6. Select Change.
7. Click OK after entering the copied path.
Solution 8 – Check launch arguments
Check your initial settings. While you may have the correct version of Java installed, the launch options may change the version used for compilation. If you performed an in-place Java upgrade, it is likely that the launch options are still from an earlier version.
Solution 9 – Check the syntax
Make sure the syntax is correct for any options you enter. The problem “Could not create Java virtual machine”can be caused by even the smallest mistake. Look for an extra hyphen or an incorrectly specified version.
Solution 10 – Check memory allocation
Insufficient memory allocated for use is one of the main causes of the problem Failed to create a Java virtual machine.
1. Open File Explorer.
2. Go to the C:\Program Files\Java folder.
3. Open the JDK folder with the installed version number.
4. Locate and run the jvisualvm.exe file.
5. The software provides a graphical user interface for memory management.
6. Increase the amount of memory and try again.
Solution 11 – Increase RAM allocation for JVM (Java Virtual Machine)
You must have administrator rights to make these changes.
1. Press the Windows key and the Pause Break button at the same time.
2. In the new window that appears, select Advanced system settings.
3. Click the Environment Variables button at the bottom of the System Properties window that appears.
4. The environment variables window will appear. Click the New button in the System Variables section.
5. A window for the new system variable will appear. Fill in the gaps with the appropriate values.
- _JAVA OPTIONS is the variable name.
- -Xmx512M is a variable value.
6. Click OK.
6. Click the OK button in the Environment Variables section.
Conclusion
Setting up the development environment can take a long time. Before you can write or compile code, you will need to set up a lot of things and meet a lot of prerequisites. These problems are not specific to Java; each language has its own set of prerequisites that must be met before it can be used.
Leave a Reply