12 Ways to fix iMessage not working on Mac
Although we usually send messages using our phones, it is more convenient to be able to carry on existing conversations and even start new ones right from your Laptop. One of the main advantages of utilizing iMessage within the Apple environment is this.
Don’t panic if you’re having trouble sending or receiving iMessages on your Mac. I can help you with a few useful fixes so that your iMessage resumes functioning normally.
1. Verify whether the receiver has iMessage
If iMessage isn’t functioning on your Mac, check to see if the person you’re attempting to send a message to has the app first before getting all irritated about it. Only other Apple devices with iMessage enabled can use the app.
To see if your messages will be sent, try sending them to a few people you’ve already spoken to over iMessage. If the problem just affects one contact, it might not be your fault after all. But, if you are unable to send a message to your contacts, your device is the problem.
You may also see if the problem only exists on your Mac or if it also affects your other Apple gadgets.
2. Look into your internet connection
Although it may seem simple, customers frequently fail to check their internet connection when iMessage isn’t functioning properly on their Mac. Sometimes, the root cause of these issues is a subpar or inconsistent internet connection.
Hence, make sure your internet connection is steady and dependable before moving on to more complex troubleshooting techniques to fix iMessage not working on Mac.
Avoid switching between your iPhone and Mac while utilizing your iPhone as a hotspot. My experience has shown that using your iPhone for a while leads your Mac to disengage from your iPhone’s hotspot, which can impair iMessage’s functionality.
3. See whether iMessage is unavailable
Apple Messages may also become inoperable due to a brief outage. If you want to see if iMessage is unavailable for everyone else, go visit Apple System Status. See if iMessage is next to a green circle. If you observe something different, Apple might be having technical difficulties, and you might need to wait until Apple’s engineers resolve the problem.
4. Use the same Apple ID to log in
The usual problem is with your Apple ID and iCloud if the messages from your iPhone don’t appear on your Mac or vice versa. Those who share devices and have several Apple ID accounts frequently have this issue.
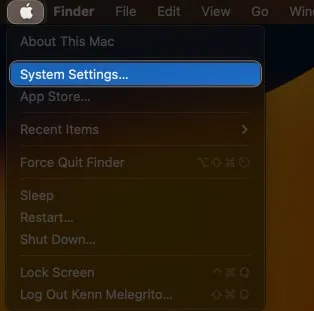
- To check which Apple ID account is signed in on a device, click the Apple menu → System Settings.
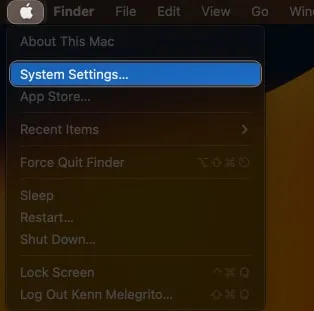
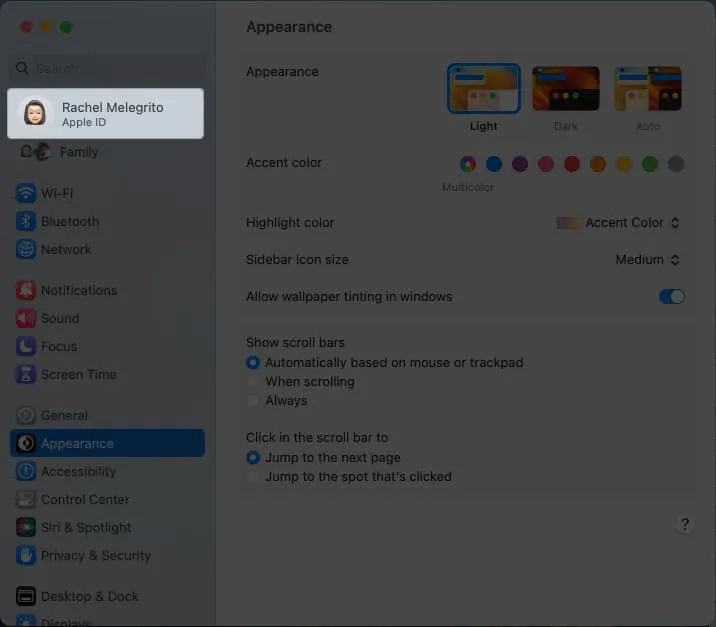
- At the top of the sidebar, check whose Apple ID is signed in.
Ensure that the Apple ID signed in on your Mac is the same as your iPhone or another Apple device you’re using to send messages.
Message Forwarding should be enabled if you’re using an iPhone and a Mac so that your Mac may receive and send messages using Messages.
On your iPhone, carry out the following to enable it:
- Go to the Settings app → Messages.
- Select Text Message Forwarding.
- Find your Mac’s name and toggle it on.
5. Verify that iMessage is turned on
Another scenario is that you haven’t set up your Mac to accept iMessages and there are no problems with Messages. For your Mac to have iMessage enabled:
- Launch the Messages app on your Mac.
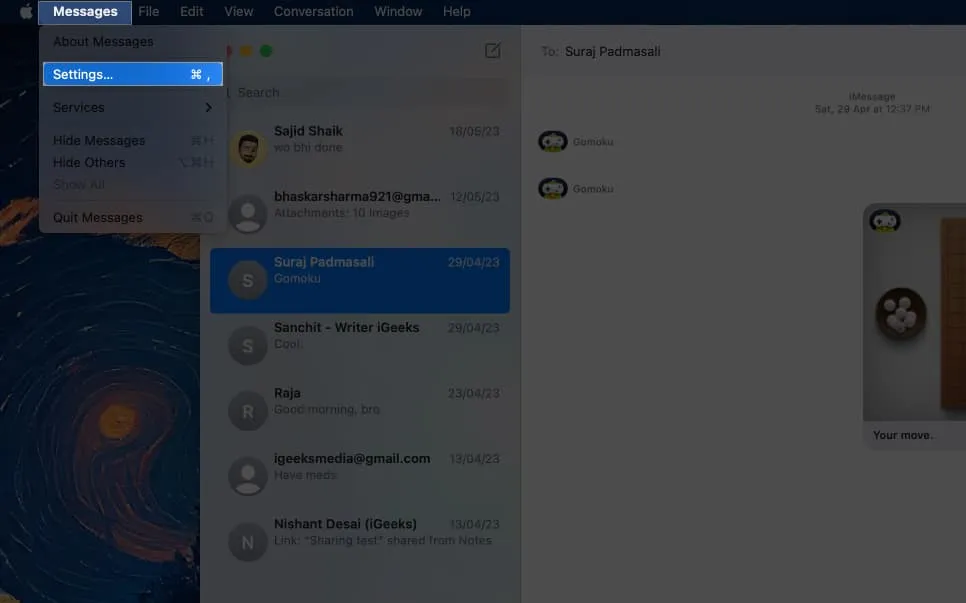
- While the window is active, select Messages in the menu bar.
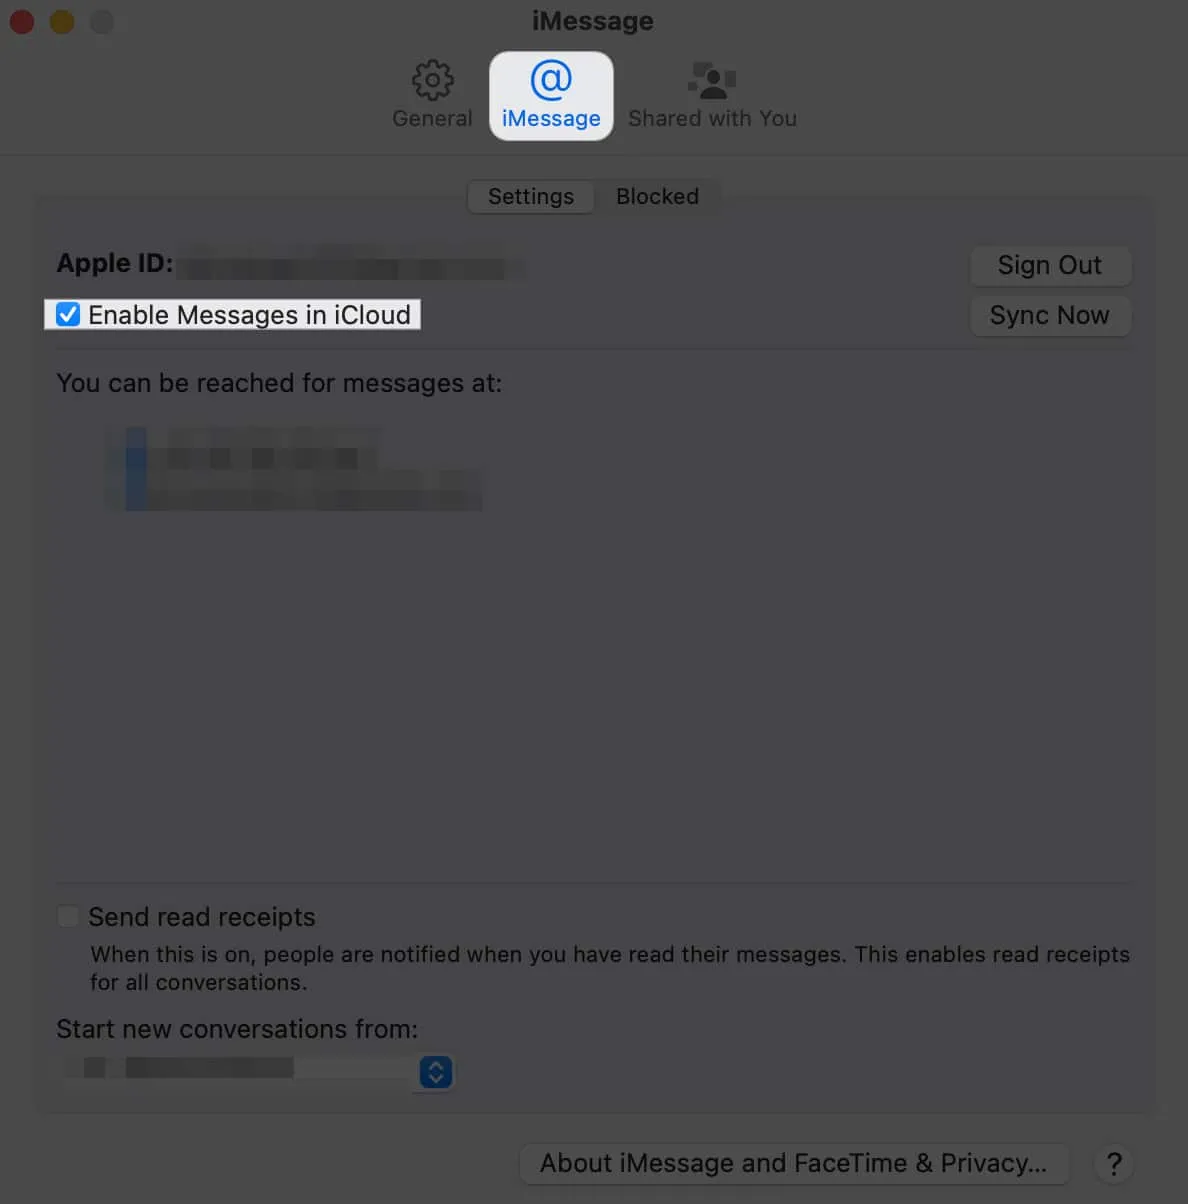
- Click Settings → choose the iMessage tab.
- Make sure that the Enable Messages in iCloud is ticked. This makes sure that your messages are synced to iCloud. If this is disabled, all your messages are downloaded to your device, but messages across your Apple devices won’t be synced.
6. Verify the Time Zone setting
Messages in your chat history are arranged by the timestamps on your Computer. As a result, even if a communication was intended for the present, if it thinks it came from earlier in time, it may move it further back in the history of your conversations. Recent communications can be missed as a result of this.
When the time zone isn’t set to update automatically, this problem frequently arises. Hence, if you receive notifications of new messages but they don’t show up in your discussion thread, this could be the reason. This is how you can fix it:
- On your Mac, go to the Apple menu.
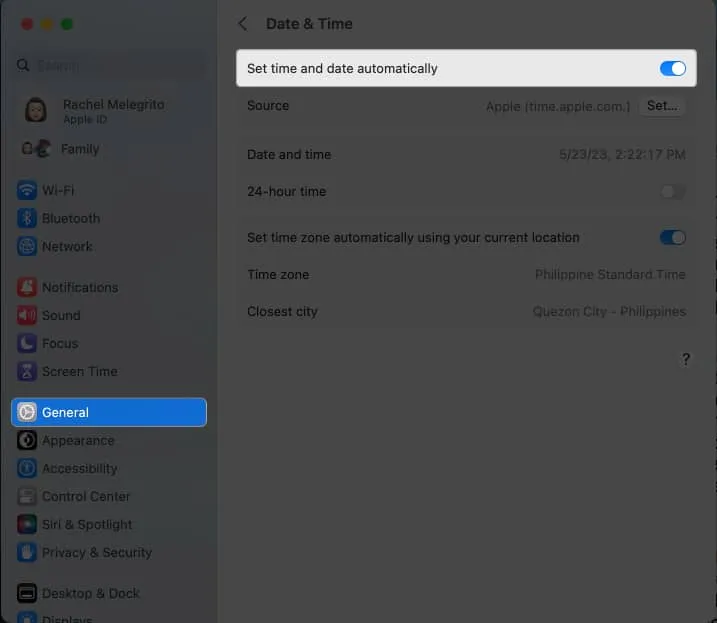
- Select General from the sidebar → Select Date & Time.
- Make sure to tick set time and date automatically.
7. Reboot your Mac
The Messages program on Macs frequently becomes clumsy, but we all know that it only requires a brief restart. Then, close any open applications, including Messages. then take these actions:
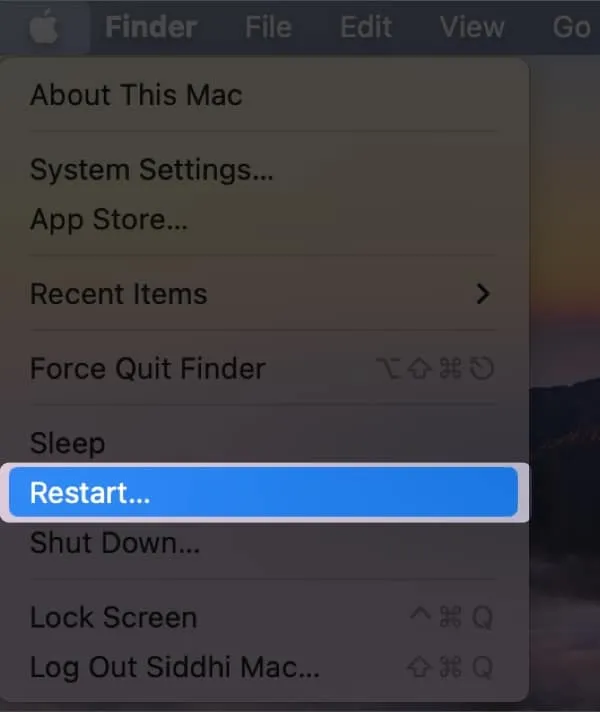
- Go to the Apple menu → Restart.
Restart Messages when your Mac has finished rebooting to see if the issue has been resolved.
8. Updating your OS
The next step would be to see if your device needs a system software update if restarting didn’t fix the problems. In addition to ensuring that your Mac operates efficiently, updating to the latest recent OS also fixes issues and glitches.
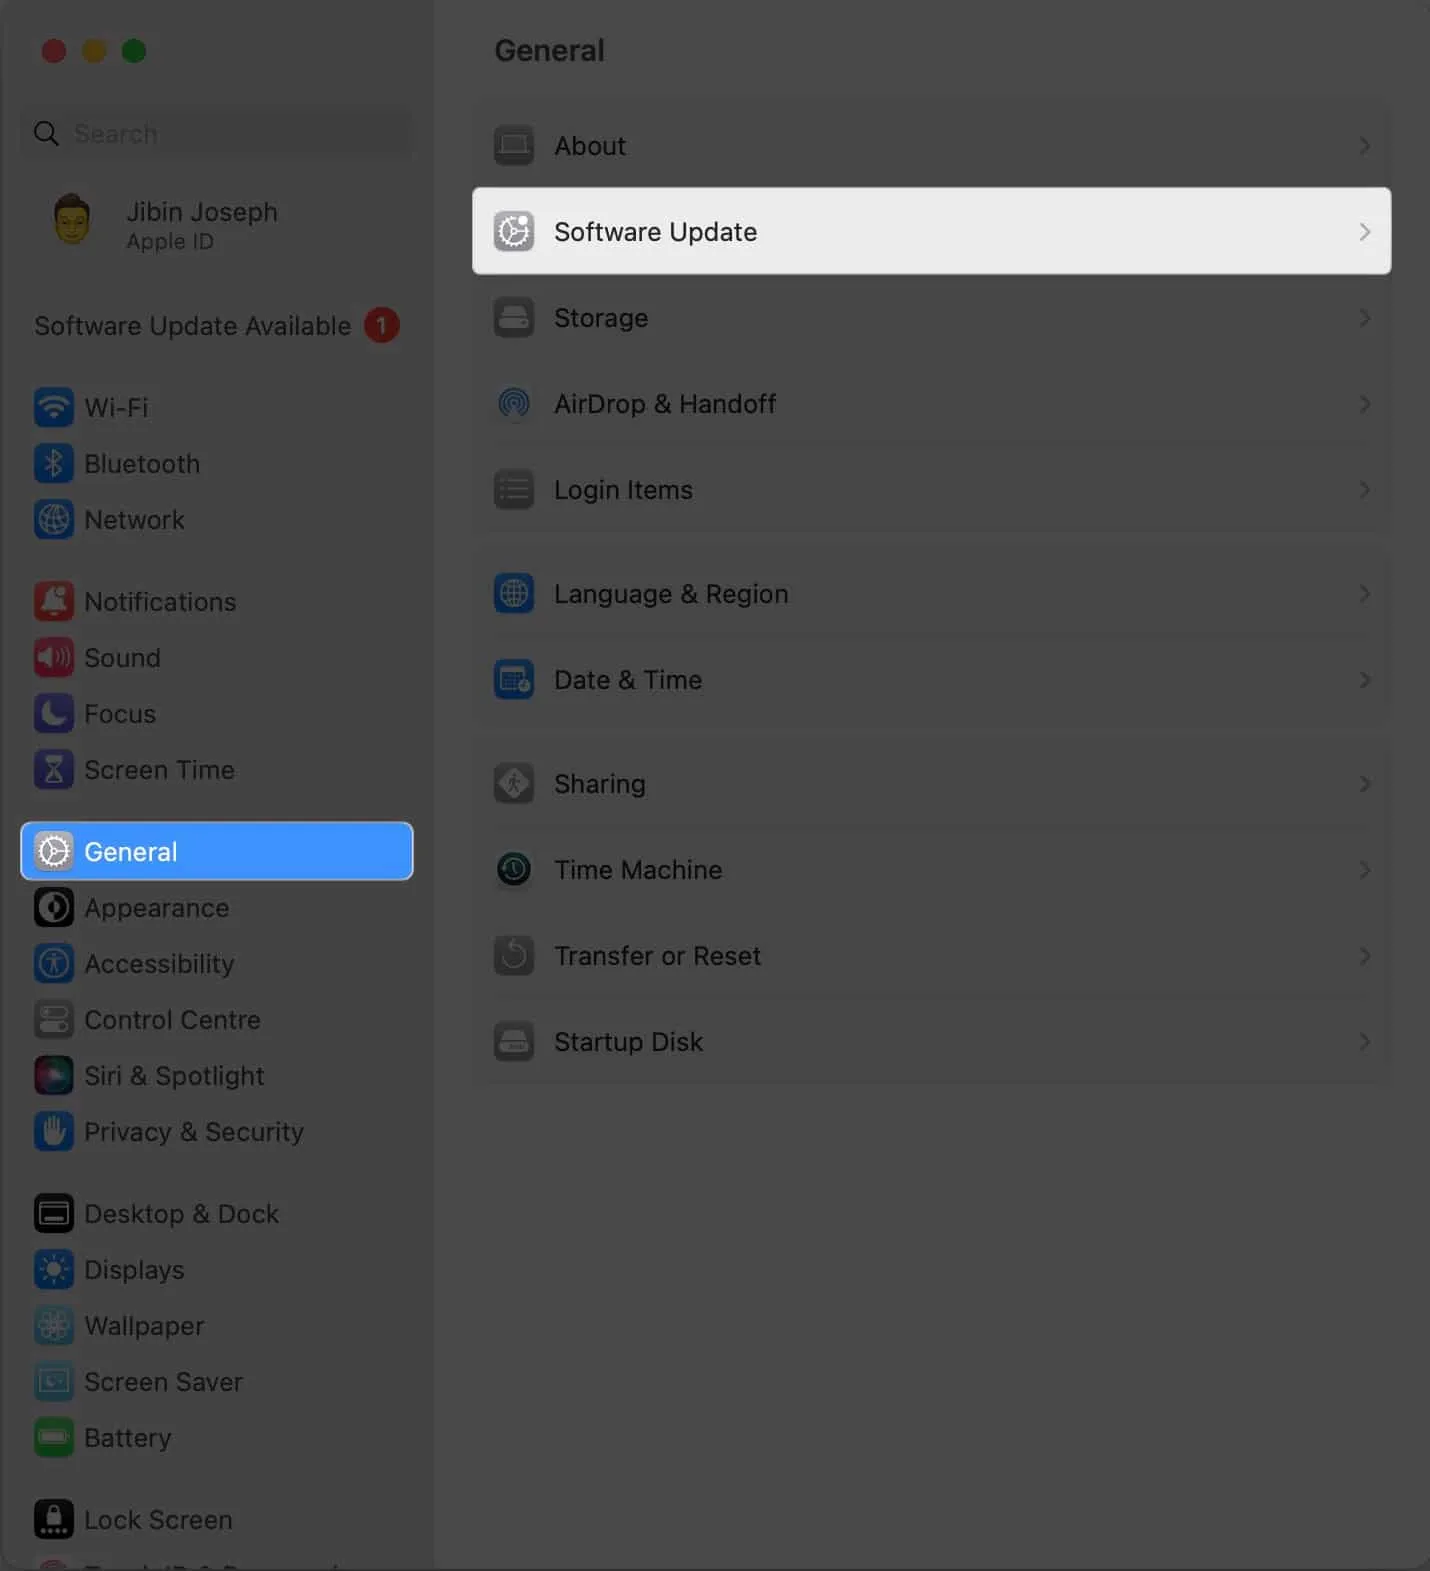
- To do that, go to Apple Menu → System Settings.
- Select General → Software Update.
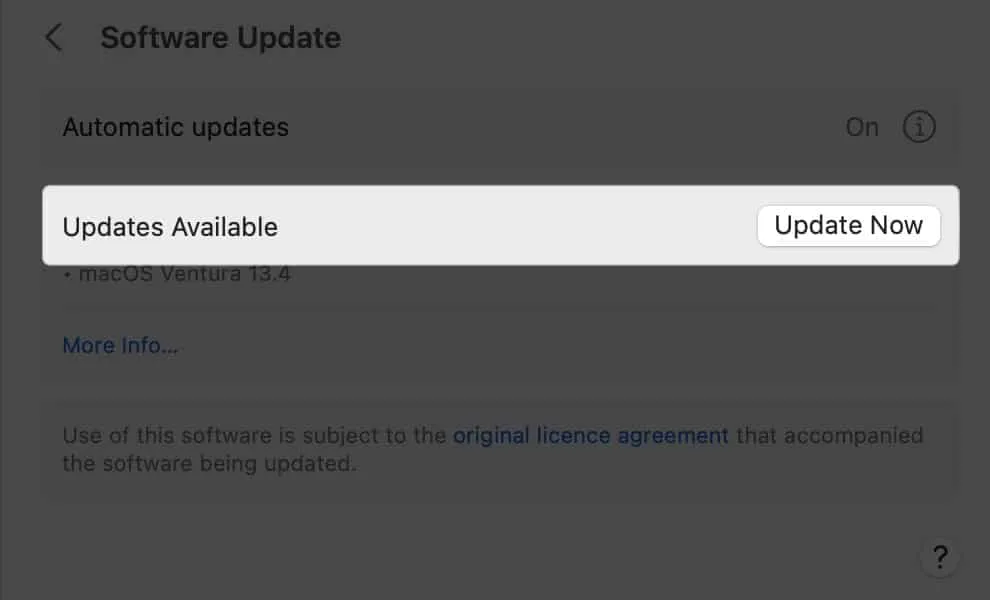
- Click Update Now if there’s an update available.
9. Change up how you send and receive messages.
If iMessage is still not functioning, see which phone number or email is currently associated with your Apple ID account and try a different one.
- On your Mac, go to Messages → Settings → select the iMessage tab.
- Enable or disable your email or phone number and see if this will get iMessage to start working again.
10. Empty the messages cache
Like every other program, Messages uses caches to store files and data. This can accumulate over time and slow the app down. The program may function more smoothly and resolve any difficulties by clearing the cache.
Keep in mind that if you erase the cache for iMessage, your message history from all of your devices will be lost. Here is how you do it:
- Open Finder on your Mac.
- Press Cmd + Shift + G.
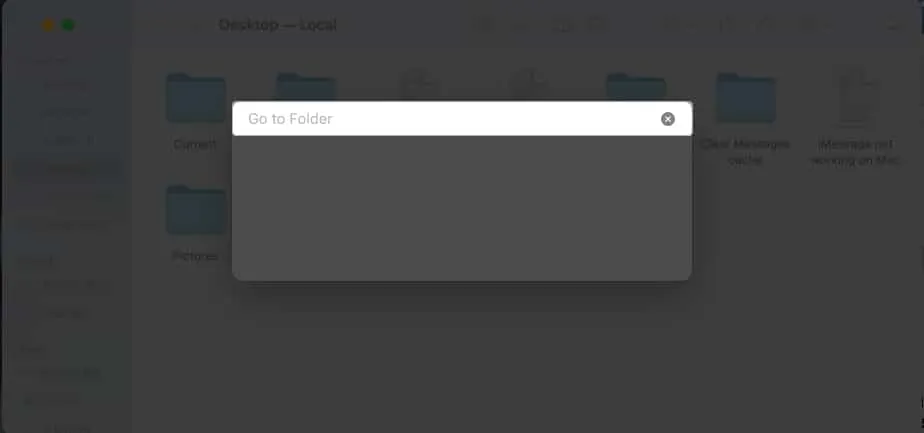
- Enter ~/Library/Messages/ in the textbox that appears.
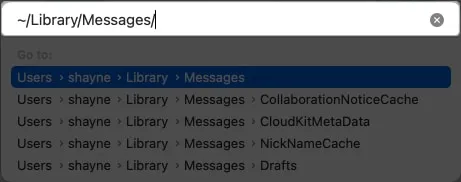
- Delete files in the following Messages folders: chat.db-wal, chat.db, and chat.db-shm.
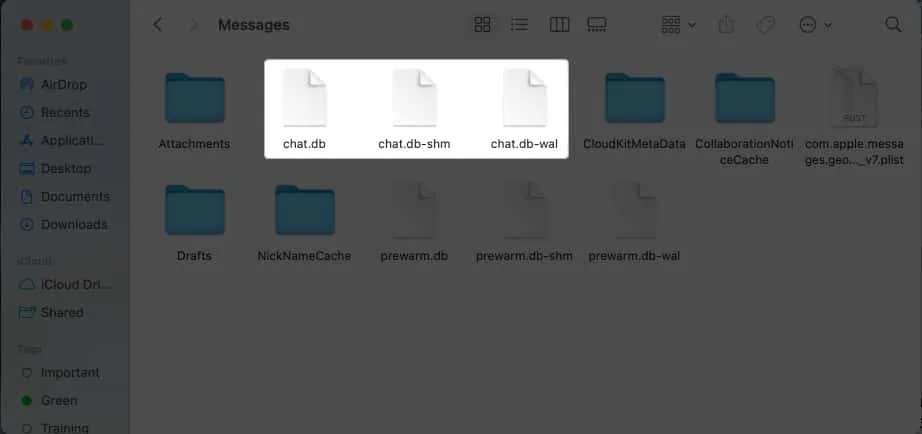
- Empty your Trash.
11. Log out of iMessage and back in again
To get iMessage back to working properly, it’s also worthwhile to sign out and back in. To do this:
- Launch the Messages app on your Mac.
- Select Messages in the menu bar.
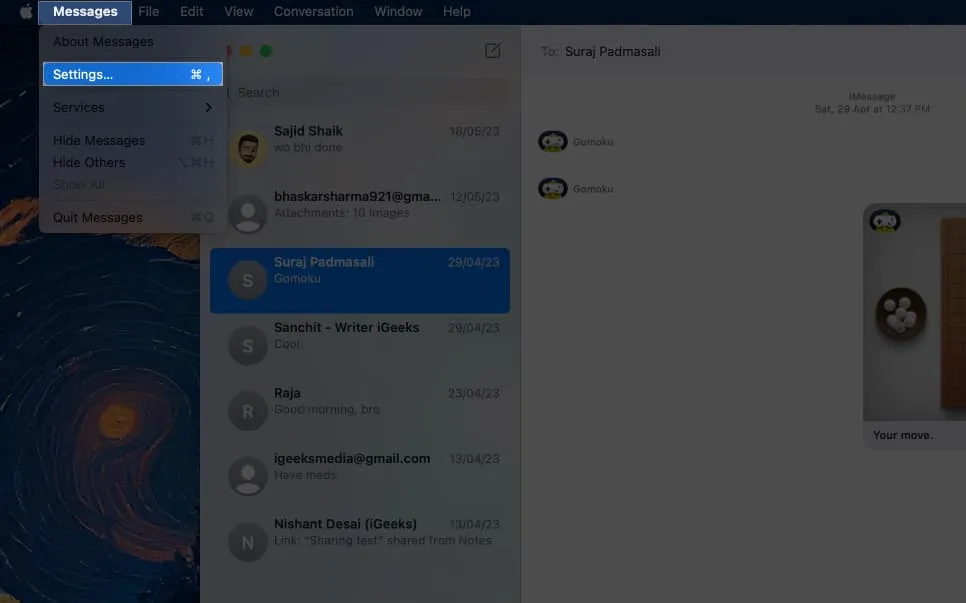
- Select Preferences from the dropdown menu → go to the iMessage tab.
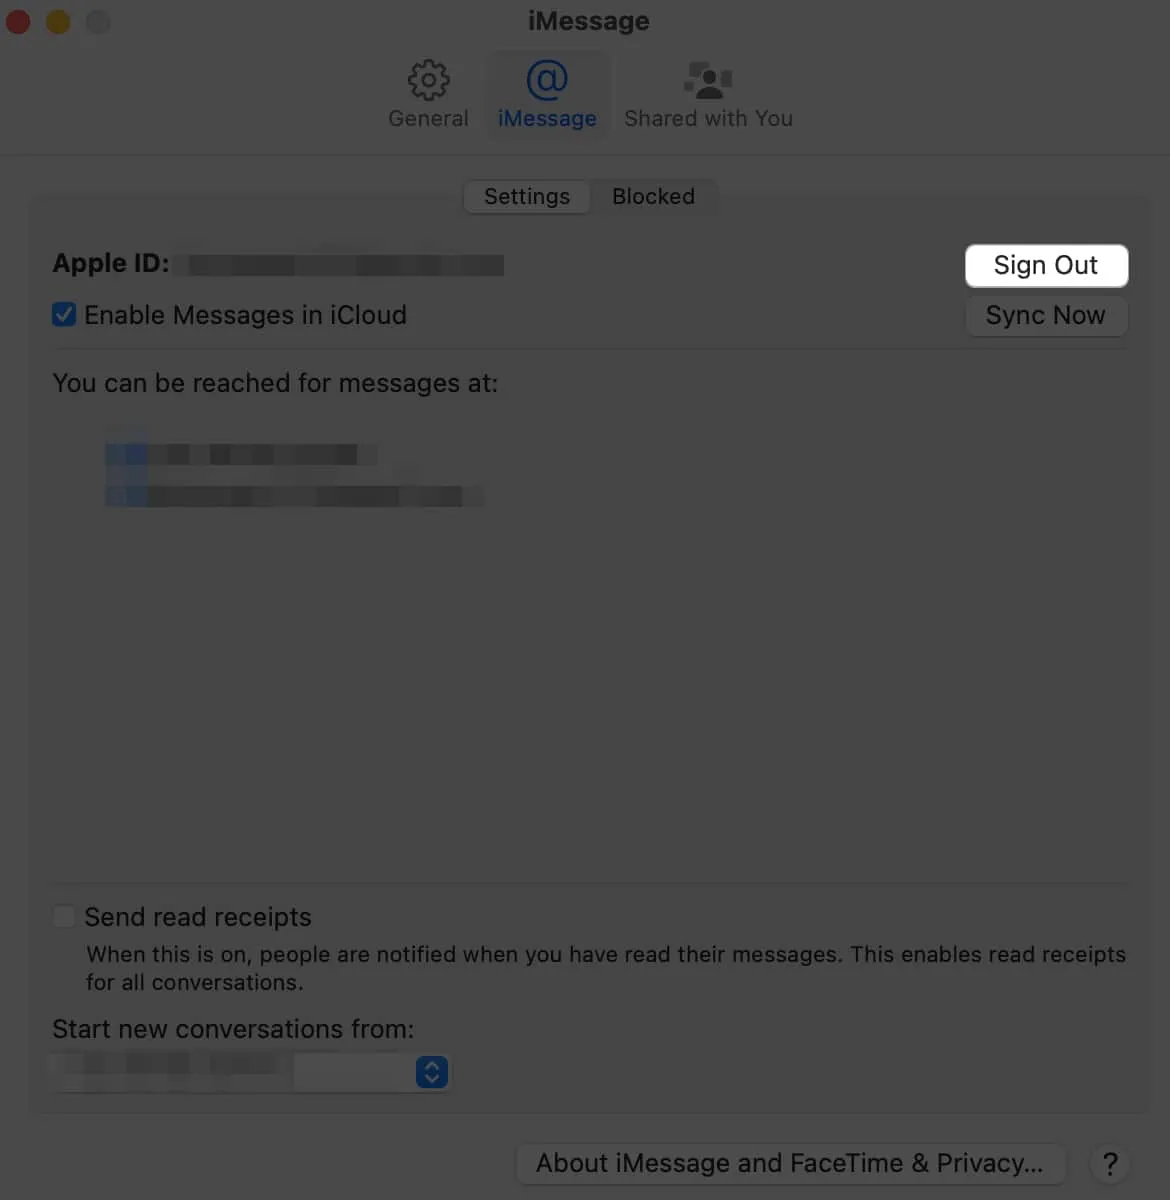
- Press Sign out next to your Apple ID.
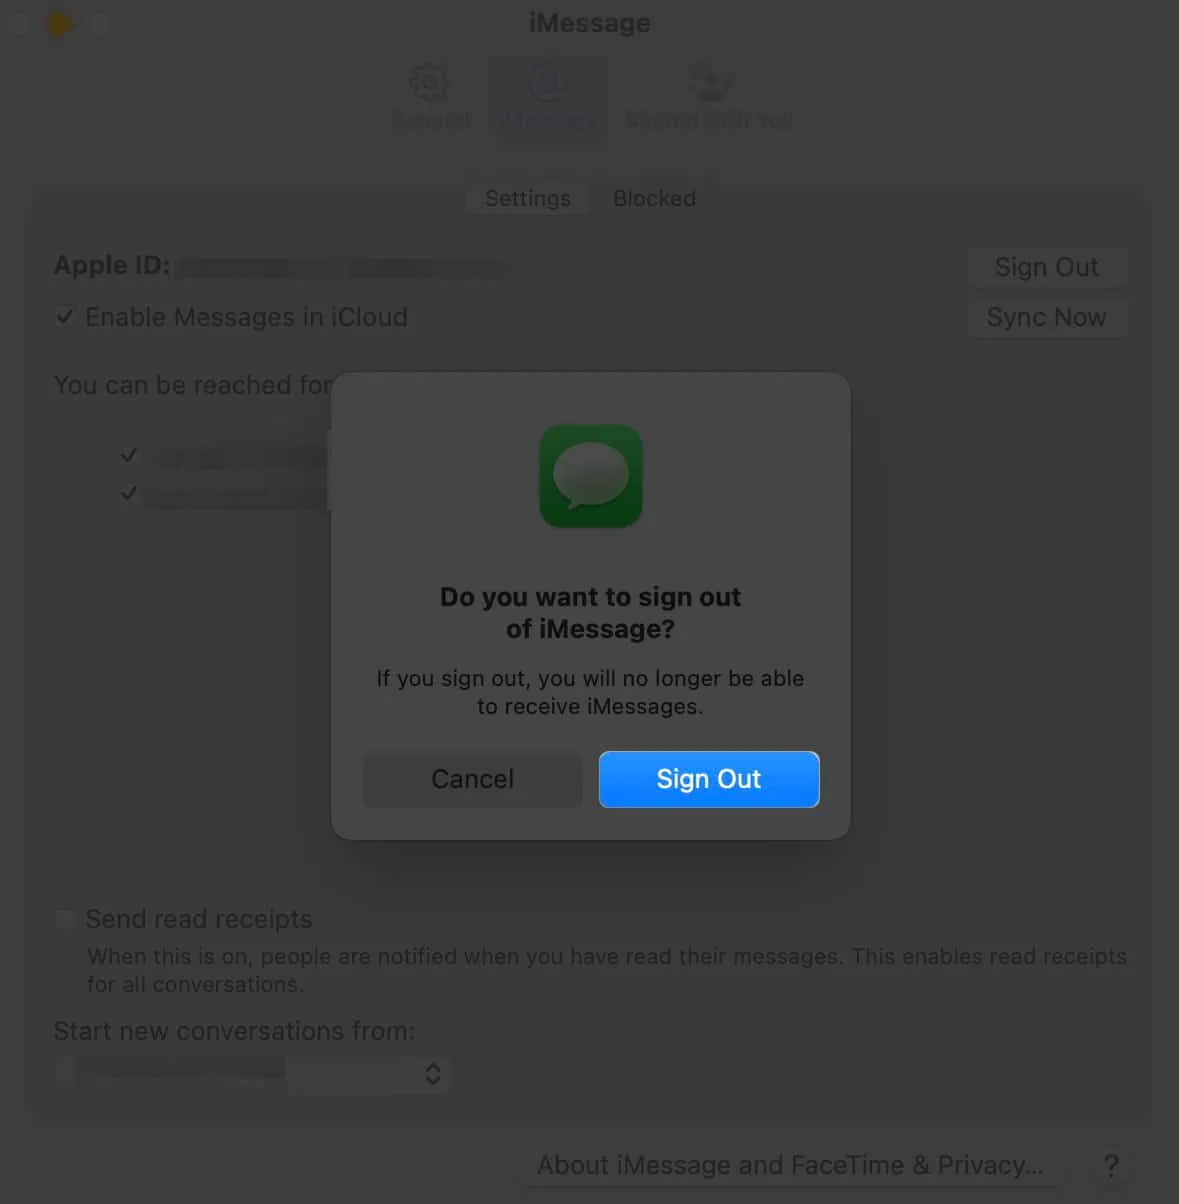
- Once you’ve signed out, sign in back again using your Apple ID credentials.
12. Create a fresh admin account
A few forum users advised deactivating the existing admin account and starting a new one. It won’t hurt to give it a shot.
- Just click the Apple logo in the menu bar → click Settings.
- Choose User & Groups in the sidebar → select Add Account.
- Enter your password to unlock and make changes.
- Make sure that the new account you’re creating is an administrator.
Contact Apple Support
If none of the solutions work, you might want to contact Apple Help for assistance. As an alternative, you could want to explore some iMessage substitute applications to facilitate your progress.
Conclusion
It is naturally upsetting when sending iMessages via your Mac doesn’t function as this is a highly helpful functionality. Did any of the aforementioned techniques work for you? Post them below!
Leave a Reply