14 Fixes for Windows Hibernation Not Working
Windows hibernation not working is one of the common problems faced by users. This problem can have several causes. There are so many available factors that come into play when we are trying to identify a problem.

In addition, the procedure will become more complicated with different PC manufacturers. Don’t worry; in this article, we have provided 14 different solutions to solve this problem.
Reasons why Windows hibernation is not working
1. Outdated device drivers. Hibernation may sometimes not work if your driver is not up to date. It would be good to update all device drivers associated with your system.
2. Virus or malware. Installing third-party applications may install viruses or malware. Install an antivirus to prevent viruses or malware from entering your system.
3. Do not update Windows 10. If Windows 10 is not updated, hibernation will not work. Your system will check for updates; based on this, you need to update them.
Solutions to Fix Windows Sleep Not Working
- Find out the app that wakes a Windows PC from sleep
- Disable wake timers
- Let your system sleep
- Disable fast startup
- Disable Screensaver option
- Check sleep settings
- Perform a clean boot
- Use the Windows 10 troubleshooter
- Update Windows 10
- Disable hybrid mode
- Scan your laptop or PC for viruses or malware
- Disable Peripherals
- Check the compatibility of connected devices
- Check the drivers associated with your system
Solutions to fix Windows hibernation not working
1. Find out the app that wakes your Windows PC from sleep
Before we move on to other solutions, we must determine what is stopping a Windows PC from sleeping. Follow the instructions below to identify the application that is causing the issue.
- Click on the search icon and search for CMD. Once the search result appears, run it in administrator mode.
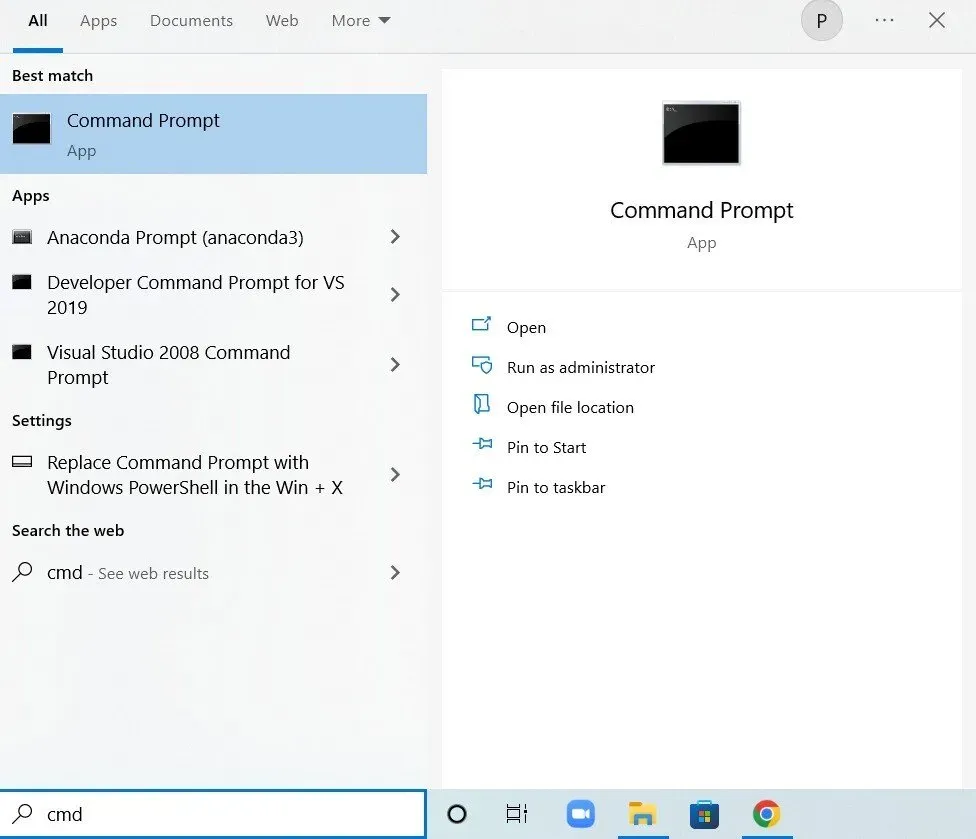
- When the command prompt window opens, type
powercfg -requestsand press Enter. - This result will display the apps causing the issue. Try to find this application and remove it from your system. If this is due to a program you have installed, uninstall that program from the Control Panel app.
- To disable it directly from the command line, type
powercfg -requestsoverride <CALLER_TYPE>"<NAME>"<REQUEST> - For example, if the problem is with sd.exe, change the name to sd.exe.
- If you want to find out who prevented the system from going to sleep, then type
powercfg -lastwake - If you are going to find out all the devices that wake up your system, type
powercfg -devicequerywake_armed
If the issue is with your network adapter, follow these steps to resolve it.
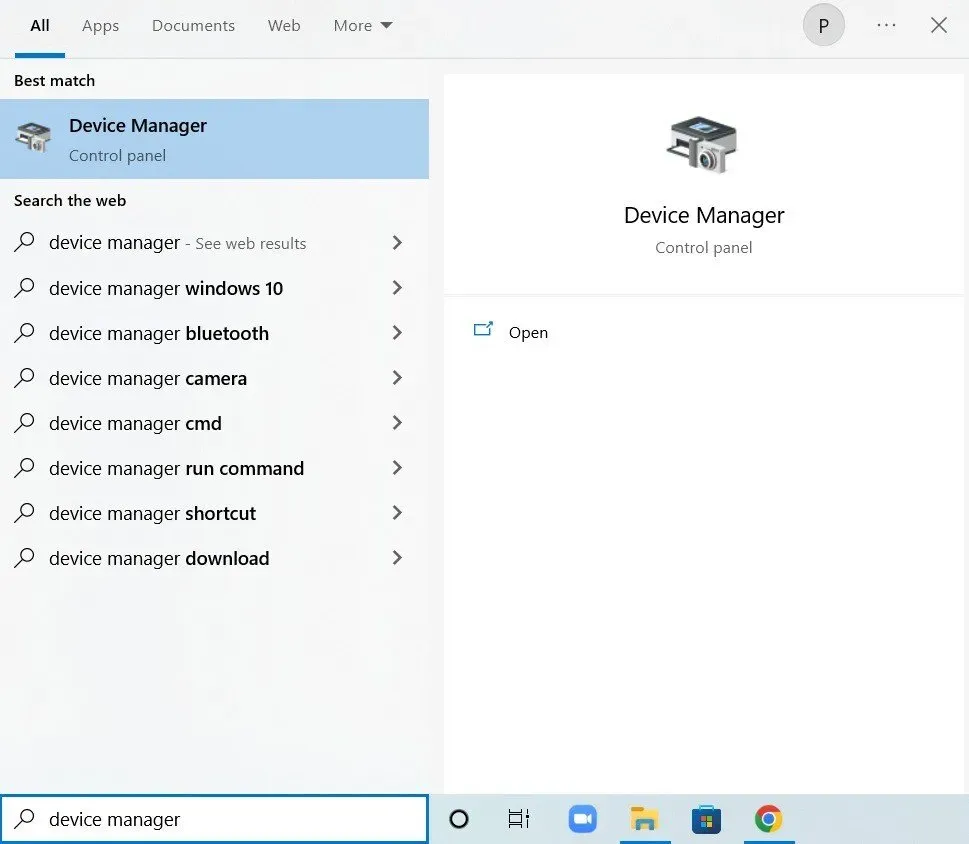
- Click on the search icon and search for Device Manager.
- Expand the Network Adapters section.
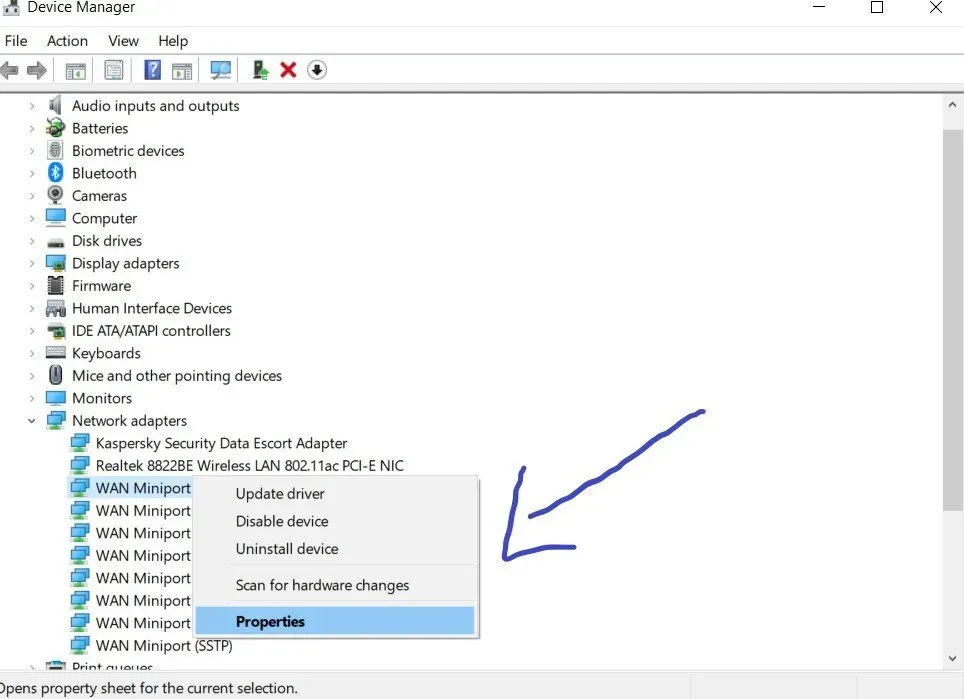
- It will display a list of adapters. Right click on the adapter that seems to be causing the problem and select properties.
- In the properties window, click on the power management tab.
- Check the “Allow the computer to turn off this device”box.
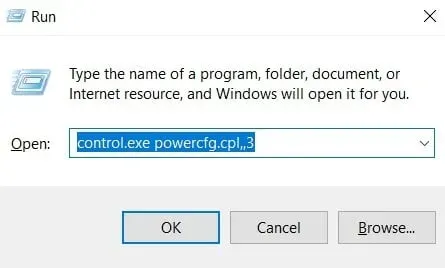
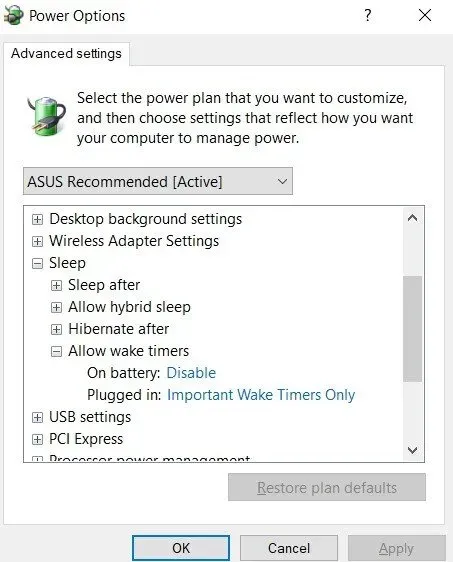
2. Disable Wake Timers
- Open the Run dialog box by pressing the Windows key + R on your PC or laptop.
- In the open field, enter
control.exe powercfg.cpl,,3
- Double-click the sleep option to expand it.
- Double-click the “Allow wake timers”option and select the “Disable”option.
- If you are using a laptop, disconnect both the mains power and the battery.
3. Let your system sleep
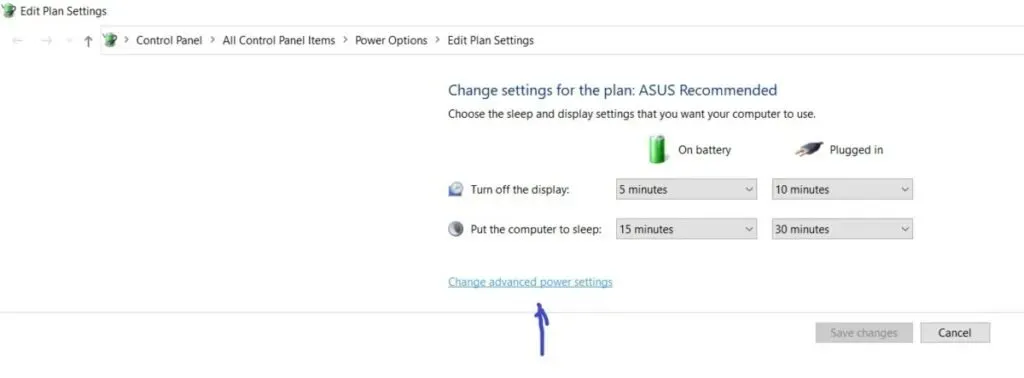
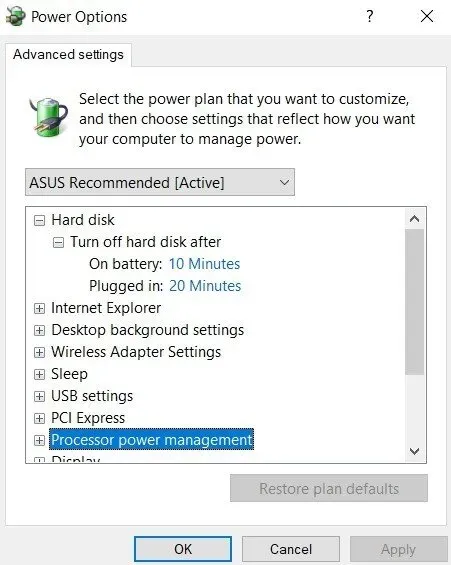
If the power settings are not set to default, this will prevent your system from going to sleep. Sometimes when you install some third party software, it messes up the settings which causes hibernation not to work on your system. Follow the instructions below to change the power settings back to default.
- Click on the search icon and search for “Edit Power Plan”.

- When it opens, click “Change advanced power settings”.
- The Power Options window will open. In it, click “Restore Default Plan”.
- Also, it would be helpful if you expand the media settings option. In that, click on the option when sharing media.
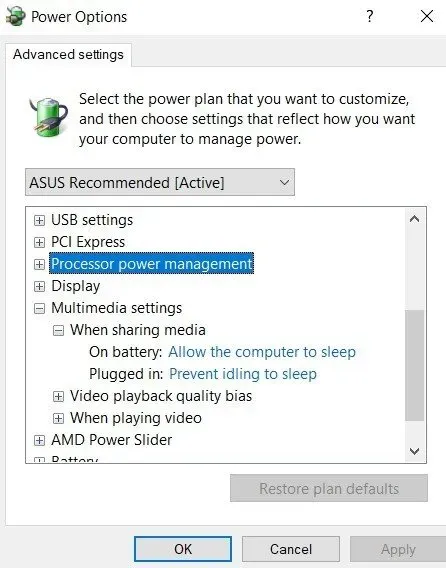
- Click on connection and battery options. From the drop-down menu, select Allow the computer to sleep.
After making all these changes, restart your computer and check if it goes back to sleep or not.
4. Disable Fast Startup
This is a useful feature by which the system will save images of loaded drivers. Follow the instructions below to disable fast startup on your system.
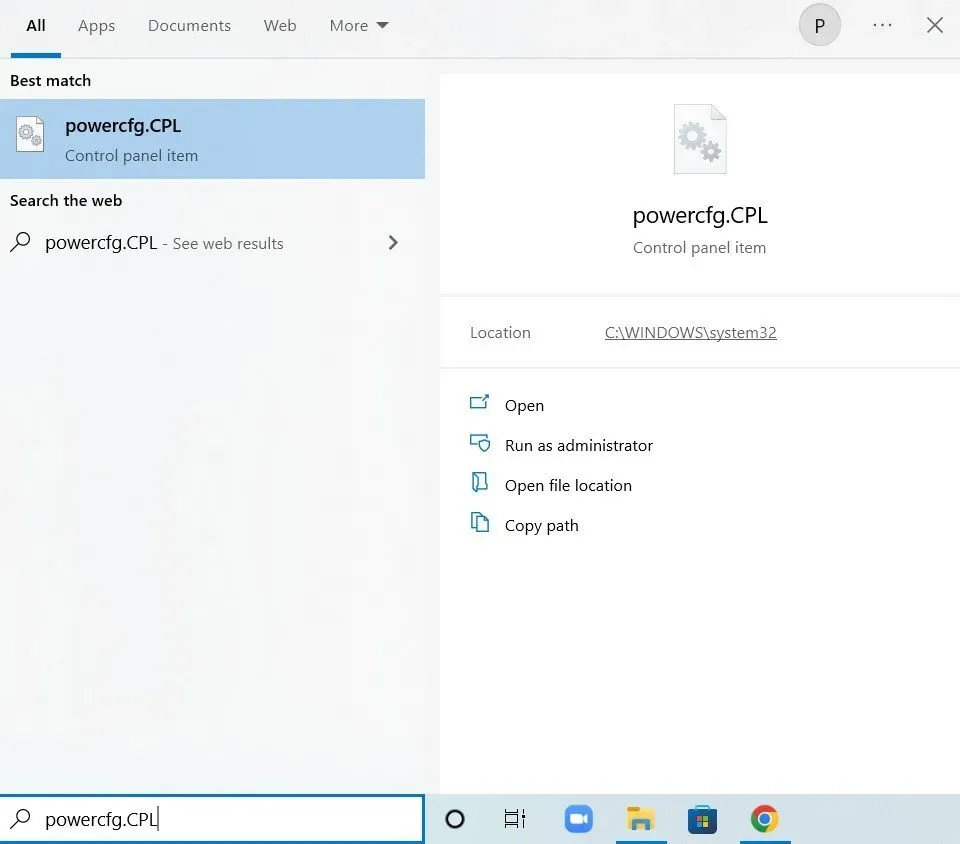
- Click on the search icon and search for powercfg.CPL.
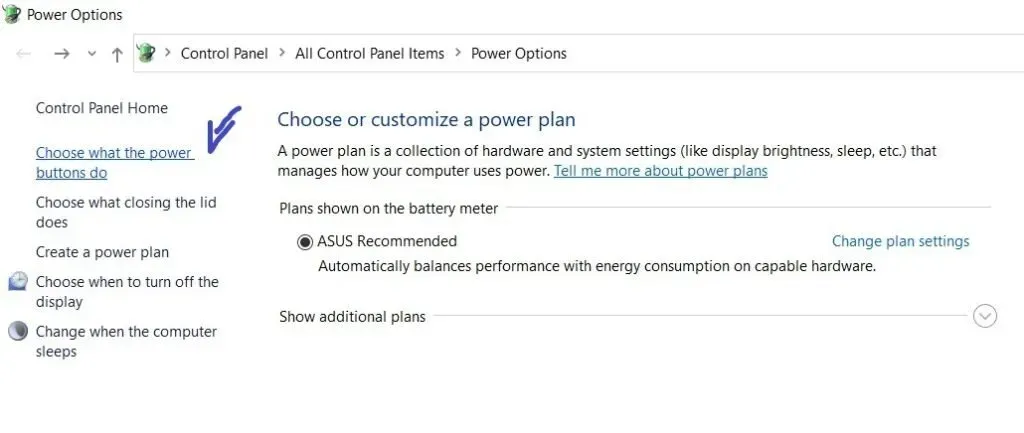
- When the Power Options window opens, click “Choose what the power buttons do”.
- You will be taken to the system settings window. In it, click “Change settings”that are currently unavailable.
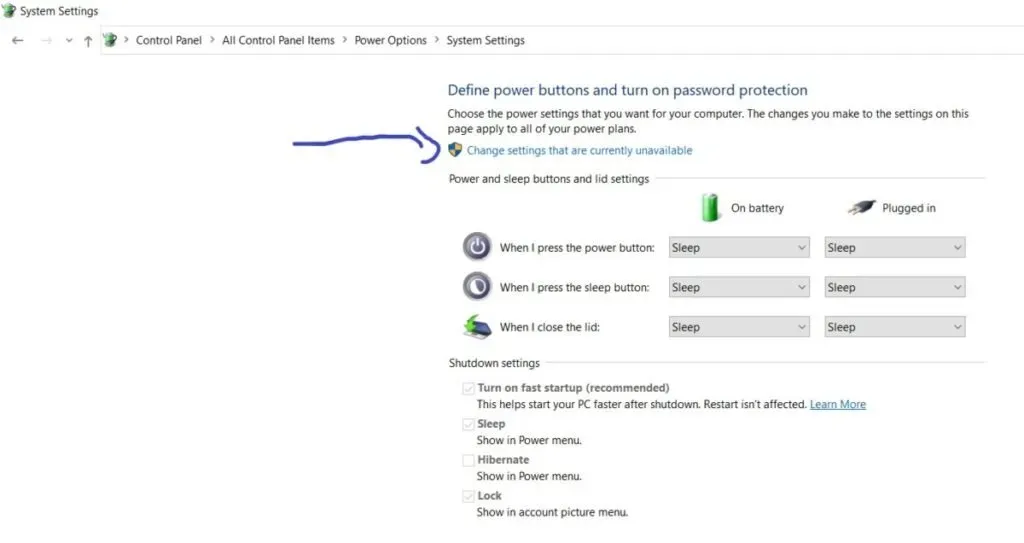
- Check the first box in the shutdown settings, which says to enable fast startup.
5. Disable the splash screen option
Sometimes disabling the screensaver helps resolve Windows sleep issues. Follow the instructions below to disable the screensaver option.
- Click on the search icon and search for screensaver screensaver.
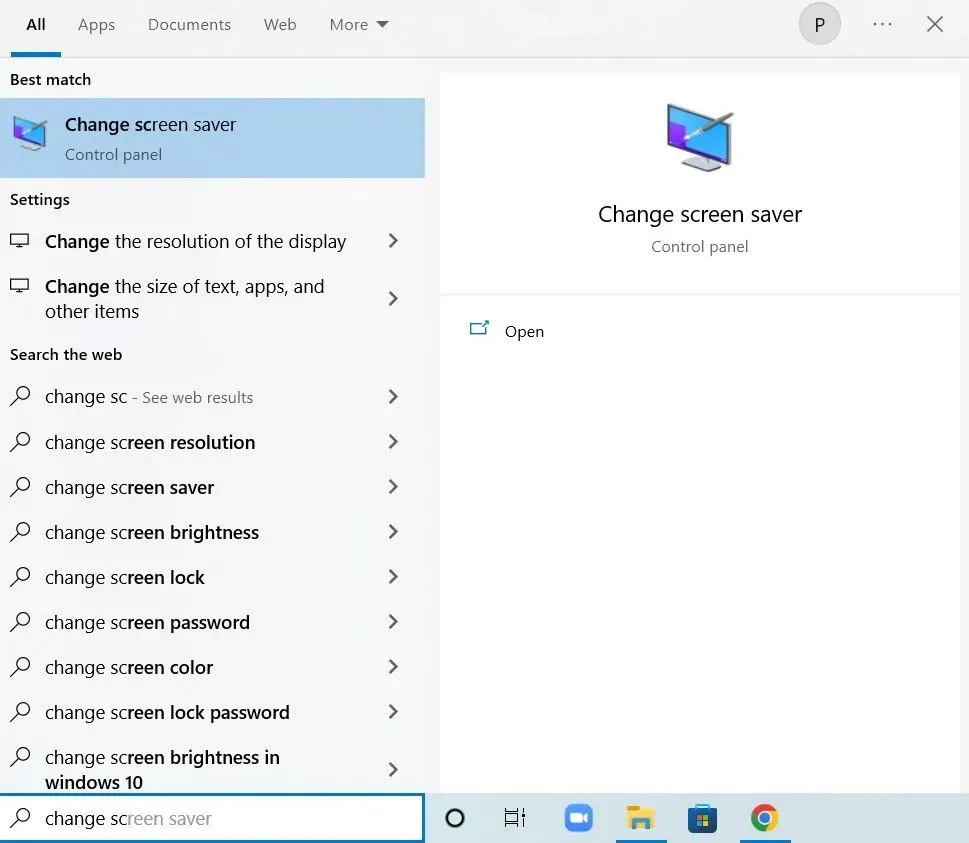
- Select the “None”option from the drop-down list.
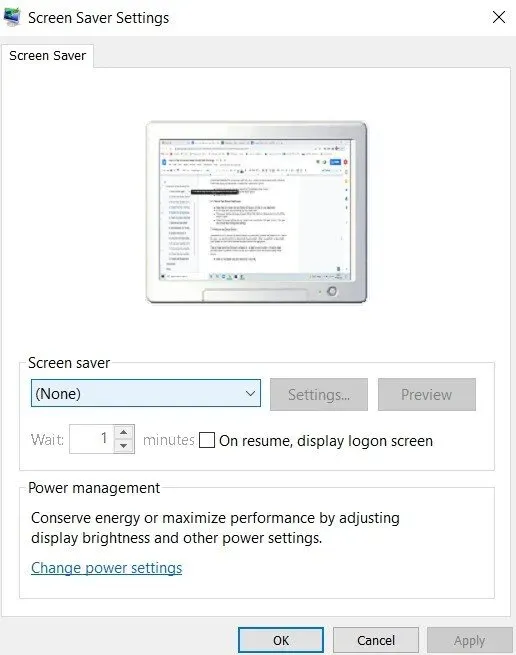
- Click OK.
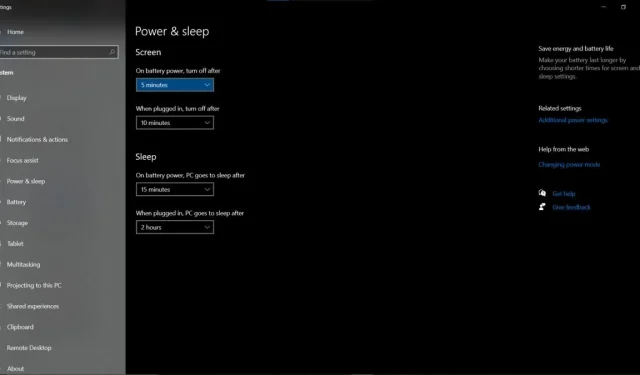
6. Check your sleep settings
- Open the Run dialog box by pressing the Windows key + R on your keyboard.
- In the window that opens, type
powercfg.cpland press Enter. - The power options windows will open. Then click “Choose when to turn off a display option.”
- Check the power settings on your system and make sure they are correct. If they are incorrect, then change the settings.
7. Perform a clean boot
Sometimes your computer will not be able to sleep if it has any third party software installed. If so, you must perform a clean boot of your system. When you perform a clean boot, your system will start up with essential Windows services and programs.
This ensures that third party software will not run on your system. Follow the steps below to clean boot your system and resolve Windows hibernation issues.
- Click on the search icon and search for msconfig.
- The system configuration window will open. While doing this, press the selective start switch. Check the box to load system services only.
- Click the OK button.
- Select the “Services”tab from the top menu. This shows all the services provided by Microsoft for your system.
- Find hiding all Microsoft service settings. And click “Disable All”.
- Click the Apply button and click OK.
- Then click on the “Startup”tab in the top menu.
- Click on the open task manager.
- Right click and disable whatever you see on that tab.
- Restart your computer and it will open in download mode. Check if the issue is resolved or not.
8. Use the Windows 10 Troubleshooter
This solution will effectively help you fix the Windows 10 sleep problem. Follow the instructions below to use the Windows 10 troubleshooter.
- Click on the search icon and search for the Settings app.
- In the Home section, click Update & Security.
- Then click on the troubleshoot option.
- In the Troubleshooting section, click Power Options.
- In the advanced menu, click “Run the troubleshooter”.
- The troubleshooter will start looking for the problem. Let him complete the operation.
After doing this, check if hibernation is working.
9. Update Windows 10
Hibernation will not work if you have not updated your Windows 10 operating system ; sometimes hibernation doesn’t work. Updating Windows 10 to the latest version will update all device drivers on your PC. Once you update this, hibernate will work without issue. Follow the instructions below to update Windows 10.
- Click on the search icon and search for the Settings app.
- In the Settings app, tap on Update & Security.
- It will check for updates. Click the Update Now button.
- Once the update is complete, reboot your system and check if hibernation works.
10. Disable hybrid mode
Hybrid mode is a combination of hibernation and sleep mode. If this mode is enabled, it will prevent your computer from going to sleep. Follow the instructions below to disable hybrid mode.
- Open the Run dialog box by pressing the Windows key + R on your PC or laptop.
- In the open field, enter control.exe powercfg.cpl,,3
- The Advanced Power Options window opens.
- Expand the sleep option. Now expand and enable hybrid sleep. Click “Off”from the drop-down menu.
- When you’re done, click OK.
Now reboot your system and check if hibernation works.
11. Scan your laptop or PC for viruses or malware.
If your computer has any virus or malware, it will affect its normal operation. So it would be better to install some kind of antivirus on your PC. Once you have installed the antivirus, scan your computer, check if there is any threat to your computer and remove it.
12. Disable Peripherals
Sometimes peripherals connected to your PC won’t allow Windows to hibernate. So, it would be good to disable externally connected peripherals. Remove external devices such as printers, scanners, webcams, and DVDs. Now check if Windows hibernation is working or not.
13. Check the compatibility of connected devices
If the device connected to your PC is not compatible, it will affect Windows hibernation. This happens when manufacturers release an update before they become compatible with the latest version. Some common culprits associated with this are printers, scanners, webcams, and DVDs.
To fix this problem, you need to go to the manufacturer’s website and check for compatibility issues. If there are no compatibility issues, unplug your device and check if the problem persists.
14. Check the drivers associated with your system
Sometimes missing or outdated drivers can cause this error. To fix this problem, you must first check if the drivers on your system are up to date or not. If they are not up to date, then update these drivers.
There are two methods to find the latest version of your driver. You can manually find it from the manufacturer, download and install it on your computer. But it takes time and requires a lot of computer skills. If you are confident in your computer skills, use this method.
The second way is done using Device Manager.
- Right-click the Windows icon and select Device Manager. You can also get to it from the control panel.
- Click on the search icon and search for Control Panel. When the Control Panel window opens, click Device Manager.
- Expand the Display Adapters section. It will show the installed drivers. Right-click the driver and select Update Driver.
- You can either update it with existing updates or automatically search for updates.
Conclusion
I hope this article helps you fix the problem of Windows hibernation not working. This is a common problem and nothing to worry about. Try implementing the solution individually and find the one that works for you.
FAQ
How to force sleep mode?
If you want to force your computer to sleep, press the laptop’s power button and close the lid. You can also use keyboard shortcuts. Press Alt + F4 on your keyboard to hibernate Windows. This keyboard shortcut should only be used when no windows are currently running on your system.
Why won’t my Windows 10 go to sleep?
Check all sleep state settings if your laptop or PC won’t go to sleep. You should check your power settings, hardware, and configuration as these will affect how the sleep buttons work. If there are any updates pending on your computer or any installed application that needs to be updated, your computer will not go to sleep.
How do I change my sleep to off?
In the search bar, look for power and sleep settings. In this select the advanced power settings option. After that click on what the power button does. Then click on change settings that are currently unavailable. In the shutdown settings, check the box next to hibernate. Once done, click Save Changes.
What keeps Windows 10 from falling asleep?
There are reasons such as outdated device drivers, viruses or malware in your system, not updating Windows to the latest version, not turning off peripherals, not turning off hybrid mode, and not turning off the screensaver option.
Leave a Reply