14 Best Fixes for Skyrim Won’t Launch
The Elder Scrolls V: Skyrim, released in 2011, is a classic game. It still has a large number of players around the world. However, some players encountered an error when launching the game. There are numerous posts on the player forums about this situation.
If you are one of those unfortunate players who are facing the “Skyrim won’t start”error, then you’ve come to the right place. Here you get a complete set of fixes that you can try and fix the error that won’t start on your PC.
14 Ways to Fix Skyrim Launching Problem
The list below provides a wide range of solutions to fix the “Skyrim won’t start”error on your desktop.
- Identify conflicting mods and remove them
- Install the latest updates and restart your computer
- Play the game offline
- Run the game in compatibility mode
- Disable touch keyboard and handwriting panel services
- Check Skyrim Inbound and Outbound Rules in Windows Firewall
- Run Steam and Skyrim in Administrator Mode
- Check the integrity of game files
- Delete WeSE
- Update device drivers (video card driver)
- End idle background programs
- Download the latest DirectX and Visual Studio C++ Redistributable.
- Use the System File Checker
- Reinstall the game
1. Identify conflicting mods and remove them
Game mods (short for “mod”) are popular with gamers who want to improve one or more of the game’s features. If you are an avid gamer, you may have installed many different Skyrim mods. But you should be aware that these mobs modify the game files, which creates errors.
To resolve errors caused by conflicting mods, you can refer to the following scripts.
- A specific mod is responsible for the error.
- In this case, you need to pinpoint the mods that are causing the error.
- First, disable installed mods.
- Launch the Skyrim game and check if it runs successfully. If the game runs successfully, you can verify that the mod is the culprit.
- Now re-enable each mod and check if the error reappears. If this is not the case, then enable the next mod. Repeat these steps until you get a startup error.
- From the previous step, you may have pinpointed the error mod. Now remove his mob and start the game.
- Mods conflict with each other.
There are times when one mod doesn’t affect your game. But due to a conflict between two different mods, an error occurs when trying to start the game.
- Repeat the steps from “a) The specific mod is responsible for the error.”
- Now that you have pinpointed the mod responsible for the startup error. Leave it enabled and disable other mods.
- Check again if the game launches successfully. If the answer is no, this mod is the only culprit behind the error.
- If the error doesn’t occur, it’s a conflict with other mods responsible for the won’t launch error.
- Enable each mod and start the verification process. Then turn it off again. Repeat this process until you find the conflicting mod.
2. Install the latest updates and restart your computer.
Many errors can be resolved simply by restarting the PC. Users first think about restarting whenever they encounter an error. As in this case, you can benefit a lot from this solution, such as a performance boost after a proper restart. So, if your Skyrim game won’t start, restart your computer.
The error cannot be cleared by a restart alone. So, the next course of action you should take is to update your computer. Microsoft regularly releases updates containing bug fixes and security loopholes. In many cases, an update can iron out many bugs and minor glitches.
- Open Windows Settings. Click the Windows logo button and select the gear icon.
- Select Update & Security.
- Notice the top left of the screen. You will see an option Check for updates. Click here.
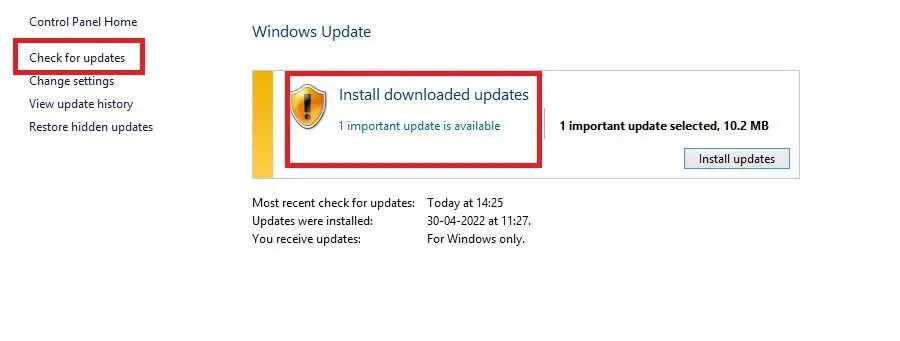
- If any updates are available for download, you will be notified and prompted to start downloading. You can start downloading right away or schedule it for later.
3. Play the game offline.
Please note if you are unable to run Elder Scrolls: Skyrim in online mode. You can then try running it offline, which is sort of a workaround. But if you’re trying to play a quick game and don’t require multiplayer battles, then this solution is right for you.
Disconnect your PC from the network. Then launch the game as you normally would, launch the Skyrim launcher and click Play.
4. Run the game in compatibility mode.
If you still haven’t fixed the “Skyrim won’t start”error, you can try this solution. Running a program in compatibility mode will force the PC to execute a software engine that emulates an older version of the operating system so that the program remains compatible with the PC.
Some users have reported the possibility of this solution. This may or may not work for your PC, but it’s still worth a try as it has worked on other PCs.
- Launch the Steam app and sign in with your Steam account.
- Go to the library and select “The Elder Scrolls: Skyrim Special Edition”.
- Right-click the game and select Properties.
- On the properties screen, you can find four options. Go to LOCAL FILES-> VIEW LOCAL FILES. This will redirect you to the game files installed on the system drive.
- Right-click the SkyrimSELauncher.exe file and select the Properties option.
- Click the “Compatibility”tab and check the “Run this program in compatibility mode”box.
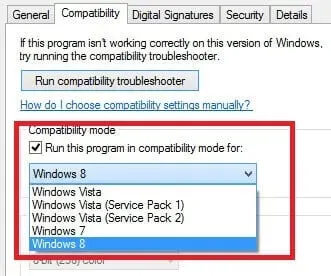
- Select an older version of the Windows operating system from the list.
- Click OK, then Apply.
- Repeat the same process for the SkyrimSE.exe file.
5. Disable the touch keyboard and handwriting panel services.
Another possible reason why Skyrim won’t launch is the touch keyboard and handwriting panel services. Microsoft provides this service for touchscreen computers and other similar devices. However, Skyrim does not support touch input services. Therefore, disabling the service may solve the problem permanently.
- Open the Run Windows dialog box. Type “
services.msc“and press the Enter key.
Alternatively
- Open the start menu and type “services”in the search bar.
- Click “Run as administrator”from the list of options on the right pane of the Start menu.
- Find the Touch Keyboard and Handwriting Panel Service service. Right-click this service and select Properties.
- On the General tab of the Properties window, click the Startup Type drop-down list.
- Select the Disable option.
- Then click Apply and then OK.
6. Check Skyrim’s inbound and outbound rules in Windows Firewall.
Skyrim game launch error can also occur due to being blacklisted by Windows Firewall. Specifically, the Inbound and Outbound rules for Skyrim are locked in the system settings.
6.1 How to specify rules for incoming connections in Windows Firewall.
- First of all, open the Control Panel window on your PC.
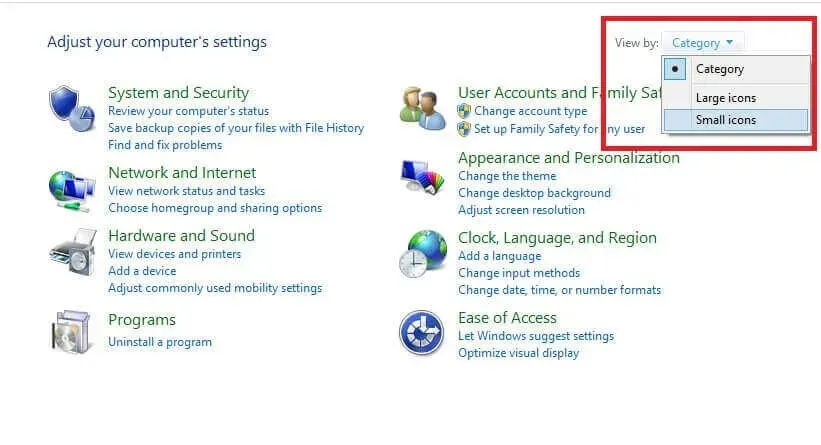
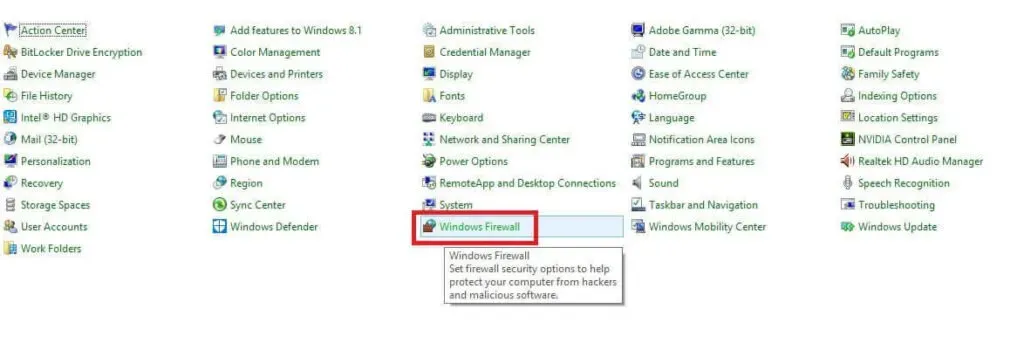
- In the upper right corner of the Control Panel screen, click the View dropdown and select Small Icons. Find and click on the Windows Firewall option.
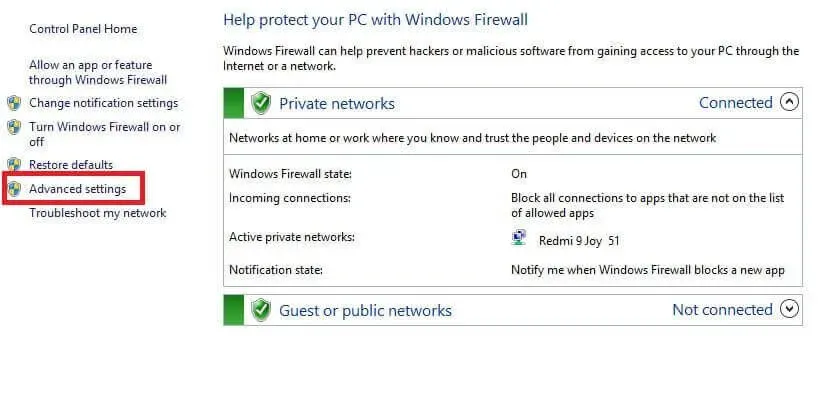
- Select the Advanced Settings option from the left pane.
- Click “Inbound Rules”located in the top left column.
- Now we are looking for the Skyrim game from the list of programs. Check the “Enabled”column next to the game name.
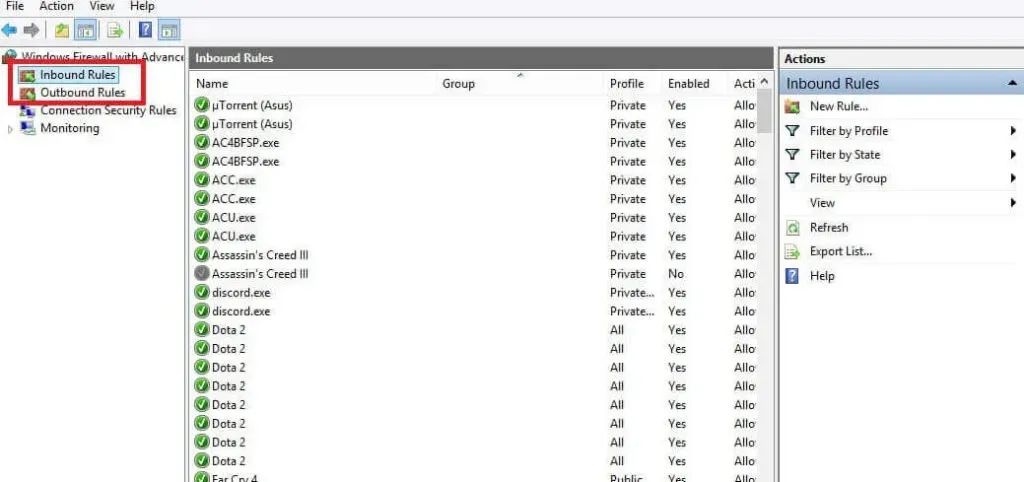
- If the status is set to “No”, click “Enable Rule”in the section located on the right panel of the screen.
- Follow the previous two steps for Skyrim SE and Skyrim SE Launcher files.
6.2 How to specify outbound rules in Windows Firewall.
- First of all, open the Control Panel window on your PC.
- In the upper right corner of the Control Panel screen, click the View dropdown and select Small Icons. Find and click on the Windows Firewall option.
- Select the Advanced Settings option from the left pane.
- Click “Outbound Rules”located in the top left column.
- Now we are looking for the Skyrim game from the list of programs. Check the “Enabled”column next to the game name.
- If the status is set to “No”, click “Enable Rule”in the section located on the right panel of the screen.
- Follow the previous two steps for Skyrim SE and Skyrim SE Launcher files.
7. Run Steam and Skyrim in administrator mode.
7.1 Temporarily run as administrator.
- Right click the Steam icon.
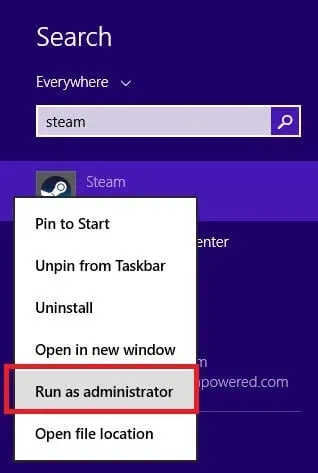
- Select the “Run as administrator”option.
7.2 Run as administrator on a permanent basis.
- Right click the Steam icon. Then select Properties.
- In the Properties window, click the Compatibility tab.
- Locate the checkbox “Run this program as an administrator”. Check the Check this option box.
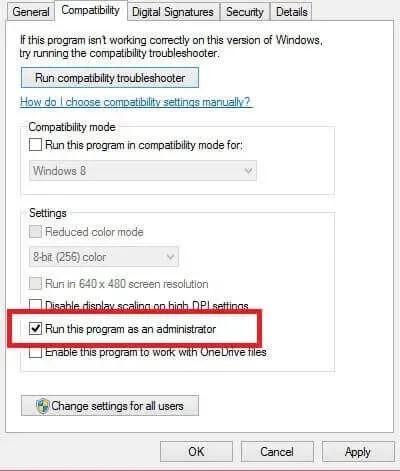
- To save changes to the settings, click Apply, then click OK.
Thanks to this process, the next time you open the Steam application, it will automatically start in administrator mode.
- Launch the Steam program. Sign in to your Steam account.
- Click the Library tab.
- Right click on the game – The Elder Scrolls V: Skyrim Special Edition.
- Click Properties.
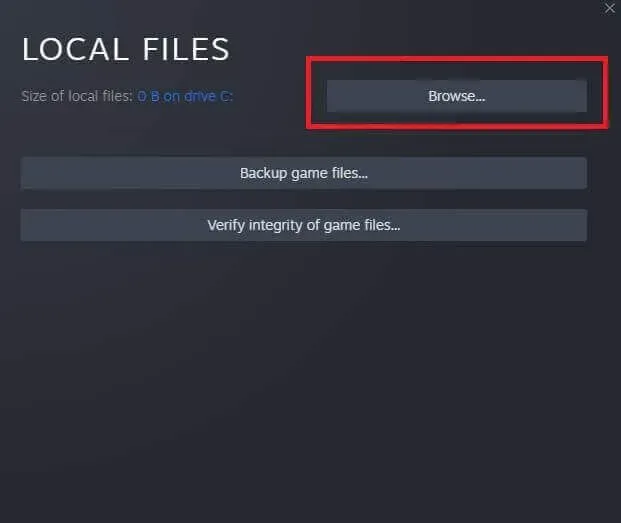
- In the properties window, switch to the LOCAL FILES tab. Then select BROWSE LOCAL FILES…
- A new Windows Explorer will open the game’s location. Right-click the game launcher icon and select Properties.
- In the Properties window, click the Compatibility tab.
- Locate the checkbox “Run this program as an administrator”. Check the Check this option box.
- To save changes to the settings, click Apply, then click OK.
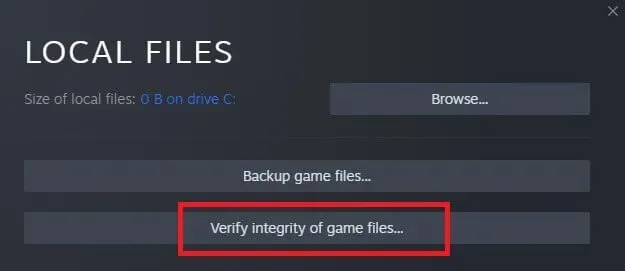
8. Check the integrity of the game files.
Your game will not launch if the game files are corrupted or missing. So the integrity of the game files is another reason that can affect the launch of the game. The Steam app comes with a built-in tool to verify the integrity of the game cache.
- Launch Steam, then sign in to your account.
- Click the Library tab. Right-click “The Elder Scrolls V: Skyrim Special Edition”and select “Properties”.
- Select the “CHECK INTEGRITY OF GAME FILES”option in the “Properties”window.
- Wait for the verification process to complete.
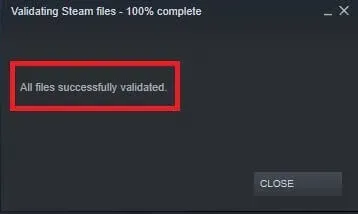
- Click “Close”when the process is complete.
- Now check if the game can be launched successfully. If not, then move on to the next solution.
9. Uninstall WeSE (Skyrim Script Extender).
WeSE (Skyrim Script Extender) is the official program launched by the developers of Skyrim. It is used to modify game scripts, adding desired changes to the game.
However, the Skyrim Script Extender has some stability issues on Windows 10. And regular users who don’t have any prior knowledge of scripting can’t use the tool at all. It is recommended to disable or completely remove WeSE.
10. Update your graphics drivers.
Automatic video driver update –
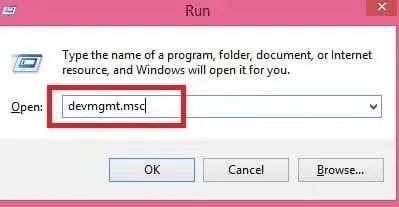
- Open the Run dialog box by pressing the Windows key + R.
- Enter the keyword “
devmgmt.msc“, then click the OK button.
- Look for the term “Display Adapter”and expand it.
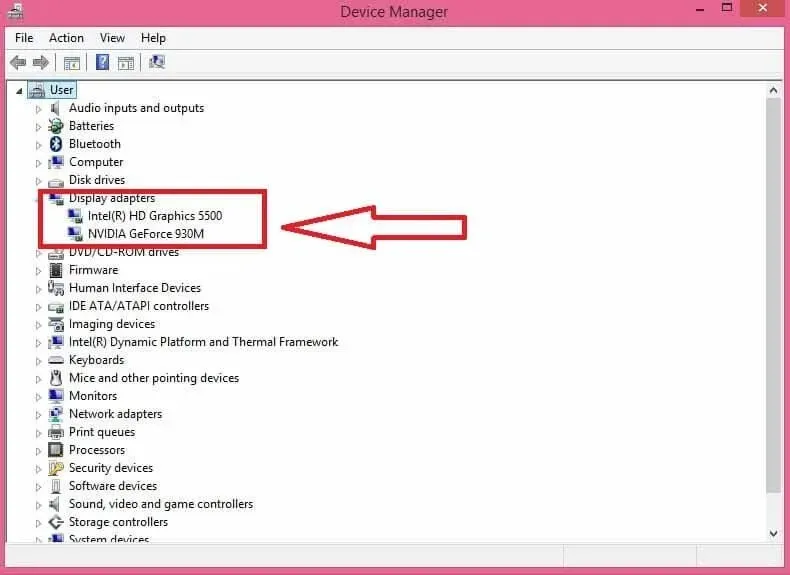
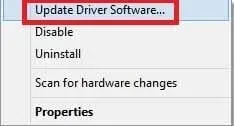
- Right-click the listed display adapter model.
- Select the “Update Display Software…”option.
- Click on the first option “Search automatically for updated driver software”.
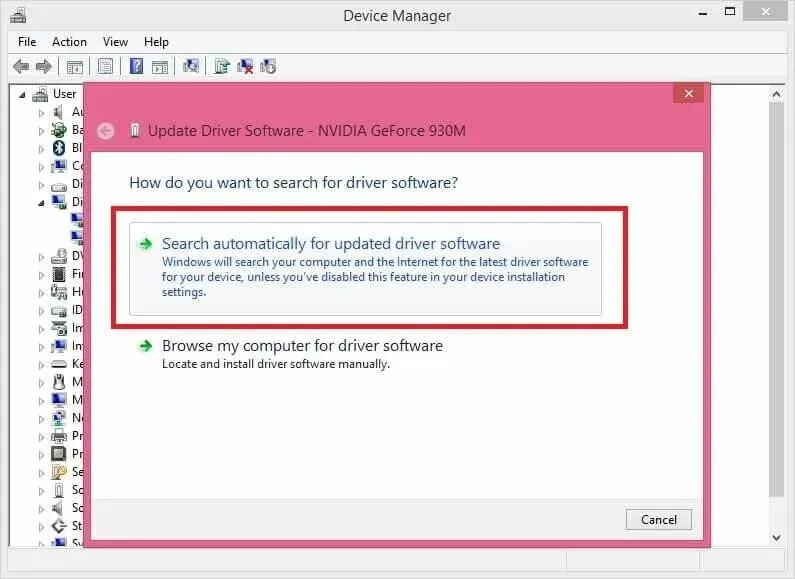
- You will then be notified if a newer and better version of the driver is available online. Follow the instructions on the screen and install the latest driver.
Update the video card driver manually –
- The first task before proceeding with the manual installation. Gather information about the current date and version of the driver.
- Open the Device Manager of your PC. Type “
devmgmt.msc“in the Run dialog box, then click OK. - Look for the term “Display Adapter”and expand it.
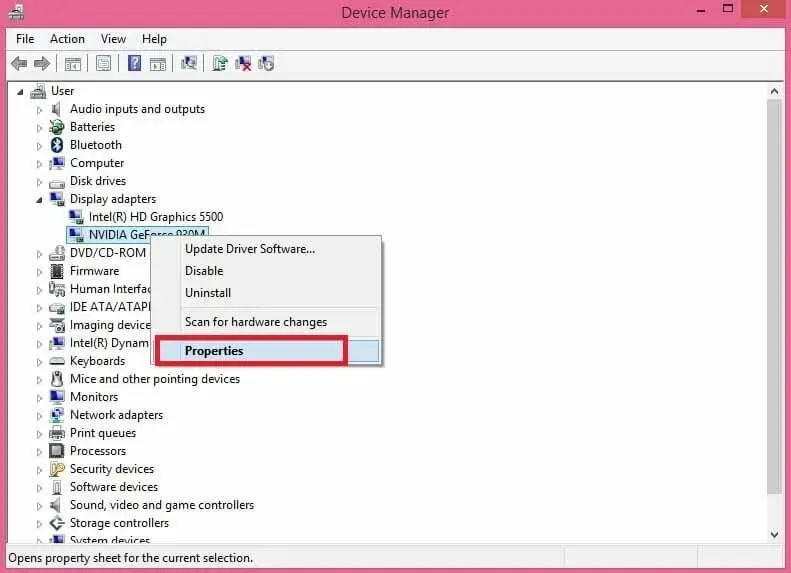
- Right-click the listed display adapter model.
- Click on the “Properties”option.
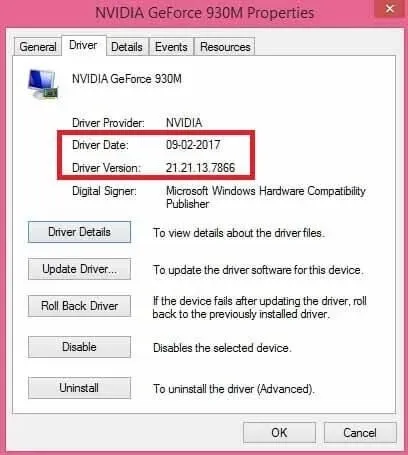
- Click the Driver tab. Here you will find various information related to your graphics driver. Write down the details of the driver date and driver version.
- Now that you know about two important driver details. Next, you need to visit the video card manufacturer’s website.
- The three most used graphics card websites are:
- Find the latest graphics driver and download it to your drive.
- Open the Device Manager of your PC. Type “
devmgmt.msc“in the Run dialog box, then click OK. - Look for the term “Display Adapter”and expand it.
- Right-click the listed display adapter model.
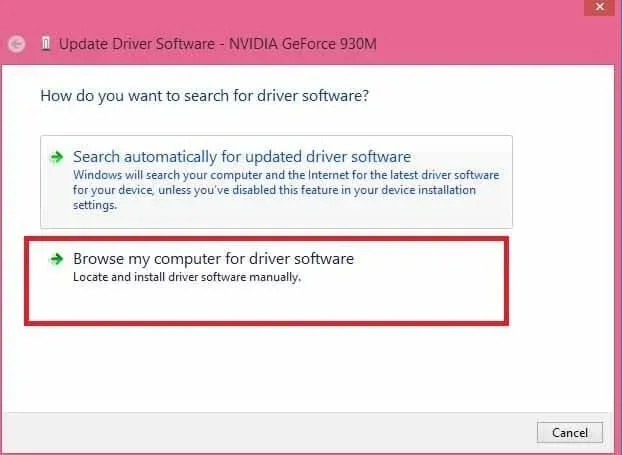
- Click “Update Driver Software…”.
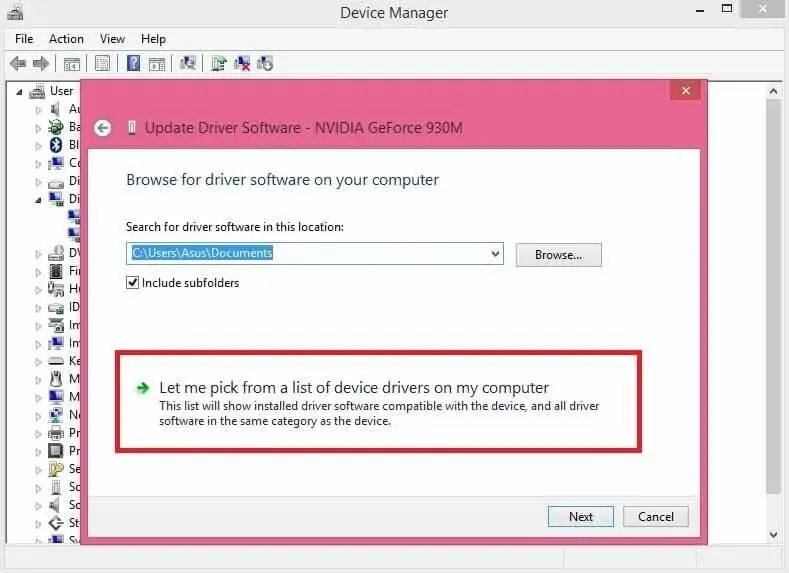
- Click on the second option “Search my computer for driver software”.
- Select the “Let me choose from a list of device drivers on my computer”option.
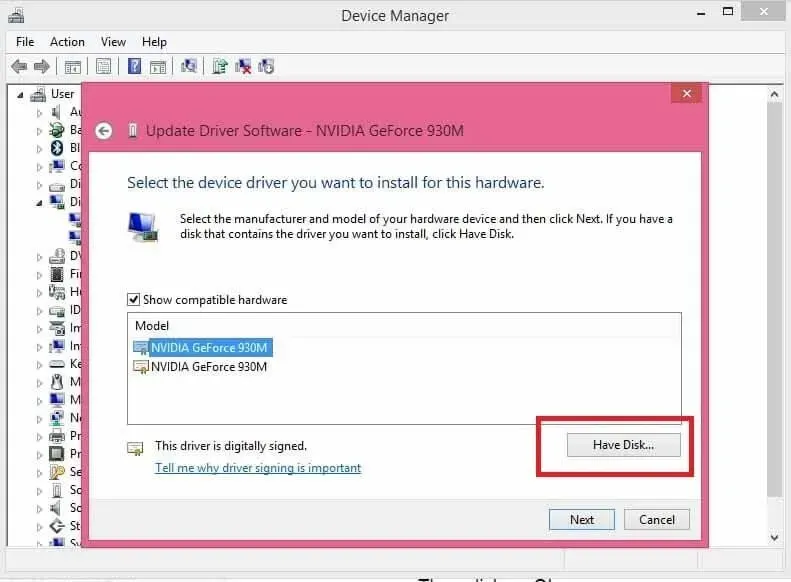
- Left-click on the “Install Disk…”option located in the lower right corner.
- Select a drive, then click the Browse button.
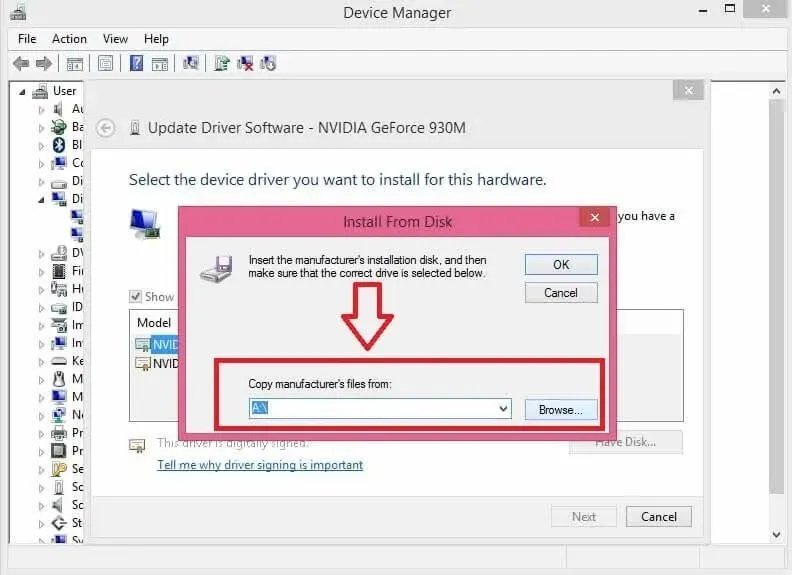
- The driver file(s) will be in *.inf format. Click “Open”. Then click OK.
- Next, your computer will begin the installation process. During installation, your screen will be blank several times.
- Restart after installation is complete.
11. Quit idle background programs.
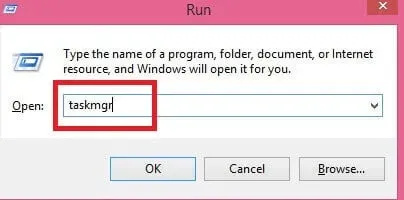
- Open the Run dialog box by pressing the Windows key + R.
- Type “
taskmgr“and press the enter button.
- In the Task Manager window, select the Processes tab. Hover over the program you want to close and right-click on it.
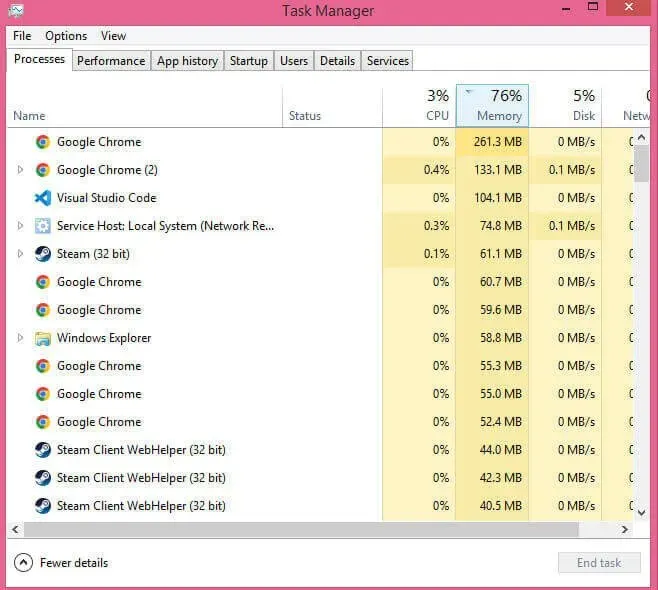
- From the options menu, select the End task option.
- Note. Be careful not to “End Task”of a process you are not familiar with. You may end up losing some important processes.
12. Update DirectX and download the latest Visual Studio C++ 2015 Redistributable Package.
Installing the latest version of DirectX:
- Open Windows Settings. Click the Windows logo button and select the gear icon.
- Select Update & Security.
- Notice the top left of the screen. You will see an option Check for updates. Click here.
- If any updates are available for download, you will be notified and prompted to start downloading. You can start downloading right away or schedule it for later.
- The latest version of DirectX will also be installed along with the update.
Reinstall Visual Studio C++ 2015 Redistributable:
- Open the control panel. Select the “View”dropdown at the top right corner of the screen. Select the Small Icons option.
- Look for “Microsoft Visual C++ 2015 Redistributable”x64 and x86 versions.
- Uninstall both Visual Studio C++ programs (note that uninstalling the Visual program may terminate your entire game).
- Then download the latest Visual Studio C++ 2015 Redistributable Package from the official Microsoft website.
- Install the programs by double-clicking the downloaded installation packages. Install the x64 and x86 versions of the Visual C++ programs.
- Restart your computer. Try to launch the Skyrim game and check if the error is spinning or not.
13. Use the System File Checker.
System File Checker (SFC) is a useful tool to check for corrupted or missing system files. You can initiate the SFC command – “sfc /scannow“Check the integrity of system files, and then restore the missing and damaged ones.
- Open a command prompt in administrator mode. Press the Windows key. Enter the keyword “
cmd“in the search bar. Right-click on the Command Prompt icon and select the “Run as administrator”option.
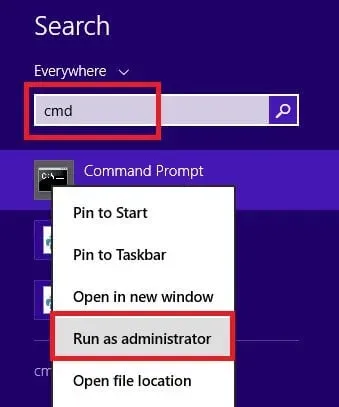
- Or type “
cmd“in the Run dialog box, press Ctrl+Shift+Enter keys on your keyboard. - When prompted for permission to make changes to the device, click Yes.
- Type the following command in the command prompt window and press the Enter button.
- sfc/scannow
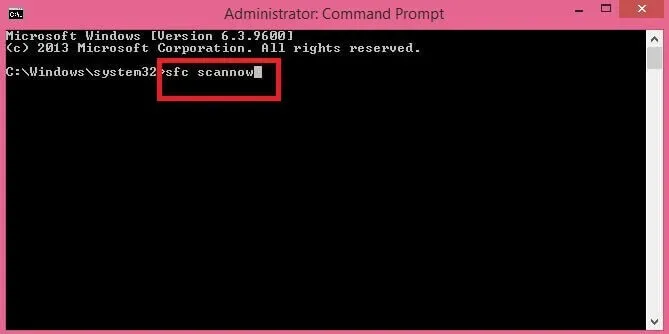
- COMMAND initiates the system file check process. Wait until the progress reaches 100%.
- Upon completion, a log containing successful and unsuccessful fixes will be saved to the local drive C (system drive).
- Restart your computer, then try launching the game. Check if the error is bothering your Skyrim game.
14. Reinstall the game.
Let’s say the situation remains the same. Then it’s time to reinstall the game. This is the perfect solution if any of the solutions above are not working on your PC.
- Open the control panel. Select the “View”dropdown at the top right corner of the screen. Select the Small Icons option.
Alternatively,
- Open the Run dialog box and type. “
appwiz.cpl”. Then click on the OK button. - Right-click The Elder Scrolls: Skyrim Special Edition and select Uninstall.
- Uninstall the game by following the instructions on the uninstall wizard screen.
- Delete the folder where the local game files were previously installed. Note. Permanently delete these residual folders and files and leave the Trash empty.
- Open the Steam app and reinstall the game again.
Conclusion
For any avid gamer, Skyrim is sure to find a place on their list of favorite games. The game is a classic. And thanks to regular updates and various mods that improve playability, it wins the hearts of both new and old players.
However, the game may freeze on the intro scene for the reasons outlined in this article. Or it won’t start when you click the “Start Game”icon.
By following the solutions above, you can fix the “Skyrim won’t start” error. Try to pinpoint the error or scale and use the appropriate solution to fix the “Skyrim won’t start”error.
Frequently Asked Questions (FAQ)
How to fix Skyrim won’t launch?
The following solutions can fix the “Skyrim won’t start”error. Resolving mod conflicts; restart your computer; keep Windows up to date; run the game in compatibility mode; specify rules for incoming and outgoing traffic in the Windows firewall; run Steam and Skyrim in administrator mode; check the integrity of the game files (cache); update your device drivers; install the latest version of DirectX and Visual C++; restore system files with SFC and finally you might have to reinstall Skyrim game to fix the error.
How to determine which mod is causing Skyrim to crash?
First, disable any mods you have installed for the Skyrim game. Now enable the single mod, then check the error status by launching the game. If the game starts fine, disable the mod and enable another mod. Recheck the game for errors by running it. Repeat this enable->check->disable process until you find the mod(s) causing Skyrim to crash.
Leave a Reply