15 Fixes for Samsung TV Not Connecting to WiFi
Have you all wanted to watch a football match with your friends on your Samsung LED TV or watch a few series on Netflix, but your Samsung TV won’t connect to Wi-Fi despite multiple attempts?
Samsung has become one of the largest multinational South Korean companies in the world and is increasingly known for its wide range of home and office products, from portable microwave ovens to laser printers and washing machines, to powerful centralized air conditioning systems.
Samsung Smart TVs lead the way in this tech world with their large OLED screens, slim design, faster user experience and instant multi-band internet connectivity via Wi-Fi and Ethernet cable.
But lately, there have been numerous user reports from households around the world reporting a common error that causes Samsung TV not to connect to Wi-Fi routers.
This connection issue only occurs on the Samsung TV model with a wireless chip, and in this article, we have provided various default fixes, accompanied by a step-by-step guide for your self-diagnosis assistance.
But first, we must find out what is causing the “Samsung TV not connecting to Wi-Fi” problem.
Why won’t my Samsung TV connect to Wi-Fi anymore?
There can be several reasons why your Samsung TV won’t connect to the Wi-Fi networks around it. This may just depend on the device, the ISP, or both. We have mentioned some of the possible reasons below:
- Common Mistakes: Your TV settings or Wi-Fi router settings can cause this Wi-Fi connection issue. A simple reconnect or factory reset fixes a few common errors on your device.
- Outdated Firmware: The firmware controls the inner workings of your smart devices, and the Wi-Fi connection issue depends on the firmware of your Samsung TV. Updating outdated firmware can fix this Wi-Fi issue.
- DNS errors. The DNS settings preconfigured on the Samsung Smart TV may conflict with the IP settings provided by your ISP. In this case, the DNS server must be changed manually.
- Mac Address Blocking: Every ISP has a registered MAC address (mostly your router) associated with every internet connection they provide. When different devices try to use the Internet, the ISP limits the data because the Mac address associated with the IP address changes randomly. If you complain to them about this problem, it may help to solve this problem.
- Wrong password problem: If someone has changed your router password and your TV has kept the previous one, then every time it tries to connect to Wi-Fi, you will encounter the “Samsung TV will not connect to Wi-Fi” error. Only a network reset solution can help you from this error.
How to solve the problem with Samsung TV not connecting to Wi-Fi network?
Now that you have identified the various reasons why your Samsung TV cannot connect to WiFi, you can try to fix them. The specific steps will vary depending on the root cause of the problem, so follow the methods according to the mix problems.
Let’s get started with the basic steps you need to follow to perform device self-diagnostics and resolve the WiFi connection issue on your Samsung TV.
- Restart or turn your Samsung TV off and on again.
- Restart your internet connection
- Check if your Wi-Fi router password is correct
- Temporarily switch to a different Internet connection
- Reset wireless settings
- Performing Firmware Updates on Samsung Smart TV Firmware
- Change DNS Server Configurations
- Check if the Wi-Fi signal strength is weak
- Edit various Samsung TV settings
- Switch to an Ethernet cable connection (for Samsung TVs with an Ethernet port)
- Install a Wi-Fi repeater to extend your range
- Enable UPnP in router settings
- Restore your router to factory settings
- Contact Samsung Technical Support
- Contact your ISP
1. Restart or turn your Samsung TV off and on again.
Before proceeding with other complex procedures, rebooting the device is the first step that everyone should take.
The Samsung TV will not connect to Wi-Fi devices around you because the network settings are corrupted if the TV is turned off with the remote control and left that way for more than 15 minutes.
In this case, a simple restart can reset the settings and fix the issue. Follow the steps below to restart your Samsung Smart TV:
Method 1:
- Make sure your Samsung TV is turned on.
- Find and hold the power button on the remote control.
- Keep pressing and holding the power button until the Samsung logo appears on the screen.
- After a few seconds, you will see the red LED start flashing.
- Try to reconnect to the Wi-Fi network after restarting the TV.
Method 2:
- Turn on your Samsung TV.

- Keep the TV turned on for about 5-10 minutes before unplugging the power cable from the wall outlet (do not use the remote control to turn off the TV first).
- Wait about 30 minutes before turning the TV back on.
- If the connection issue persists, continue to the next step.
2. Restart your Internet connection.
Wifi routers often run into a problem where they seem to be working properly (even the LED blinks), but the Wifi network is disconnected from all devices.
In these scenarios, it is important to reset your network settings by simply restarting your Internet connection. Follow these steps to restart your wireless network:
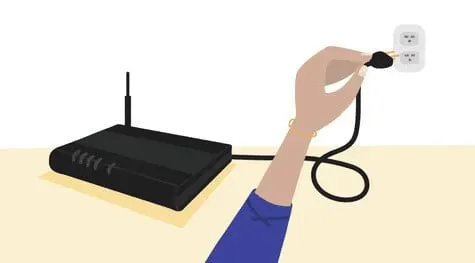
- Power off the Internet Router by unplugging the power cable from the electrical outlet.
- Wait 10-15 minutes before turning the power back on.
- After turning it on, wait a few seconds until the Internet connection indicator turns green. You should now be able to connect your Samsung TV to your Wi-Fi network.
3. Check if the password of the Wi-Fi router is correct.
Your Samsung TV saves the Wi-Fi password so you don’t have to enter it every time you connect to the Internet to watch something.
Someone in your family may have changed the Wi-Fi password without telling you, and therefore your Samsung TV will not connect to an already saved Wi-Fi network.
In this case, you can follow the steps below to make the saved password correct:
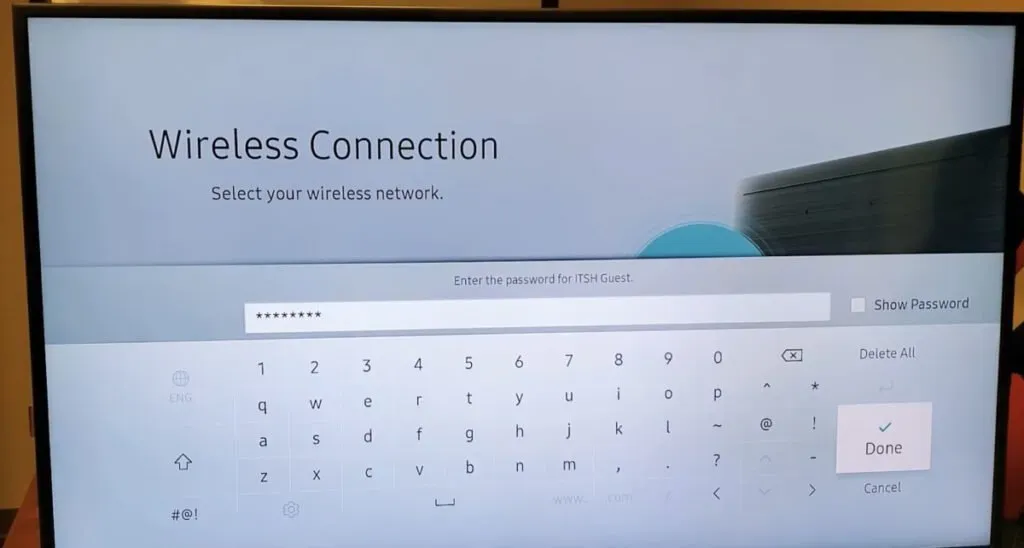
- Take the remote in your hand and press the Home button.
- On your Samsung TV menu, navigate to the options in the following order: Settings > General > Network > Open Network Settings > Wireless.
- Select the name of the wireless network you usually connect to.
- Enter the password you last used. Click “Show Password”to make sure you entered the correct password.
- Click the Connect button. If it says that the password is incorrect, find out who changed the password of the router and find out the correct one. Enter the new password on your Samsung TV and you will be connected immediately.
- If the password is correct but your Samsung TV still won’t connect to the Wi-Fi network, try the other methods below.
4. Temporarily switch to a different Internet connection.
If your Samsung TV won’t connect to the Wi-Fi networks stored in its memory, you can try connecting it to a different wireless network that it doesn’t know about.
You can create a mobile hotspot on any portable Android device or iPhone with a good internet connection and try to connect your Samsung TV to it.
If this method succeeds, your Samsung TV is fine and the problem exists with your Wi-Fi router or ISP settings due to Mac being locked. Follow these steps for applicable fixes:
- Open your Android or iPhone device and turn on Mobile Hotspot or Wi-Fi Sharing.
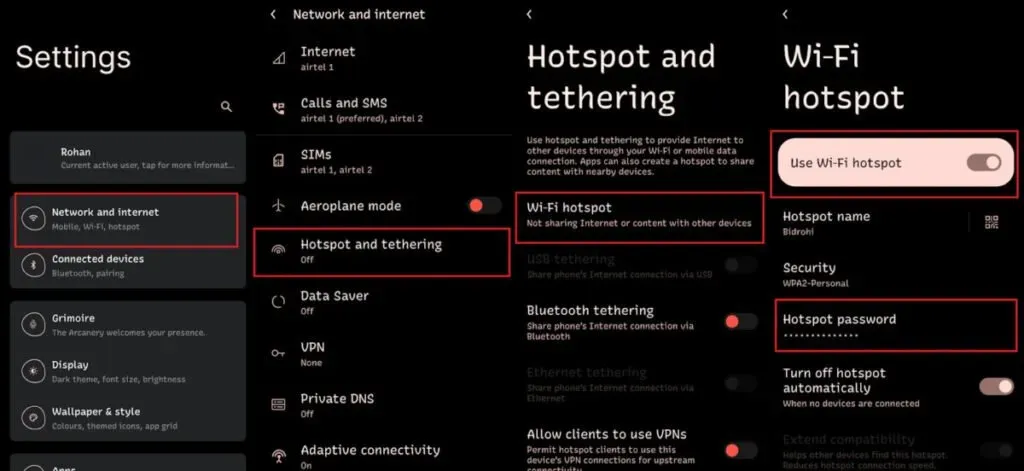
- For Android, go to Settings -> Network and Internet -> Hotspot & Tethering -> Wi-Fi Hotspot and turn on the Use Wi-Fi Hotspot option.
- For iPhone, go to Settings -> Cellular -> Personal Hotspot and click on Allow Others to Join.
- Before logging in to your Samsung TV, make sure you know your mobile hotspot password. It can be found in the access point settings.
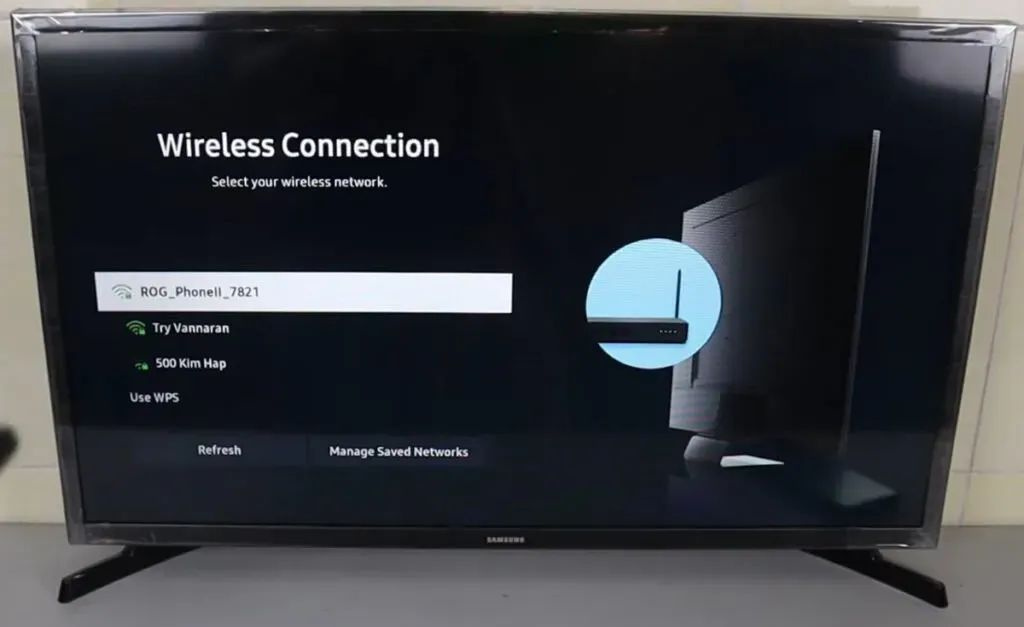
- When the name of the mobile device’s access point appears in the list of available wireless connections, connect to it and check if the problem persists.
- If the TV is properly connected to the mobile hotspot, the TV’s Mac address is most likely blocked by the Internet router.
- You can contact your ISP to unblock the TV’s Mac address.
- Proceed to the next method to reset the network settings of your Samsung TV if you cannot connect to the mobile hotspot.
5. Reset wireless settings
If your Samsung TV cannot connect to an access point other than your regular home wireless network, there must be a problem with the network settings your Samsung TV uses when connected to any network.
The problem of detecting a wireless network can be fixed by resetting the network settings by following these steps:
- If you are watching a channel on a Samsung TV, go to the home screen by pressing the Home button on the remote control.

- Go to the “Reset network settings”menu by selecting the following options: “Settings”-> “General”-> “Network”-> “Reset network”.
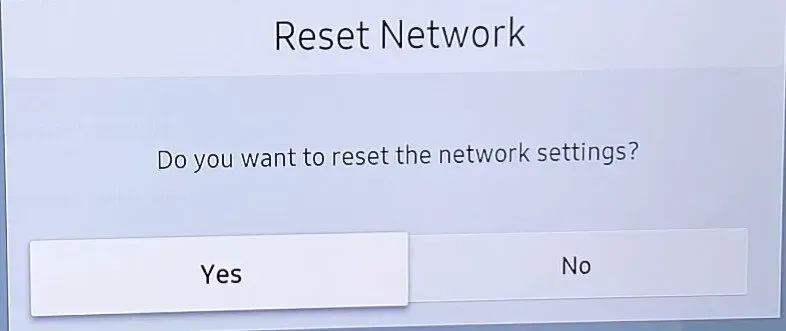
- In the pop-up window that appears asking for confirmation, select “Yes”and press the “Enter”button.
- You will be notified that the operation was successful and you can connect to a wireless or wired network by clicking the Network Settings option.
6. Perform a firmware update on the Samsung Smart TV firmware.
A legacy firmware update is required to keep your Samsung TV up to date with the latest software updates and bug fixes. You must update the device firmware according to the model and region of your TV.
If the firmware is not up to date, you will have problems connecting to the Internet. We will be using a computer to get the necessary firmware for your device since you cannot access the internet through your TV. Follow the instructions below to find out more:
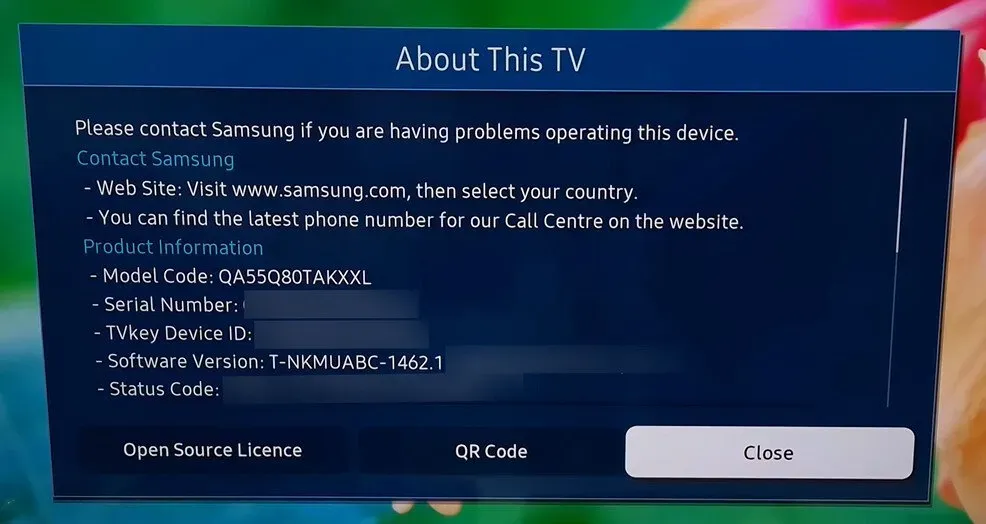
- First, we need to know the Samsung TV model and the installed firmware version.
- Turn on the TV and enter the menu by pressing the Home button on the remote control.
- Go to the “Settings”menu (gear icon). And select Support from the left pane.
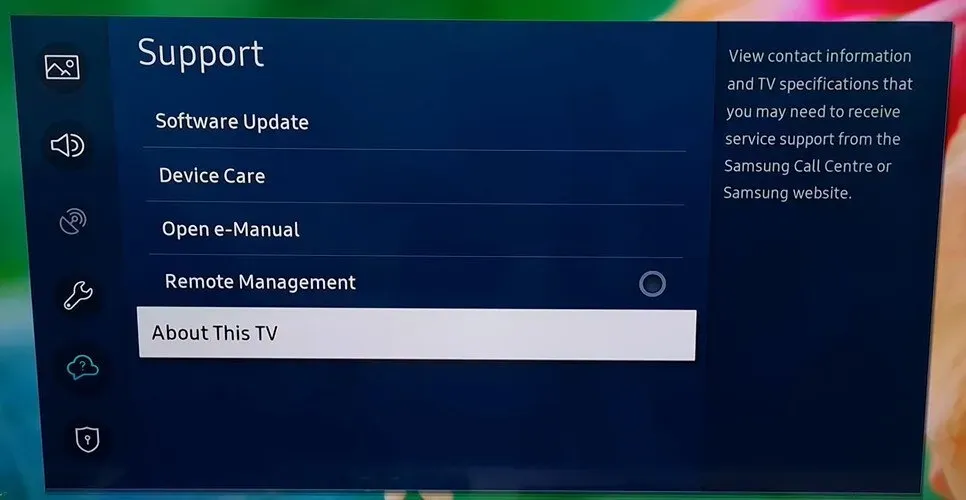
- Click on the “About TV”option and a pop-up window will appear with the model code, serial number, and software version. Click on their image and attach them separately.
- Go to your computer with an internet connection, open a browser and go to this Samsung TV support link.
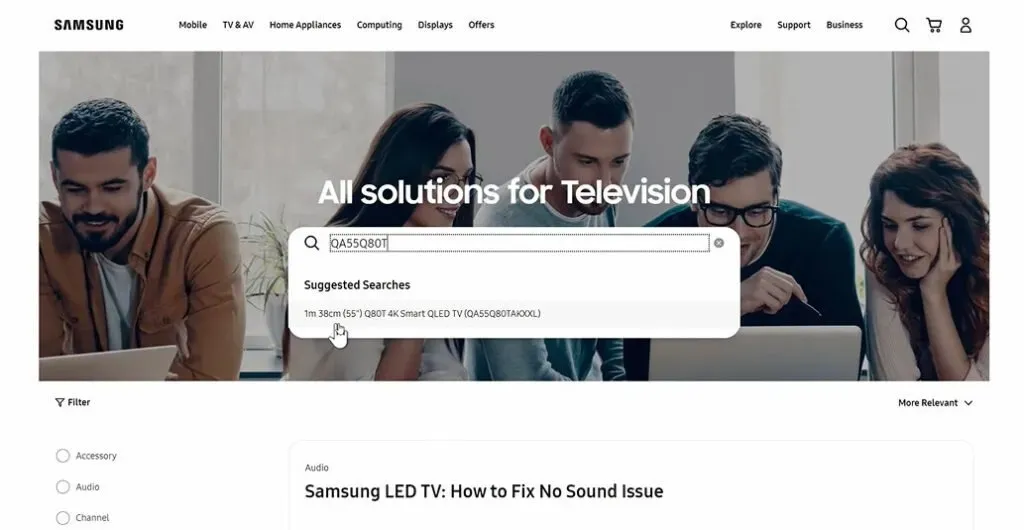
- Enter your Samsung TV model number in the search bar and your TV will be listed there. Click on it to open it.
- On the left panel, click Firmware/Software. Scroll down and you will see the update file (USB type).
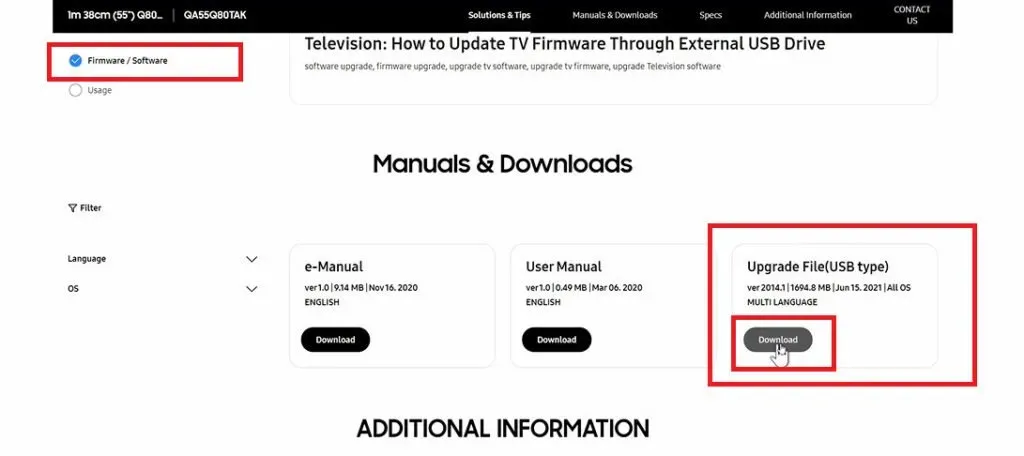
- If the firmware version is newer than your TV, click the Download button.
- Open the downloaded zip file and extract everything to a USB stick.
- Plug the USB into your TV’s external USB port.
- The Samsung TV will detect a new device. Click Cancel.
- Go to Menu (Home button) -> Settings -> Support -> Software Update -> Update Now.
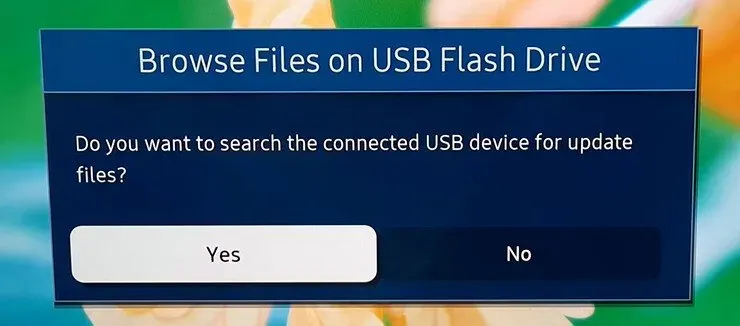
- In the View USB Files menu, click Yes.
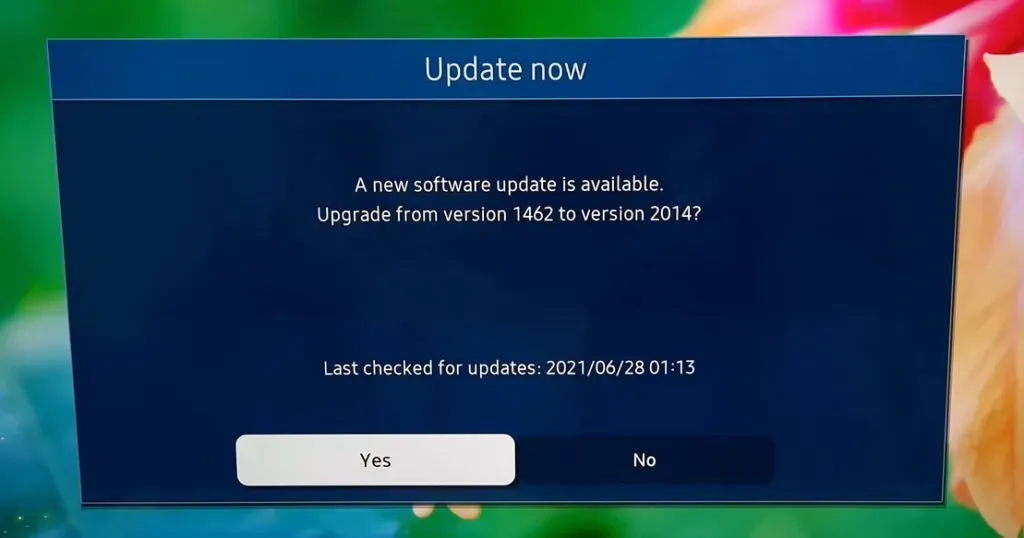
- Click “Yes”again on the “Update Now”window.
- Your TV will reboot once the firmware update is complete and you can see if the issue still exists.
7. Change DNS Server Configurations
If you get internet from a carrier that provides a static IP address, chances are high that they also have a separate DNS server without which your internet router cannot connect to the internet.
To help your Samsung TV connect to Wi-Fi routers, you must enter this DNS address after changing the DNS mode to manual. Follow these steps to change the DNS mode and enter DNS settings manually:
- On the remote, press the Menu button and then the Settings button.
- Select Network and then Network Settings.
- Select “IP Settings”from the Start Menu.
- Now select DNS Mode, make sure the green checkmark is set to Manual, and click OK.
- Enter your preferred DNS server and click OK.
- If the issue was related to your DNS settings, you should now be connected to the Internet and can use the Samsung Smart Hub button to automatically change the settings of connected devices.
8. Check if the Wi-Fi signal strength is weak.
Check the Wi-Fi status of your Samsung Smart TV if it keeps losing internet connection. The connection is most likely unstable.
- If the wireless network shows only a few bars or is constantly flickering, the device may not have a stable connection.
- The easiest way to fix this problem is to clean up the area where your router is located.
- Place it in a prominent location in your home, away from walls and furniture that might interfere with its wireless signal.
- If you have no other choice but to install the router in a room with many obstacles, we recommend using Ethernet cables to connect devices instead of WiFi.
9. Edit Various Samsung TV Settings
If the problem persists, your Samsung TV may not be set up correctly (especially if it won’t even connect to your phone’s hotspot). Several users have had success with the following settings. Please note that each user’s instructions will vary significantly.
Disable Samsung Instant Start
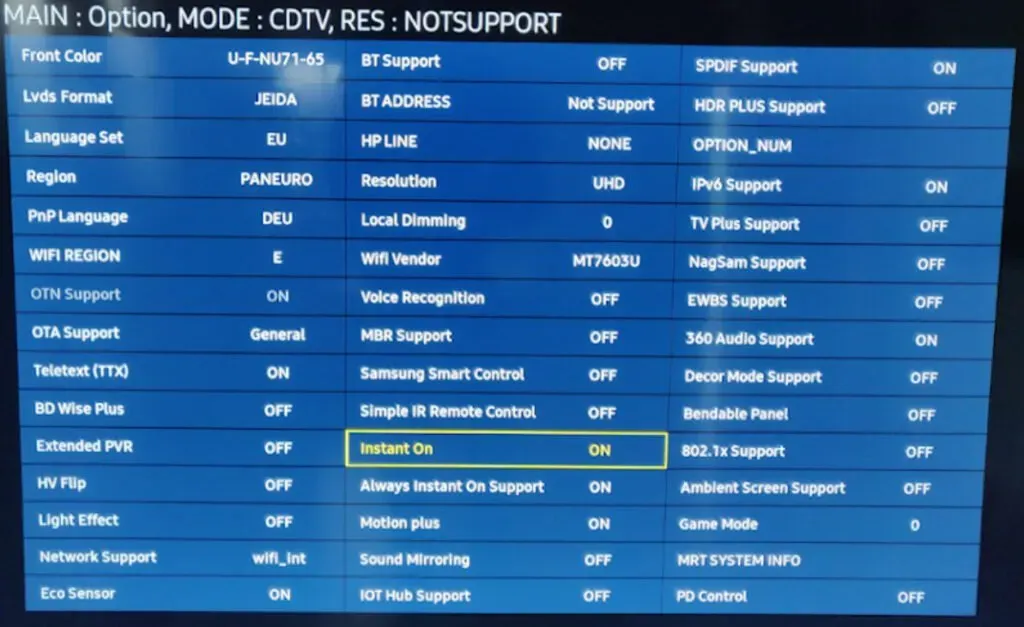
- Press the “Menu”button on the remote control and open “Settings”.
- Scroll down and select General in the left pane.
- Find Samsung Instant On on the right and turn it off.
- Restart your Samsung TV.
Disable Autorun Last App and Autorun Smart Hub

- Open the “General”section in the “Settings”menu of your TV.
- Open Autorun Last App in Smart Features.
- Disable it and restart your TV to see if the problem is fixed.
- If not, go to Smart Features (steps 1-2).
- Disable Smart Hub auto-start and check for Wi-Fi.
Change usage mode
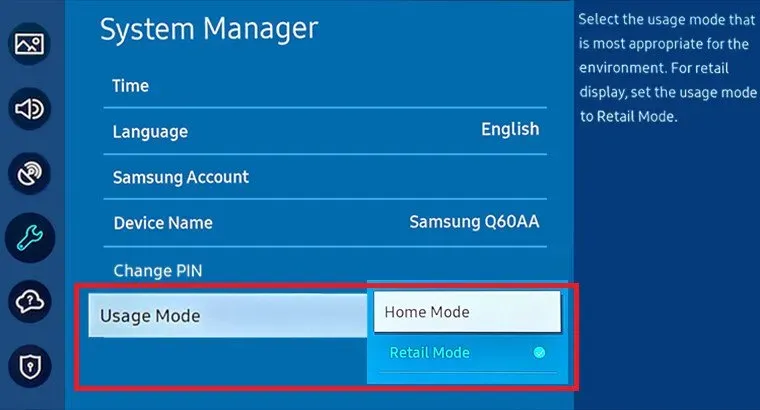
- Open the settings page on your TV and select the “Support”option.
- In the right pane, expand Usage Mode and select Home Use.
- Use the default PIN 0000 if your Samsung TV asks you to.
- Restart your TV and check if the Wi-Fi connection is working properly.
“Power off by mobile device”function
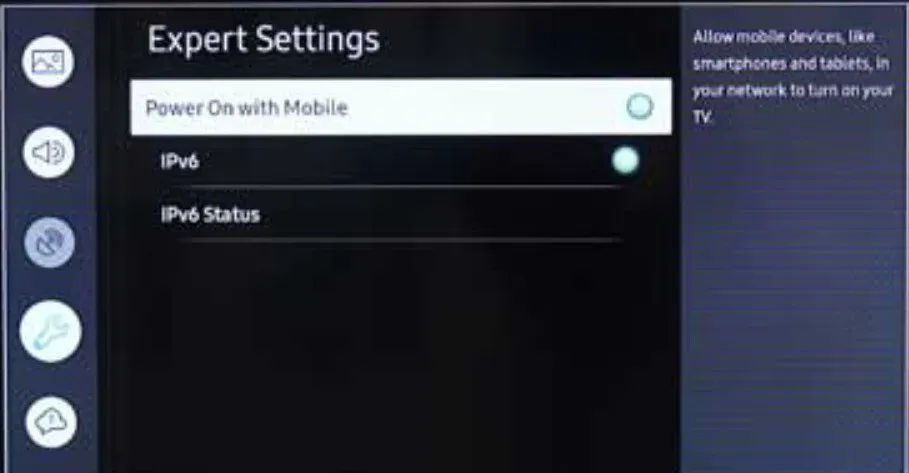
- Open the “General”menu in the “Settings”window of your TV.
- Select Network and then Expert Settings.
- Then deactivate Power on With Mobile (after that, the Smart Things mobile app will not work).
- Restart your TV and check if the Wi-Fi problem is fixed.
Change Samsung TV Name
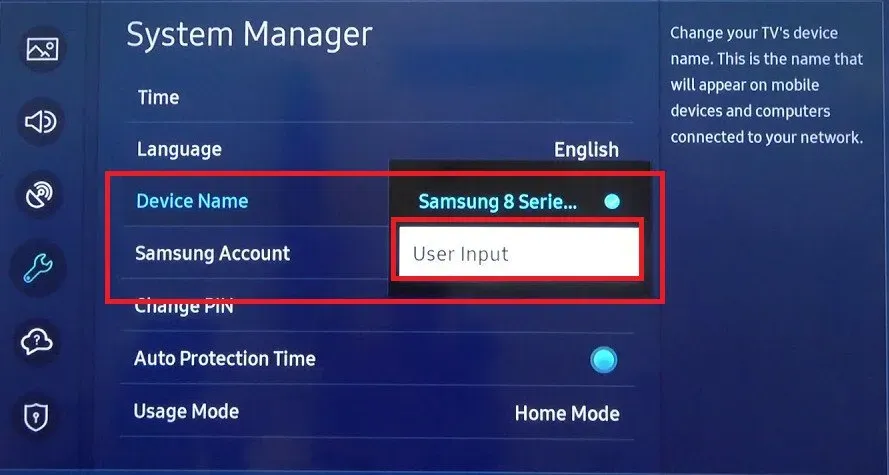
- Open the settings menu using the Settings Remote button.
- Go to the “Network”tab, select “Device Name”and enter a new name for your TV.
- Make sure the new name doesn’t match the names of other devices around you.
- Restart your TV and check if the issue is resolved.
Update Smart Hub Resources
- Select “Source”in the Smart Hub on your TV’s remote control.
- Now, press the “A”(red) button on the remote to force refresh sources, and then check if the problem is fixed by opening any of the apps (such as Netflix or YouTube).
Change Wi-Fi Region and Reset SVC
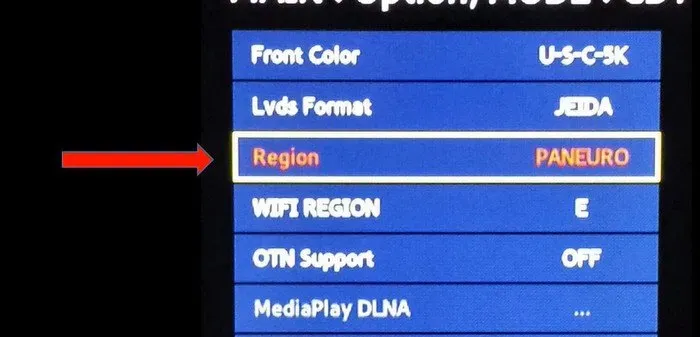
- Turn off the TV and put it into “Secret (or Service)”mode before using it again (be very careful with changes to the service mode, as this can permanently damage your TV). Press the following buttons on the remote control in the following order: (>> is the fast forward key)
- Information >> Menu >> Mute >> 1 >> 8 >> 2 >> Power.
- In the service menu, open “Management”-> “Suboption”-> and change “WiFi Region”to A.
- Click “Apply”and reboot your TV.
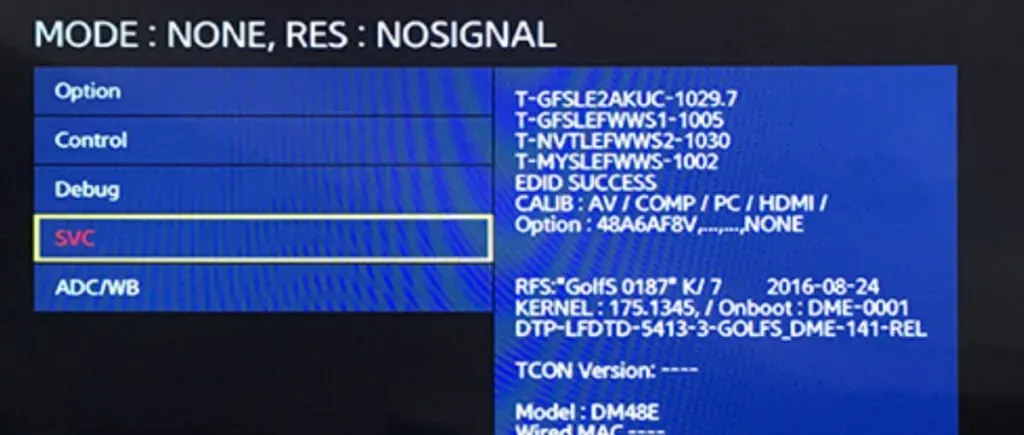
- If changing the Wi-Fi region did not resolve the issue, boot the TV into service mode and select SVC.
- Press SVC Reset and the TV will automatically reboot.
Change country settings on TV

- Launch Smart Hub on the TV and press the following key combination on the remote: (>> and << are the fast forward and rewind keys, respectively)
- >> 2 8 9 <<
- In the “Internet Service Location Setting”window, change the country other than the one currently set and accept the Samsung Terms and Conditions.
- Restart your TV and check if the Wi-Fi problem is fixed.
Sign in to your Samsung TV account
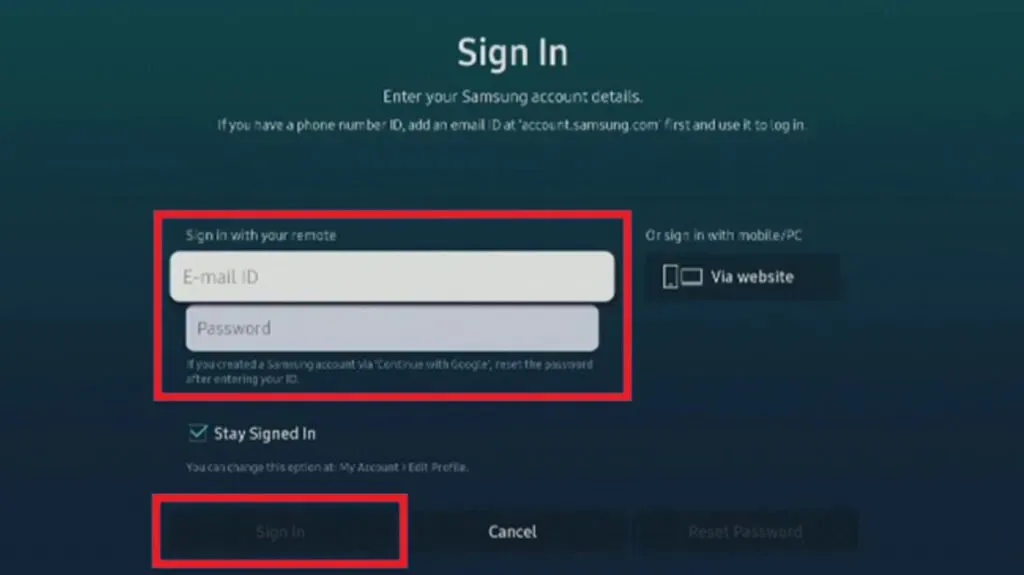
- Go to the Smart Hub tab in the settings menu.
- Select the Samsung Account option and sign in to your Samsung account or re-enter your credentials.
Reset Samsung TV Smart Hub to Default
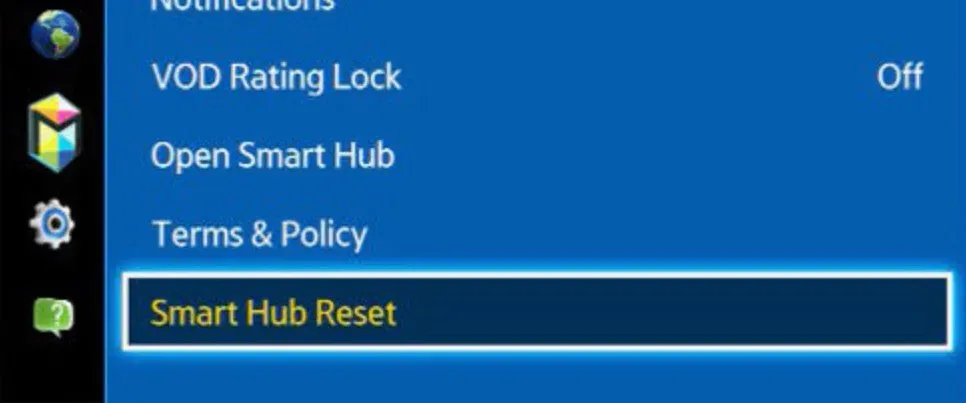
- Open the “Settings”menu, go to the “Support”page, open “Self Diagnosis”and select “Reset Smart Hub”.
- Enter the default PIN 0000 and press Enter to confirm.
- Wait for the reset procedure to complete and check if the issue is resolved.
Disable Soft AP
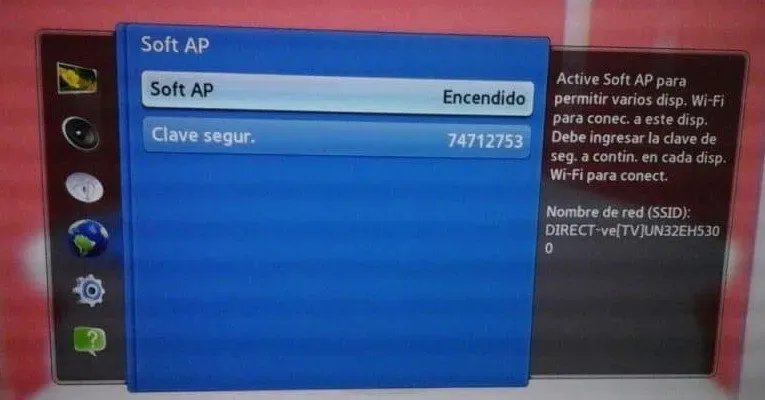
- Launch your Samsung TV’s “Settings”and go to the “Network”tab.
- Select the Soft AP option and press OFF to disable it.
- Restart your TV and check if the problem is still there.
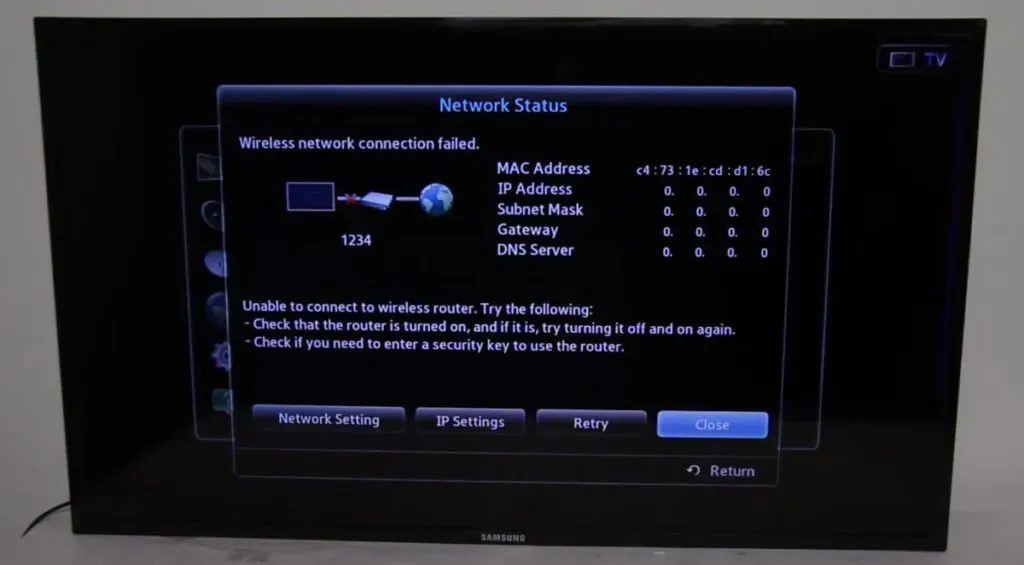
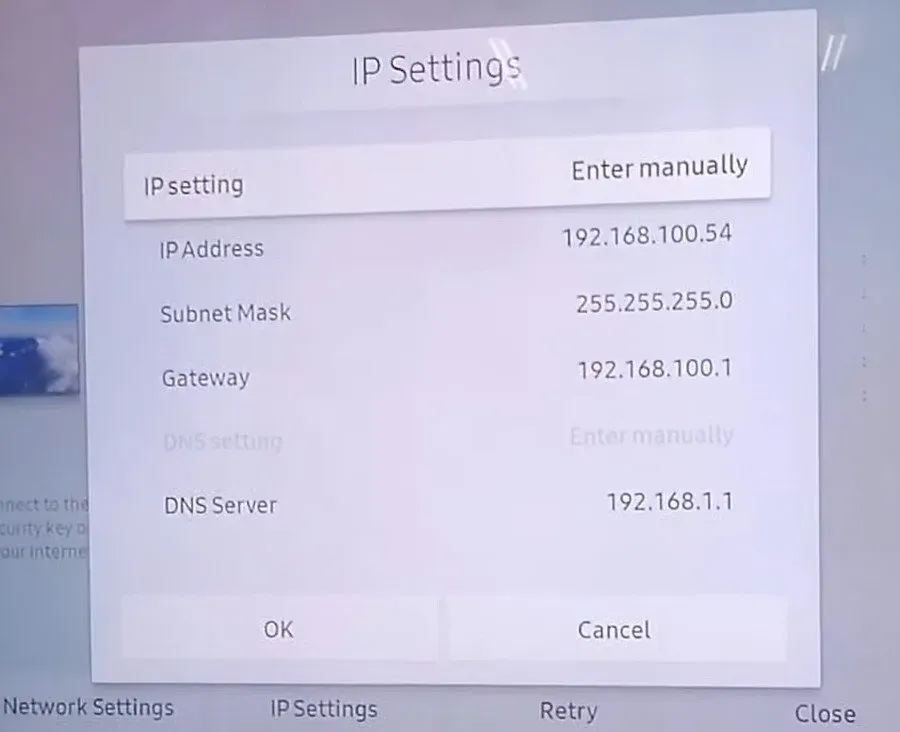
Set the IP address and DNS settings manually

- Go to the “Network”section in the TV settings.
- Select “Network Status”, open “IP Settings”and change it to “Manual”.
- Enter the correct IP address, subnet mask, and default gateway IP address after contacting your ISP.
- Enter the DNS values provided by your service provider.
- Select Connect after changing the values.
- Check if the problem with Wi-Fi is still there.
Change your TV’s timezone
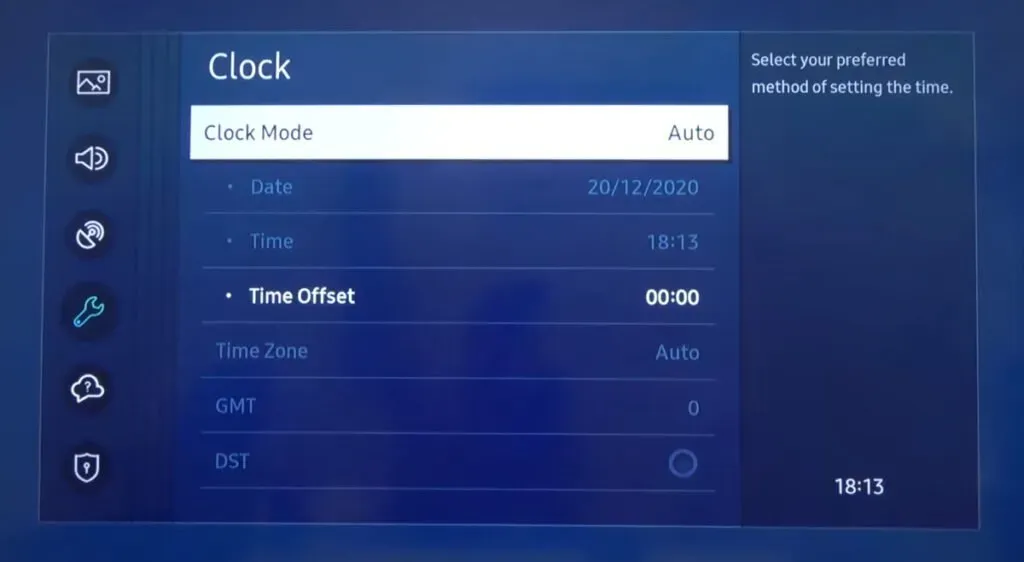
- Launch the TV settings window and open General.
- Select “System Manager”and click “Time”.
- Open Clock and change the TV’s time zone. If it is not active, change the clock mode to manual.
- Restart your TV and check if the issue is resolved.
Disable Smart TV AnyNet+
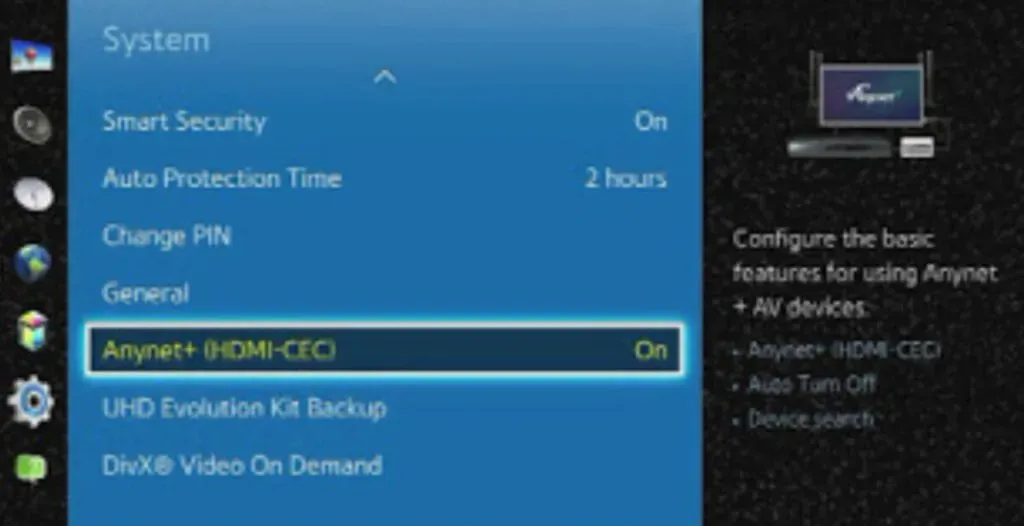
- Launch your Samsung TV settings and go to the General tab.
- Select the External Device Manager option and select AnyNet+.
- Disable it and check if the Wi-Fi issue is resolved.
10. Switch to an Ethernet cable connection (for Samsung TVs with an Ethernet port)
If your Samsung TV model comes with an Ethernet port on the back, you can connect your router’s Internet cable directly to this port. A direct connection is more reliable and faster than using a router, and you can quickly troubleshoot Internet connection problems. Follow the instructions below to find out more:
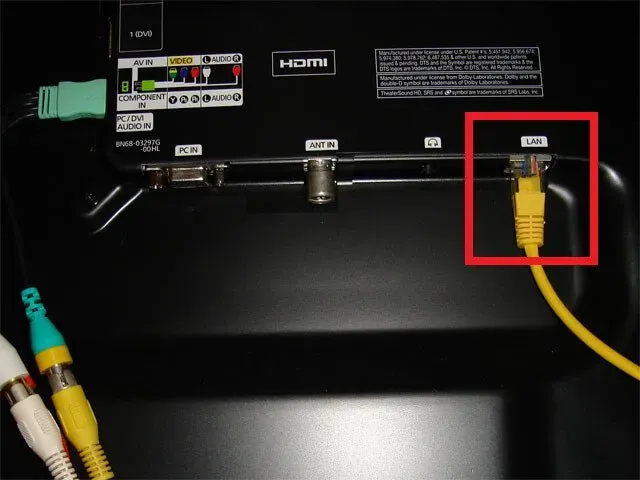
- Pull the gray LAN wire directly out of the router’s Ethernet port.
- Adjust it so that the wire can easily reach the TV.
- Plug the Ethernet cable into the appropriate port on your Samsung TV.
- If you receive a notification to set up a LAN connection, please enter the correct IP address and DNS settings.
11. Install a WiFi repeater to extend the range
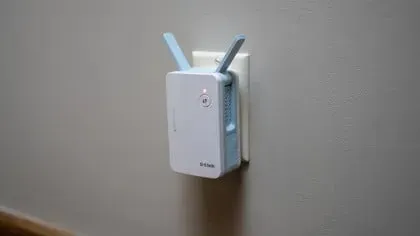
Your Samsung TV may not find the Wi-Fi router in the list of available connections because the Wi-Fi signal is too weak to reach the wireless modem inside the TV.
To solve this Wi-Fi connection problem, we advise you to install a Wi-Fi repeater near your TV so that it can extend and increase the Wi-Fi coverage area in your home or office.
12. Enable UPnP in the router settings.
UPnP is enabled by default on routers. For privacy reasons, some users prefer to deactivate it. UPnP makes it easy to discover and connect your devices. Samsung TVs may have trouble connecting to Wi-Fi networks if this feature is disabled, resulting in an automatic shutdown.
As a result, you must ensure that UPnP is enabled on your router by doing the following:
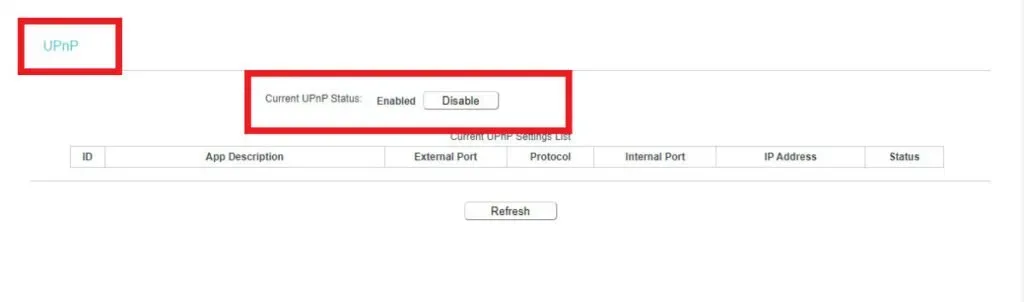
- Open the administration page of the router (usually 192.168.0.1) on the computer connected to it.
- Sign in using the default username and password.
- Click More > Advanced Setup/Network > UPnP.
- Make the UPnP setting enabled.
- Click Apply and your router will reboot once.
13. Resetting the router to factory settings.
If you were unable to achieve the desired result by resetting your TV, and connecting an Ethernet cable directly to your Smart TV works without problems, your router may be causing your Samsung TV to keep disconnecting from the Internet. In such a case, follow the steps below to reset the router to factory settings:
- There is a small round button behind your router with RESET written over it. Older models may also have a small hole that you can push with a paper clip to reset the router.
- Keep the button pressed until the router’s lights turn off. Release it and they will start flashing again.
- You must configure the router with all IP settings and Wi-Fi passwords after the hard reset is completed.
14. Contact Samsung technical support.
If all of the above solutions to the problem with the Samsung TV not connecting to Wi-Fi did not work, then as a last resort, you can try contacting Samsung Technical Support. You can:
- Visit their service center
- Contact them online or chat with them via whatsapp
- Contact them for remote support
- Use warranty repair services
15. Contact your ISP
You may not be getting internet connectivity on your Samsung TV because ISPs are doing maintenance in your area, temporarily blocked your MAC address, or your bundle has expired and hasn’t been automatically renewed.
The only possible way to sort out these problems is to call the technical support of the ISP or carriers and politely ask them if such problems occur.
Conclusion
I hope this article on fixing the problem with Samsung TV connecting to Wi-Fi helped you get your TV back to normal. Please leave a comment below to let us know which method was successful in your efforts and provide information on other fixes for this issue.
FAQ
Why won’t my Samsung TV let me connect to WIFI?
Your Samsung TV is preventing you from connecting to Wi-Fi due to many reasons such as poor Wi-Fi connection, DNS settings mismatch, MAC address blocking, outdated Samsung TV firmware, ISP service issues, etc. Follow our article to learn more about how to solve this serious problem.
Why is my TV no longer connecting to Wi-Fi?
If your Wi-Fi network has been saved on your Samsung TV and will no longer connect to the same Internet, you should check your router and reset your Samsung TV’s network settings. Follow this article to learn more about the fixes for this particular error.
How to make Samsung TV recognize my Wi-Fi?
You can make your Samsung TV recognize your Wi-Fi network by manually changing the TV’s DNS server and IP address, resetting the TV’s network settings, or performing a firmware update. For other fixes to resolve this Wi-Fi connection issue, follow this article.
What to do if your Samsung Smart TV won’t connect to WIFI?
If your Samsung TV won’t connect to Wi-Fi, you first need to determine if the TV or router is causing this error. Once you’ve found the culprit, you can try rebooting the device, changing its network settings, or calling the device manufacturer’s support.
Leave a Reply