3 Best Ways to Format USB on Mac
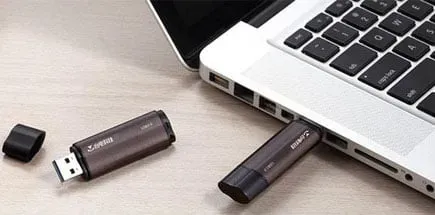
Any new USB drive is formatted with a specific format such as FAT32, exFAT, APFS, NTFS, etc. Depending on the formatting, the USB drive can be used with data systems on Windows or Mac laptops and desktops.
Since Windows is the world’s most popular and most used operating system, many USB flash drives are formatted as FAT32. However, these USB sticks are not very compatible with macOS. They will continue to run into problems.
Thus, before using them, it is important to format USB on Mac laptops with Mac-compatible formats such as APFS, exFAT, or Mac OS Extended.
Why you need to format USB on Mac
The two most popular operating systems are Mac and Windows. These operating systems have different file systems, and only a few of them are cross-compatible.
The file system is the system your operating system uses to store, retrieve, and identify files on your system. Without it, the OS will not be able to store, retrieve or identify any files.
We use USB drives to store information in the form of files. When connected to a system, the OS retrieves, saves, or identifies files on USB drives using the file system in which the USB drive is formatted.
Generally, most USB flash drives are formatted as FAT32, the Windows file system. As such, many users have reported that it sometimes throws errors when connecting to macOS.
Thus, it is important to format the USB drive so that the file system is compatible with macOS.
What is the best format for a USB drive on a Mac?
There are several file systems where you can format USB on Mac. Formatting most common on macOS:
APFS (Apple File System)
The default file system designed for macOS 10.13 and later is APFS. Suitable for SSD. Because the file system is only compatible with the latest version of macOS, you won’t be able to use USB drives formatted with this format on older versions of macOS.
Mac OS X Extended (Journaled) and Mac OS X Extended (Case Sensitive, Journaled)
The default file system for macOS 10.12 and earlier is HFS+ or macOS X Extended. The biggest advantage of the HFS+ file system is that it does not limit the size of a file that can be stored on disk.
The file format is partially compatible with Windows OS, since it can be read by Windows but not written. Also, if you plan to use a USB drive to back up your time machine, then Mac OS X Extended is the required format.
Mac OS X Extended (Journaled, Encrypted) and Mac OS X Extended (Case-Sensitive, Journaled, Encrypted)
Both of these formats are similar to the previous ones, except that you must enter a password to connect the USB drive to the Mac, as it will be encrypted.
MS-DOS (BOLD)
FAT or FAT32 is the most widely compatible file system that is suitable for both macOS and Windows OS and can be used to transfer data between the two OSes. However, before formatting USB to FAT32, you should be aware that the file system does not allow files with long names, and the file size cannot exceed 4 GB.
ExFAT
Extended FAT or ExFAT is an improved version of FAT32 that provides more storage and larger files. The format is also compatible between Windows and macOS.
How to format USB on Mac?
After researching various user forums, we have put together this guide describing various methods for formatting USB on Mac to various file systems such as FAT32, exFAT, and NTFS.
- How to format USB to FAT32 on Mac?
- disk utility
- Terminal command line
- How to format USB to ExFAT on Mac?
- How to format USB to NTFS on Mac?
1. How to format USB to FAT32 on Mac?
FAT32 is a very flexible format for both Mac and Windows. It can be read and written by both operating systems and hence is very popular. Any drive formatted in FAT32 can be scanned and burned by macOS.
We can format USB drives to FAT32 on Mac in two ways:
- disk utility
- Terminal command line
1. Disk Utility
- Start by inserting a USB drive into your Mac’s USB port and let the OS scan it and display its icon on the screen.
- Select “Search”in the upper right corner and type “Disk Utility”. Select the “Disk Utility”option.
- Navigate to the left side and select your USB drive from the dropdown menu. Now click “Erase”indicated at the top.
- Enter a drive name and select the format you want to format the drive in.
- Click erase. You can check the formatting progress on the progress bar. Once the process is complete, click Done.
- Exit Disk Utility.
Once the process is complete, your USB drive will be formatted to FAT32. This process will delete all data on your drive, so be sure to back it up somewhere.
2. Terminal command line
For users who are unable to format their USB devices with Disk Utility, they can use the terminal command line in Mac to do so. Please follow the steps below to format USB on Mac to FAT32 using terminal.
- Start by inserting a USB drive into your Mac’s USB port and let the OS scan it and display its icon on the screen.
- Continuously press spacebar, command and type Terminal. Press the enter key.
- At the Mac Terminal command prompt, type diskutil list to display a list of all peripherals connected to your Mac.
- At the next command prompt, type sudo diskutil eraseDisk FAT32 MBRFormat /dev/disk2. It will format the USB stick (disk2) to FAT32 file system.
Once the process is complete, your USB drive will be formatted to FAT32. This process will delete all data on your drive, so be sure to back it up somewhere.
2. How to format USB to ExFAT on Mac?
Unlike FAT32, extended FAT or ExFAT provides users with more storage space and allows for larger file sizes. In addition, FAT32-formatted USB drives create problems when connecting to a Mac.
- Start by inserting a USB drive into your Mac’s USB port and let the OS scan it and display its icon on the screen.
- Navigate to Applications in the Finder menu and open Disk Utility.
- Navigate to External and select your USB drive from the dropdown menu. Now click “Erase”indicated at the top.
- Enter a drive name and select the ExFAT file system you want to format the drive with.
- Now select the default GUID Partition Map (GPT).
- Click erase. You can check the formatting progress on the progress bar. Once the process is complete, click Done.
Once the process is complete, your USB drive will be formatted to ExFAT. This process will delete all data on your drive, so be sure to back it up somewhere.
3. How to format USB to NTFS on Mac?
The NTFS format is most suitable for Windows PC, and hence, if you want to format USB on Mac to NTFS for use on Windows, you need to install an NTFS driver on your system.
- Start by inserting a USB drive into your Mac’s USB port and let the OS scan it and display its icon on the screen.
- Many users have looked at drivers such as Tuxera NTFS for Mac, NTFS for Mac OS X 8.0, any open source software, NTFS-3G, or any form of Tuxera NTFS available.
- Install the downloaded NTFS driver on Mac.
- Navigate to Applications in the Finder menu and open Disk Utility.
- Navigate to External and select your USB drive from the dropdown menu. Now click “Erase”indicated at the top.
- Enter a drive name and select the NTFS file system you want to format the drive with.
- Click erase. You can check the formatting progress on the progress bar. Once the process is complete, click Done.
Recover Lost Data from Formatted USB Drive
When formatting a USB flash drive, data is likely to be lost. To recover lost data from formatted USB drives, you need to stop using the device and use third party recovery tools like Tenorshare 4DDiG.
The software allows users to recover lost files from external devices such as USB drives, SD cards, cameras, and hard drives. It is supported by macOS Monterey, Big Sur, Catalina, and other older versions.
Frequently Asked Questions (FAQ)
What is the best format for a USB drive on a Mac?
There are several file systems that you can format a USB drive with on a Mac, such as APFS (Apple File System), Mac OS X Extended (Journaled), and Mac OS X Extended (Case-Sensitive, Journaled). Mac OS X Extended (Journaled, Encrypted) and Mac OS X Extended (Case-Sensitive, Journaled, Encrypted), MS-DOS (FAT), and ExFAT.
How to format USB to FAT32 on Mac?
– Start by inserting a USB stick into your Mac’s USB port and let the OS scan it and display its icon on the screen. – In the top right corner, select Search and type Disk Utility. Select the “Disk Utility”option. Navigate to the left side and select your USB drive from the dropdown menu. Now click “Erase”indicated at the top. – Enter a drive name and select the format in which you want to format the drive. – Click “Erase”. You can check the formatting progress on the progress bar. Once the process is complete, click Finish. Exit Disk Utility.
Why is there no FAT32 option?
It may be that FAT32 is not available for your USB drive. Because Windows only allows FAT32 drive partitions on drives that are 32 GB or smaller, if the partition is larger than 32 GB, the FAT32 option will not be available.
Is ExFAT the same as the FAT format?
Extended FAT or ExFAT is an improved version of FAT32 that provides more storage and larger files.
Leave a Reply