Top 5 Fixes: Leaving JoyCon Not Charging
The Joy-Con is an extremely useful and enjoyable device designed to be used with the Switch. However, this has recently caused a number of problems.
This may seem like a simple device, but along with the various functions, there are other problems. Left JoyCon not charging.
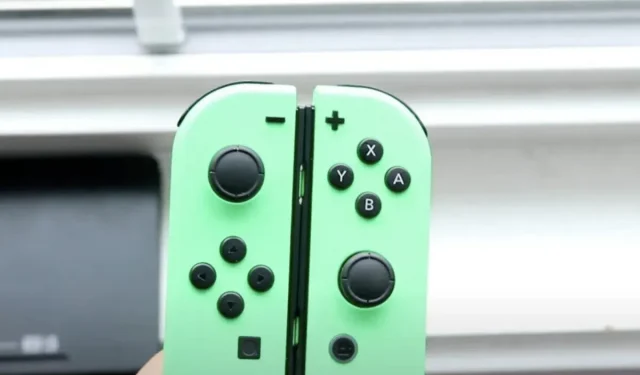
It has a directional element on the left and a Joy-Con on the right, just like any other standard controller. There are four buttons along with a navigation bar that has been developed for a long time.
However, there is only one significant difference – the old controllers did not require a large charge. Users simply had to plug them in and they could draw power from the console.
Given that it must be charged to work, there are many other components that need more attention. There are many ways to solve this problem without any problems.
Why won’t my left Joy-Con charge?
There may be several reasons why your left Joy-Con is not charging. Since your controller may have lost pairing with the Switch or Joy-Con, they do not charge when connected to the console.
What’s more, if your software has faulty or corrupted files, your console’s entire system won’t work properly either, which could result in your Joy-Con not charging.
This applies to both of your Joy-Cons, but at the same time, some hardware issues may also cause your left Joy-Con to not work as often.
If you want to charge your controllers, especially when connected to a Nintendo Switch, your console must be connected and turned on or put into sleep mode.
Sometimes your Joy-Cons won’t charge if your adapter is defective or damaged.
This usually happens when you dropped the switch and some of the internal components were damaged as well.
Too much moisture or the fact that the console is not waterproof can also lead to power issues.
How to fix left joystick not charging?
- Sync Joy-Con
- Use the Joy-Con
- Update Firmware
- Clean your Joy-Con and Switch
- Use the charging dock
1. Sync your Joy-Con
Trying to sync or re-sync your Joy-Con will also help you charge your Joy-Con more easily. You must remove the controller from the console in order to re-sync it.
Now press the sync button located on the connected side of the console.
You can turn off your Nintendo console by removing it from the docking station. Wait a few seconds after turning off your Nintendo before turning it back on. Place it on the docking station, attach the Joy-Con and let it charge for several hours.
There is a possibility that the battery status may be hidden. However, the dock console should be left for four hours.
After four hours, you can check the console again. By now it should be fully charged and you should be able to access it easily.
If you still don’t see the correct battery status, you can try removing your Joy-Con and reconnecting it to your console a few times.
This will also help you sync properly with the controller and re-sync if you’ve already done the former.
2. Use the Joy-Con
If your Joy-Con is still not charging properly, we recommend changing the charging method to help you resolve the issue.
This solution is recommended for users who are unable to charge or connect their Joy-Con to the Nintendo Switch Dock.
In this case, you will have to remove the Joy-Con from the console. Then connect it to the power port using the handle.
Now you can move away from the Joy-Con for about three hours. This will almost certainly solve your Joy-Con charging issue.
3. Update firmware
There were complaints from several customers who also reported that the left Joy-Con would not charge due to an issue with the console’s firmware. As a result, the battery indicator does not display the correct battery status.
Even if it is fully charged, the indicator on the connected controller will display a low battery level from time to time.
You can try updating the firmware to avoid such an event. Alternatively, you can also try installing new firmware for your controller and the console connected to it.
Go to console settings and check if any updates are available. To update the firmware on your Nintendo Switch, you can download it and go to System Settings.
Software Update is the first option on the tab. Now select software settings and wait while the console searches for updates.
When an update is found, it should be installed on your console.
You can update the firmware by going to the controller settings and searching for updates. You can make sure the firmware is also up to date and installed before trying to charge your Joy-Con again.
4. Clean Joy-Con and Switch
If updating the firmware or resynchronizing the switch didn’t resolve the issue, you might have a dust or debris problem.
You will need some isopropyl alcohol and a clean Q-tip to fix this problem.
You can also use scissors to cut off the top of the Q-tip to make it smaller and more precise.
Make sure the Switch is not turned on, then clean both sides of the Joy-Con and Switch.
5. Use a charging dock
If none of the methods mentioned above worked for you and you are still unable to charge your left Joy-Con, you may want to consider purchasing a new charging dock.
Most users noted that buying a new charging dock solved the problem. Using a different or new charging dock is better than buying a new set of controllers or switch.
Conclusion
The most common solution to fix your Left Joy-Con not charging is to unplug it from the Switch, power off and back on, and reconnect to your controllers.
You can use isopropyl alcohol and compressed air to clean it out if that doesn’t work.
This helps remove any dust or debris that is causing you problems. If nothing works, you can purchase a new or different charging dock, or check for insurance or warranty coverage to get a replacement.
FAQ
How long will JoyCons last before replacement?
Joy-Cons typically last 2 to 4 years before being replaced. However, this largely depends on whether they have been dropped frequently or whether the equipment has been badly damaged. If you’ve used your switch controllers correctly and found no major issues, you won’t need a replacement anytime soon. As long as the Nintendo Switch console and the Nintendo Charging Dock show accurate battery status and generally perform well, it will last for several years.
How to charge a dead Joy-Con?
The best way to charge a depleted Joy-Con is to leave it on the Switch, either on the docking station or using the included USB-C cable. However, if you are unable to properly charge your Joy-Con, there is a high chance of a software or hardware problem. In addition, you should also remember that replacing the charging dock can help you solve certain problems leading to the correct charging of your depleted Joy-Con. As long as you have the charger, AC adapter, USB cable, and a suitable power outlet, you can easily charge a depleted Joy-Con.
Why is my left Joy-Con not working?
There may be several reasons why your left Joy-Con is not working. It may have lost pairing with the Switch or Joy-Con. It could also be due to a few corrupted files or bugs in your software. This will render the entire Joy-Con dysfunctional, and other hardware issues can also cause your left Joy-Con to be less responsive. You need to make sure the console is plugged in and turned on when you try to charge it.
Leave a Reply