Everything you need to know about your iPhone’s focus feature, from creating and editing focuses to automating them
With iOS 15, Apple introduced a new feature called Focus, an extension of Do Not Disturb that lets you focus on the one thing that matters at any given moment. It does this by minimizing distractions from your iPhone and other Apple devices, but there’s a lot you should know about setting up and using Focus on your iPhone or iPad before you dig in.
You can access Focus from Settings, Control Center, and Siri, but what you can do with Focus depends on what you’re using. For example, you can ask Siri to turn focus state on or off with something like “Turn on Do Not Disturb Mode”or “Turn on Personal Attention,”but Siri can’t help you change any of the settings for each focus.
Using focus from the Control Center
First, open the Control Center by swiping down from the top-right corner of the iPhone screen (Face ID models) or up from the bottom of the screen (Touch ID models).
Locate the focus control
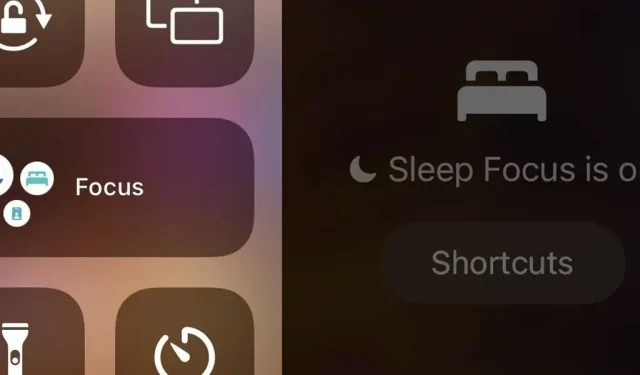
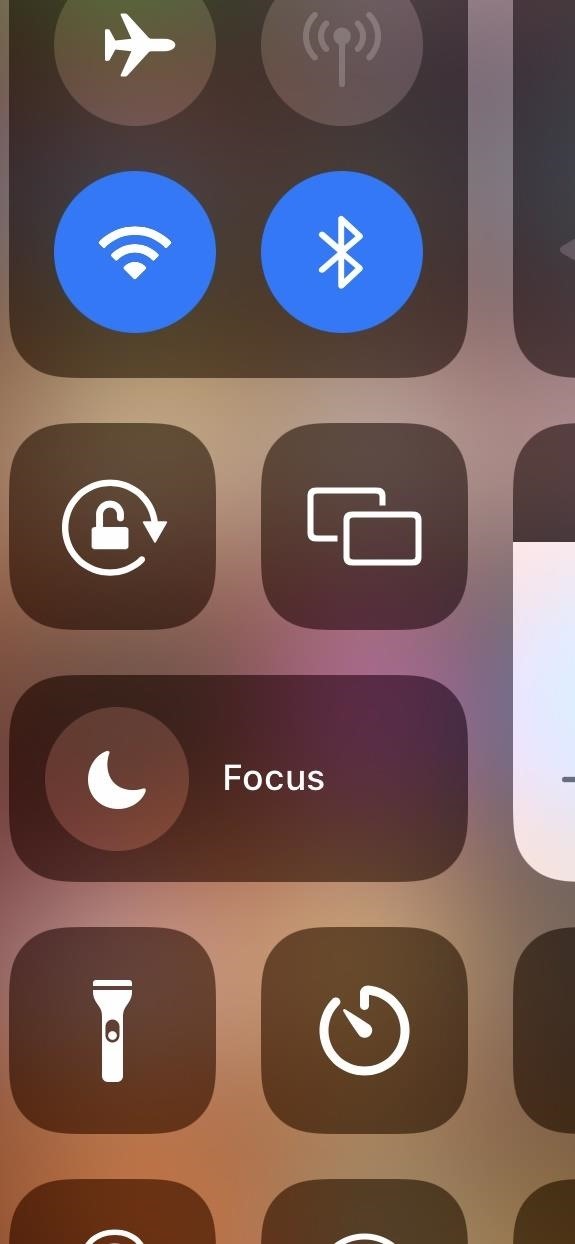
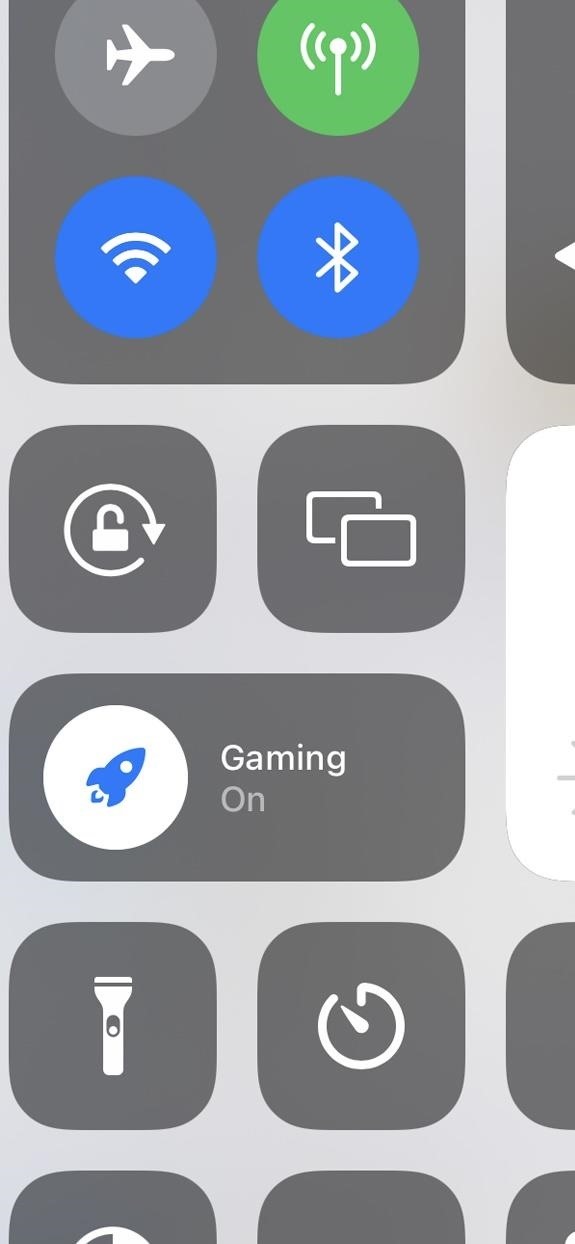
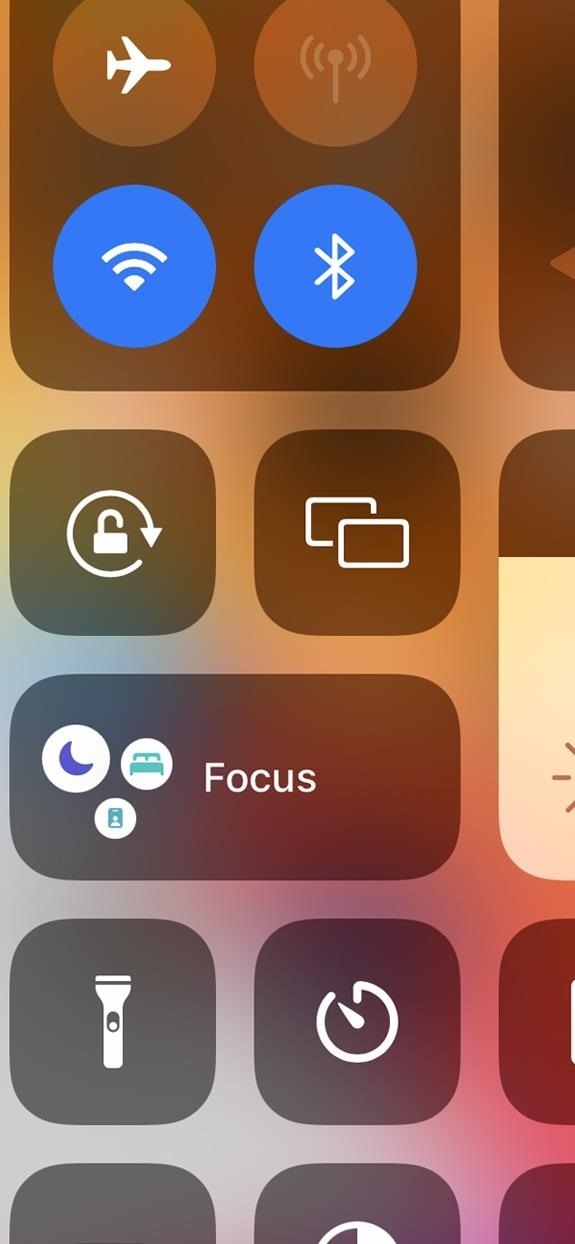
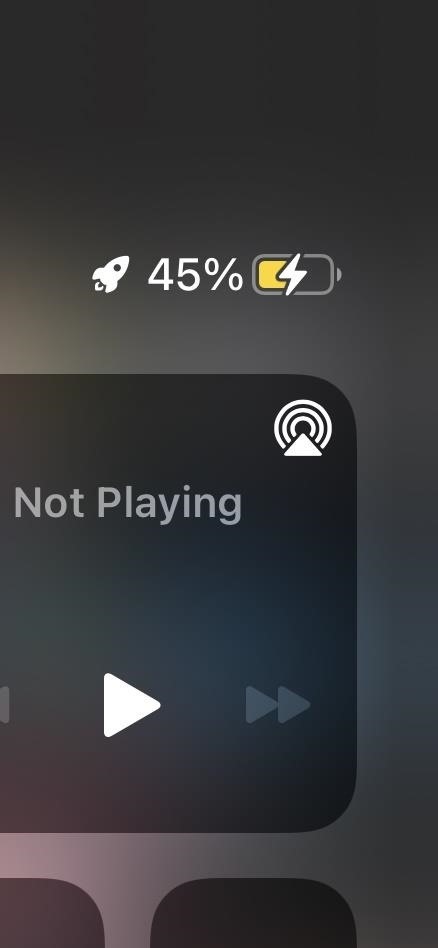
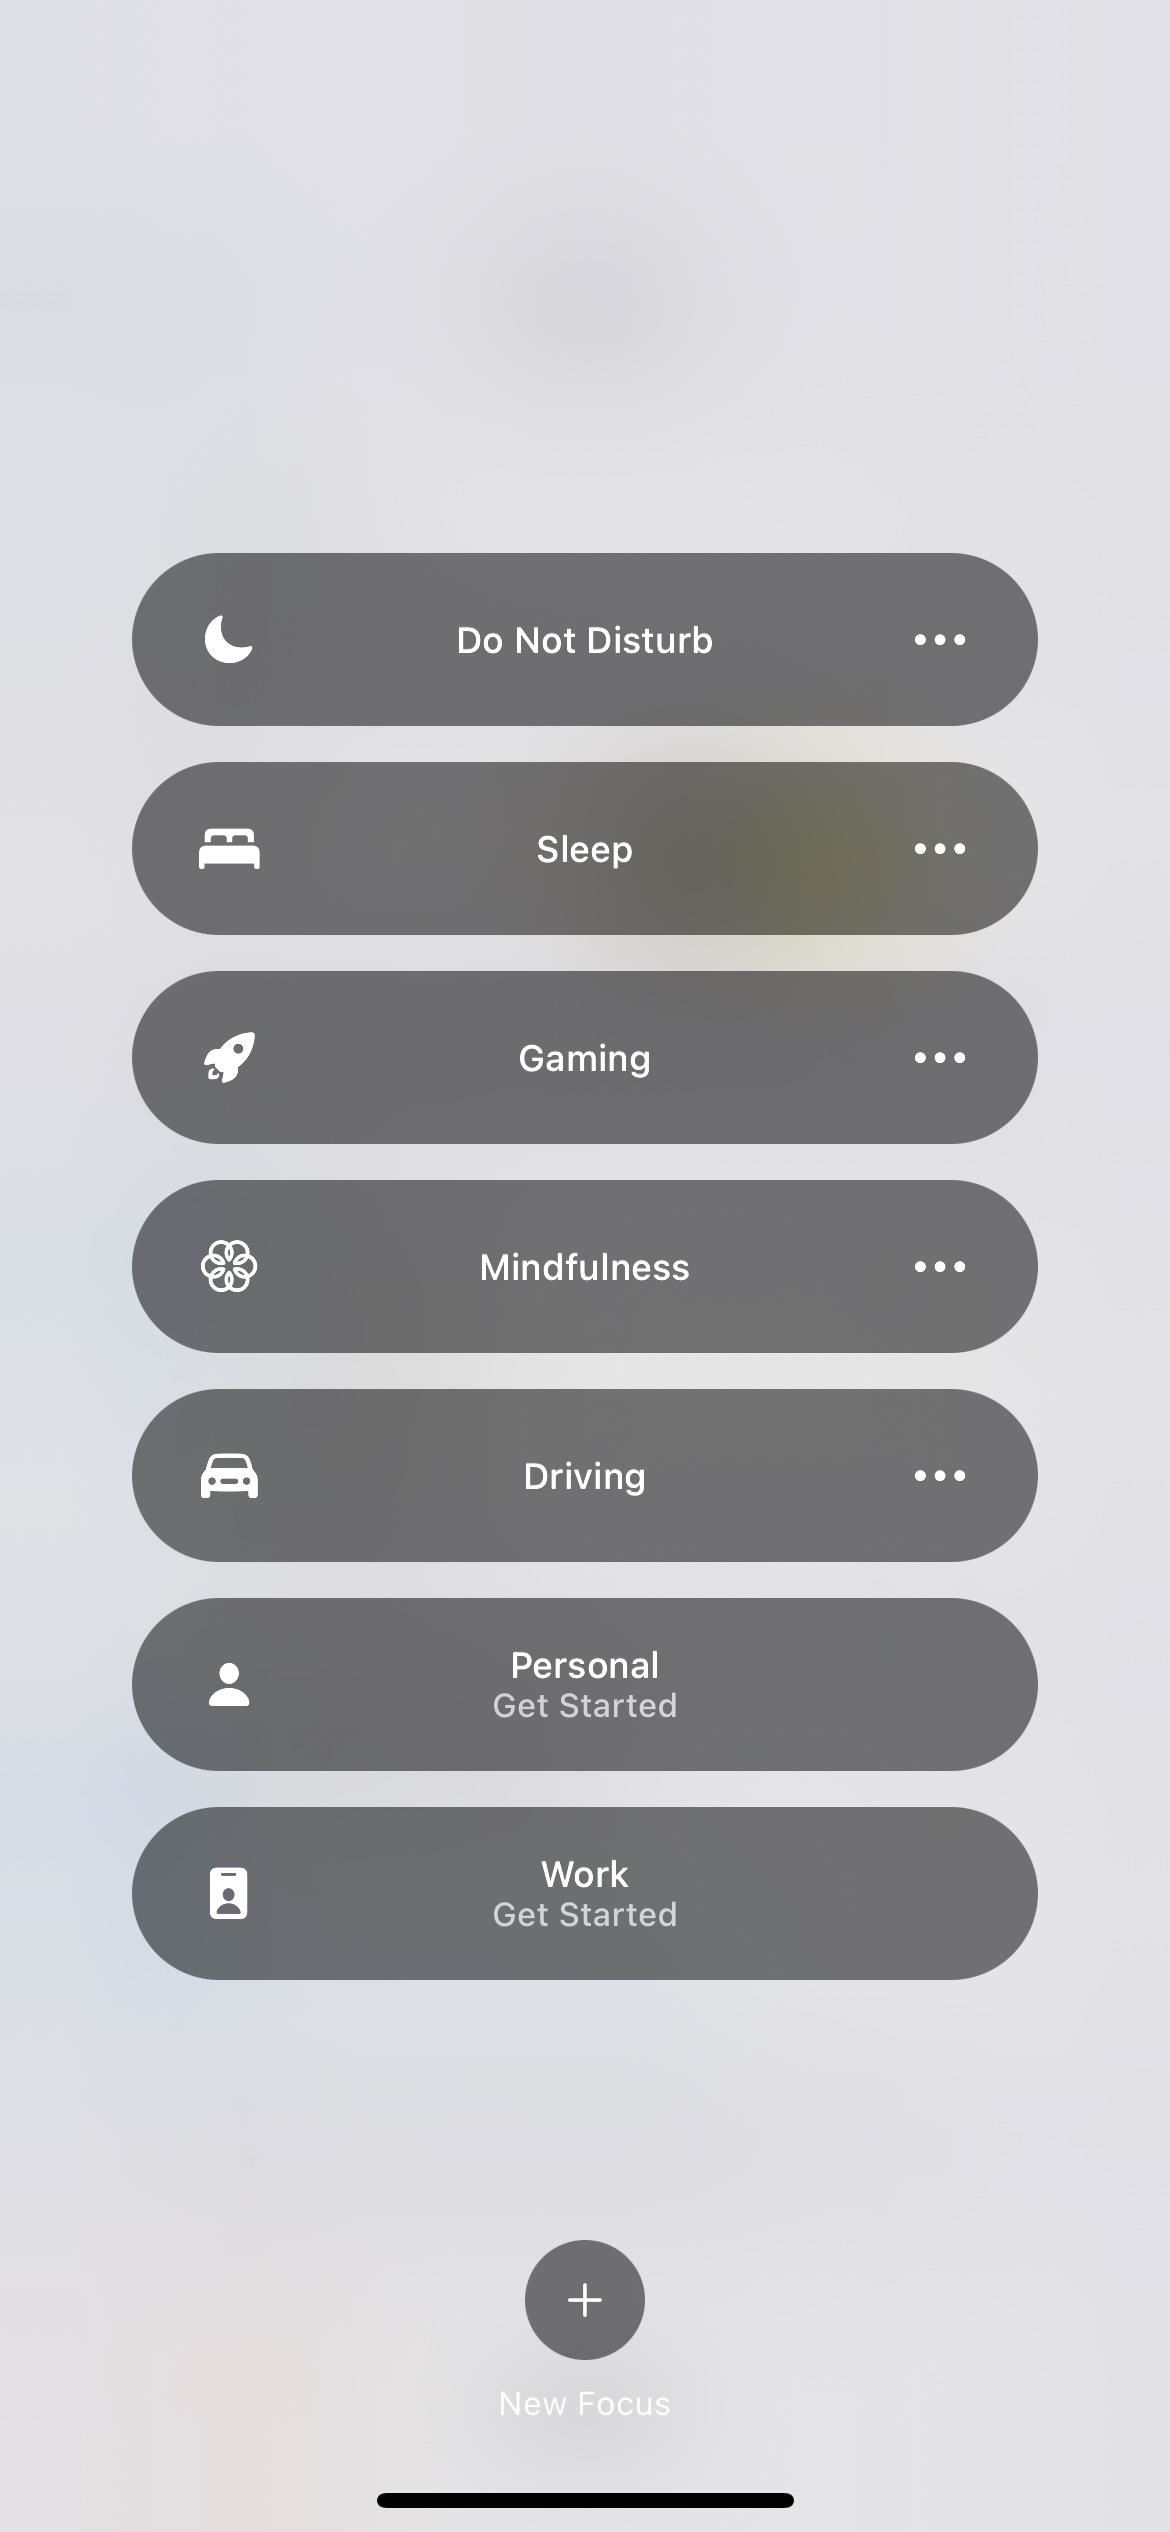
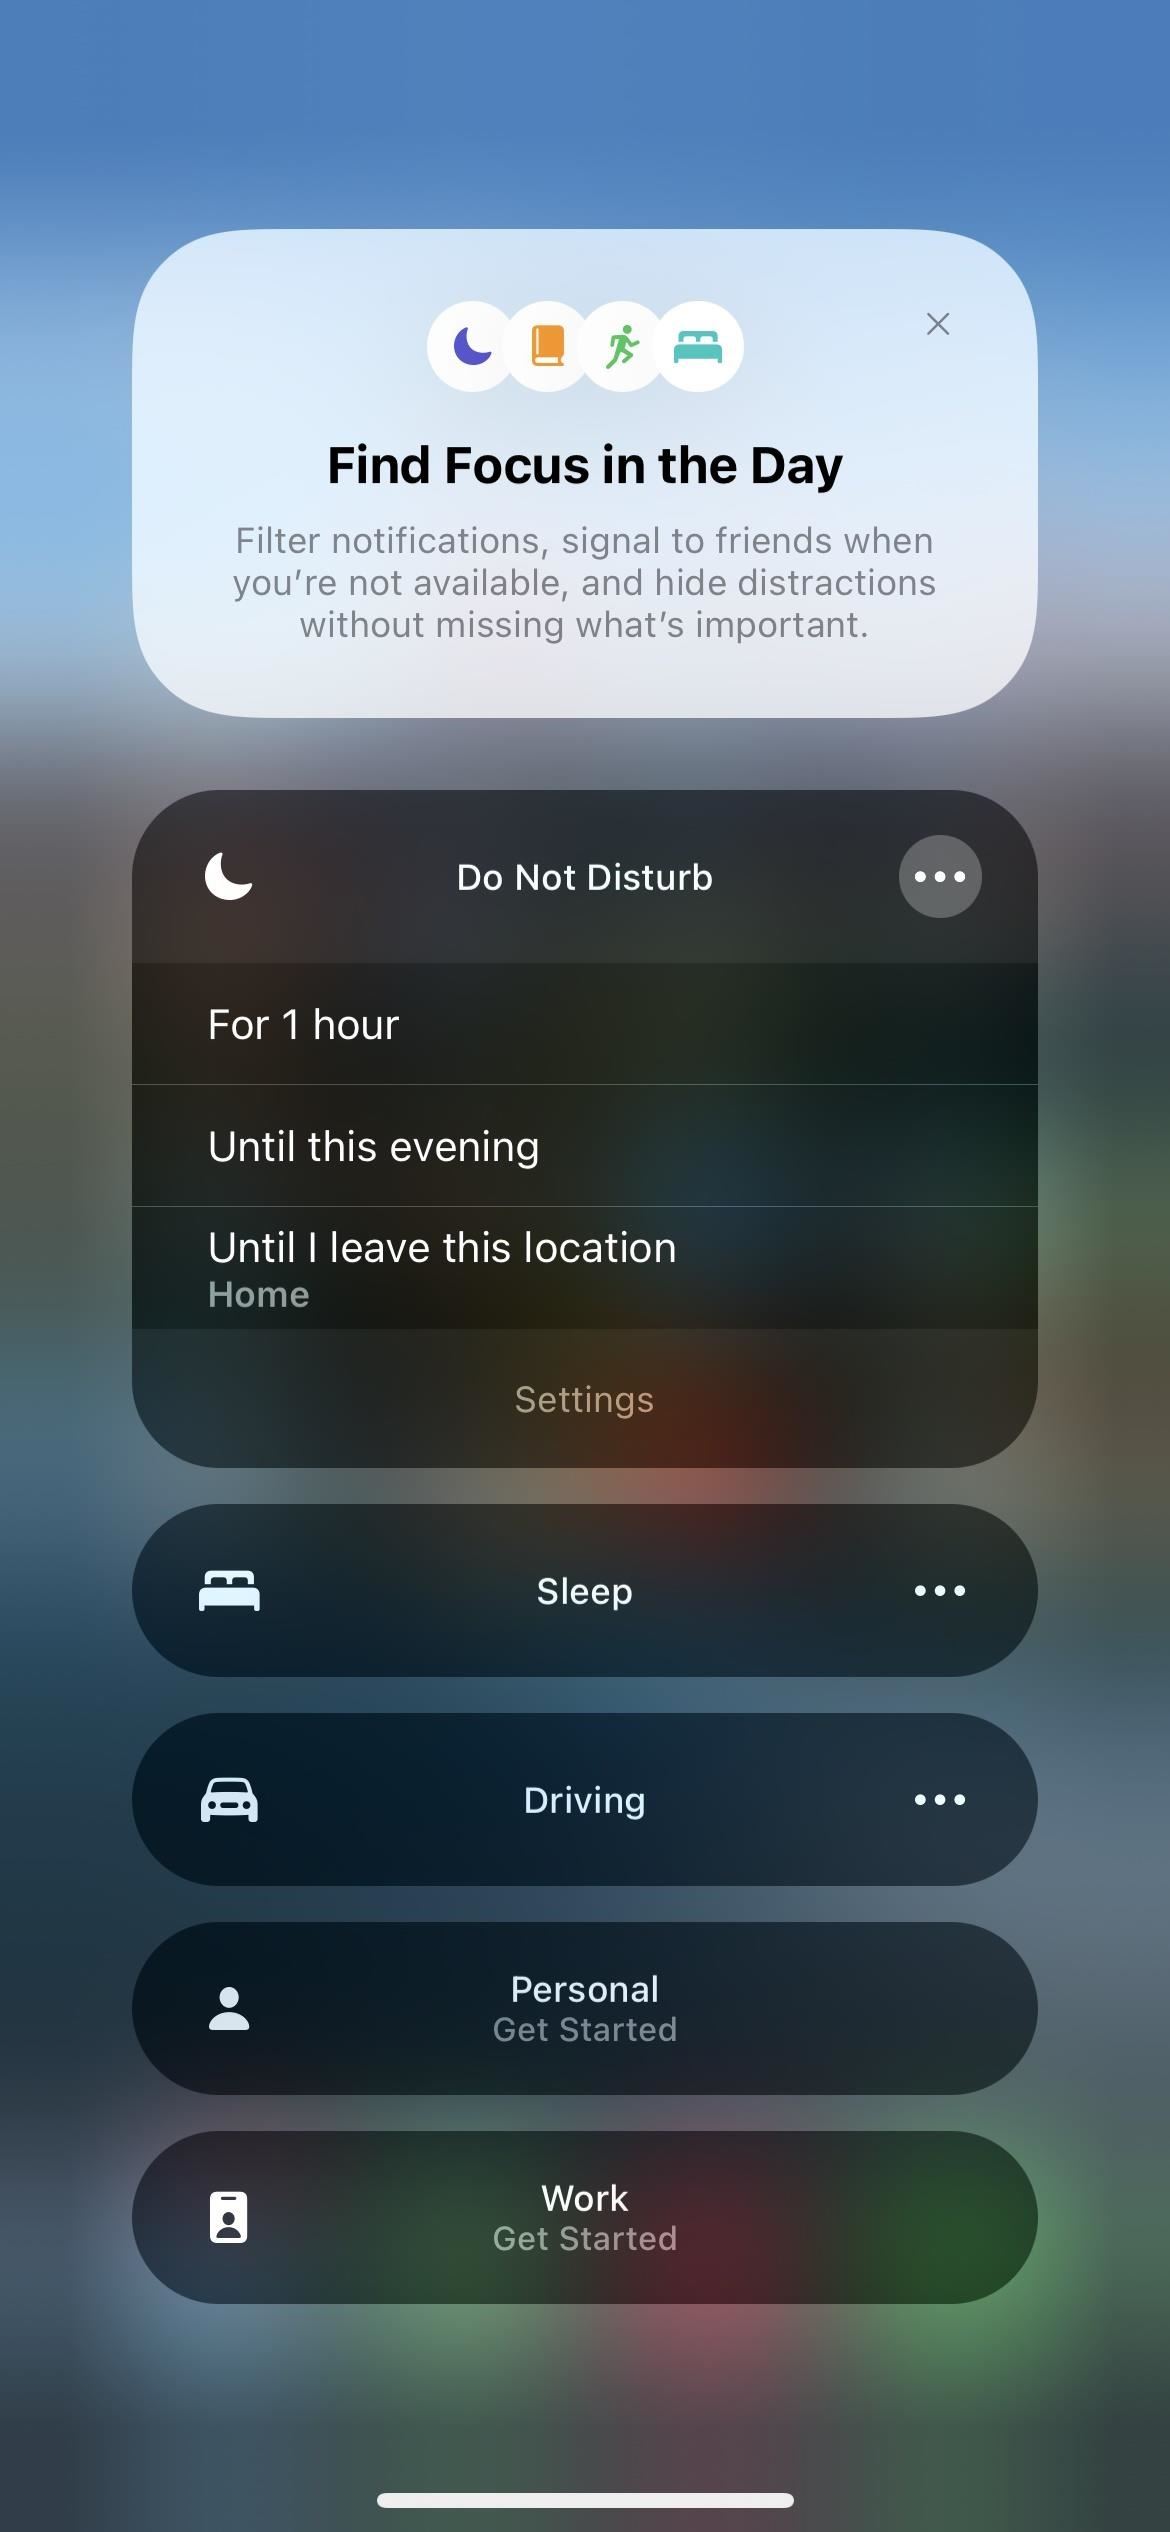
You will see the focus control in the Control Center, and it will look different depending on what state it is currently in. When it’s inactive it will just say “Focus”. Otherwise, the label will be the label of the current focus state.
The control’s icon will display the symbol for the currently active focus. When it’s off, it can display the previously used status, the upcoming schedule, or the default moon in Do Not Disturb mode. Clicking the icon turns the focus on and off. (Note: If you’ve never used Focus before, there may be several symbols on the icon, such as icons for Do Not Disturb, Sleep, and Work modes.)
See when focus is active
When the state is active, the control will show “On”and an icon for focus will appear on the lock screen and status bar, so you always know. If you don’t see it in the status bar, the location symbol is probably taking up space. In this case, you may see the focus symbol in the status bar of the Control Center.

Change focus type
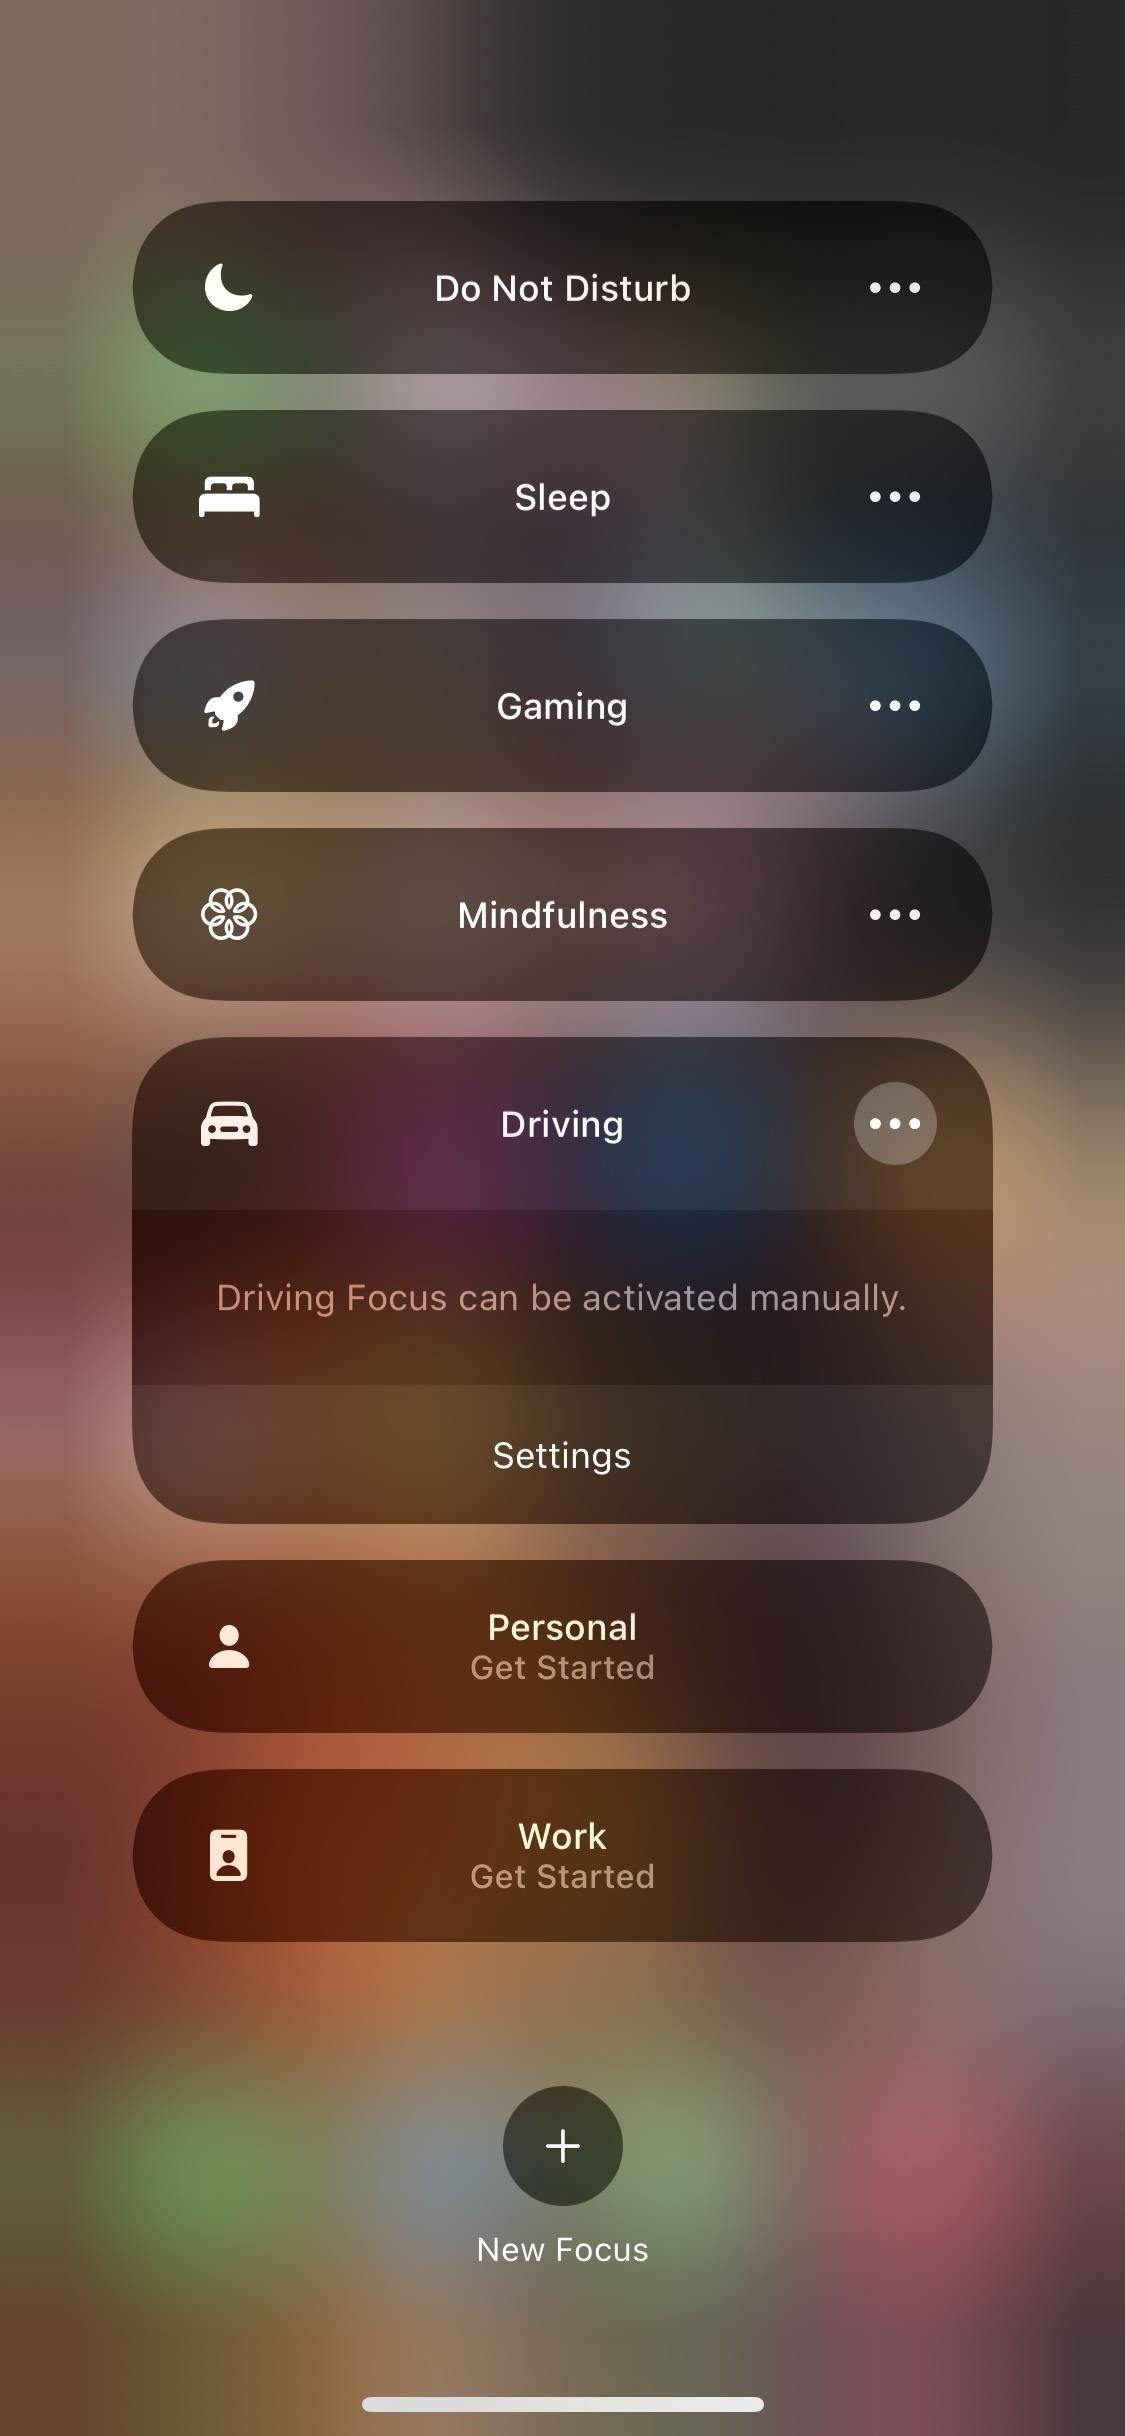
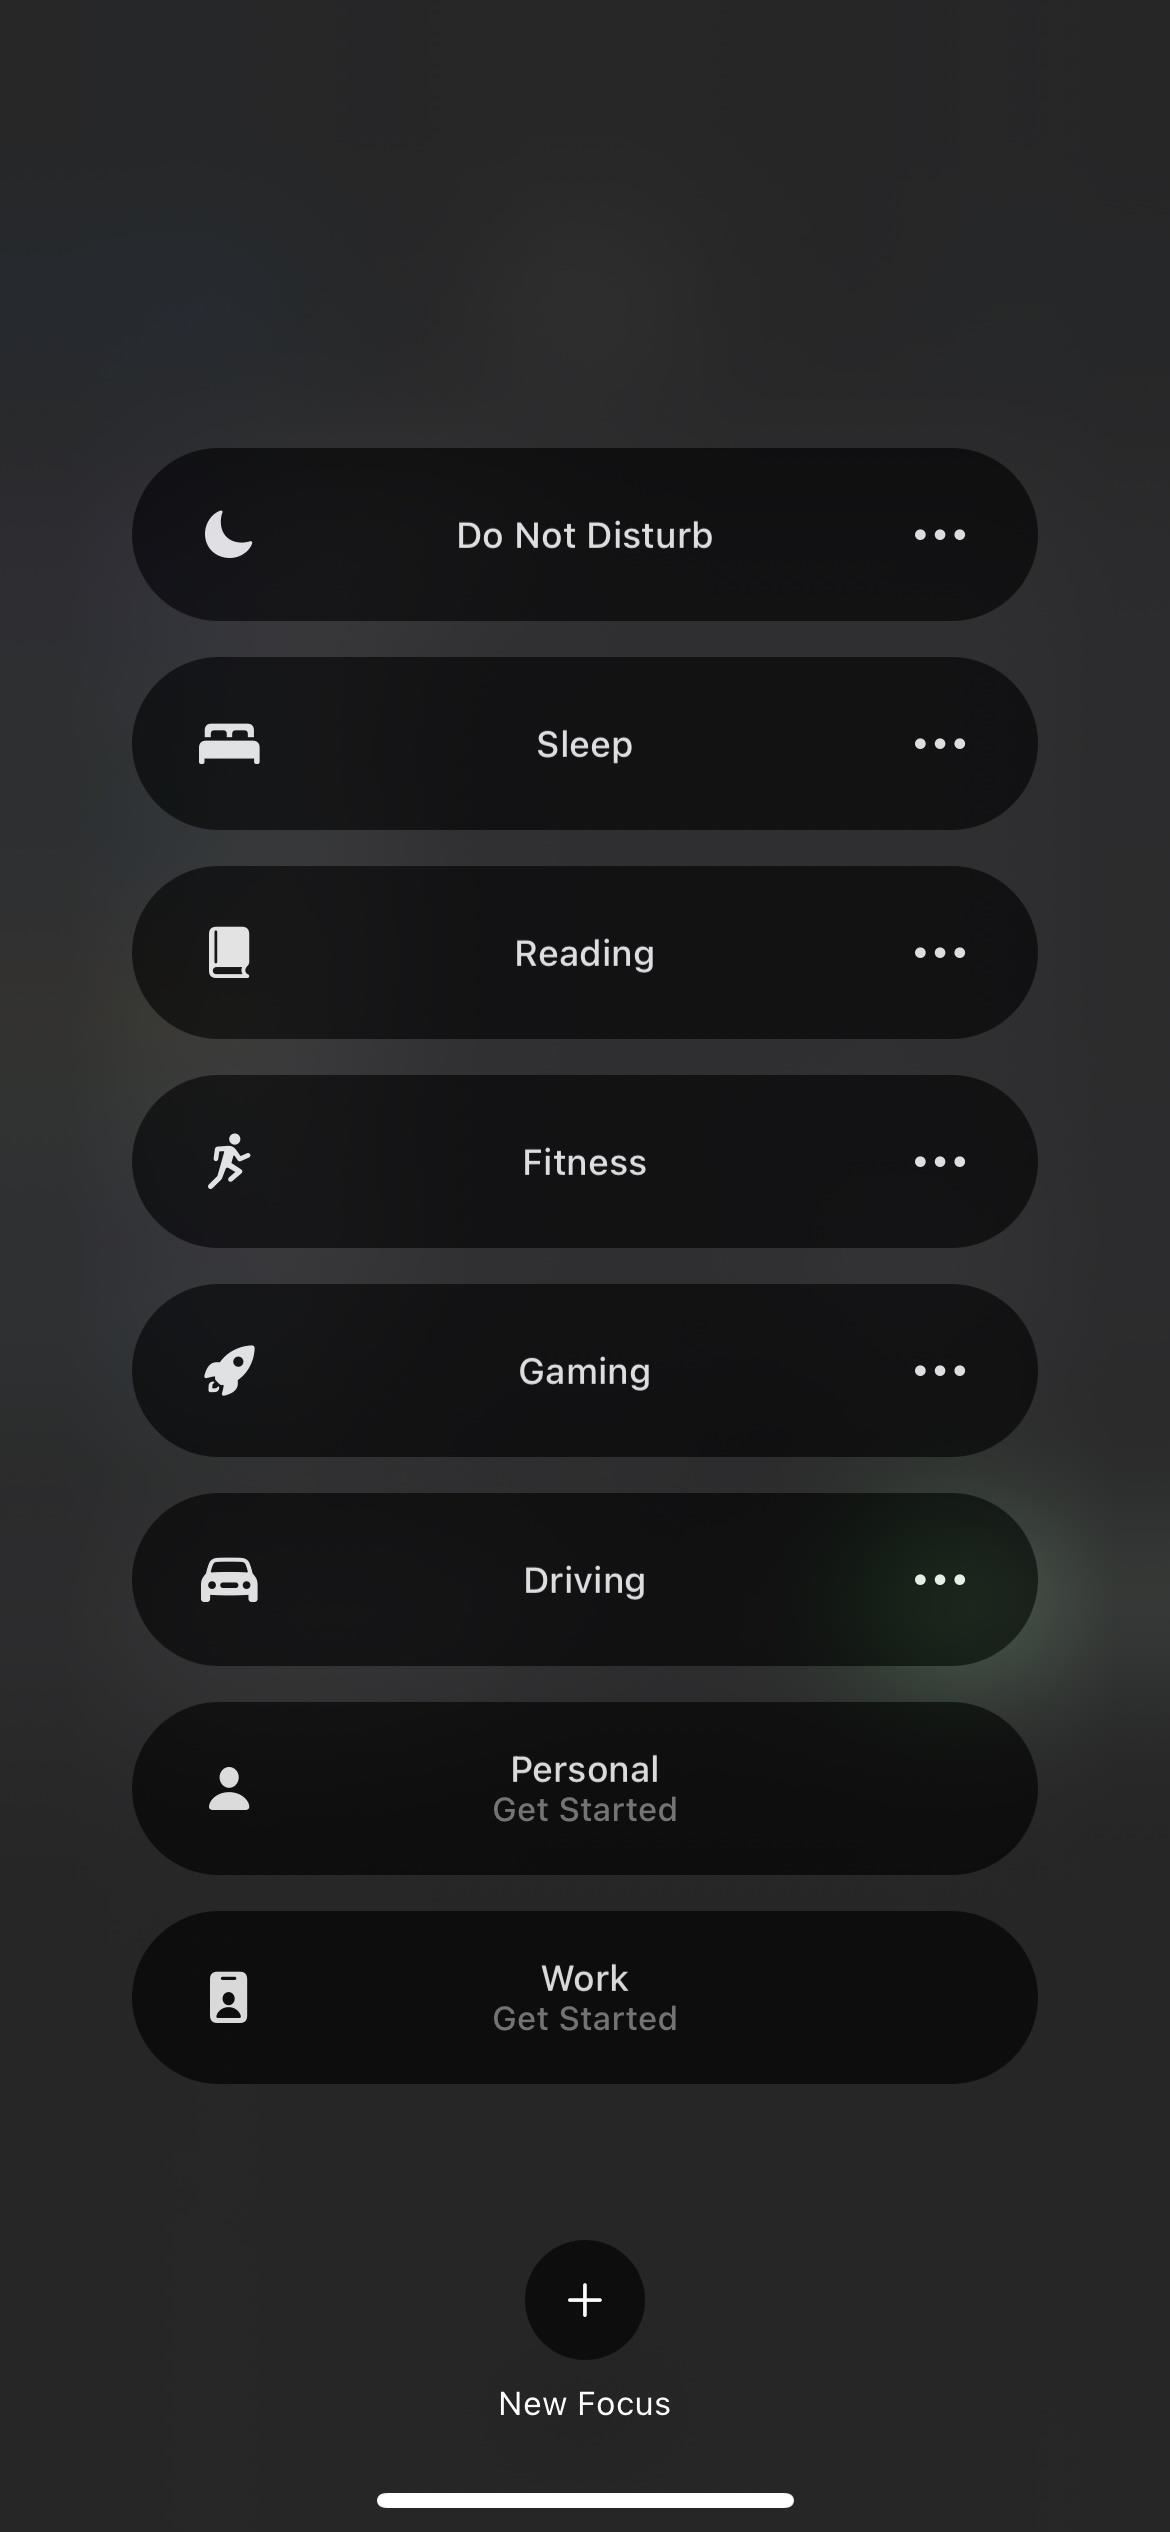
Tapping or long-pressing the rest of the focus control will display a list of all available focus states so you can quickly turn it on when needed.
In the list, you can click on the focus to turn it on or off, and you can click on the ellipsis (•••) next to each one to see more options. Most focus states allow you to turn them on for one hour, until evening, or until you leave your current location. There are no time options in Sleep and Driving mode as they depend on your sleep schedule and driving time respectively.
Each focus in the list will have a shortcut to its “Settings”from the three-dot menu.
Add new tricks
Below the list, you can click on the plus sign (+) to add a new state. If you don’t see the plus button, it’s either because the Focus explanation card is still at the top of the list (close it) or because you’ve maxed out the number of slots available for Focus (you can only have up to 10 focuses).
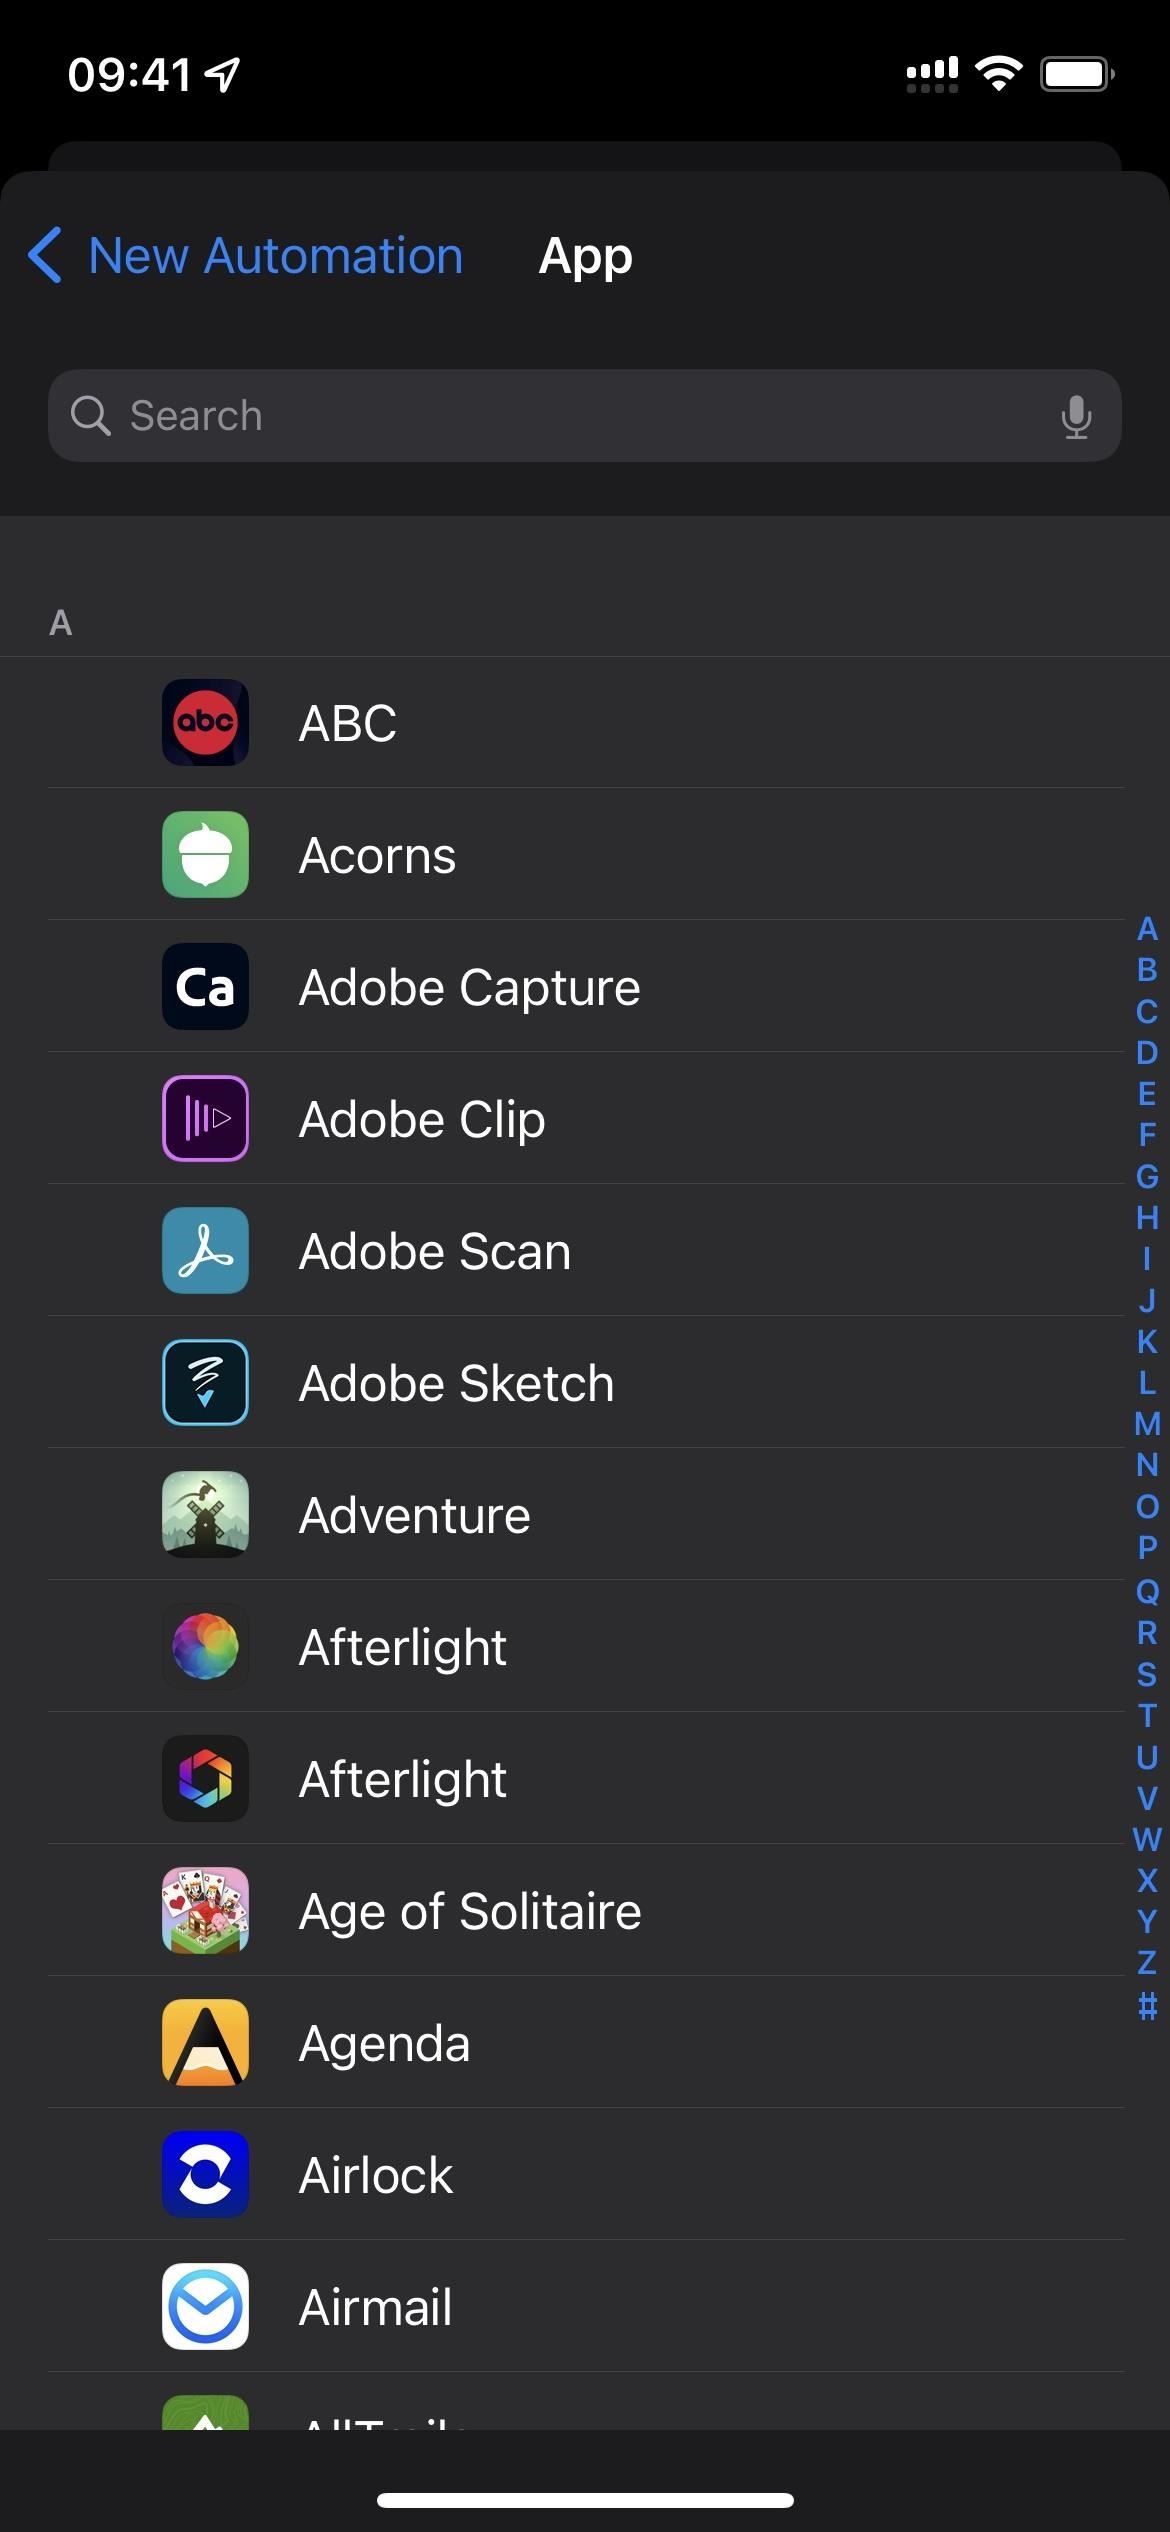
After clicking the plus icon, you will be redirected to the focus settings in the settings, where you can immediately select the focus to start building. For more information on creating focus, see the next section, “Using focus from settings”.
Using focus from settings
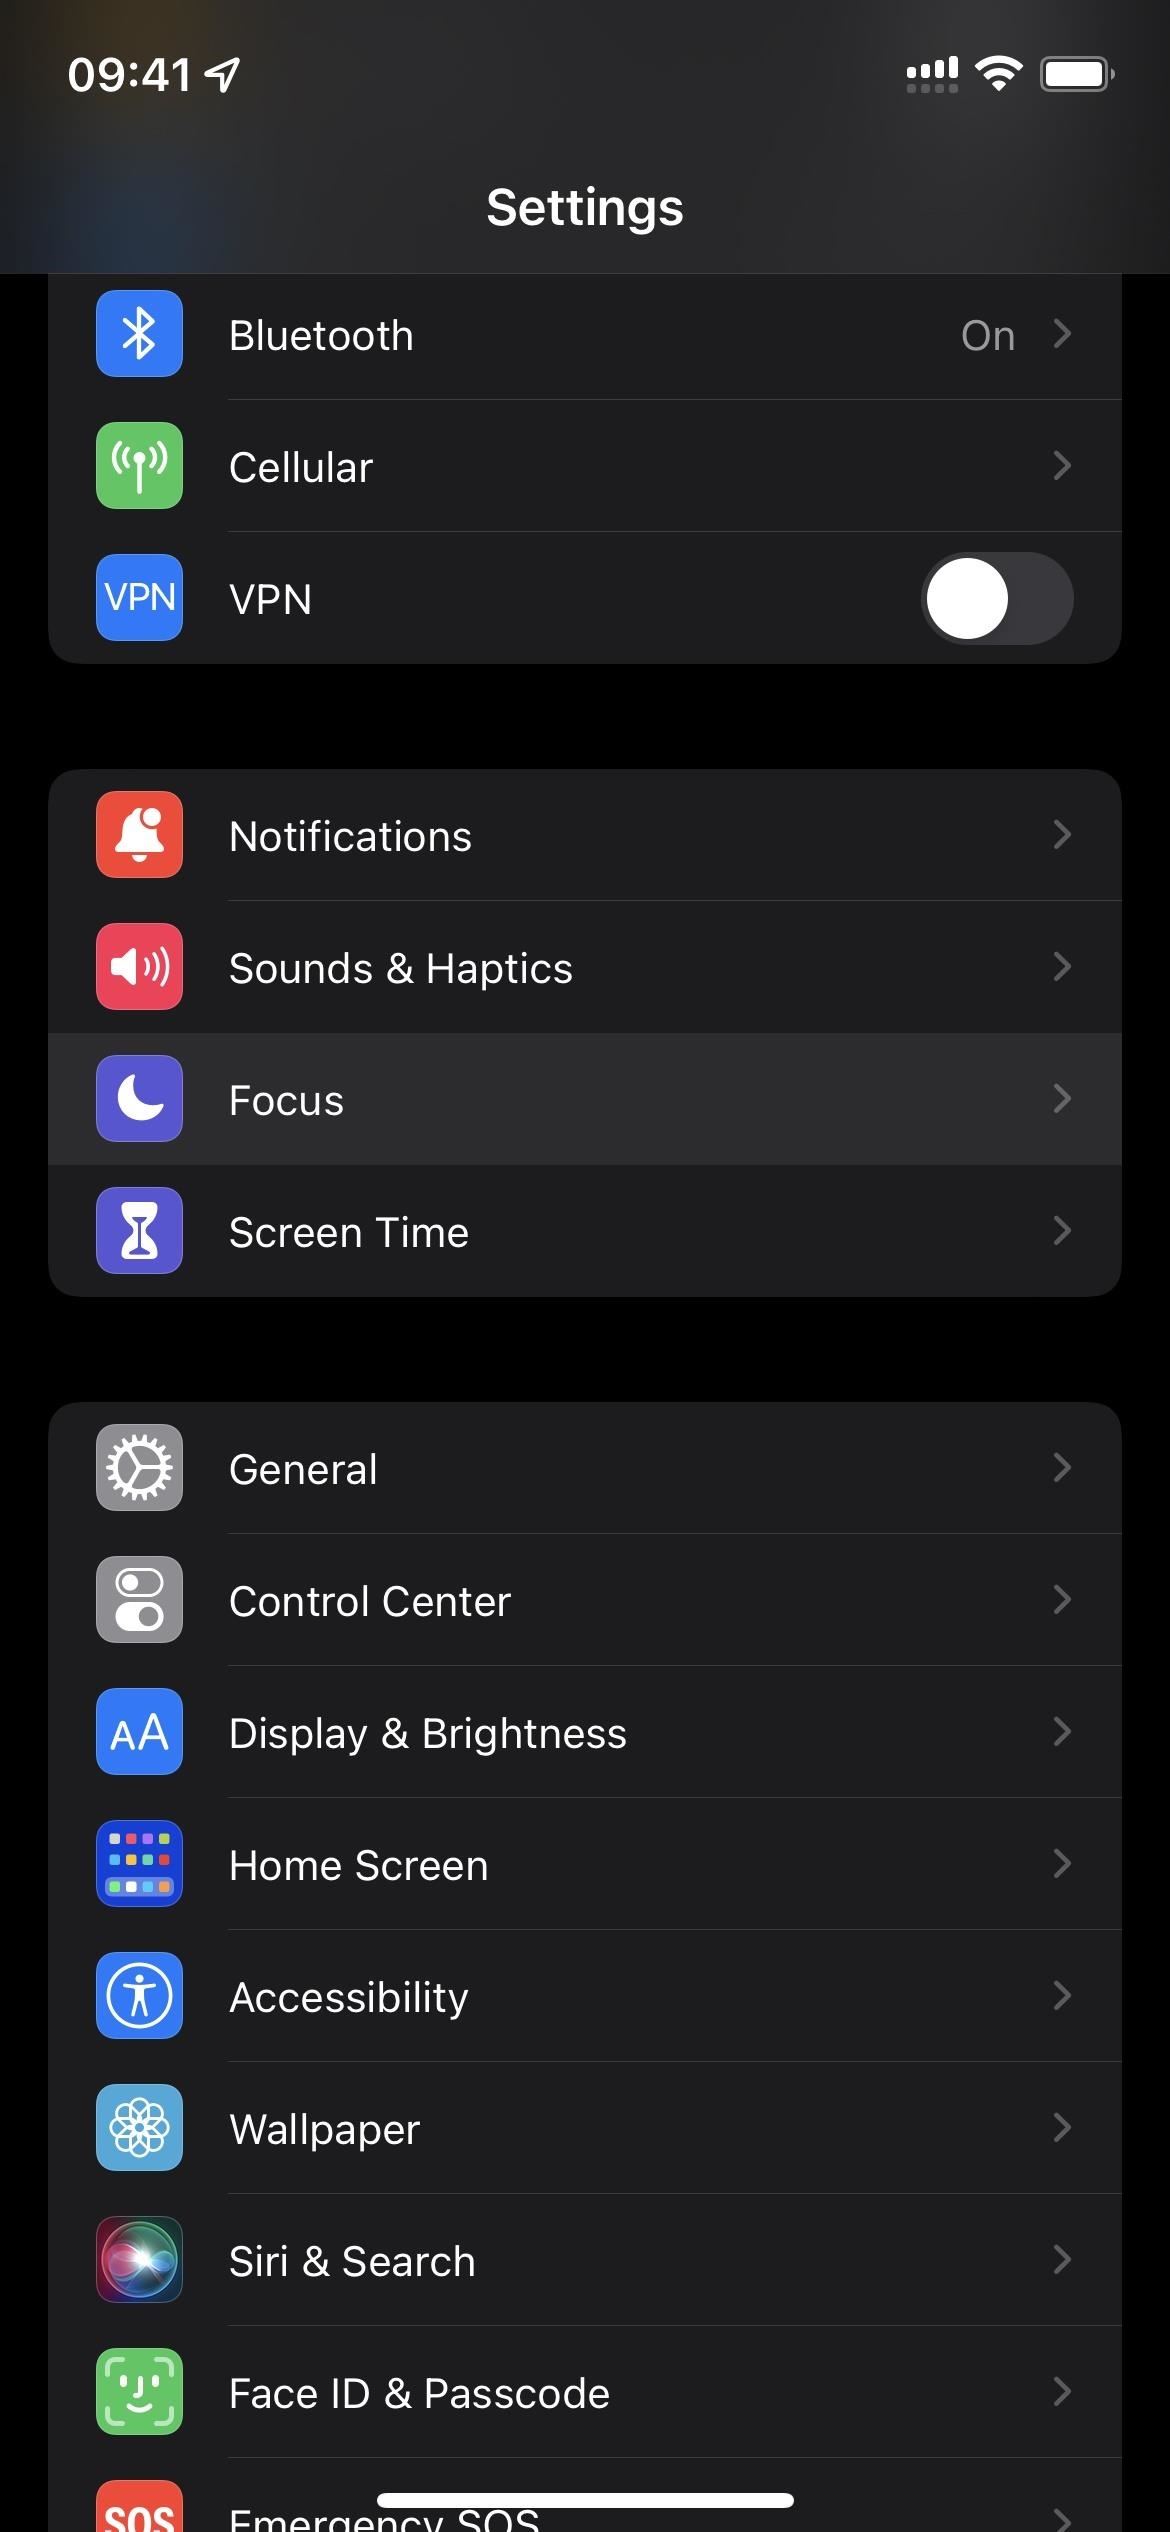
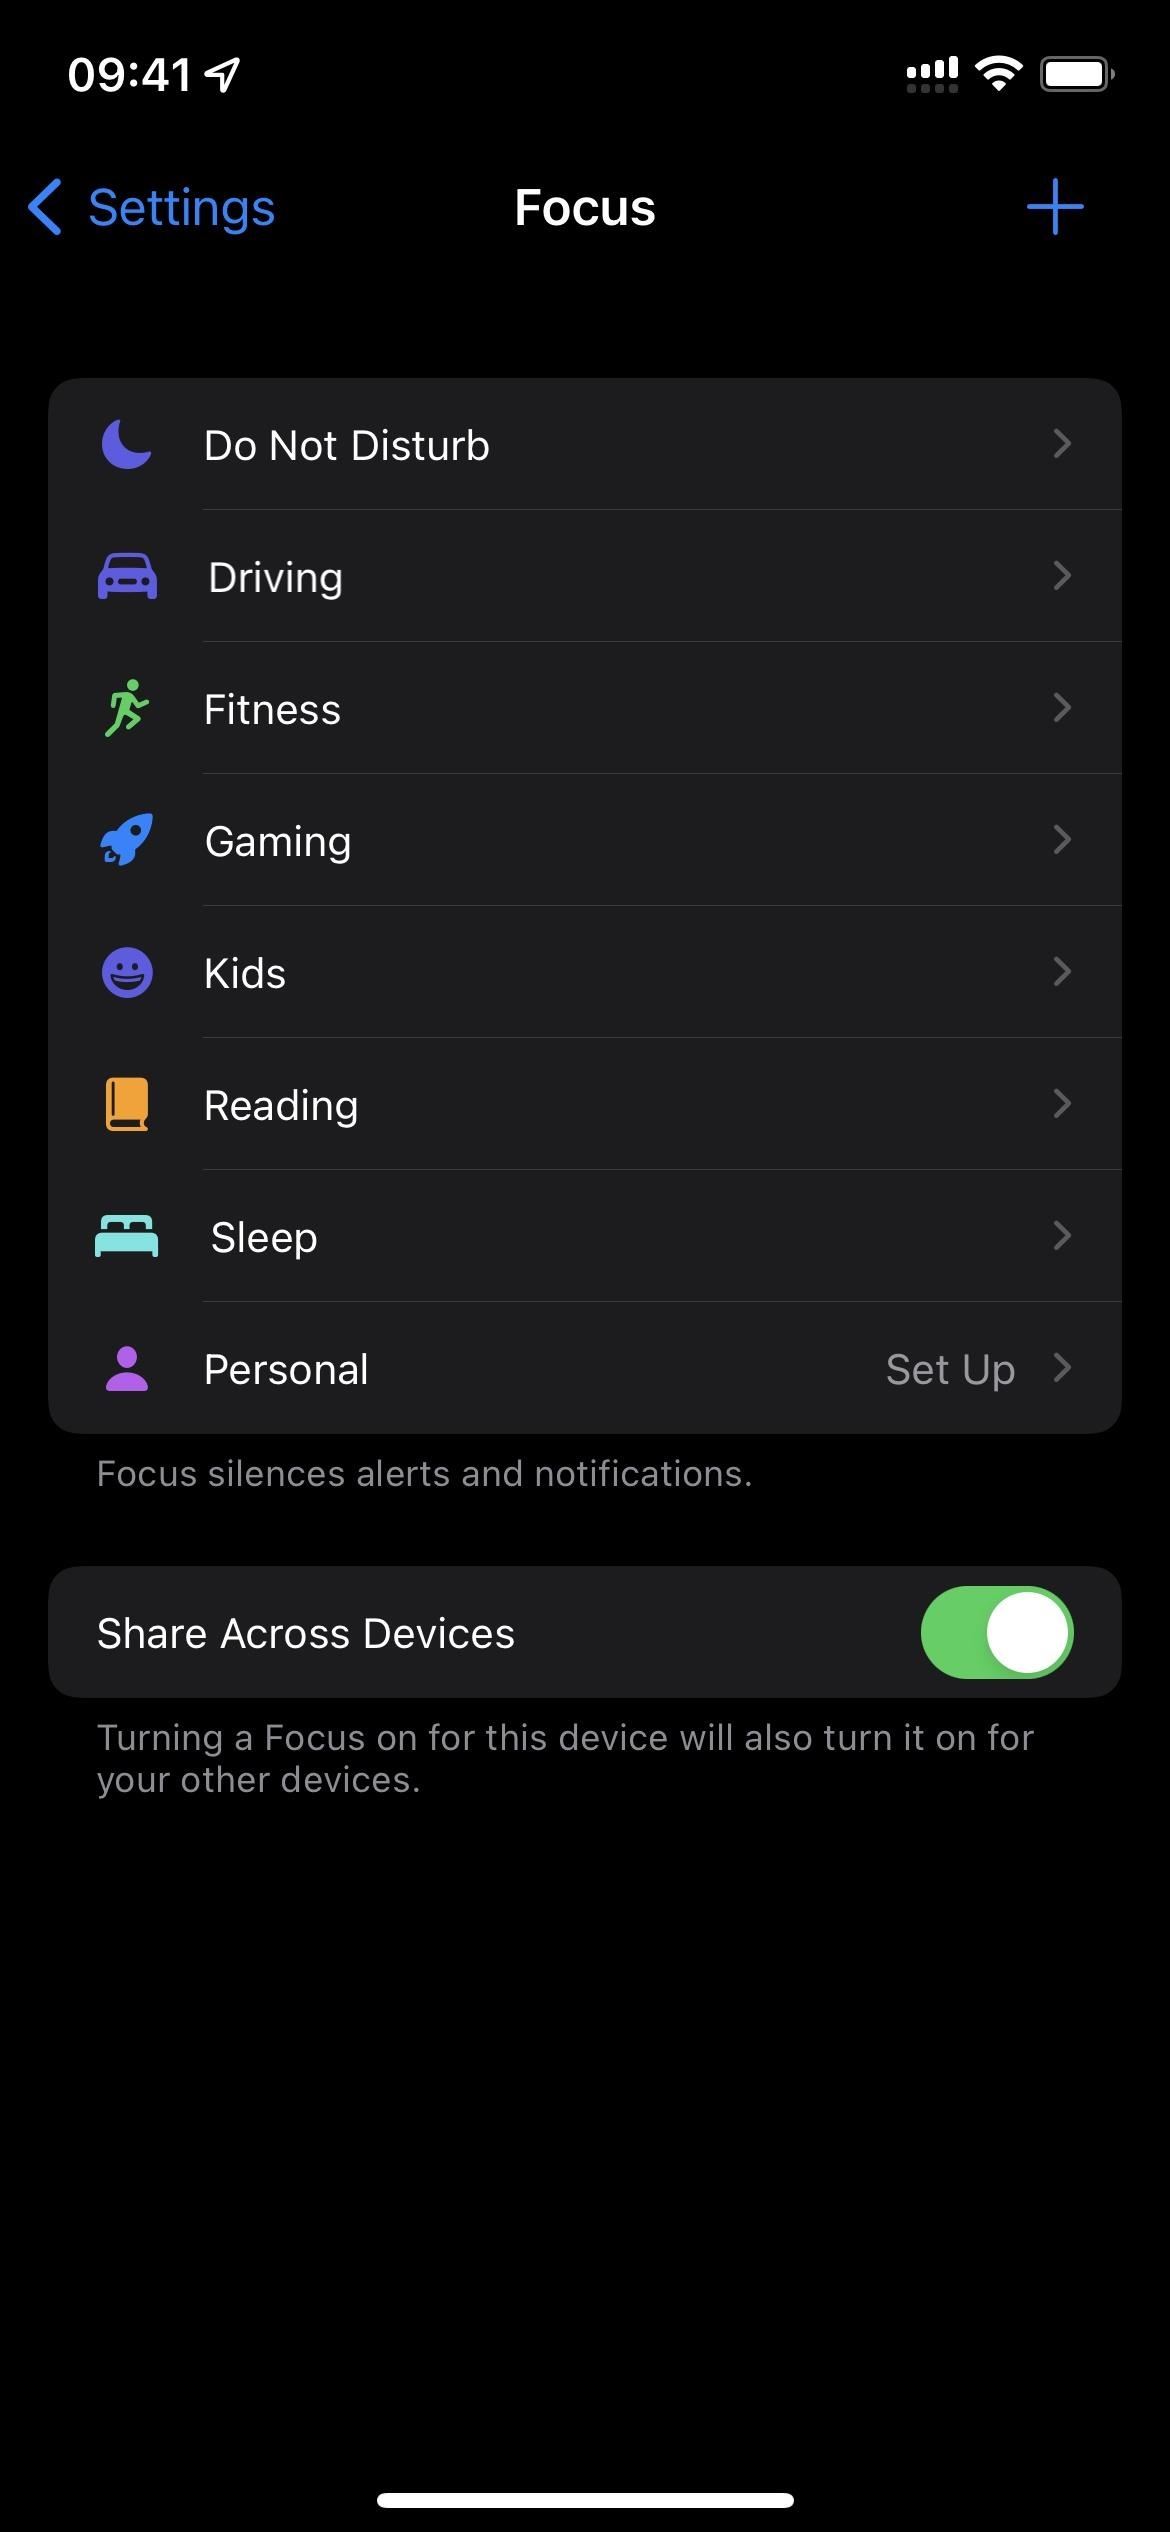
The Focus menu in the Settings app allows you to manage all the focuses, create new ones, turn them on and off, etc. Go to Settings -> Focus to get there.
View your tricks
The tricks you see in the Focus menu depend on how you set up your iPhone before updating to iOS 15. Everyone will have a Do Not Disturb mode, but you might see tricks like Driving and Sleep, and you’ll see the options Personal and work focus setting. You can edit any of the ones you already have, or start from scratch with a new focus by clicking the plus (+) sign.
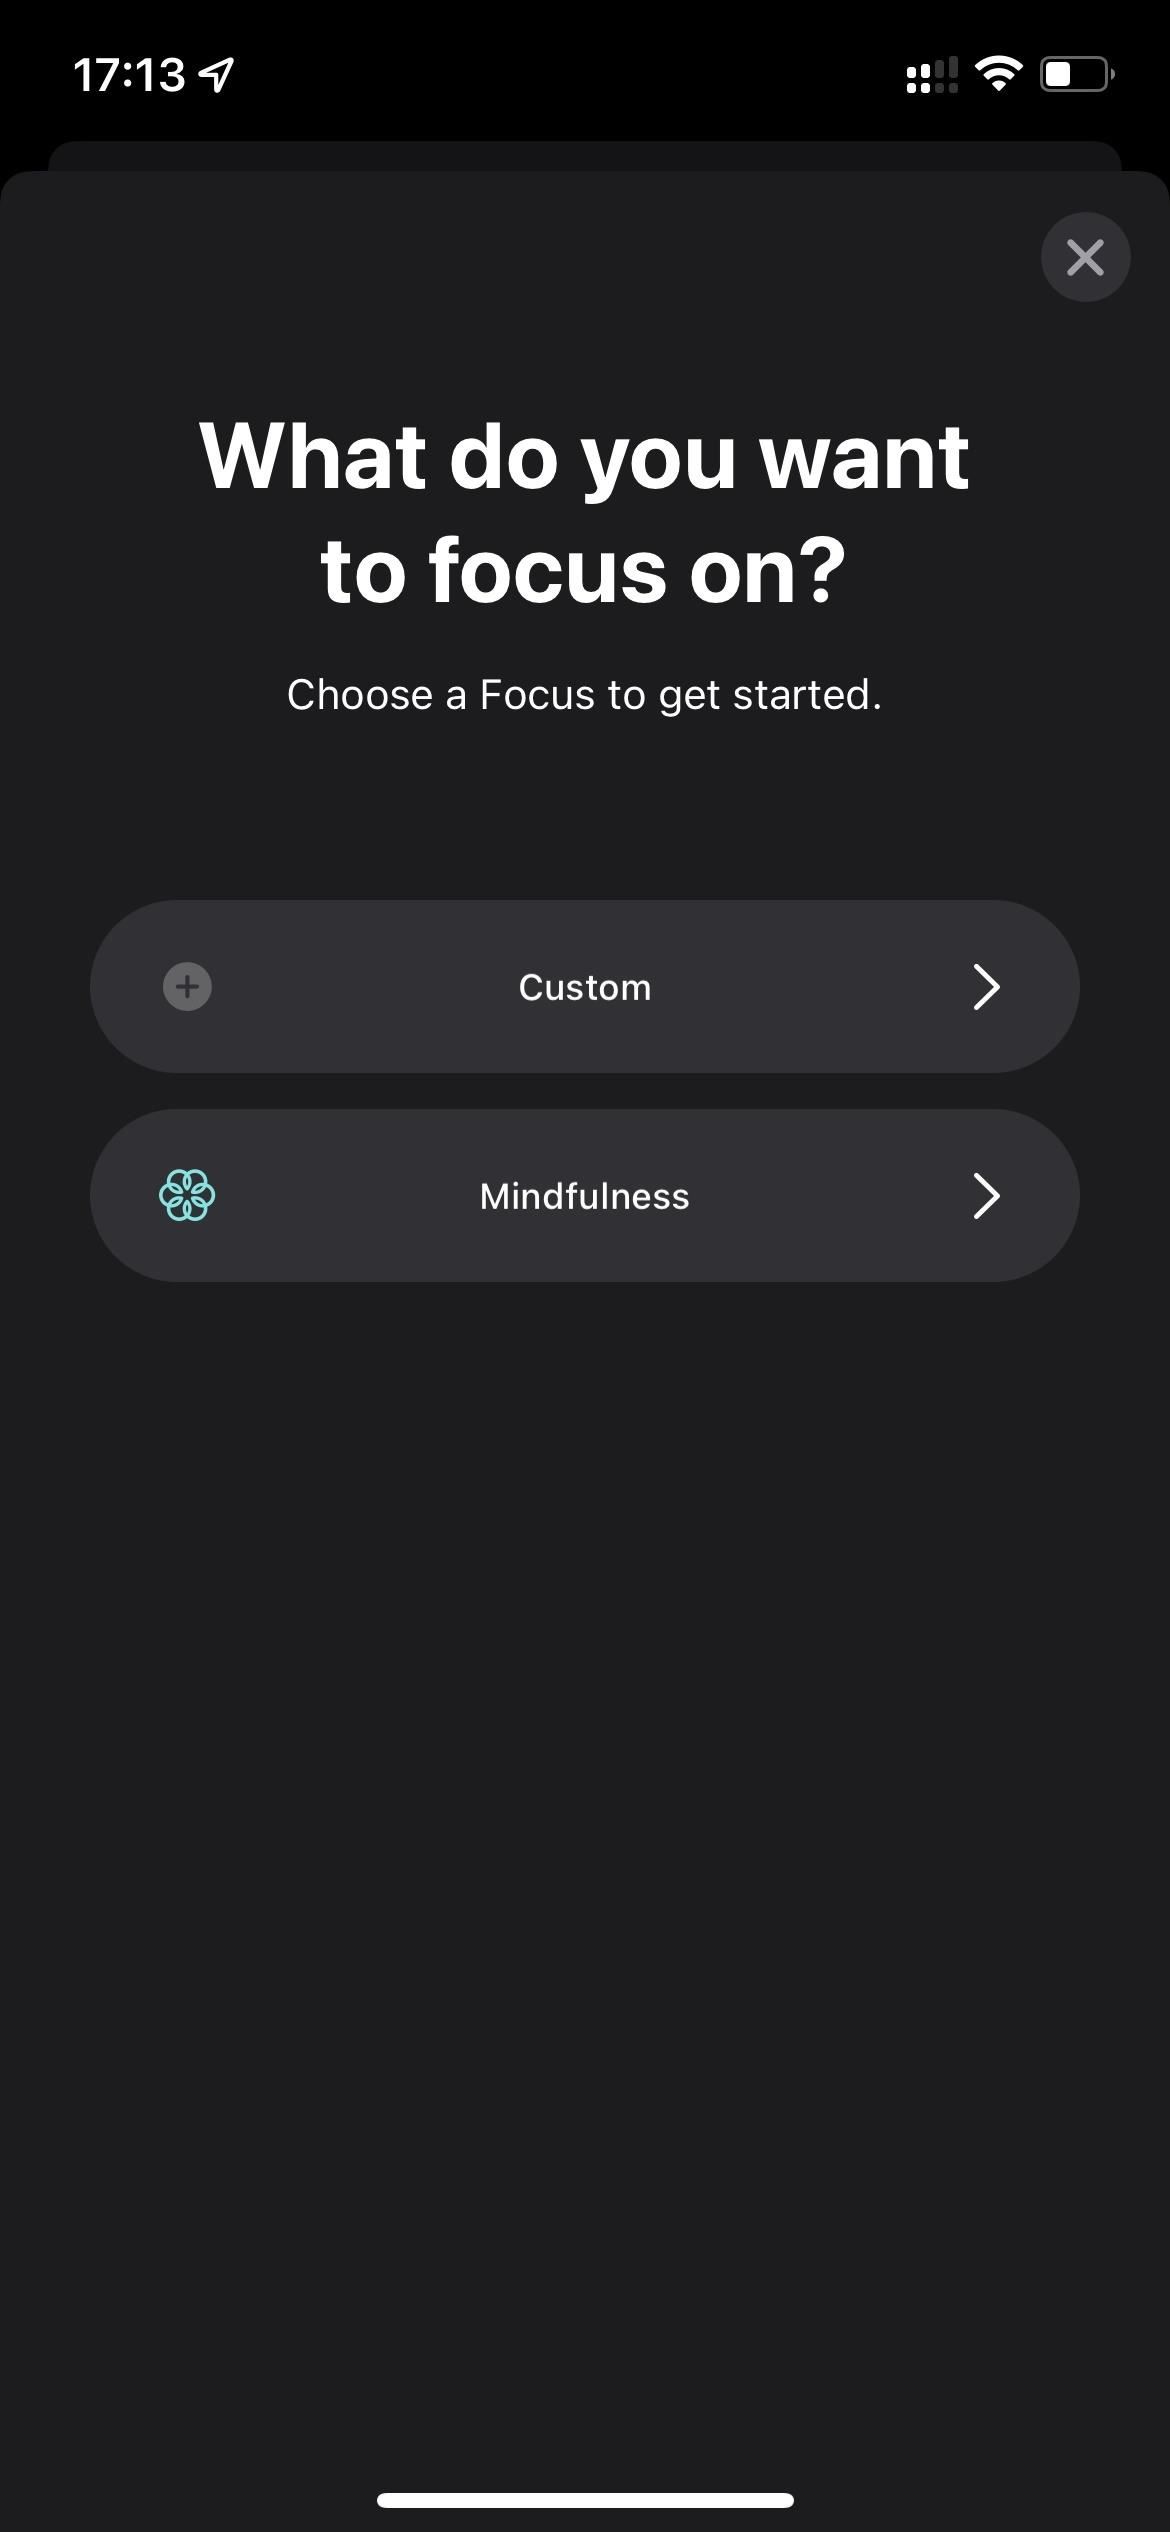
When you create a new focus, you will have templates to choose from and what you see depends on what you have already set up. You can create driving, fitness, gaming, mindfulness, reading, sleep, personal and work focuses, but you can only have one of each. You can also create a “Custom”focus and you can have multiple custom focuses until the total number of focuses reaches 10.

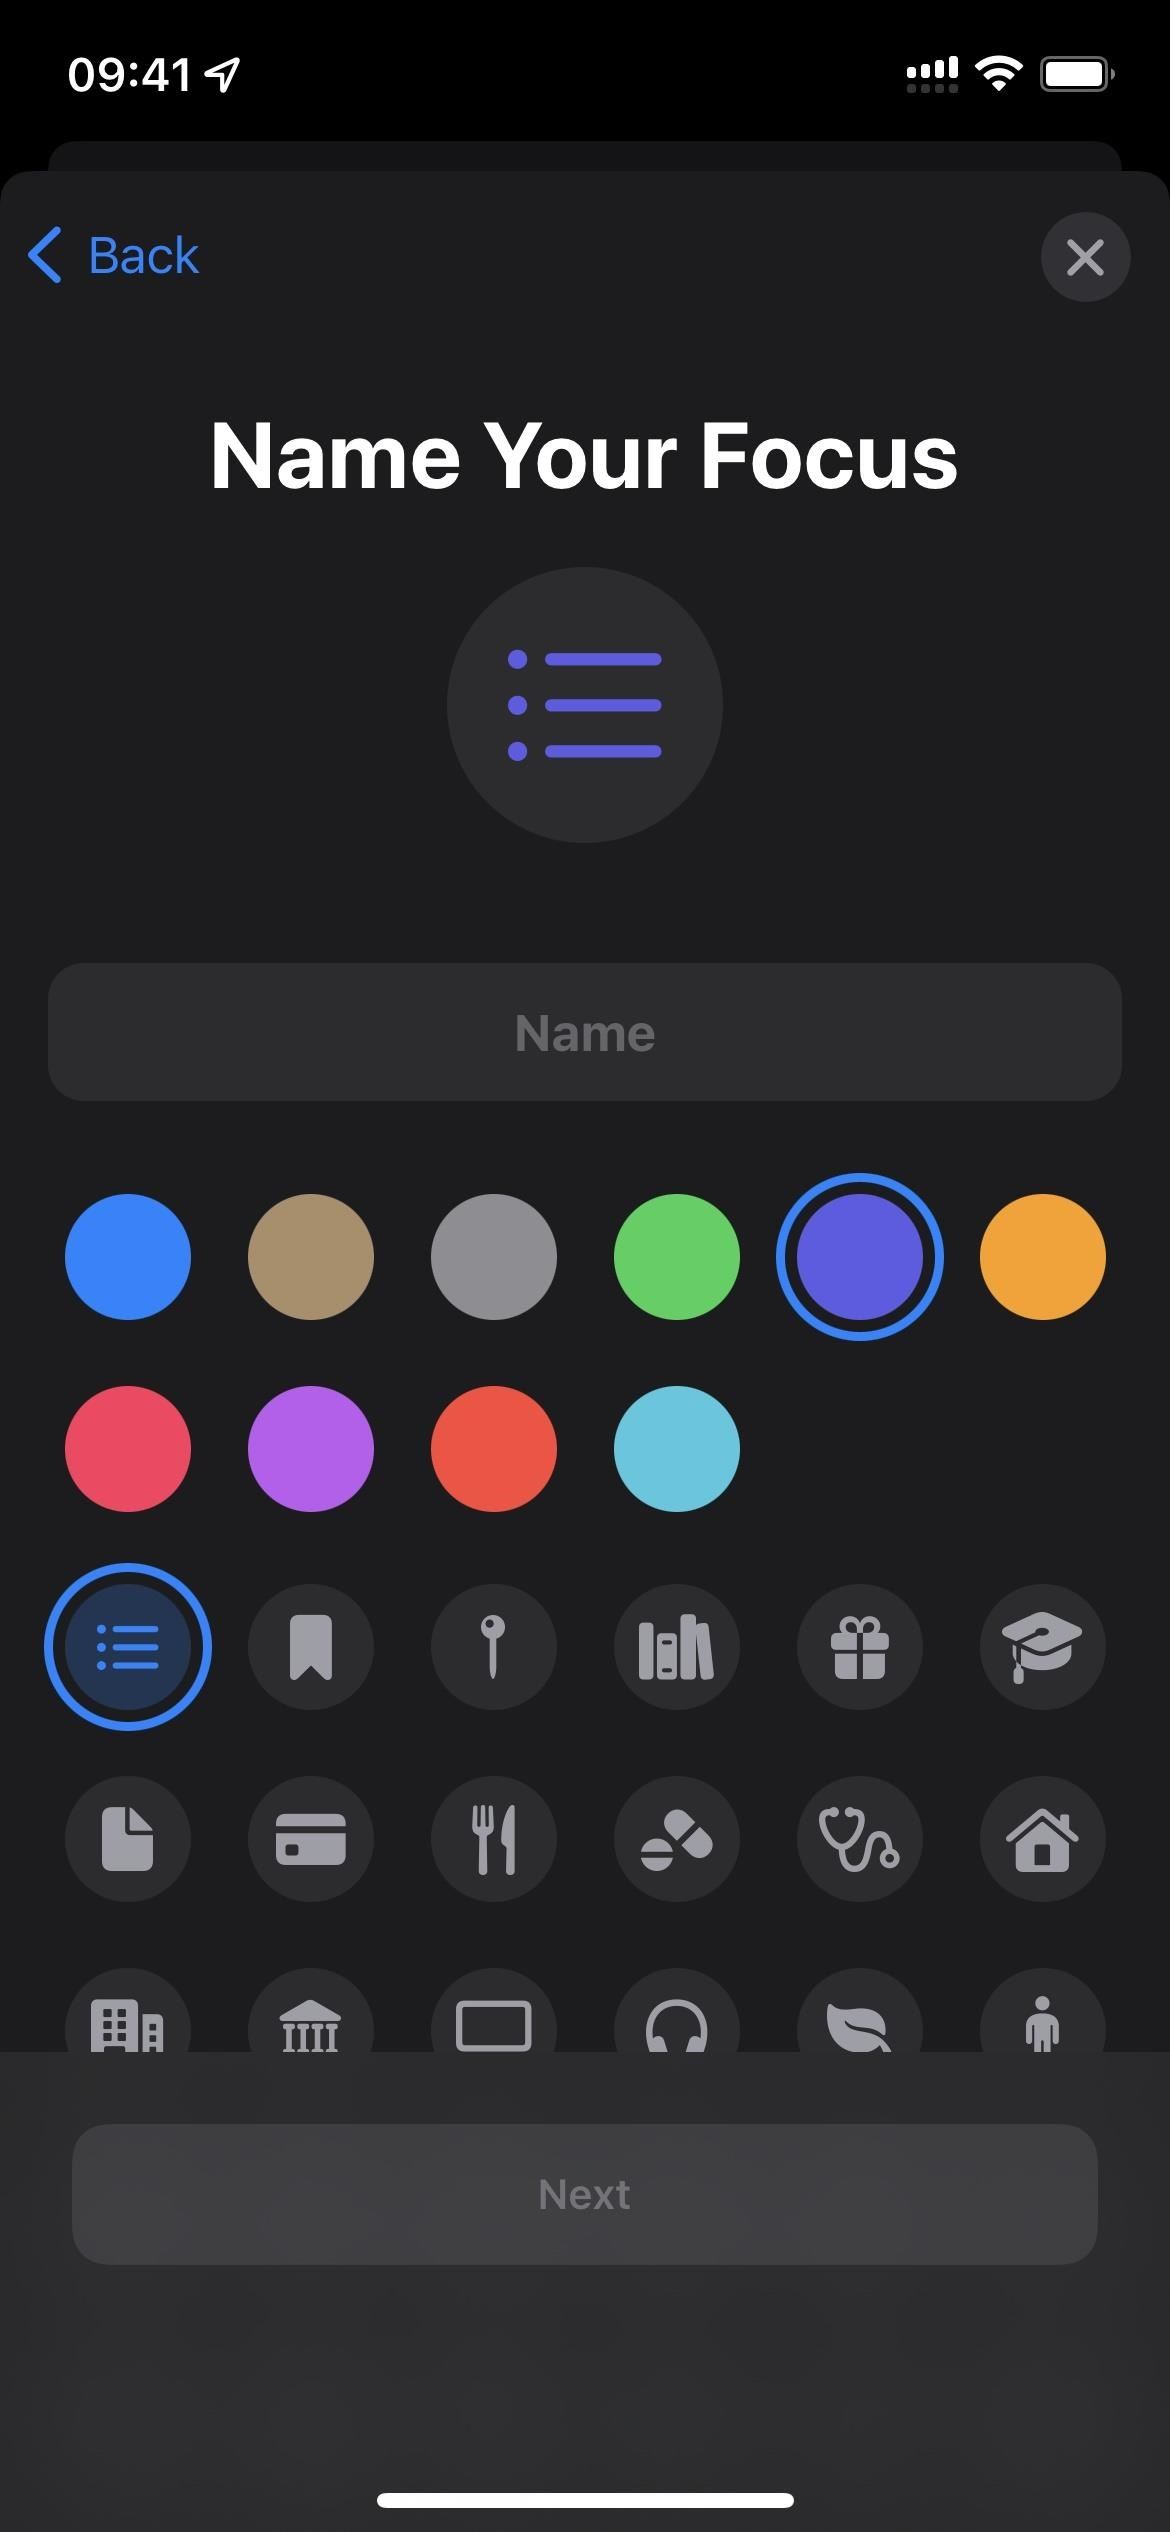
Create a new custom focus
First, let’s quickly move on to custom focuses. These custom focus states are configured the same regardless of your purpose, and you can customize other features after they’ve been created.
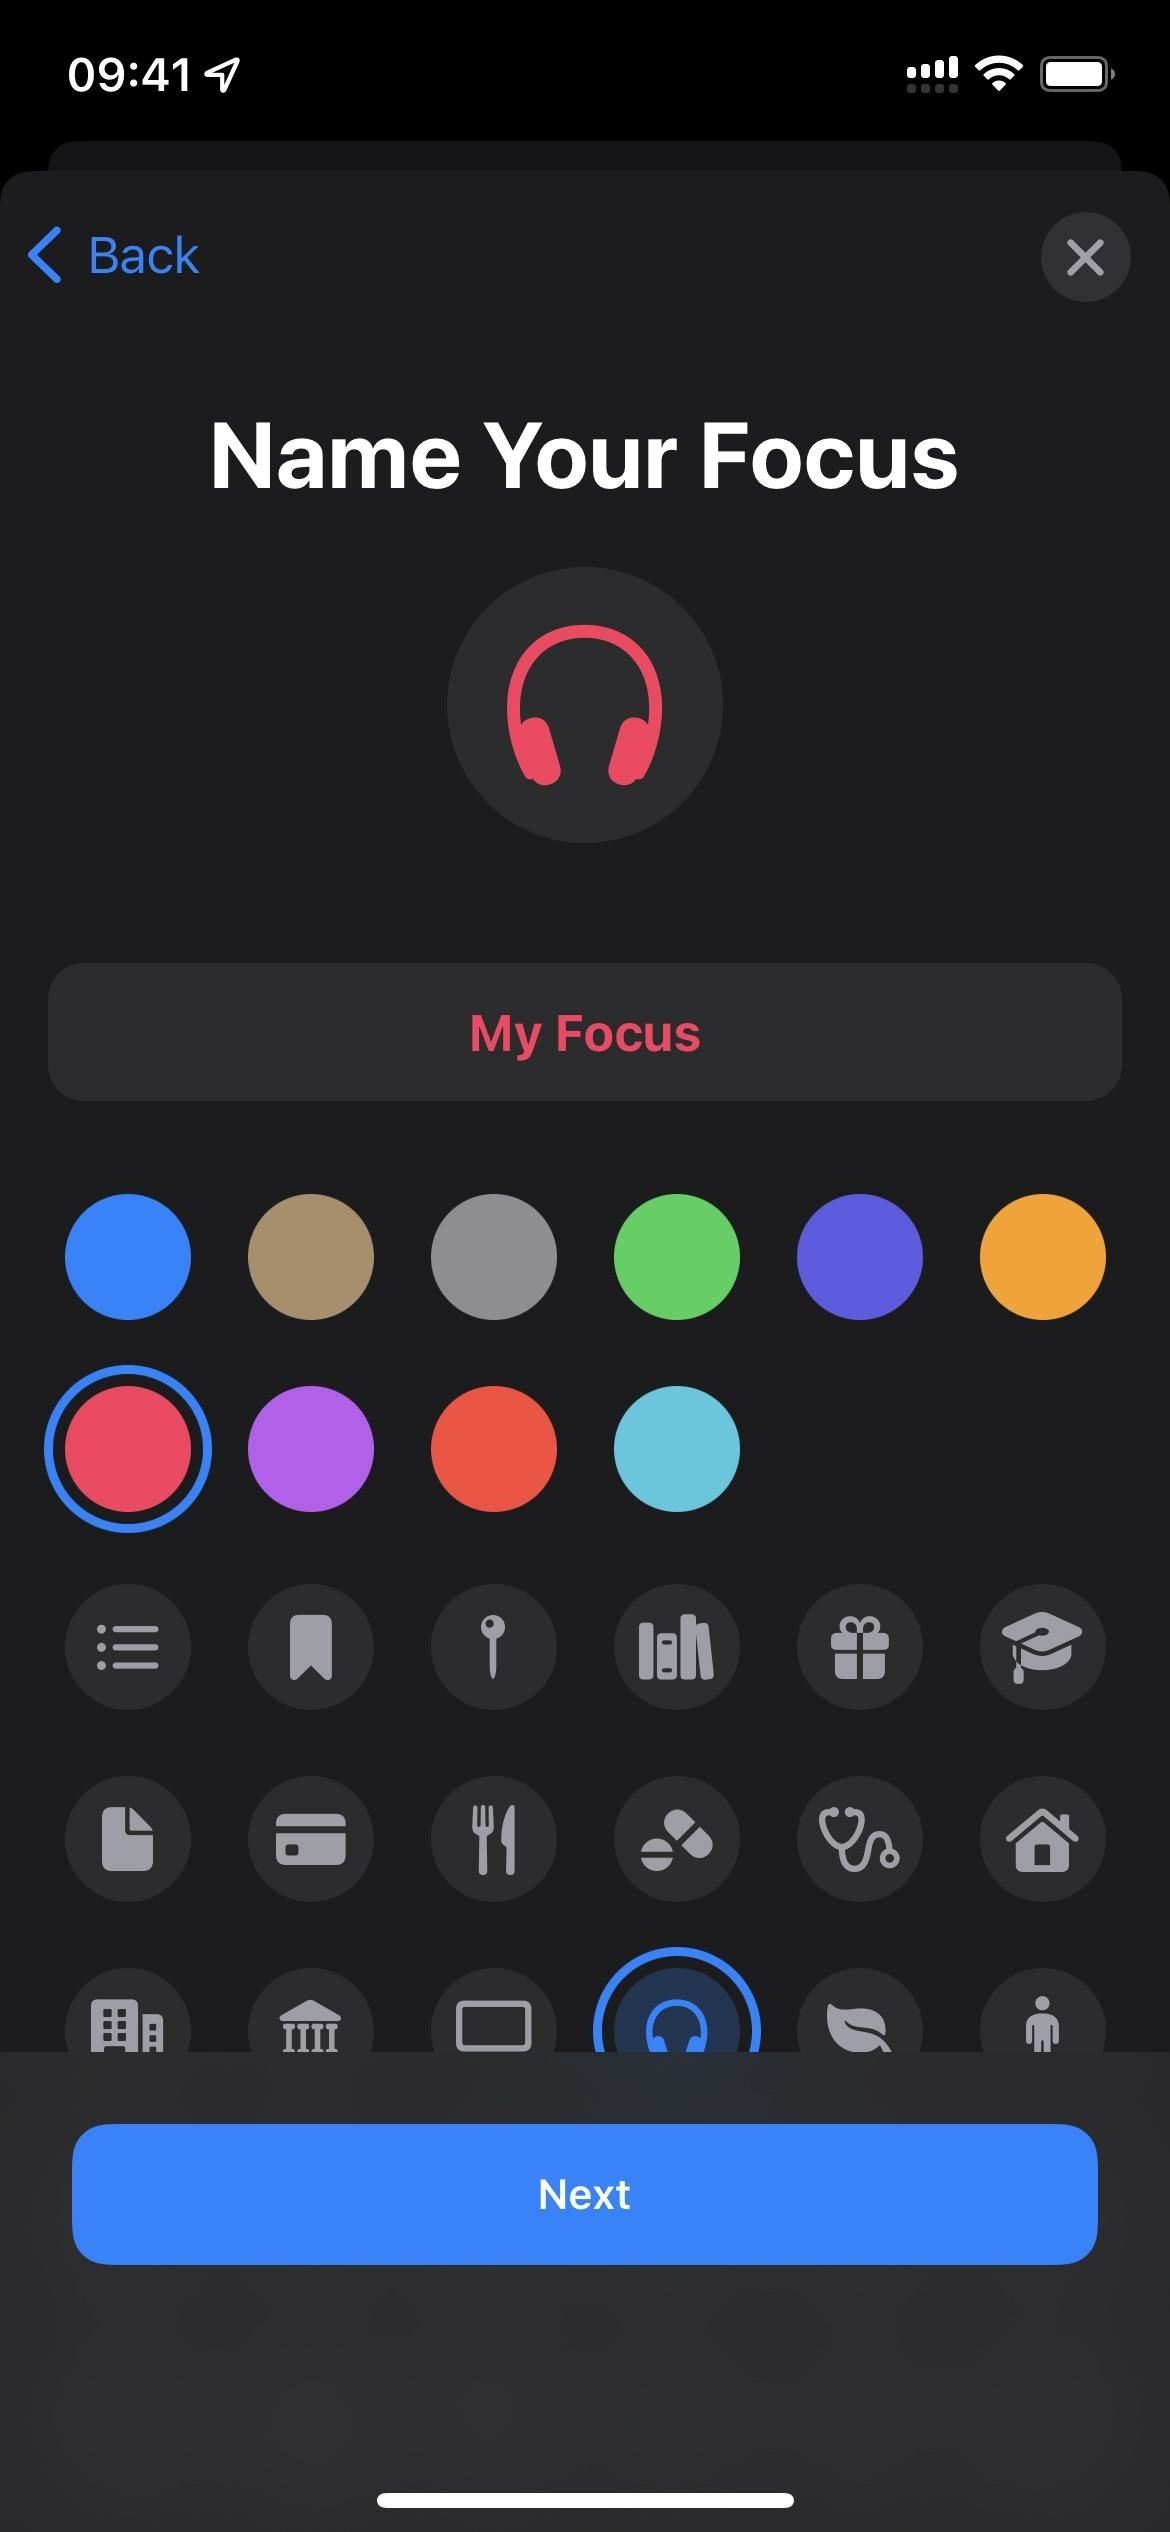
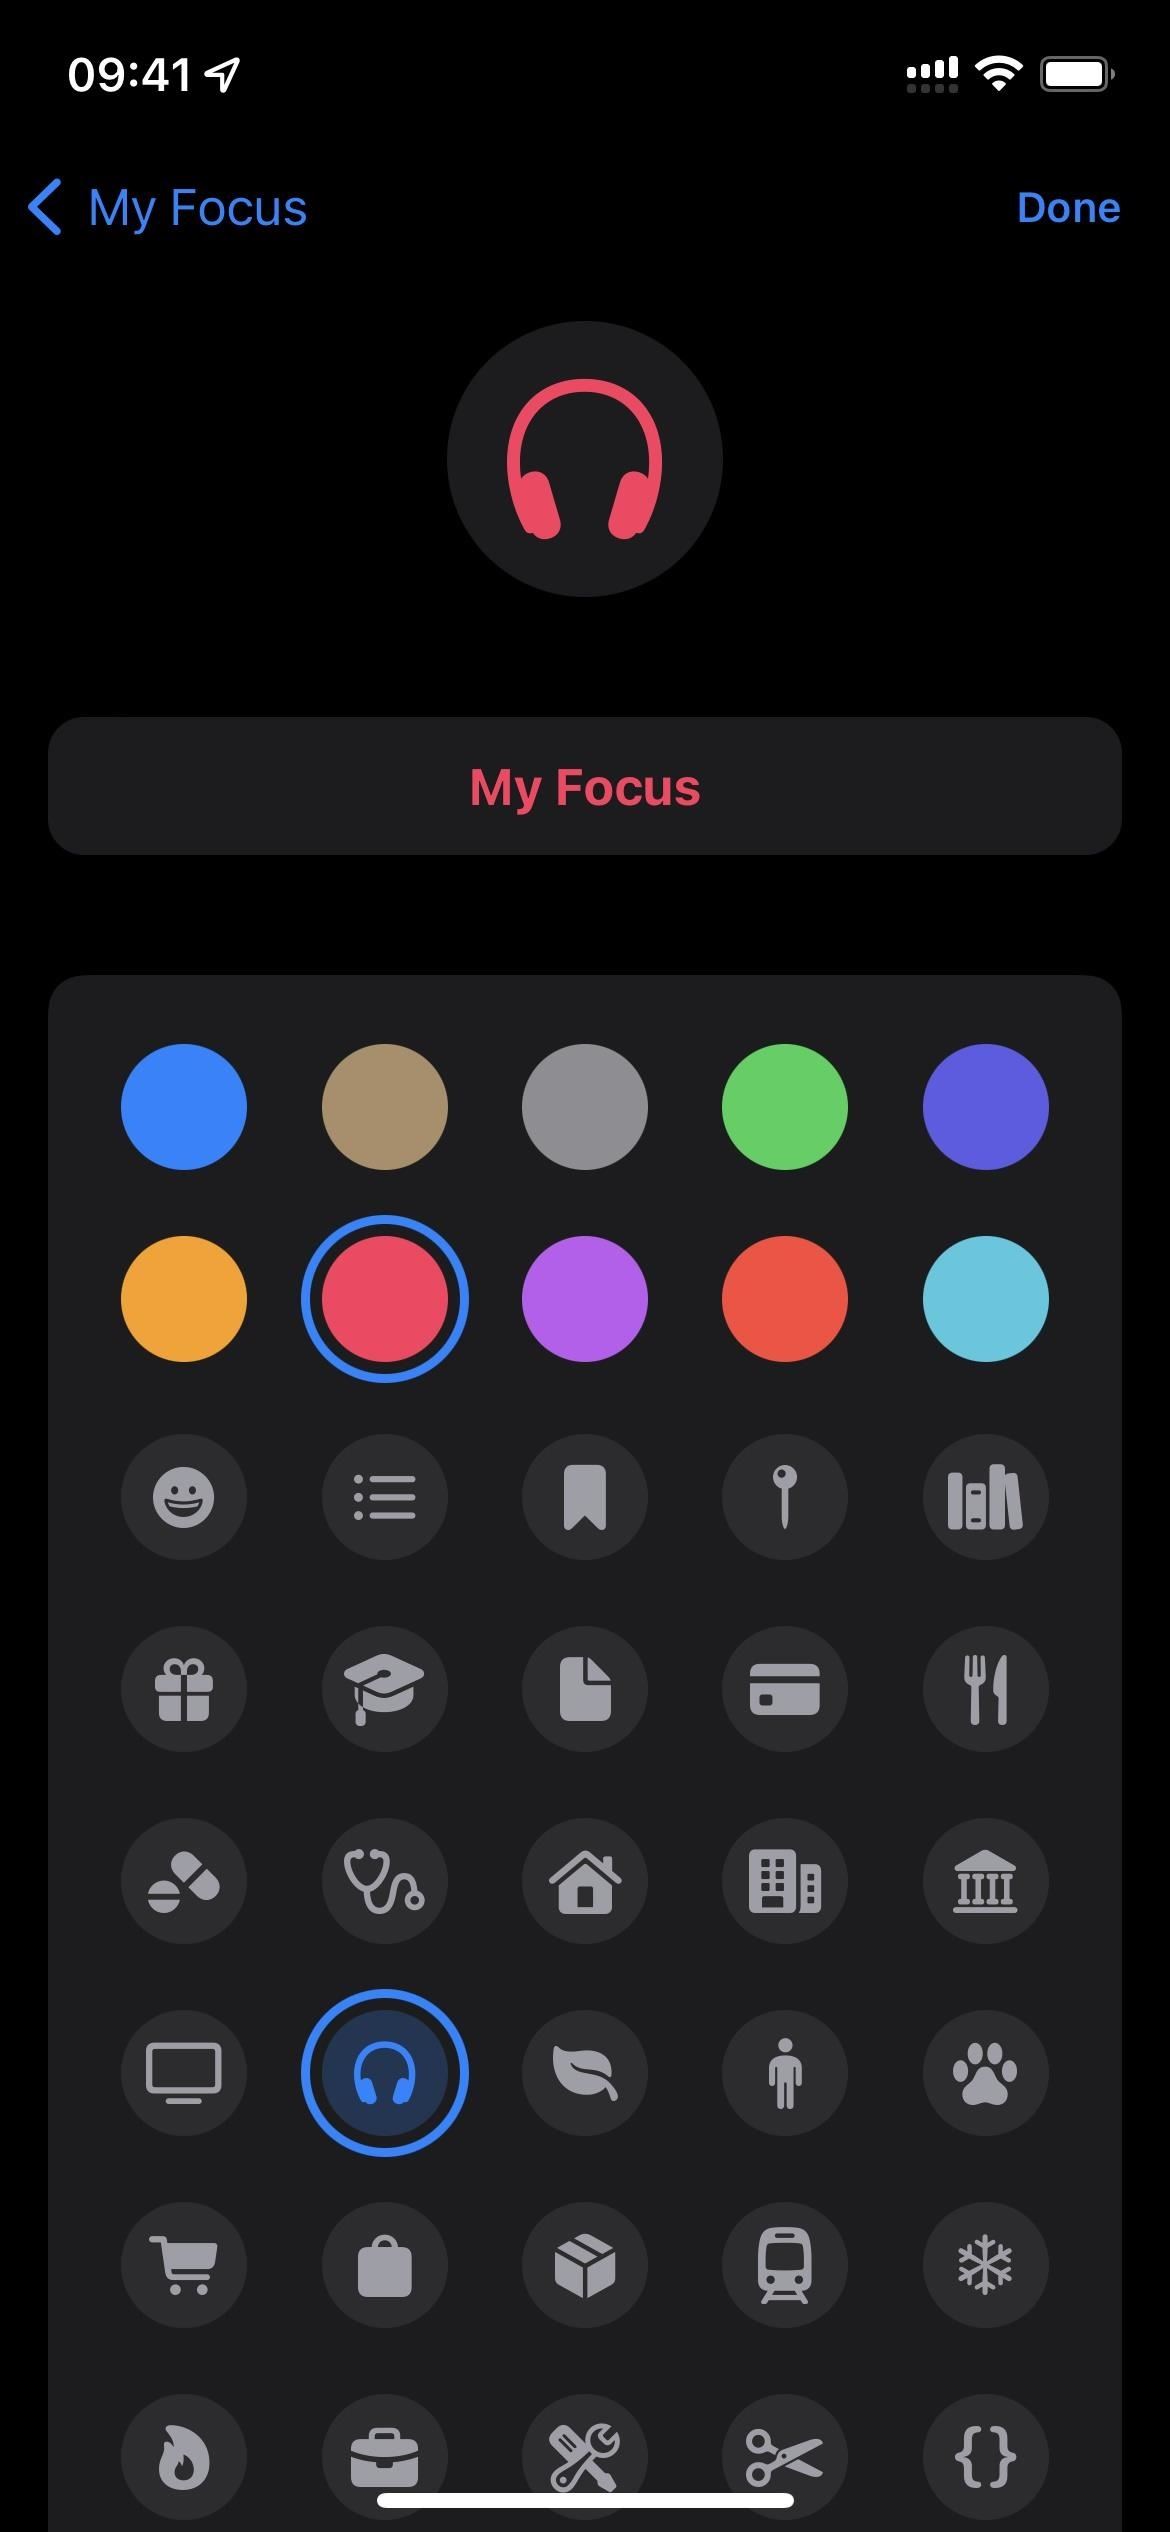
Choose a name, icon and color
After clicking on the plus sign (+), select “Custom”from the list to start a new focus. Next, create a name for your focus, choose a color and icon to represent it, and click Next.

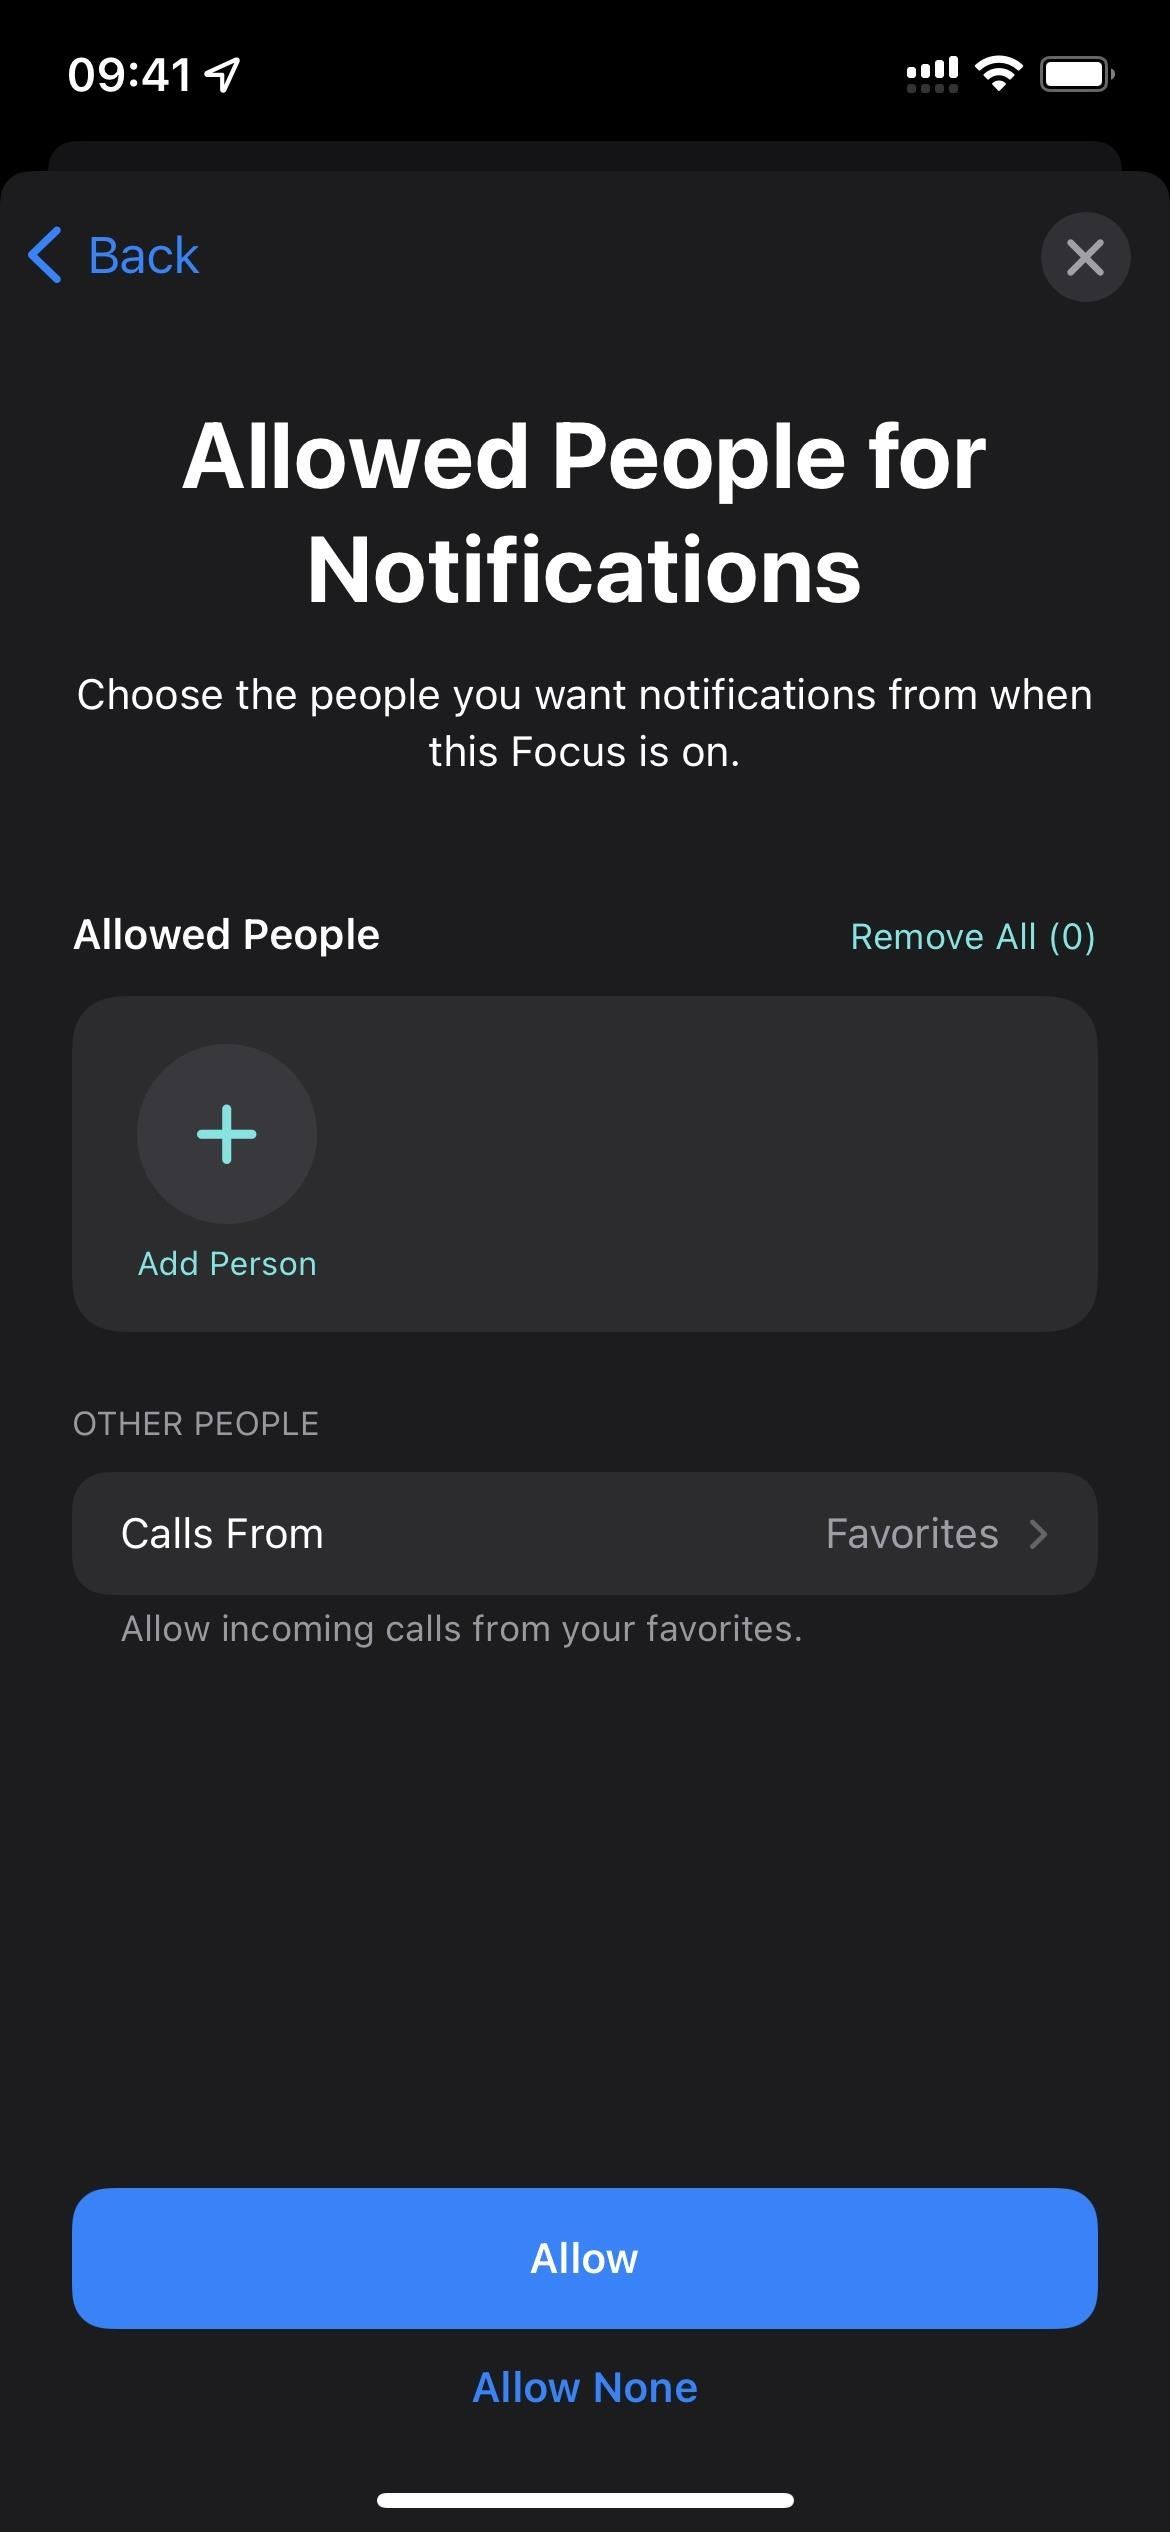
Allow notifications from specific people
The next step is to select “Users Allowed to Notify”. This will allow you to select contacts or groups of contacts that may be out of your scope. That way, you’ll always get important notifications even if you block out distractions on your iPhone.
You can select individual people from your contacts by clicking the “+ Add person”button; just toggle each name and hit done. You may already have some frequent contacts on the allowed list, but you can remove them, as well as others you change your mind about, by using the minus sign (-).
In the Other people section, you can allow calls from everyone, no one, favorites, all contacts, or specific groups that you have set in contacts. There’s also an “Allow Recall”option here – turning on the toggle will allow contacts not on your allowed list to break out of your focus if they call back within three minutes of the first attempt. Click “Done”to return to the allowed settings.
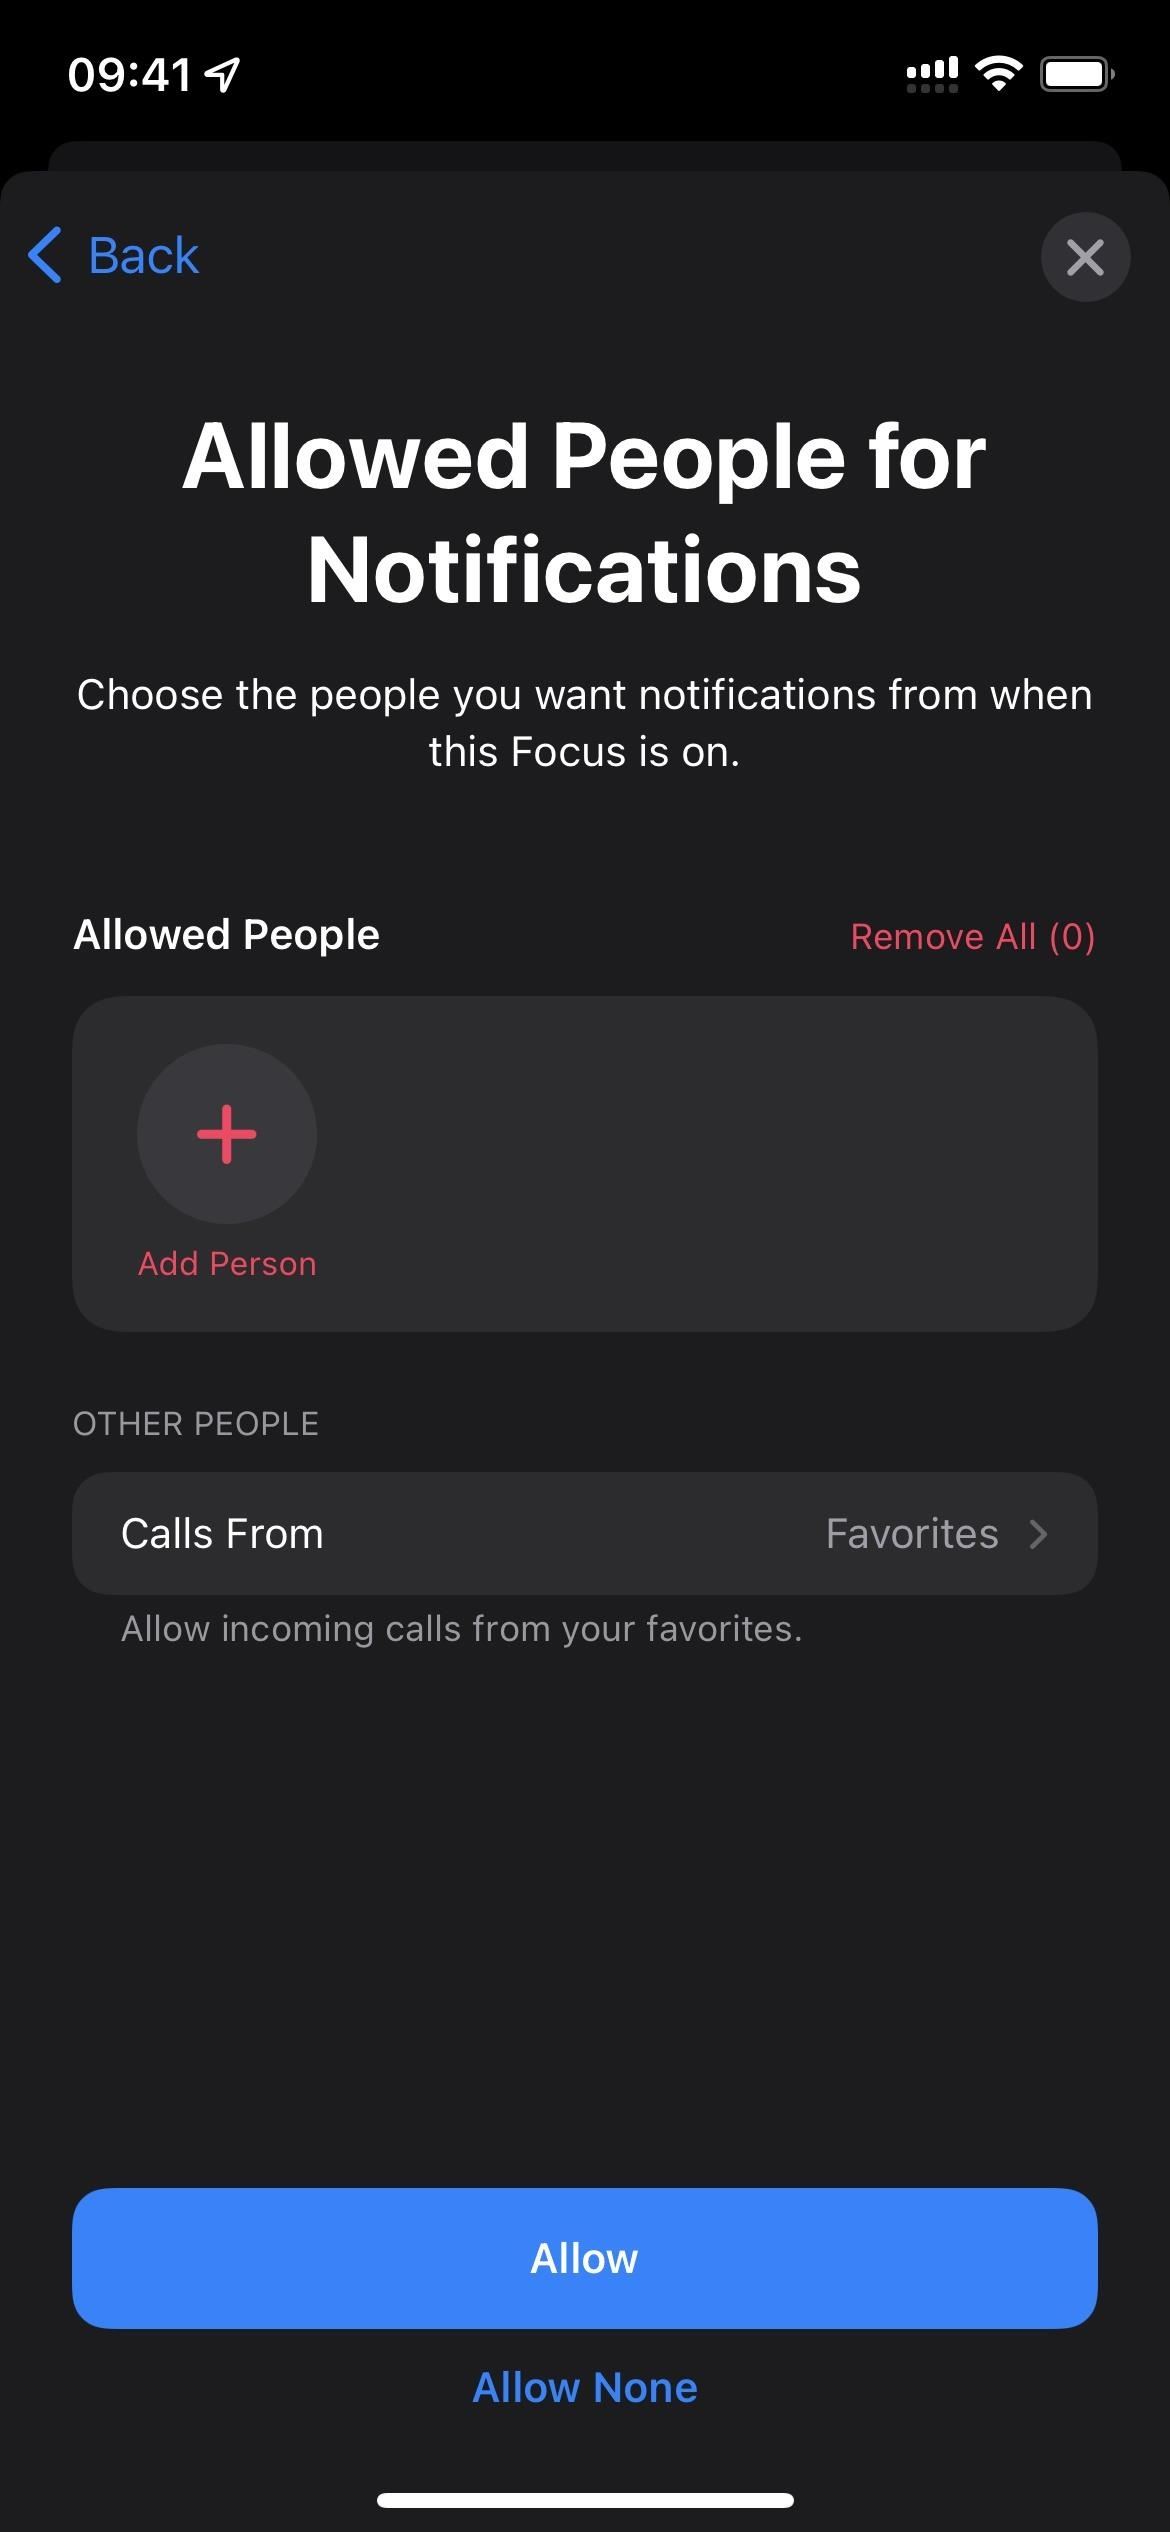
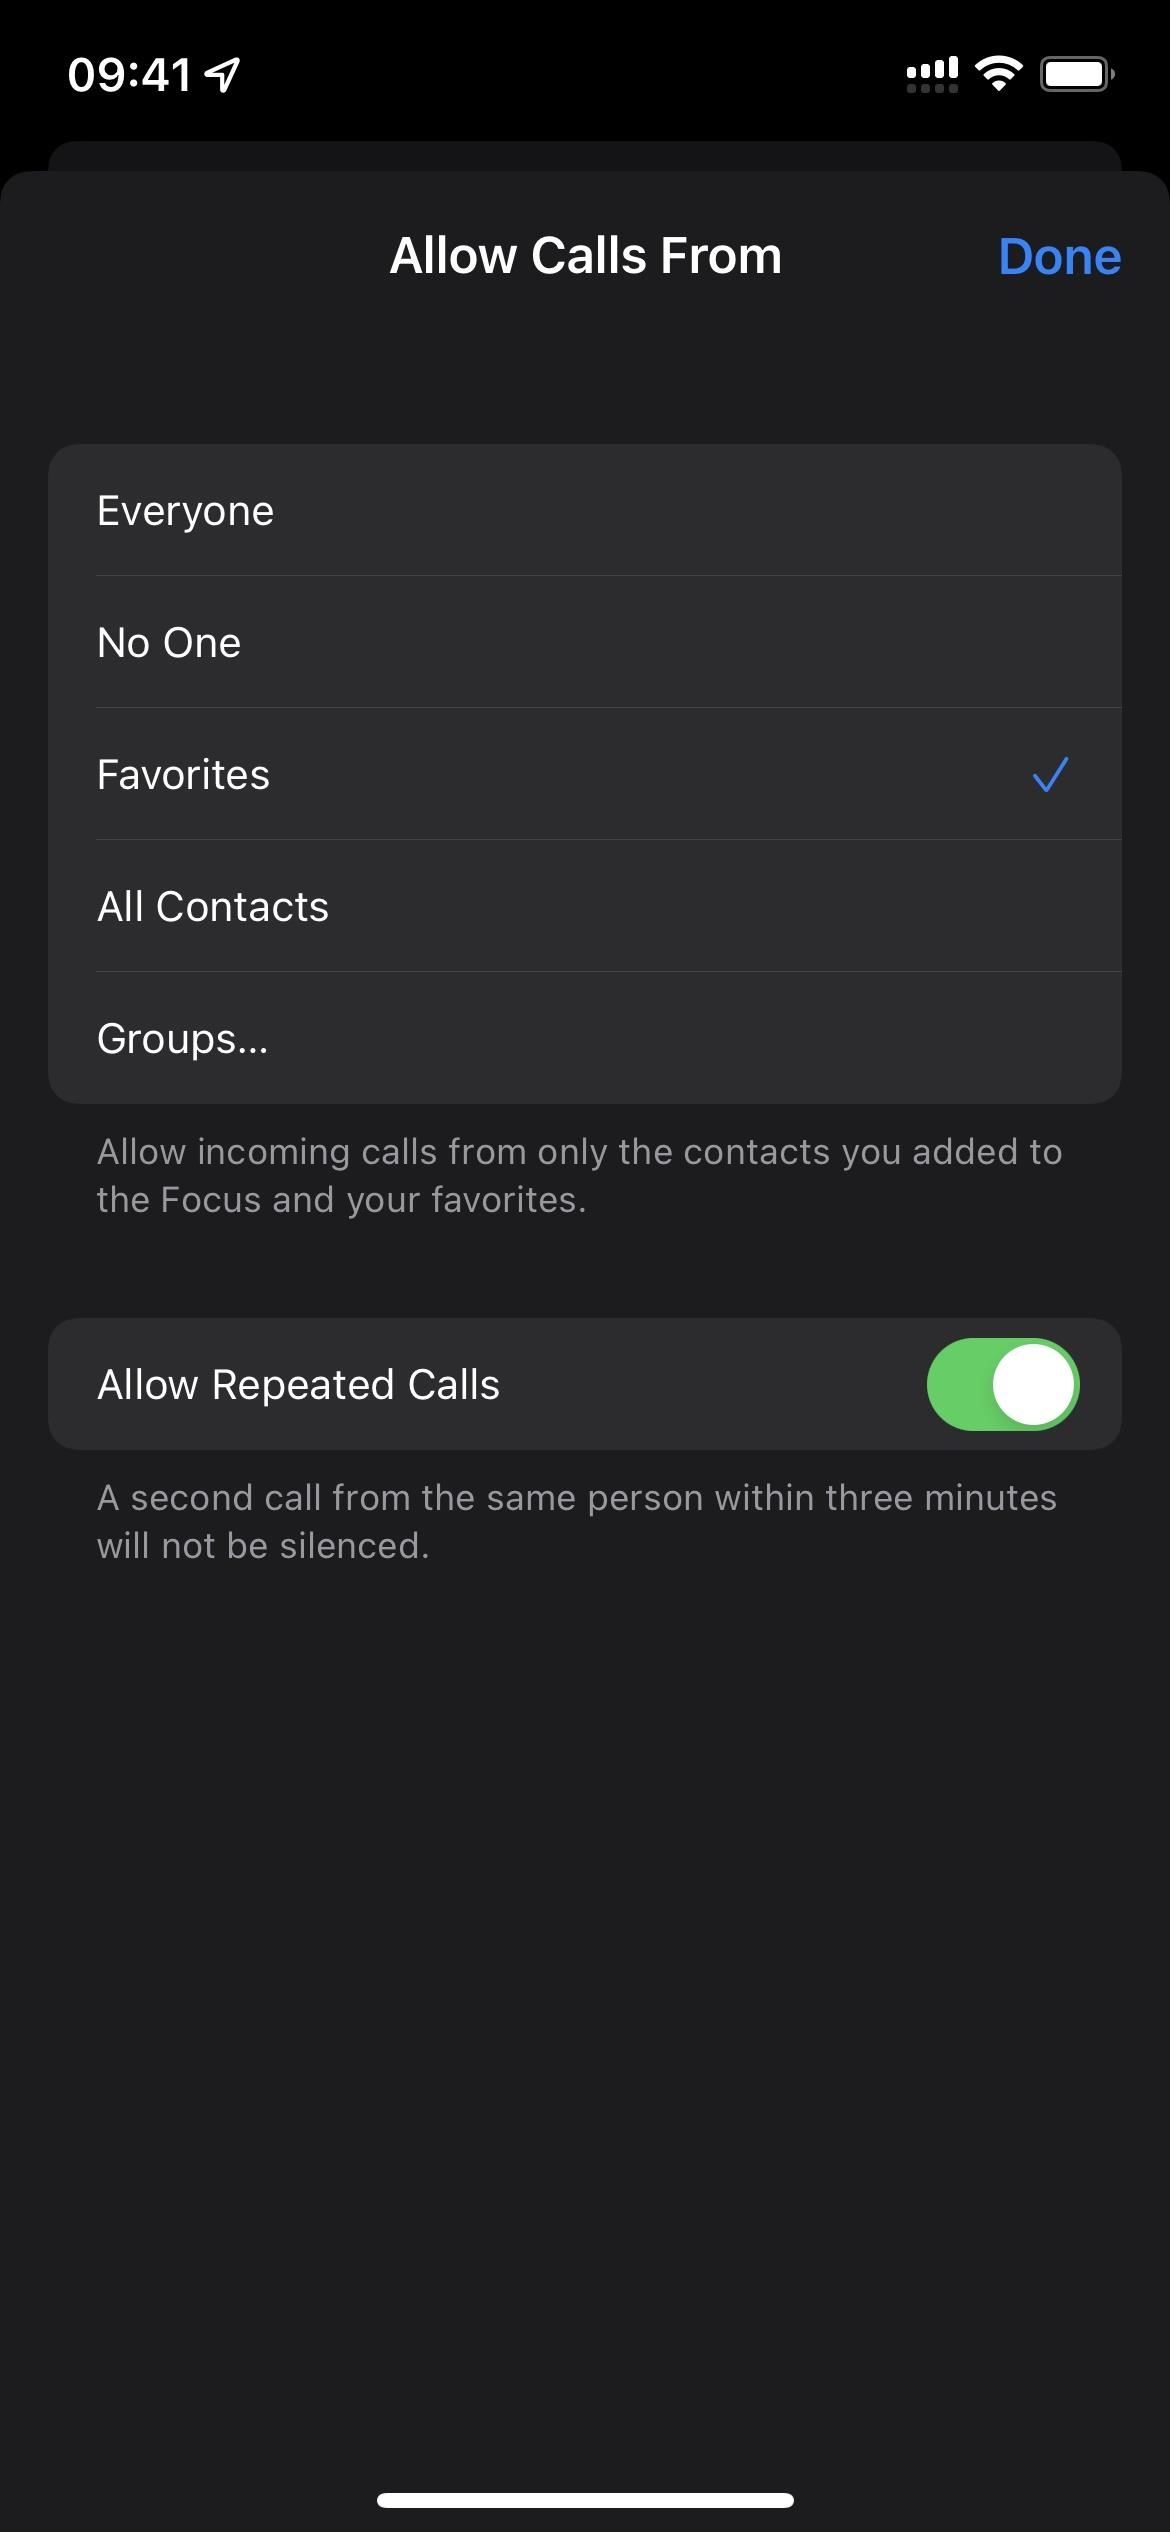
At the bottom, click “Allow”to allow all contacts you select. You can also select Don’t Allow below it if you decide you don’t want any contacts to interrupt your focus state. Either option will take you to the next setup screen.
Note that these settings do not override the emergency contact. If you have an emergency contact set up, it will still get through, regardless of your focus settings.
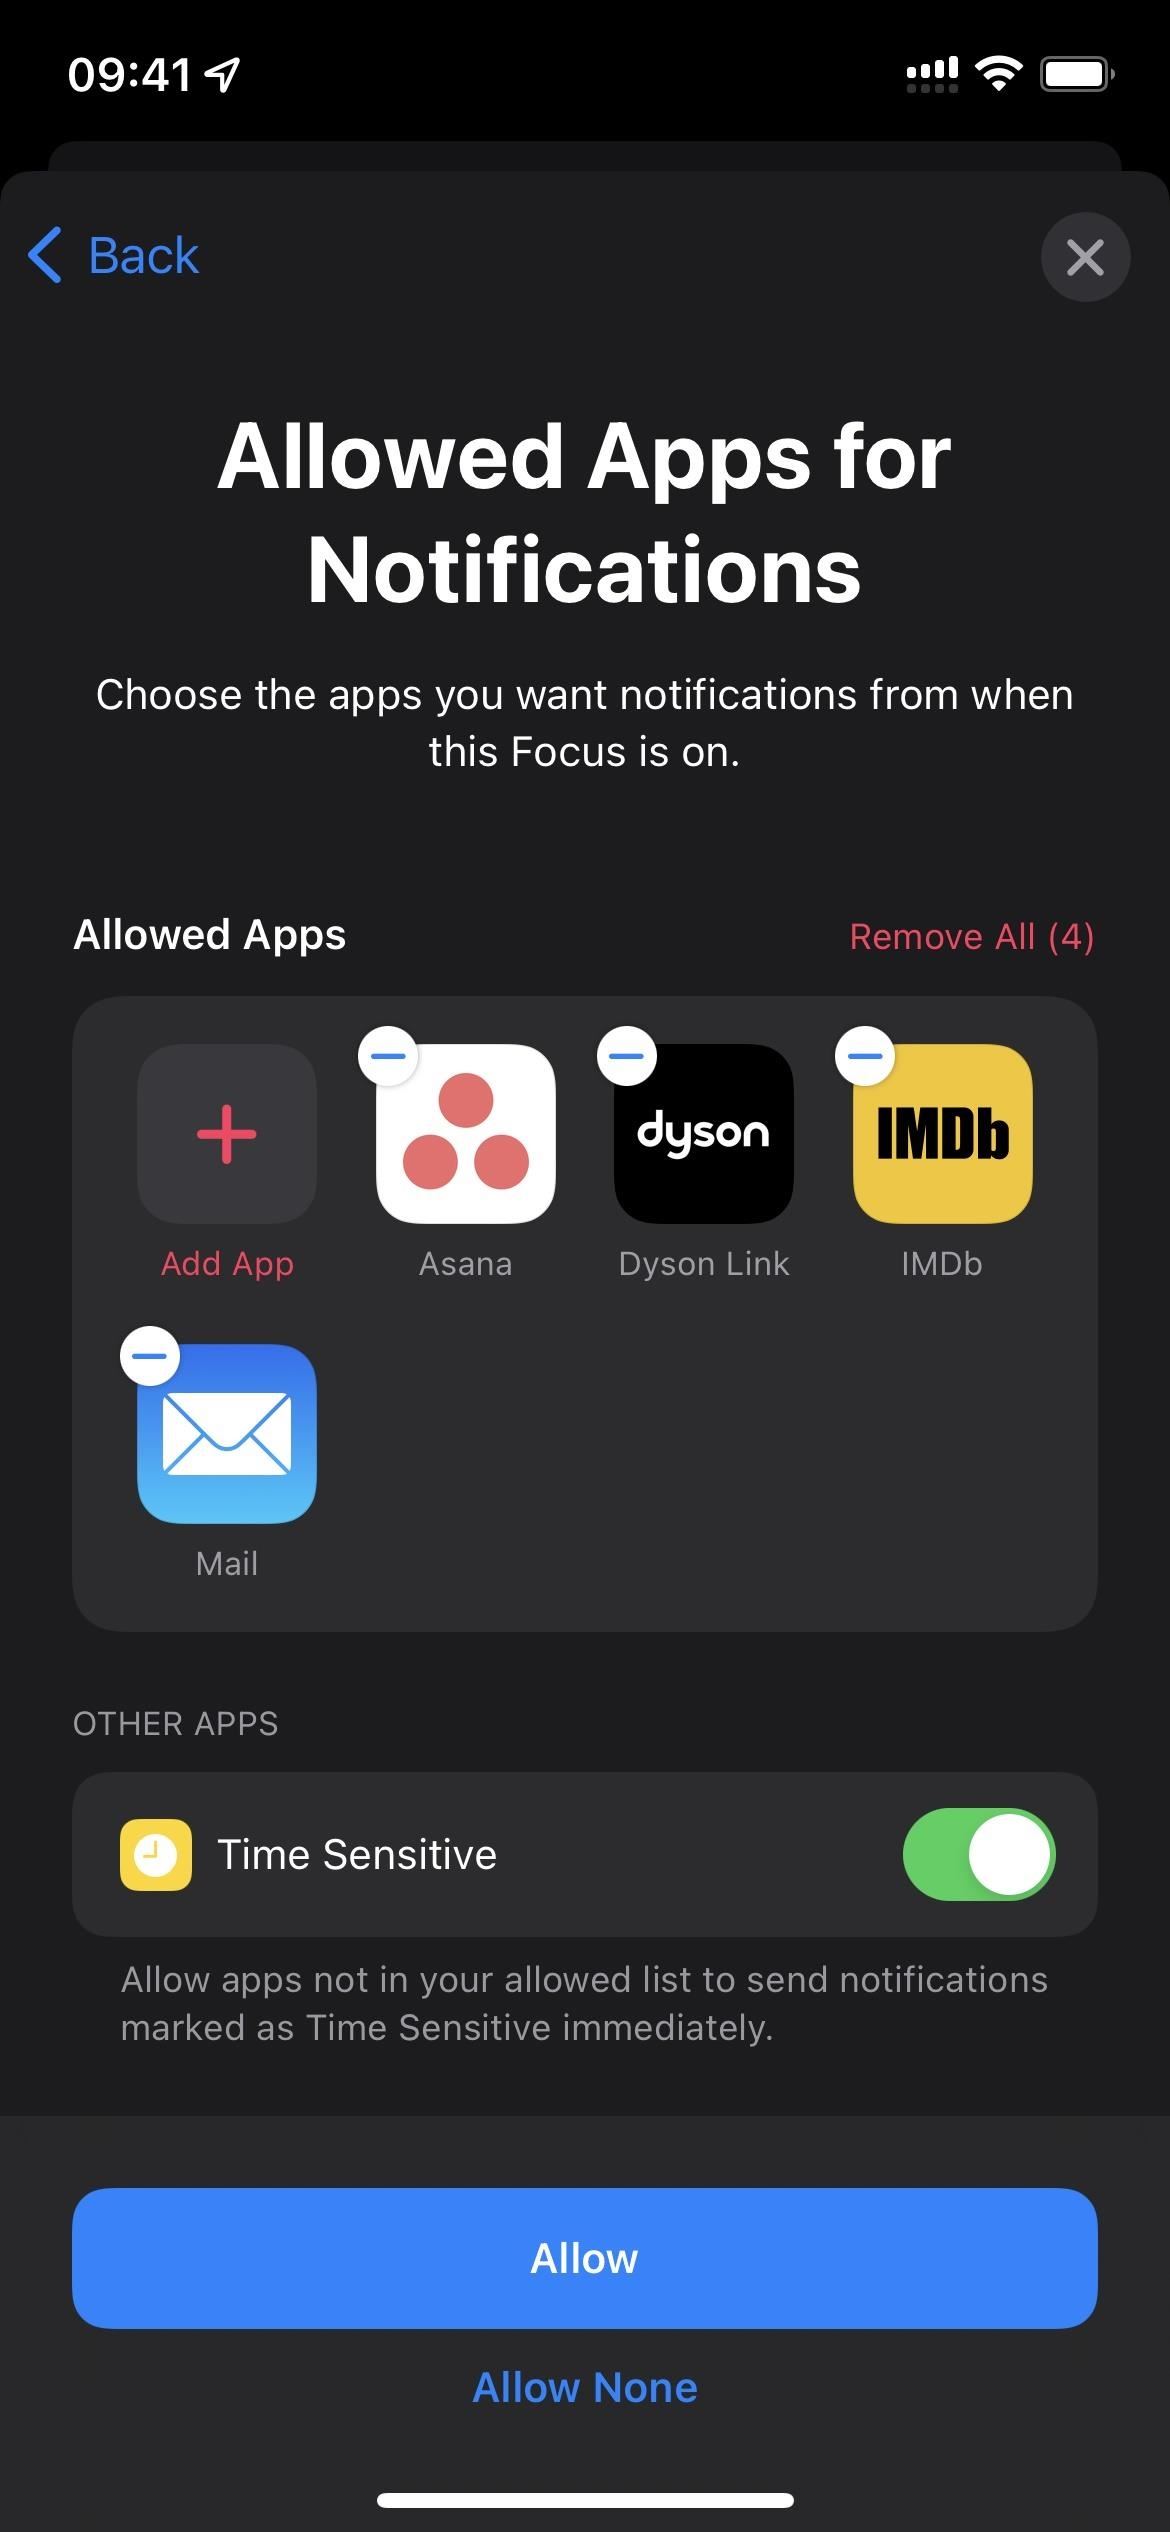
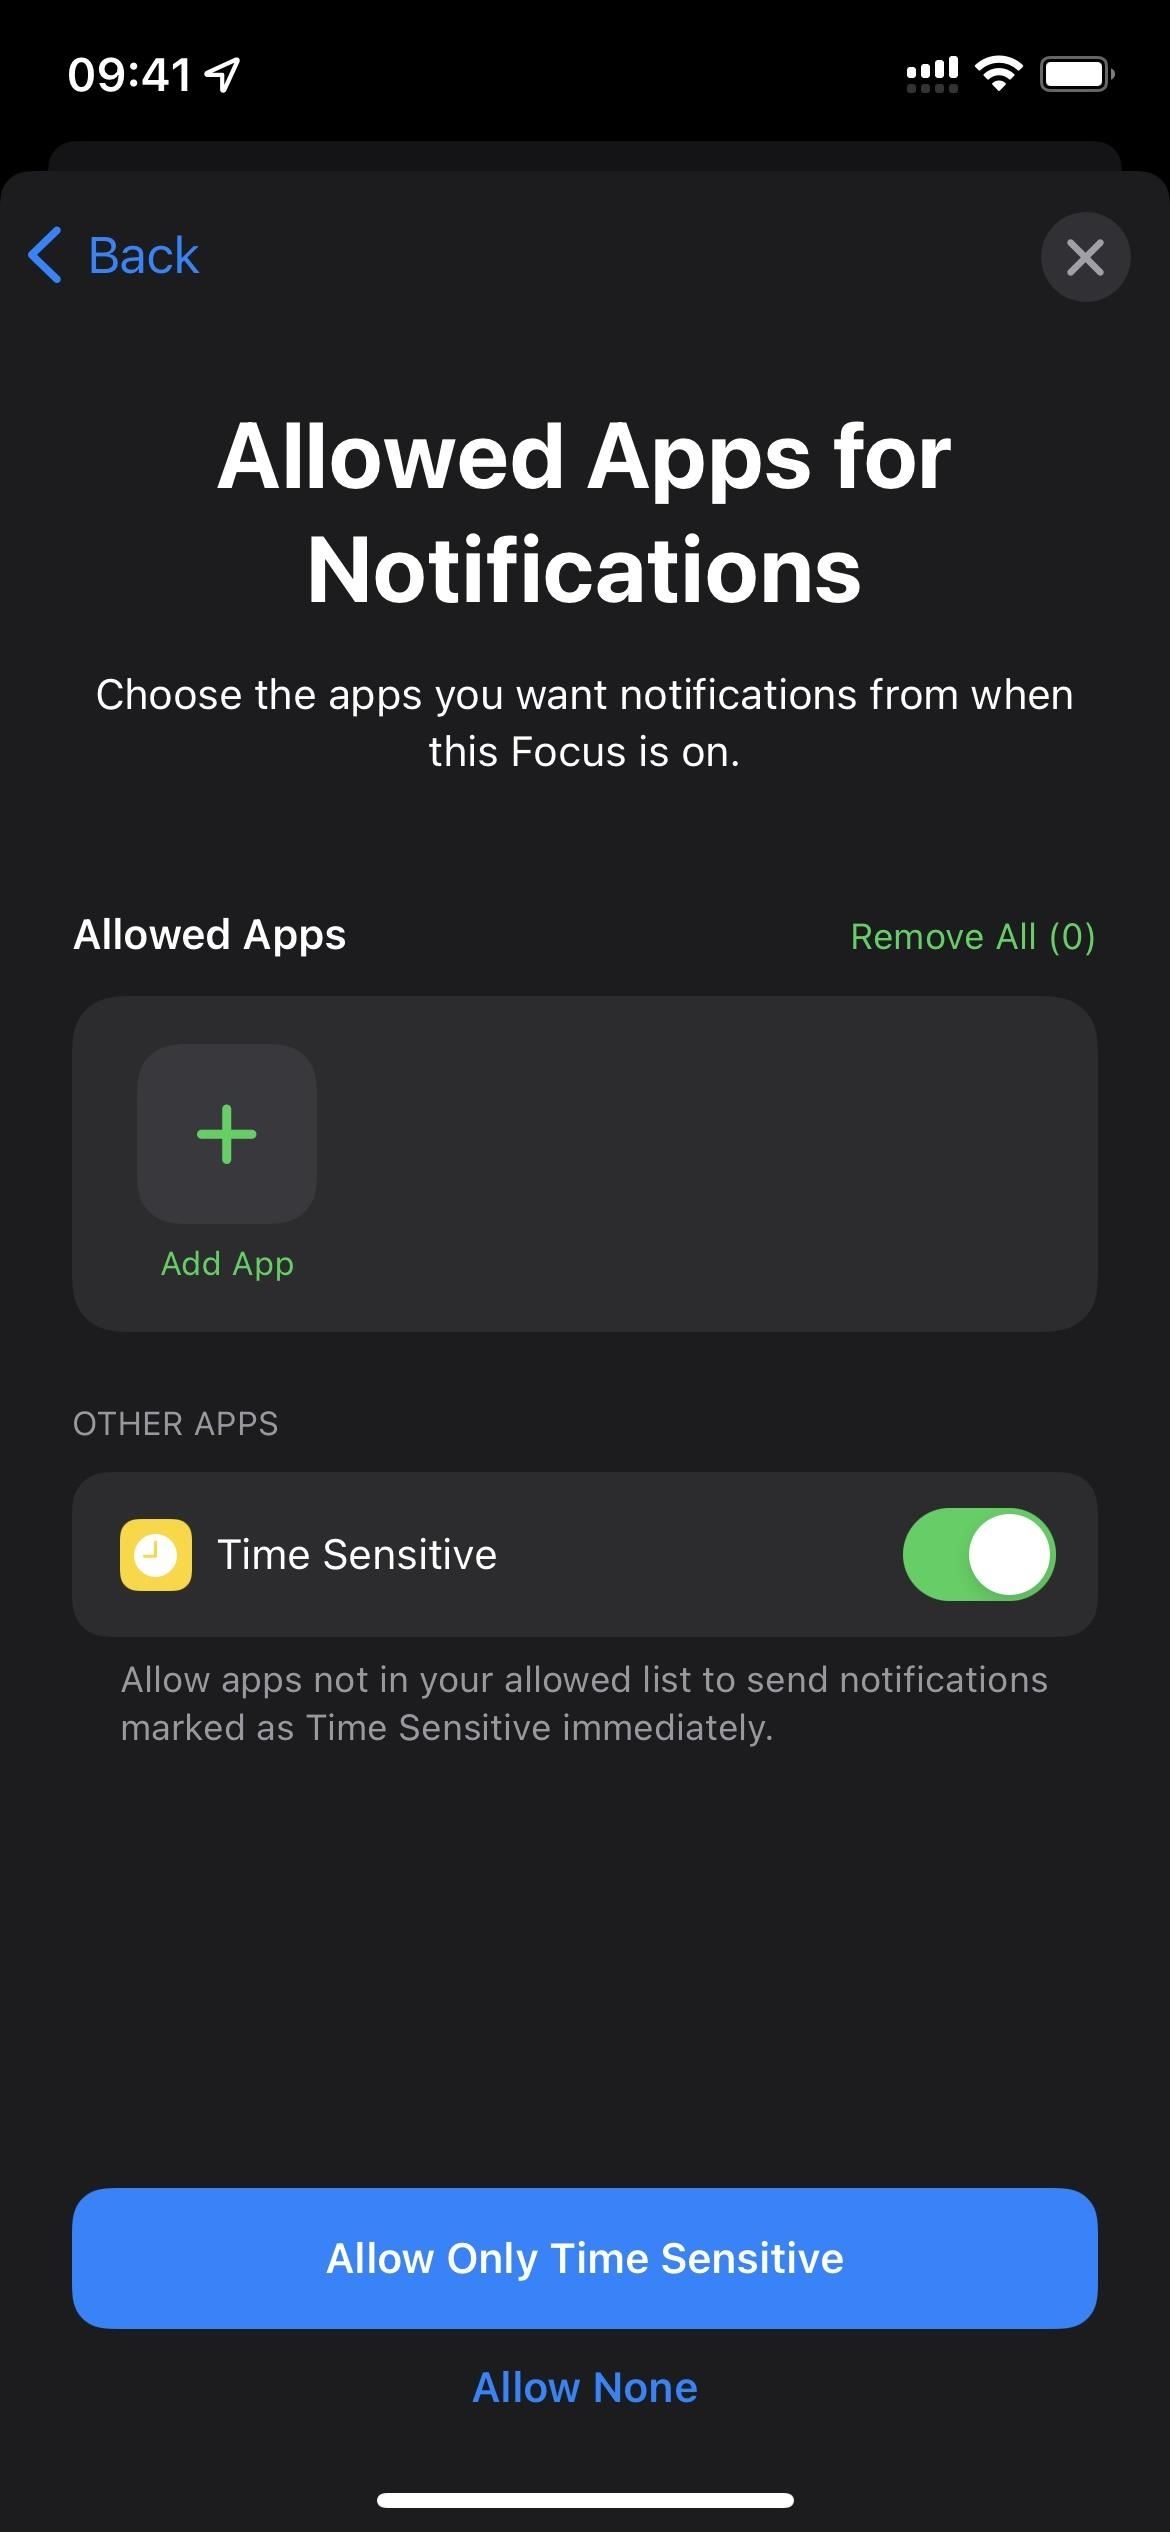
Allow notifications from specific apps
Next, select “Allowed applications for notifications.”Here you can select the apps on your iPhone that can show you notifications during your focus state.
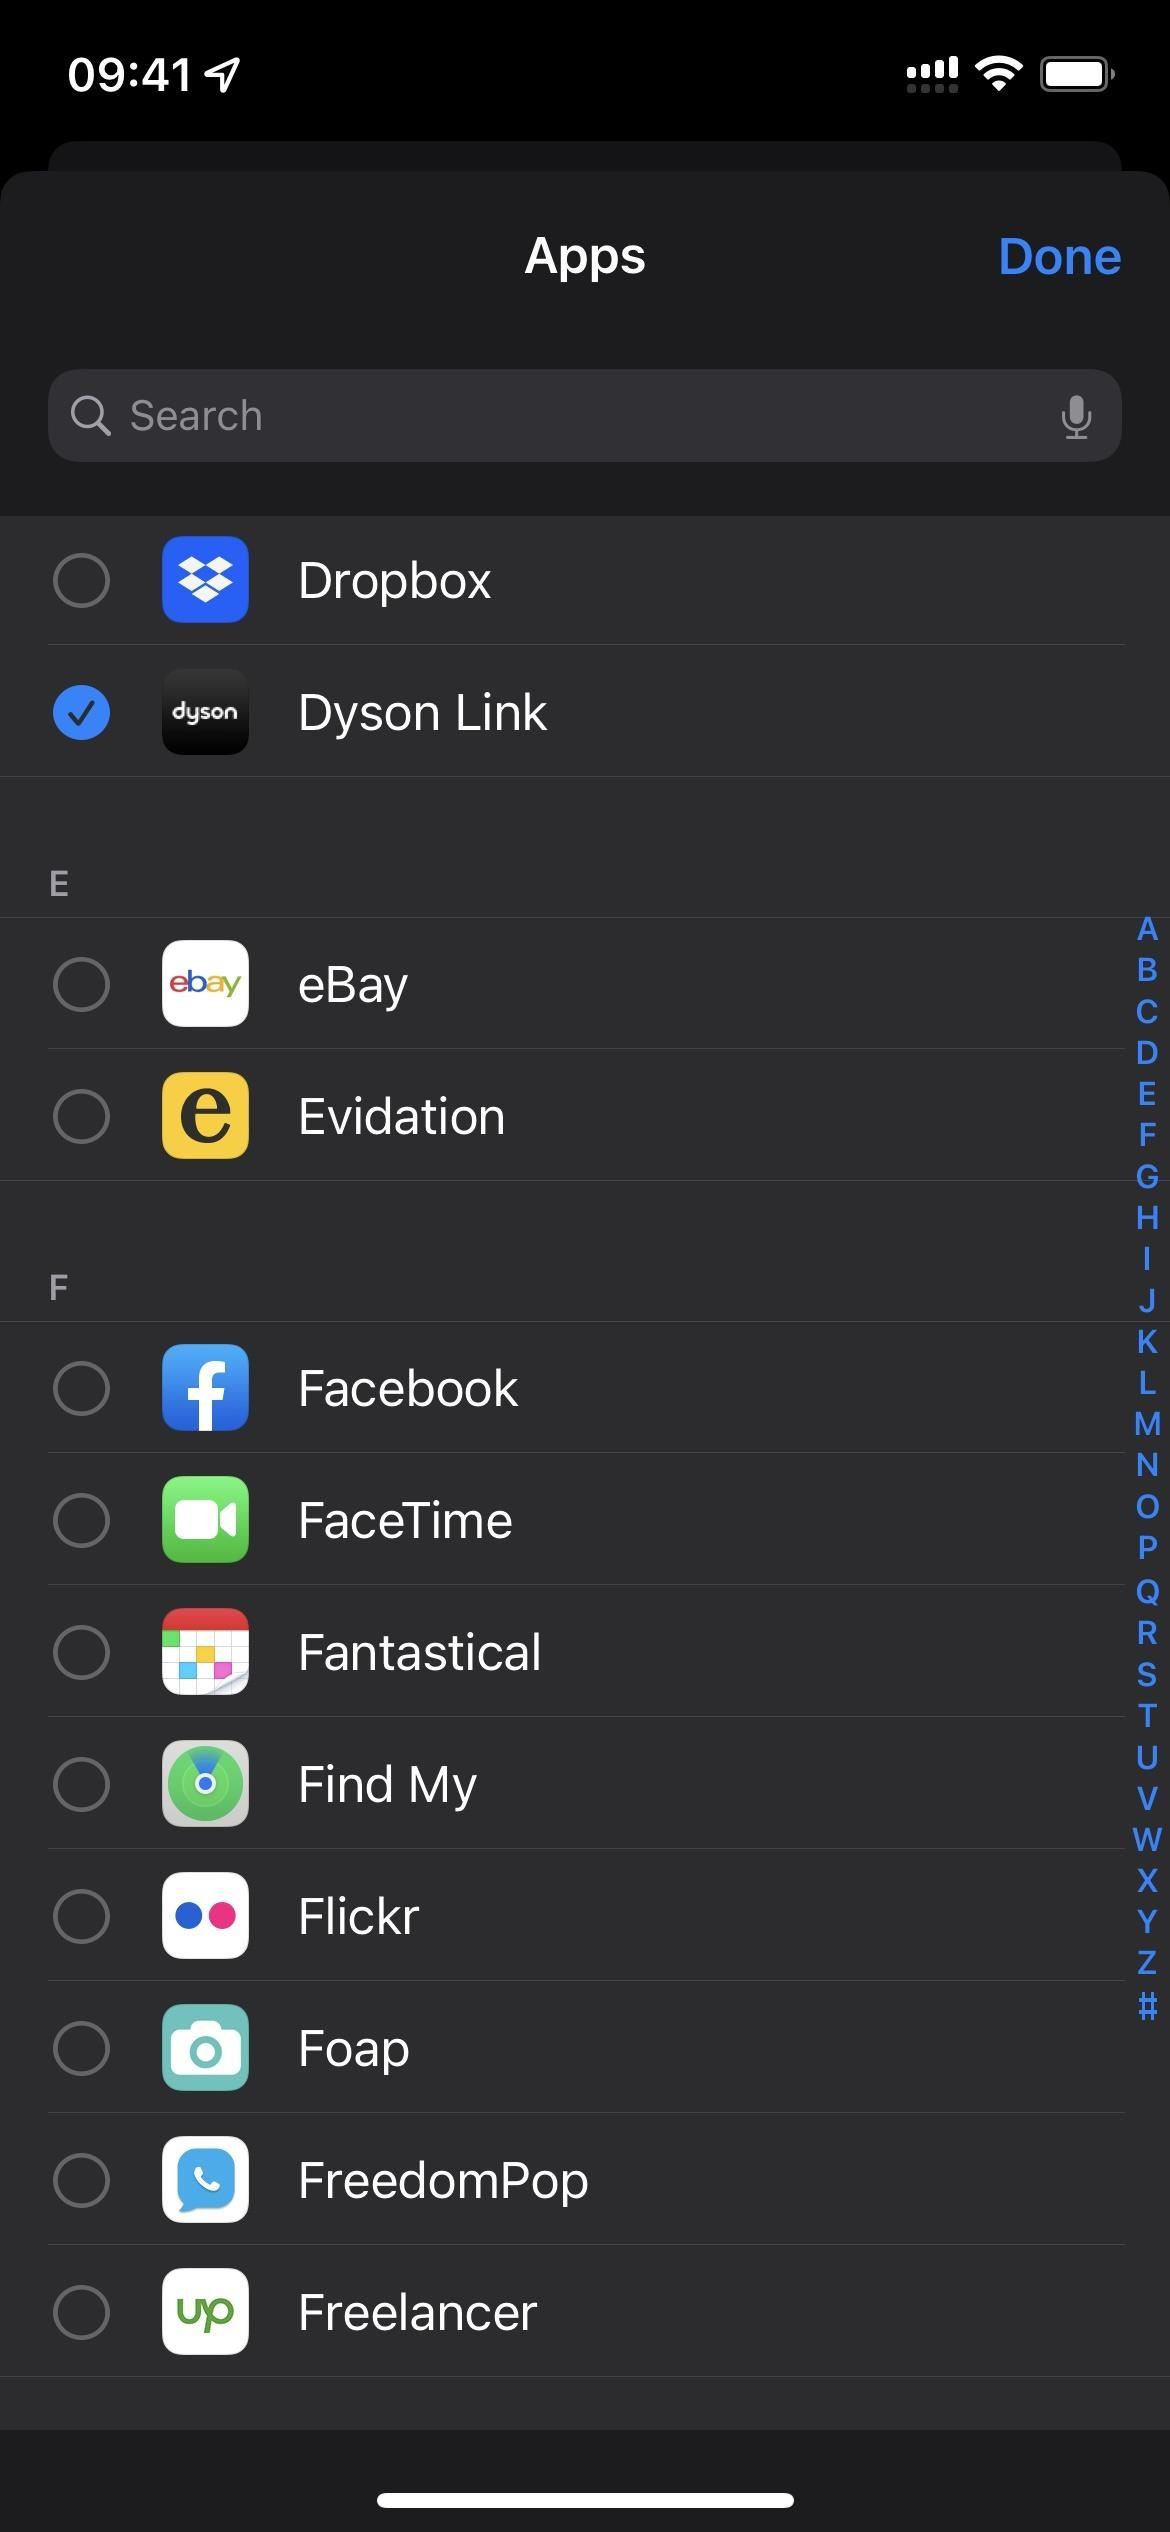
Similar to the previous setup screen, you can see suggested apps already in the allowed list, and you can enable others with the “+ Add App”button. On the screen to add apps, switch each app you want and click “Done”. You can remove applications from the allowed list using the minus sign (-).
There is also a “Other Applications”section with a “Time Sensitivity”toggle. This will allow any application with a temporary alert to notify you during the focus state.
At the bottom, click “Allow”to allow all the apps you choose. It may also say “Only allow time-aware”if you haven’t allowed individual apps, but you’ve enabled the “Time-aware”toggle. You can also select Don’t Allow if you decide you don’t want any apps to interrupt your focus state.
Save your new focus and manage it
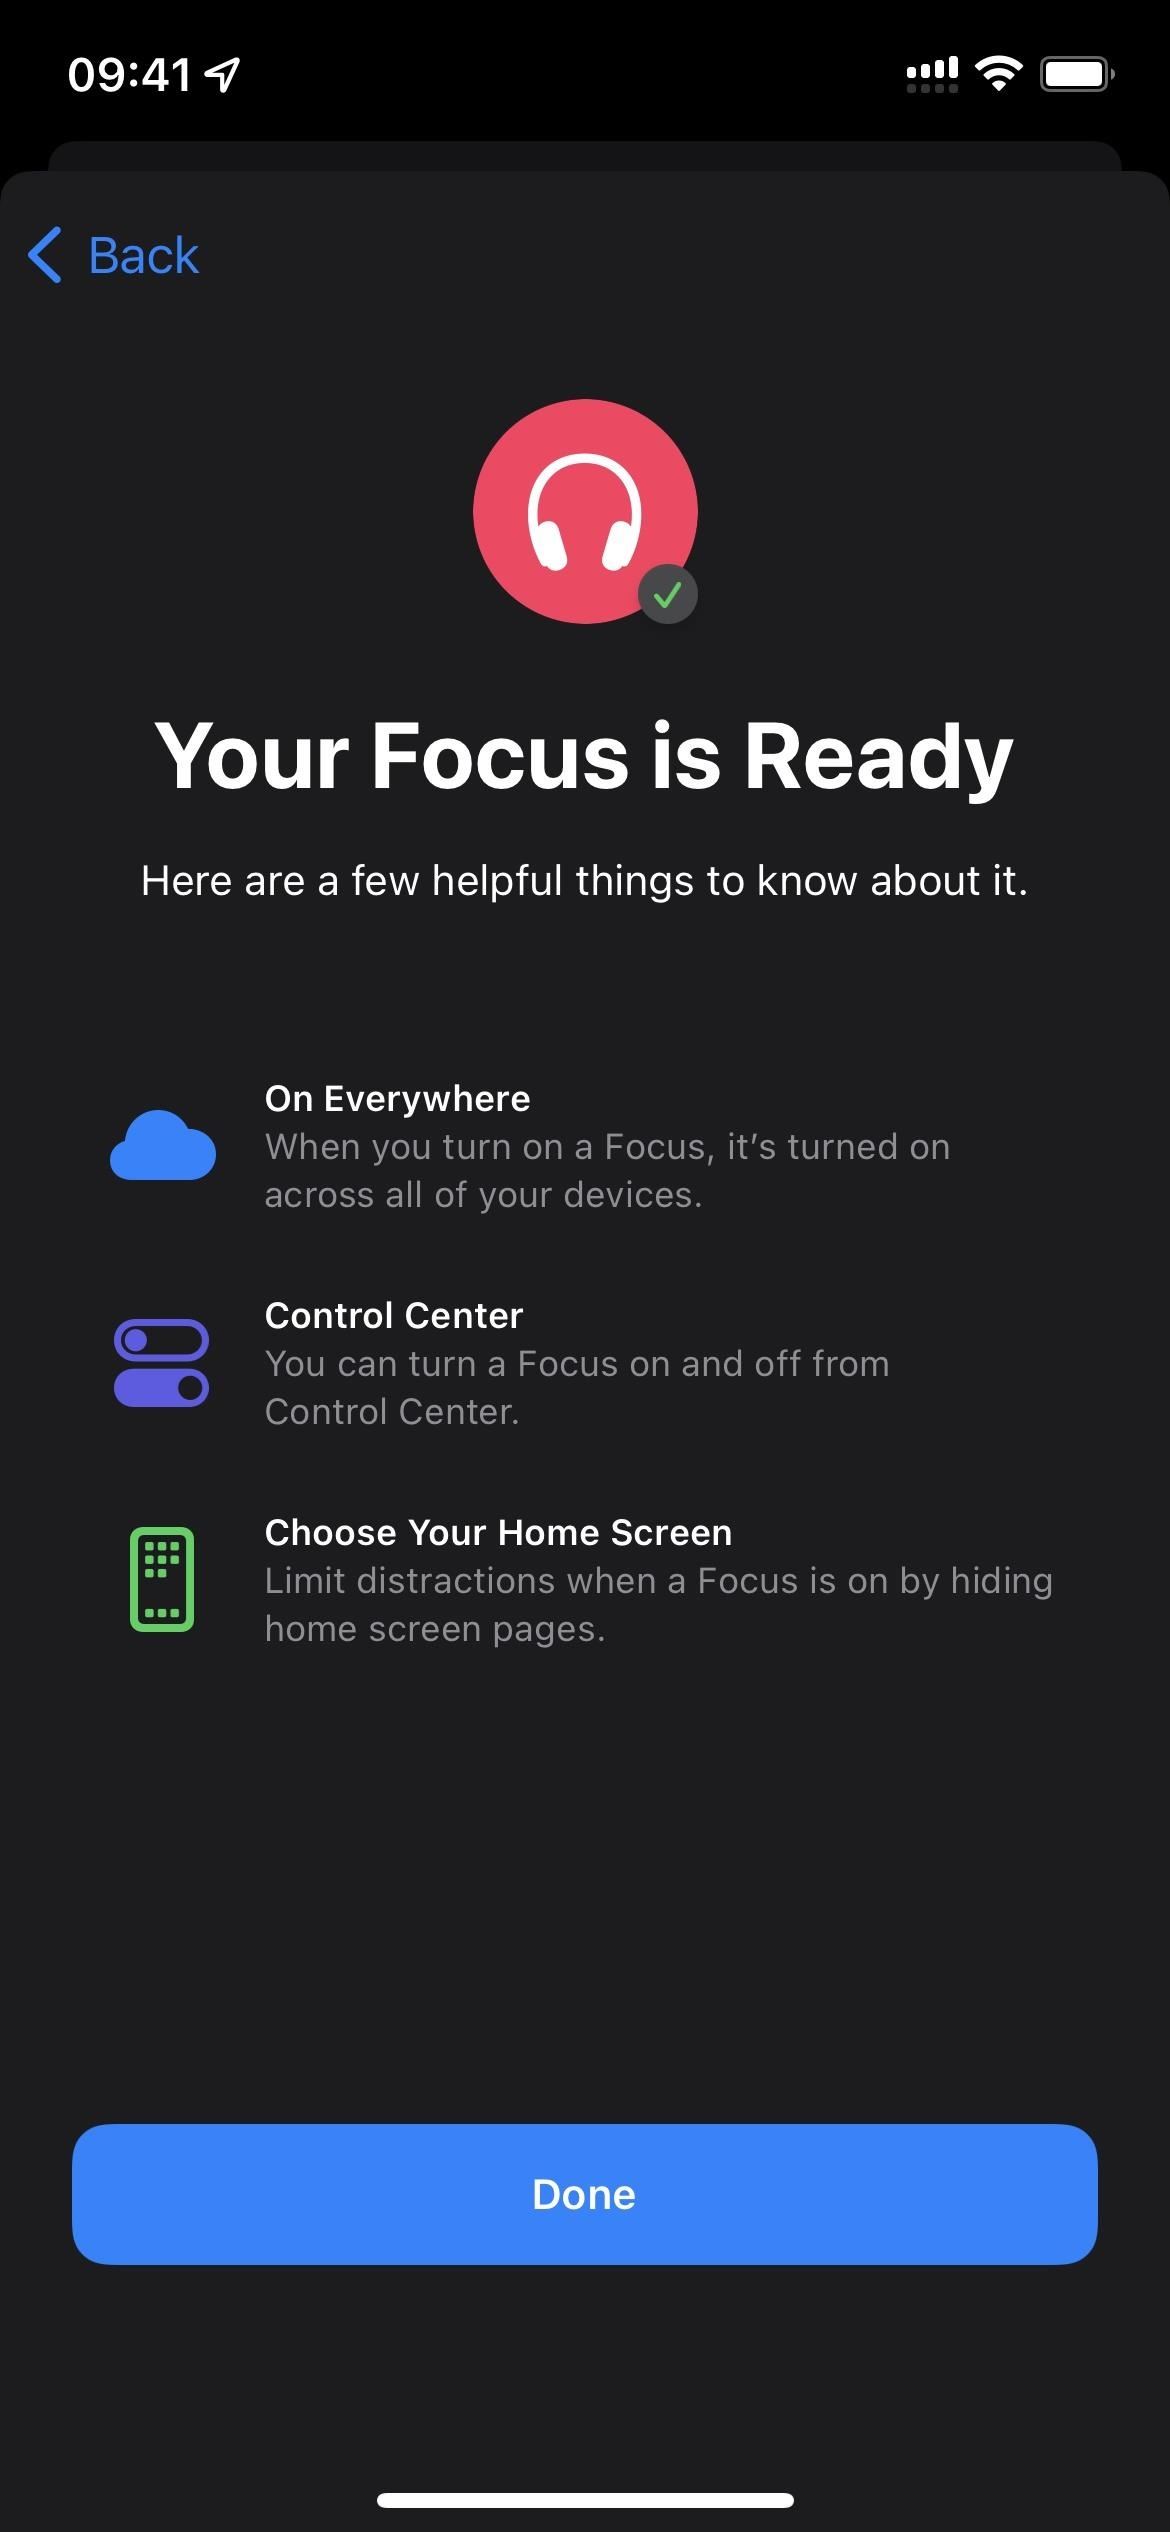
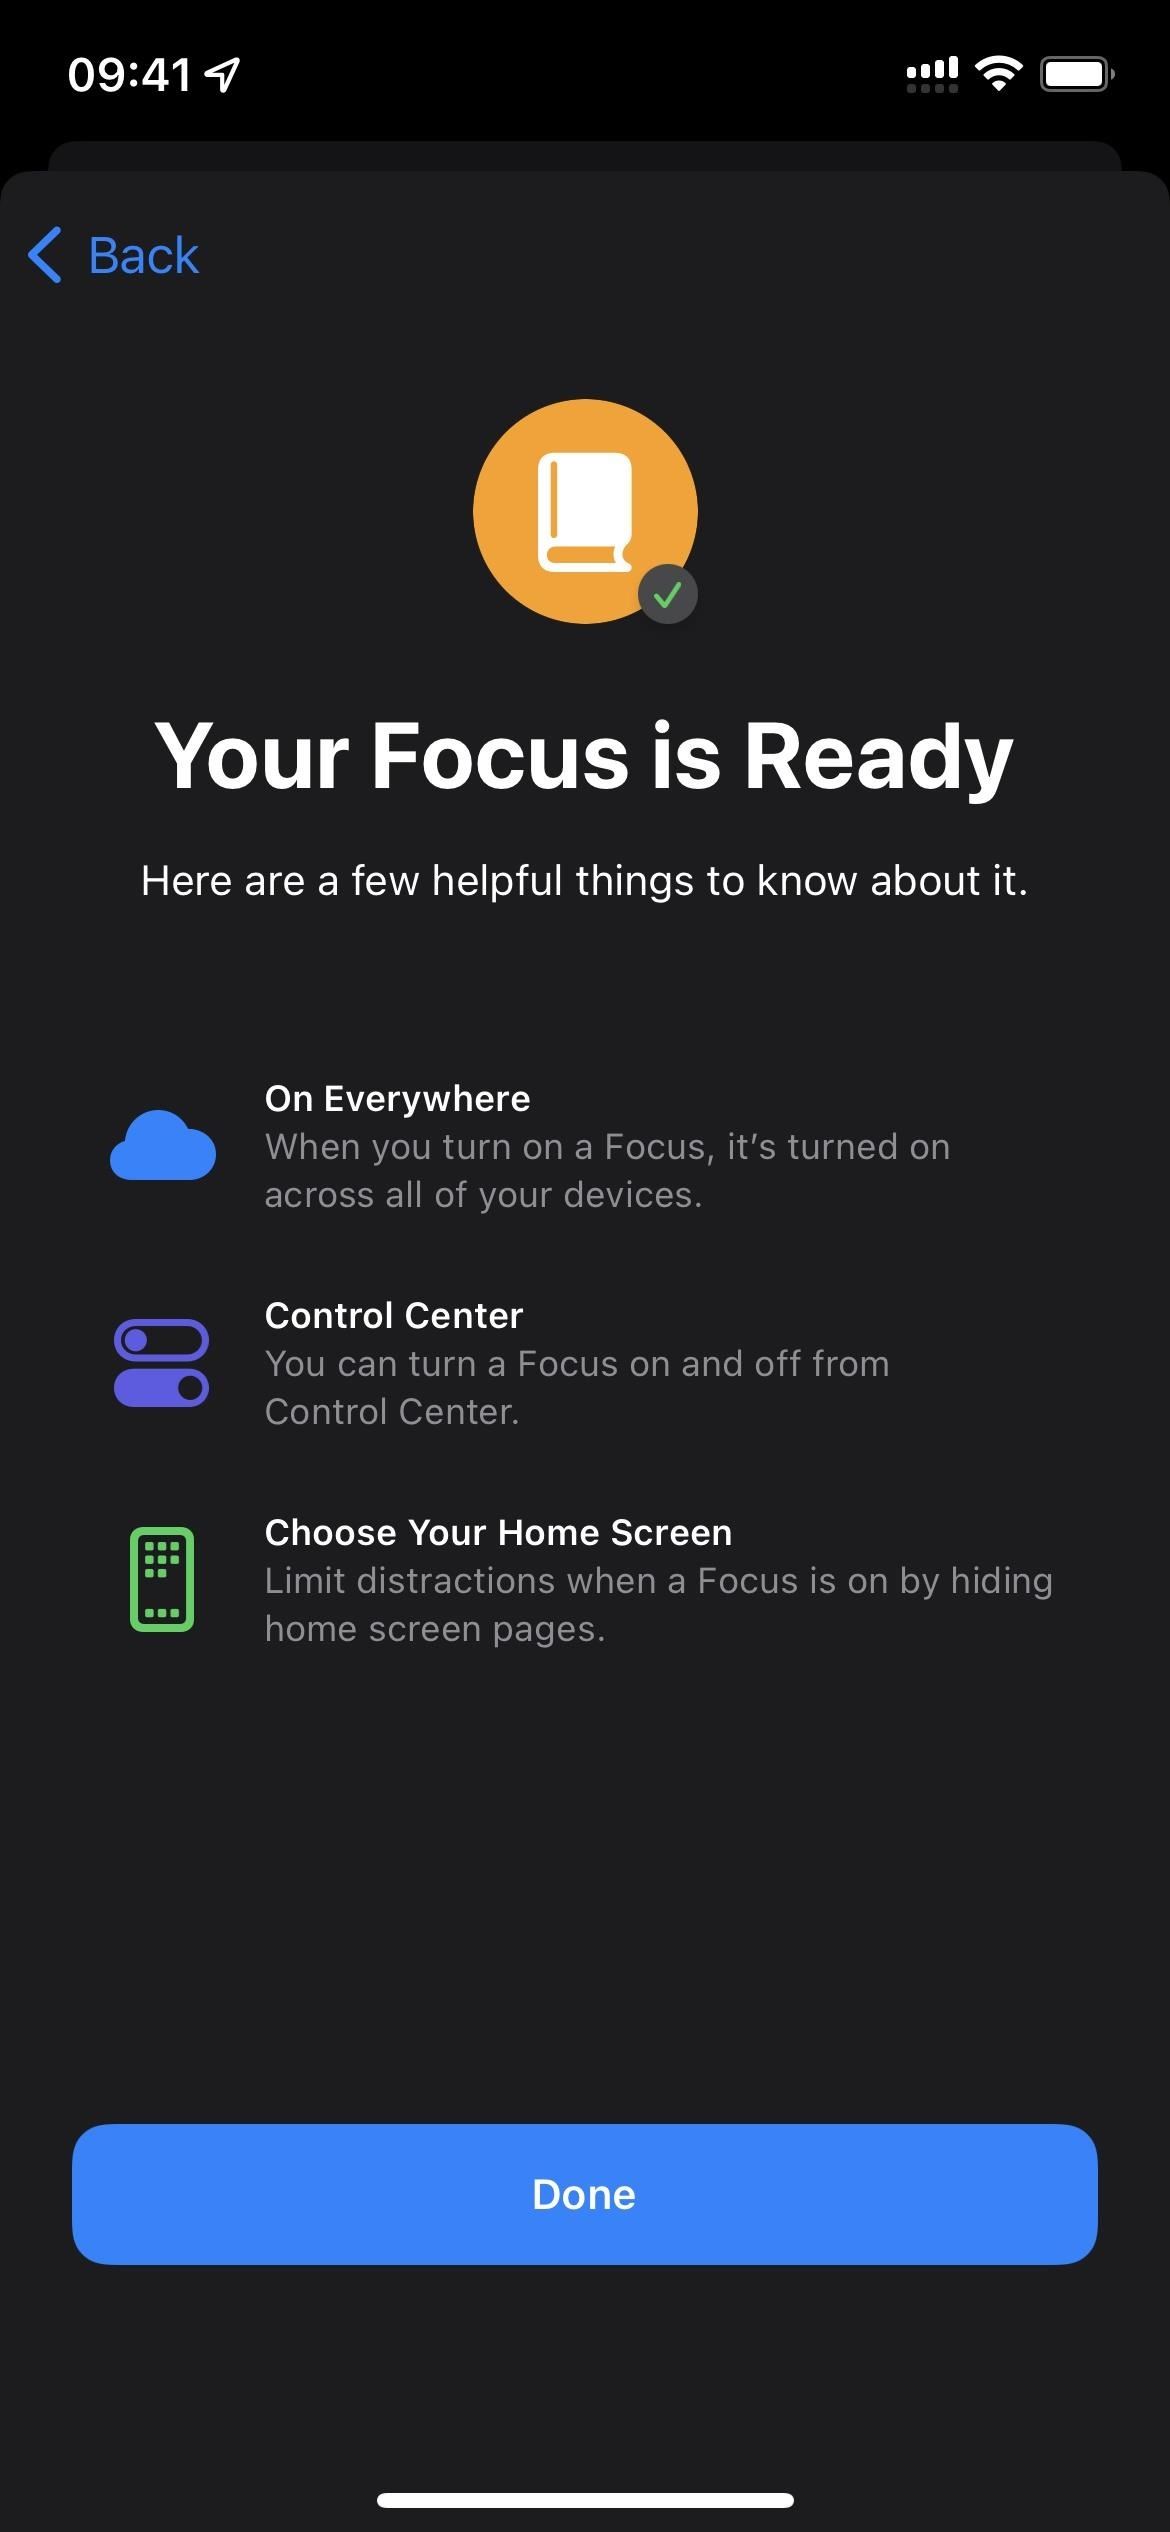
The next page will tell you that your focus is ready and will show you some basic information about how the focus works. Click the Done button at the bottom to see more settings for the focus you just made.
Create focus from a template
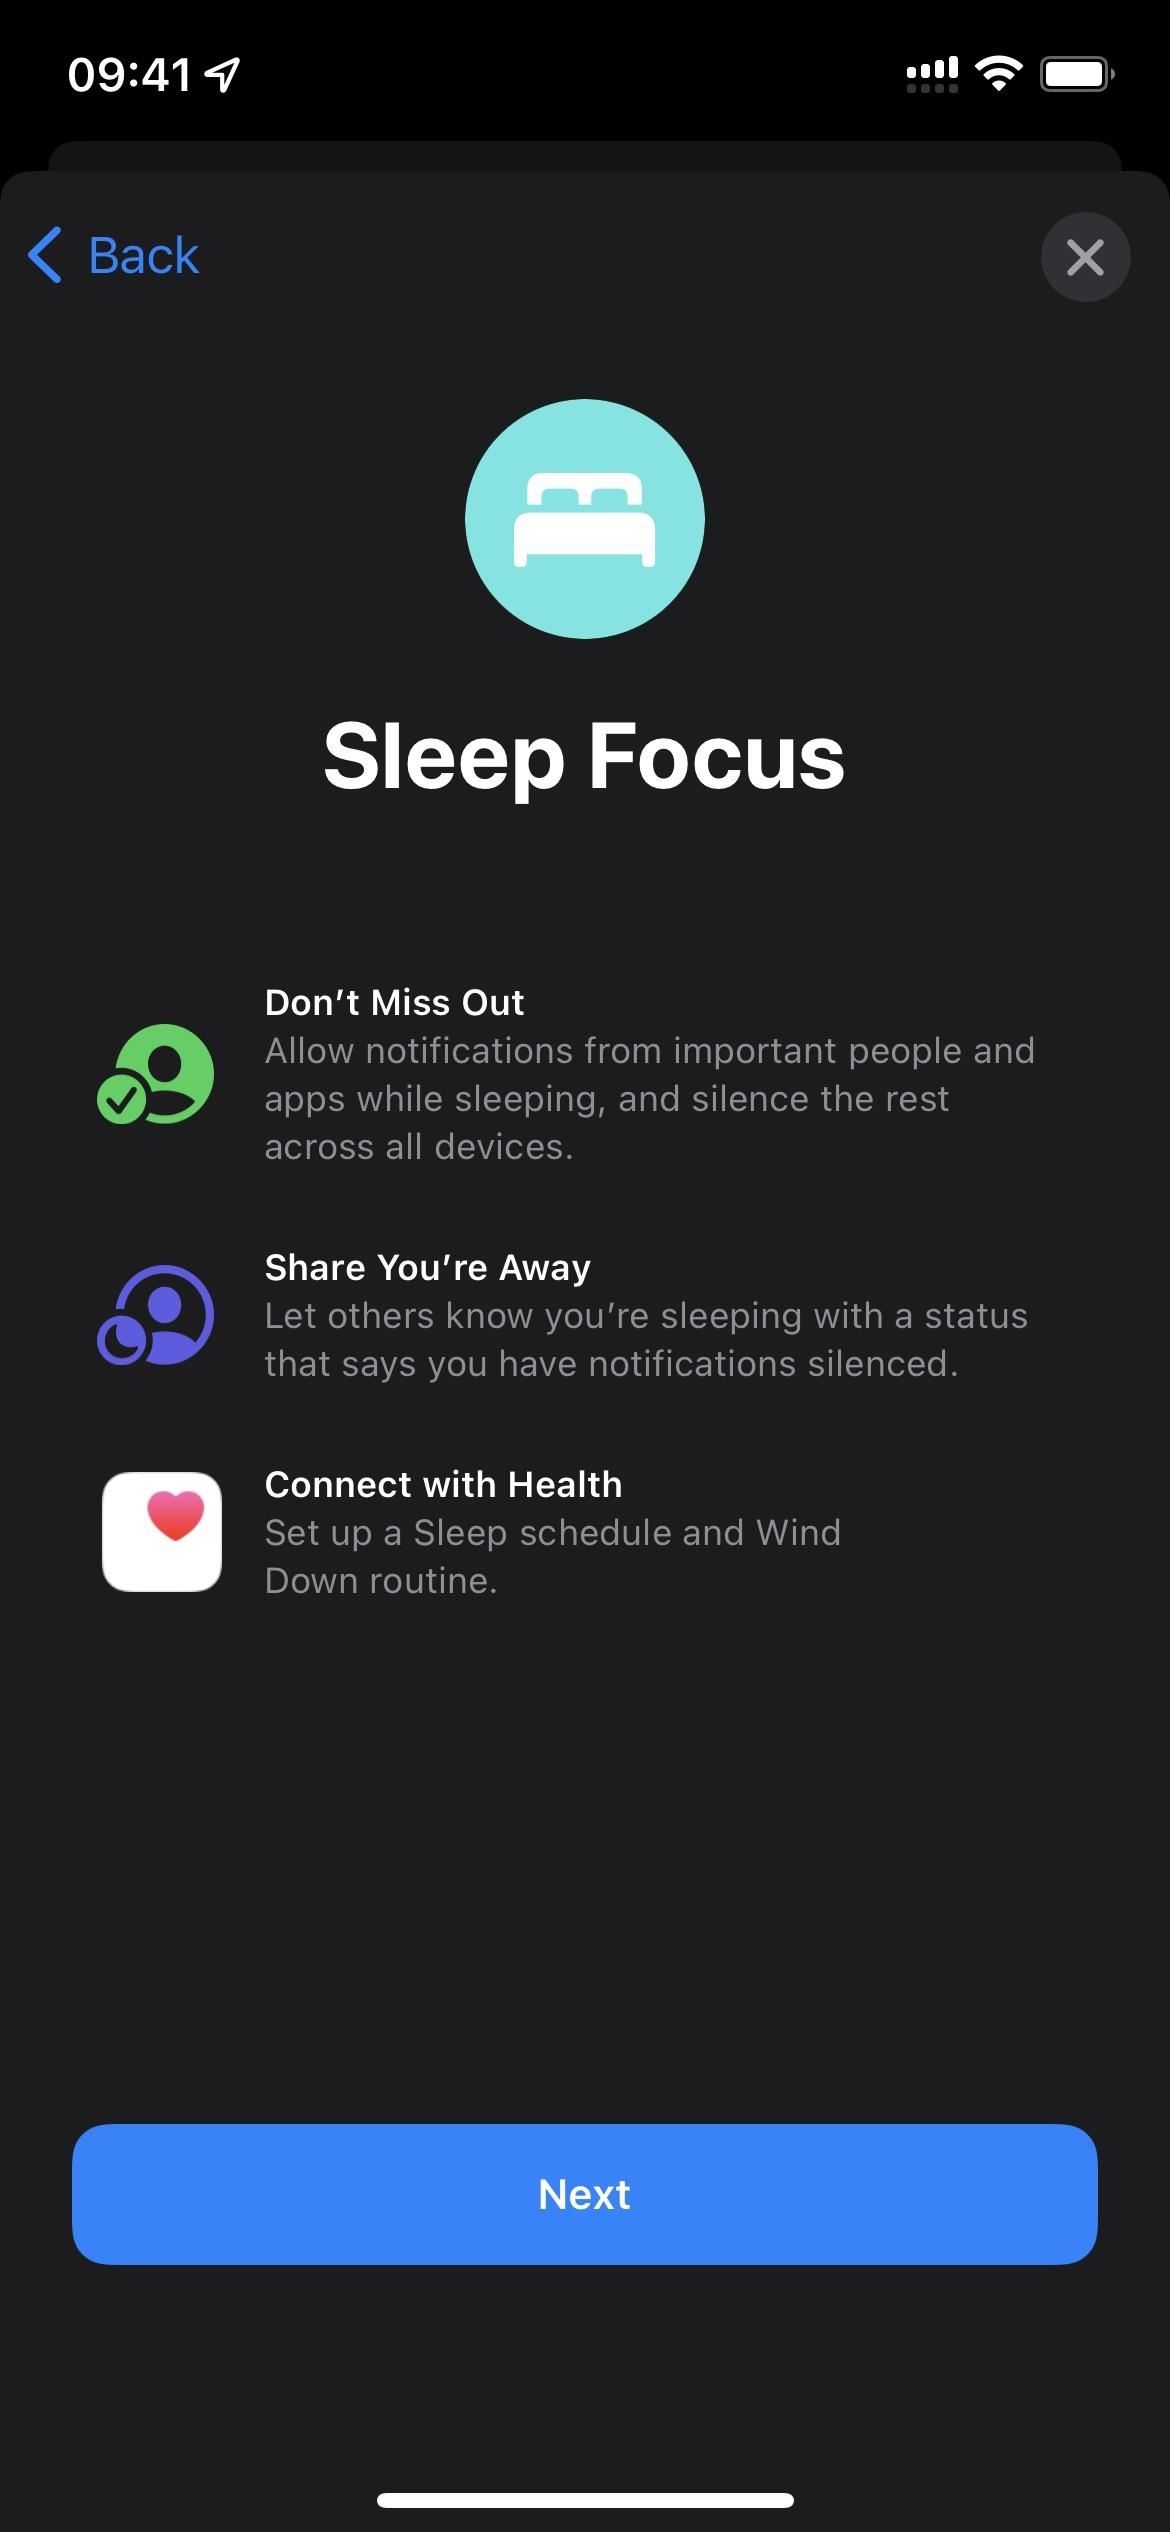
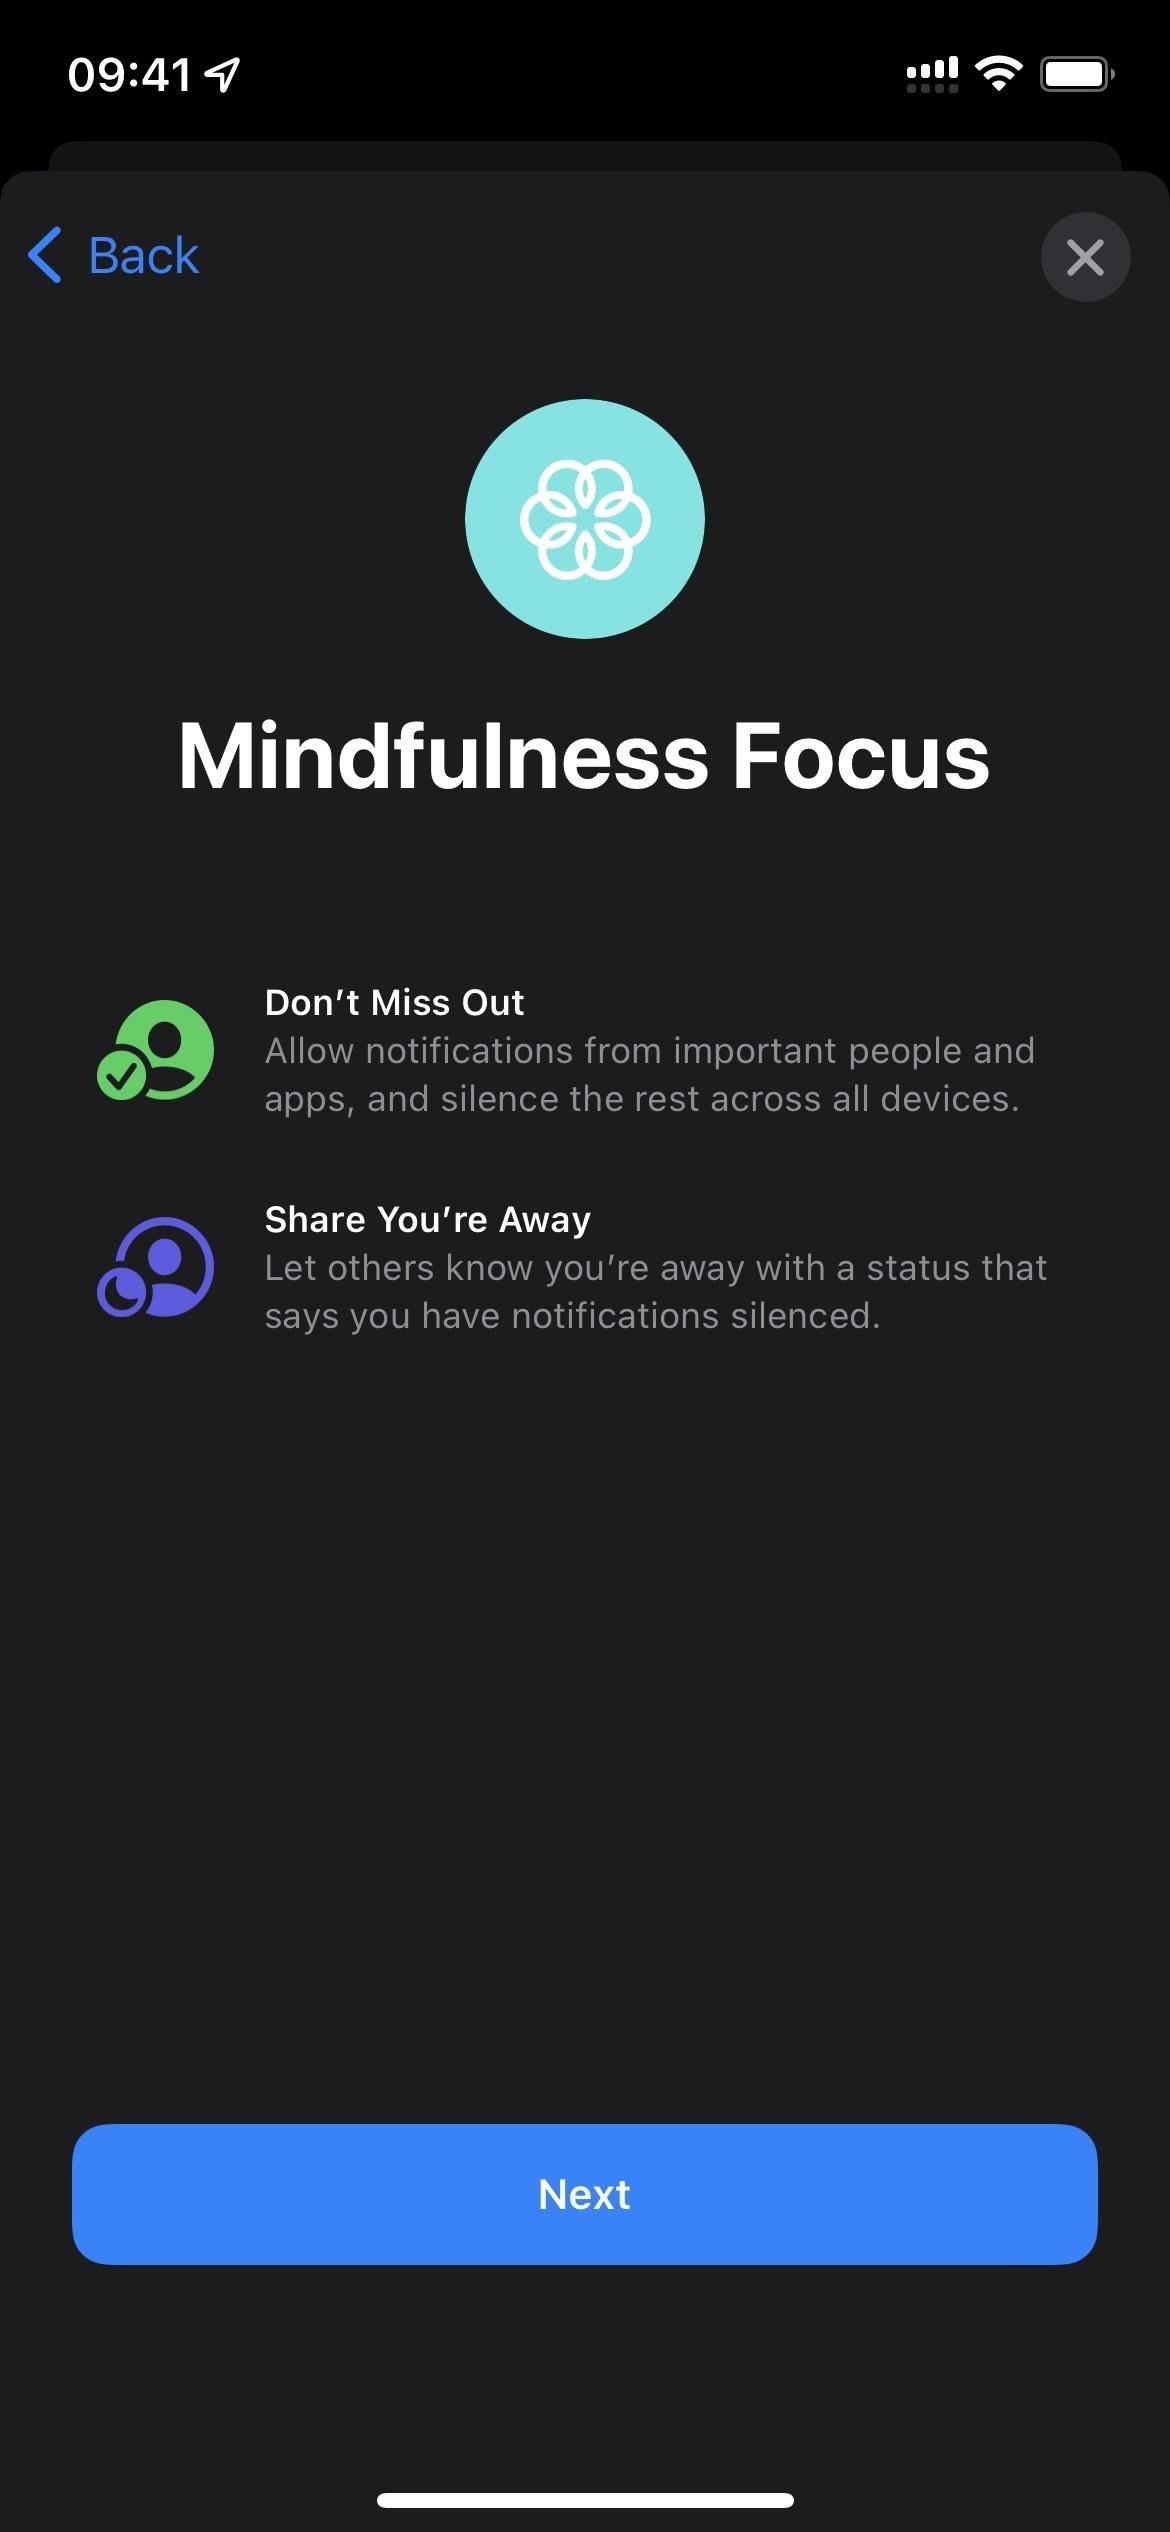
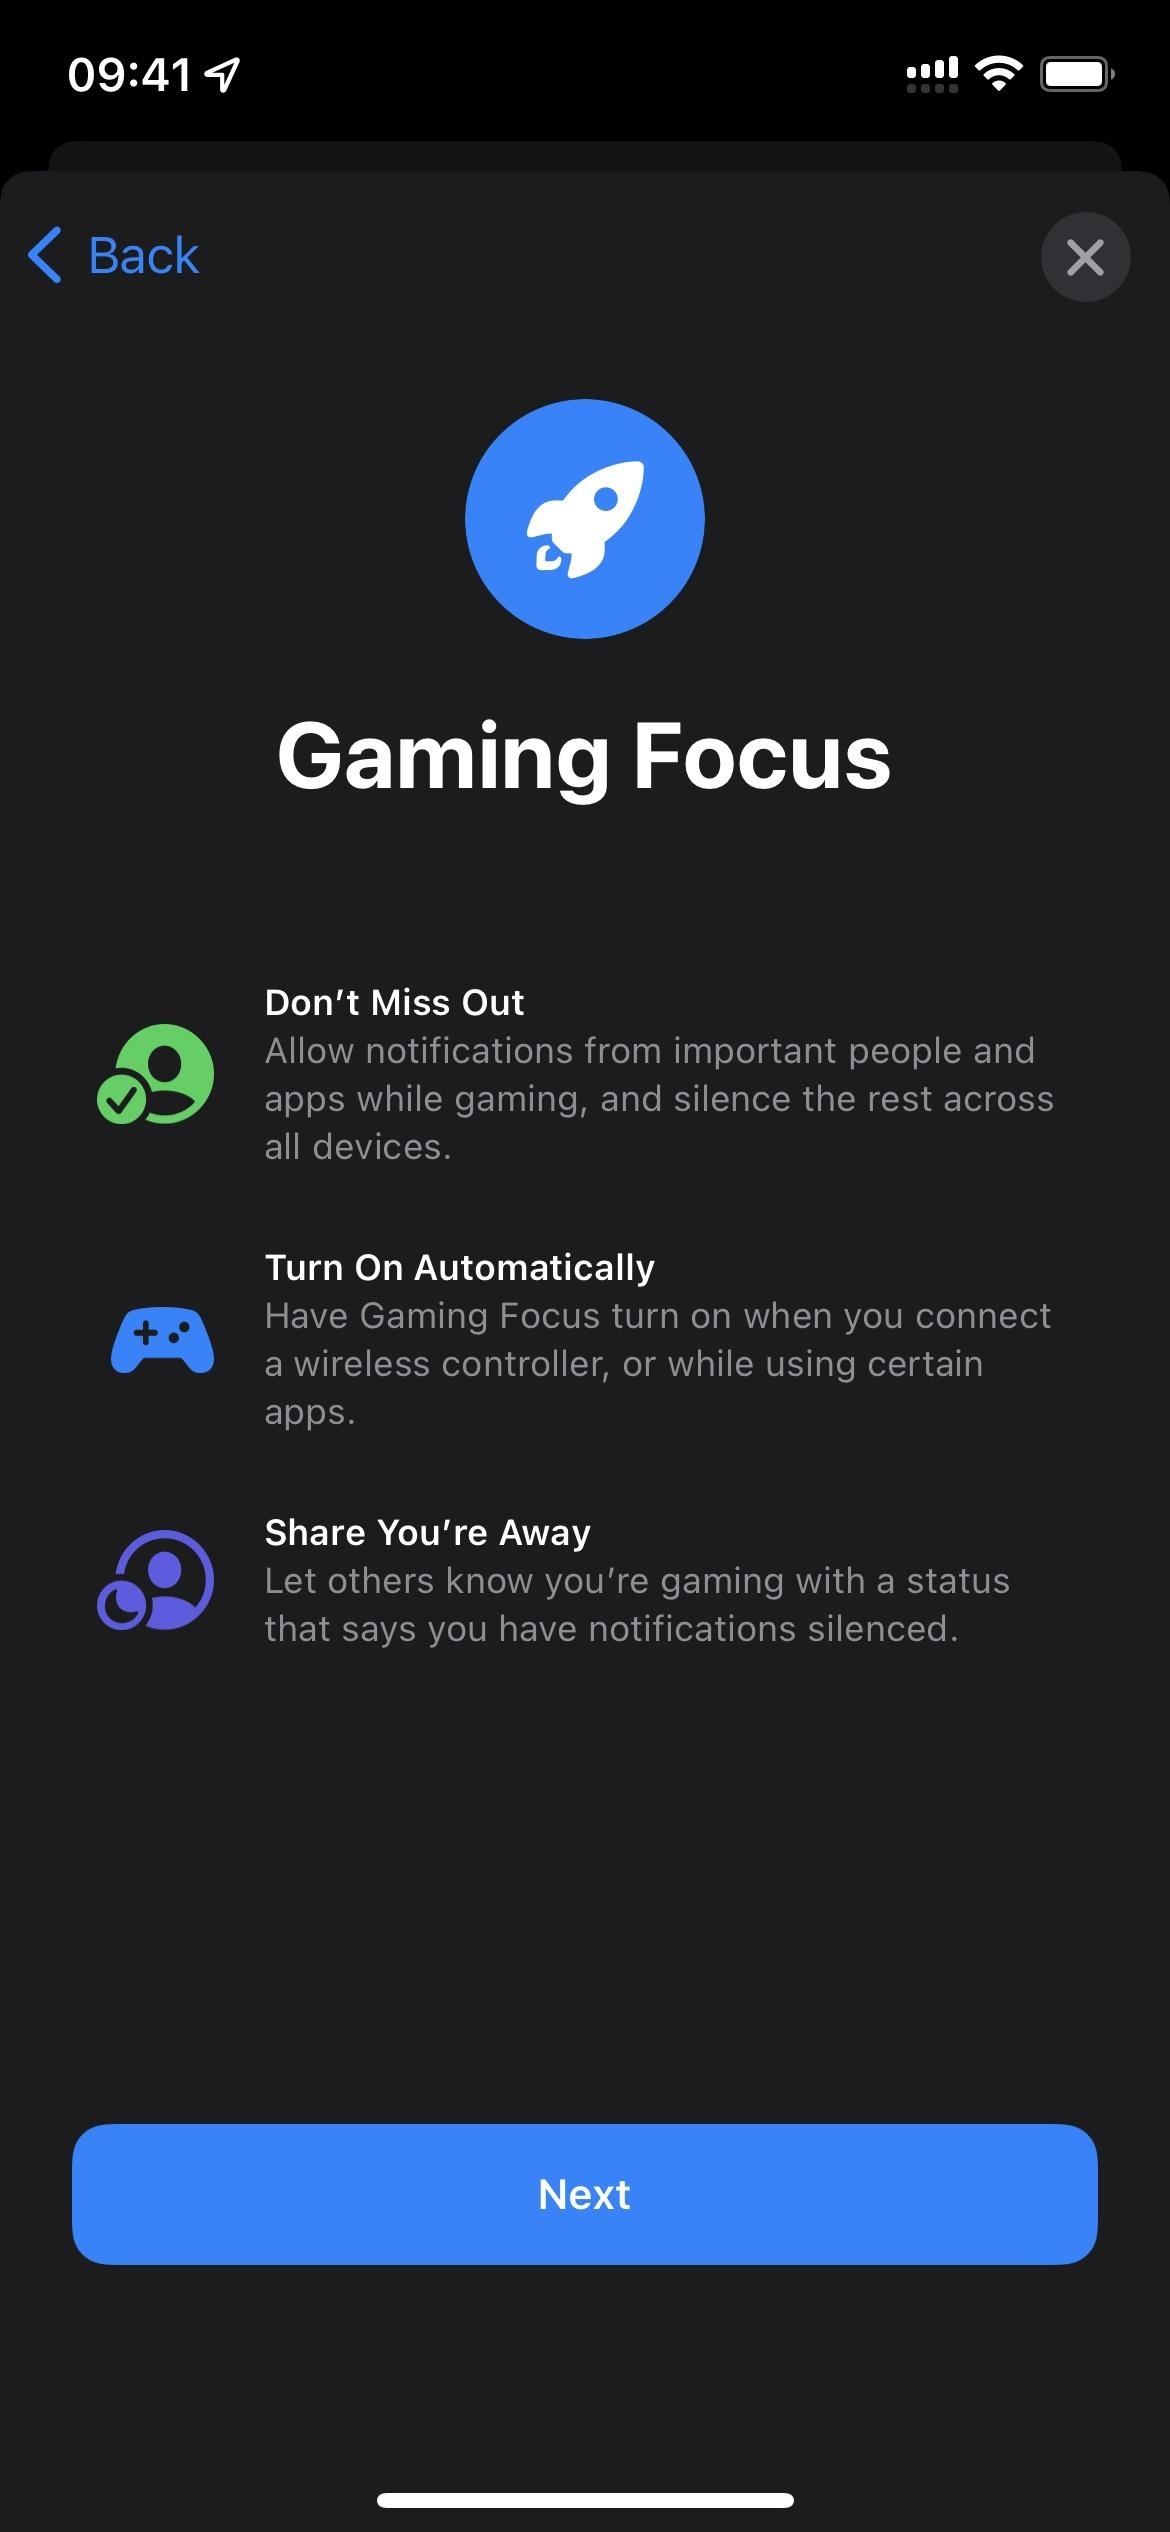
Creating a focus state using one of Apple’s pre-built templates works similarly to setting a custom focus. However, some templates have unique characteristics specific to this category, such as Apple Health integration in Fitness and Sleep states.
Choose a template
After clicking on the plus sign (+), select the desired template from the list to start a new focus. You will see a splash screen that gives useful information about the focus you have selected. Click “Next”to continue.
Allow notifications (varies by template)
You will then access the same screens as in Custom Setting: “Allowed Users for Notifications”and then “Allowed Apps for Notifications”with the same options as before. See the custom steps above for more details on this. Note, however, that the Driving focus will only let you select people, not apps, because it wants to minimize distractions when you’re driving.
Choose whether to allow it to work automatically or not (depends on the template)
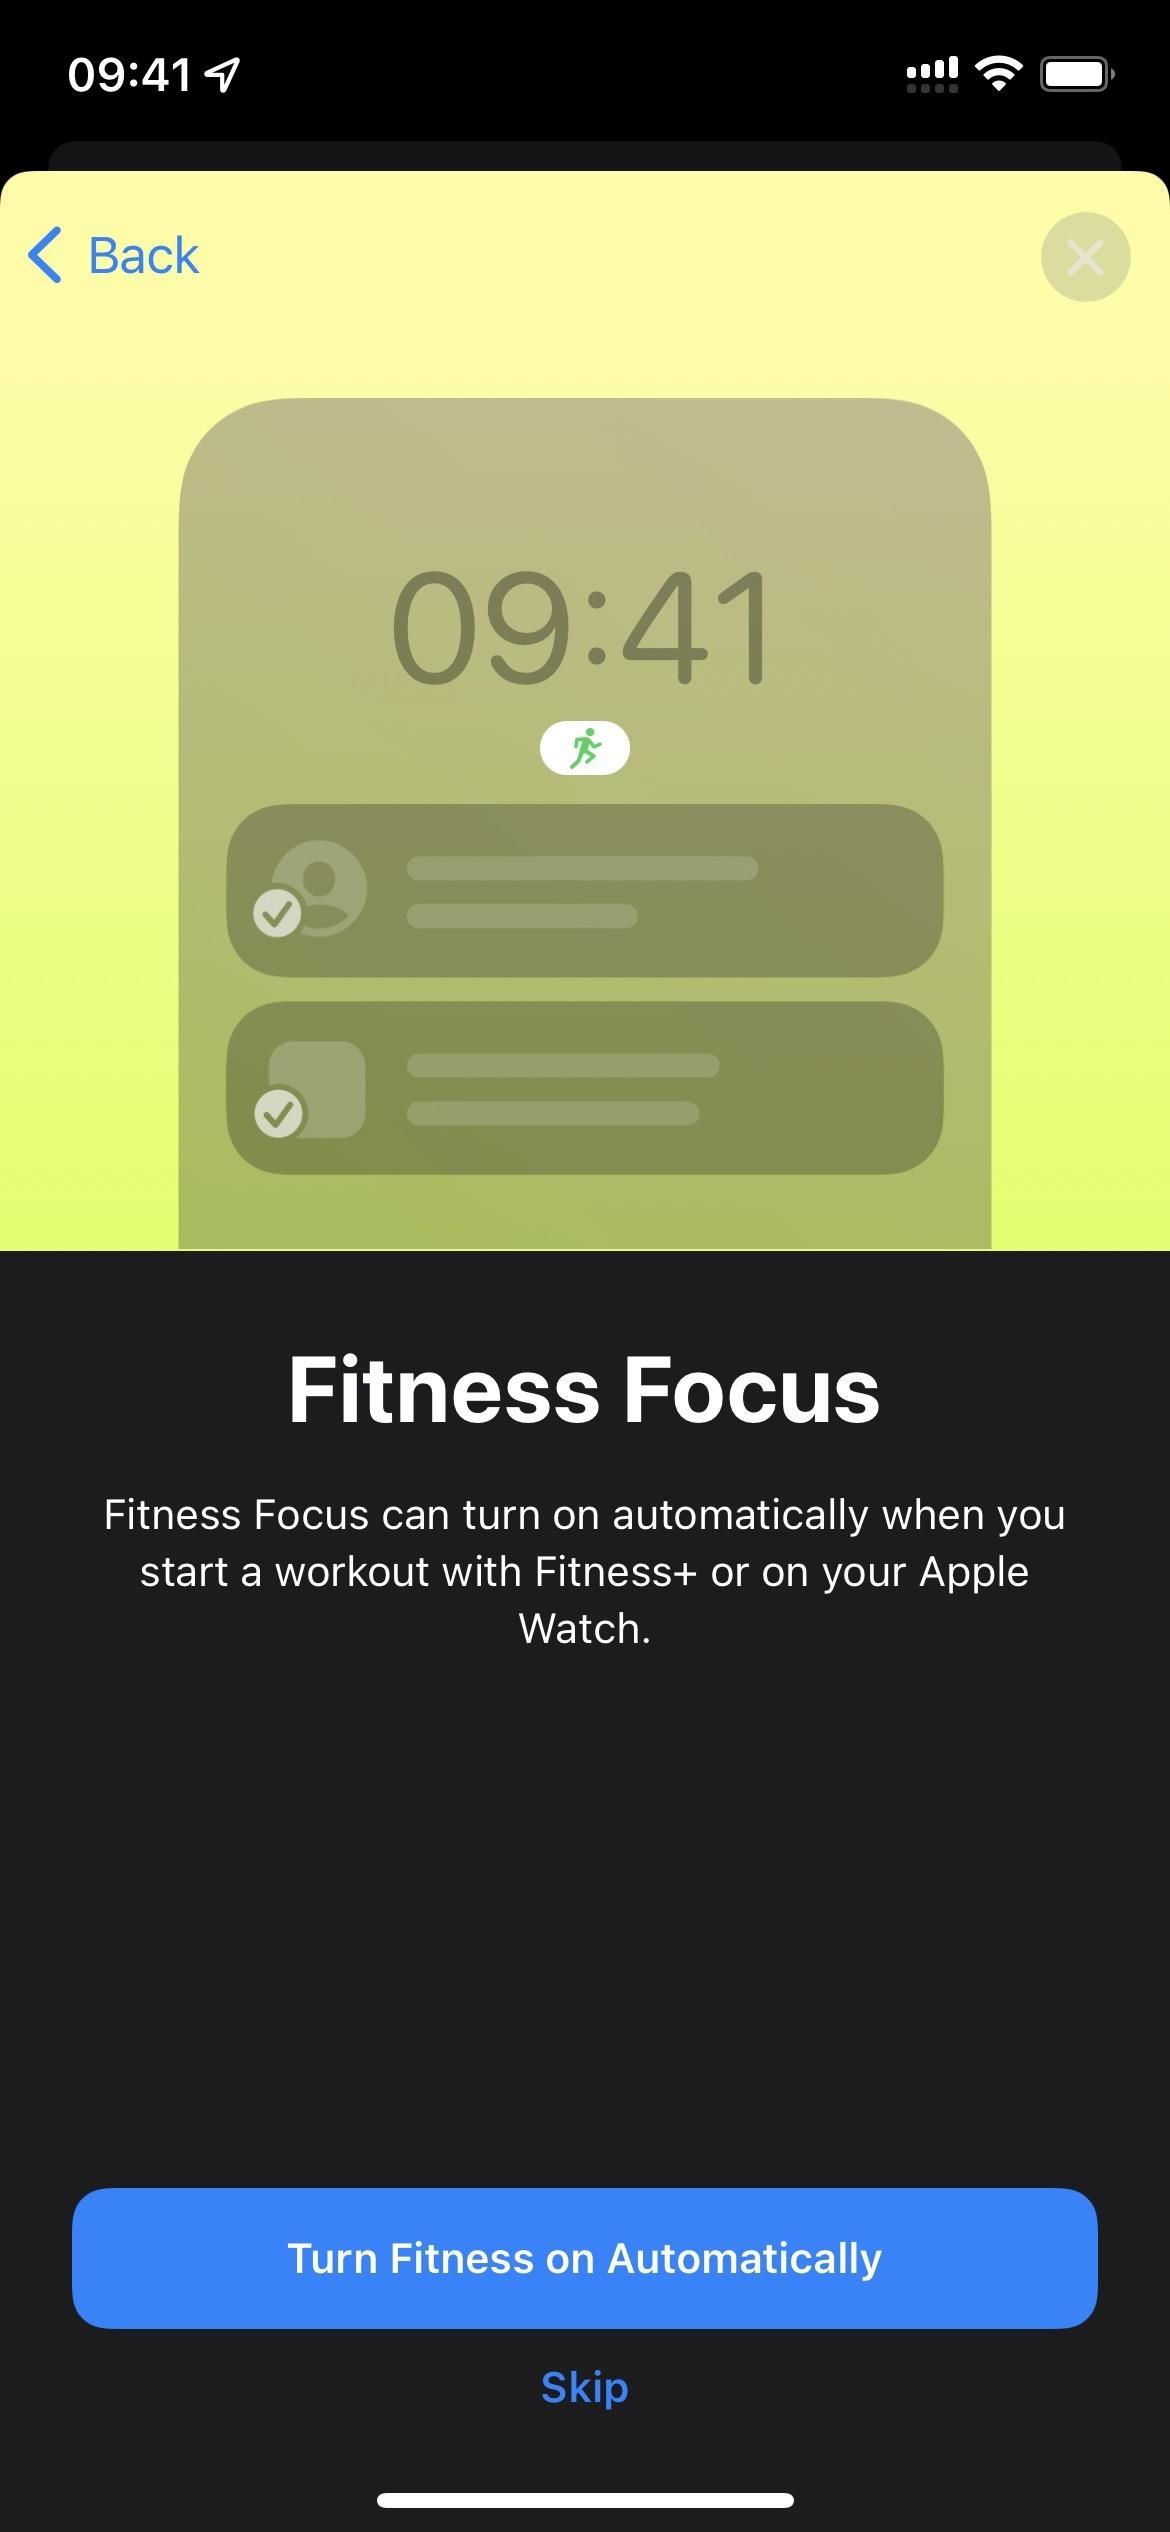
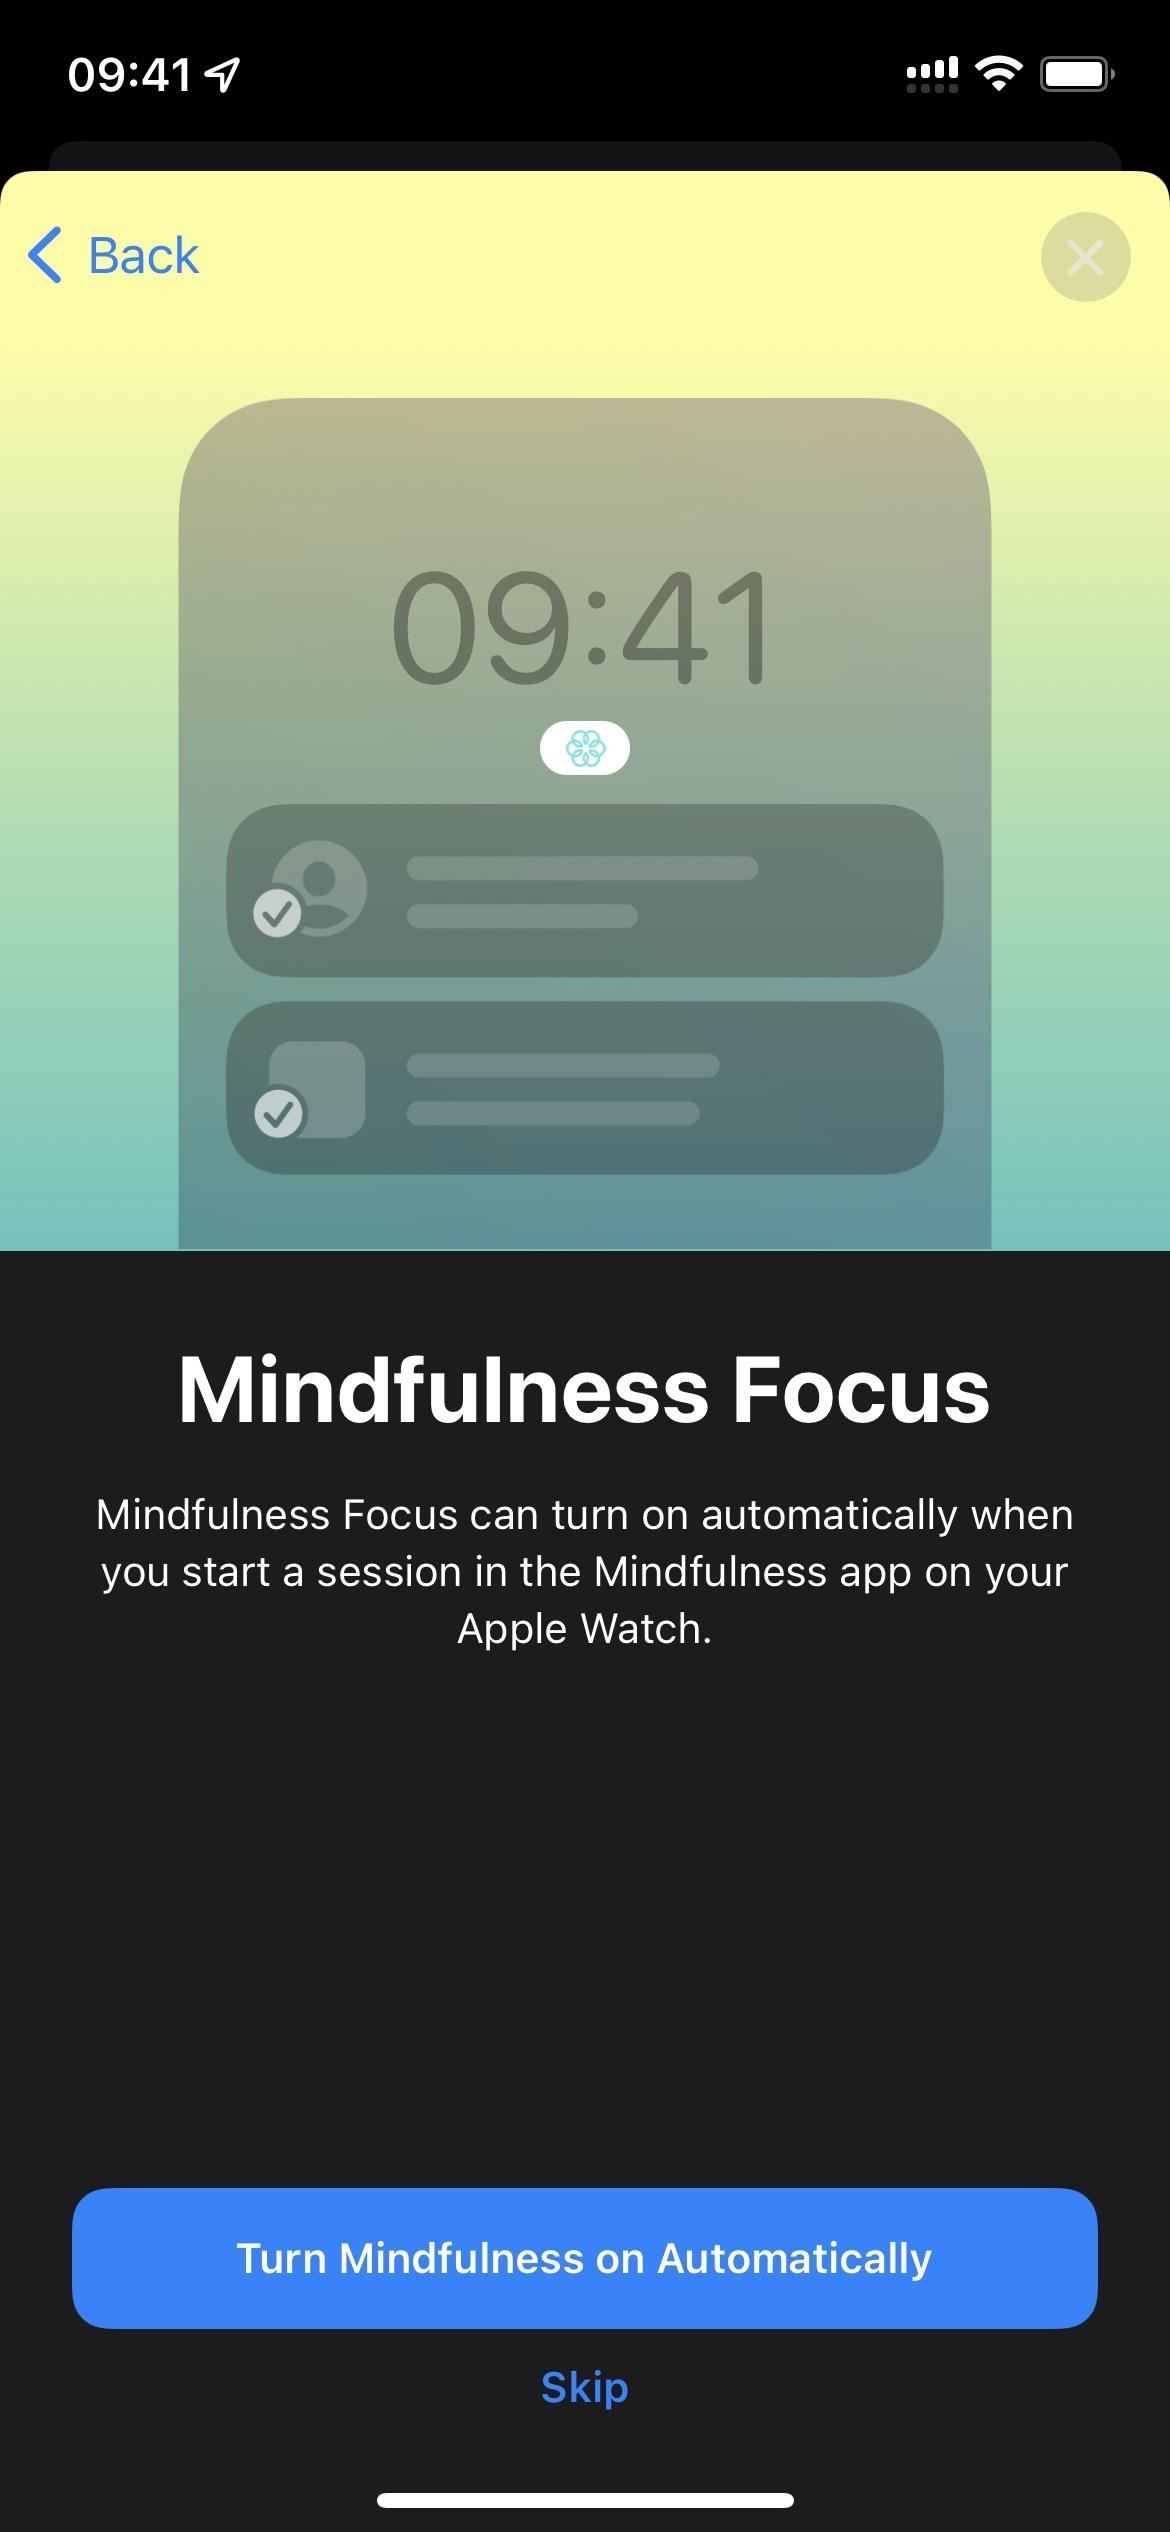
After clicking “Allow”, “Allow only with time”or “Do not allow”for your notifications, some templates will ask you if you want to enable focus automatically. These templates include Driving, Fitness, Games, and Mindfulness.

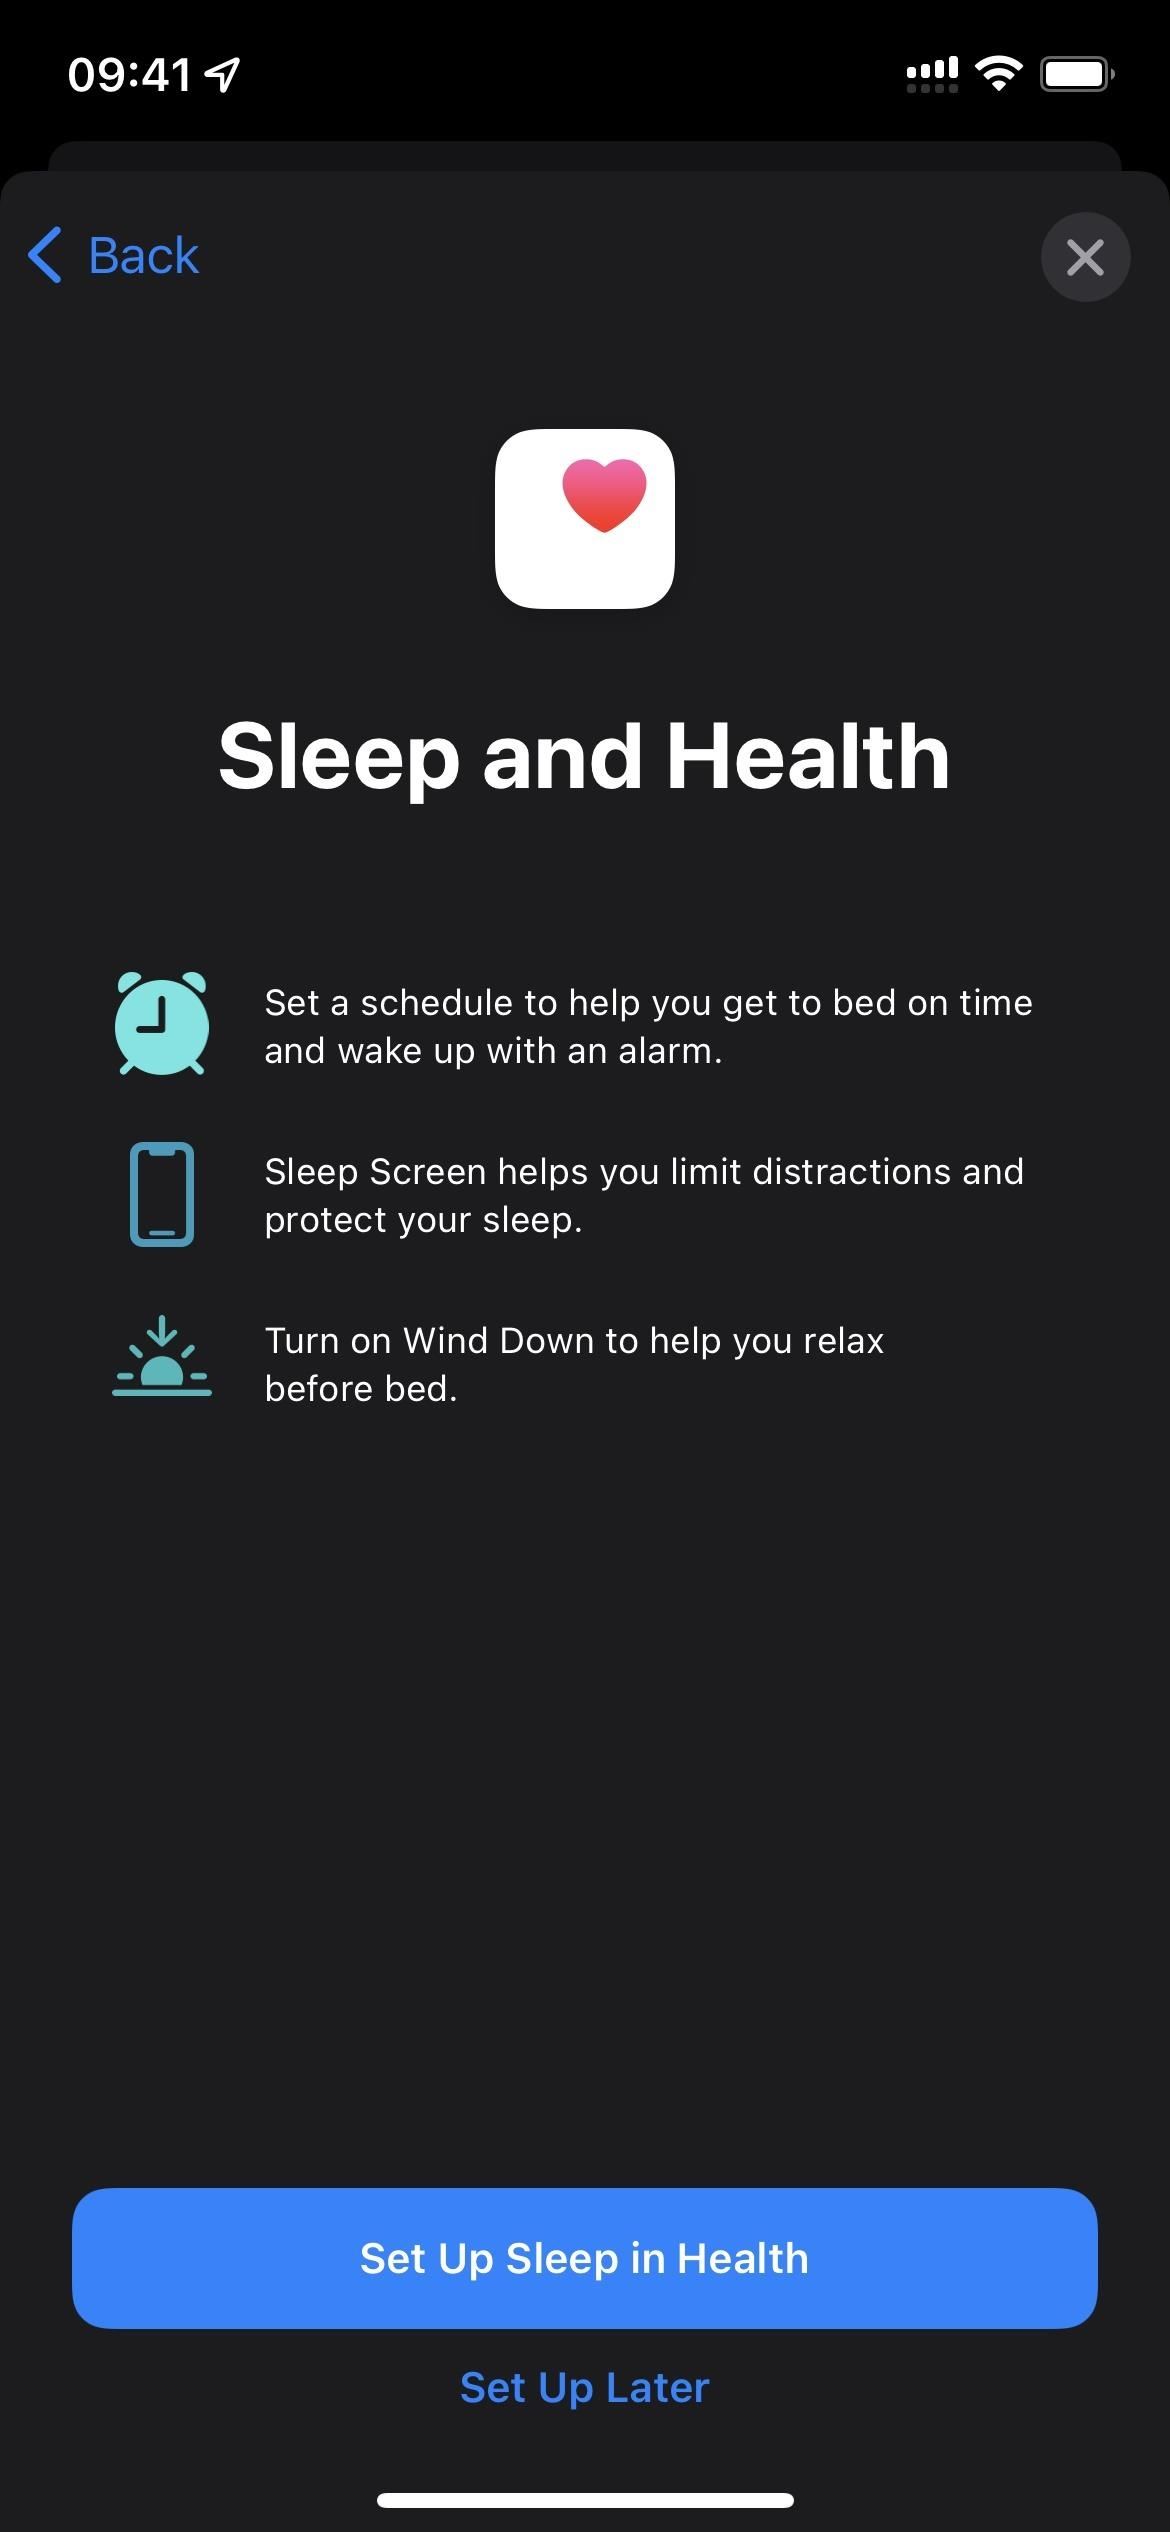
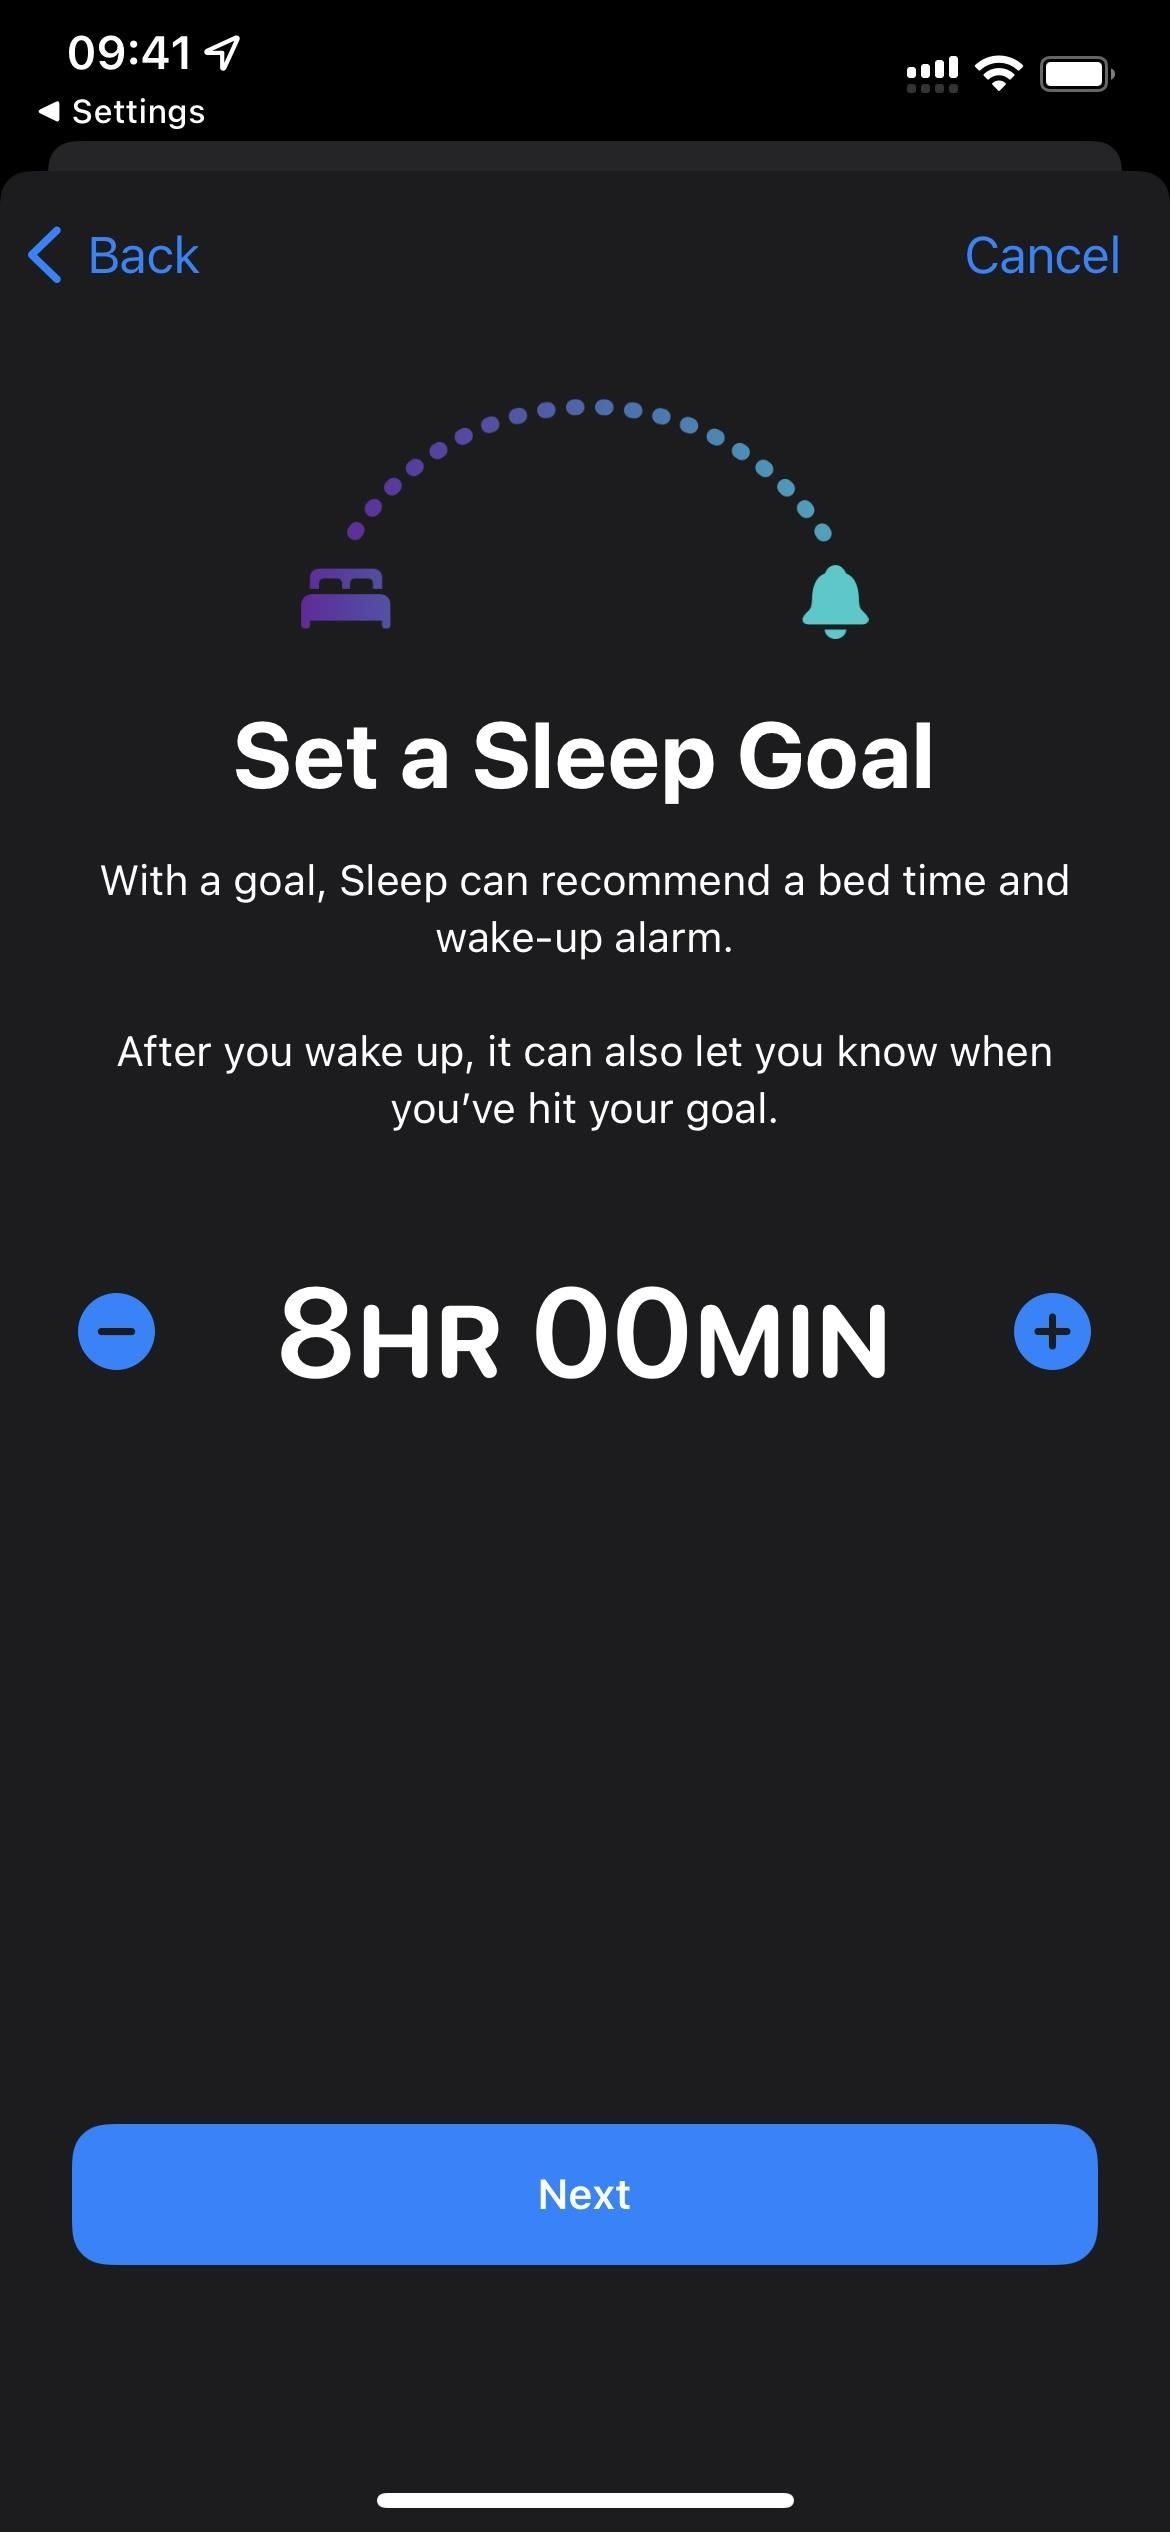
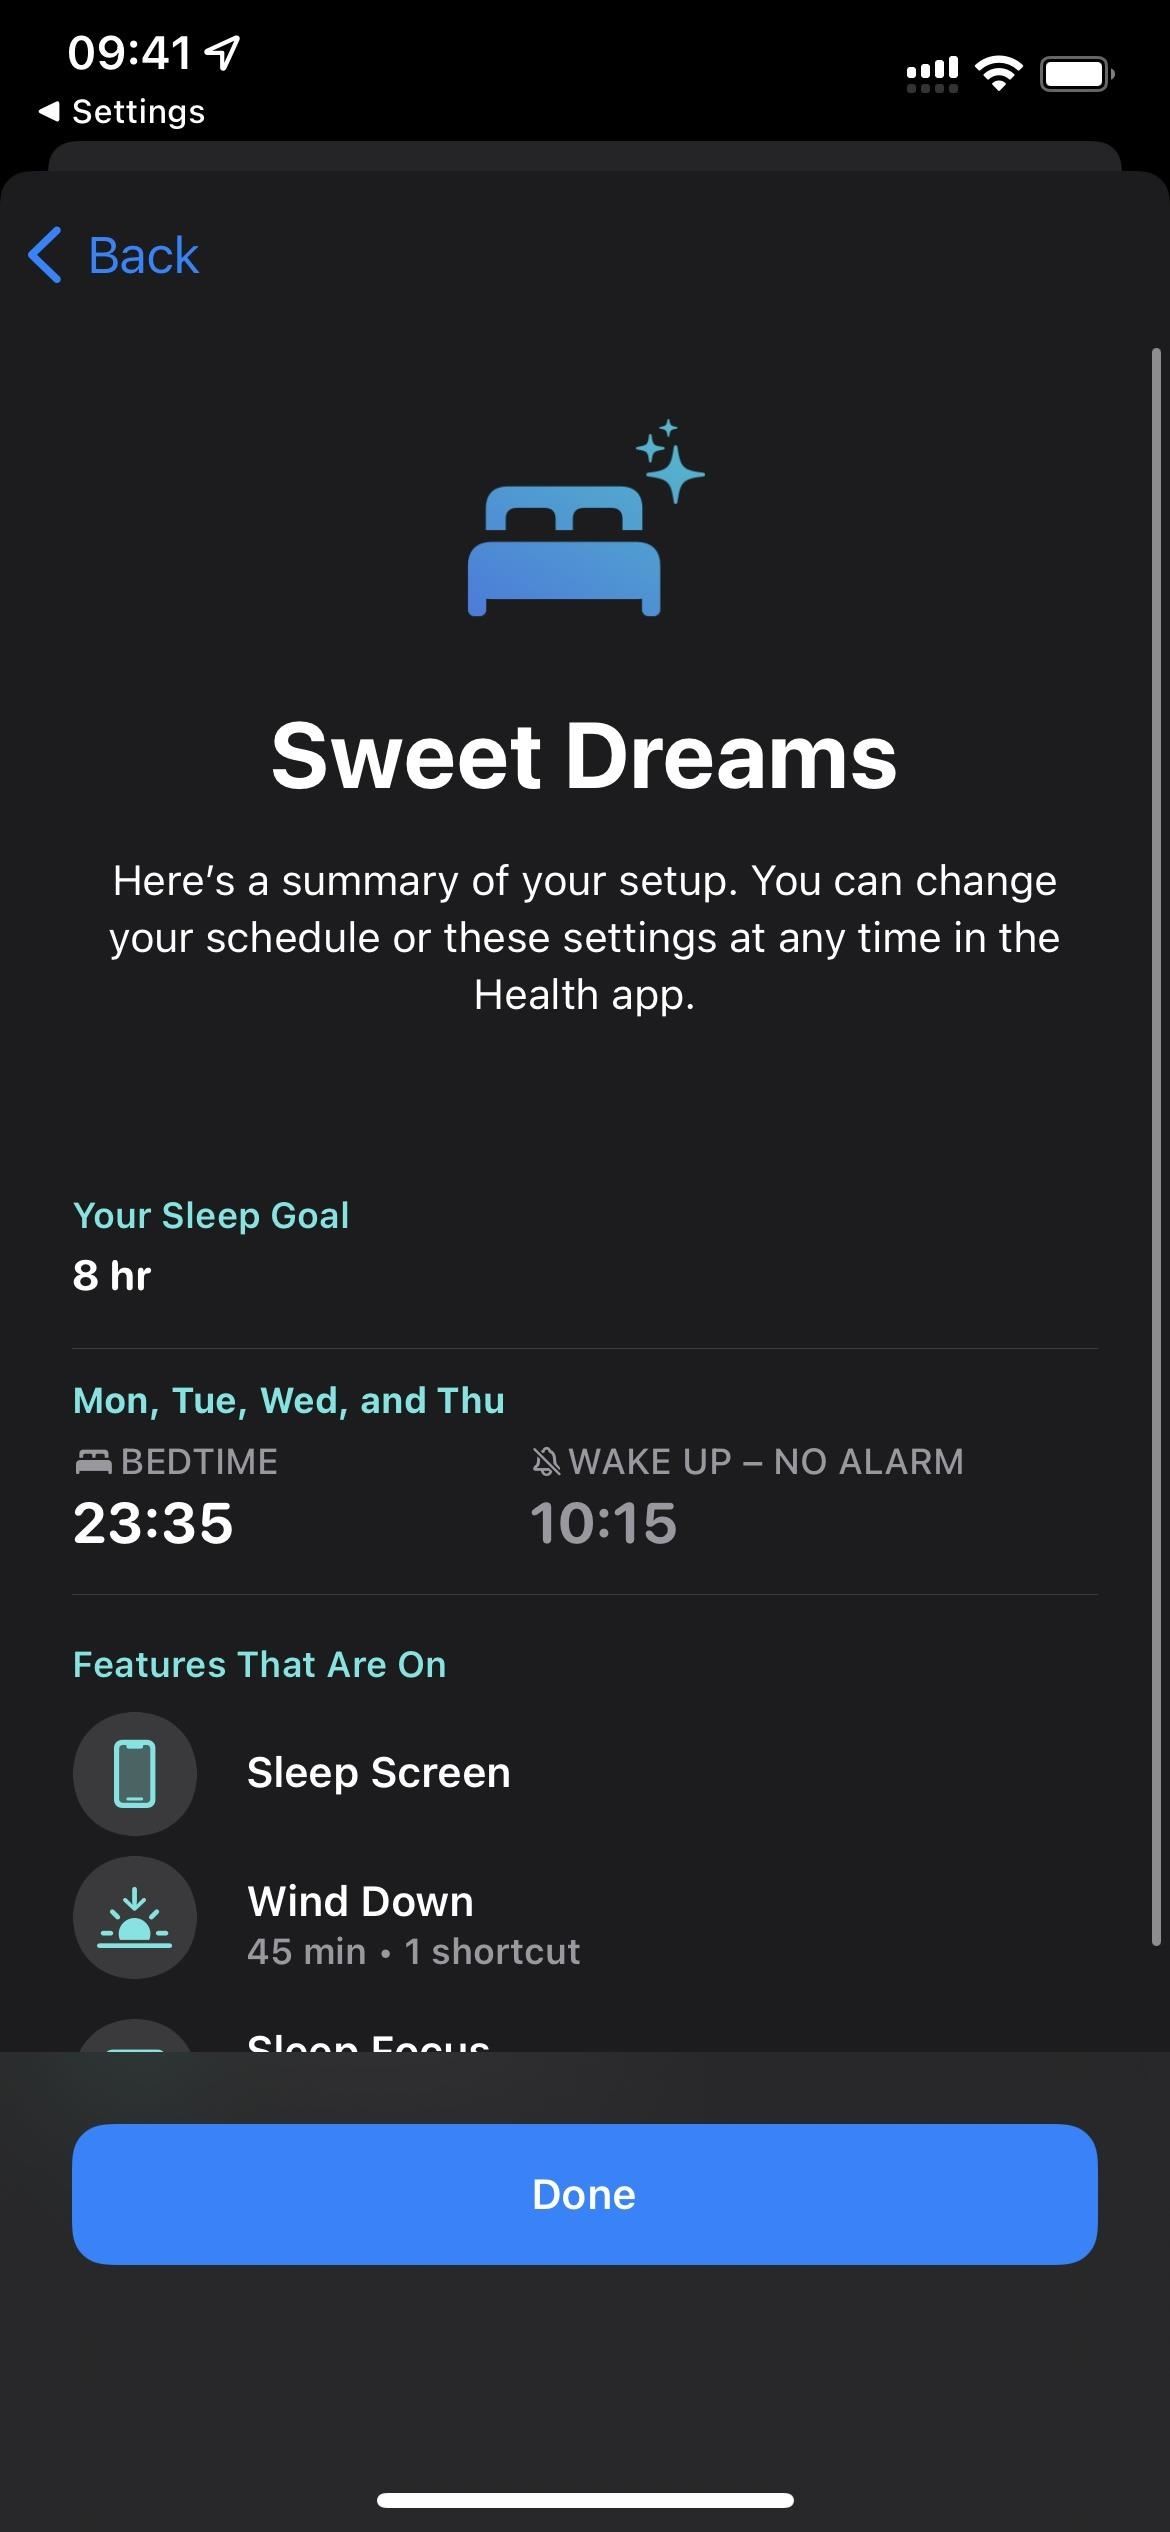
Customize sleep mode in healthy state (sleep pattern only)
For the Sleep template, instead of the auto focus on and off screen, you’ll see Sleep and Health work together, with the “Adjust Healthy Sleep”option to open Health or “Adjust Later”to continue creating focus. If you already have a sleep schedule set up, you won’t see this page when creating a focus.
Save your new focus and manage it
The next page will tell you that your focus is ready and will show you some basic information about how the focus works. Click the Done button at the bottom to see more settings for the focus you just made.

Customize Other Options for Your Focuses
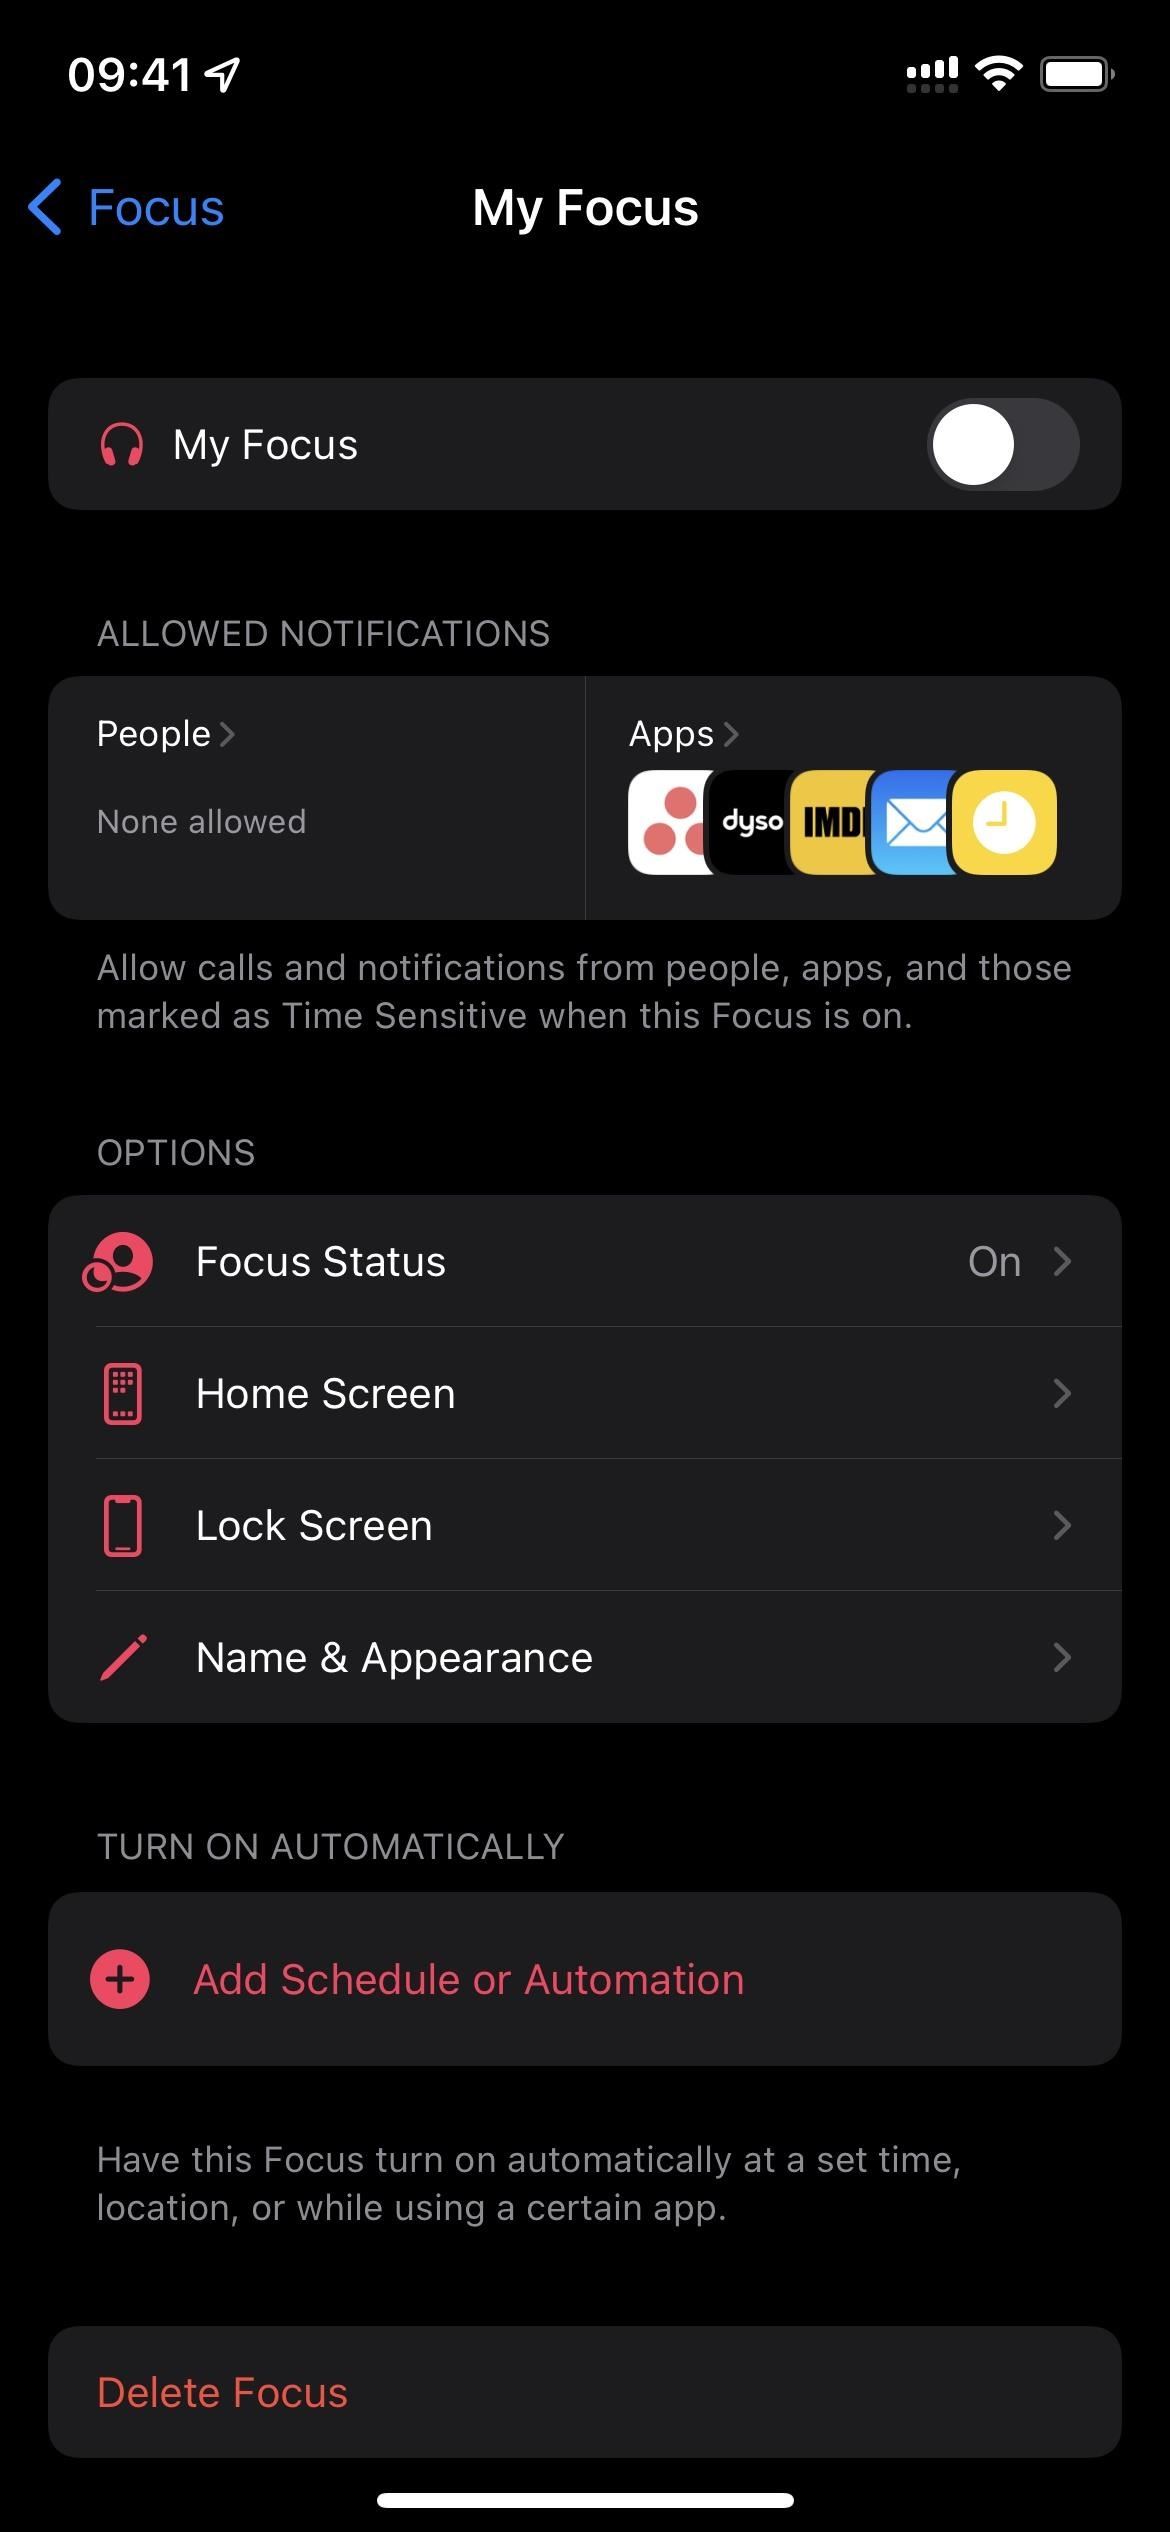
Whether it’s a template or a custom build, each trick provides more options after the initial setup. Once you hit “Done”on the last build screen for your focus, it will take you straight to those other settings for the focus you just created. You can also access these options from the main list in Settings -> Focus.
toggle switch
This allows you to manually enable or disable focus and applies to all focuses.

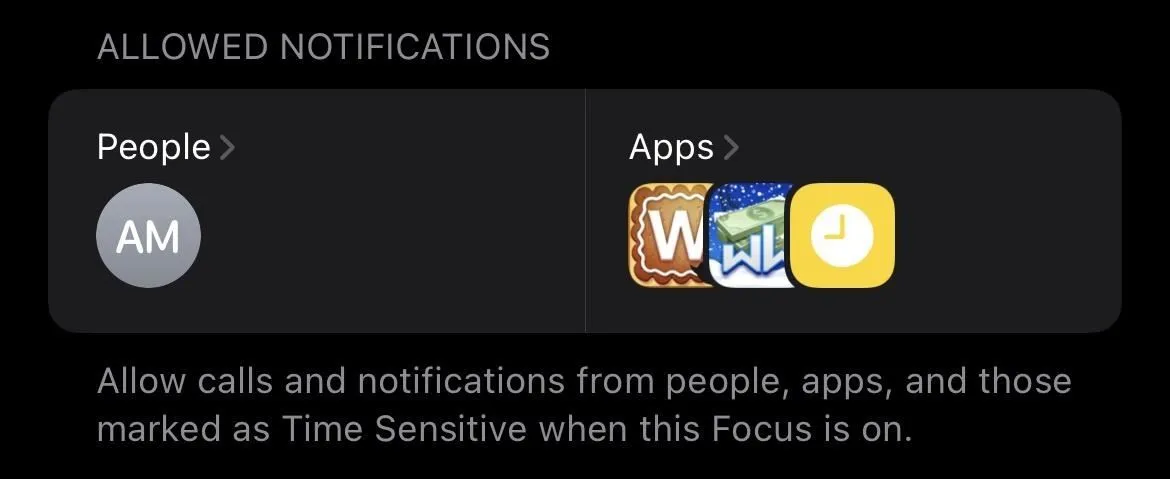
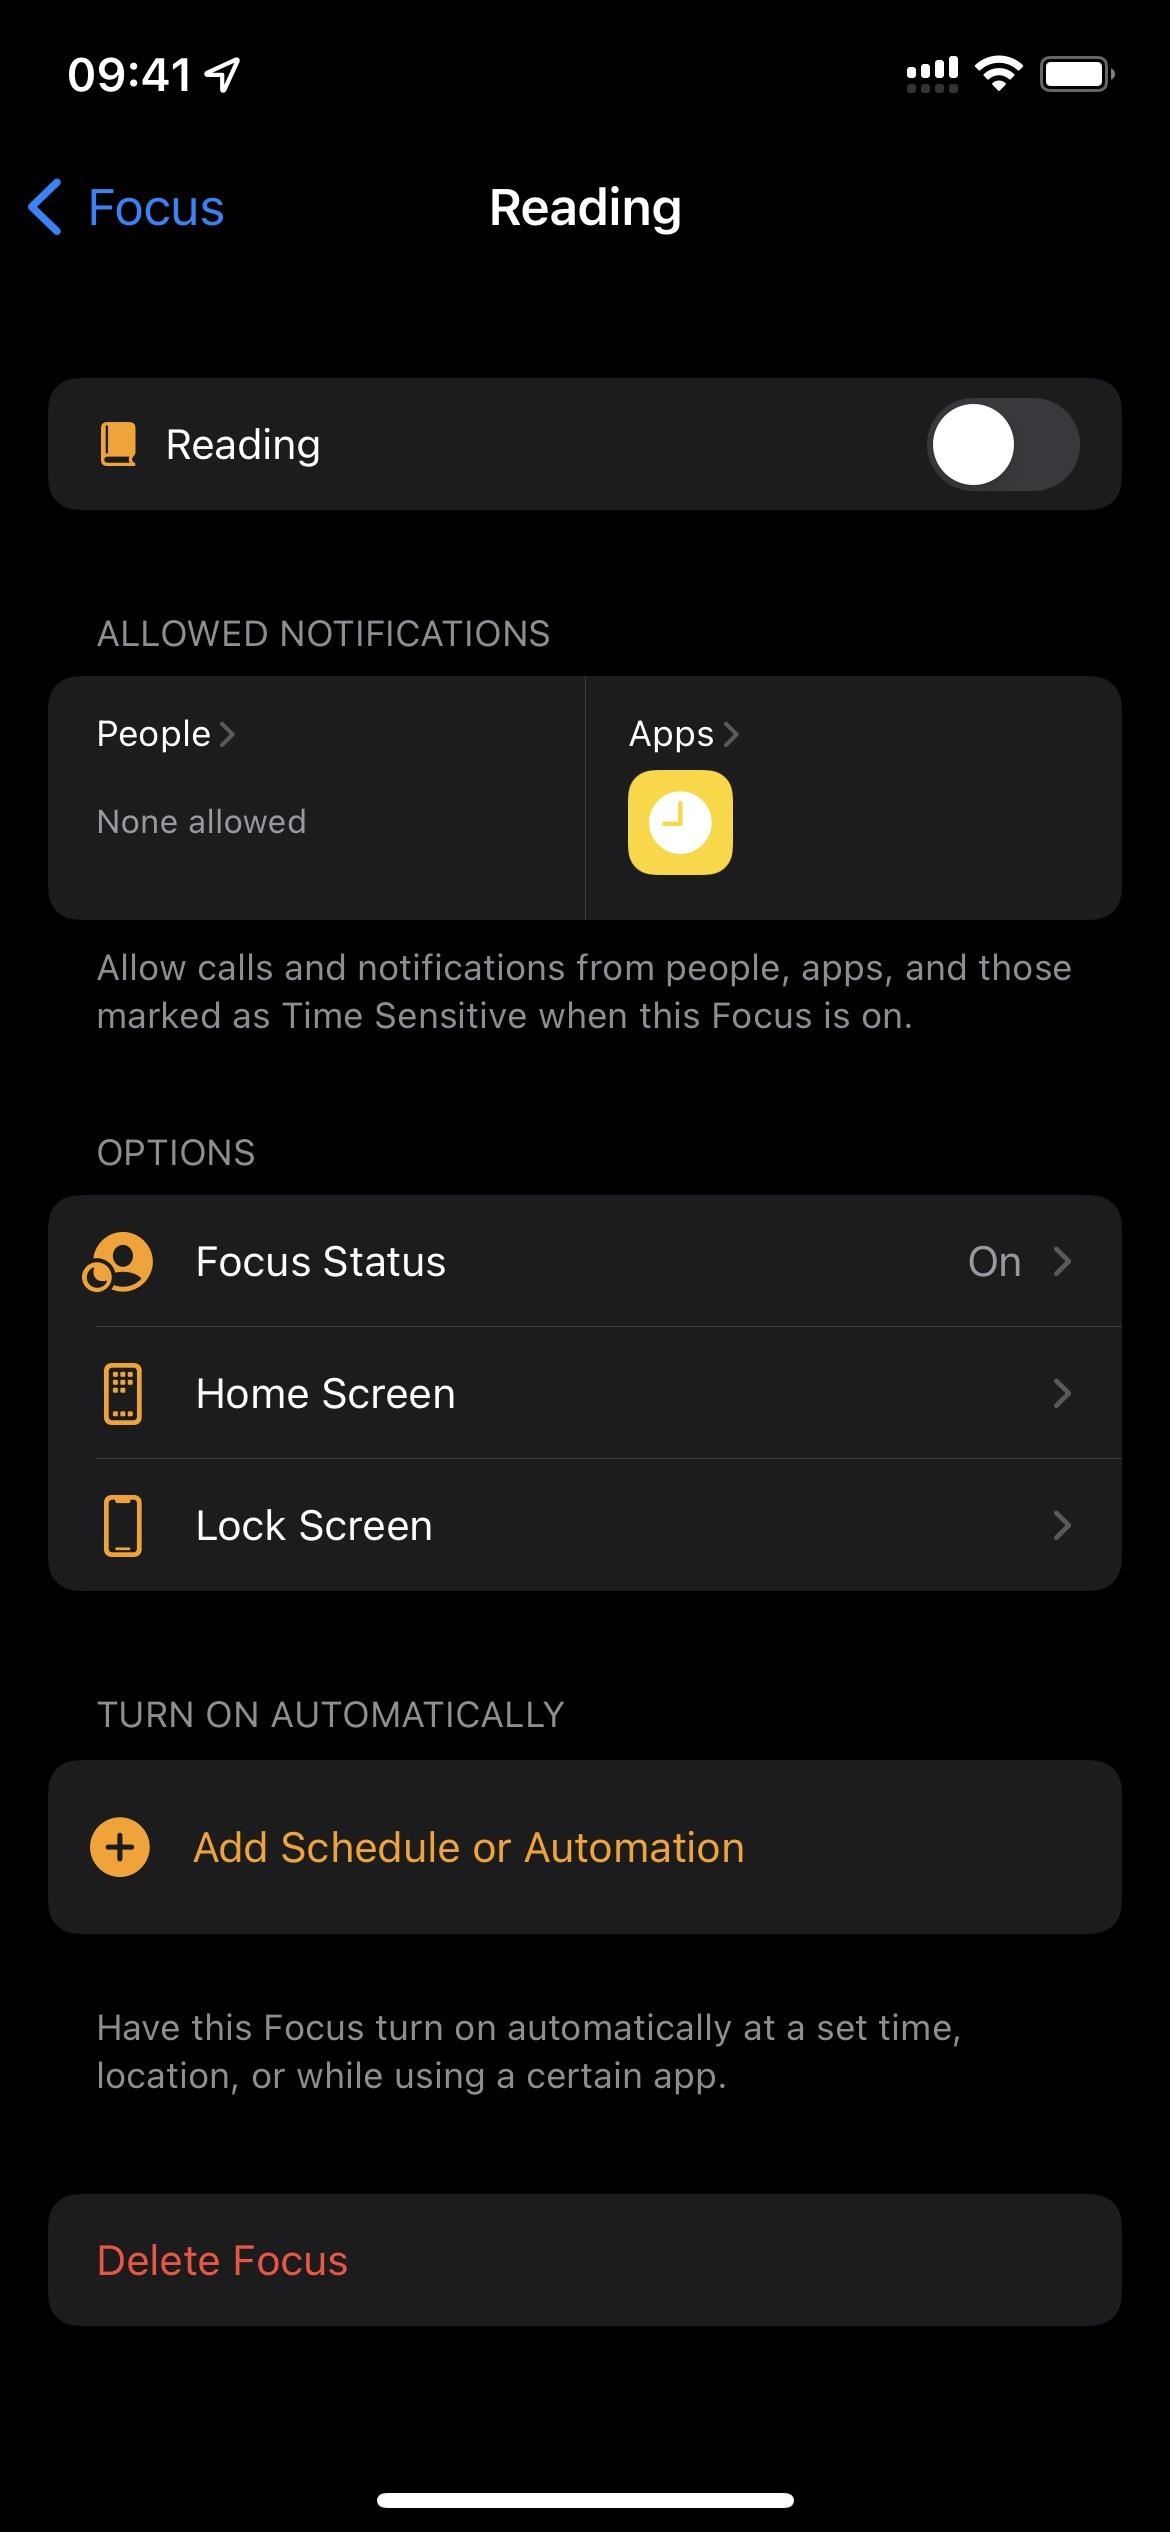
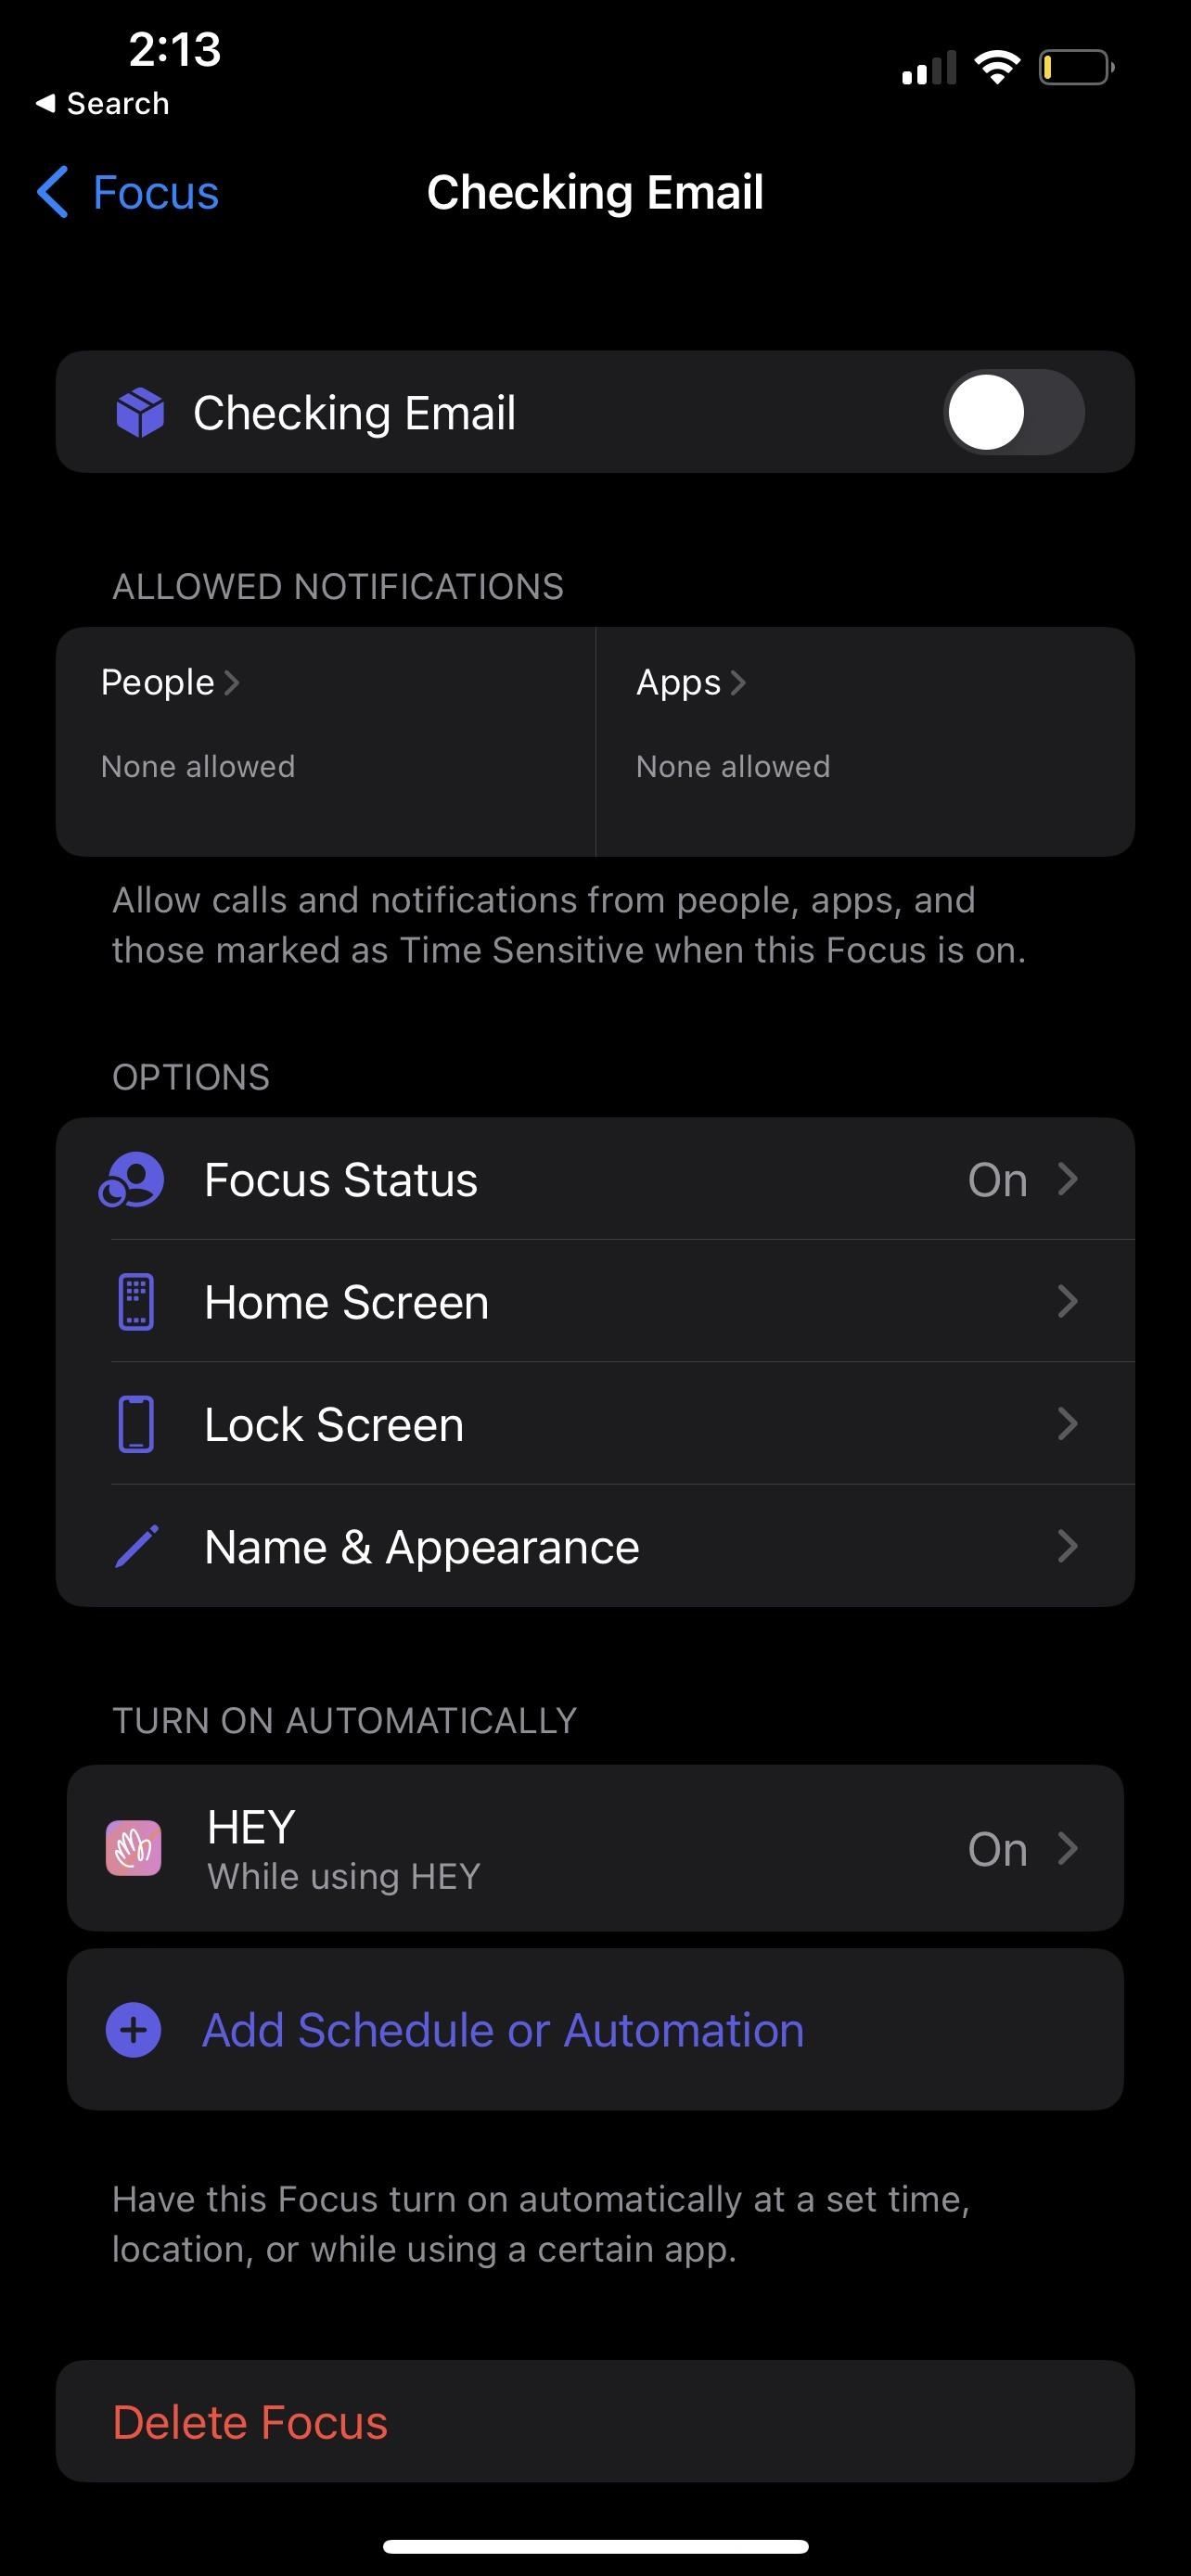
Allowed Notifications
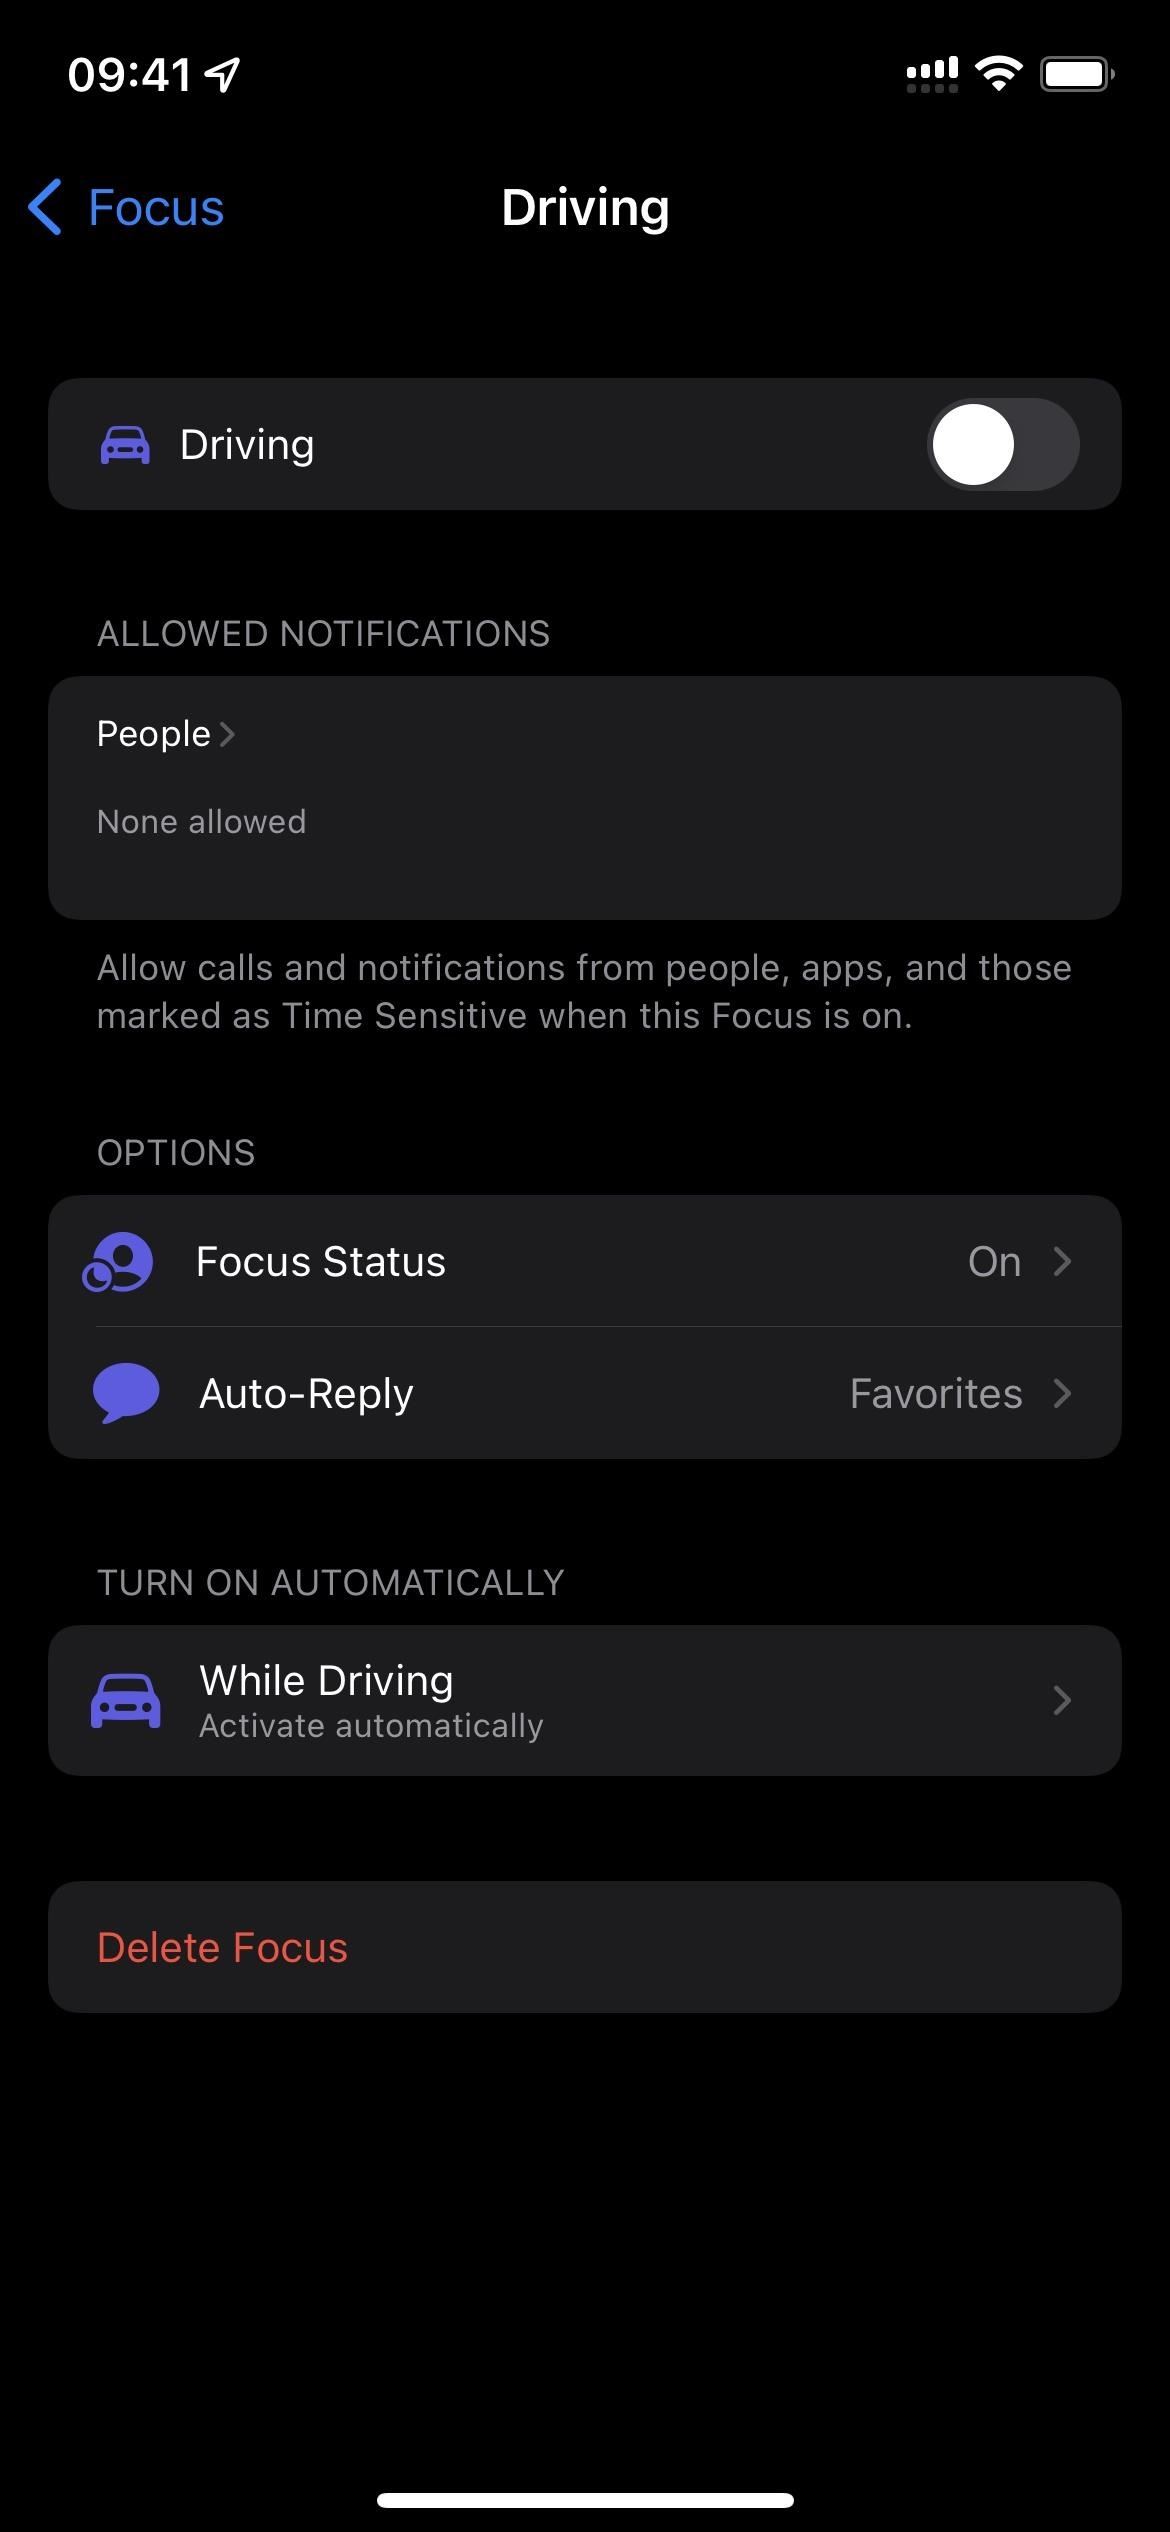
This will show you all the people and apps that have permission to notify you when focus is active. Driving will only show people, and the rest will show both.
Clicking on the sections with people or apps will open the settings where you can customize your choices. See the “Creating a New Custom Focus”section above for more on how they work.
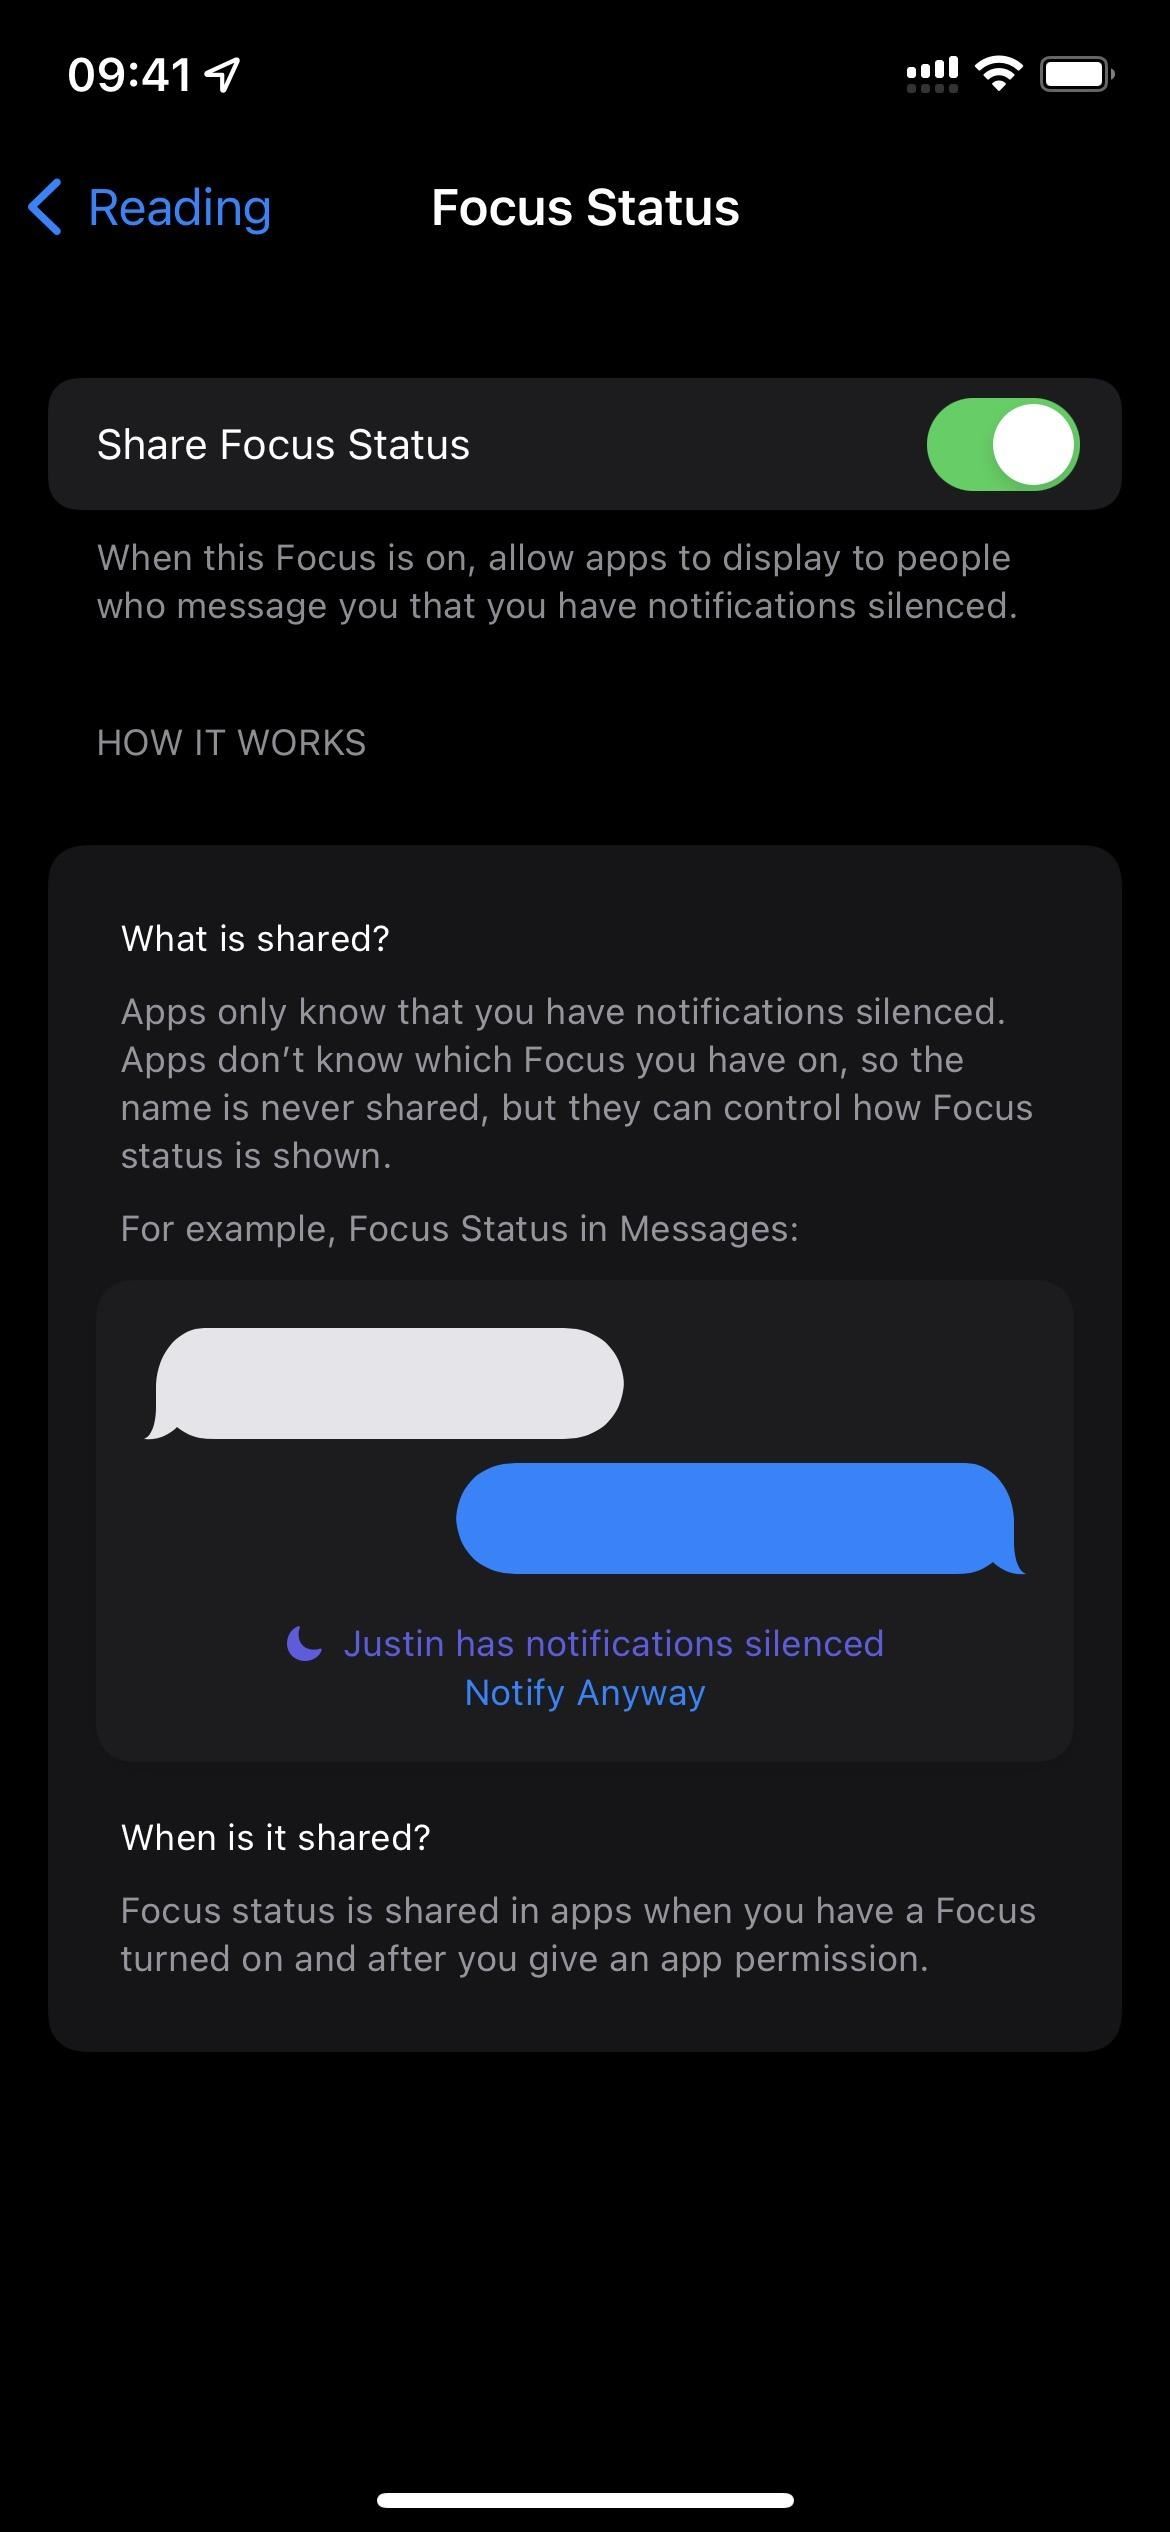
Focus Status
This setting is enabled by default for all focus types, but can be disabled. When Share Focus Status is enabled, supported apps can tell people who send you messages that your notifications are silent. It won’t tell you what state you’re in, just your notifications are disabled.
Even with the focus state active, apps still need permission to use it, and you will be prompted for permission to do so, as if you were asking for access to the camera, LAN, camera, etc. You can change these apps using Settings – > Privacy -> Focus or individual application settings.
Apps can display your focus status in different ways, but in the default Messages app, senders will see “[Name] turned off notifications”with a “Notify anyway”option in case of emergency or importance. If your focus status is off, the Messages app will show messages normally. Third party applications will also behave normally as they cannot detect active focus.
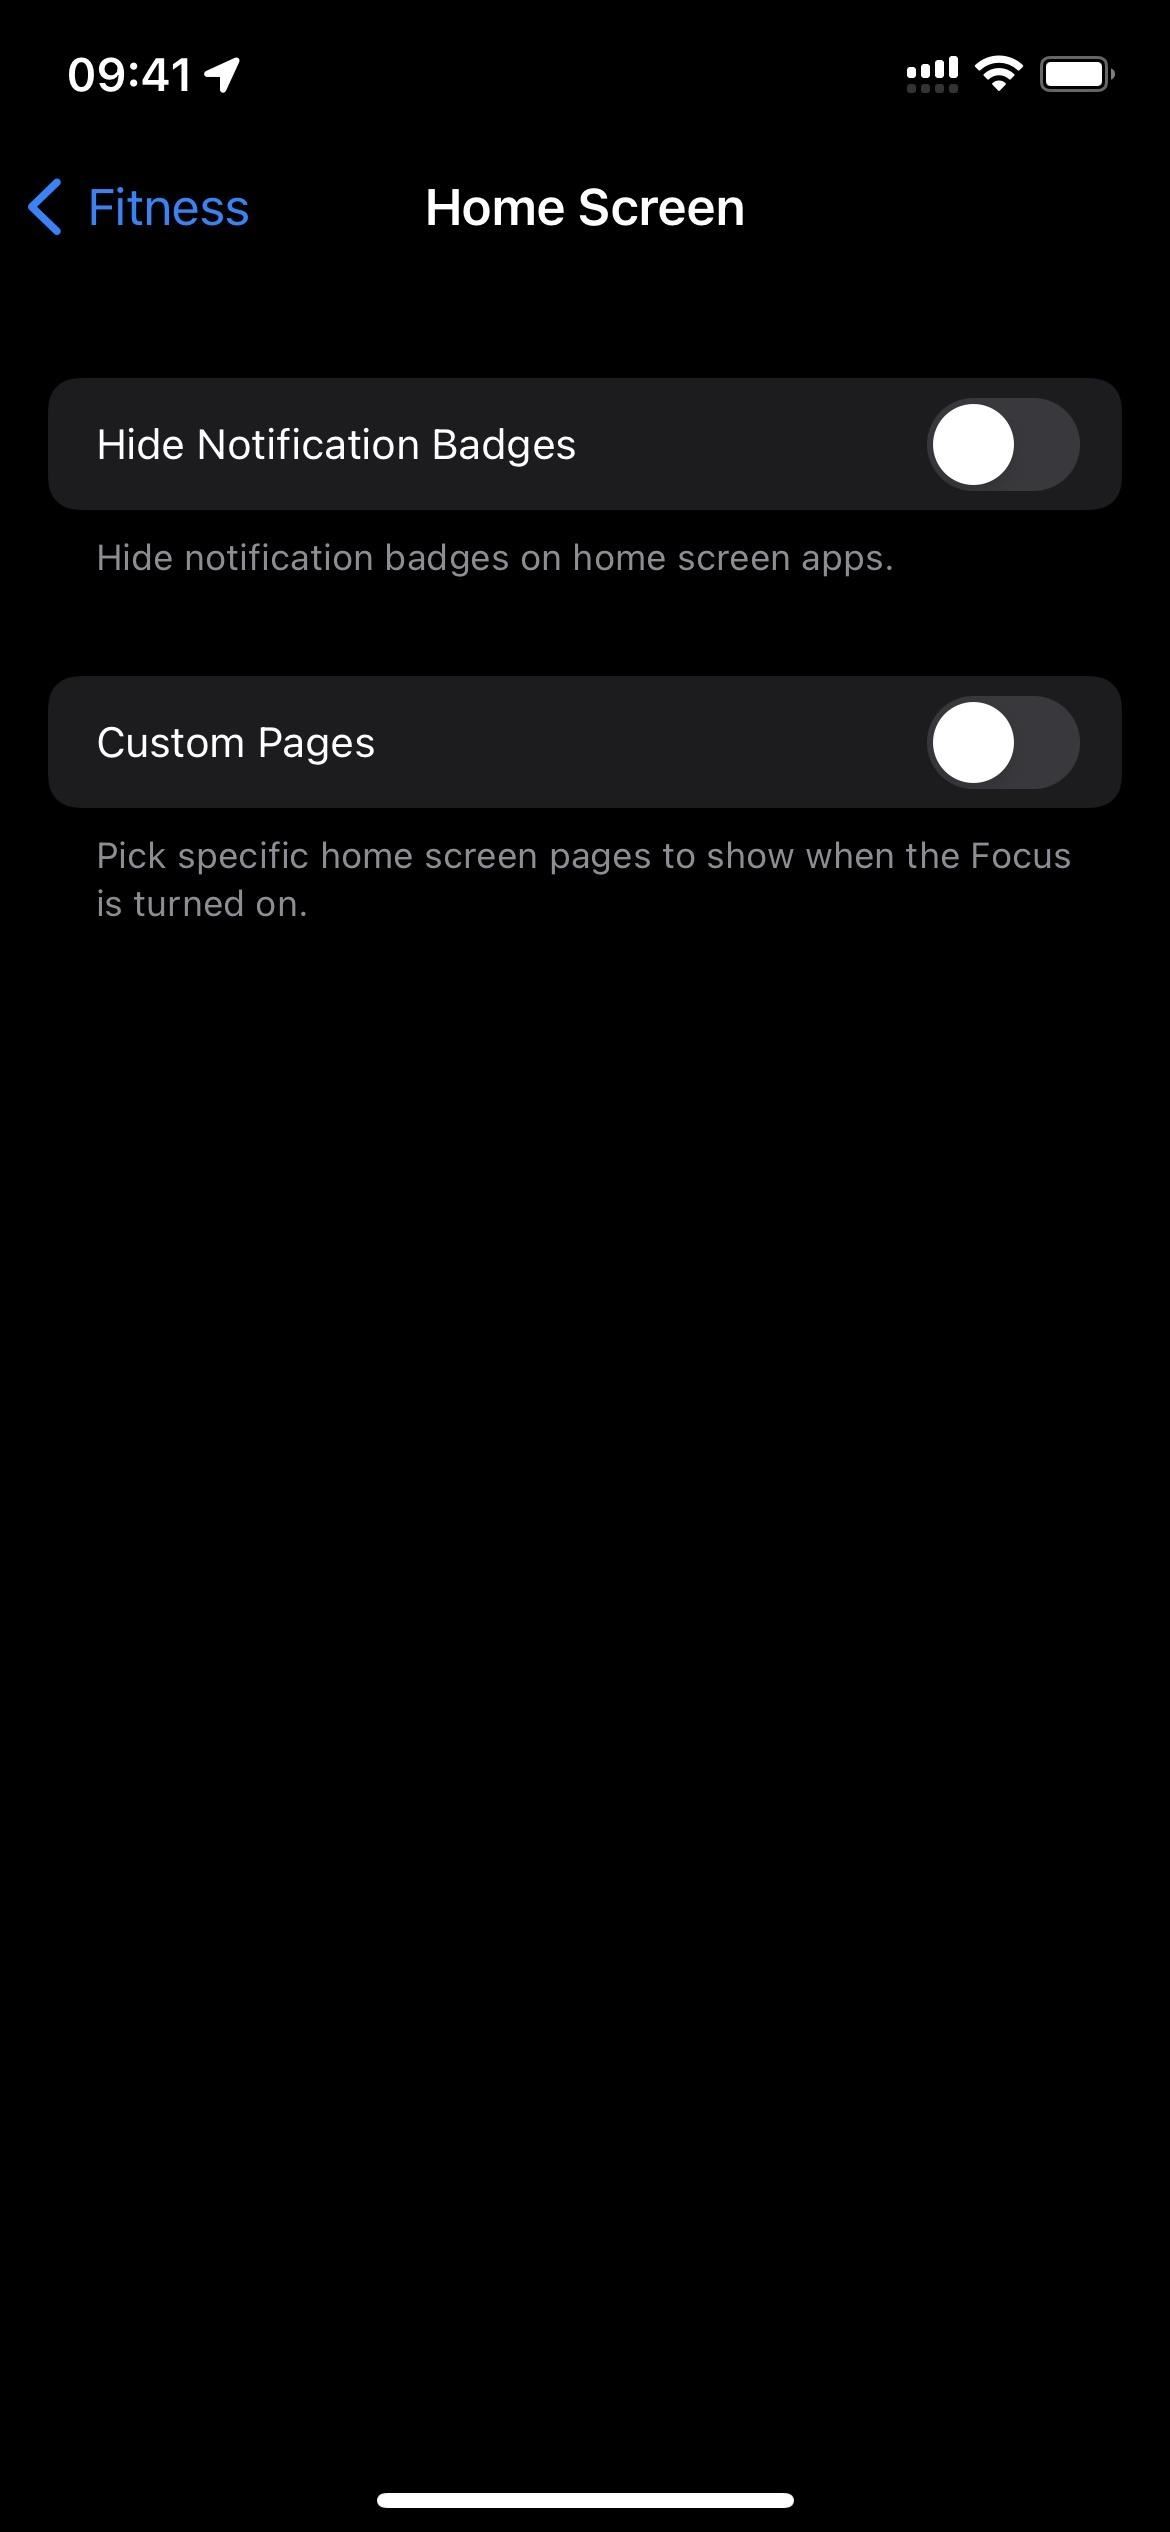
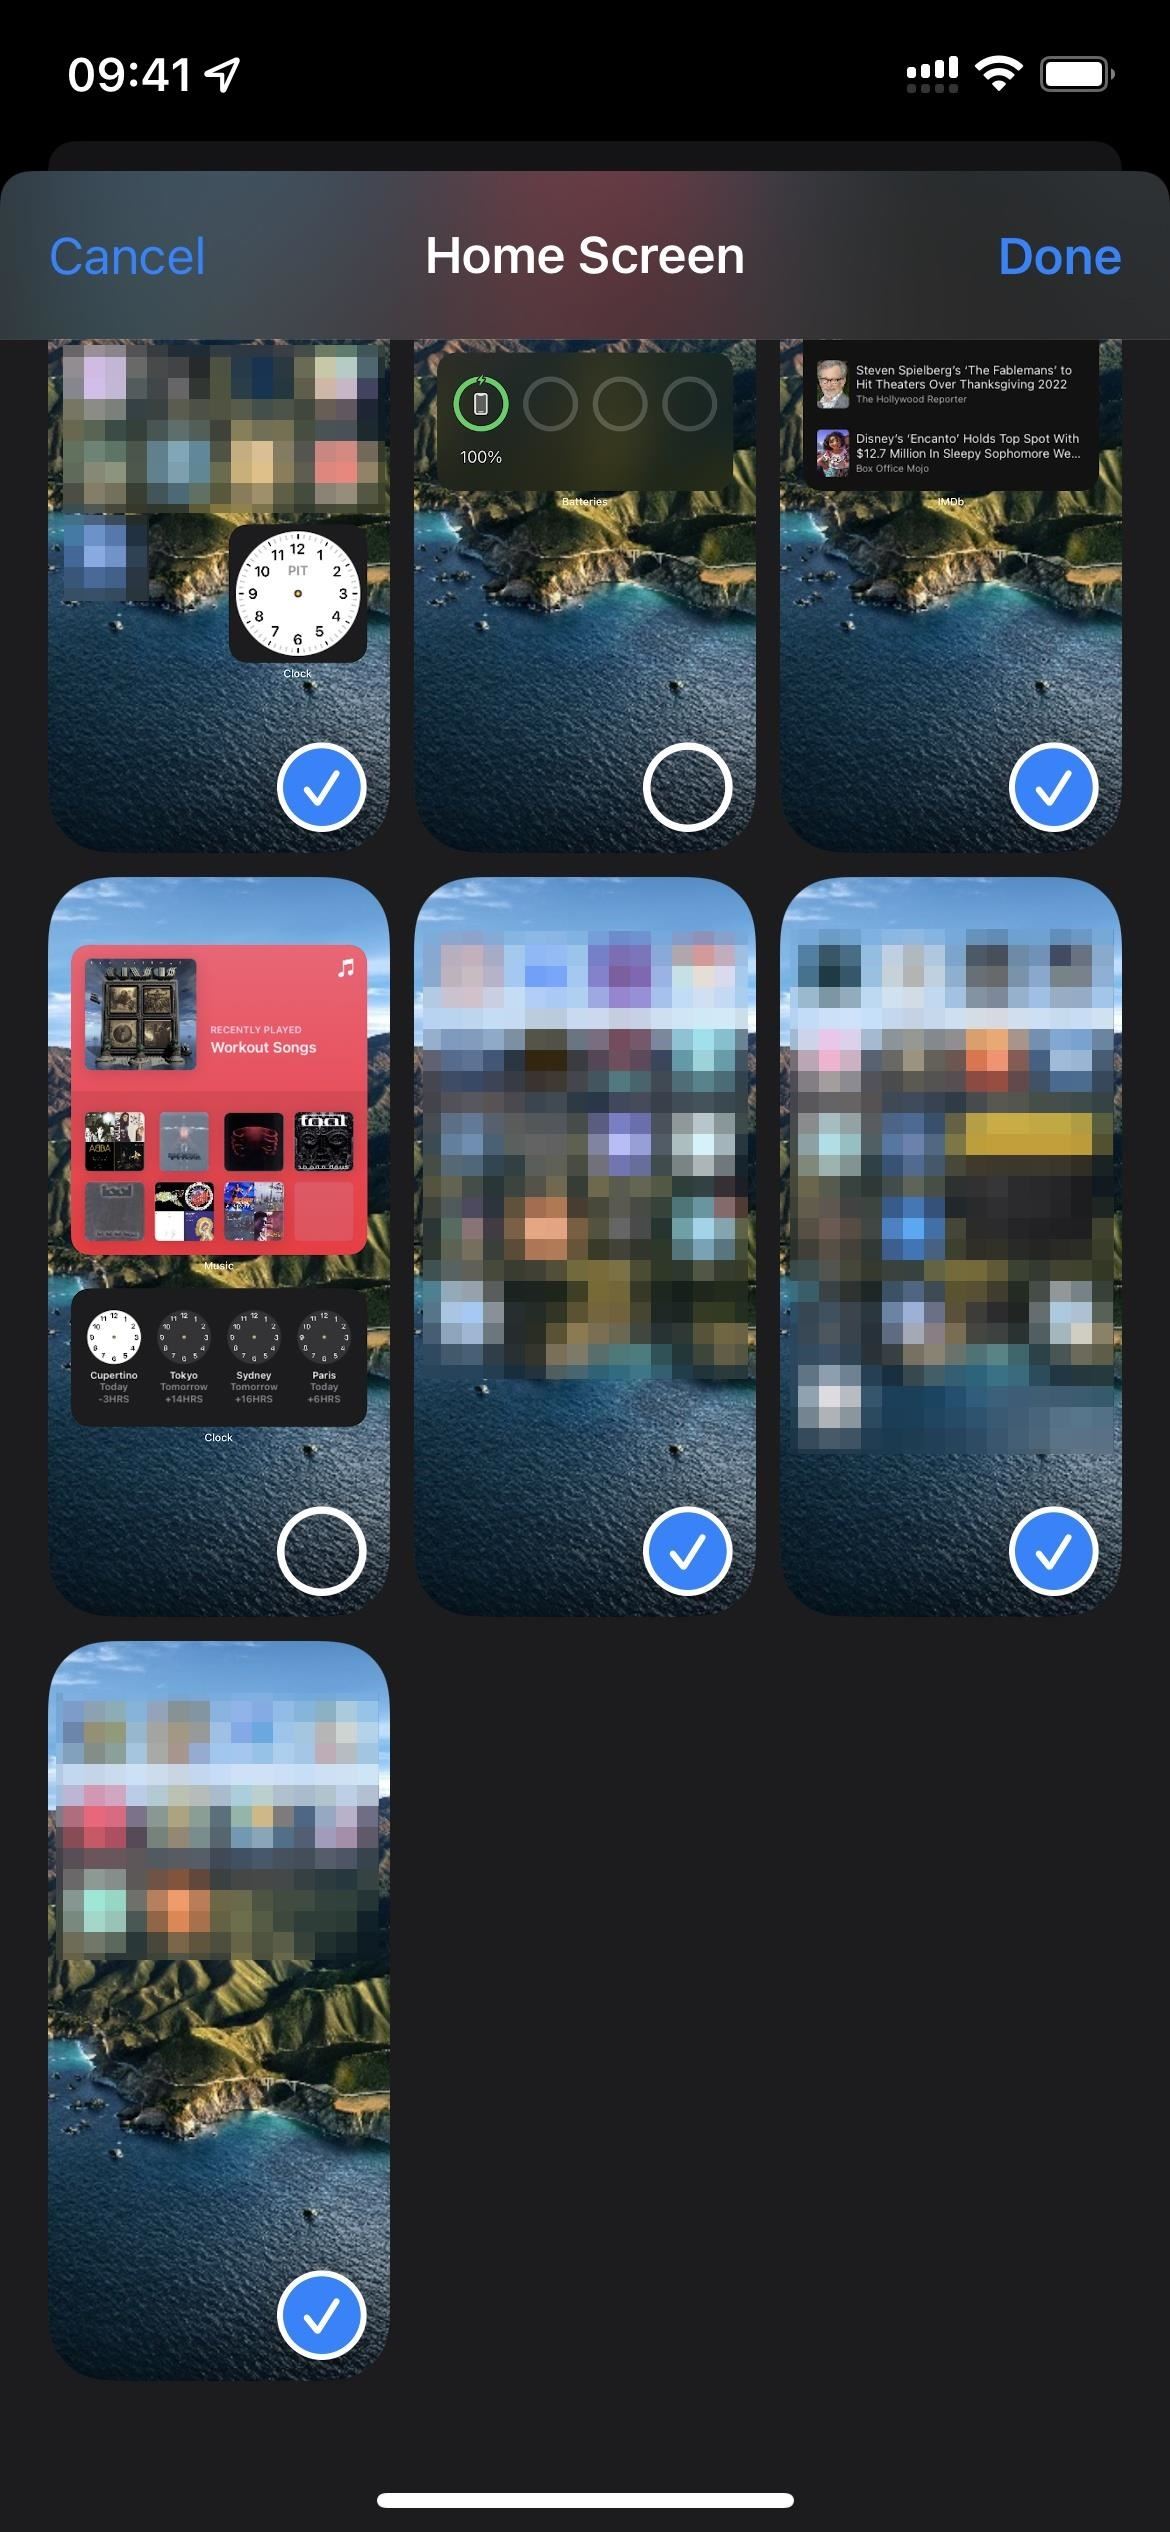
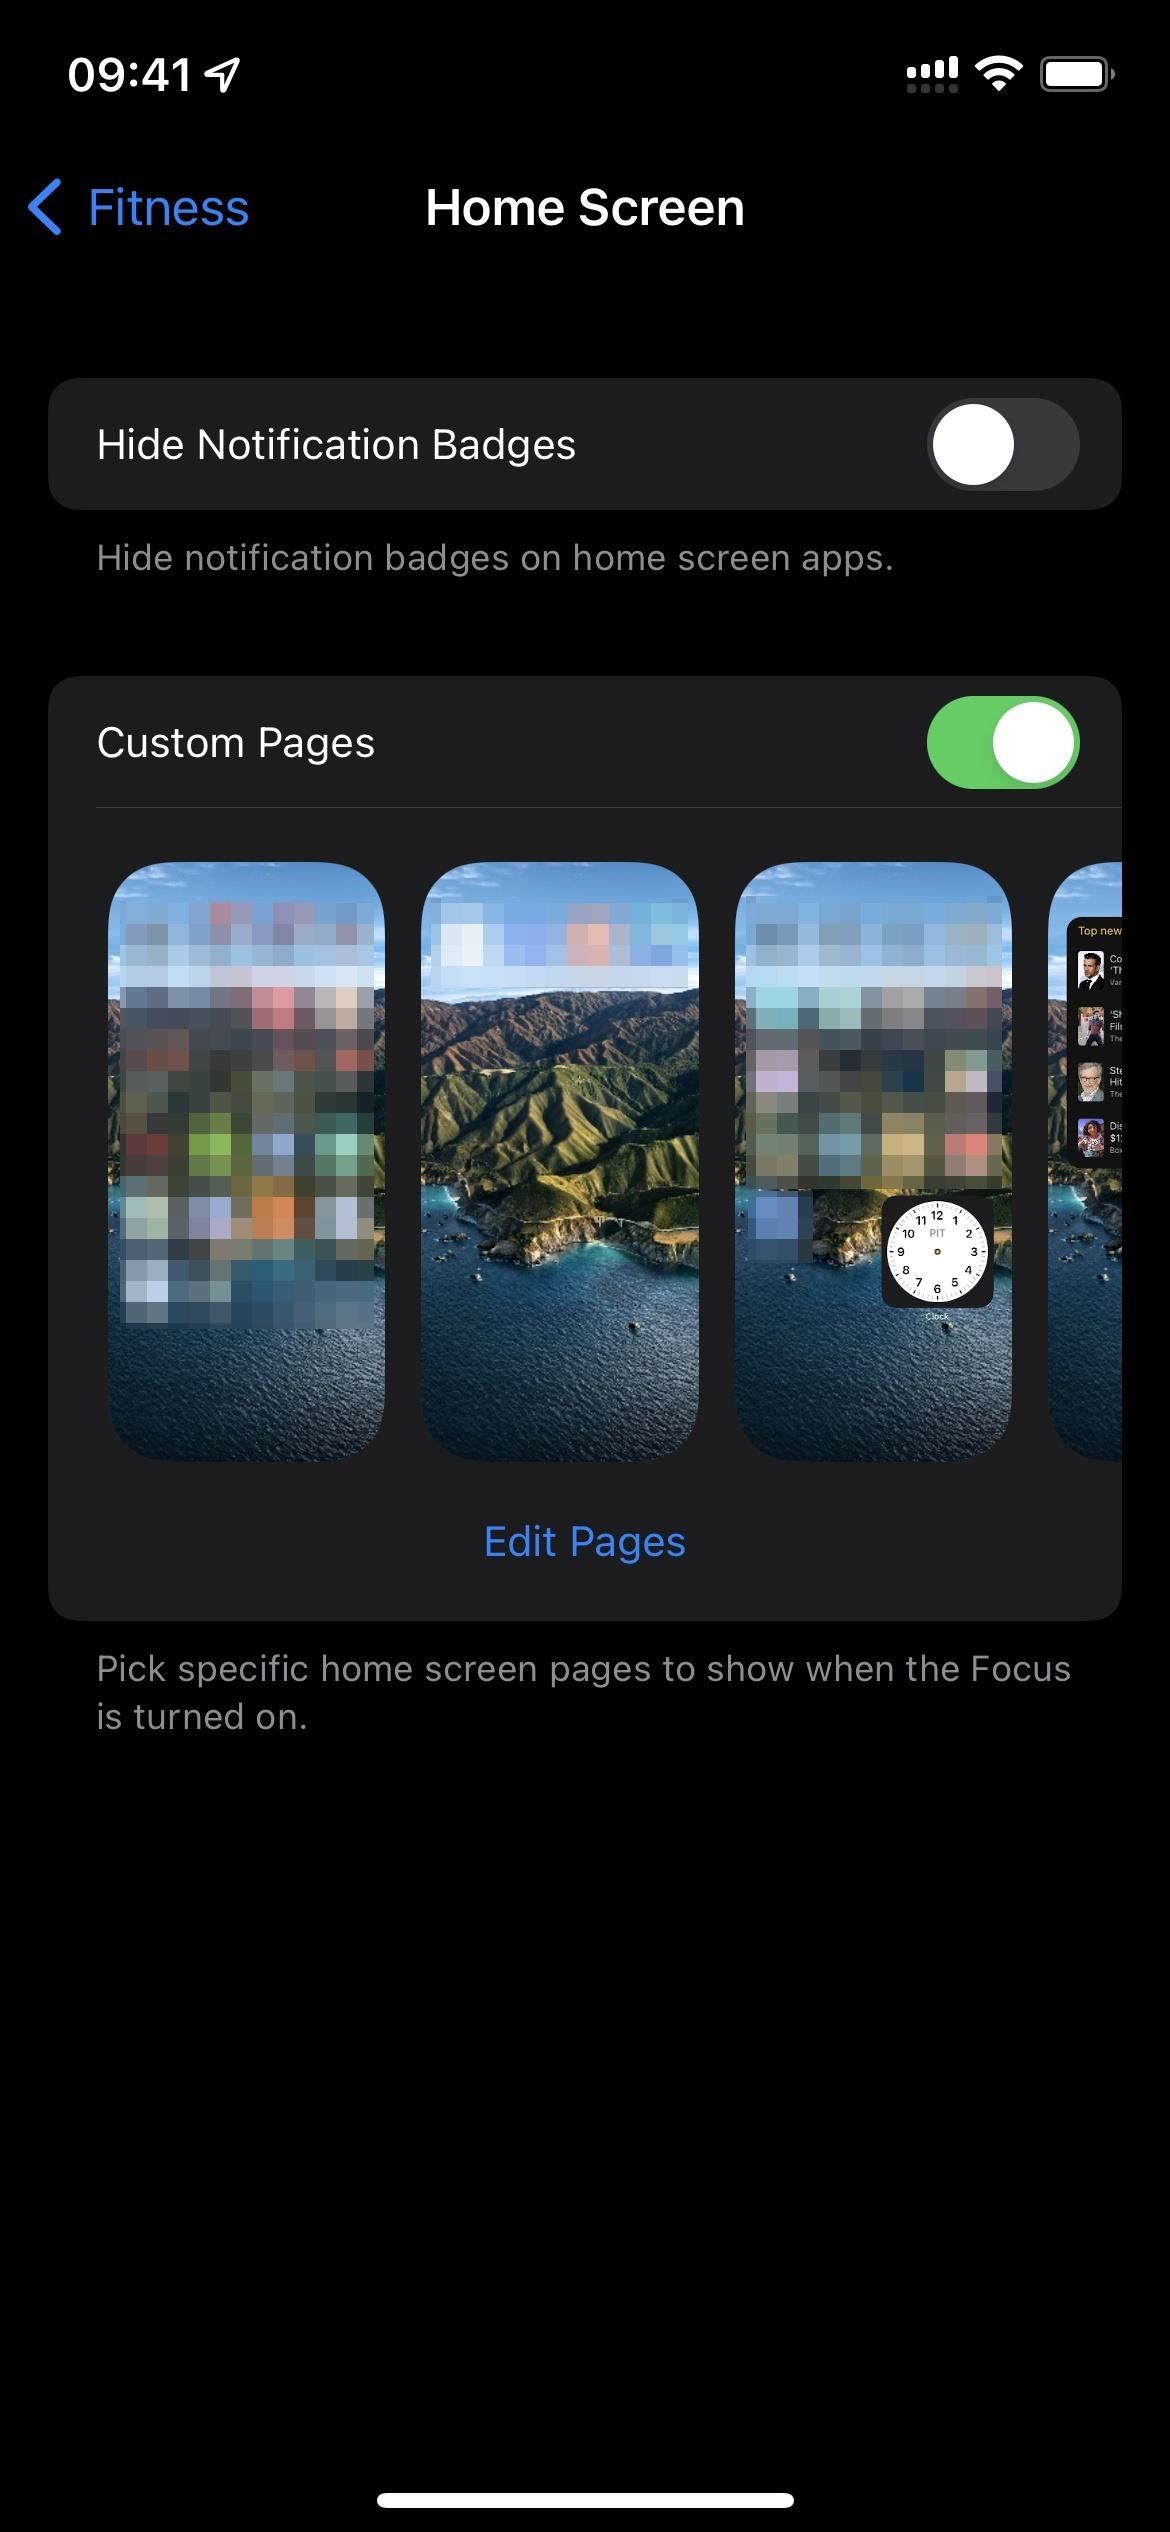
home screen
This setting, which applies to all focuses except Driving, has two toggles: Hide Notification Icons and Custom Pages. If you’re using icons on the home screen, you can temporarily turn them off when you’re in focus. Even more impressive is that you can hide entire pages of the home screen when focus is active.
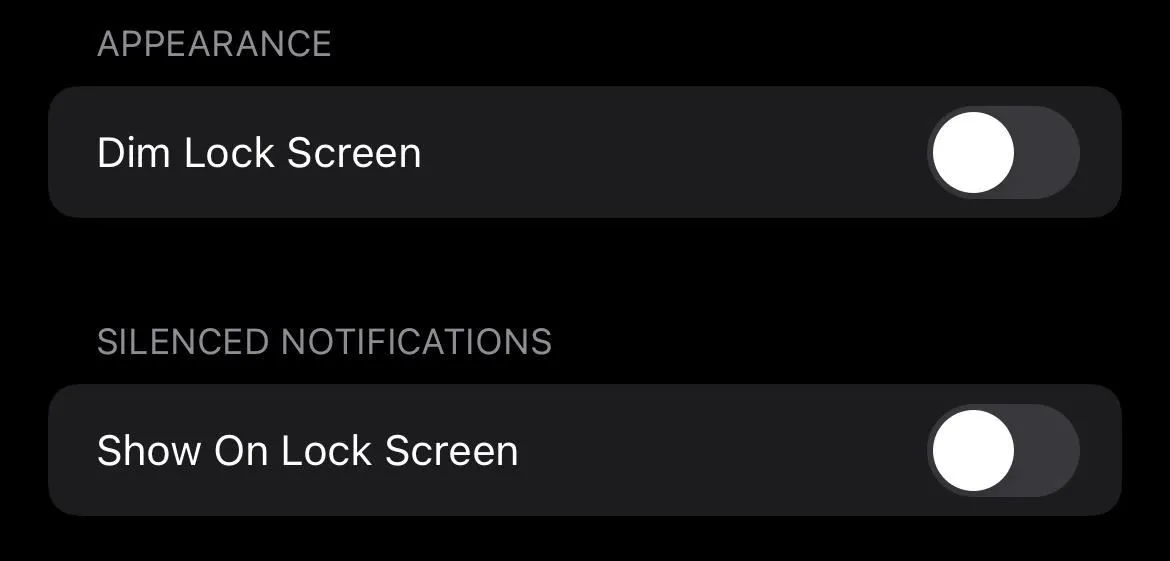
Lock screen
This setting also has two toggles: Dim Lock Screen and Show on Lock Screen. All focuses will have both, except “Driving”, which shows nothing, and “Sleep”, which lacks a dimming option. If you select the dim option, your lock screen will be less bright than before. If this setting is enabled, the second setting allows you to display muted notifications on the lock screen.
Answering machine
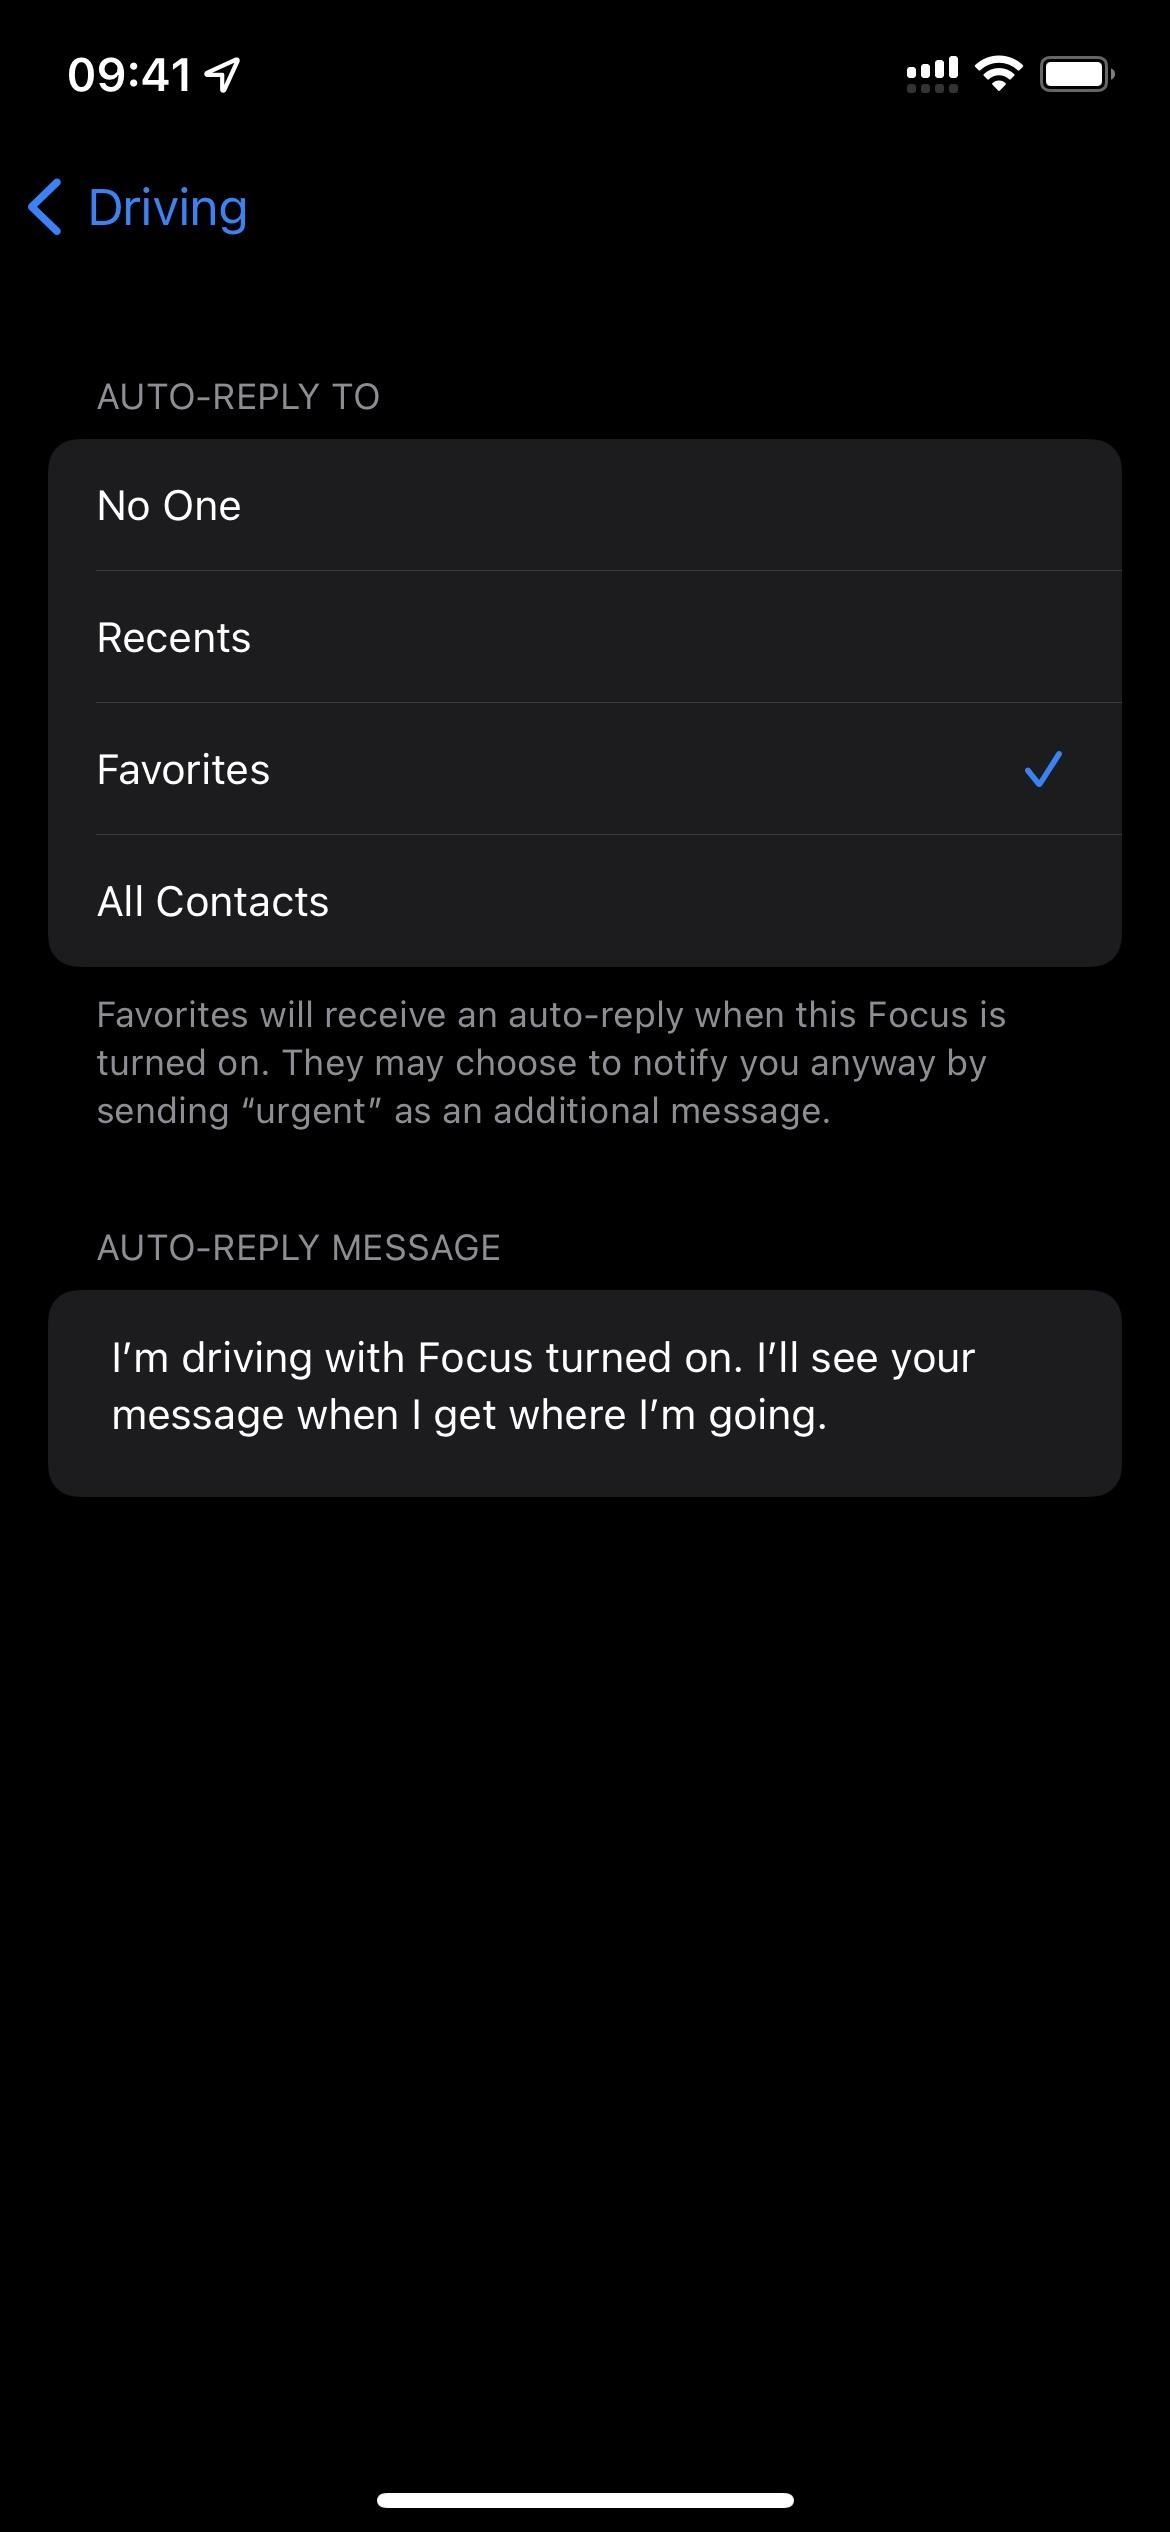
This only applies to Driving mode. Once you open it, you can set iPhone to automatically reply to selected contacts with a custom message. You can select Nobody, Recents, Favorites, or All Contacts. If they write “urgent”in another message, they will break out of focus. You can edit your own answer in the text box under the Auto Reply section.
Name and appearance
This setting only applies to your custom focuses, as they are the only ones you can change the name, icon, and color for. When you choose it, you will be able to do so.

Turn on automatically (or on schedule and health)
This allows you to automatically enable focus based on a preset or custom trigger. For the most part, you can install multiple triggers, but you will have to create them individually. What you see in this section depends on the focus type, but most of them have their own variation:
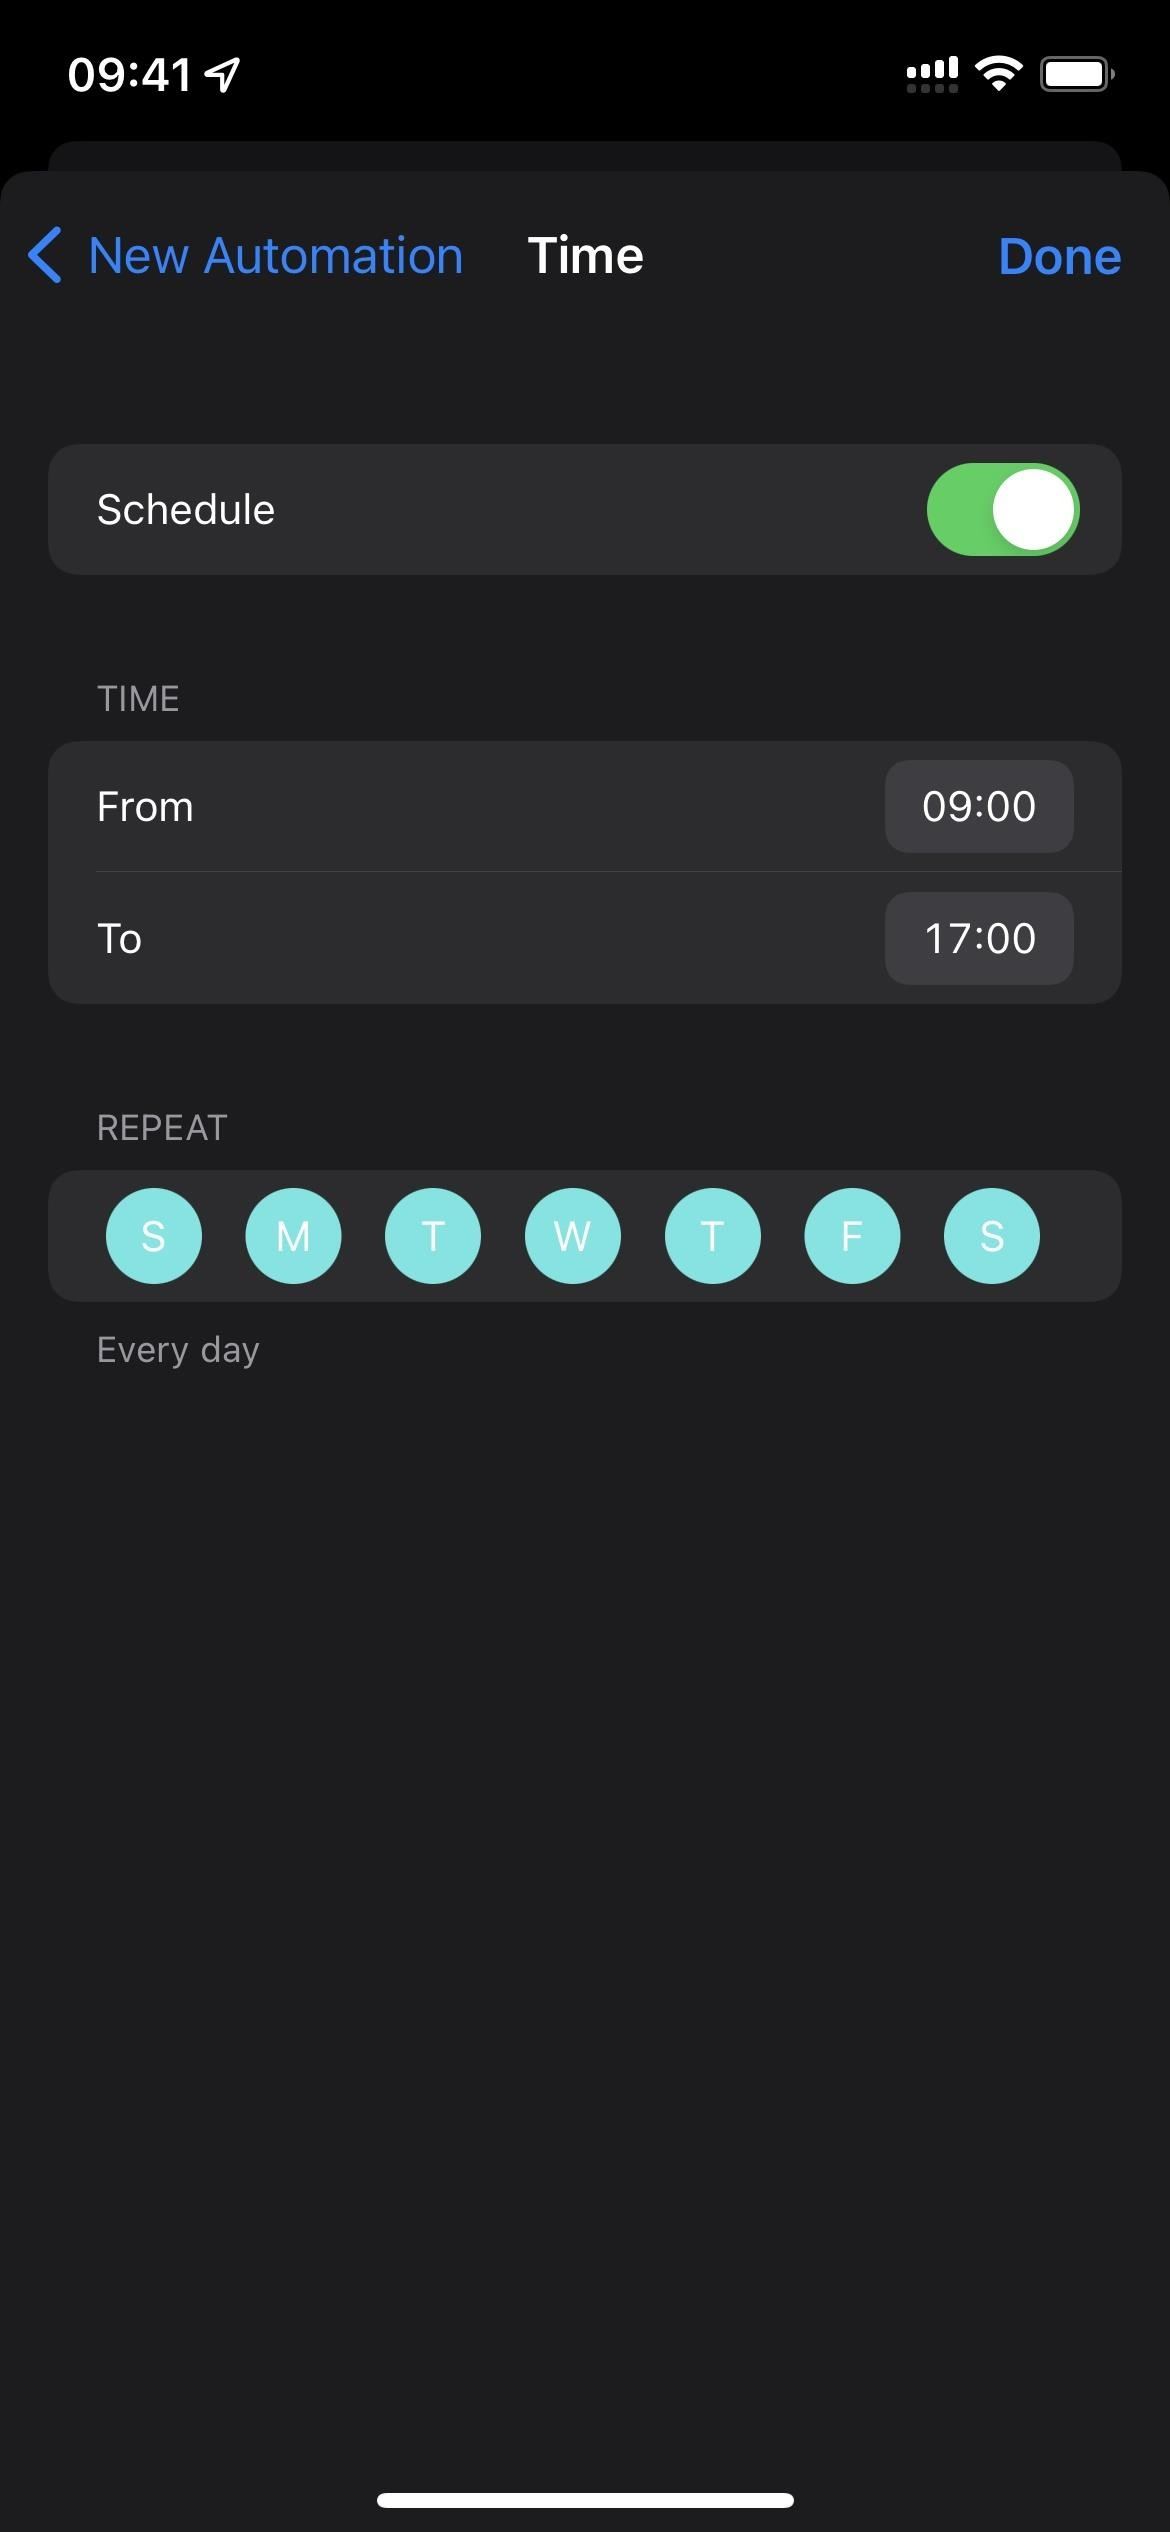
- Add Schedule or Automation: Allows you to create a custom trigger based on time, location, application, or smart activation. The latter, Apple explains, “automatically turns on [focus] at appropriate times throughout the day based on signals such as your location, app usage, and more. Driving and Fitness eliminates the smart option. Sleep Focus only allows you to set up a schedule through the Health app.
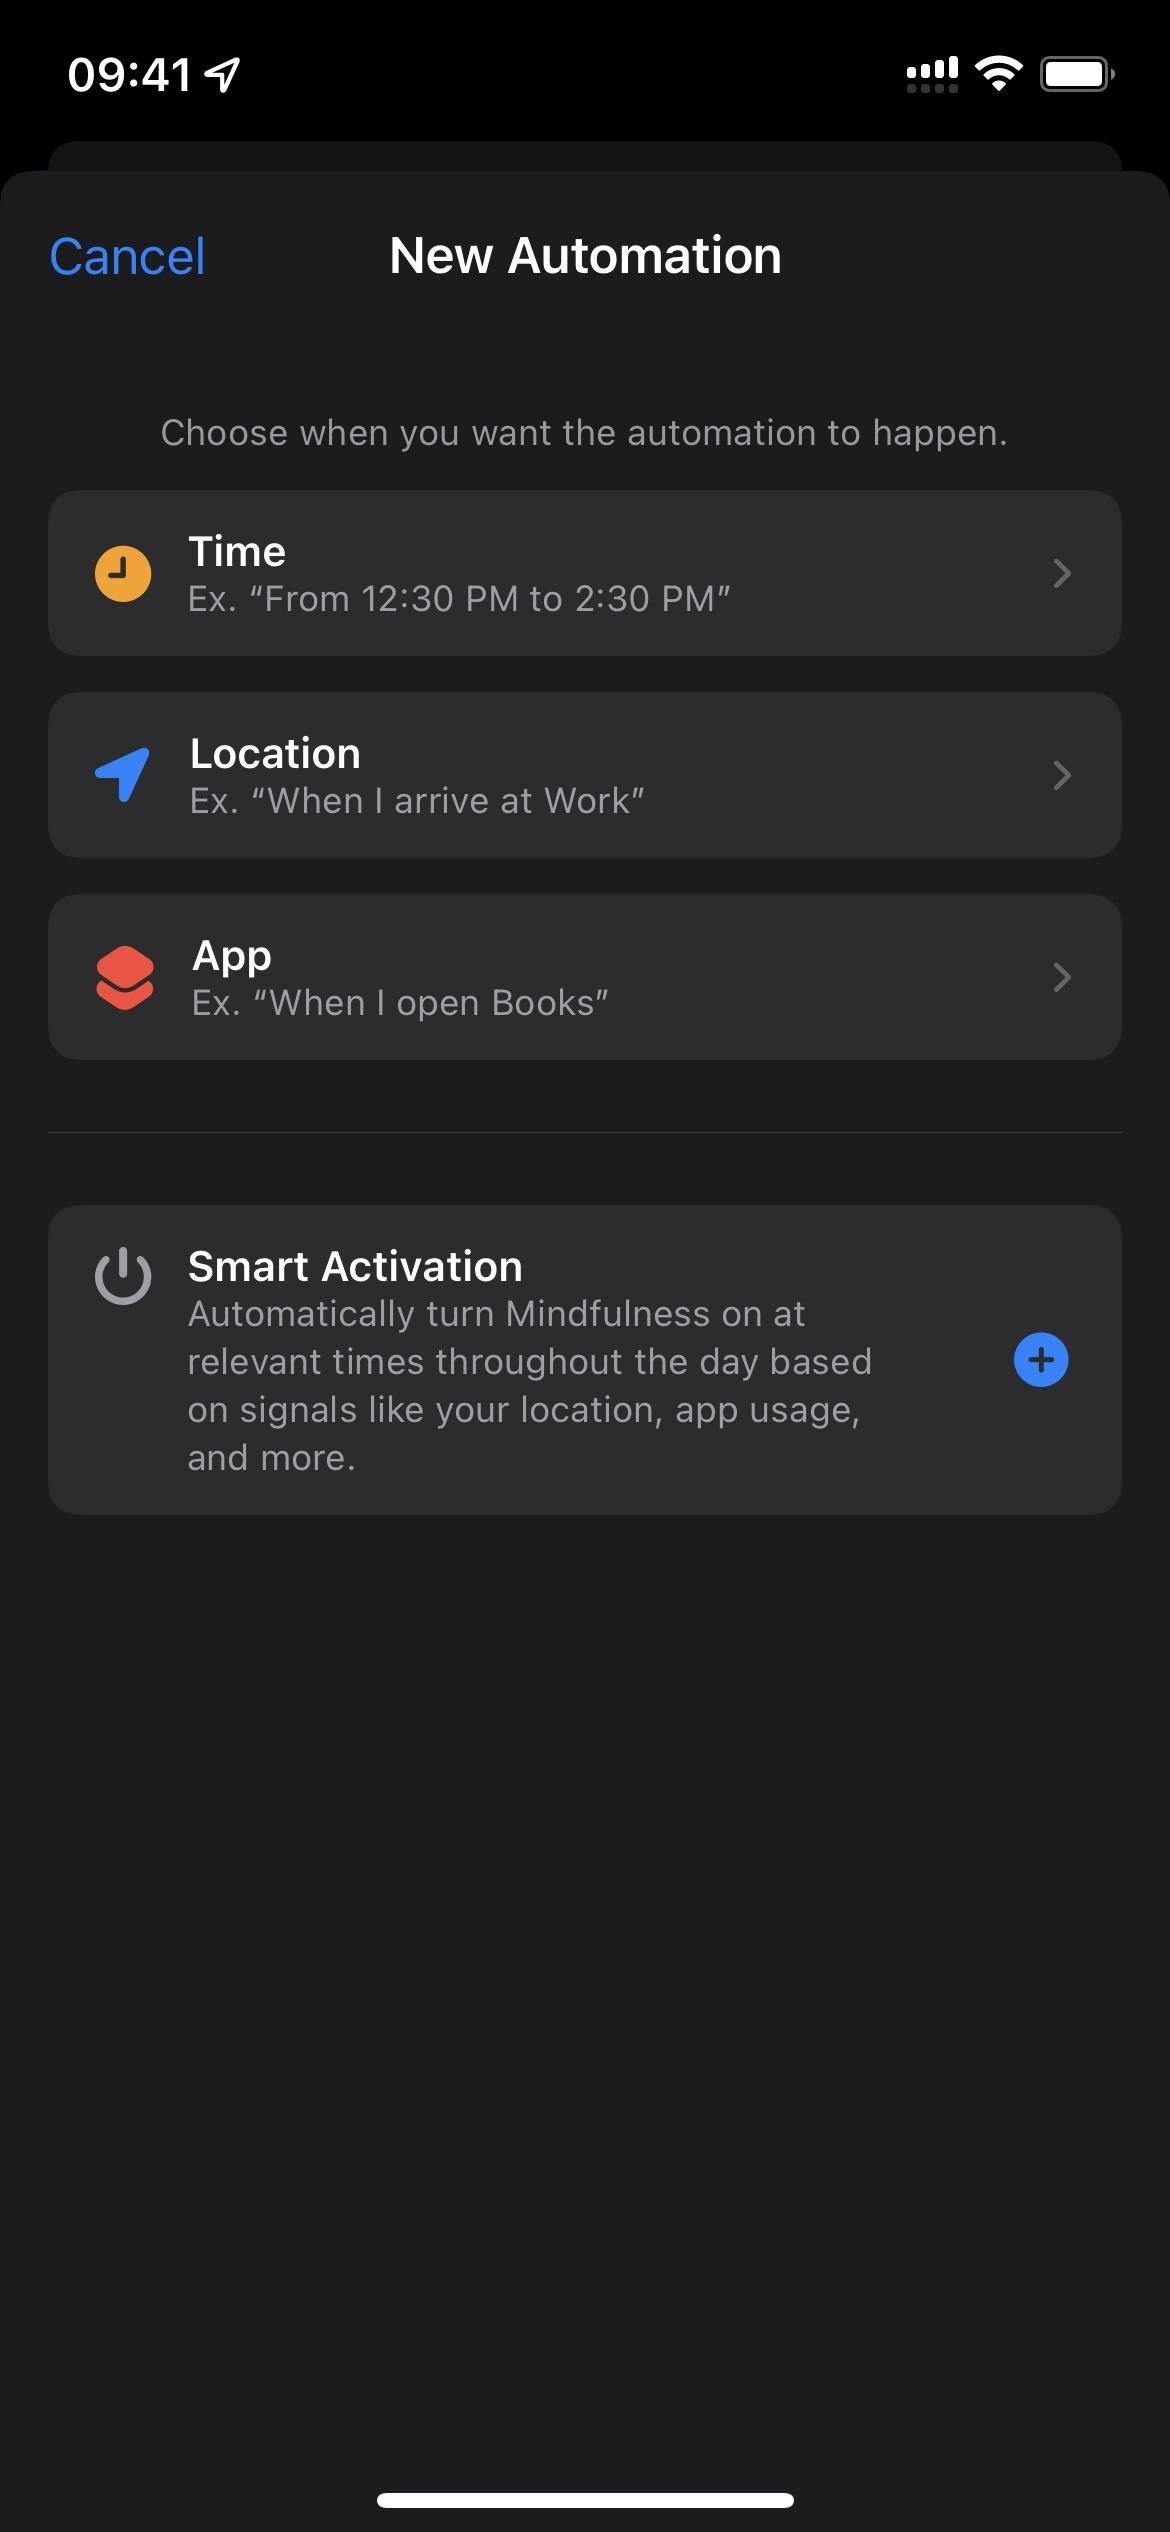
Other schedules and automation you may see include:
- [Time]: When turned on, the Do Not Disturb focus is turned on and off automatically for the set time. The time range will also be displayed if you have set up custom schedules for other focus types using the Add Schedule or Automation option.
- [Location]: When enabled, focus is automatically enabled based on the location settings you have created using the Add Schedule or Automation option.
- [Application]: When enabled, it will automatically enable focus for any application you have selected via the Add Schedule or Automation option, and disable it again when you exit the application.
- Smart Activation: When enabled, it will automatically switch focus at the correct time throughout the day based on signals such as your location, app usage, etc.
Other preset triggers will include:
- Wireless Controller: When enabled, connecting a controller to iPhone will enable the Gaming focus.
- While Driving: If enabled, this setting will turn on Driving focus when it detects you are driving. It can be set to automatically detect driving, wake up whenever your iPhone connects to your car’s Bluetooth, or wake up when you turn on CarPlay. You can also manage it manually.
- Workout: If this setting is enabled, the fitness focus will be enabled when you start a workout with your Apple Watch.
- Mindfulness: When enabled, this setting will enable mindfulness focus whenever you start a session in the Mindfulness app for Apple Watch.
- Enable on Disable: If enabled, this setting will enable sleep focus every time a recovery period is scheduled. Under the toggle, you will see the next sleep schedule as well as the weekly schedule.
Remove focus
This button removes focus as directed and allows you to experiment and see what works best for you. You can remove any focus state other than Do Not Disturb, which is mandatory. If you remove a focus created from a template, you can always revert the focus type, but you will have to rebuild its settings.

Increasing the level of focus
Apple made the Focus flexible because everyone works differently. There are enough options to allow someone to customize their notifications based on the situation, but not so many to make things difficult. However, Apple has added another feature that advanced users will appreciate: shortcut integration.
The options included with Focus already provide the ability to use shortcuts with triggers to automatically switch focus states. Thanks to integration with shortcuts, you can use Focus in triggers that you have already set up or plan to create.
For example, if you want to take a five minute nap, you can create a shortcut that plays your best sleep music, starts a timer, and activates focus. Here are a few more examples that I don’t understand:
- Email Checker: If you live in your email and spend a lot of time checking it daily, you can set the “Email Checker”focus to automatically start when you start your email client and disable when you exit your email client. You don’t need labels for this.
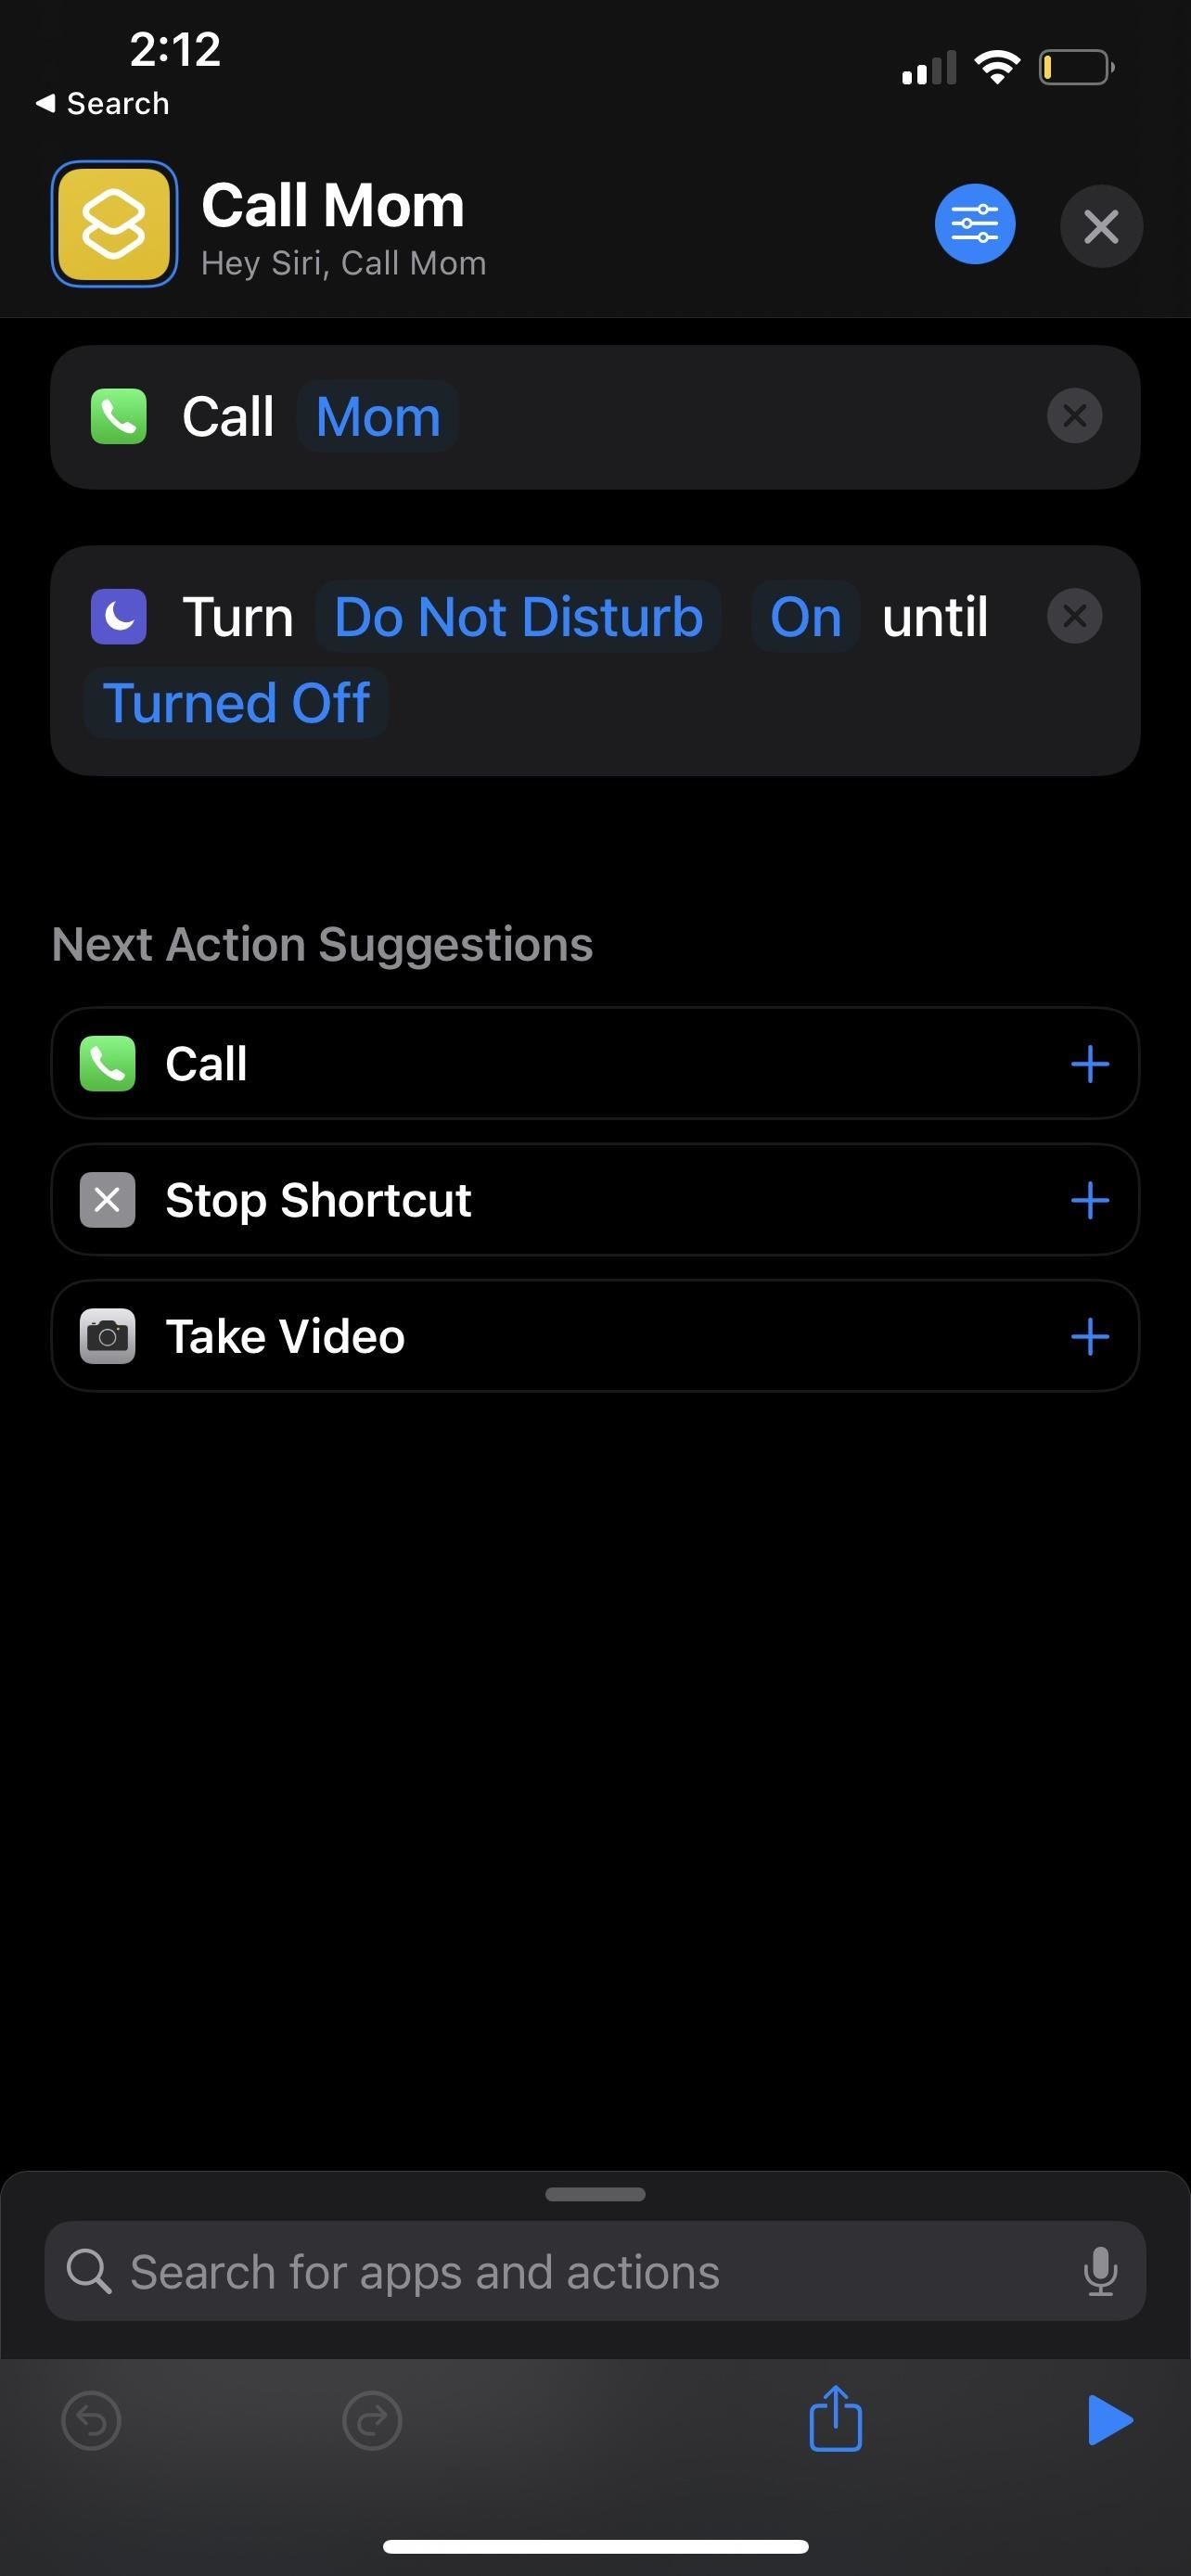
- Mom Focus: If you never want to be distracted while talking to your mom, you can create a “Call Mom”shortcut that triggers any focus state you want. Currently, Apple doesn’t have any shortcut actions that can disable the focus state when a phone call ends, so you’ll have to disable focus manually. You can choose “Phone”as an app trigger in the focus itself, but if you call from a shortcut, the focus won’t know that it will be disconnected when the call ends because you haven’t opened the app completely.
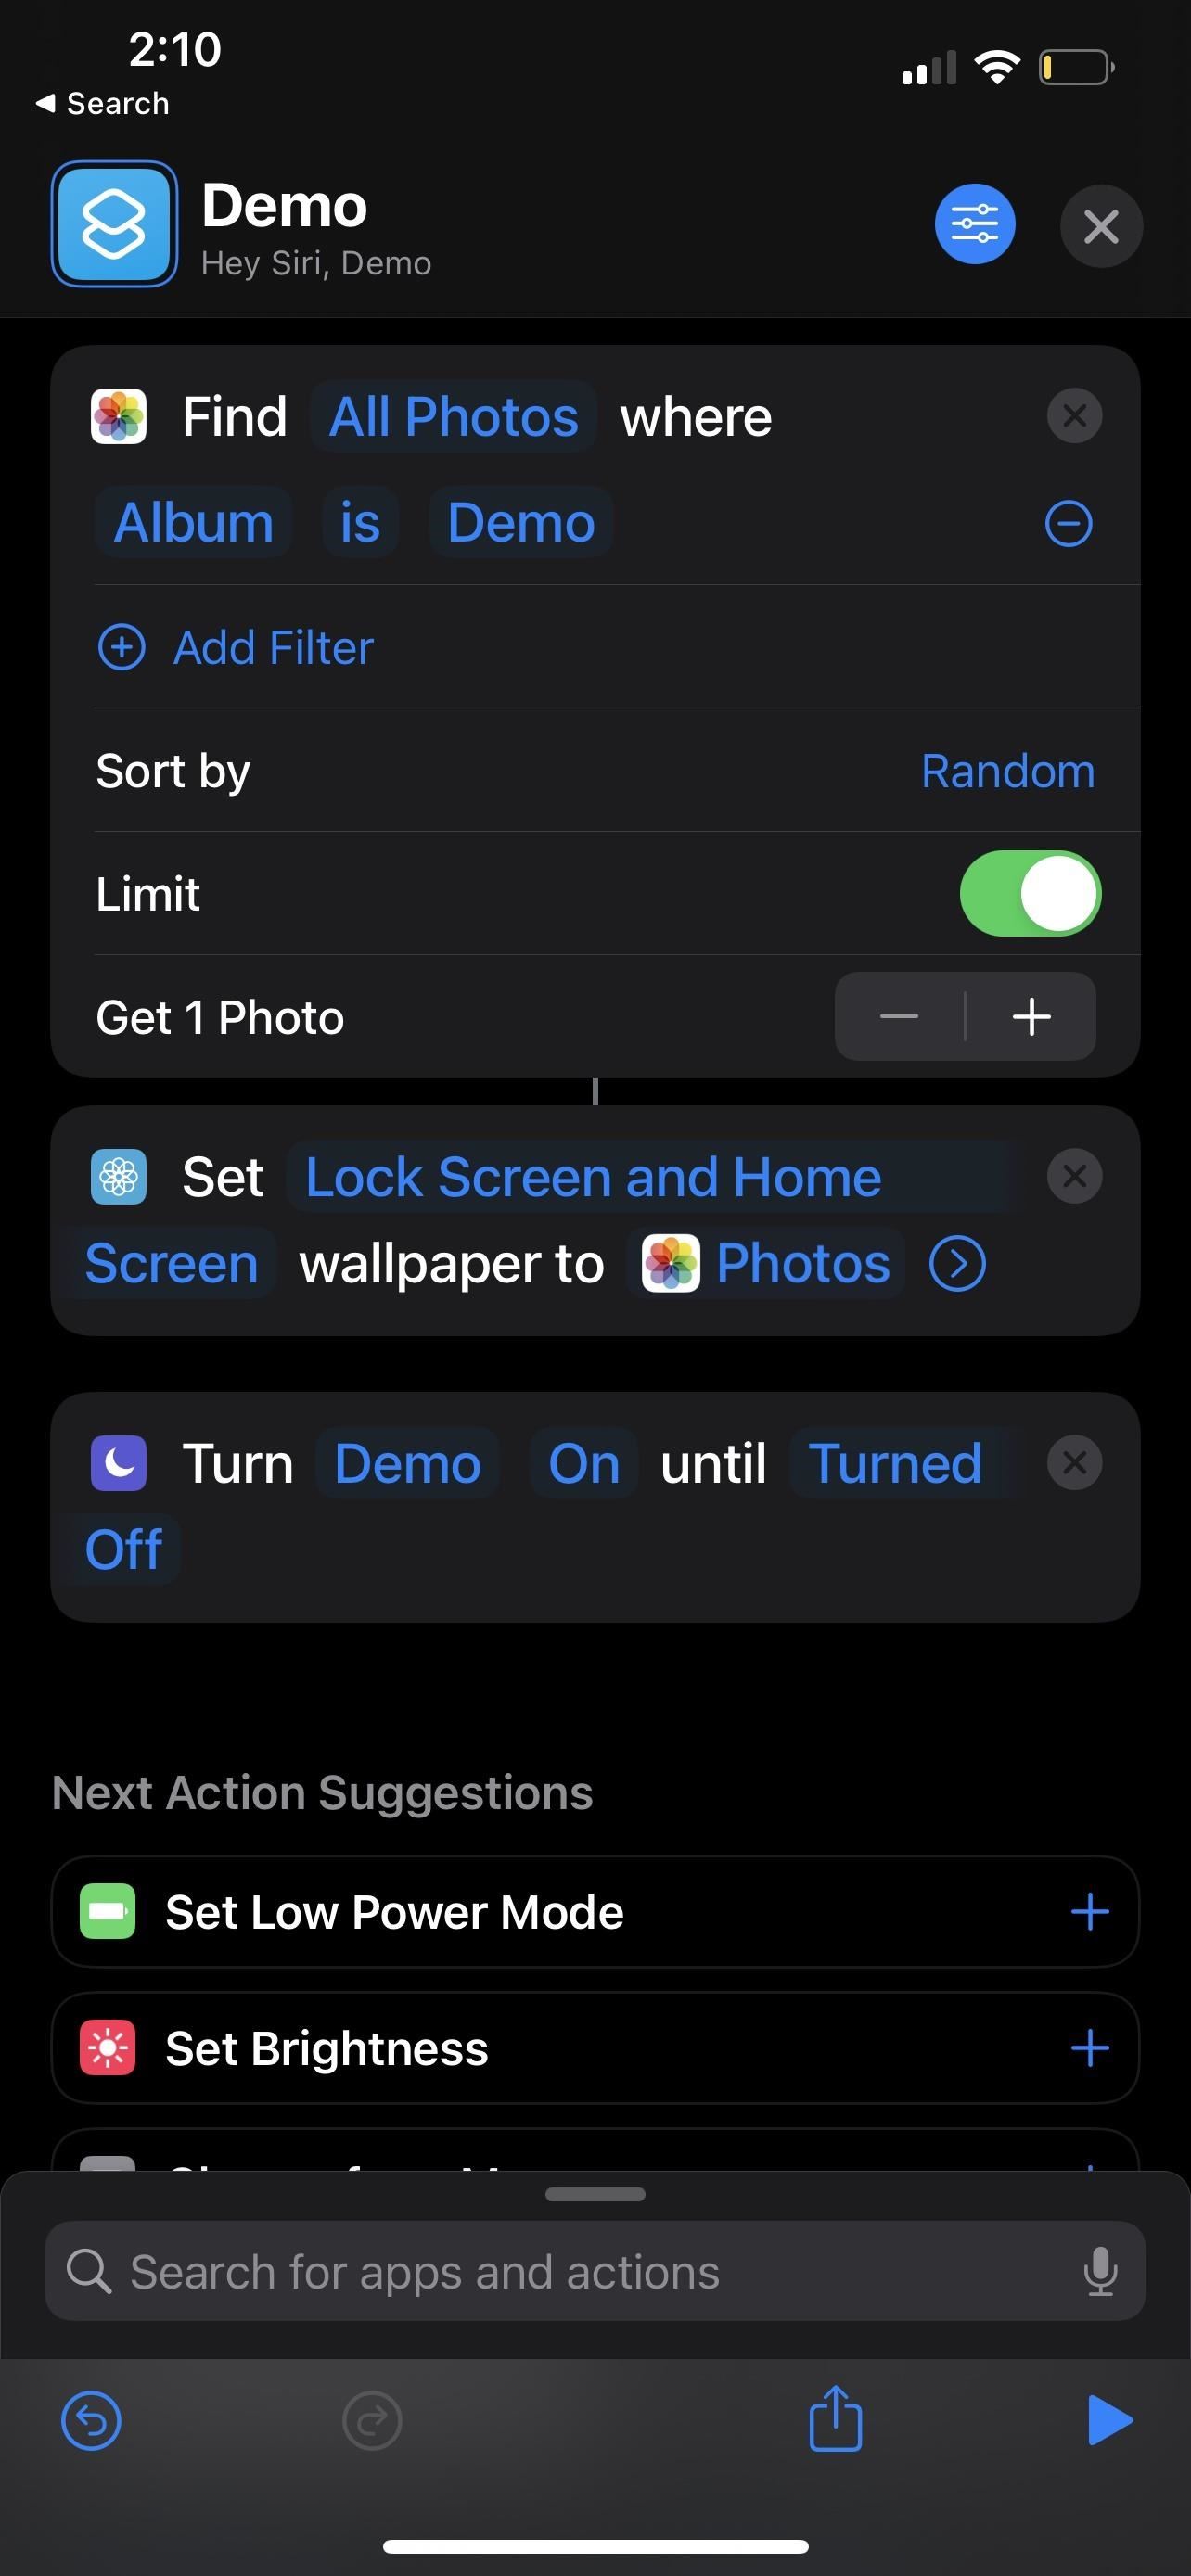
- Screenshots. Here’s a handy tip for YouTubers and tech writers; create a “Demo”focus and set it to mute calls and text messages and only show the home screens you need to demo. Do you want to become more advanced? Use the shortcuts to set a custom wallpaper and enable the focus state you have set for the demo.
Using focus on iPhone, iPad, Mac, and Apple Watch
I know what you’re thinking right now: if I set the focus state on my iPhone, will it apply to my other Apple devices as well?
Yes, Apple has done what they do best with Focus — it syncs Focus across Macs, iPads, iPhones, and Apple Watches. If you turn on focus for one device, it will automatically turn it on for other devices that are signed in with the same Apple ID.
Using Focus on iOS, iPadOS, and macOS is very similar. The Control Center on Mac is accessible through the menu bar in the top right corner. From there, you can access Focus settings similar to those on iPhone and iPad. The Apple Watch lets you swipe up from the bottom to access the Control Center and toggle focus states on and off, but you can’t set up a new focus from the Apple Watch.
While it seems like it would be great to use the same accent on every device, this option might not work for everyone. Apple does give a toggle in the settings of each focus that allows you to turn off “Sharing between devices”. Disabling this option will allow you to manage focus states on each device individually.
By now, you should know the basics and some of the more advanced options for the Apple Focus feature. This is the first version of Focus from Apple, so we will probably see even more advanced features later. However, there are plenty of options to explore – explore the trigger and shortcut options and you’ll be a prime user of Focus.
Leave a Reply