How to add a text or image watermark to a document in Google Docs
Google Docs allows you to add a text or image watermark to your document. You can use your name, email address, company name, or words like “Private”, “Confidential”, “Internal Use Only”, etc. as a watermark. Also, you can choose your company logo or other relevant image as a watermark. Let’s show you how.
How to Add a Watermark to Google Docs
1) Go to Google Docs on your computer and select an existing document, or click Empty to create a new one.
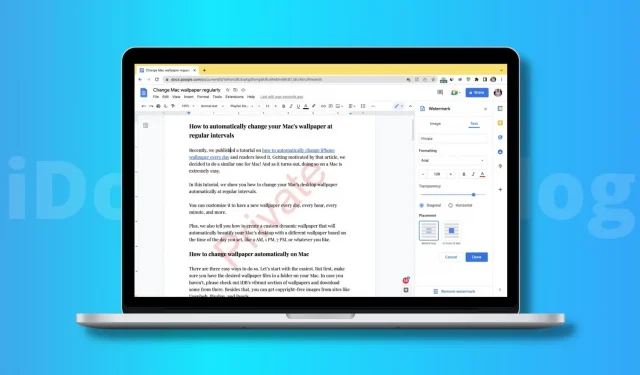
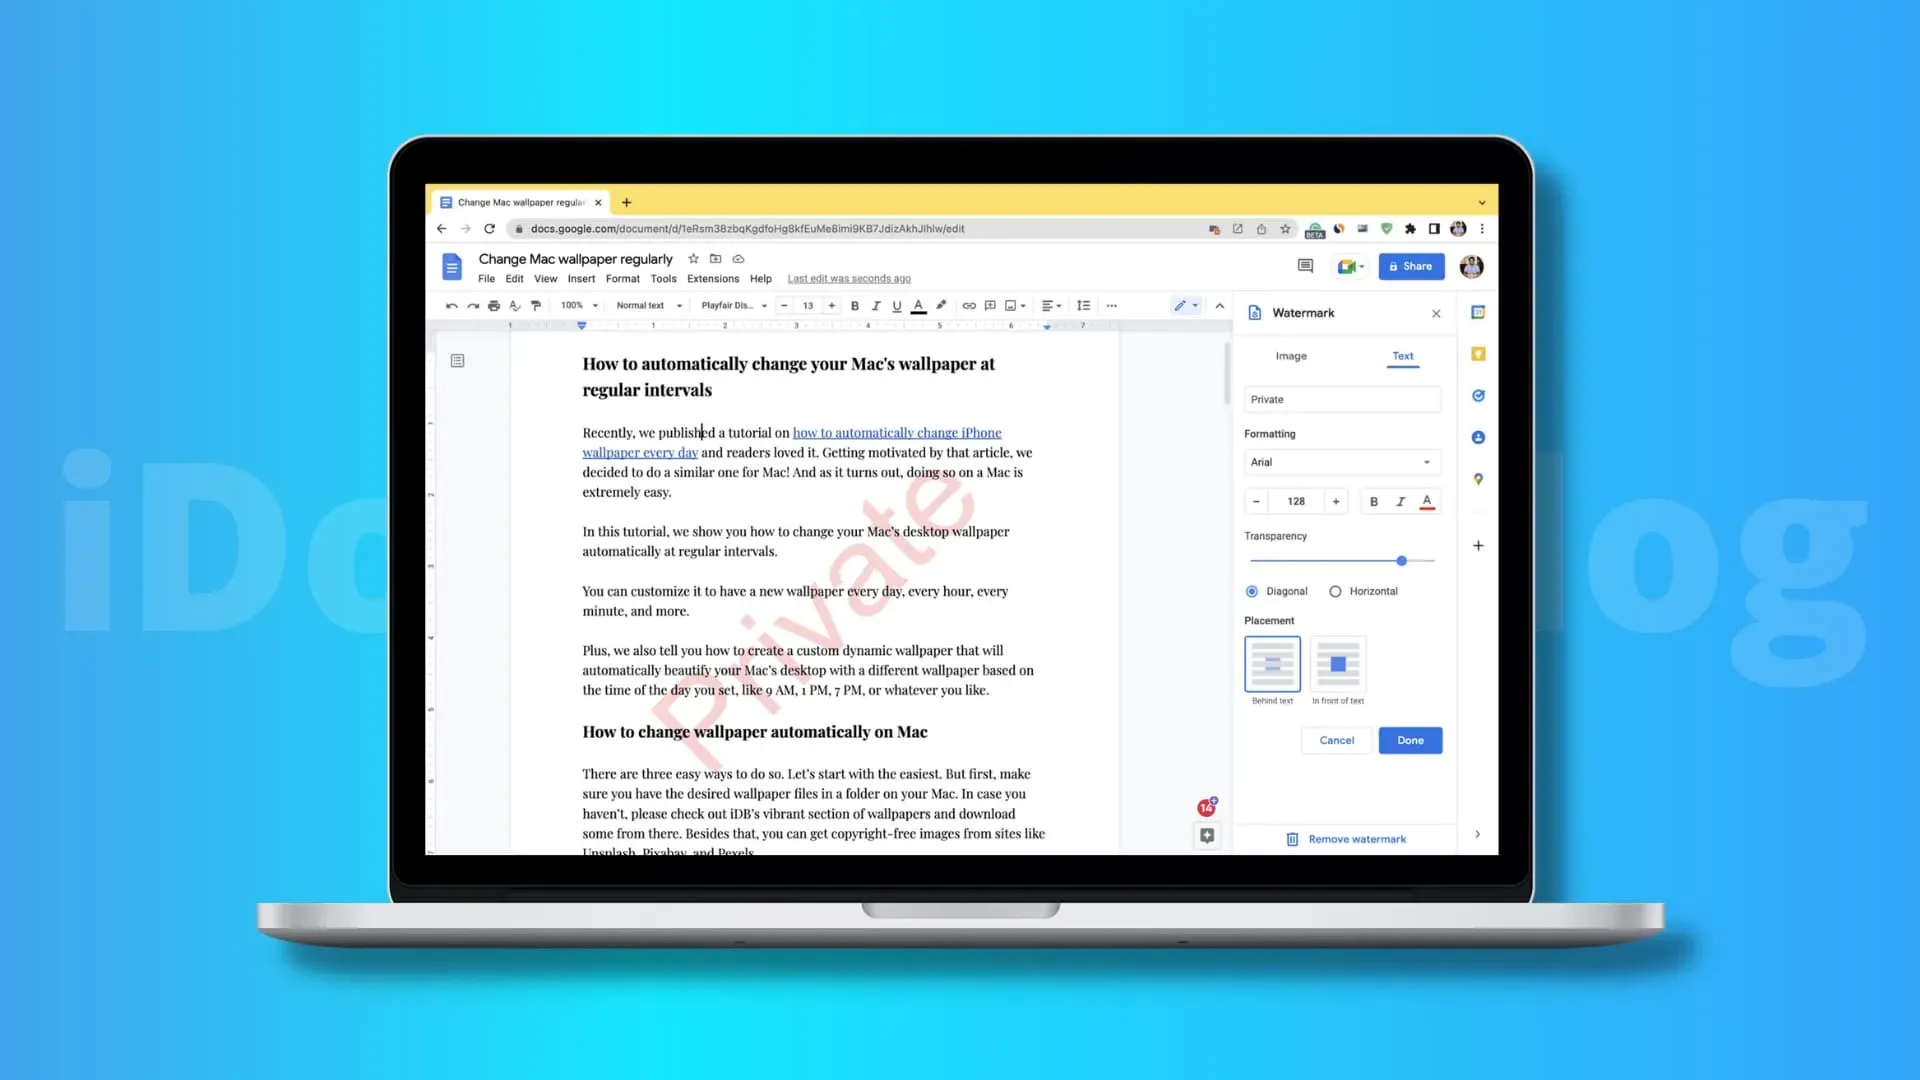
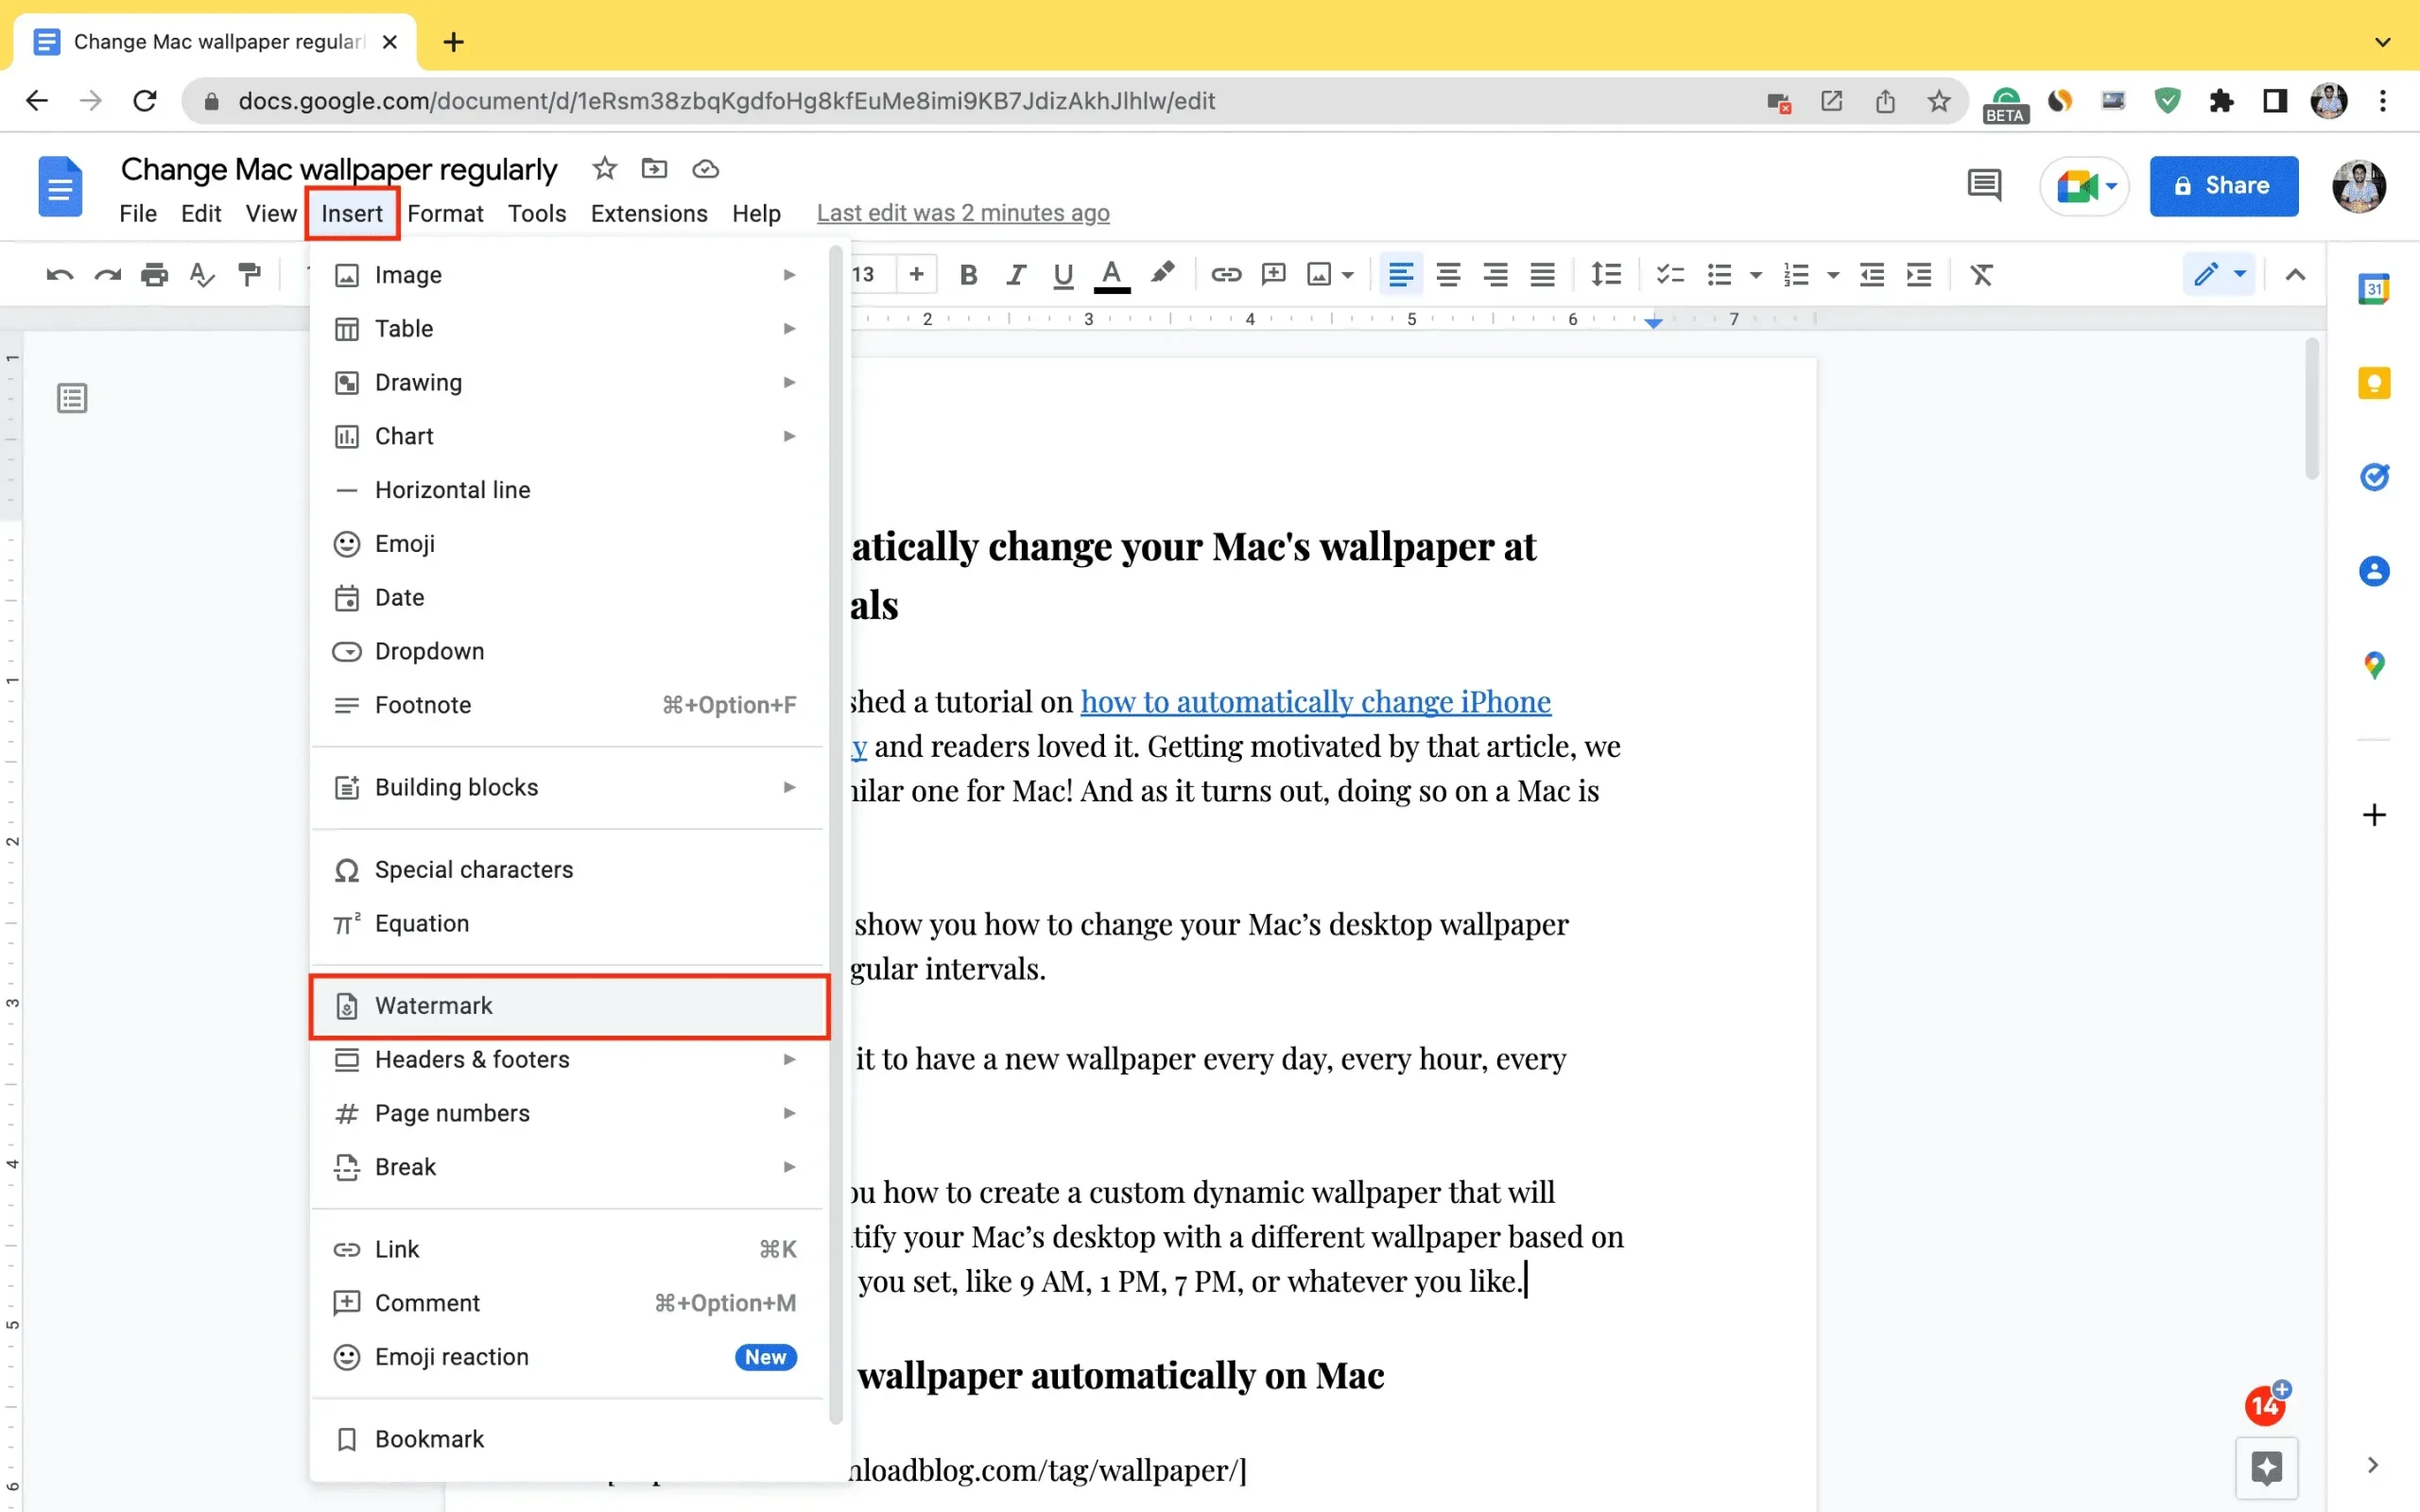
2) Click “Insert”and select “Watermark”.
3) On the left sidebar, select “Image”to add a photo/logo as a watermark, or click “Text”to use words as a watermark. Here are the steps for both:
Image Watermark
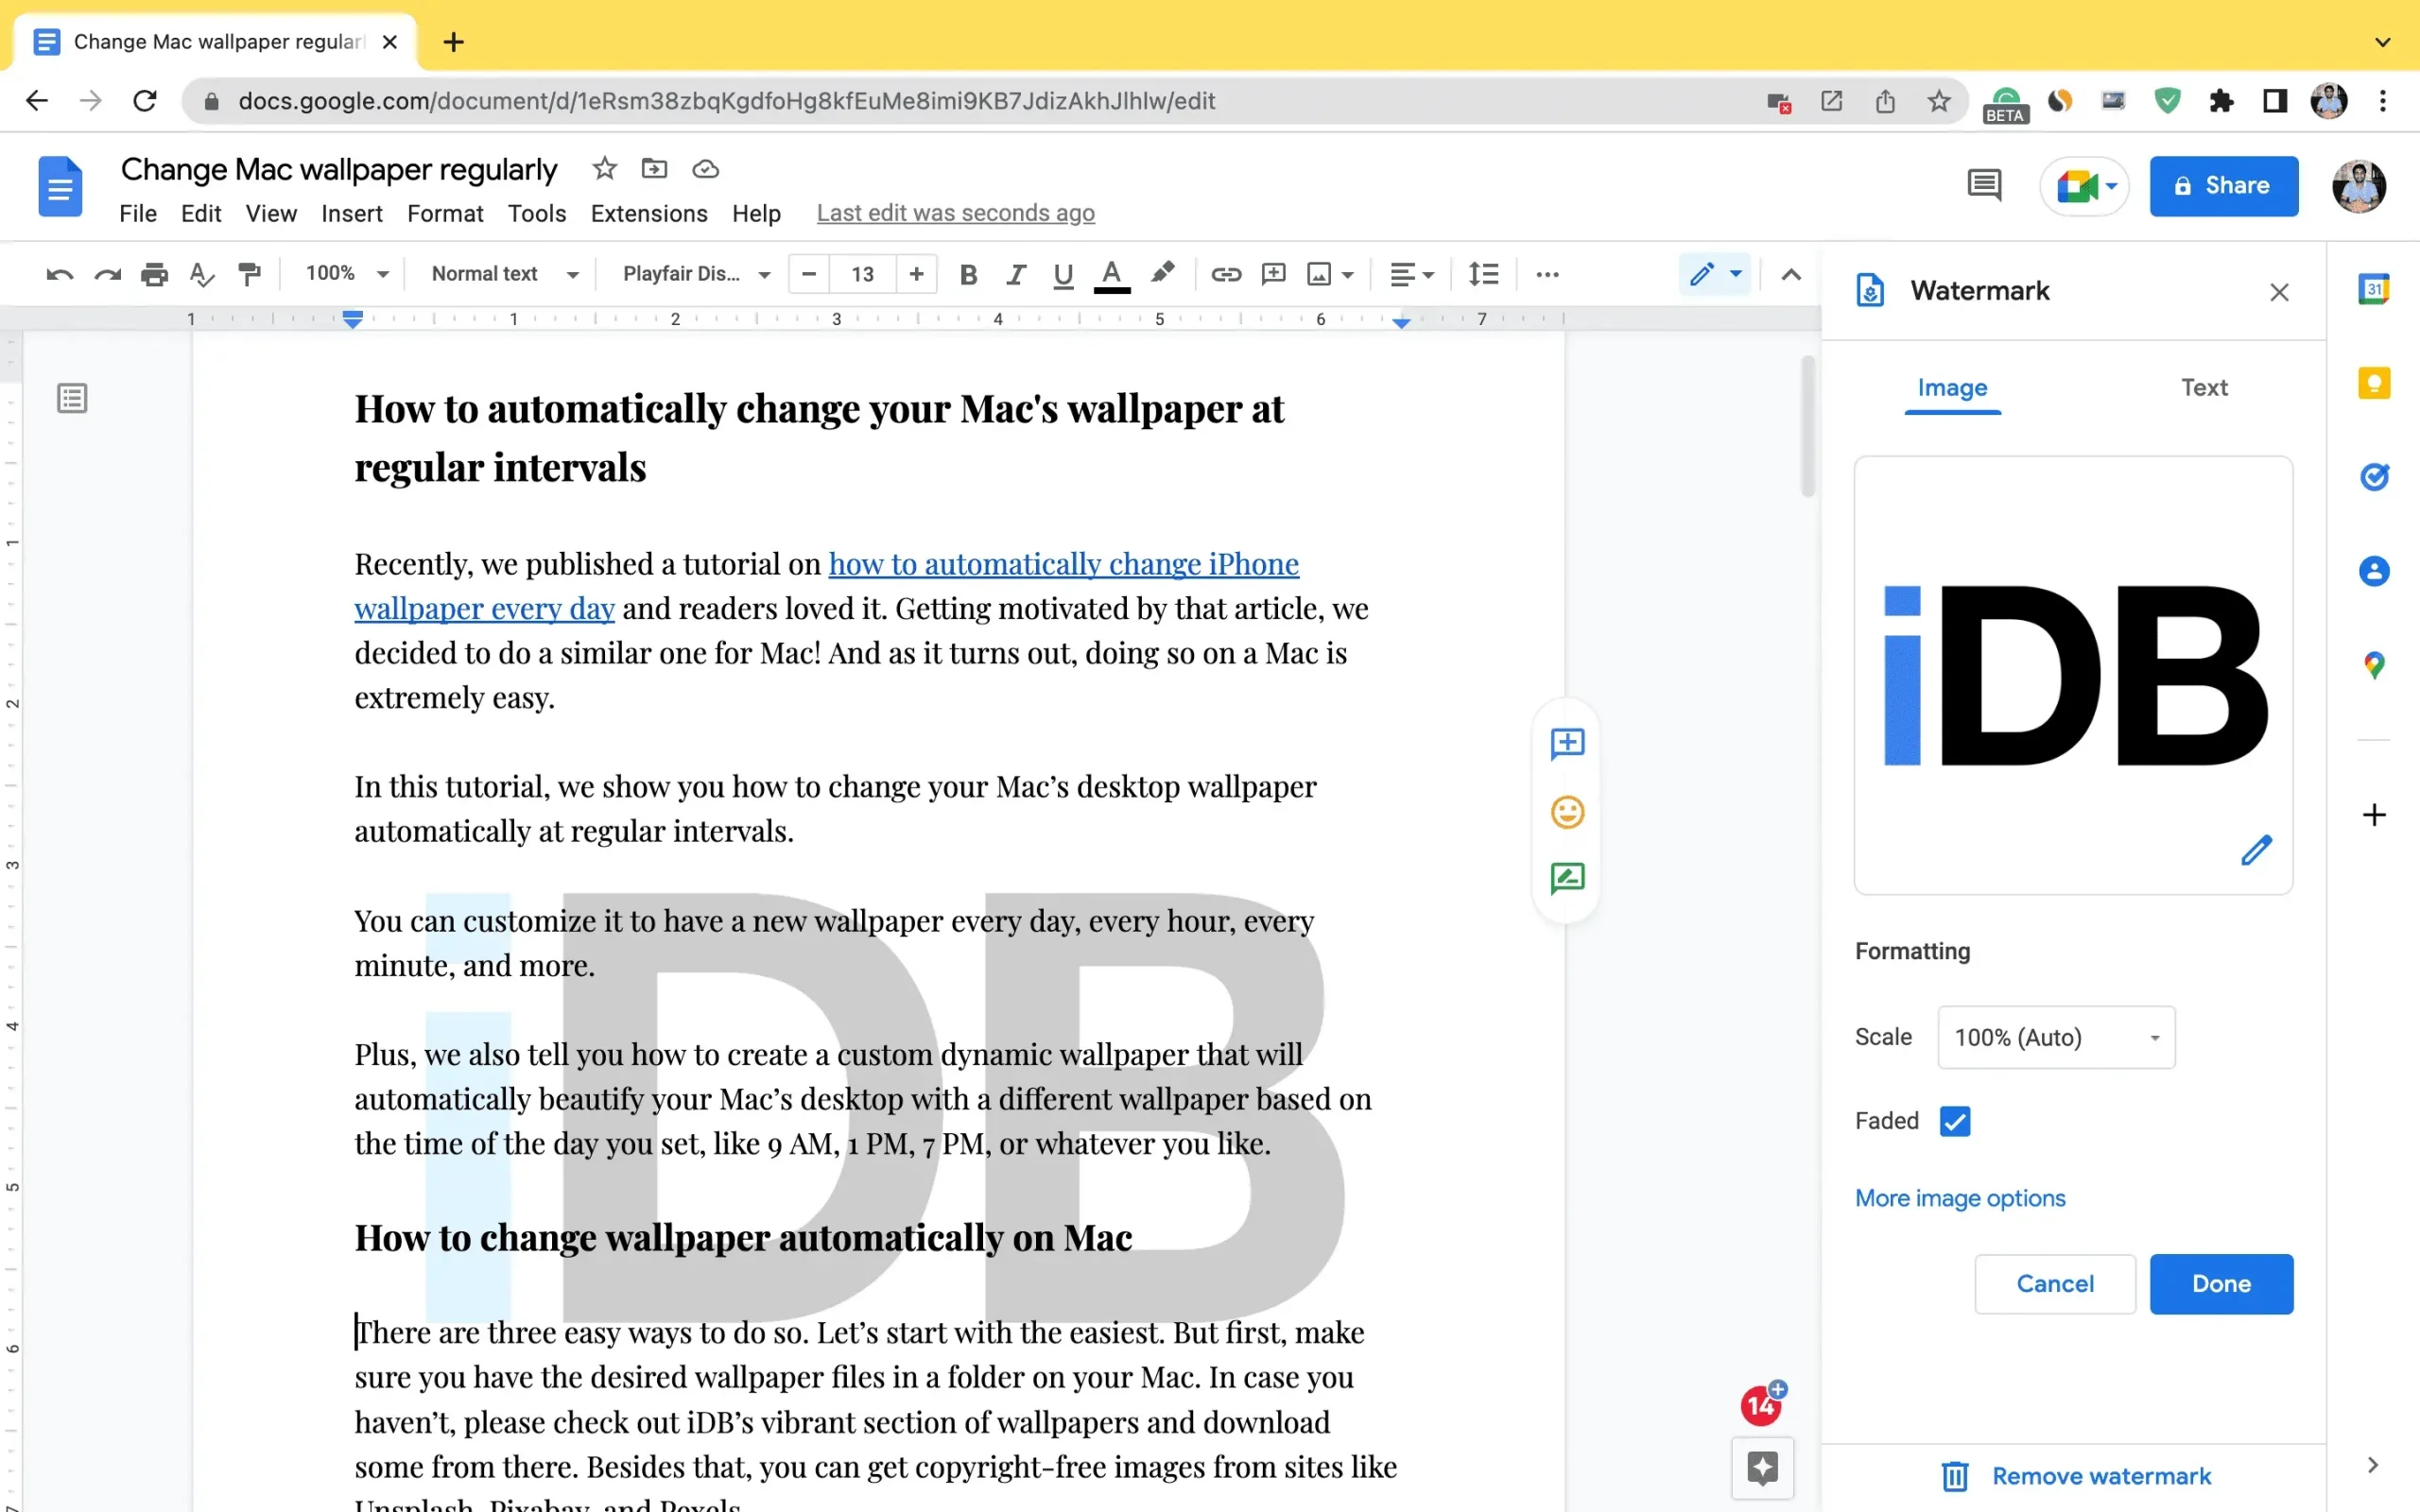
Click “Choose Image”and upload the desired image or select it from Google Photos, Drive, etc. Right after selecting the photo, it should appear as a watermark. But you can customize it to your liking using the following options:
Scale: Use this to change the percentage of the watermark – 50%, 100%, 150%, 200%, or 500%. For best results, select 50% or 100%.
Pale: This option should be selected by default because the main purpose of a watermark is to appear in a document without blocking the corresponding text. Faded gives this nice translucent option, but you can take it off if you want.
Then click More Image Options to access additional tools:
Size and Rotate: Use this to resize the watermark exactly. The Angle option allows you to rotate the watermark diagonally or according to your tilt. Apart from the options here, you can also double-click the watermark in the document and drag the edges to adjust the size.
Wrap text: In most cases, this option is blurry. When it isn’t, text wrapping lets you decide how the text will look in relation to the image. For example, should the image appear inline with the text, wrap the text around it (the image appears to the left or right with the text next to it), break the text, or appear in front of the text and hide the text behind it. or appear behind the text. As a watermark, the image you’re adding is already behind the text (and that’s probably why the Text Wrap option is blurry).
Position: You can decide where on the pages the watermark will appear by entering the X and Y values or by selecting the desired option in the Quick Layouts section.
Recolor: With recolor you can add a filter to the watermark image. Because this can change the look a lot, I recommend avoiding this option if you’re using your company logo as a watermark. However, the last black and white filter, called “Negative”, is sometimes useful.
Settings: This is an important setting as it contains a “Transparency”slider that allows you to control how the watermark looks. In most cases, to look professional, I recommend making the watermark unobtrusive. And setting watermark transparency is the perfect way to make sure your text is seen clearly and the watermark stays behind it in a crisp, non-irritating way. In addition to transparency, you can change the brightness and contrast of the watermark. If you think you’ve made too many unwanted settings, use the Reset button to start over.
Finally, when you’re done, click the X to the left of the image option and then click “Done”to add a watermark to this Google Docs project. The watermark will appear on all pages of the document.
Text watermark
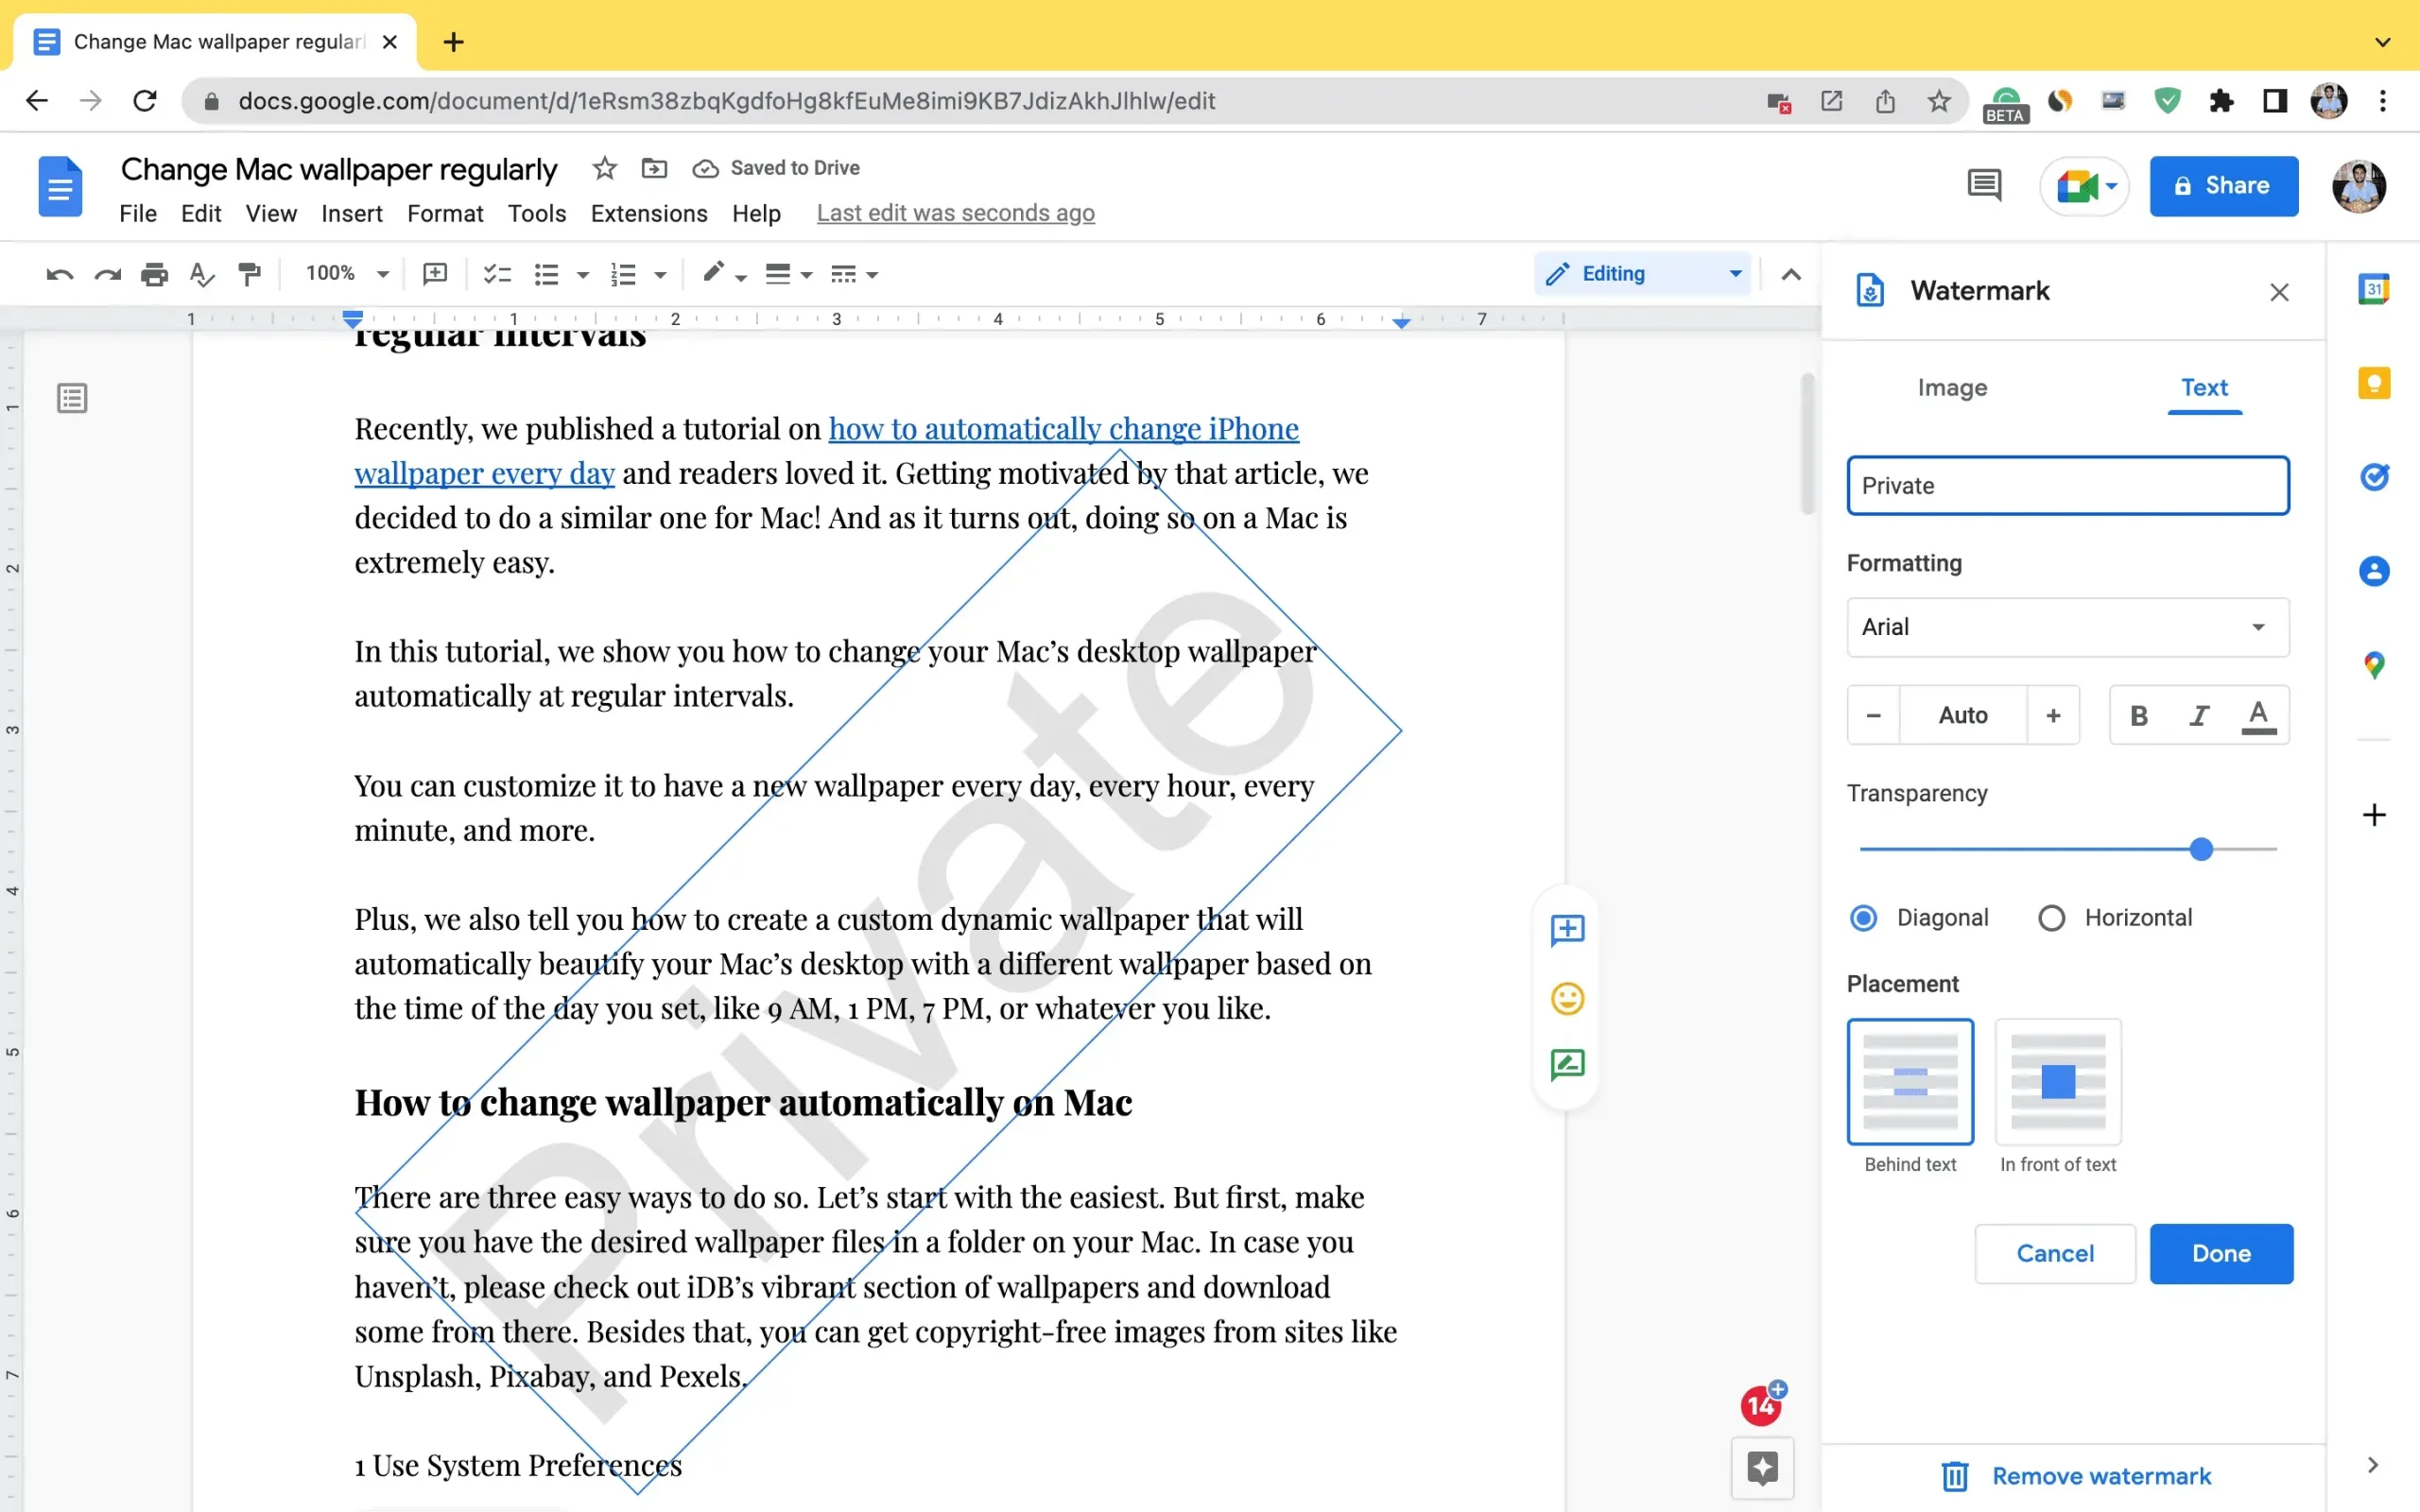
After clicking “Text”in the upper right corner, enter your desired watermark text in the “Insert Text”field. It will immediately appear as a watermark. If you like it, click Done. And in case it doesn’t suit your taste, the following options will help you tweak it:
Formatting: Use it to change the font type, size, make it bold or italic, and add color to the text watermark.
Transparency: With this, you can adjust the clarity or transparency of the text watermark. To make sure it’s not intrusive, you can set it to somewhere after 75%.
Diagonal and Horizontal: Use these and see what works best for your document. Usually watermarks like the words Private, Confidential, etc. go well with the diagonal format.
Placement: Finally, you can use them to place the watermark above or below the text. In most cases, the watermark looks nice when it’s behind the text.
Working with watermarks in Google Docs
Here’s how you can add a watermark to Google Docs. Once that’s done, you can click File > Download to save the document locally with the watermark.
During my testing, I found that sometimes an image watermark can cause problems and appear cut off or blocked behind text. And when the Text Wrap option is disabled, it becomes difficult to fix it. But one way to solve this problem is to make sure that your real text is present in the document and then add a watermark. If your document is already ready, copy it and paste it into a new Google Doc. After that, add a watermark to the new document.
I also found that you can use both an image-based watermark and a text-based one. There can’t be both.
All in all, watermarking in Google Docs is easy to use and I hope the guide was helpful.
At the moment, the Google Docs app for iPhone doesn’t seem to have a watermark feature. However, you can add an image behind the text, which can work as a watermark, but the experience will be lackluster.
Leave a Reply