The Files app on your iPhone just got cool with the latest performance update
If you’re not already using the Files app on your iPhone to manage your pictures, documents, and other files in iCloud, third-party cloud services, or local storage, it’s time to start. Apple’s built-in file manager has finally become a powerful engine with a lot of tricks in the latest software update.
Files is a hidden gem and you are really missing out on a lot of useful features if you don’t use them. The app can help you get your work done faster, make deep changes on the go, and more right from the palm of your hand. For example, did you know that a PDF file can be edited right in Files? Usually you install a third-party application for this, but no more.
And this is just the beginning. With the iOS 16 update for iPhone, Files has a host of new tricks to help you be more productive as you cut down on the time spent editing your desktop or sending file after file—just do it from your iPhone, wherever you are. are.
1. Full access to files when saving or moving files
At first glance, the new Save to Files experience you’ll see on the share sheet in Safari or any other app doesn’t look much different in iOS 16 from iOS 15, but there’s actually a lot going on in the updated one. Look. The same applies to moving files to other locations directly in the Files app.
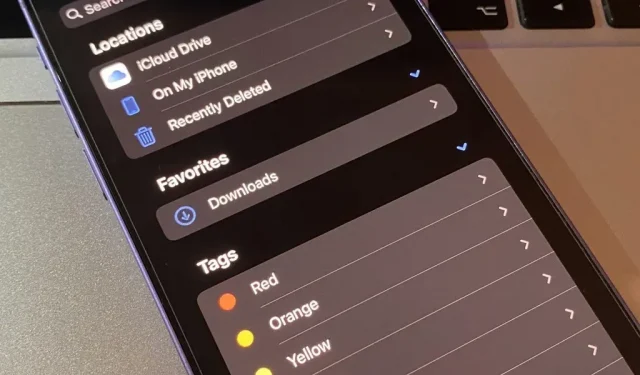
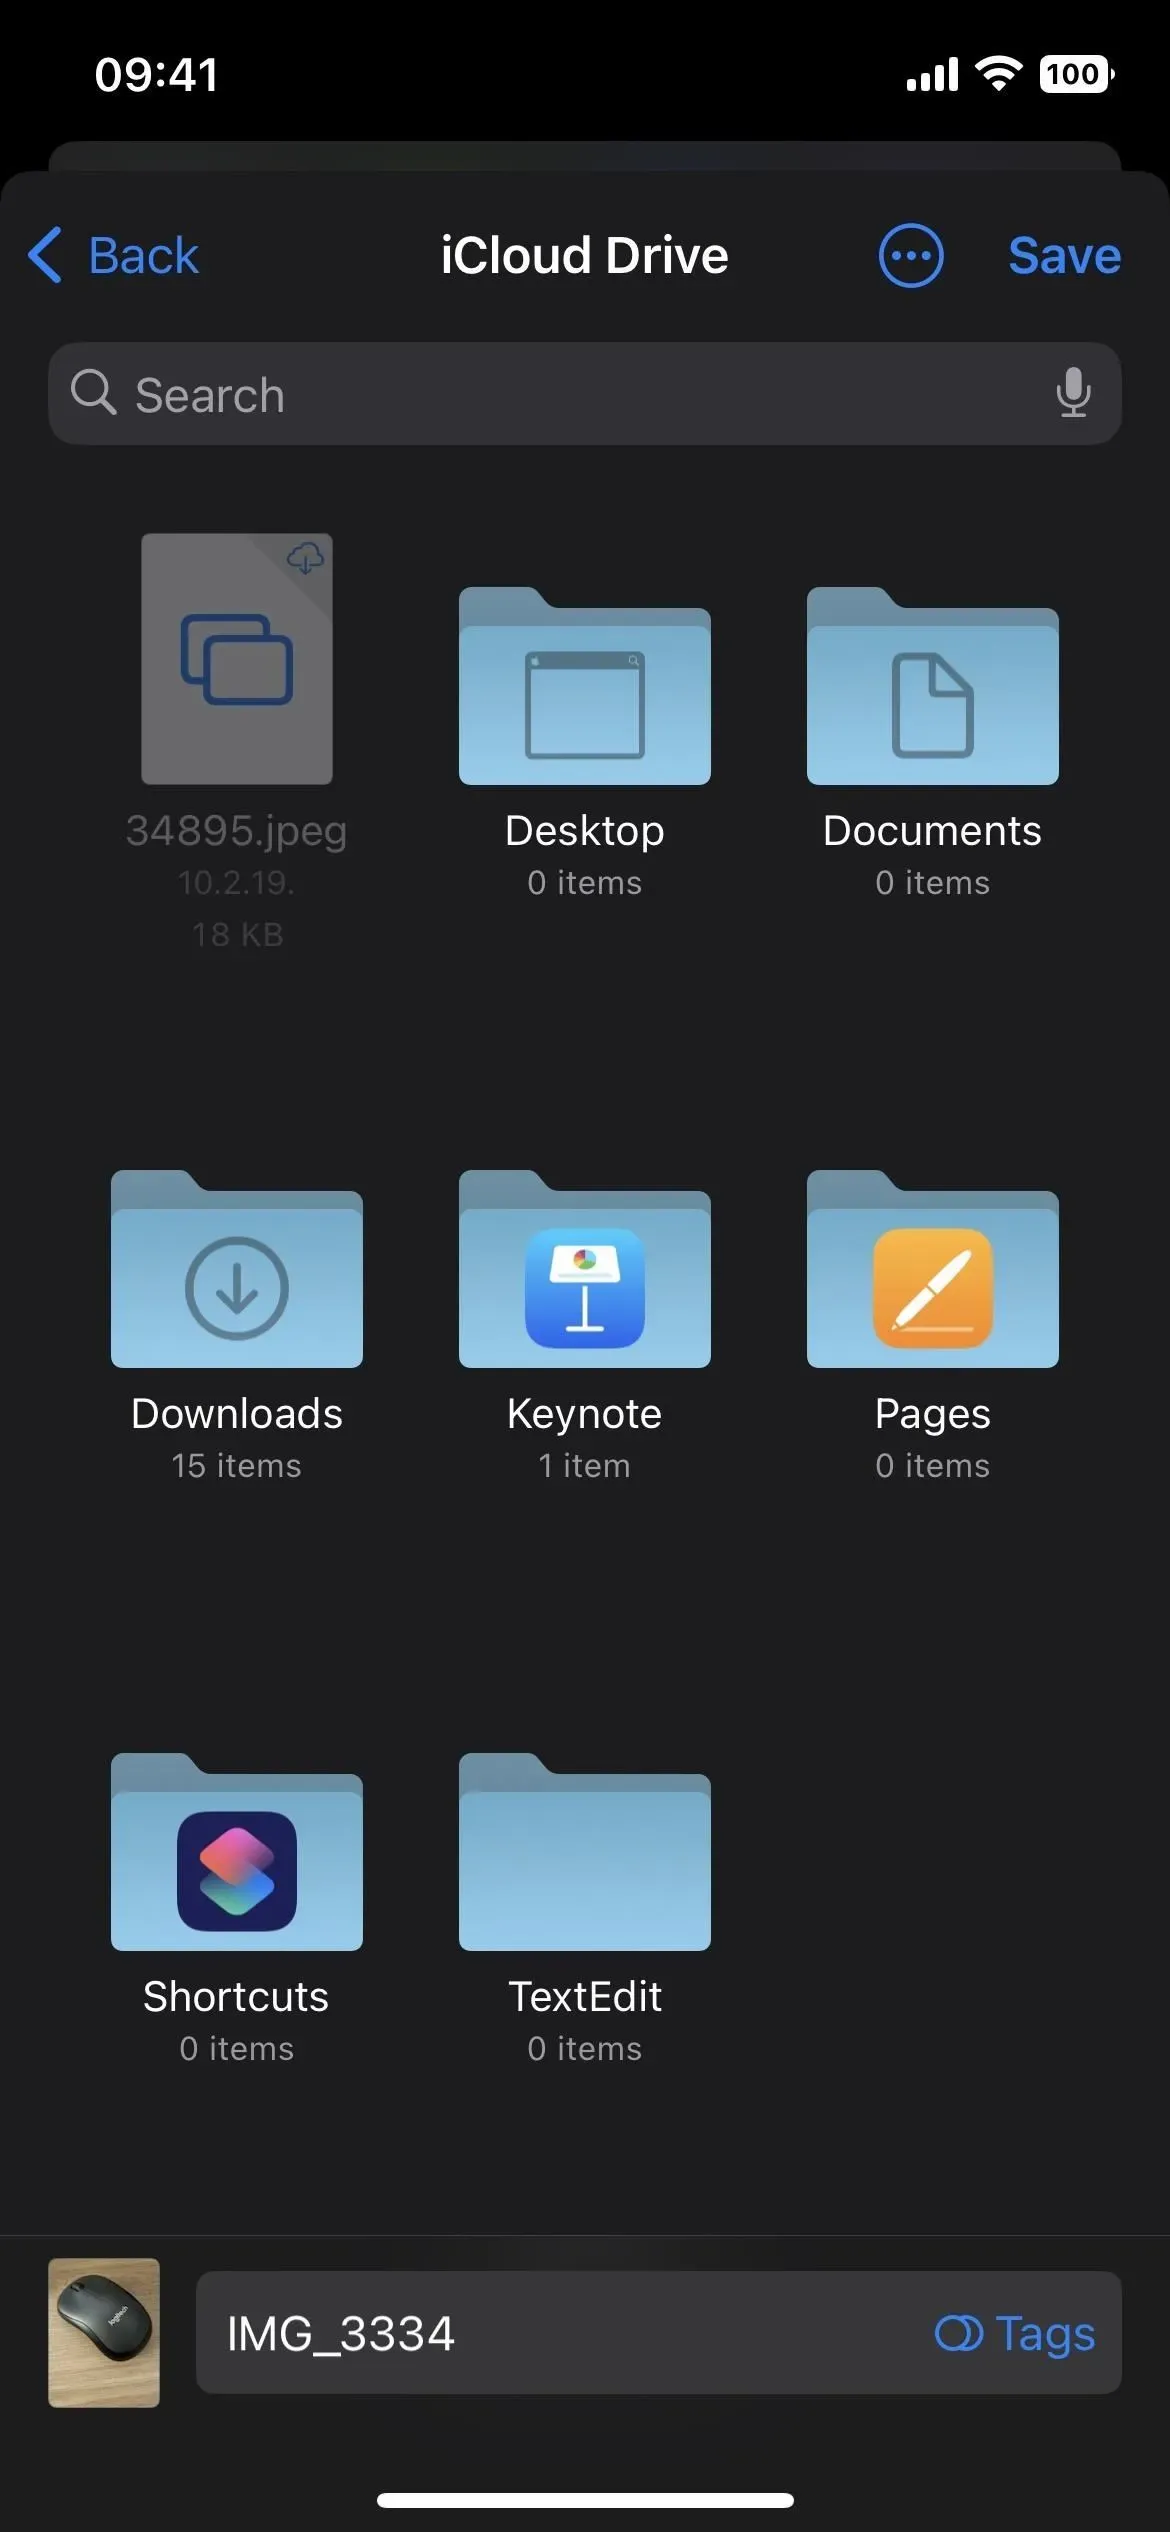
When saving a file from another application, you can still rename the file and create a new folder, but you also have full access to the files:
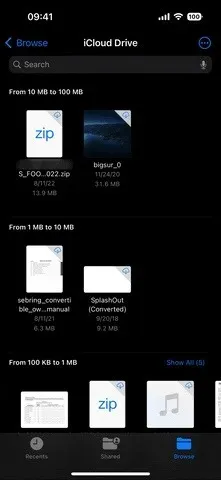
- Look for iCloud Drive for a specific directory instead of browsing.
- Find and select your favorite folders on the browsing screen.
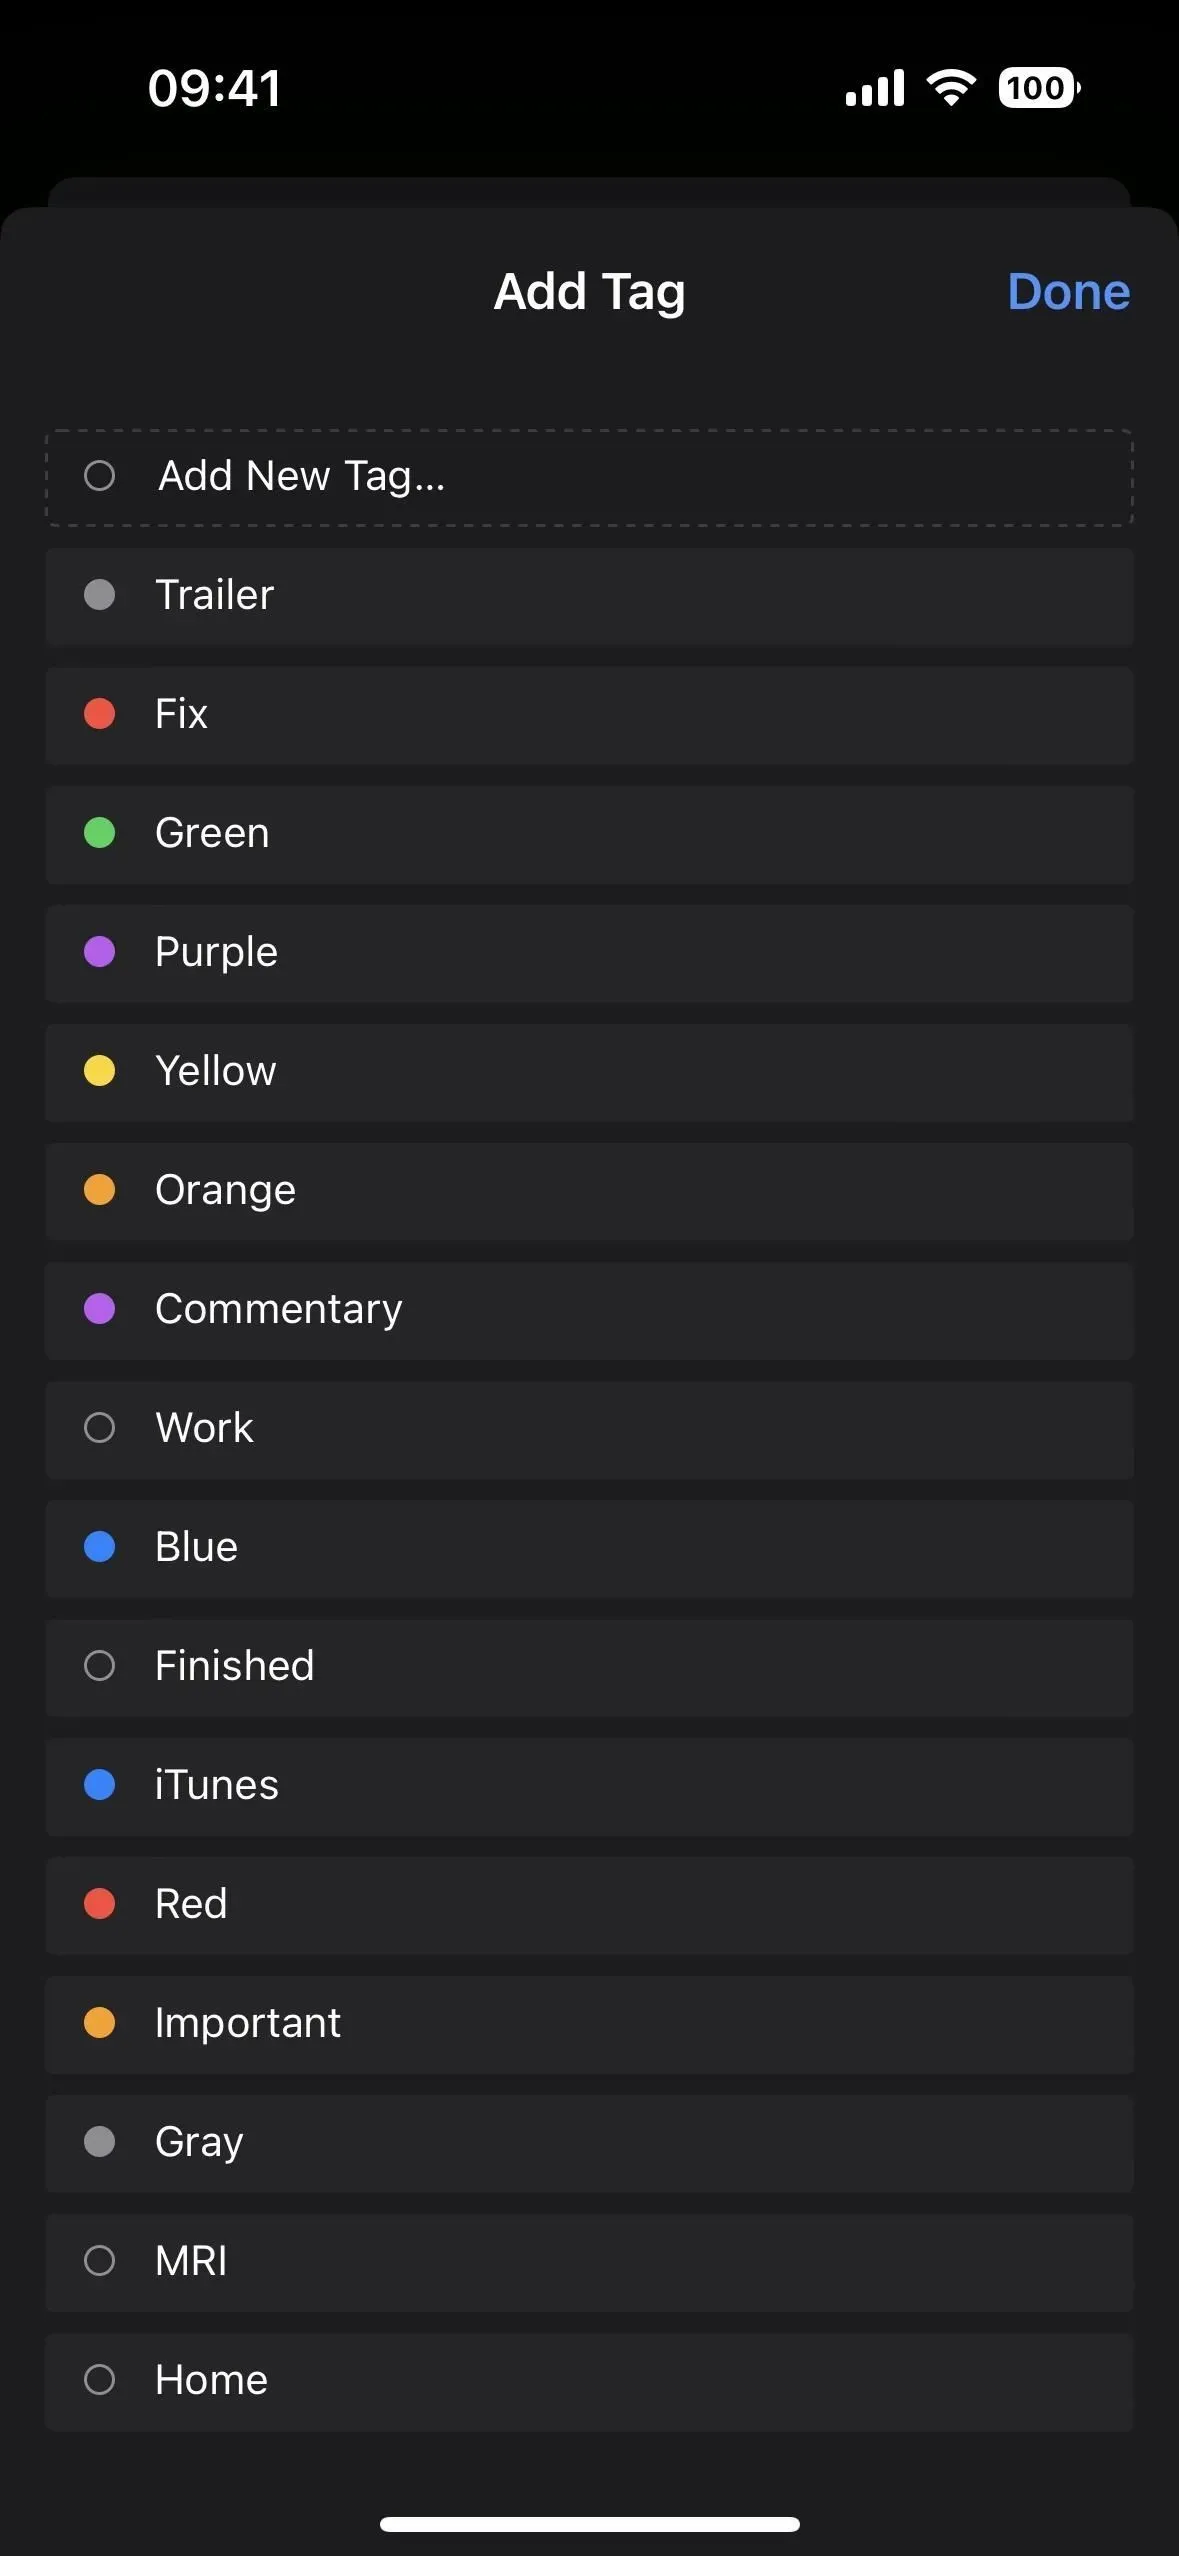
- Assign or create new tags for the file.
- Edit the Browse screen to show, hide, or reorder locations, favorites, and tags.
- Browse files, not just folders. (This may help you find a folder with files similar to what you are saving.)
- View folders and files in a grid instead of a list.
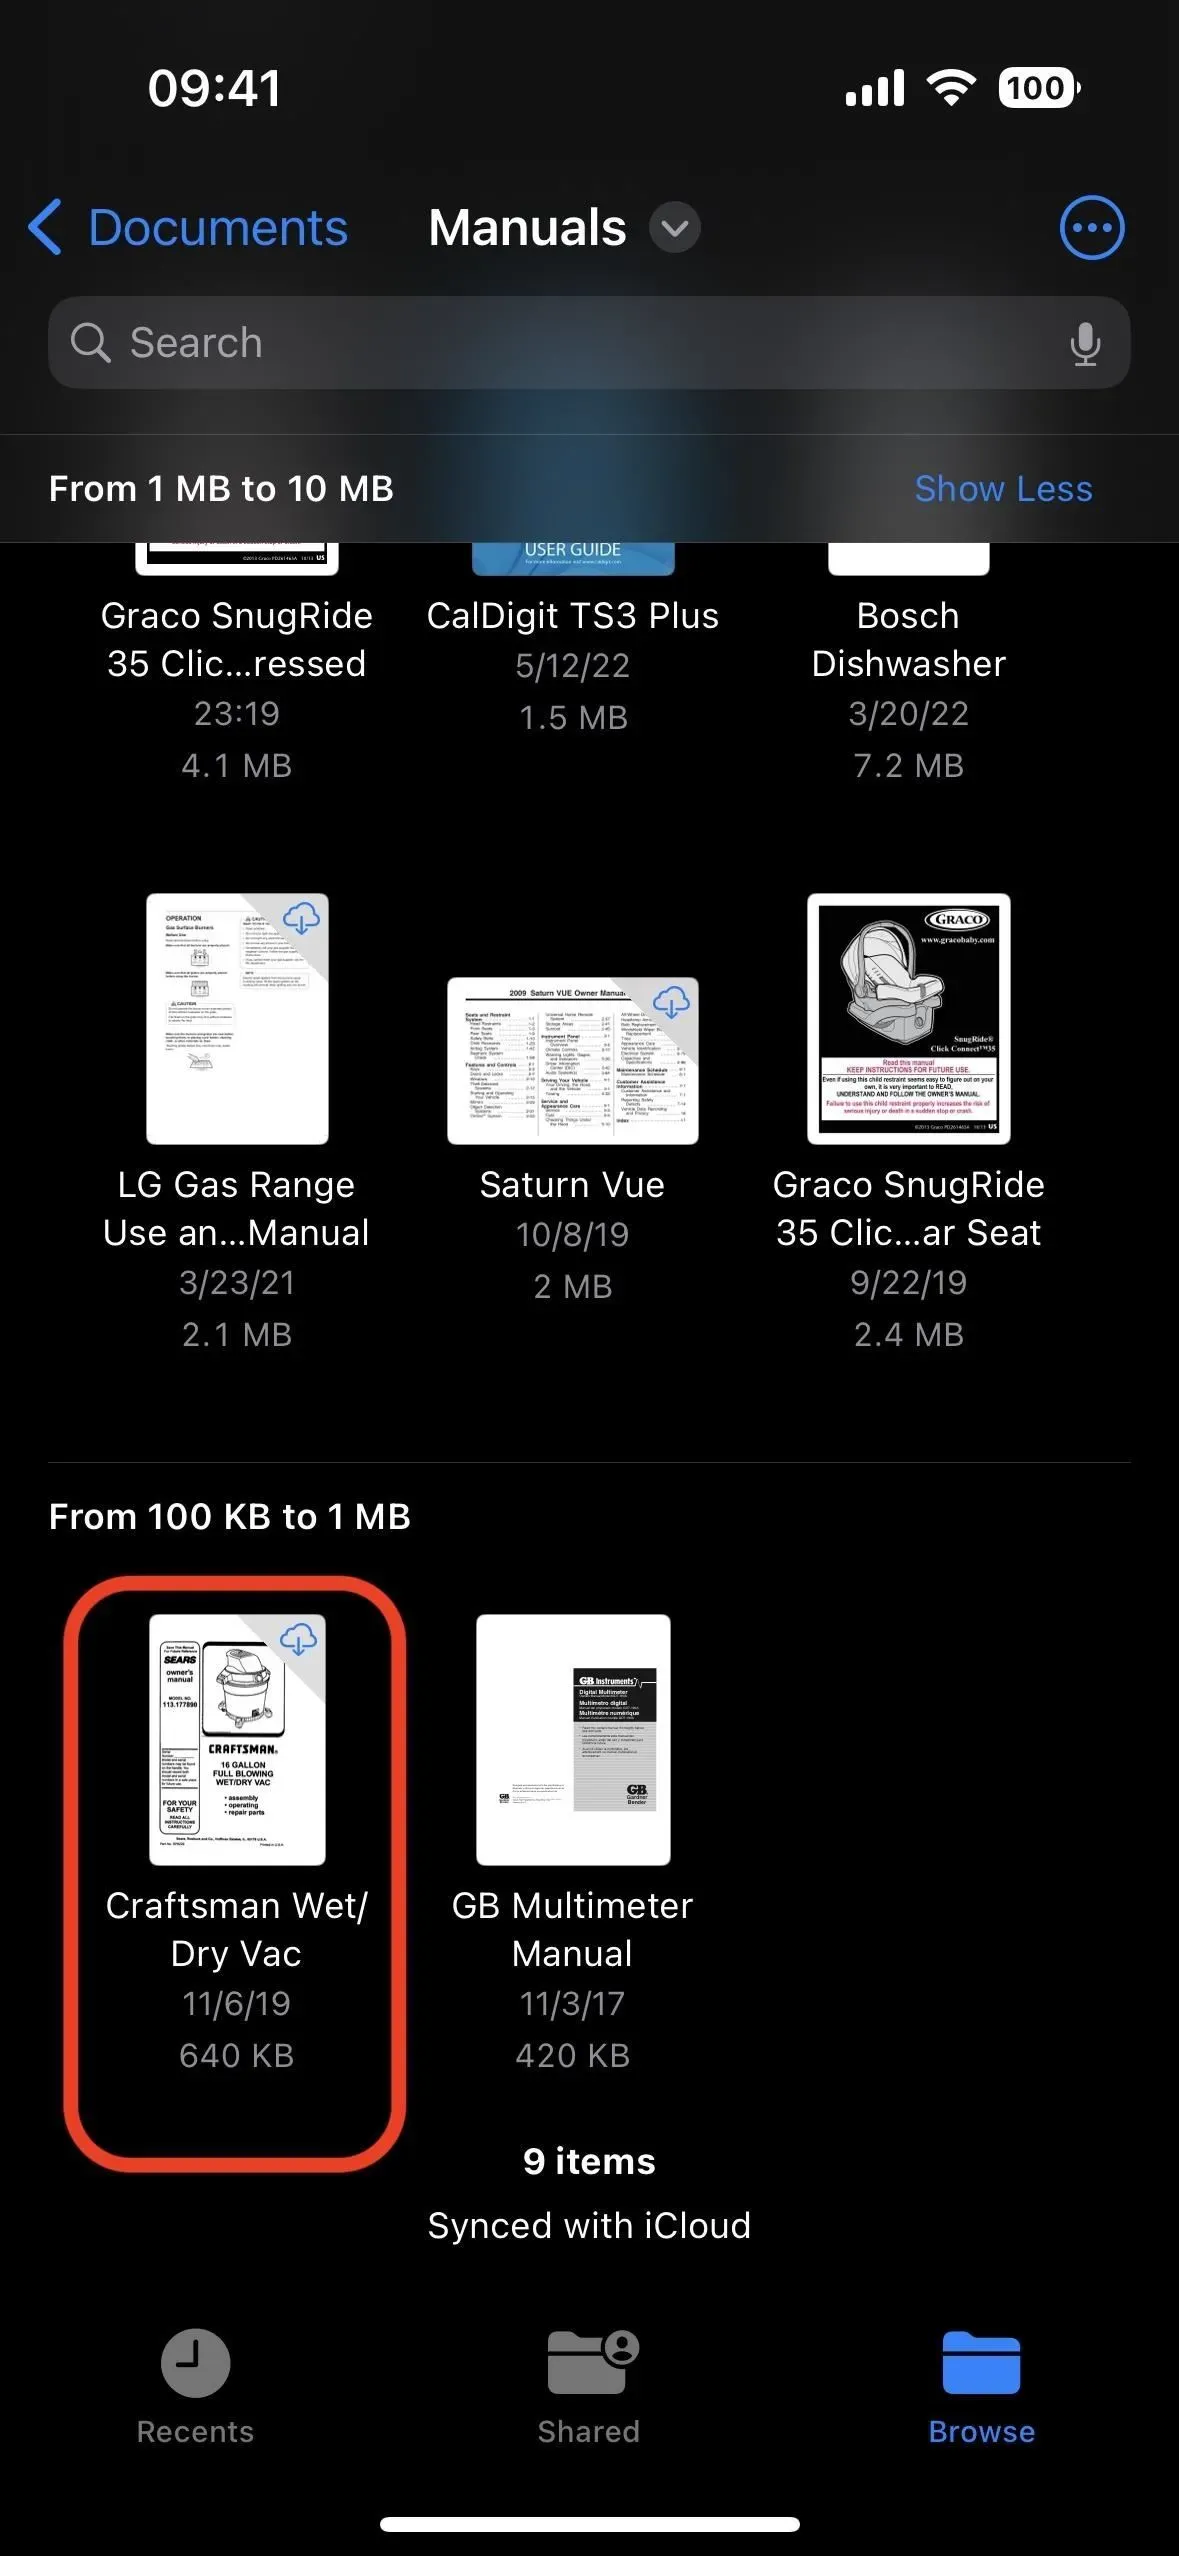
- Sort folders and files by name, type, date, size or tags.
- Group folders and files by name, type, date, size, or shared.
- Show or hide all file extensions.
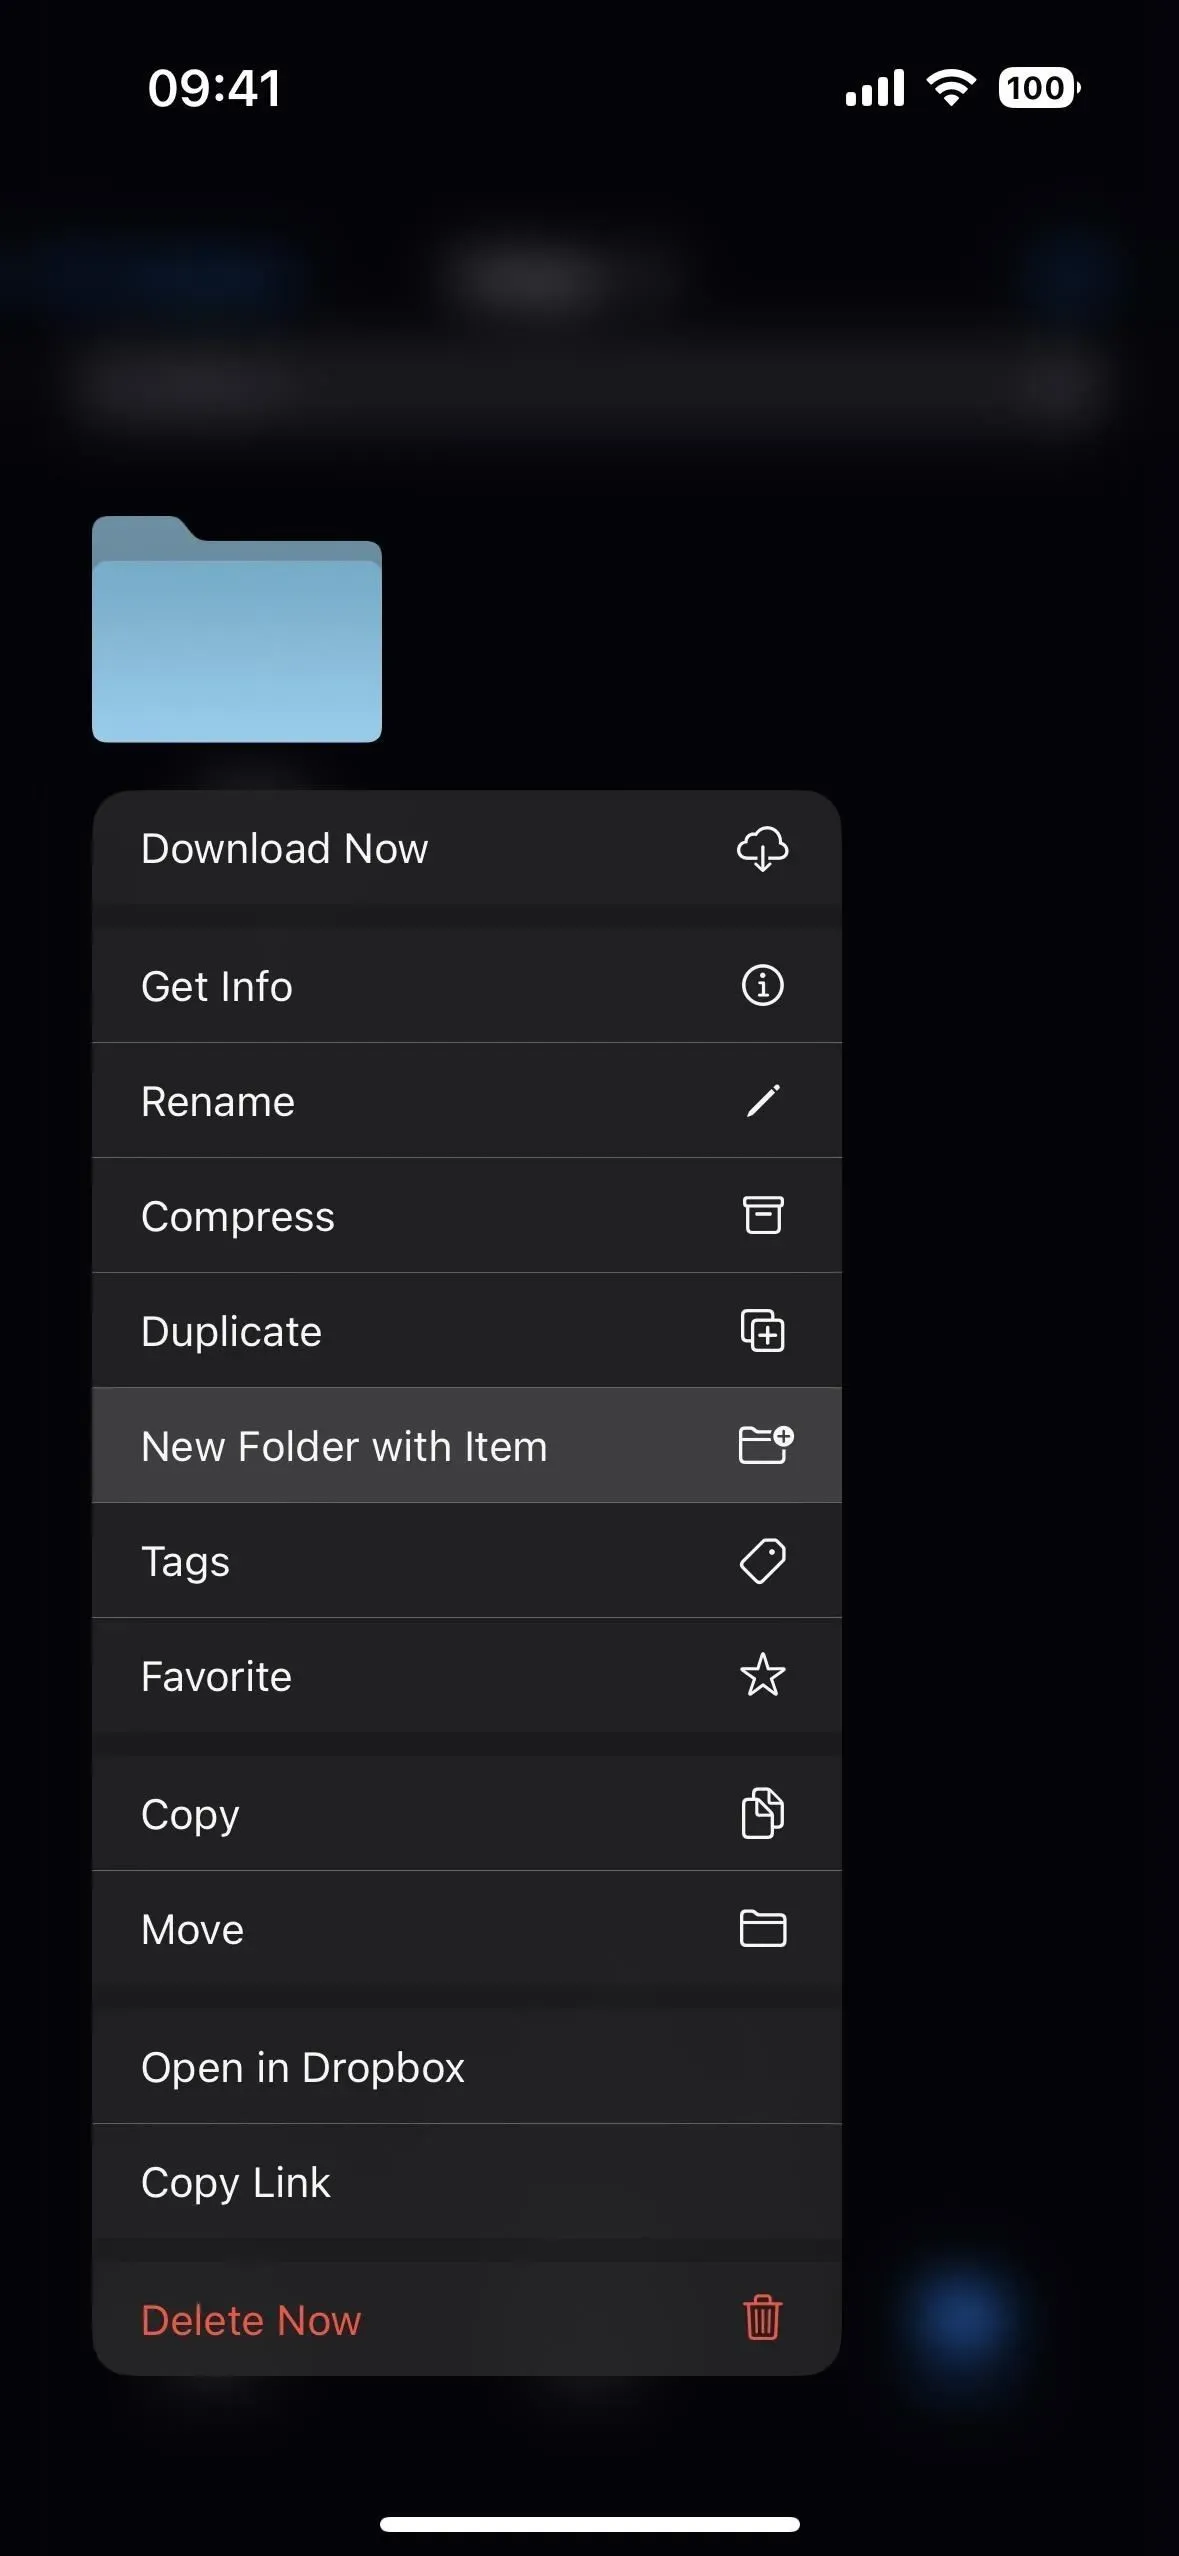
- Tap and hold folders to rename, duplicate, get information, add to favorites, and more.
- Manage your shared folder.
- Move the current files to other directories.
- And more.

All of this applies when moving or copying a file to another location directly in the Files app, but you’ll also see a new progress bar letting you know when the transfer is complete.
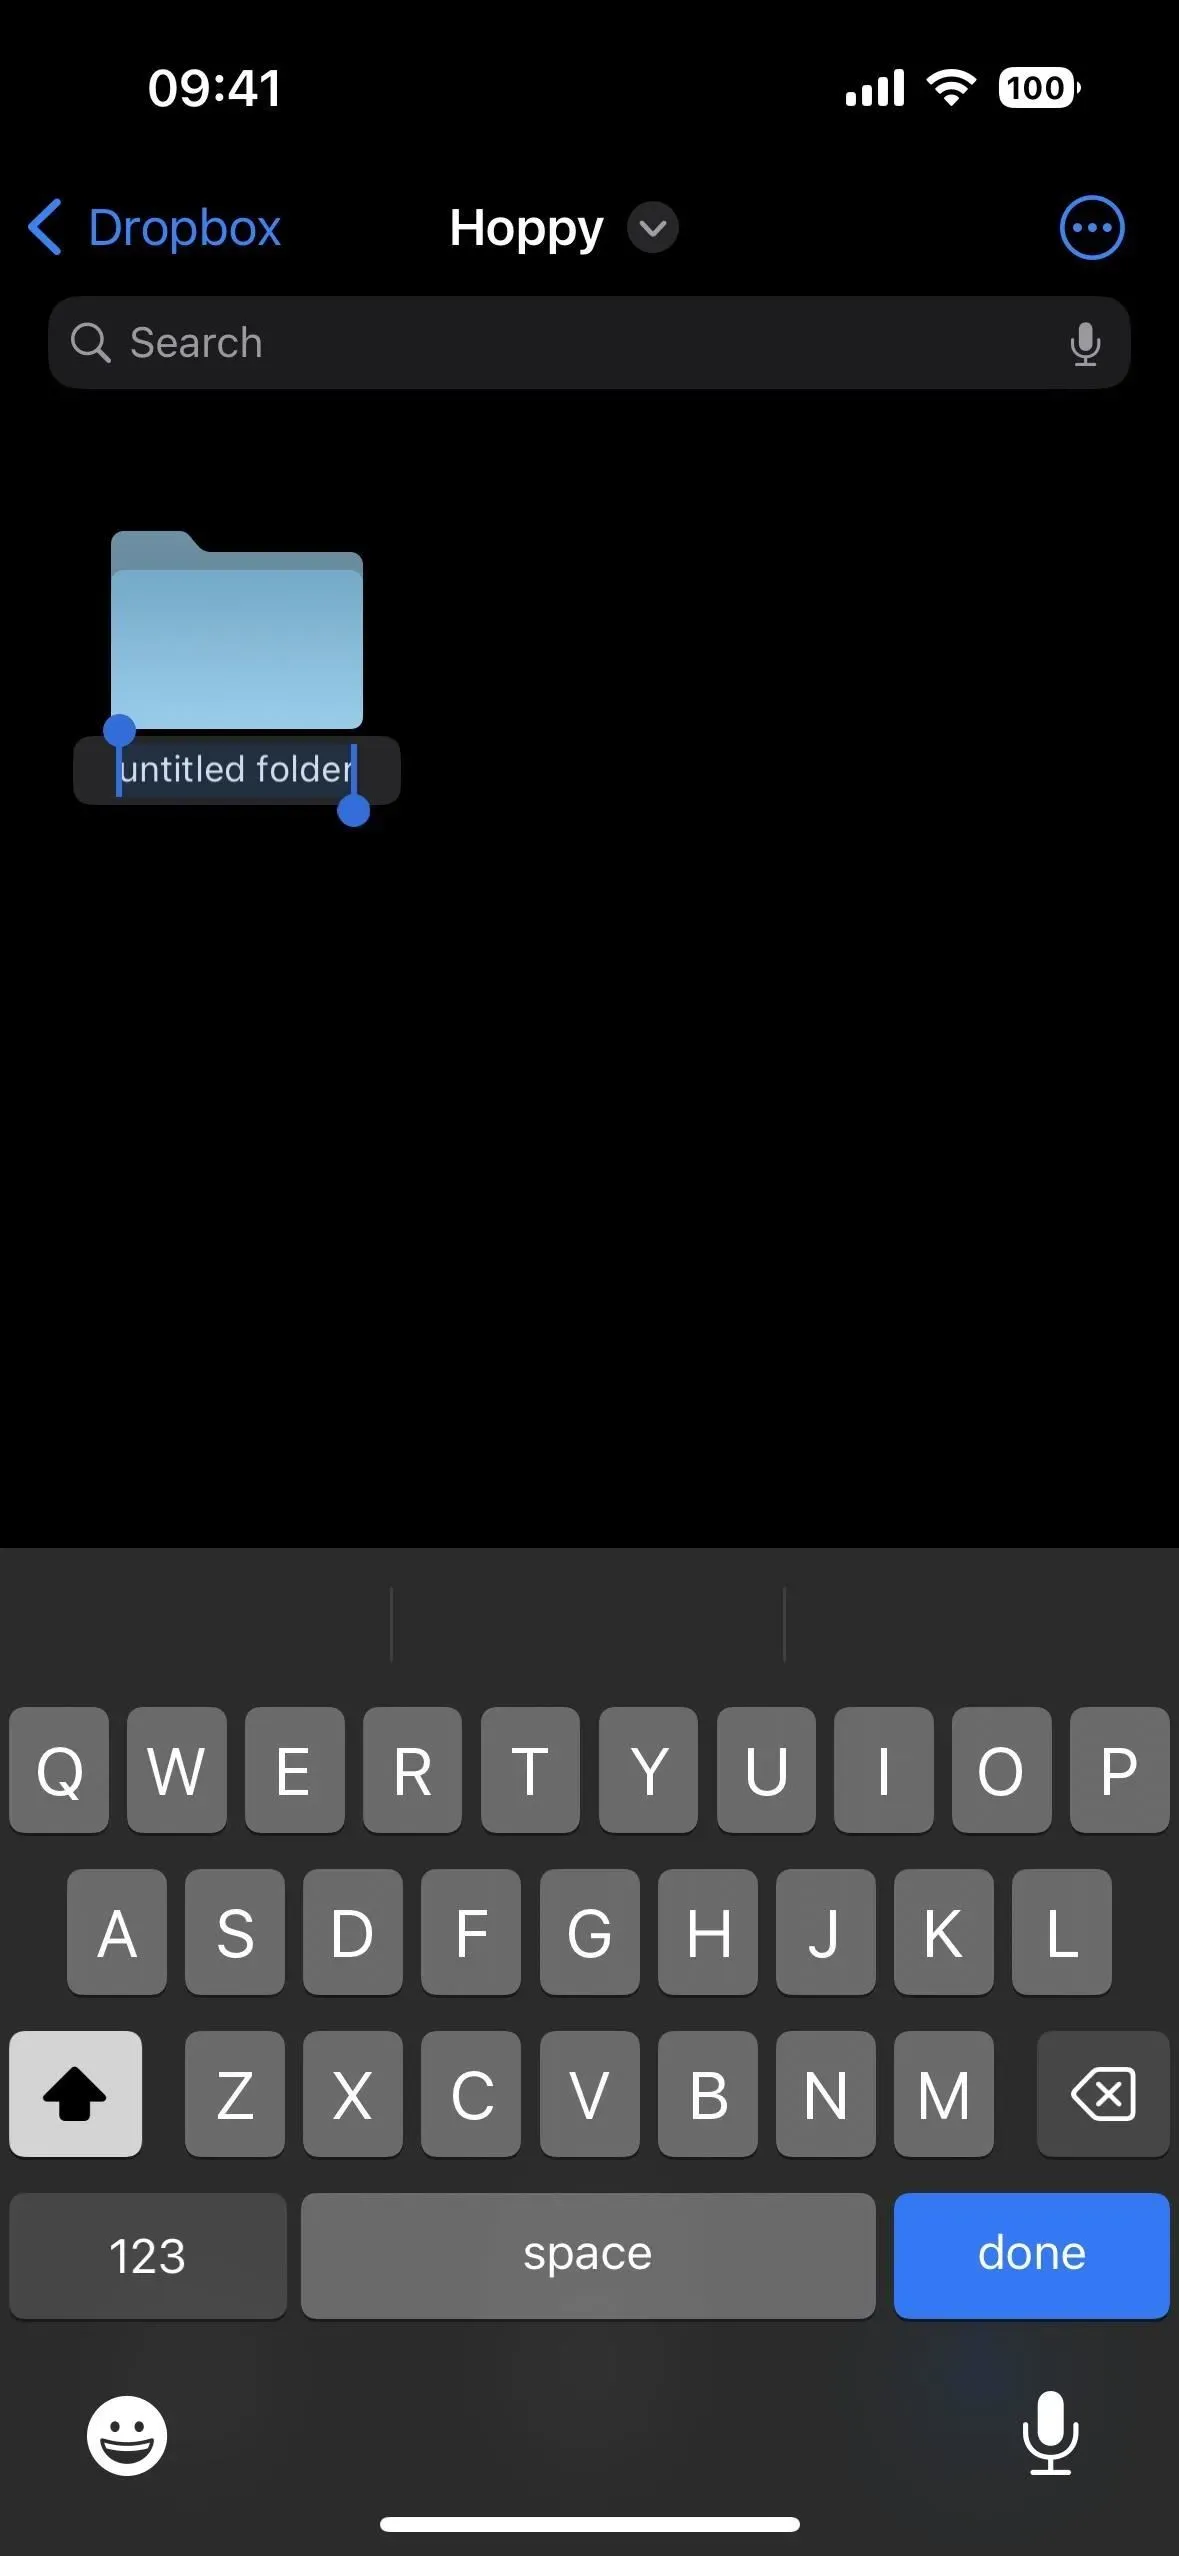
2. Move items to new folders
Another new thing you’ll notice in Files is the ability to put the selected image, document, or folder into a new folder within the same directory. So, instead of creating a new folder and then moving an image, document, or folder into it, you can simply press and hold on an item and choose New Item Folder to immediately create a new folder containing the item.
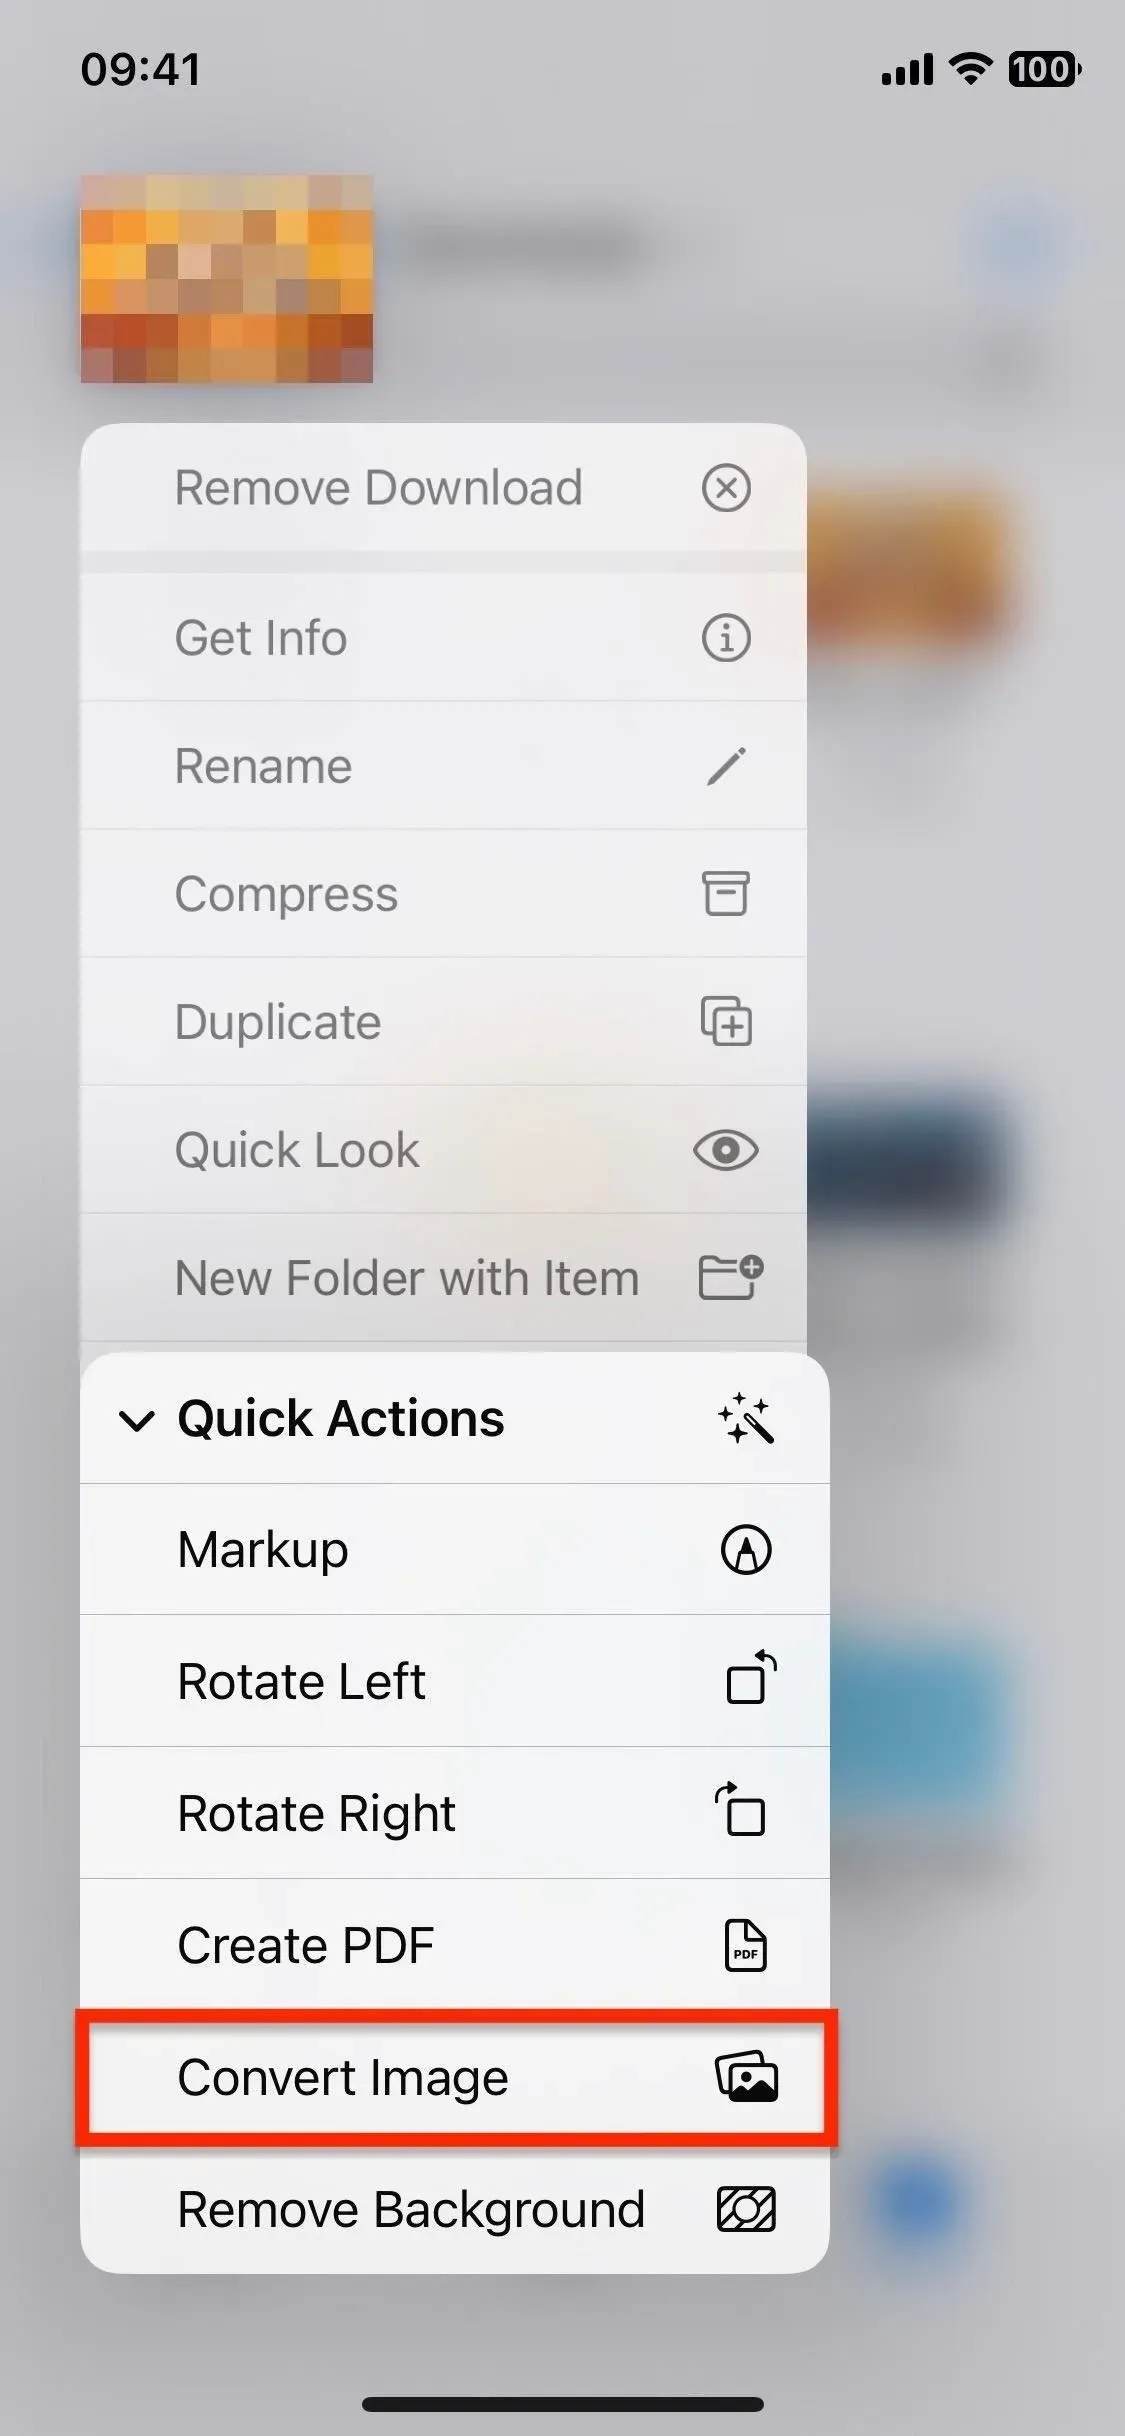
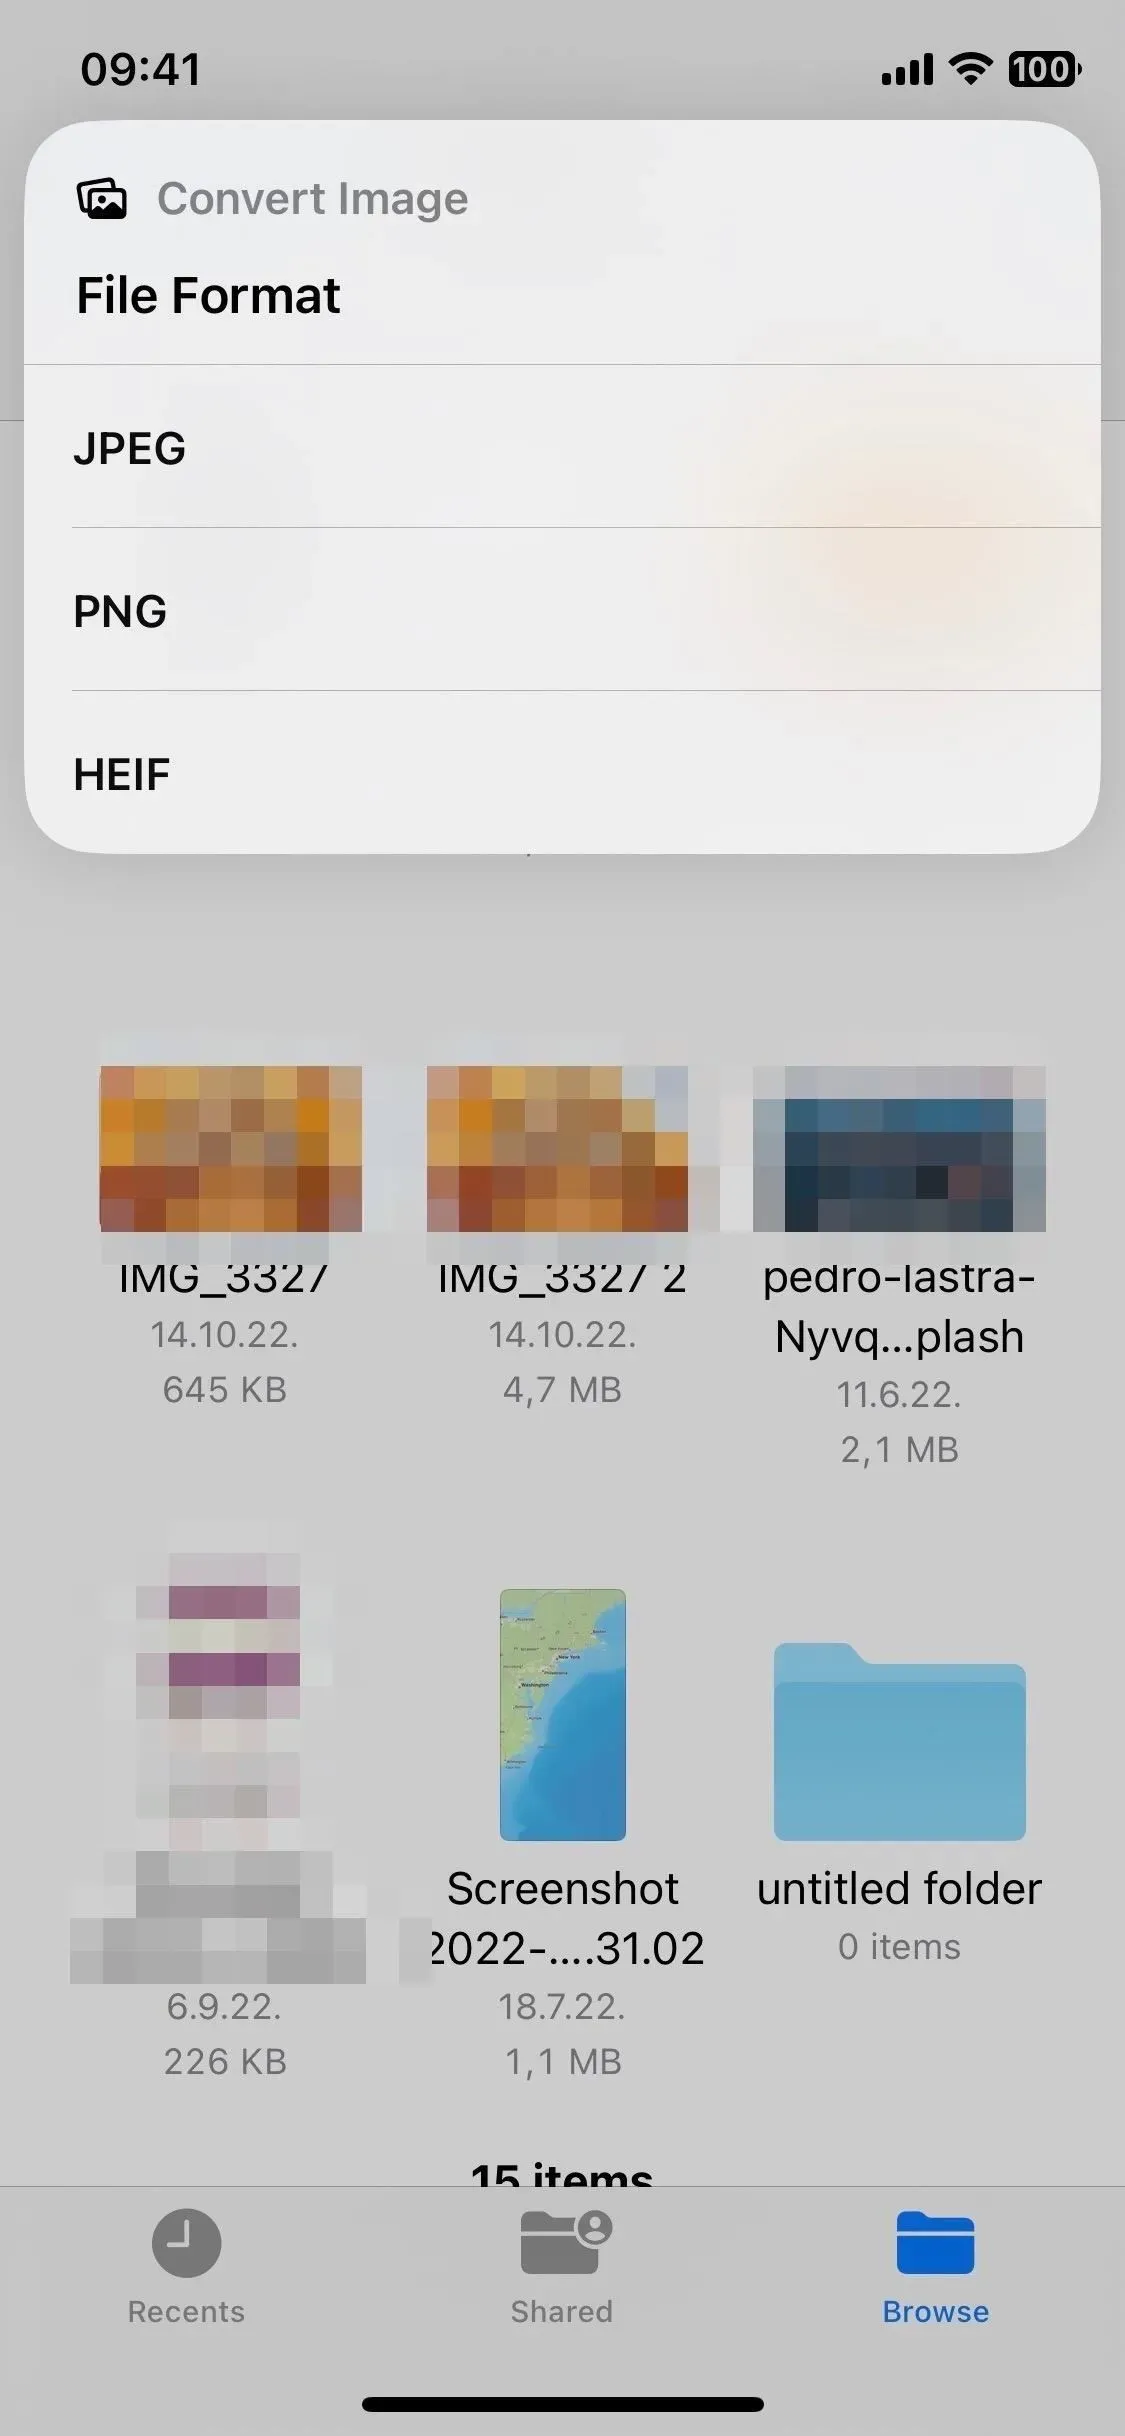
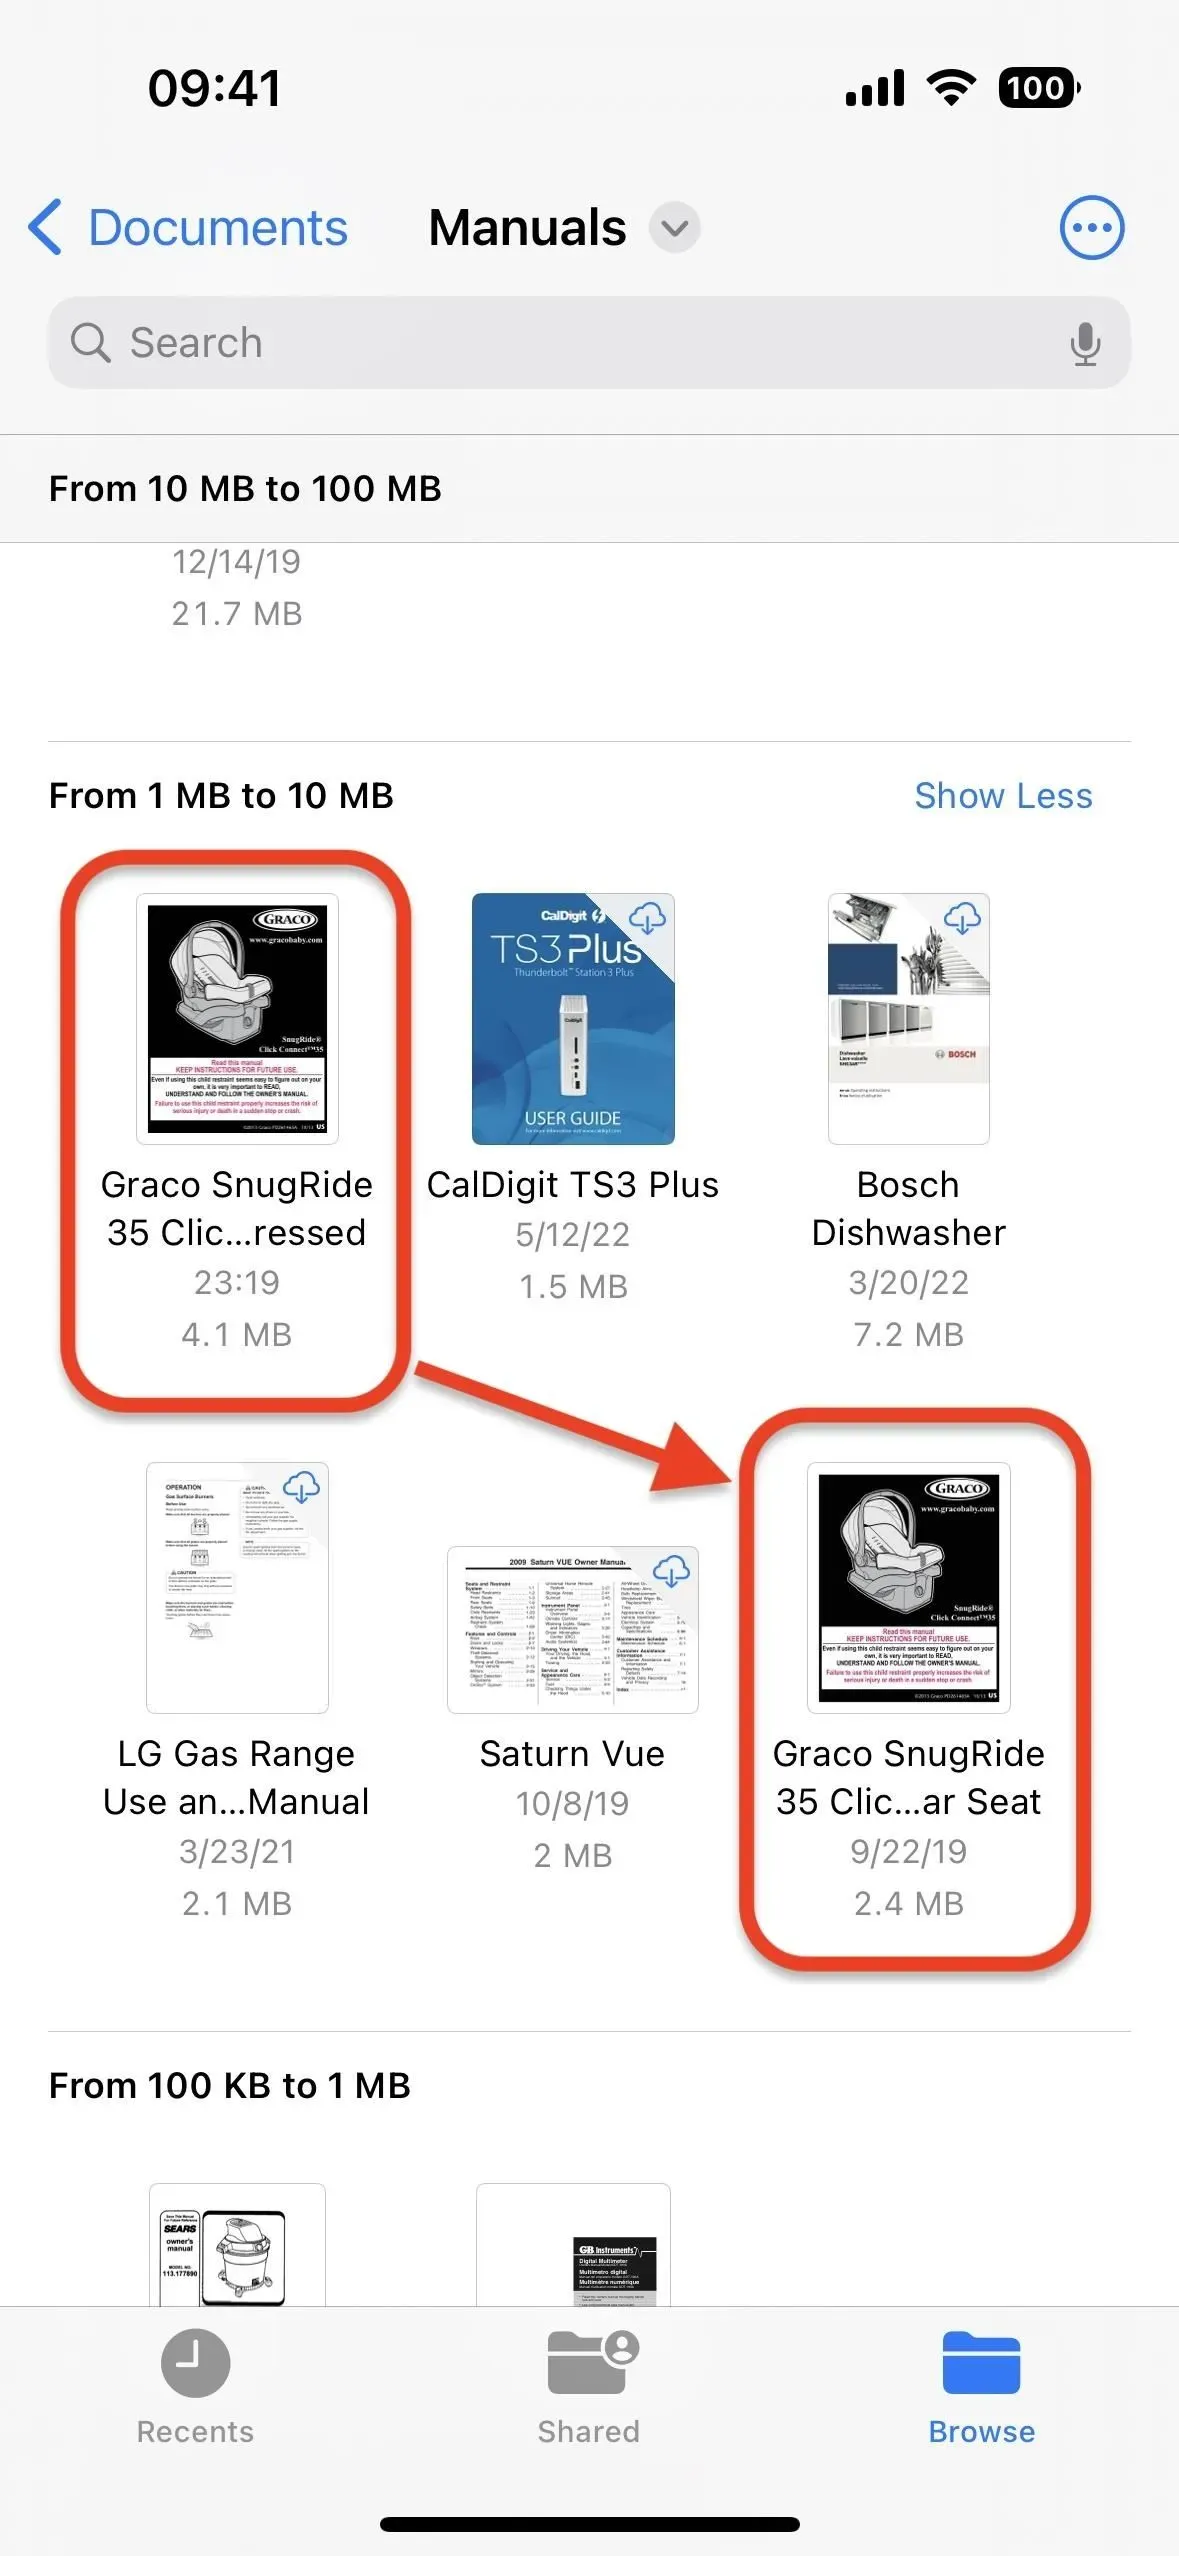
3. Convert images to JPEG, PNG or HEIF
When you long press on an image in Files, you will see a long context menu with a “Quick Actions”section. Tap this to display the new Transform Image action. Convert Image lets you change the file type of an image from or to JPEG, PNG, or HEIF. Once you select one, you will select the image size you want for the new image and the new compressed file will appear in the same folder.
You can also convert images in bulk. Open the ellipsis menu (•••) at the top, click Select, check all the desired images, and then click the ellipsis menu (•••) in the toolbar. Then select “Convert Image”and select the desired file type and size.
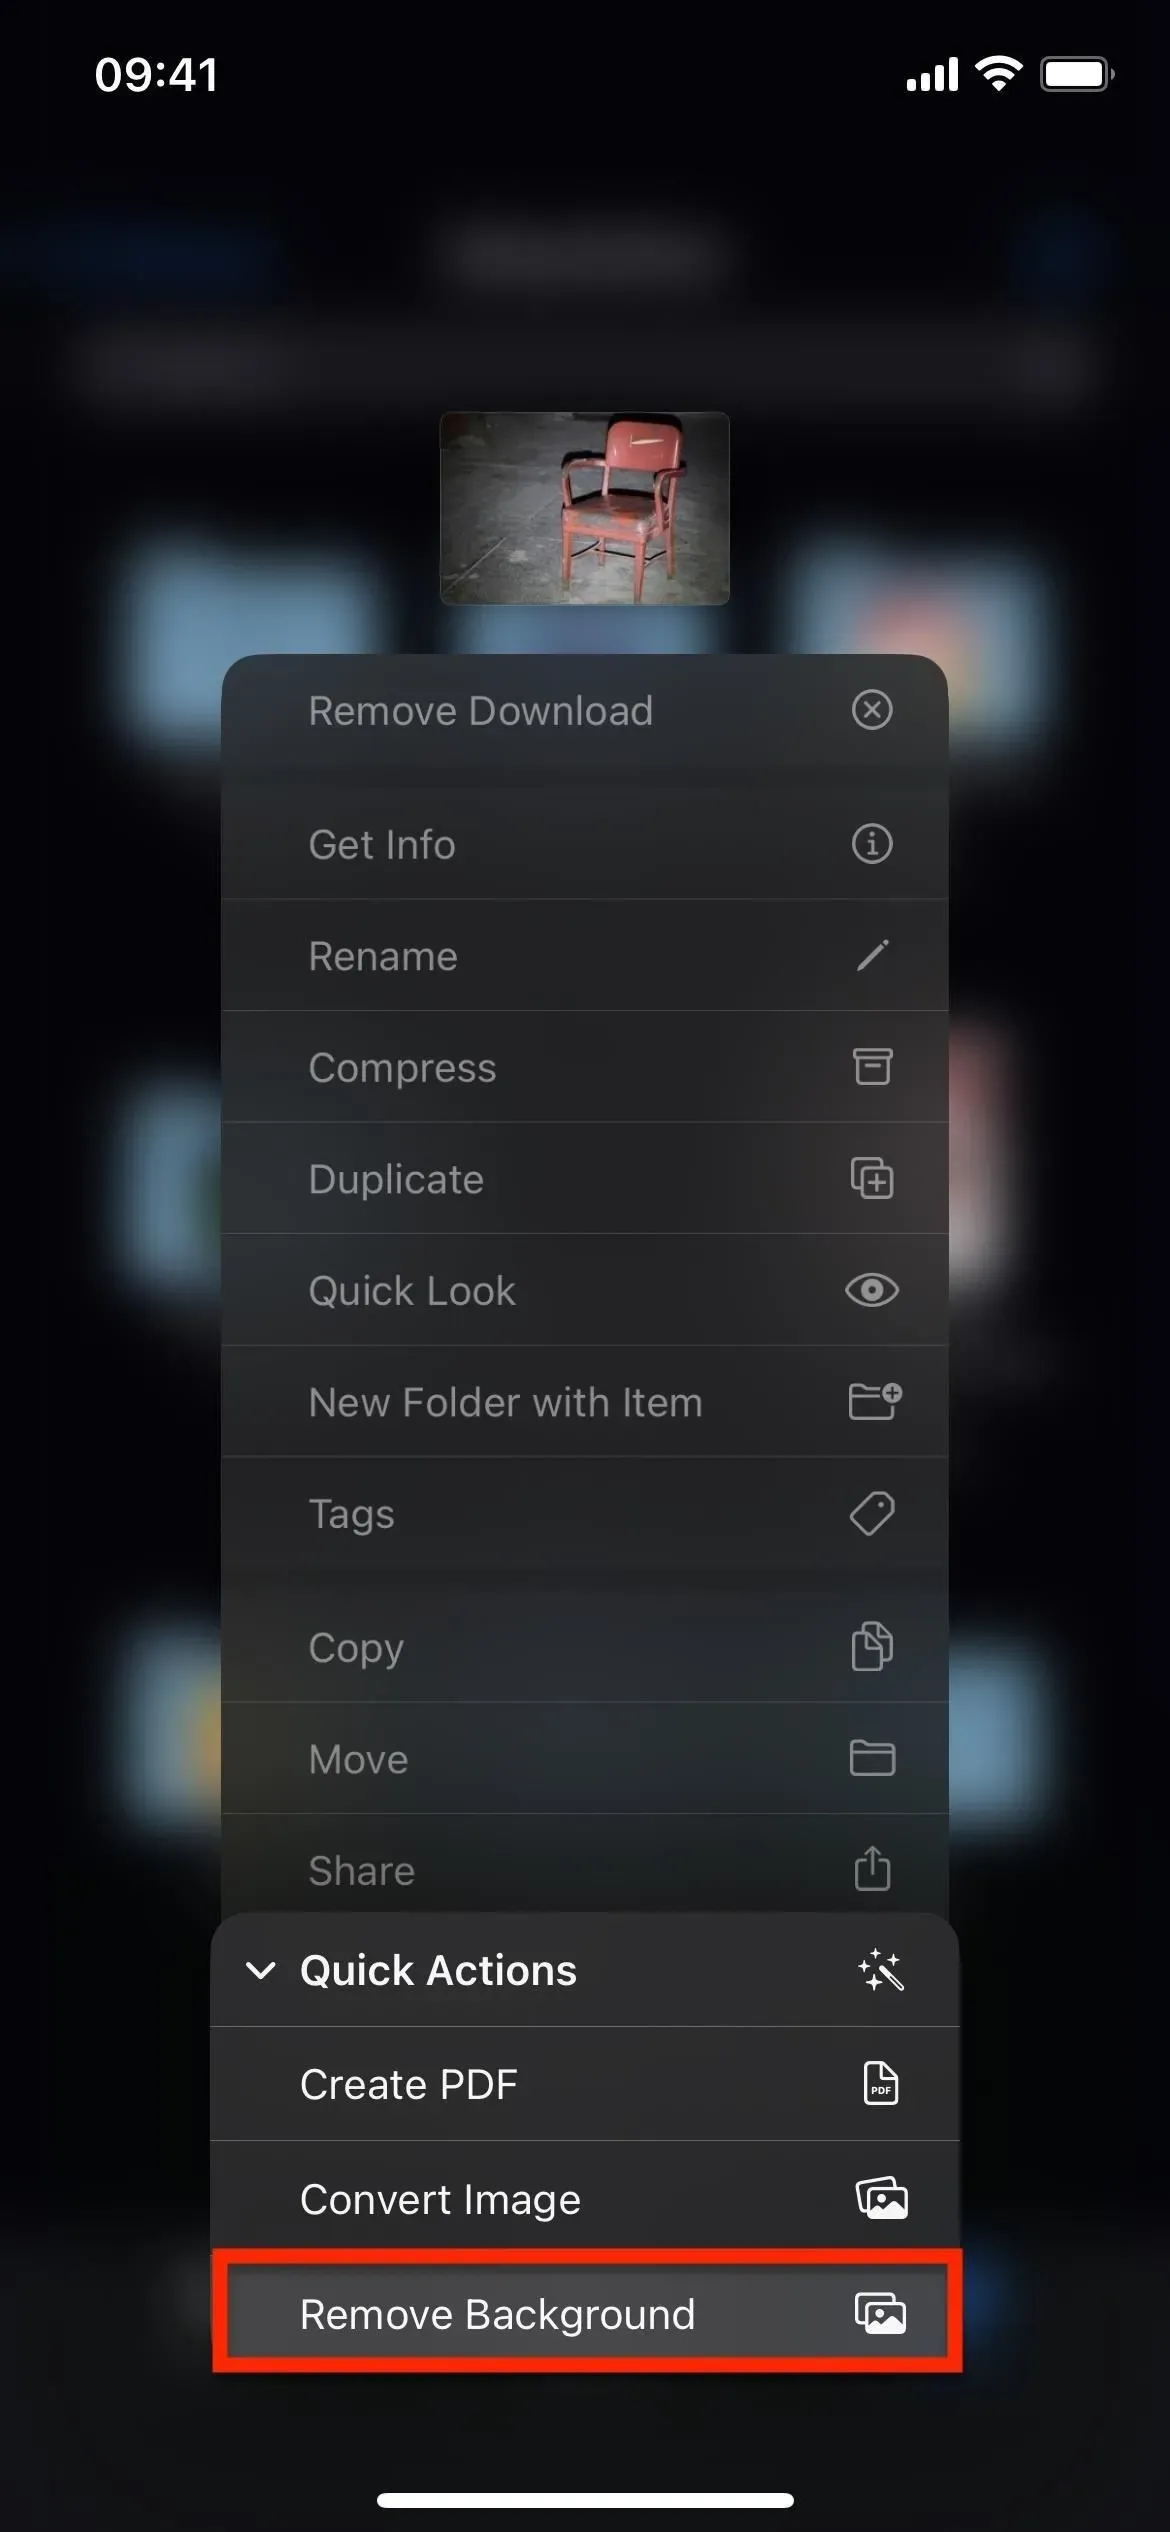
4. Remove background from images
Also in the Quick Actions menu, when you long press on an image, the Remove Background function is available, which is located next to the image conversion option. Remove background uses a new system-wide feature that creates a new PNG image file containing only the photo object and no background. As with converting image file types, the result will appear in the same folder.
You can also remove backgrounds in bulk. Follow the same steps mentioned above to convert your images to a different file type, but choose “Remove Background”instead and see how it works with all selected content.
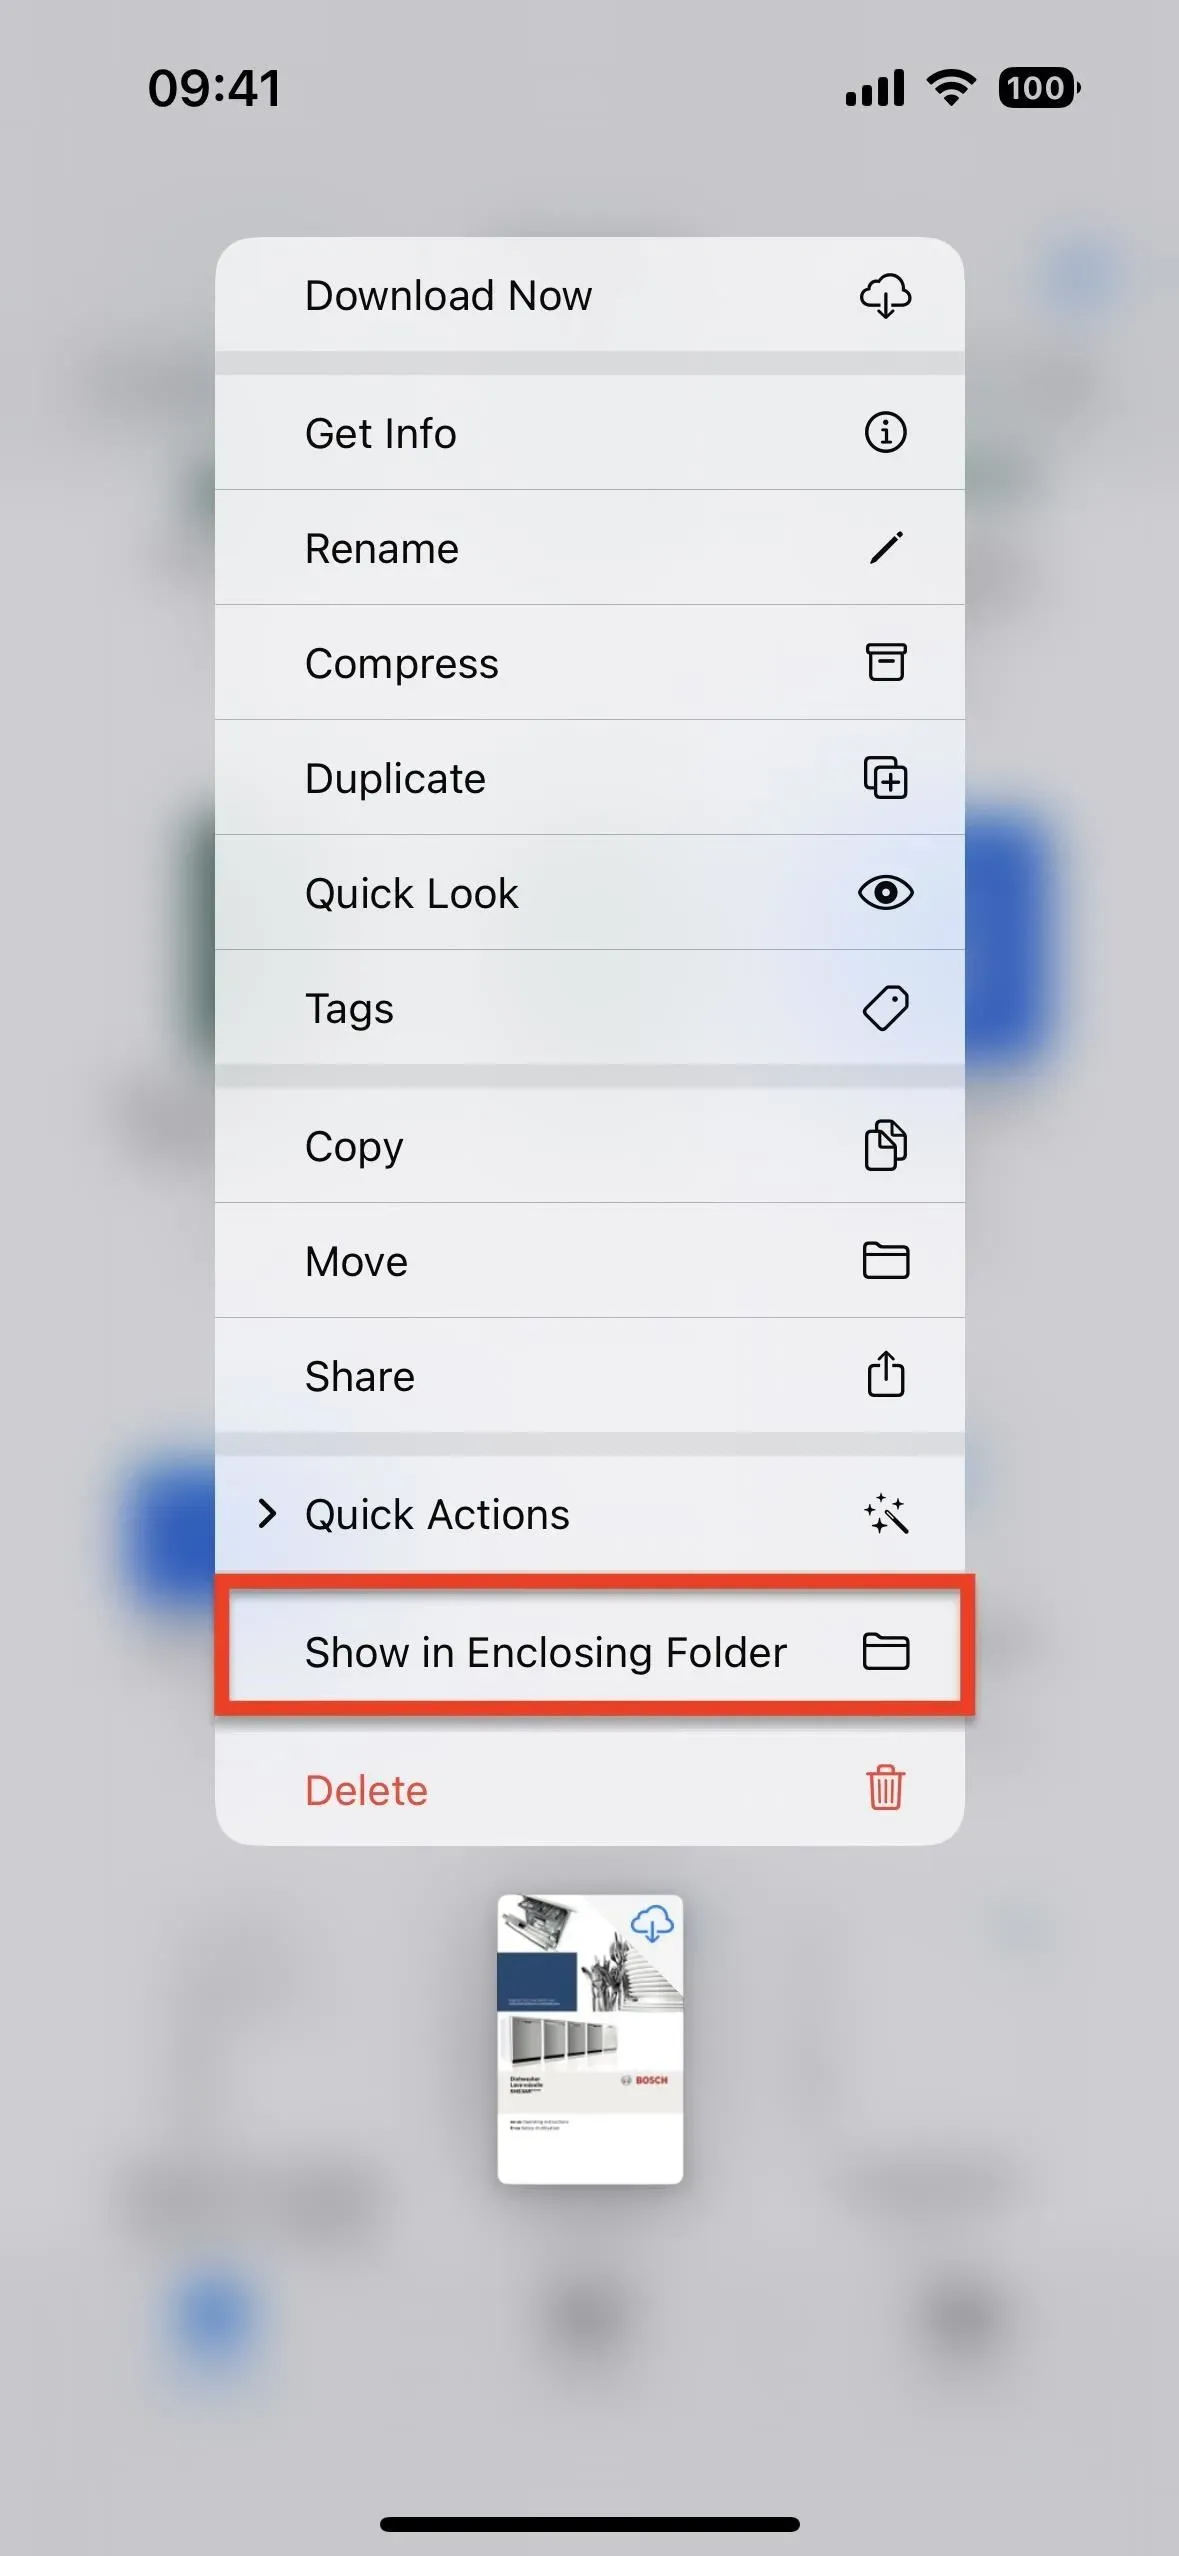
5. Jump to attached folder faster
If you need to know what folder a file is in, whether you found the file in the Recent tab or by searching, you can press and hold on the file, tap on Get Info, and then find and tap on the folder name. to navigate to the attached folder. In iOS 16, there’s now a faster way to do this: press and hold on a file and tap “Show in subfolder.”
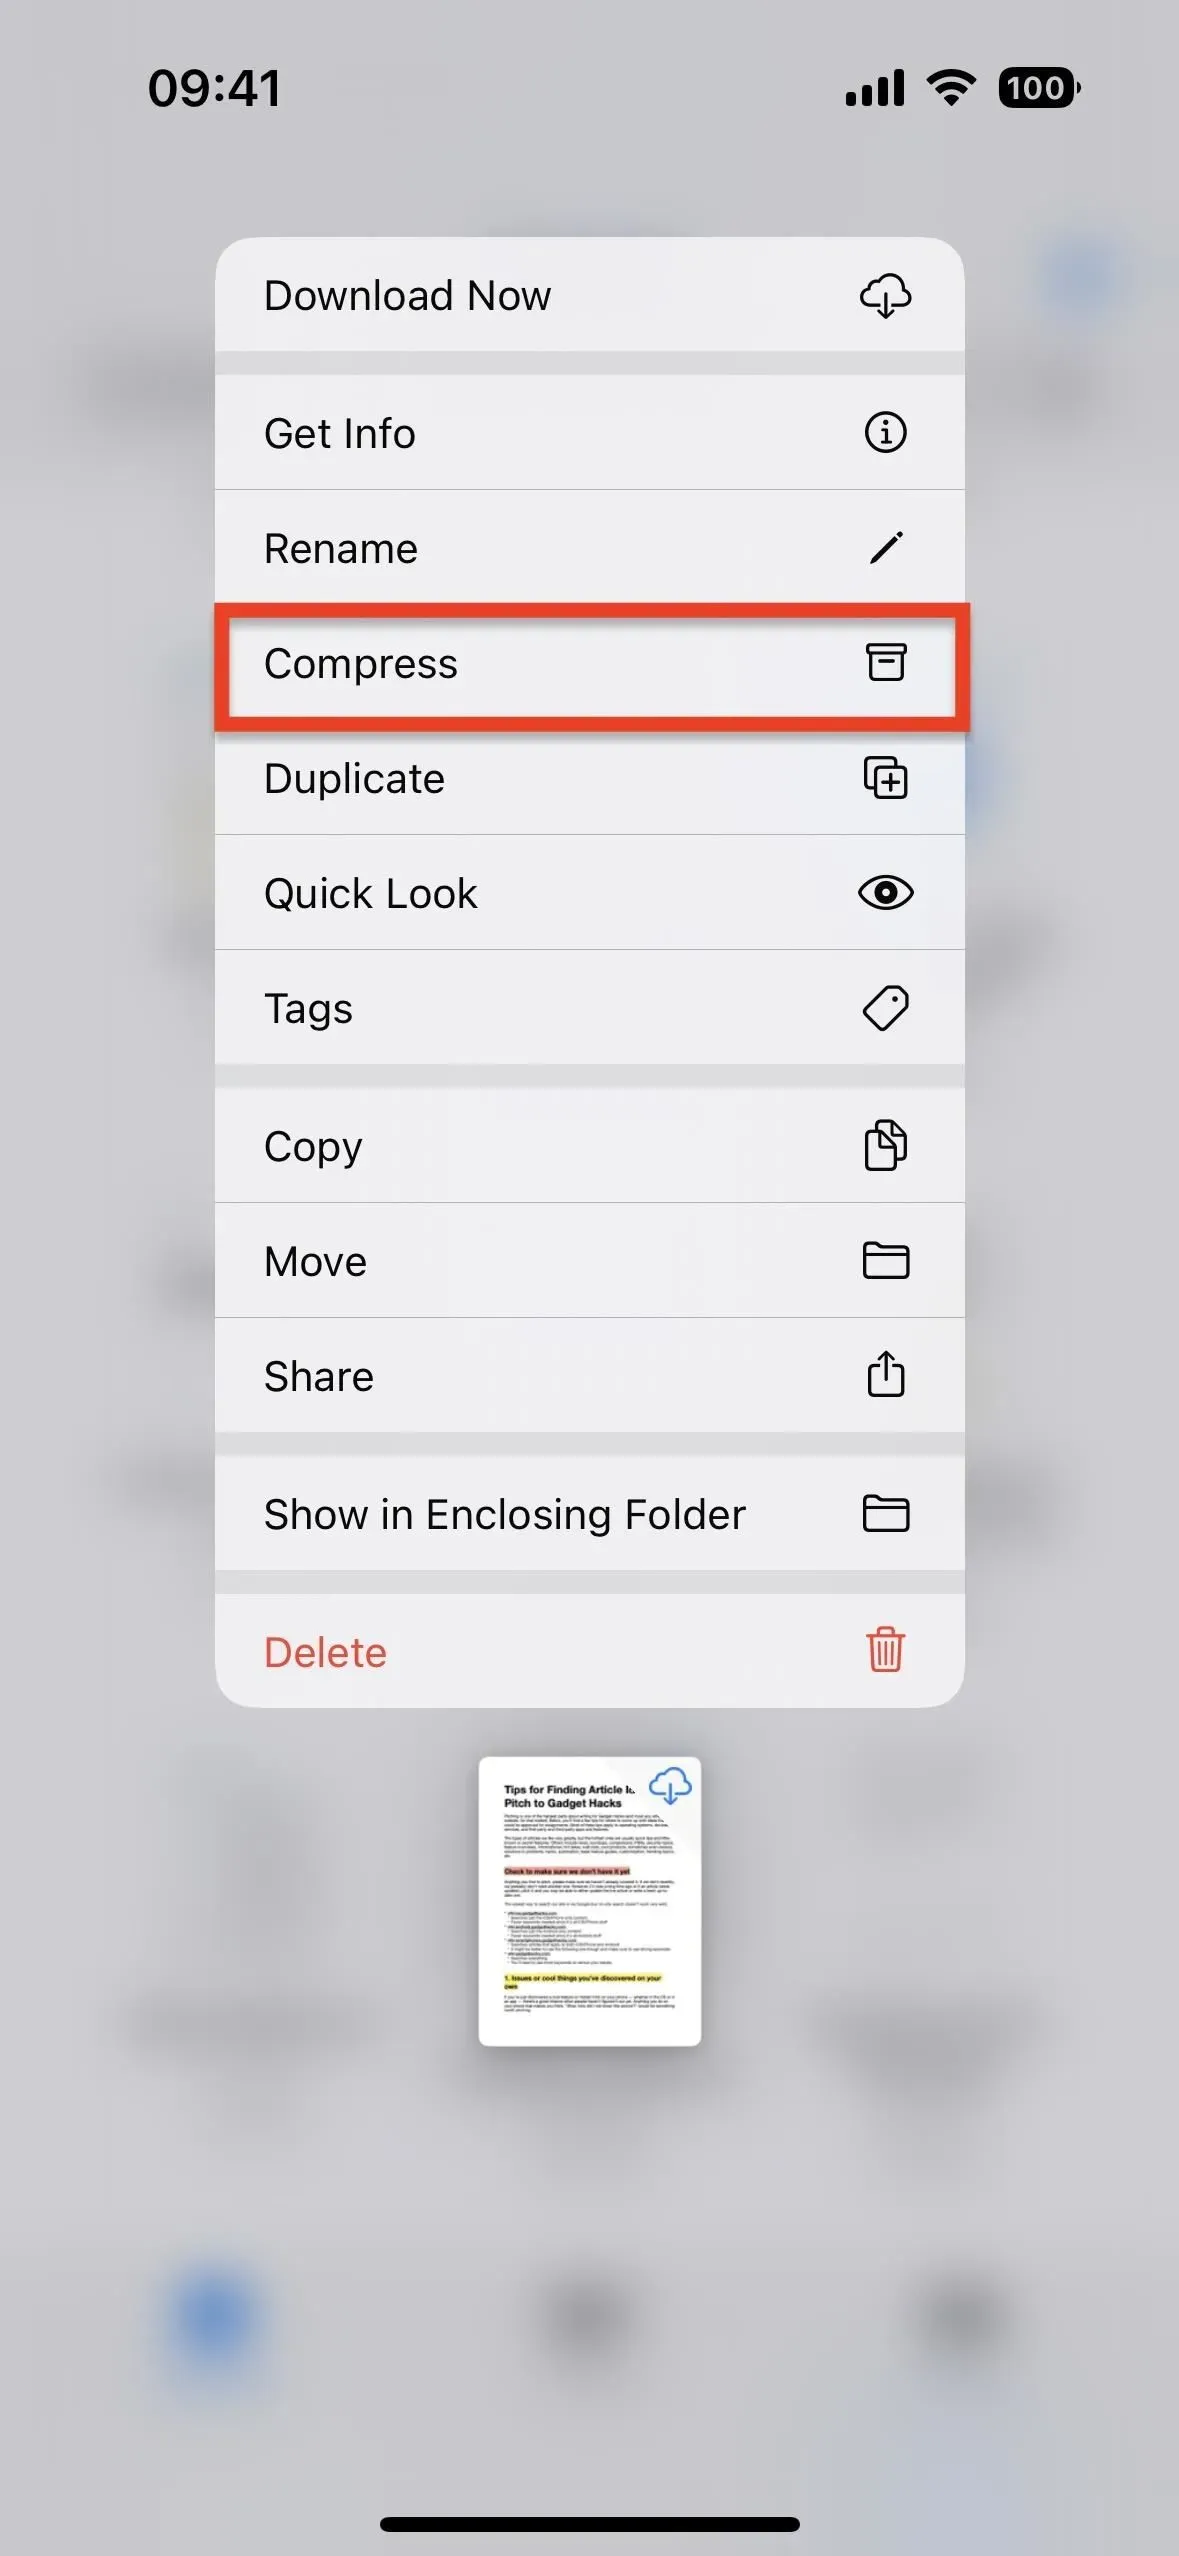
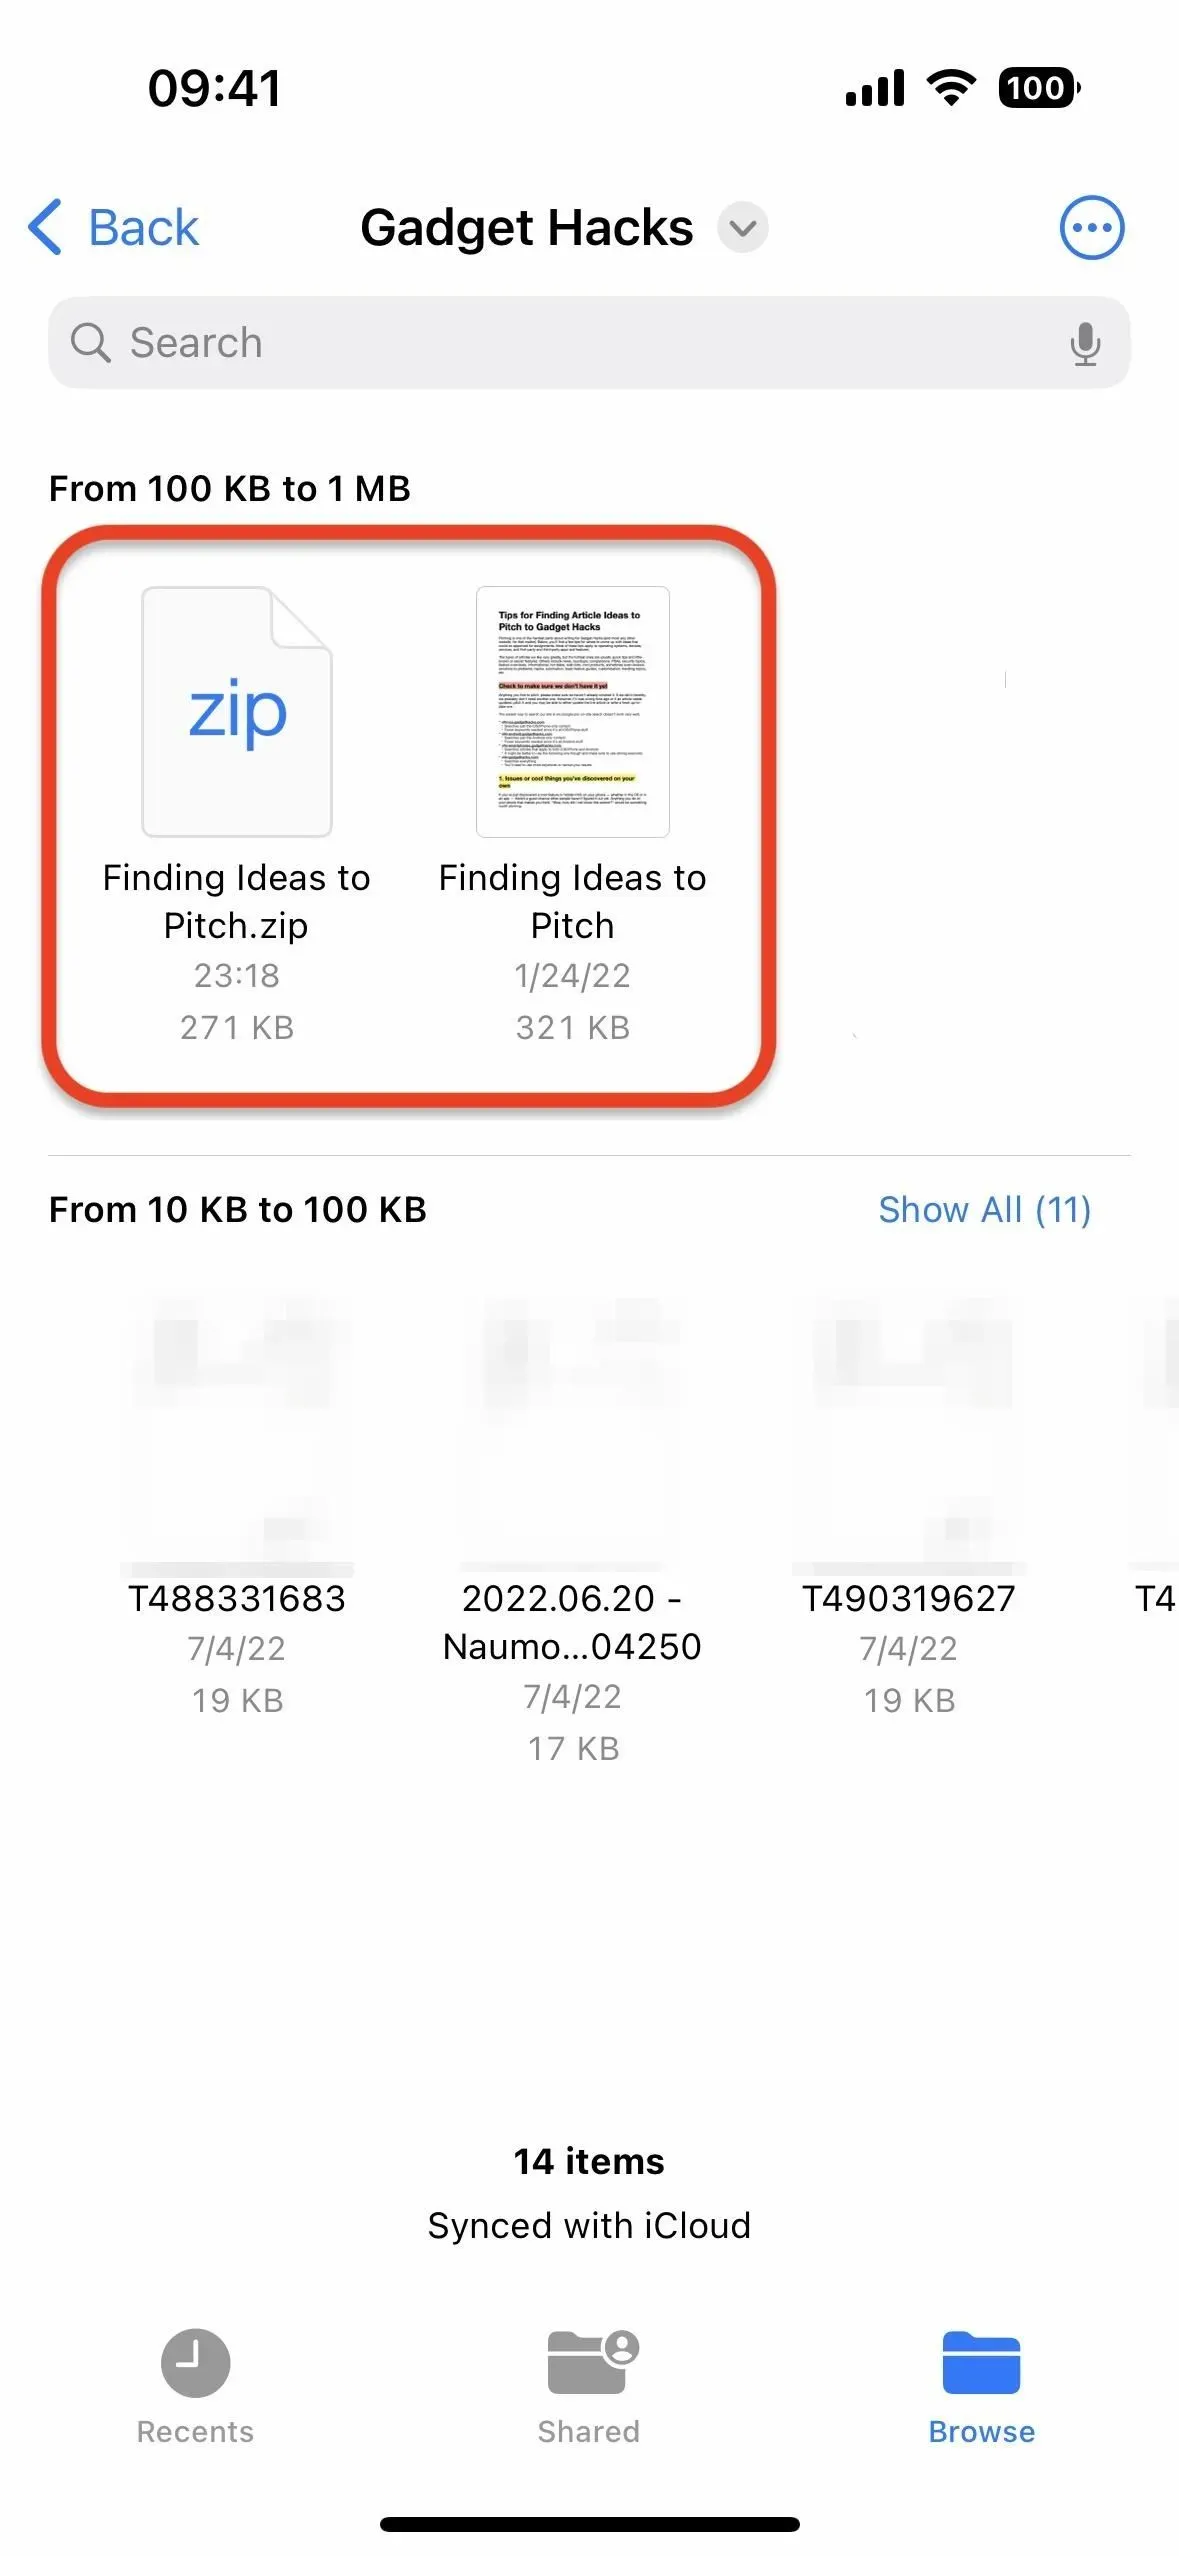
6. Compress more files
You may have already seen the Compress tool available from the long press menu for a file, but if you were looking for it in iOS 15 right now, you would probably only see it as an option for folders. The Compress tool is now available from the long press menu for all files, not just folders. The resulting ZIP file will be in the same folder as the file.
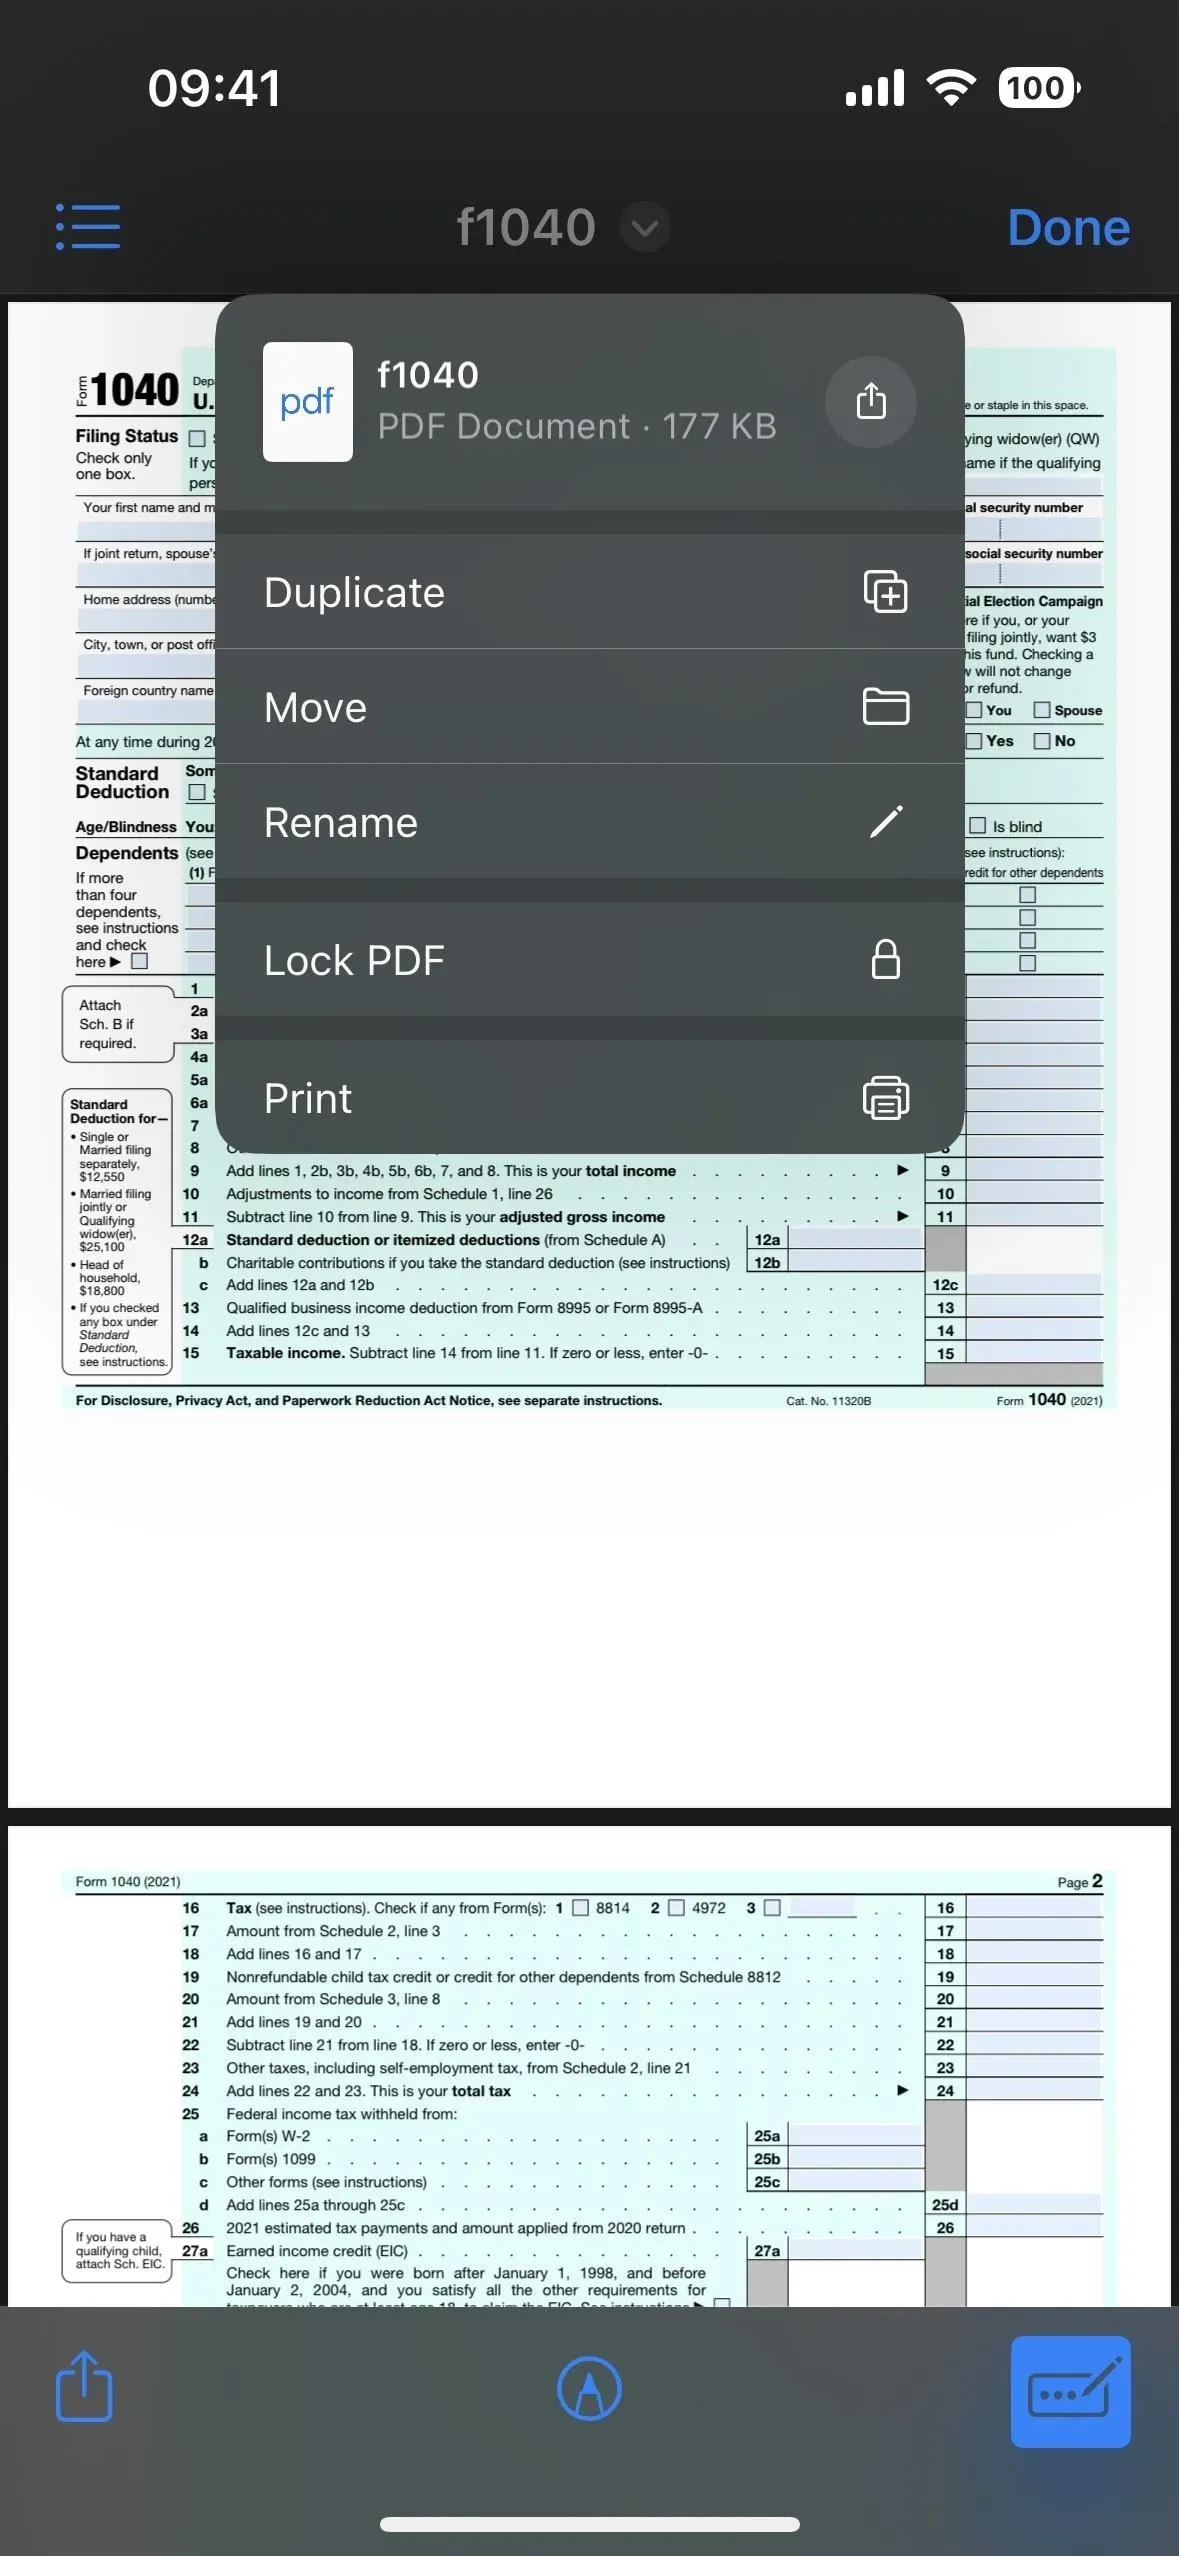
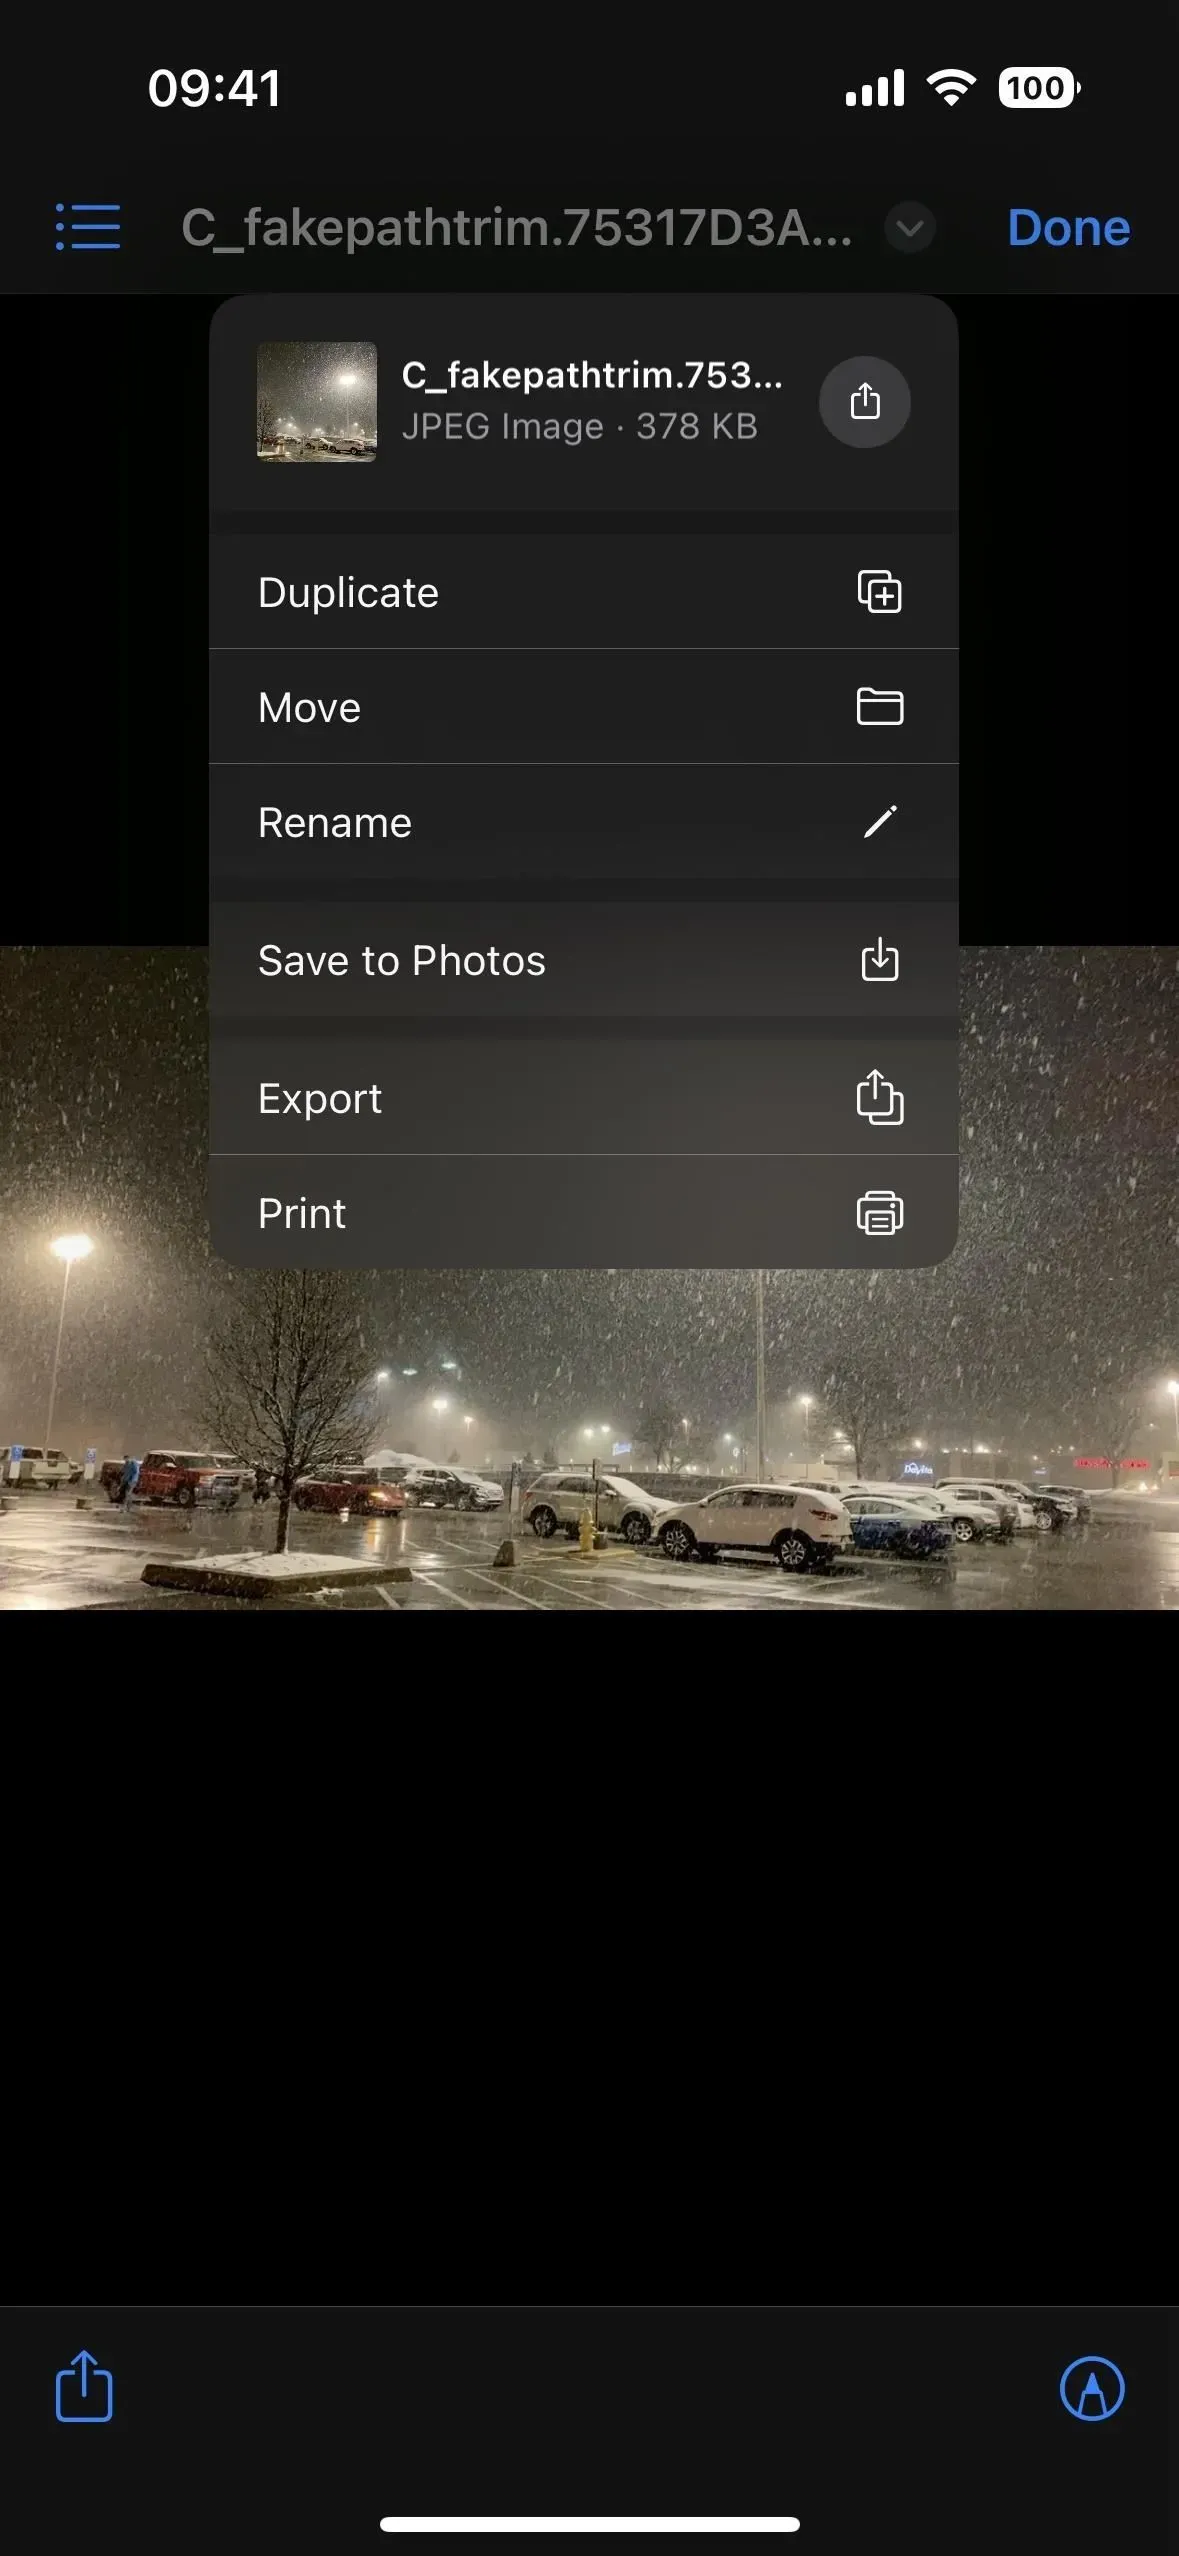
7. Actions in Quick Look
When you use Quick Look to view a file in the Files app, you can now tap the file name at the top (or the arrow next to it) to view options such as duplicate, move, rename, save a photo, export, or print, depending on the file type. You’ll see a “Lock PDF”option for PDFs, which Apple has moved out of the sharing list for faster access.
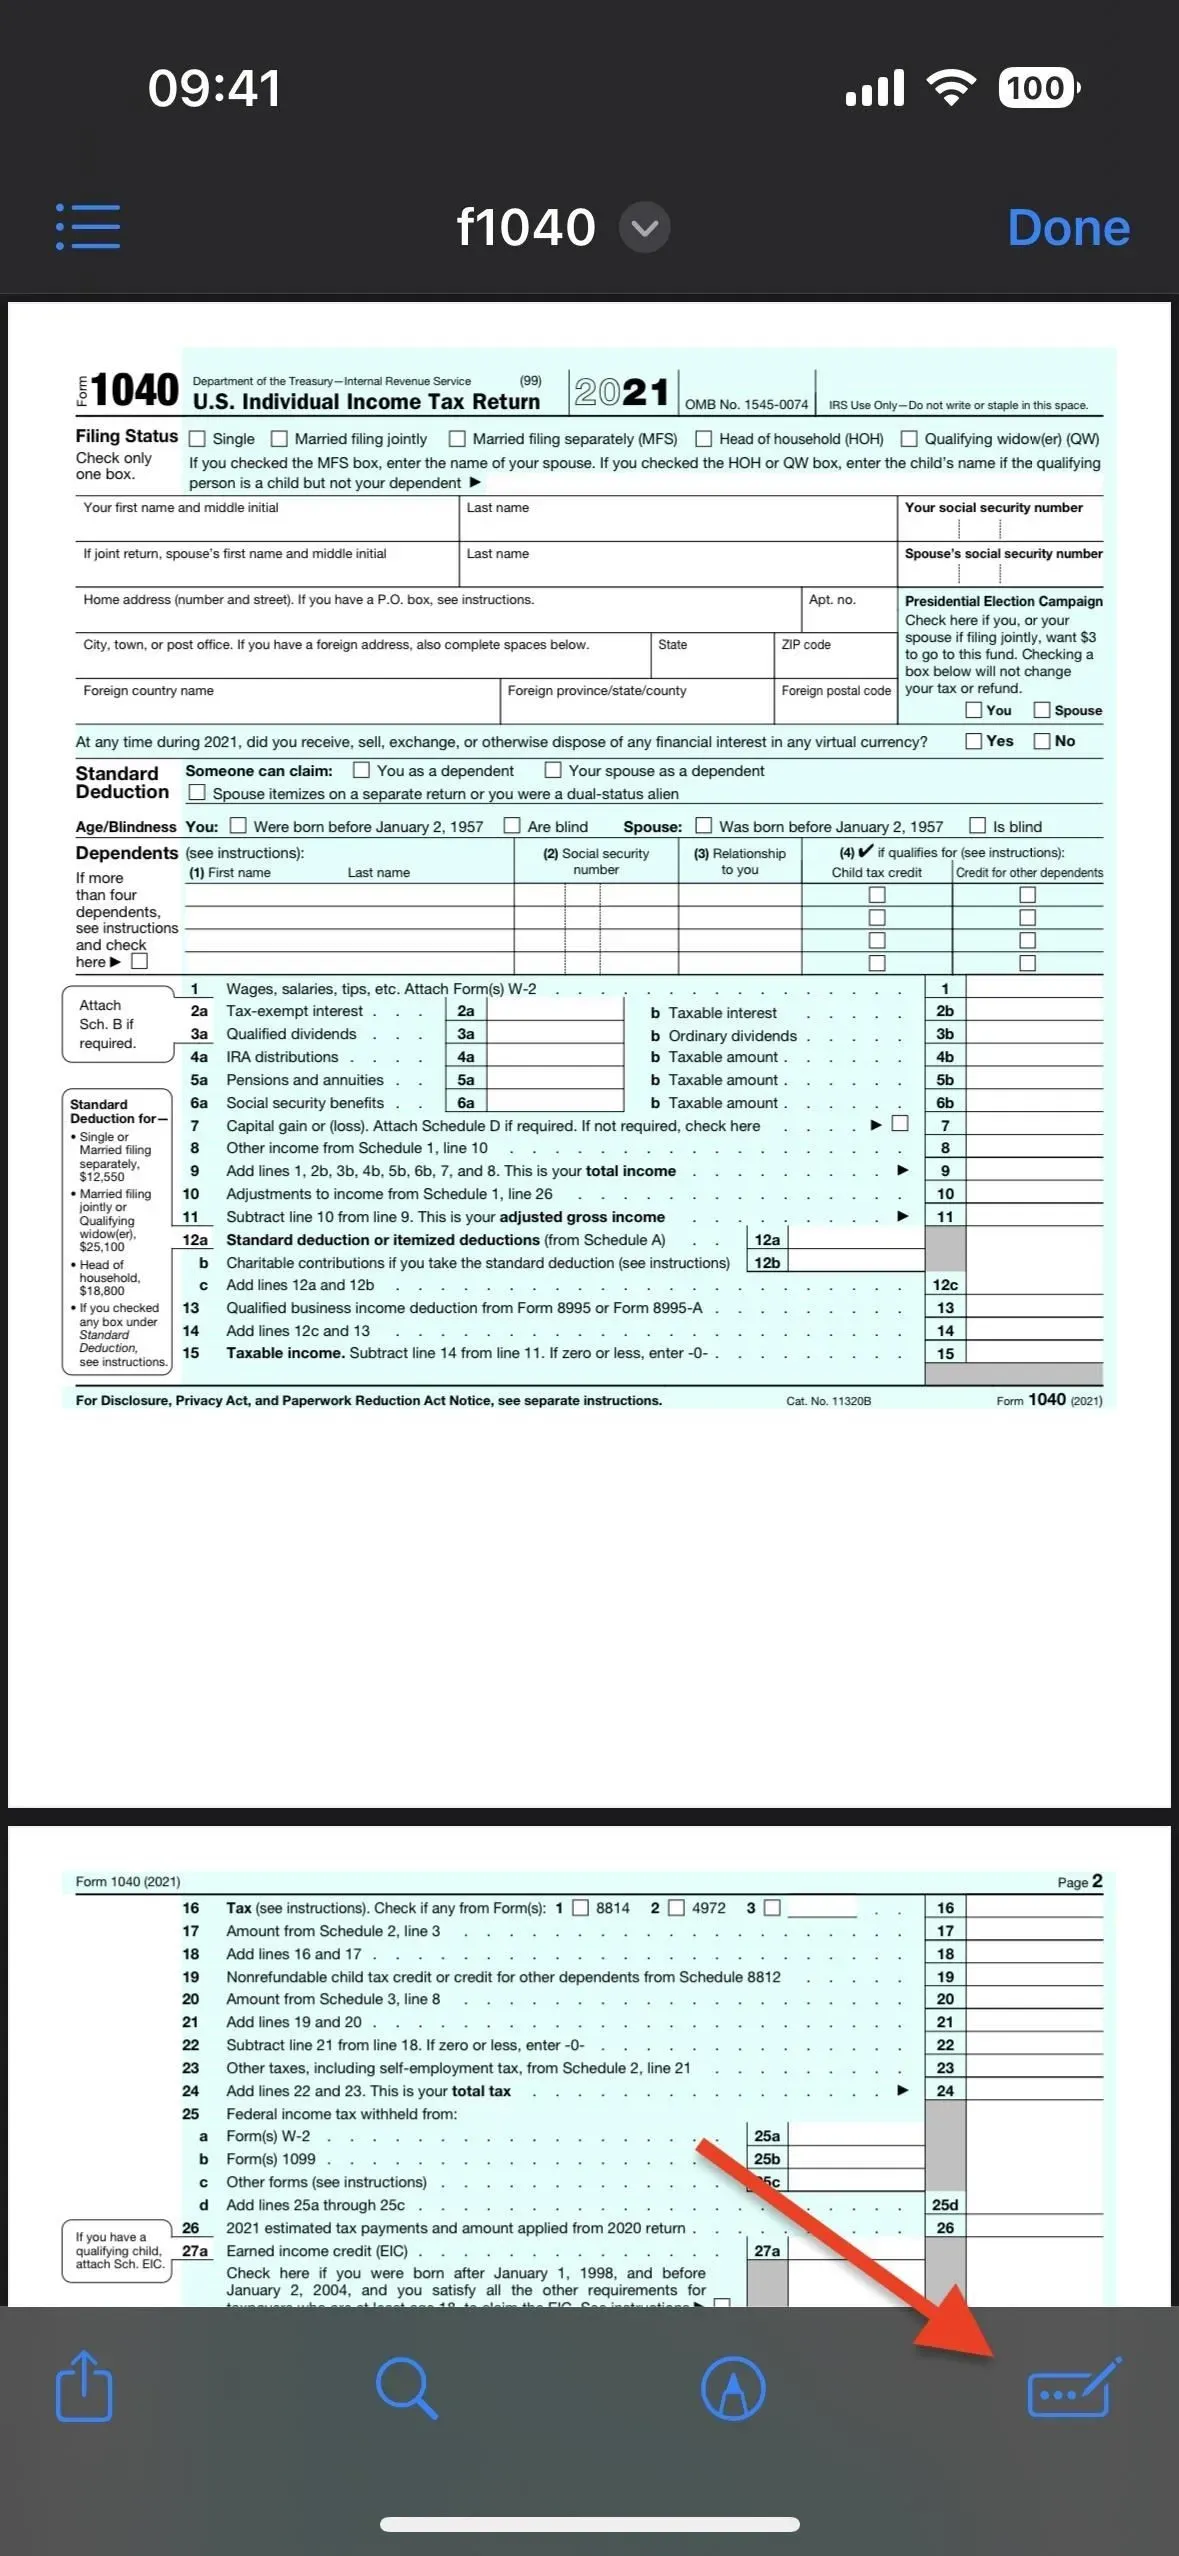
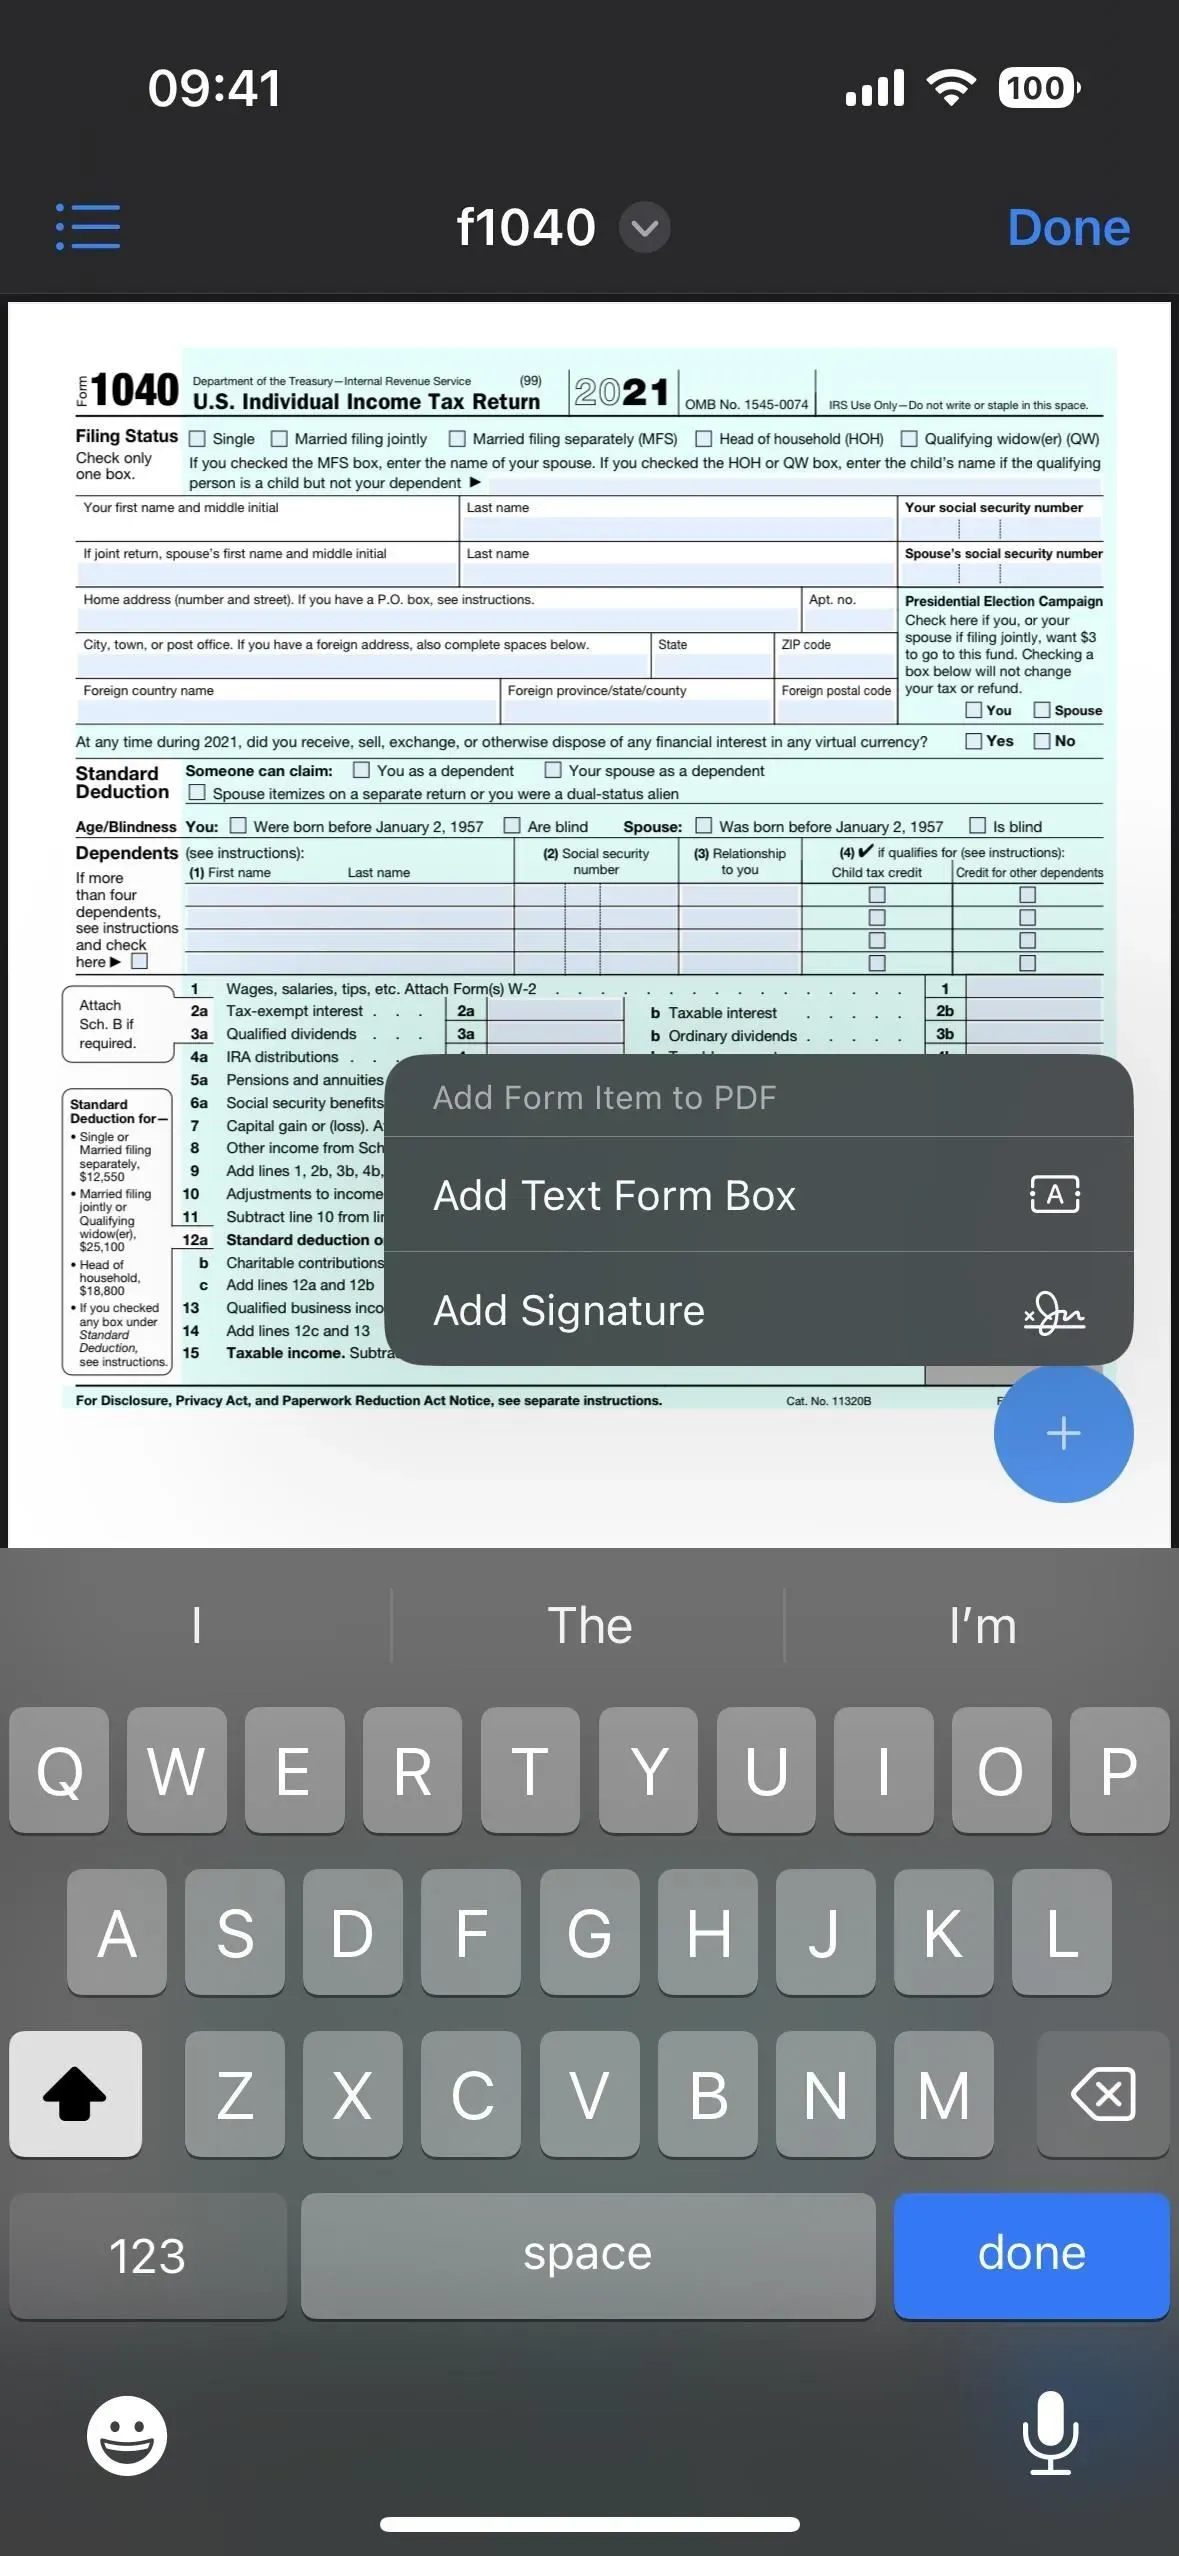
8. Autocomplete PDFs in markup
Once you open a PDF with Quick Look in Files, you’ll see a new three-dot and pencil option in the toolbar next to the Markup button. It’s an autocomplete button and it’s also available in the markup editor.
In iOS 15, you could already touch fields on a pre-formatted editable form to open the keyboard and start typing, but it wouldn’t be as easy on non-editable forms. The new Autofill button in iOS 16 will detect fields on non-fillable forms and provide text fields where you can start typing. You can even click the blue (+) button to add your signature or custom text box to the PDF document.
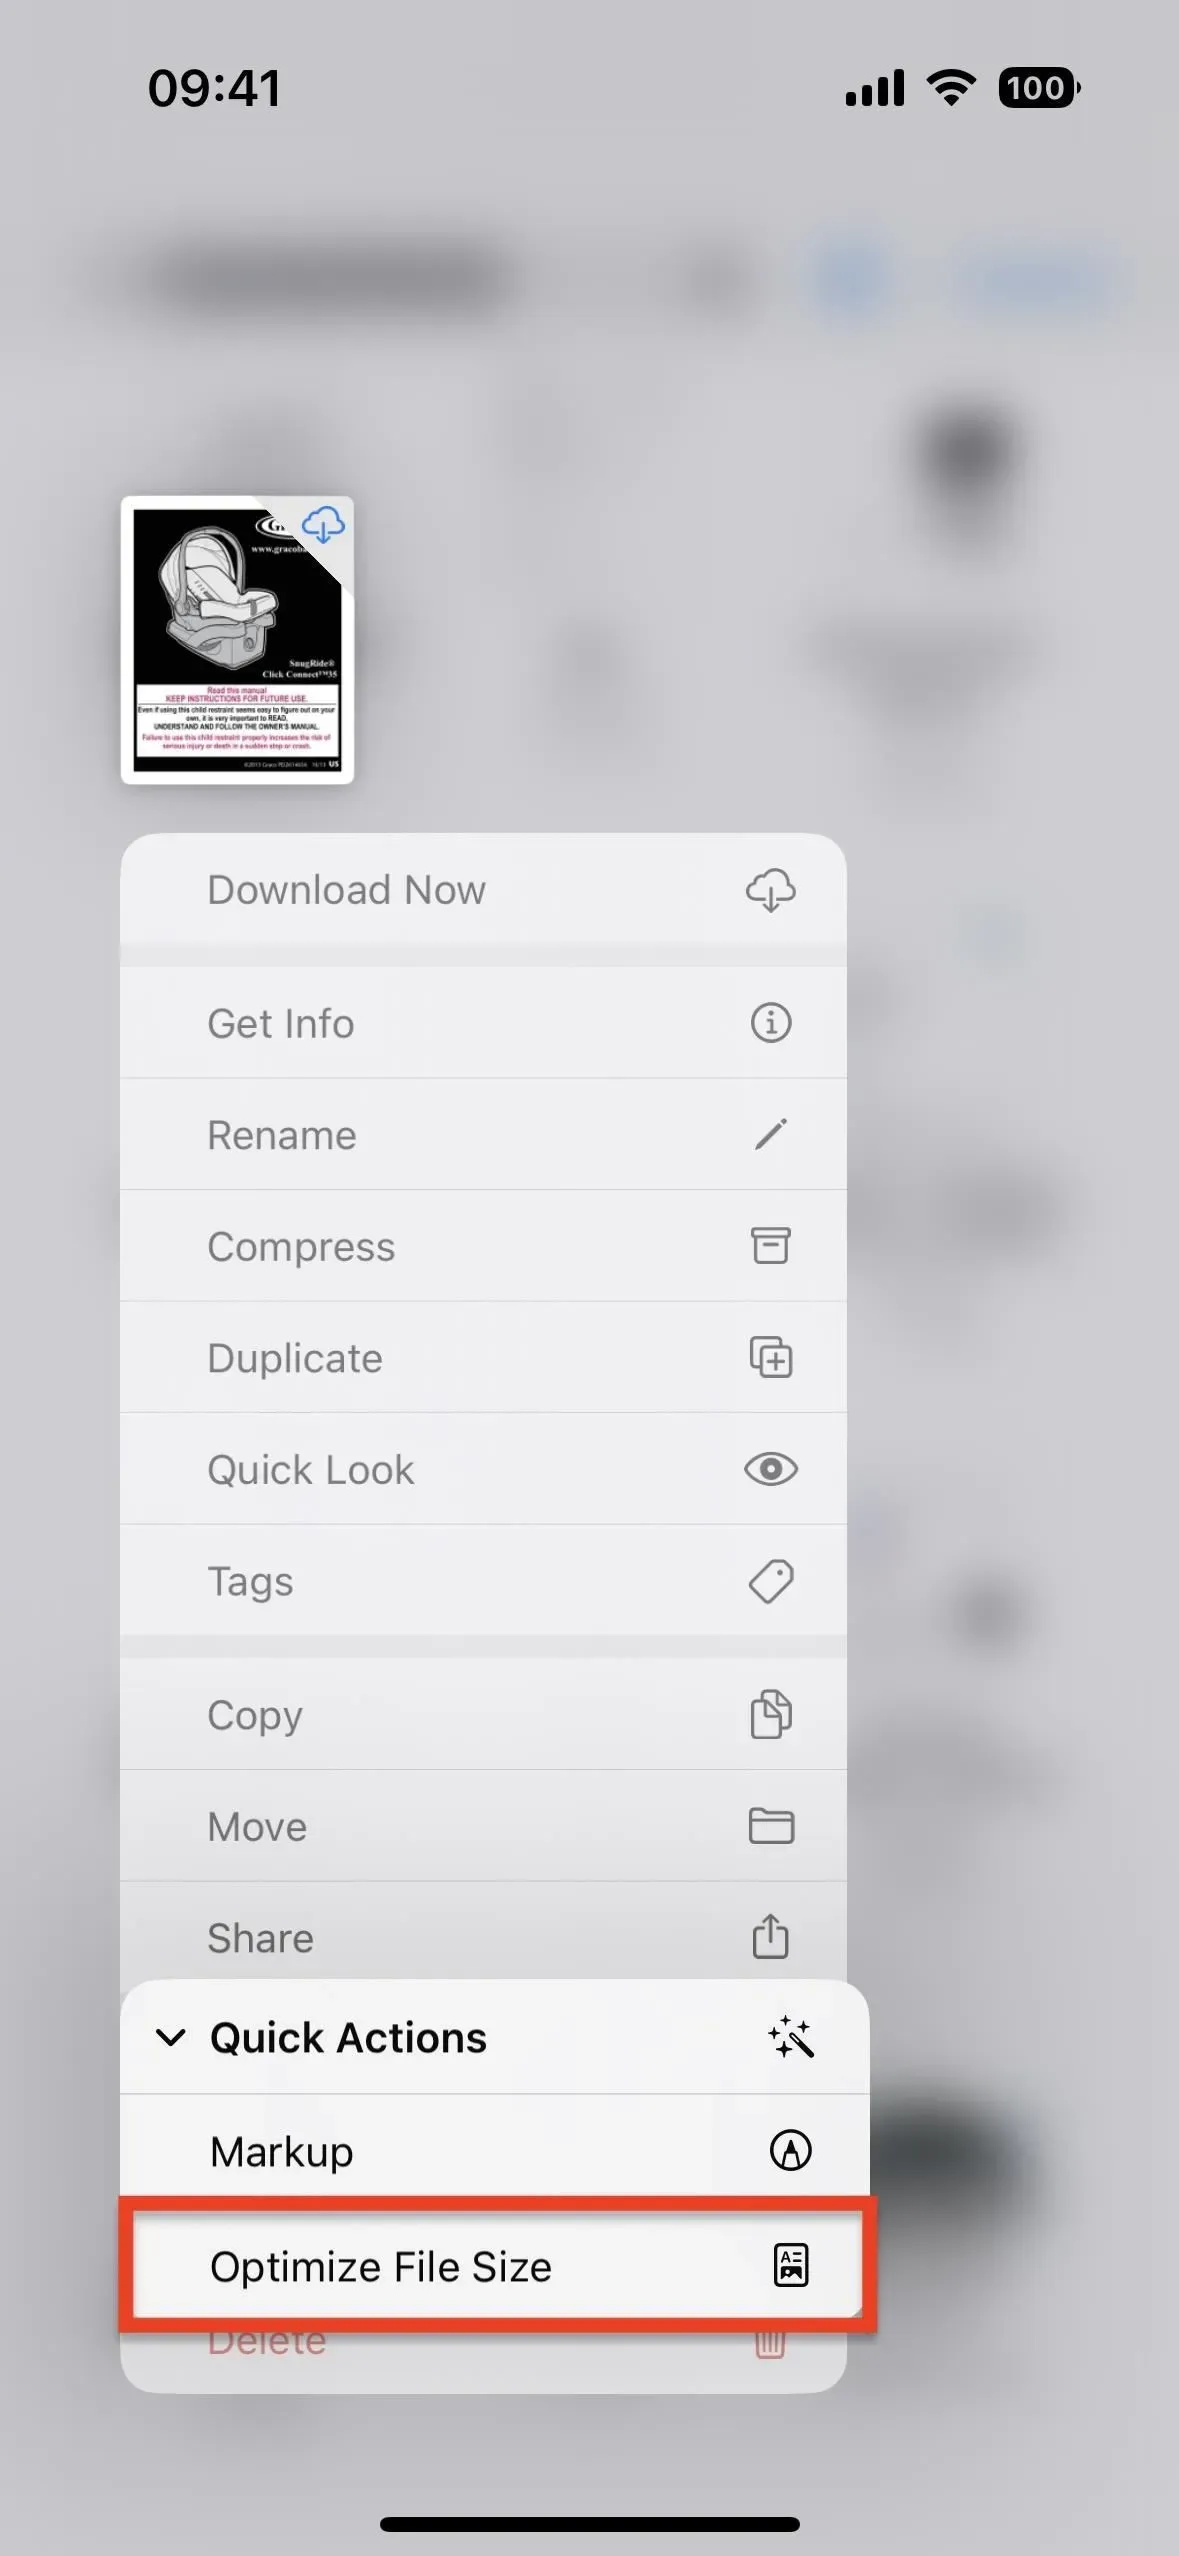
9. Optimize PDF File Size
Another new option for iOS 16 is the “Optimize File Size”action in the long press menu for PDFs. This action reduces the file size by compressing PDF images. You won’t always notice a significant change in file size after using it, for example when PDF images are already compressed. (Note that this action is also available in the Shortcuts app.)
10. Delete downloaded files from local storage
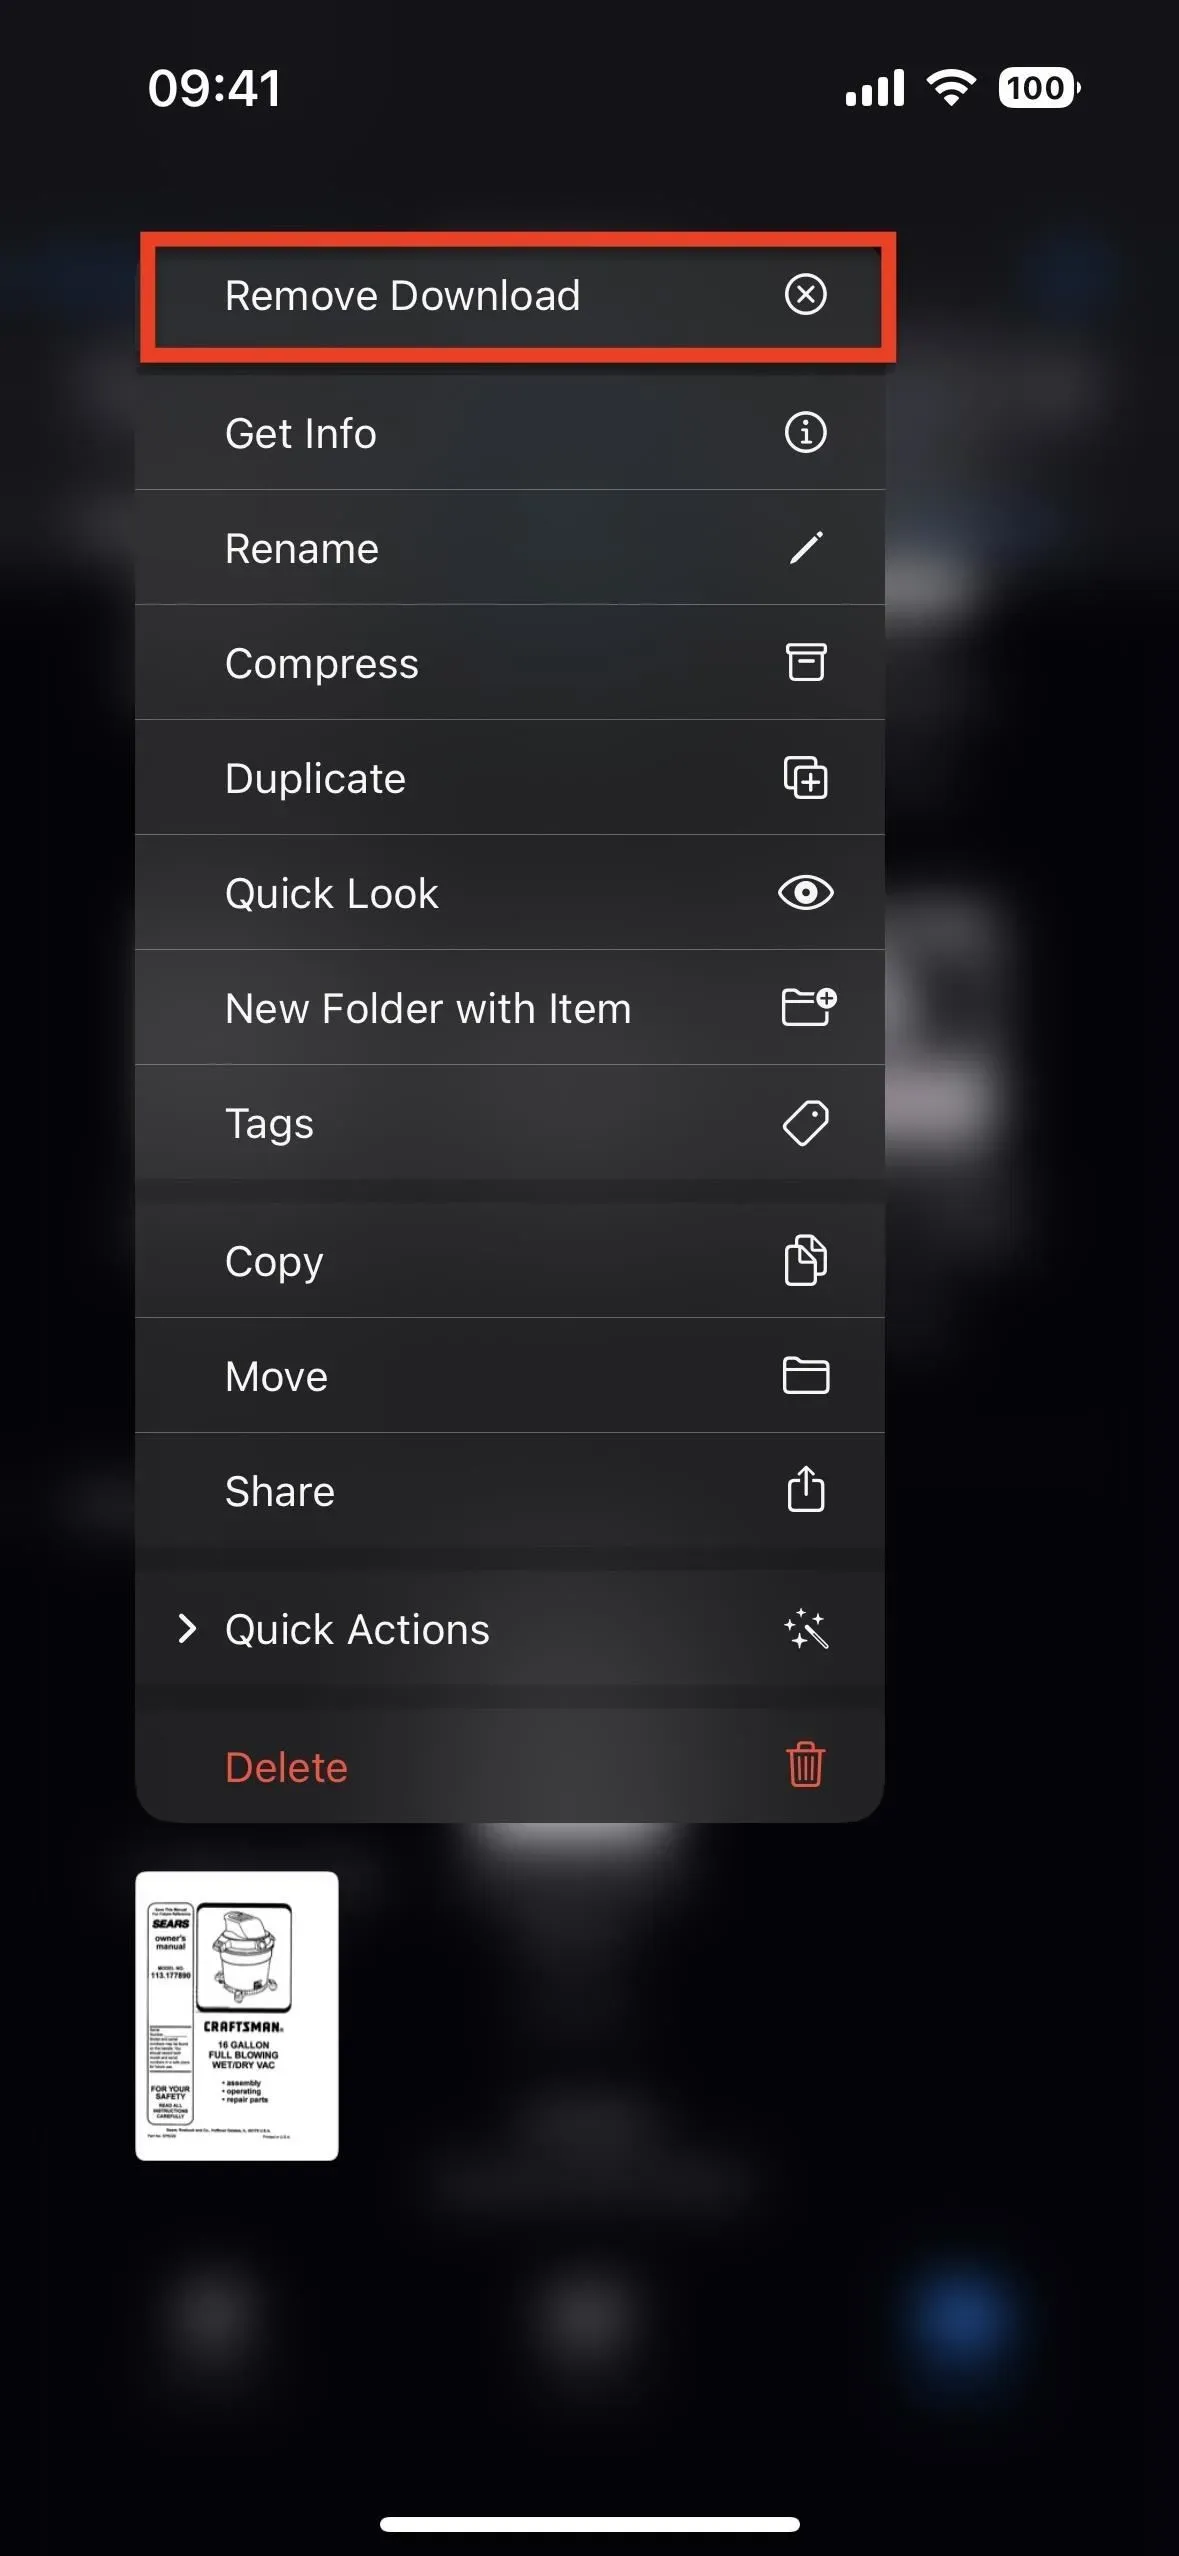
When you long press on a file with the iCloud download symbol, you should see a new “Download Now”button that used to be just called “Download”. Okay, it’s not a big change, but you’ll definitely notice it when you long-press on a file without the iCloud download symbol.
Where there used to be a “Download Now”button, there is now a “Delete Download”button that allows you to immediately remove the downloaded version from local storage. It won’t delete the file from iCloud, so you’ll see the iCloud download symbol again once Files deletes it from local storage.
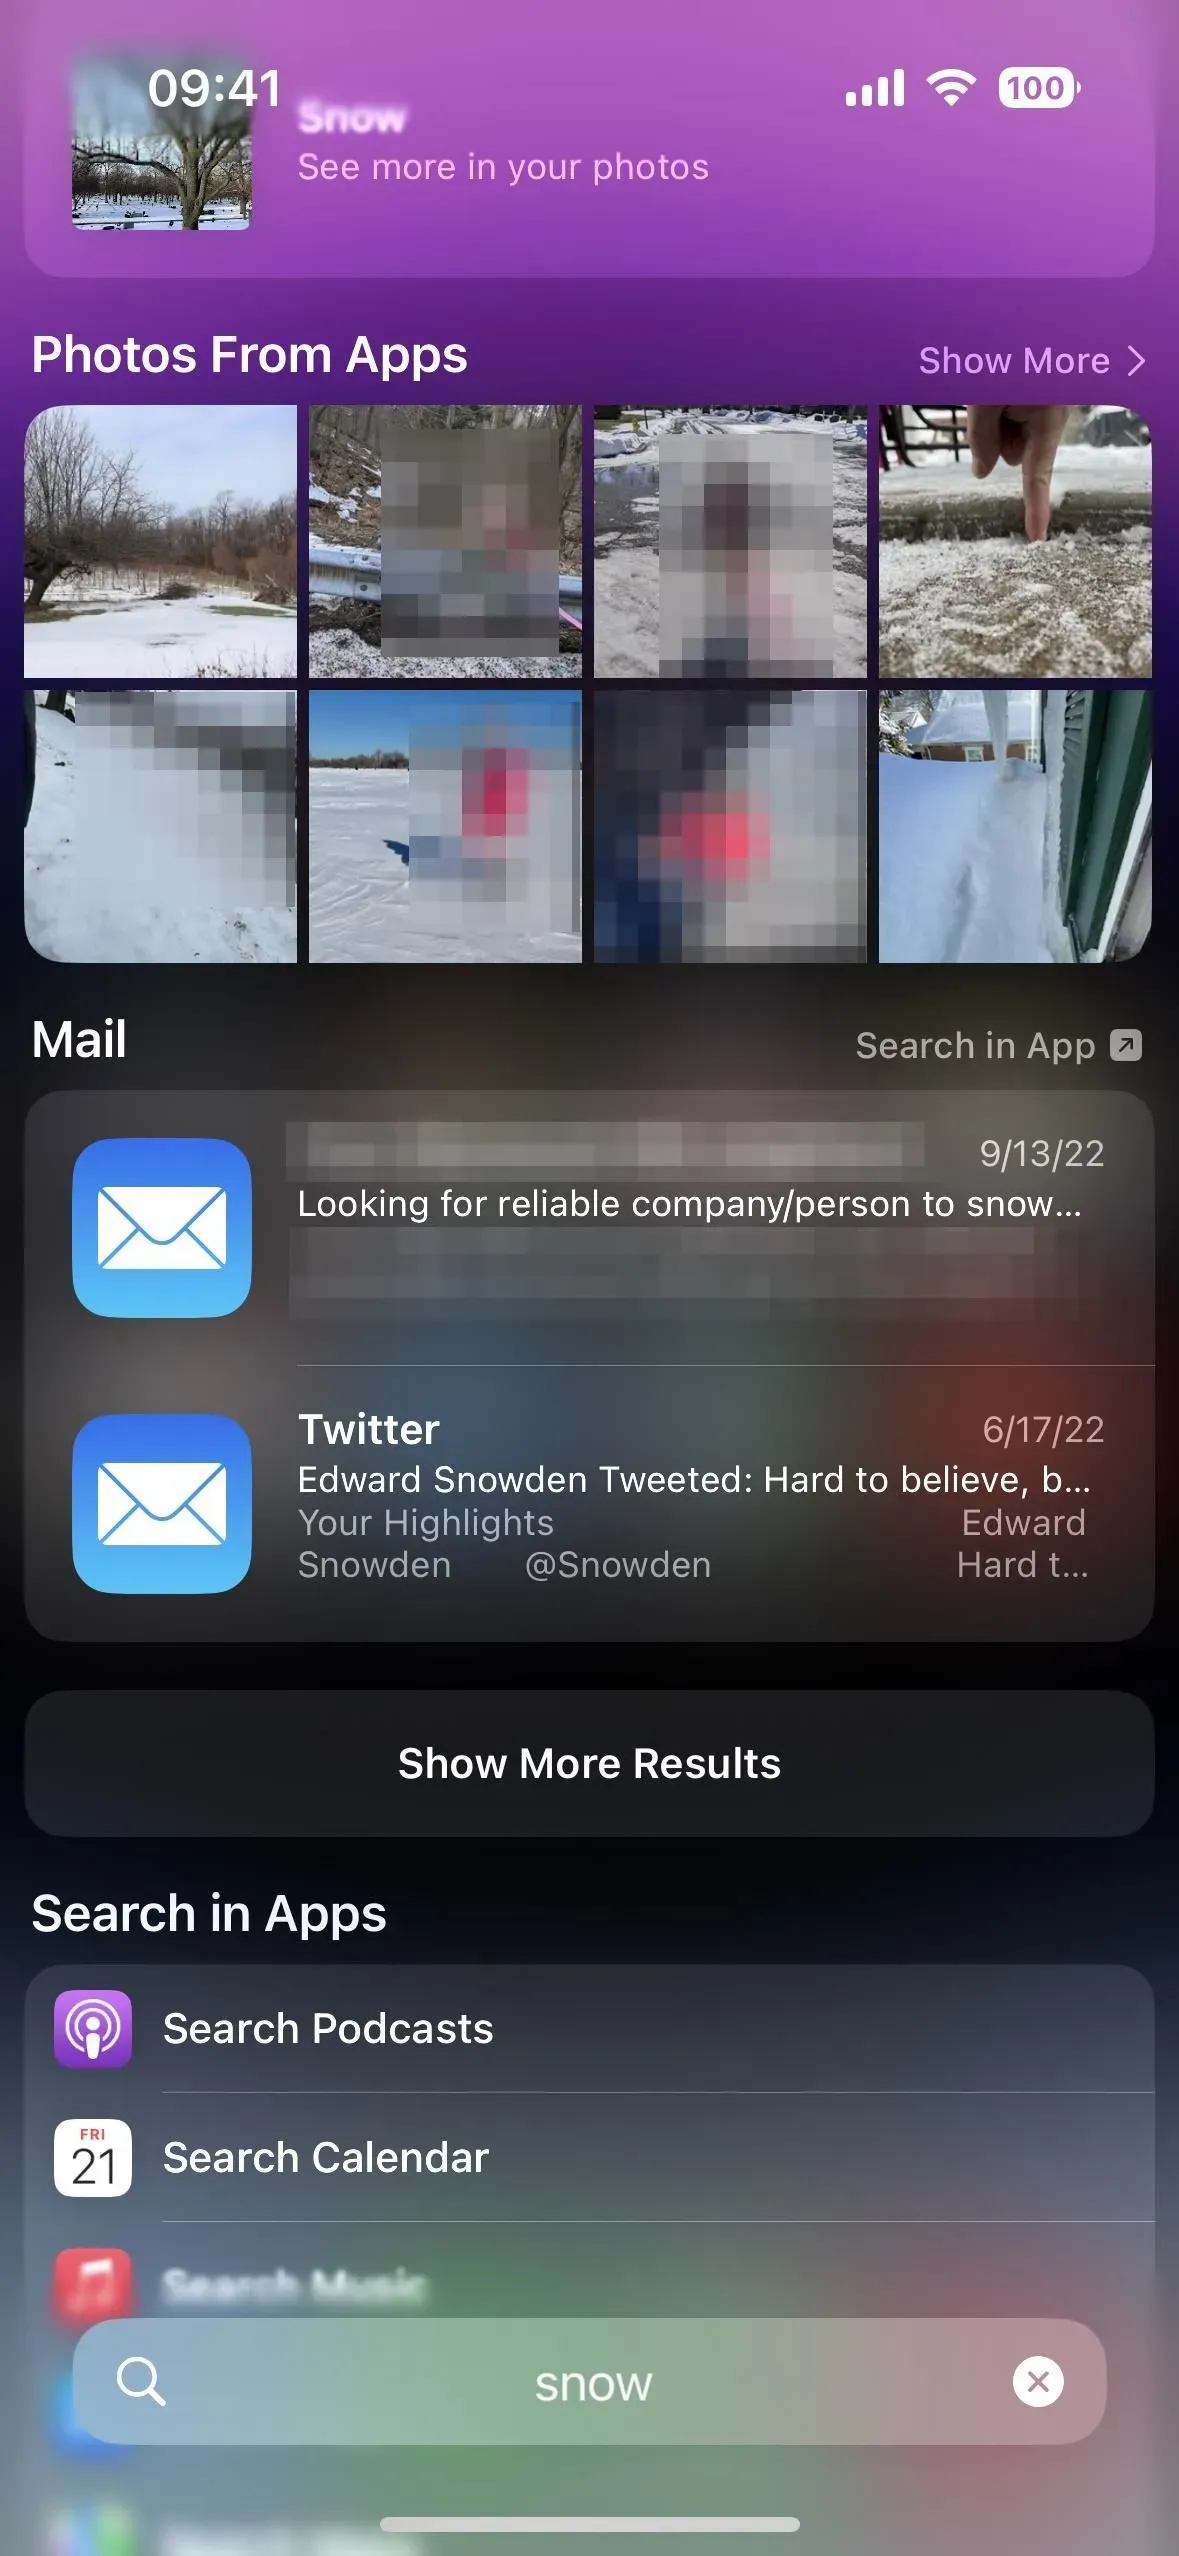
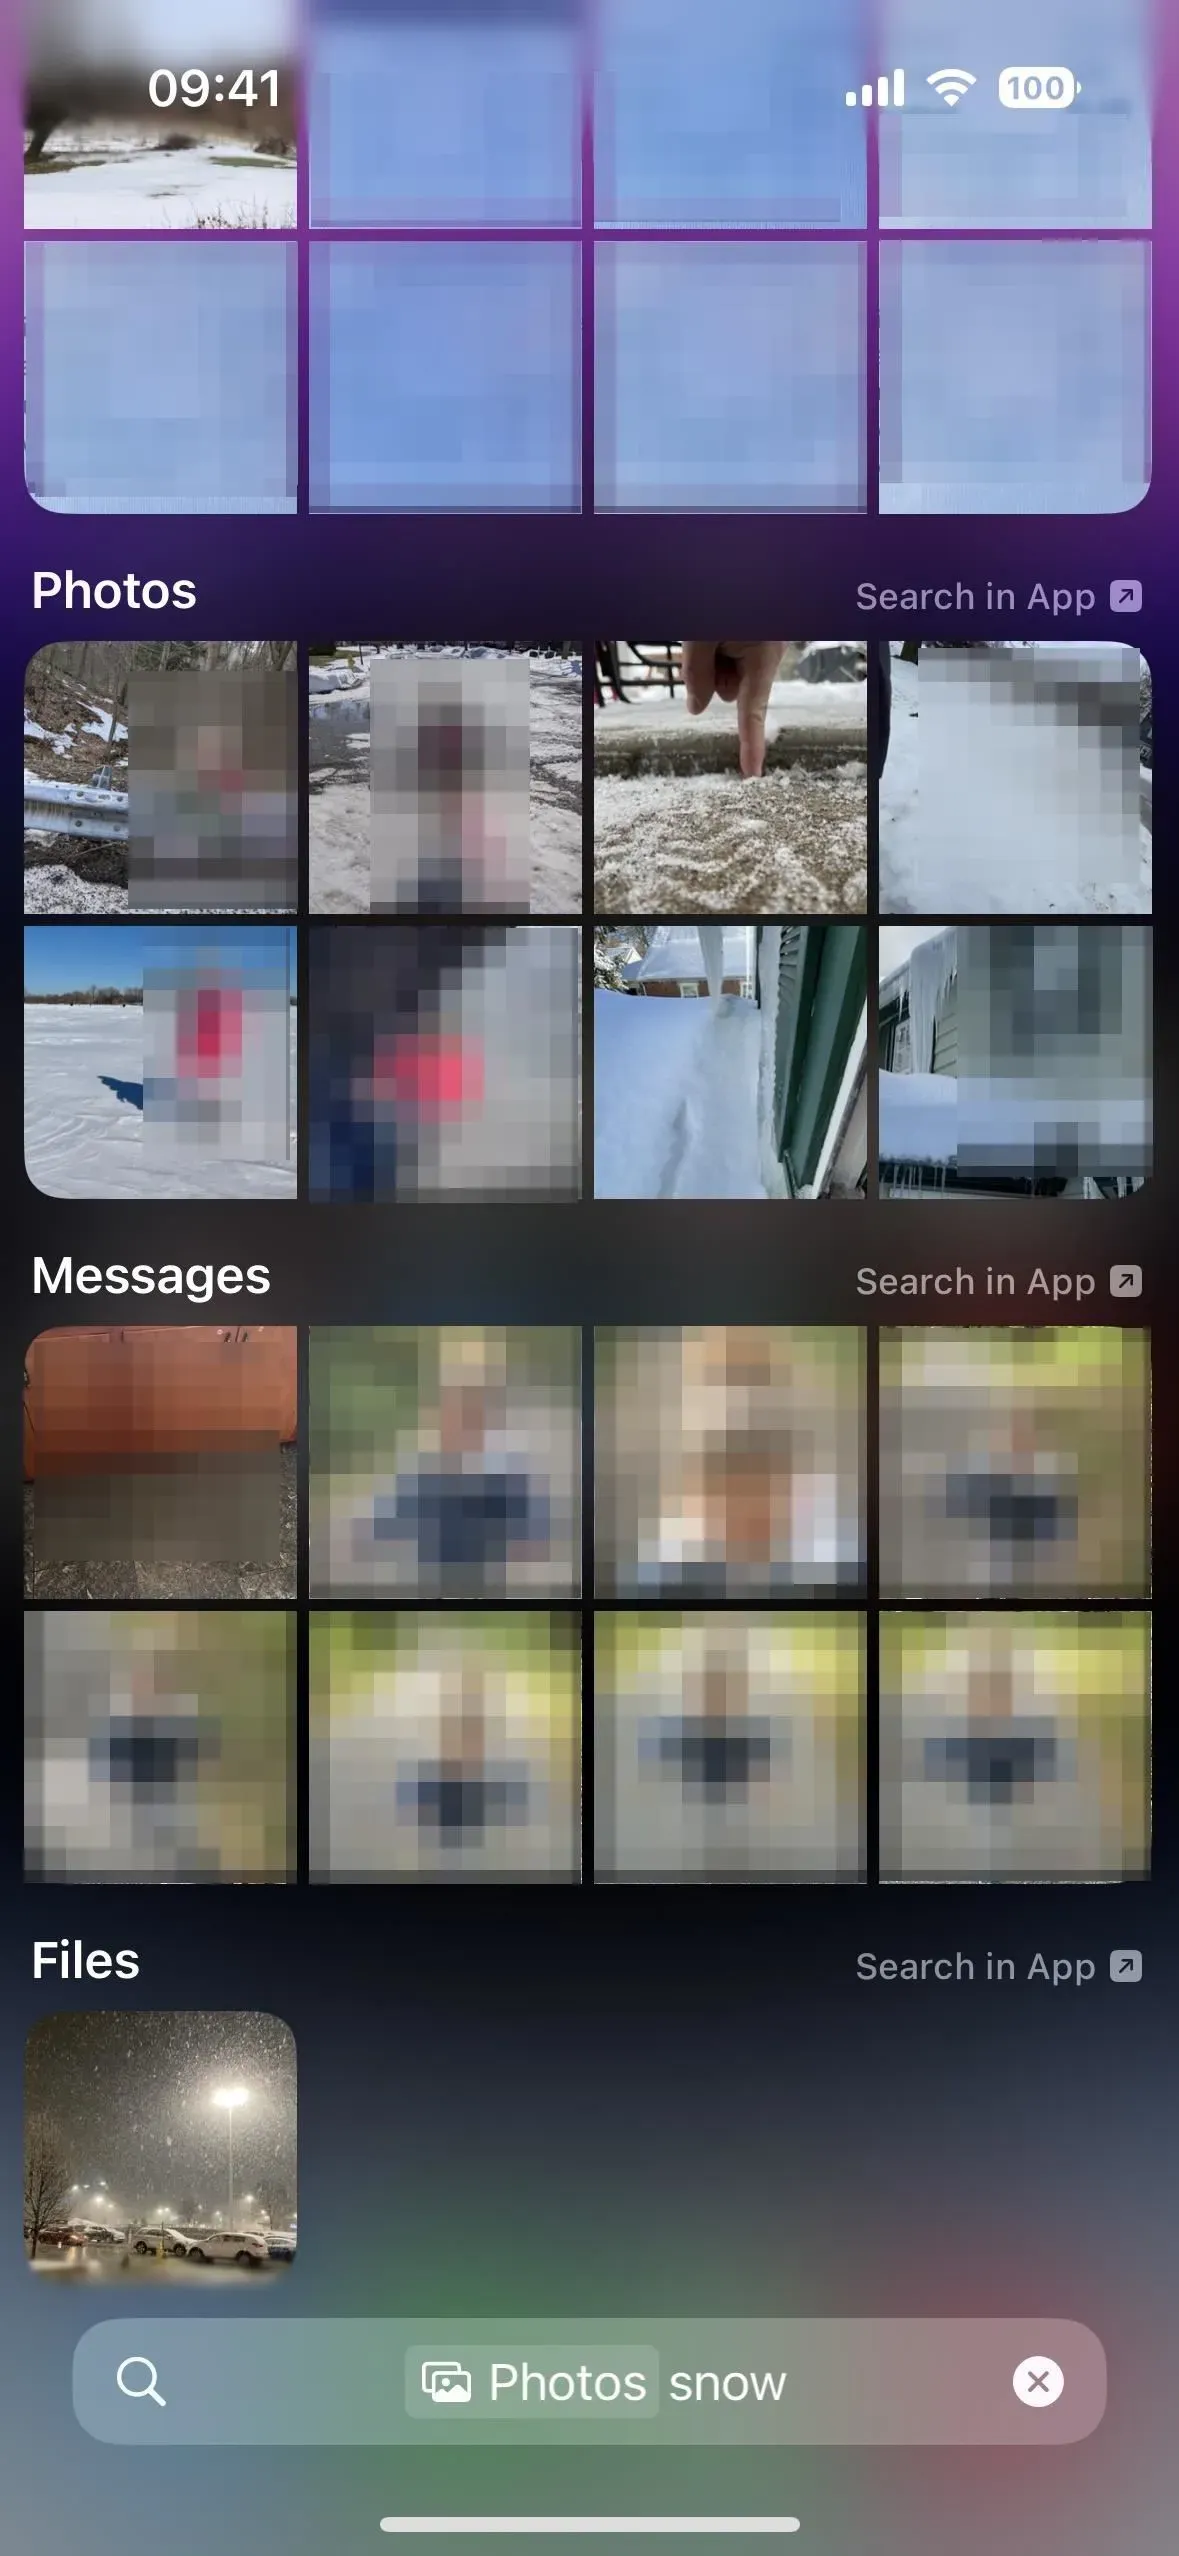
11. Search by image content with Spotlight
While you could already use Spotlight Search on the Home screen to search for documents by name in the Files app, iOS 16 adds more search options to help you find images by context. For example, you can search for words in a screenshot, the location where the photo was taken, and even the people and visible text in the photo. It can even search for images of things like dogs, cats, and cars.
This change applies to Spotlight search on the home screen and to the search tool available directly in the Files app. Precise image search is available in other apps such as Messages and Notes.

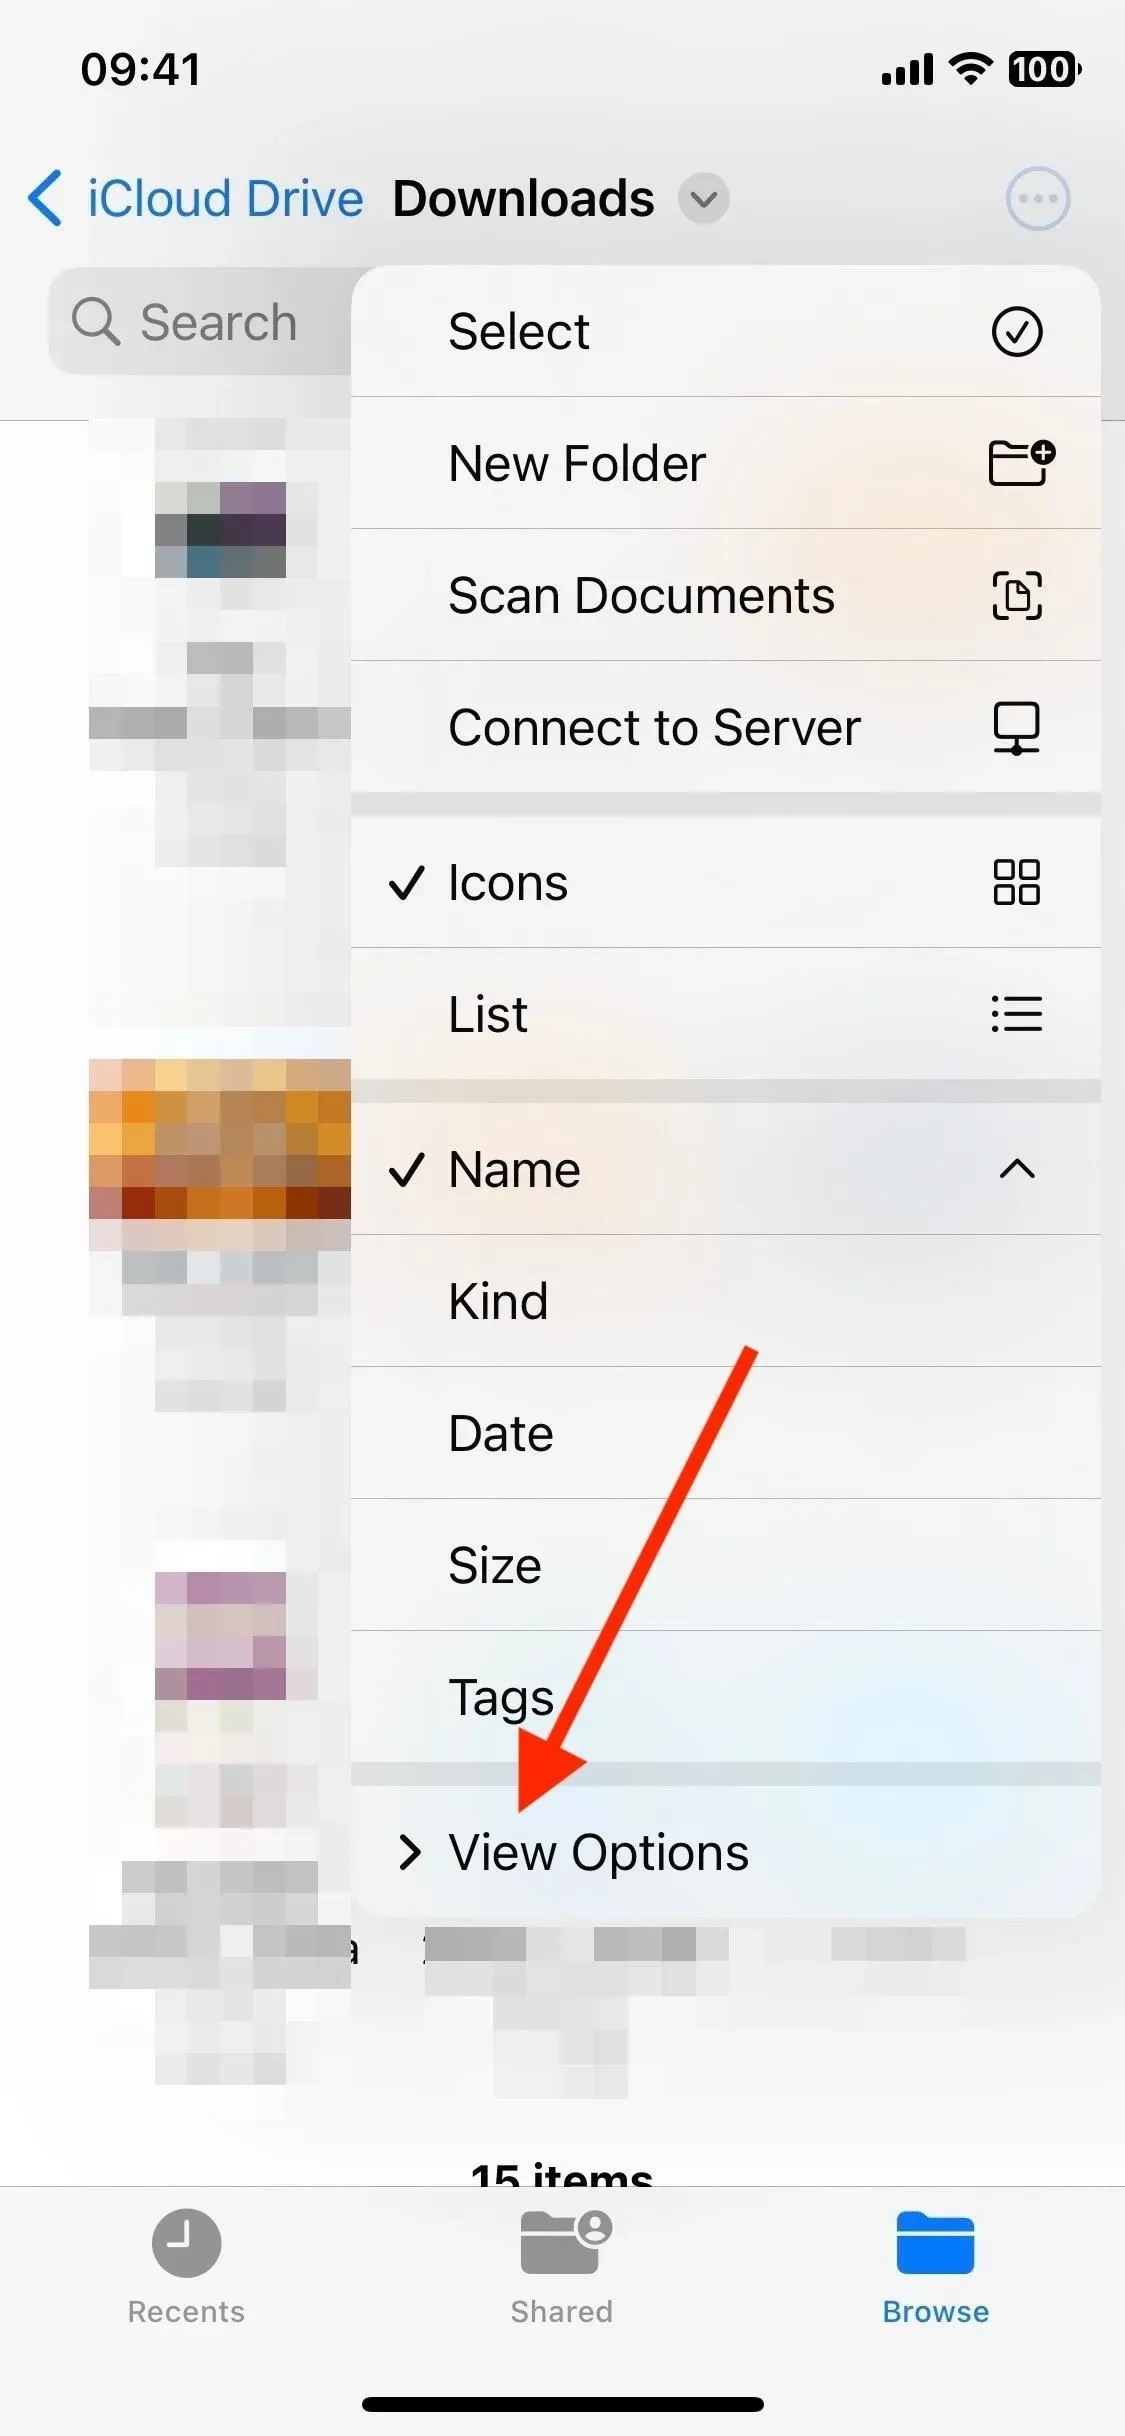
12. Simplified group sorting
Groups help you organize files and folders by last modified date, file type, or size, but this isn’t a new sorting tool in Files. What’s new is that when you click the ellipsis (•••) to find the Use Groups option, you’ll see that Apple has changed it to View Options.
Previously, you clicked “Use Groups”to turn it on, which automatically selected your last sorting option, and you had to go back to the ellipsis (•••) menu to change it if needed. Now you can click View Options and immediately select the sorting method you want.
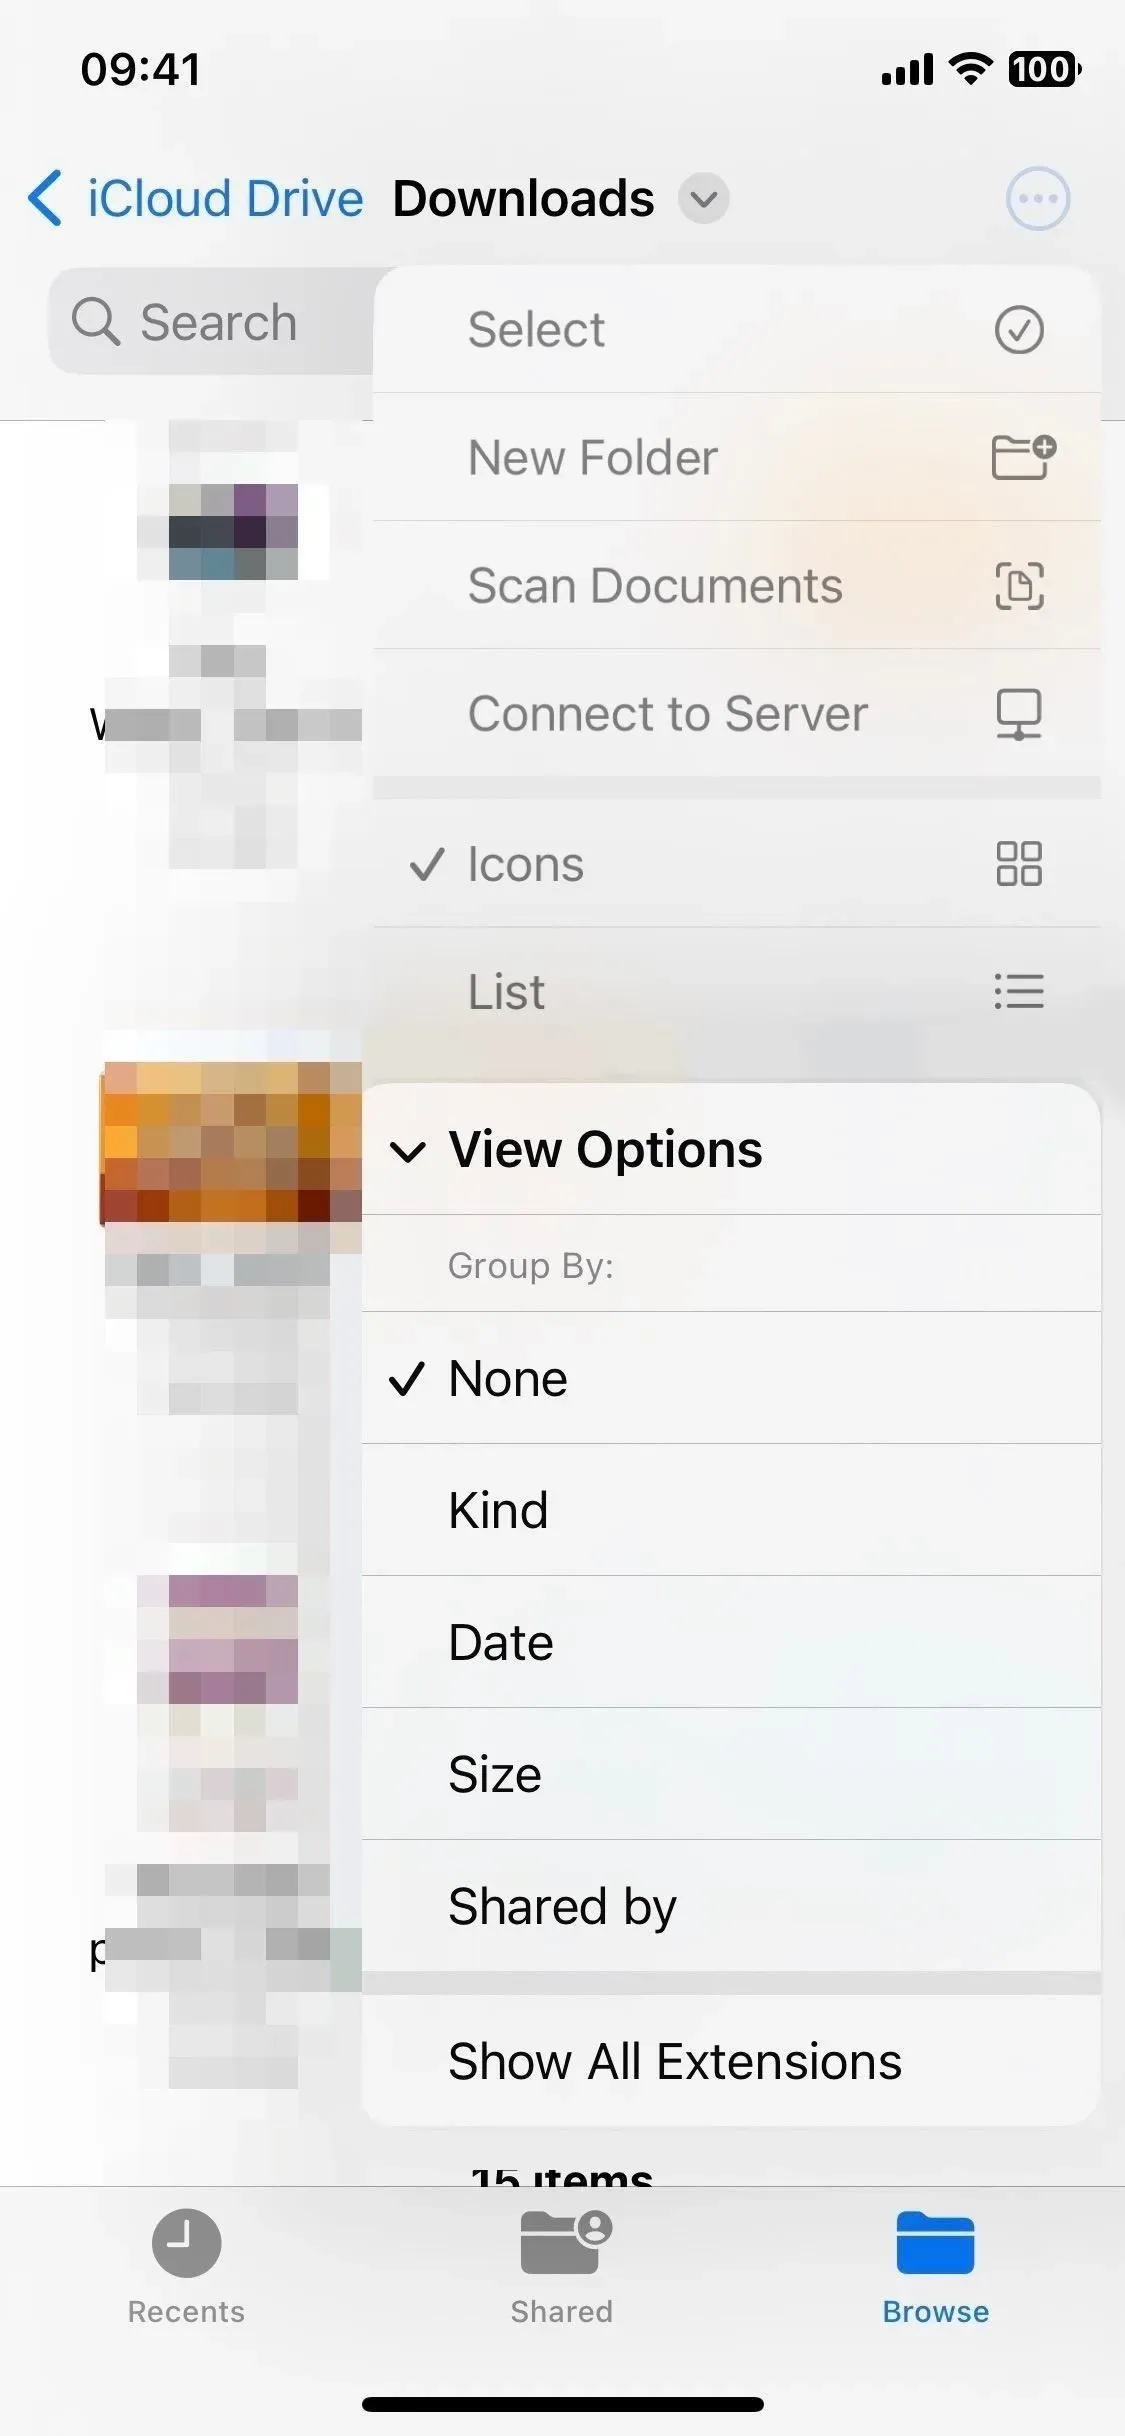
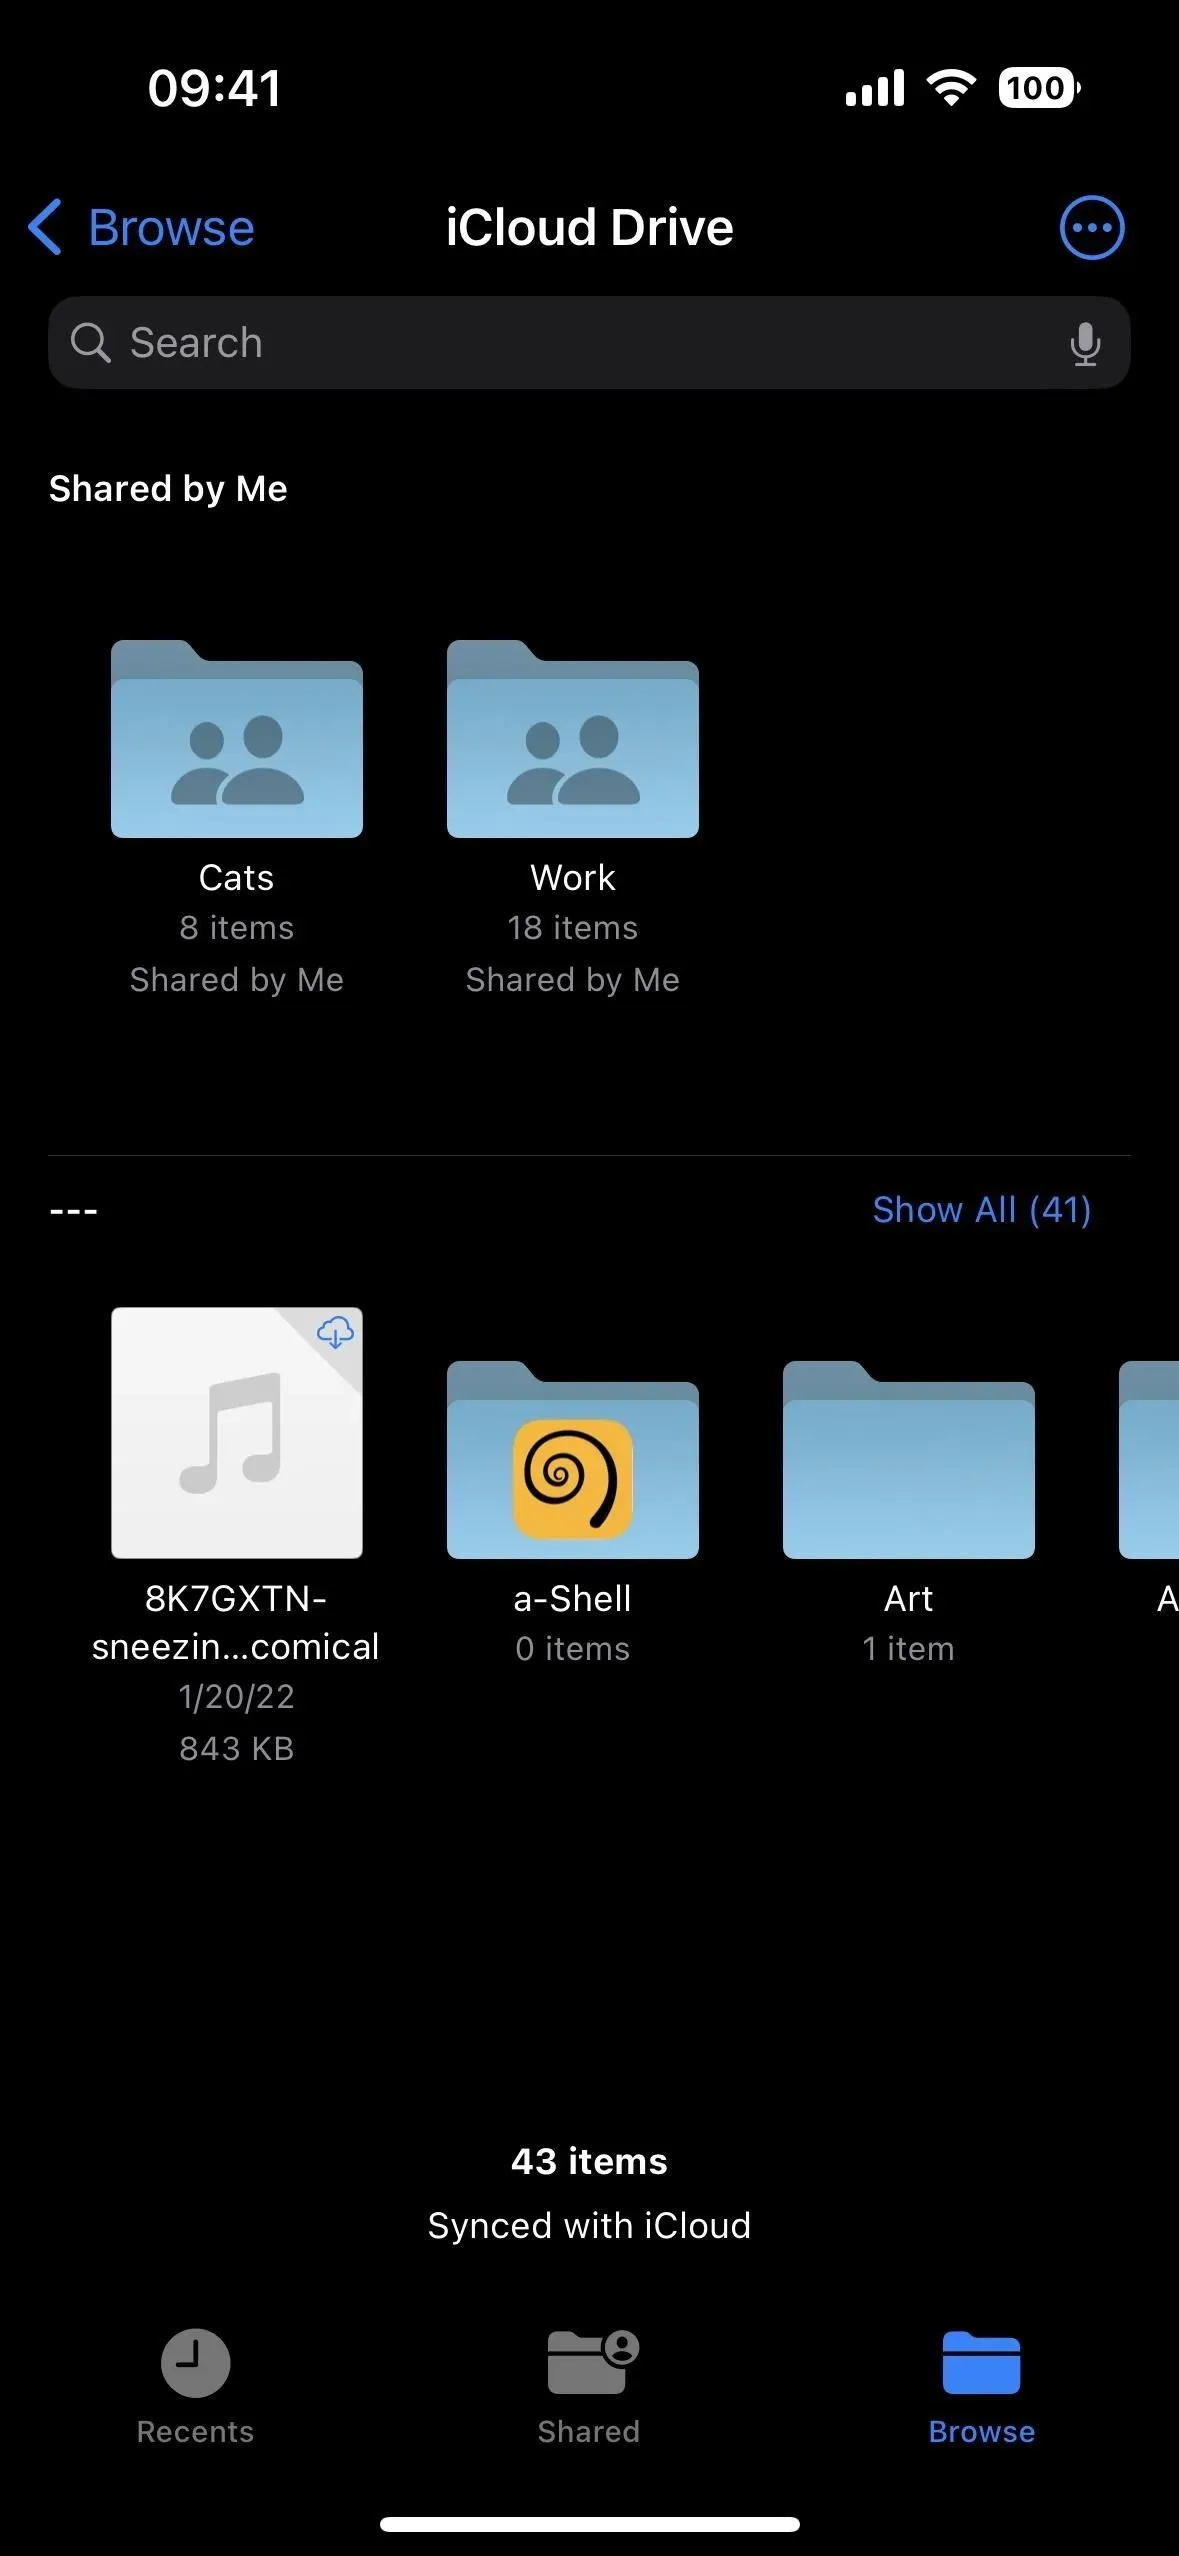
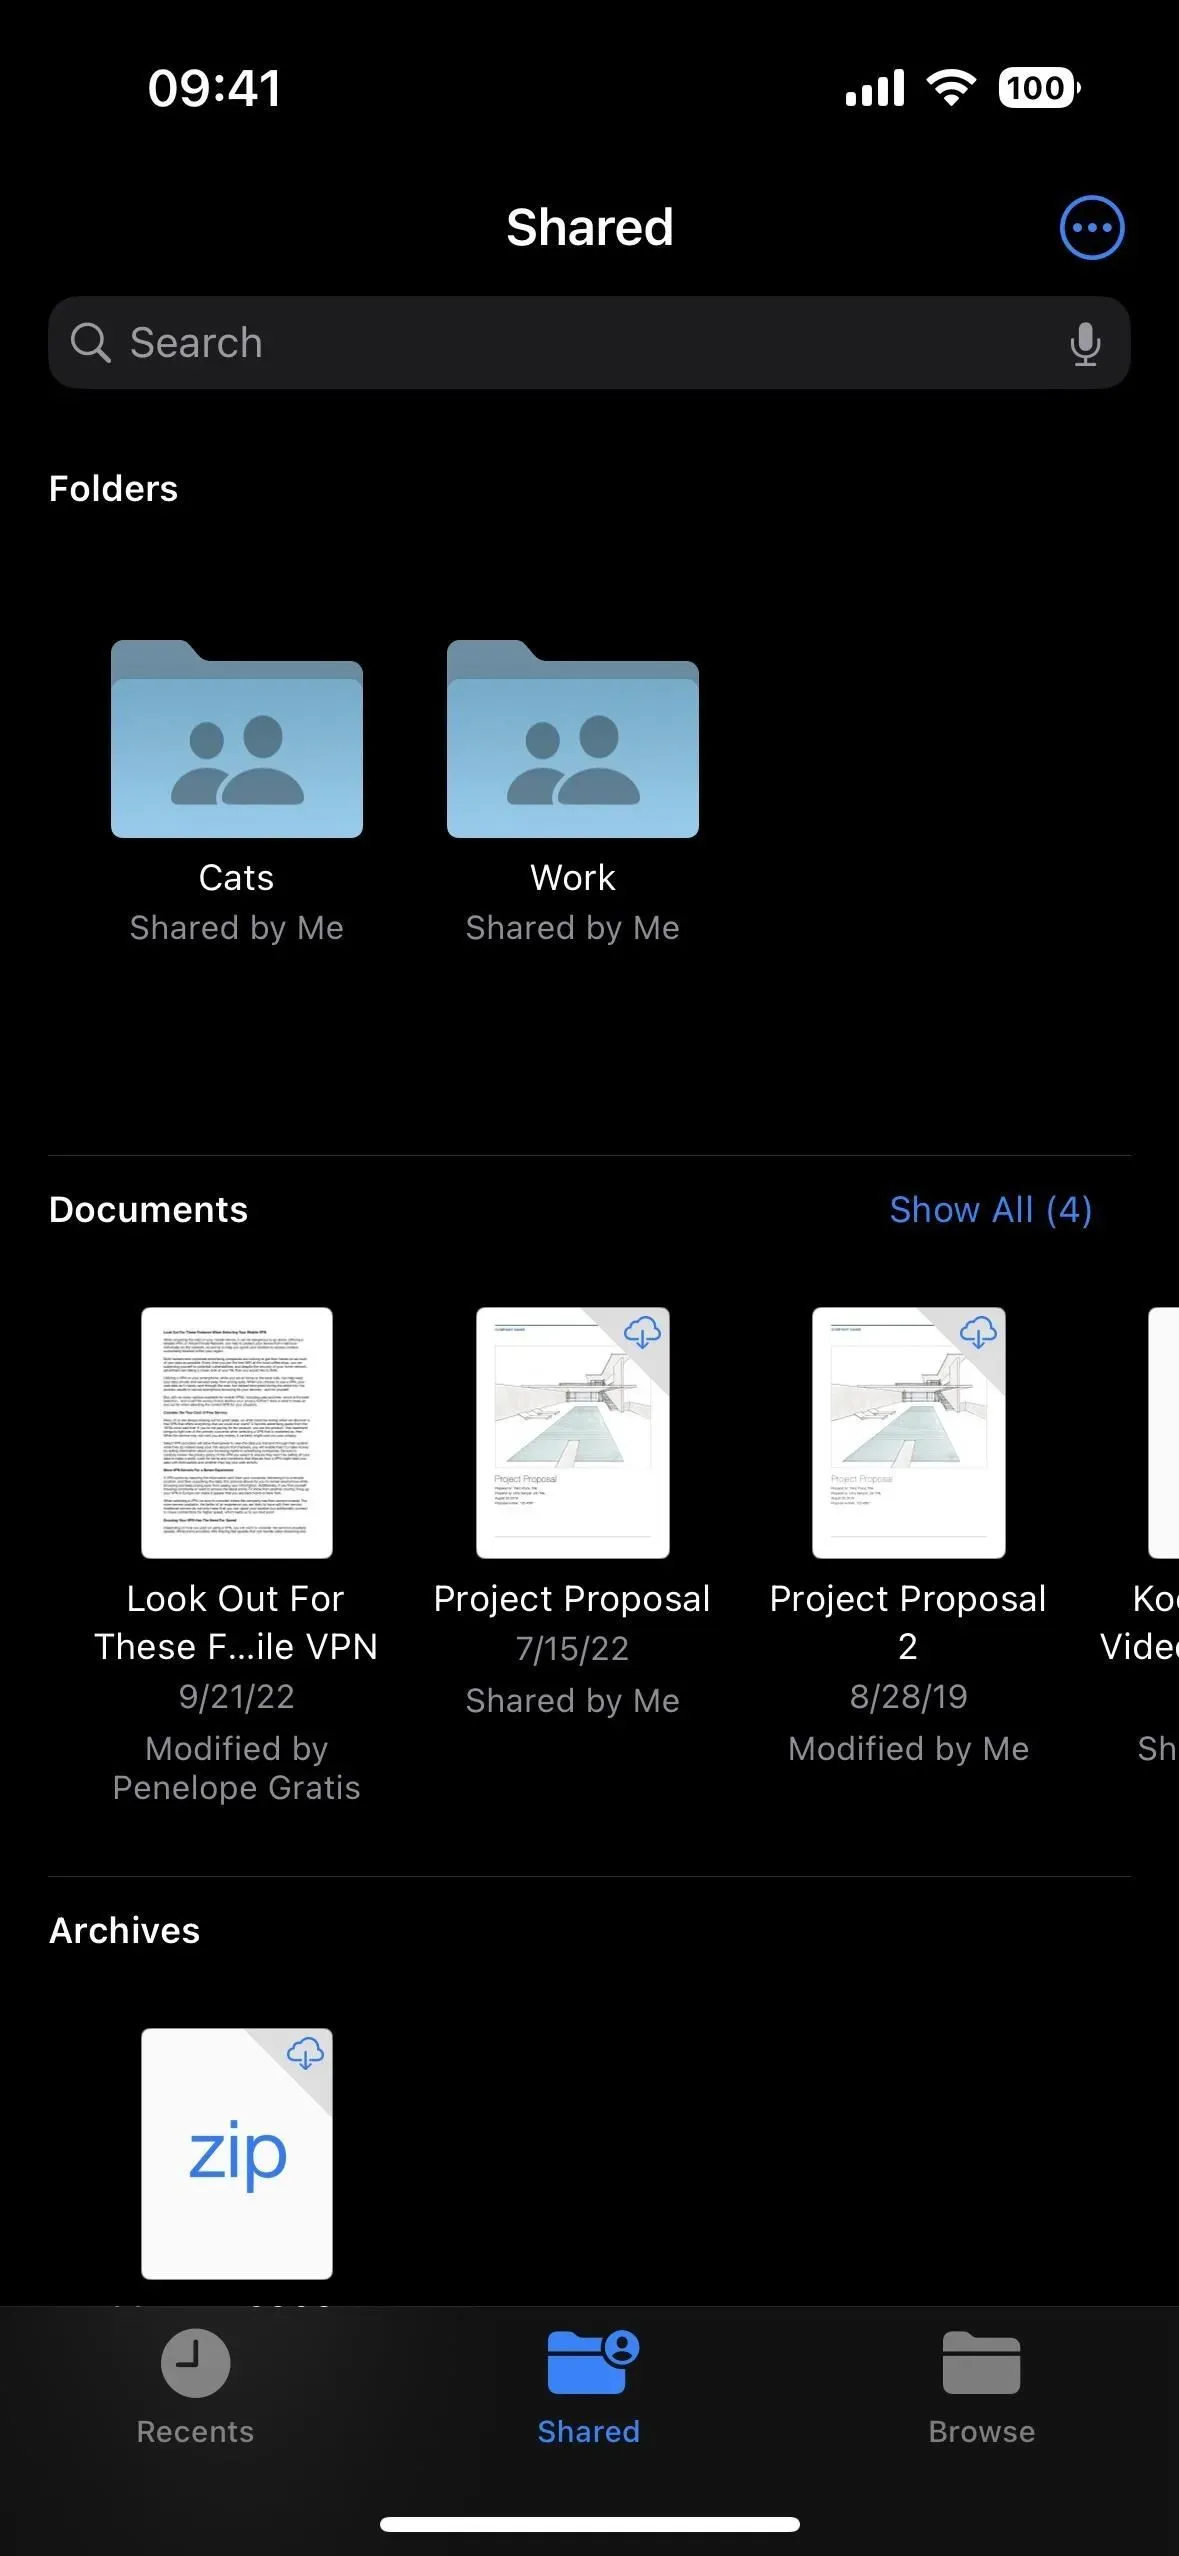
13. Sort content by who shared it
Another new feature in the new View Options sorting menu is Sharing, which lets you group content by who has shared it. Files and folders you’ve shared with others will get their own “Shared with me”section, while content you’ve shared will be listed under “Shared with [username]”. Undistributed content gets a separate section.
What’s more, a whole “General”tab in “Files”does the same thing, but without the non-shared content. The new tab lets you sort shared content by last modified date, file type, or size, not just who shared it. If you want to find all the files and folders you have that haven’t been shared yet, View Options on the Browse tab is the most useful.
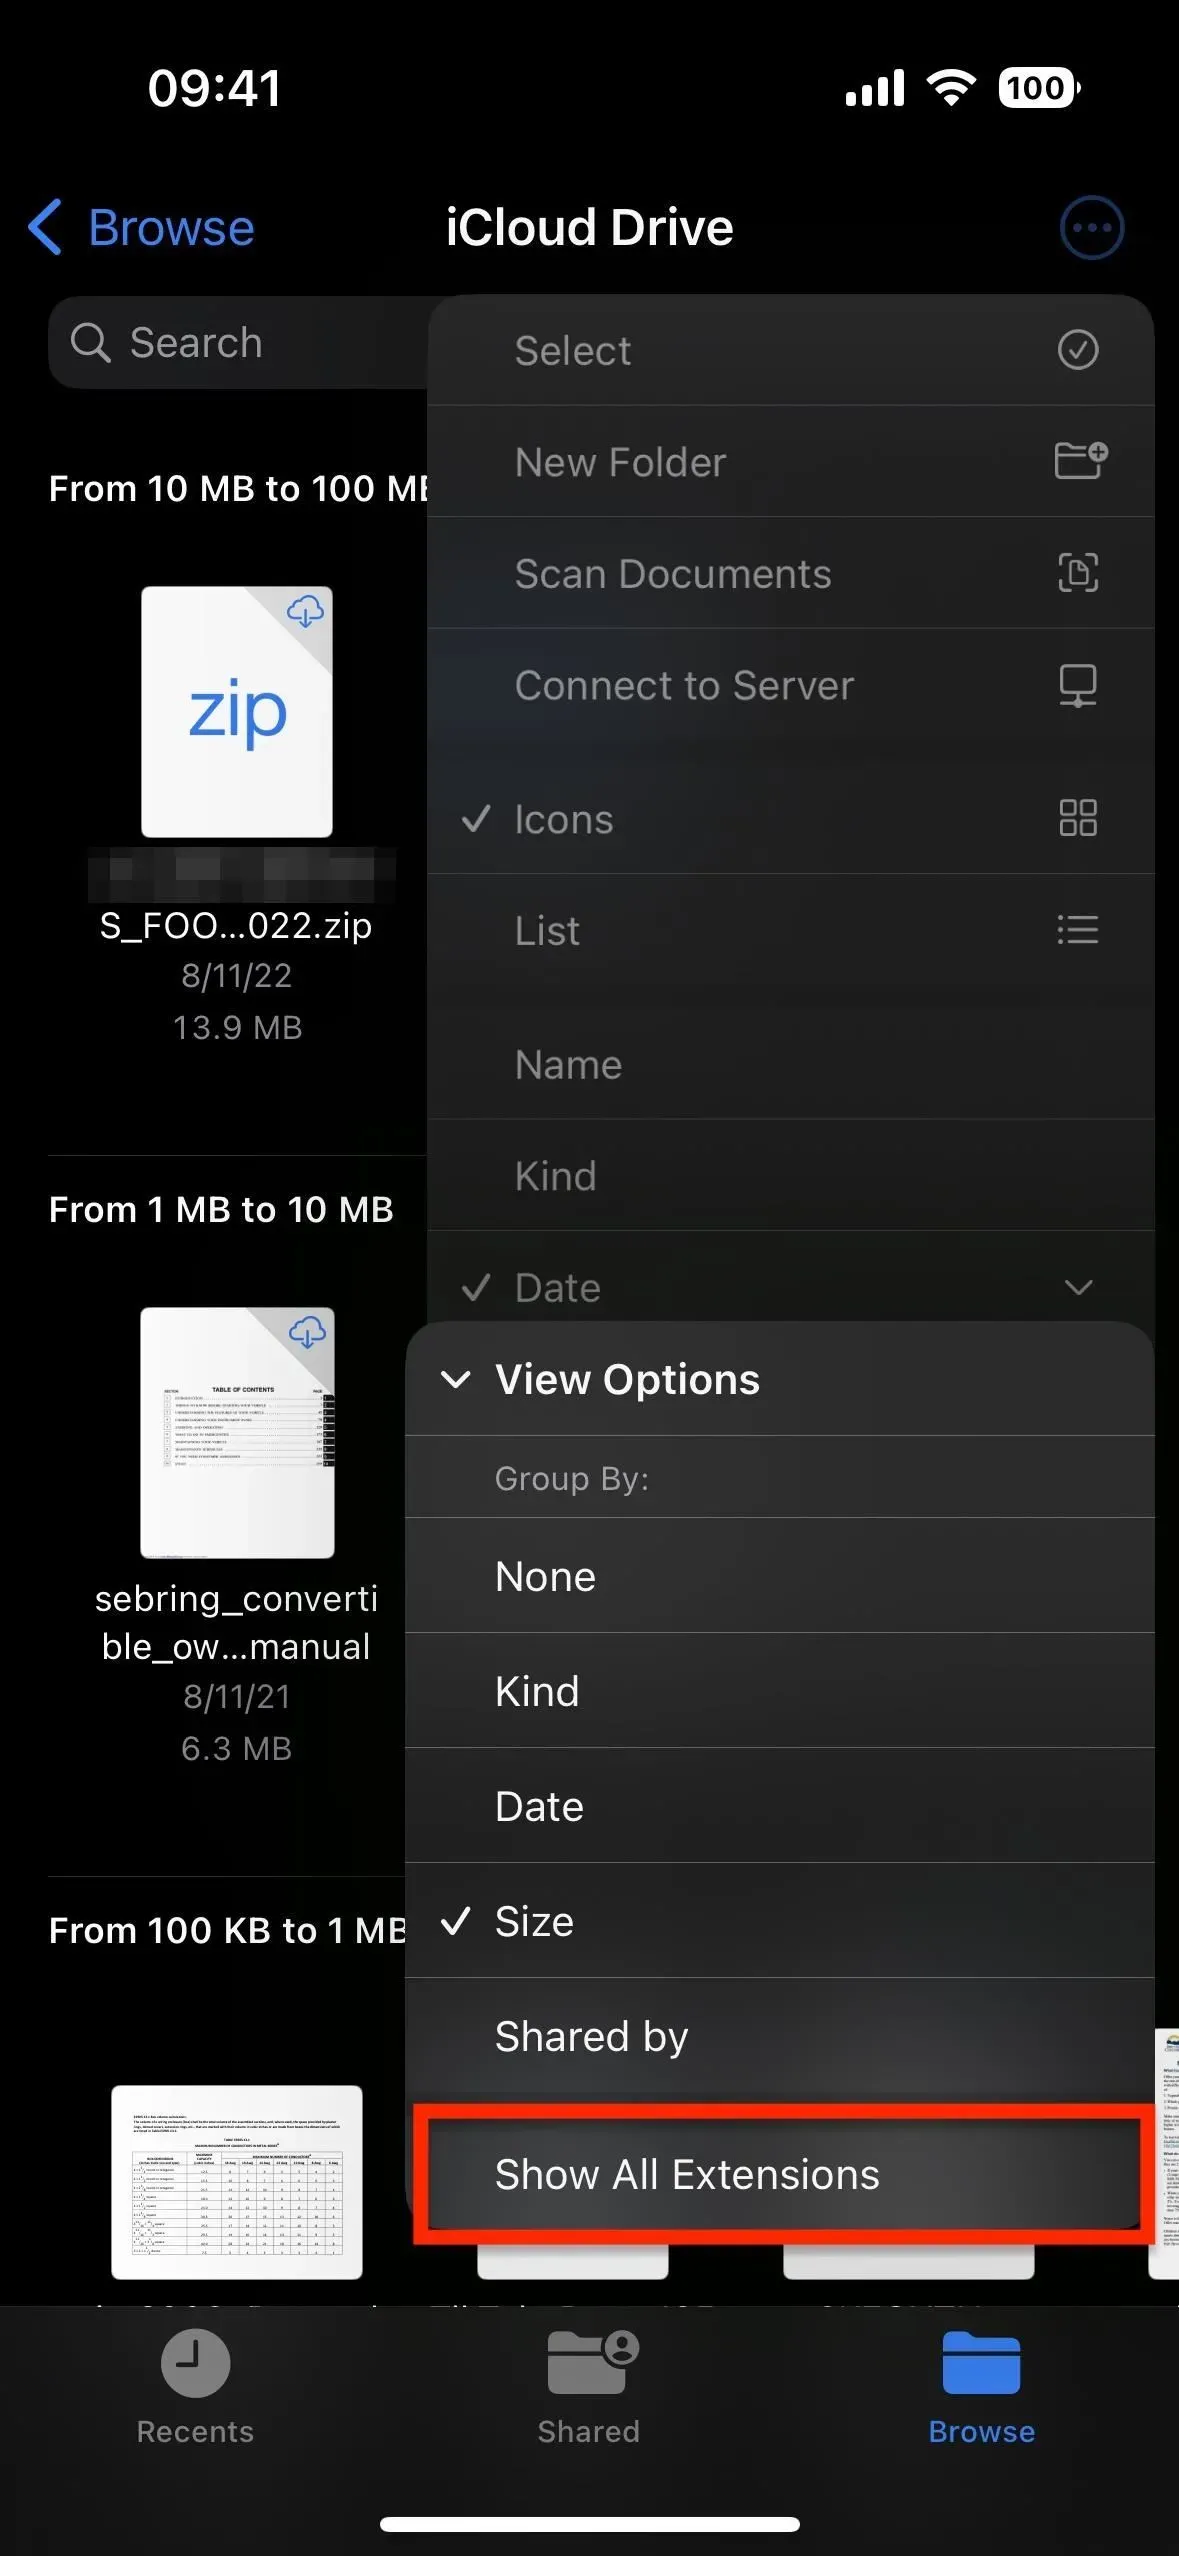
14. Show/hide file extensions
There is also a Show All Extensions option in the View Options sorting menu. This can be useful when you have files that appear to be the same but are in different formats. For example, if you need to share an image that you’ve converted to PDF, the extensions display will help you select it instead of the JPG version.
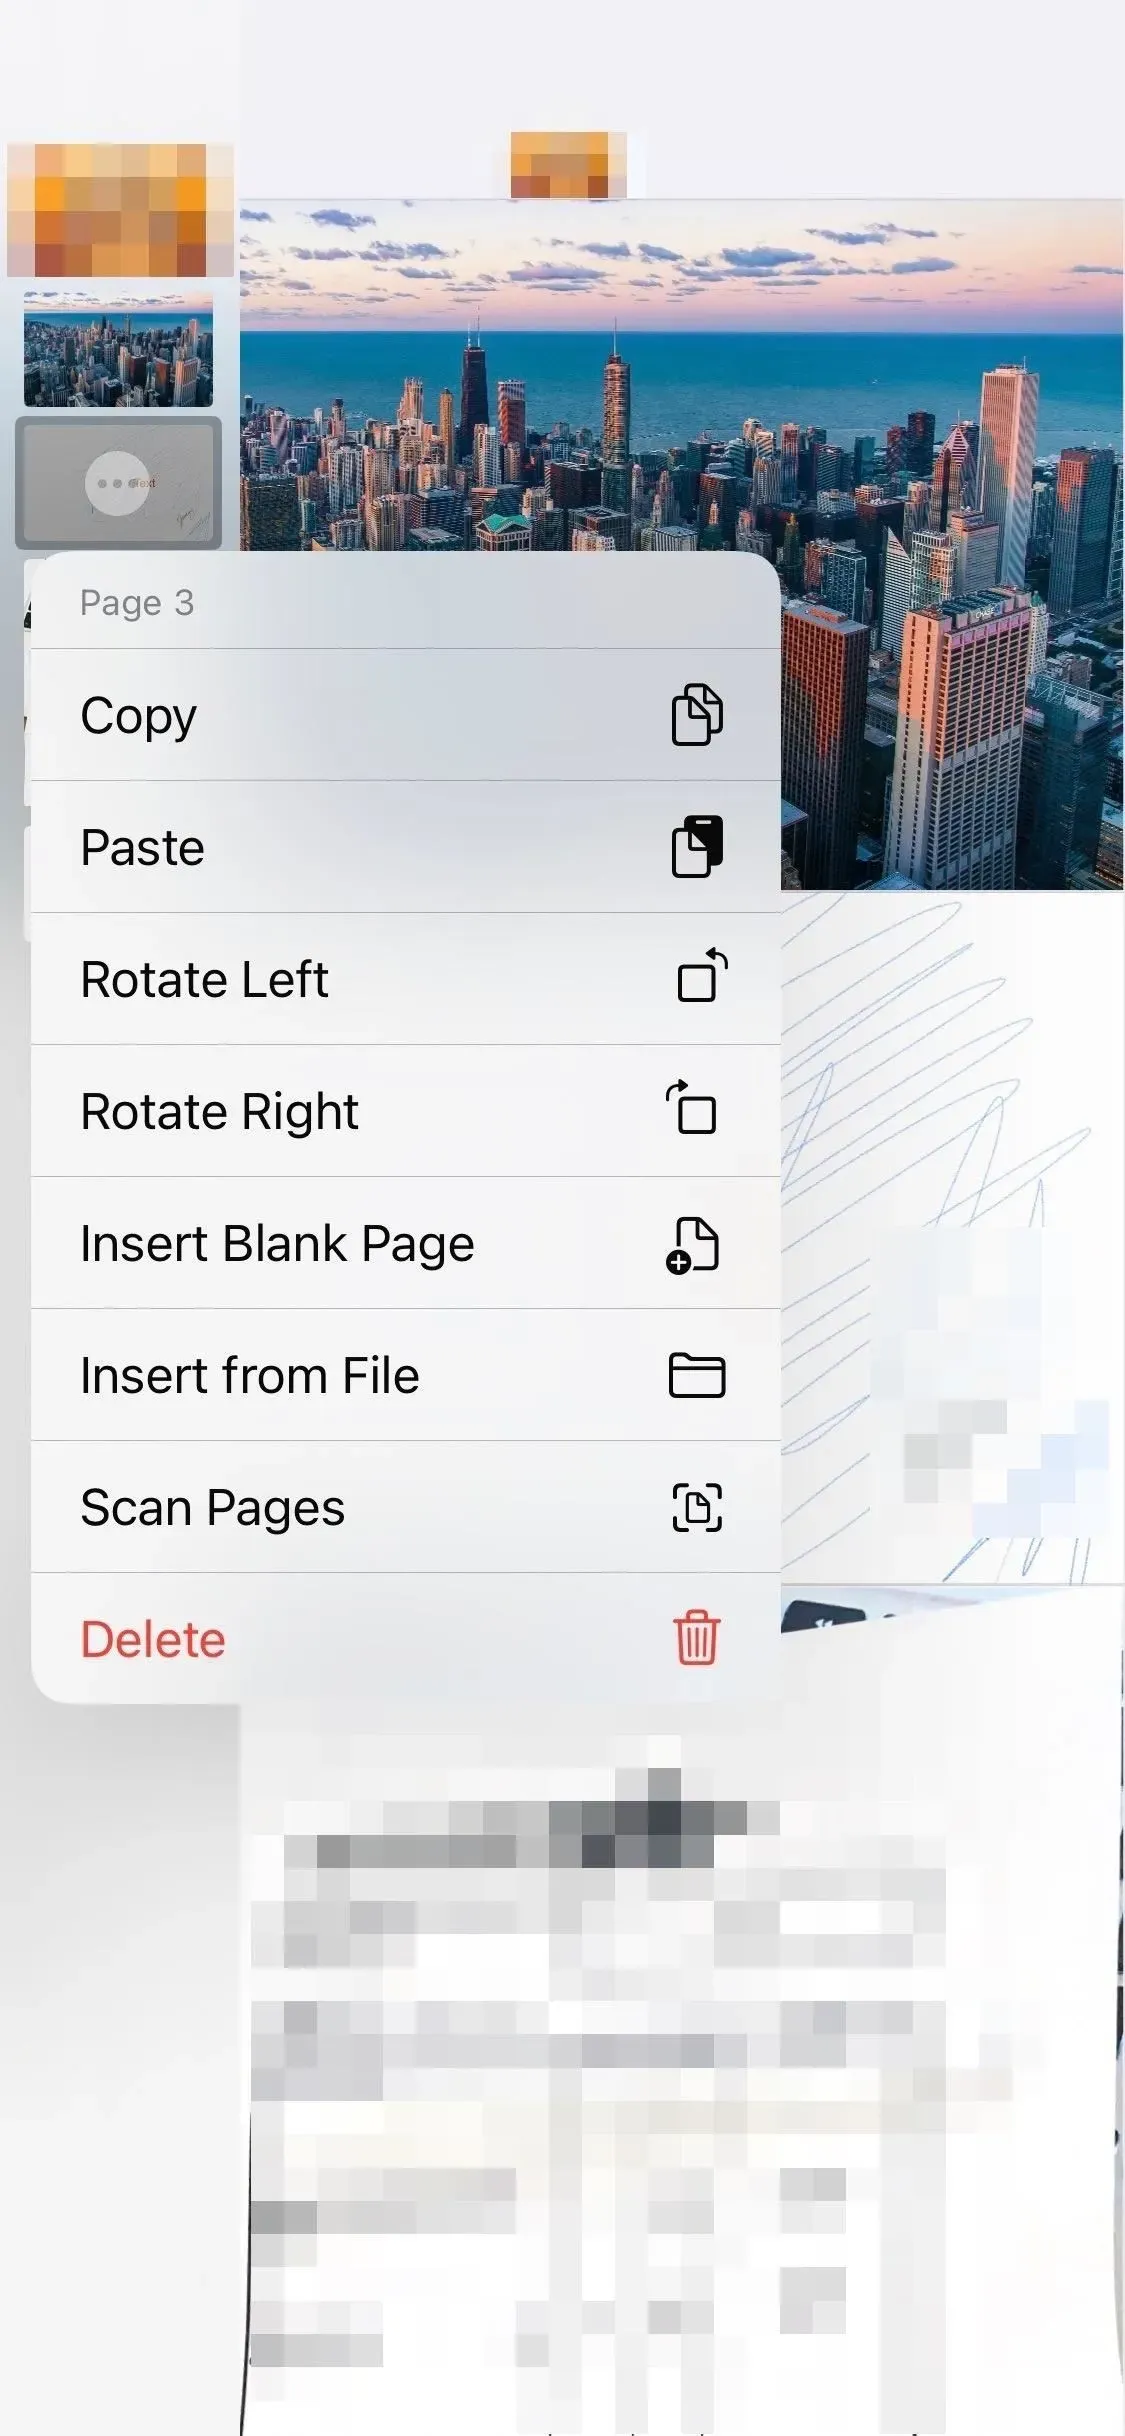
15. Copy/paste PDF pages into a document
You can now copy and paste individual pages into a PDF document. Open the desired PDF file, tap the page number in the corner, and then press and hold the desired page, or tap the page and tap the ellipsis menu icon (•••). From the options, click “Copy”to copy it to your clipboard. You can then paste the page into another app, such as an iMessage conversation, or you can use “Paste”from Page Options in PDF to paste it elsewhere in the document.
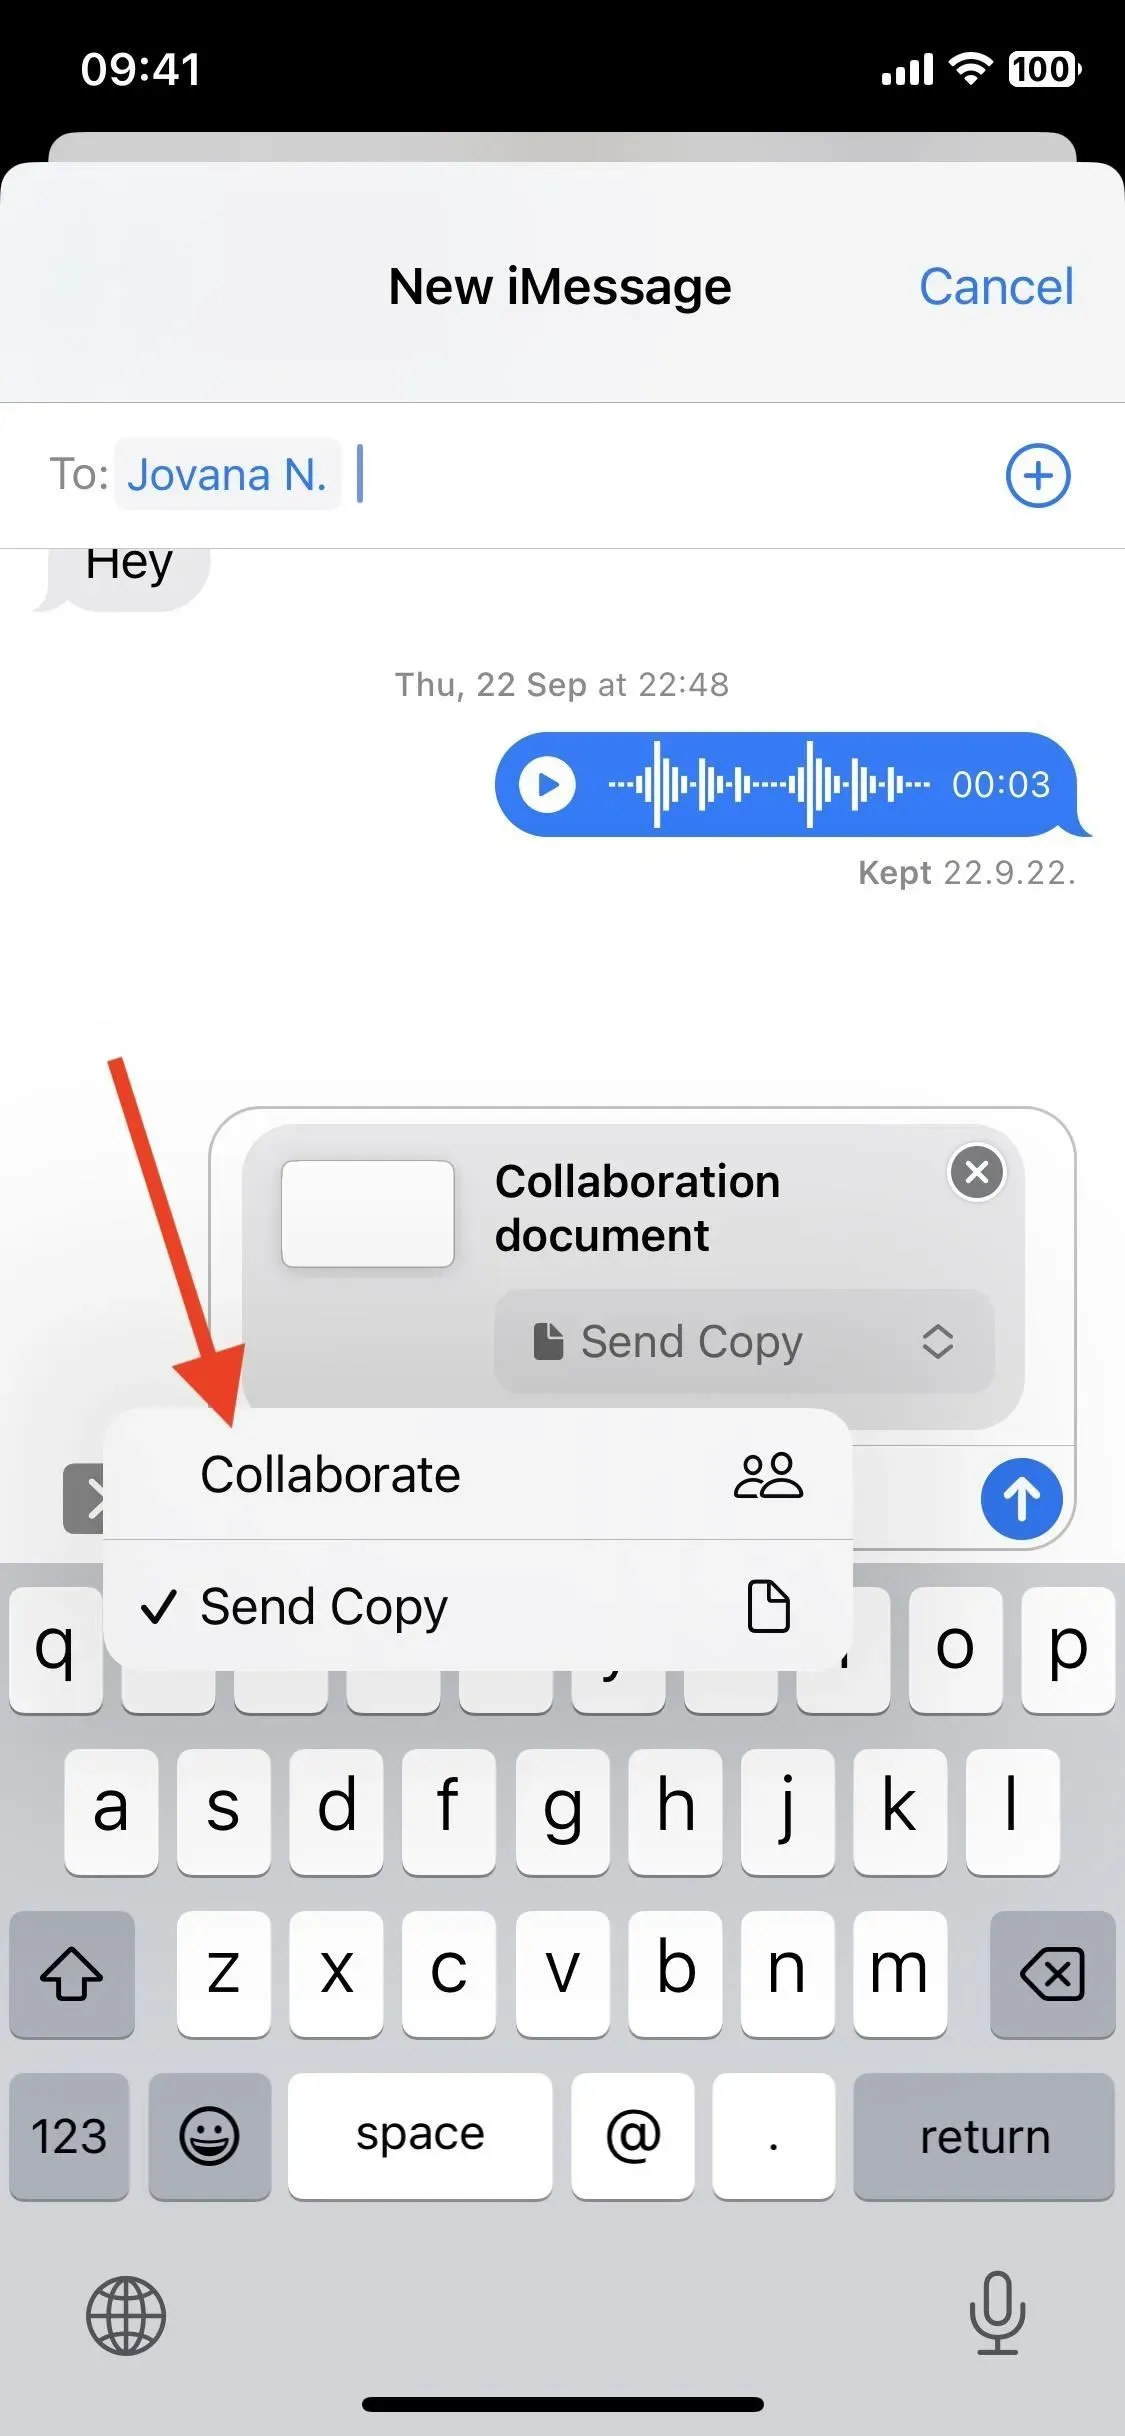
16. Work on files together in Messages and FaceTime
In iOS 16, a new collaboration feature lets you send invitations to collaborate with other people in FaceTime or in messages. It is compatible with many apps on your iPhone including Files, Keynote, Numbers, Pages, Notes, Reminders, Safari and some third party apps. Here’s how it works for files:
- Click the Share button with an open document, or long-press a document in a folder and click Share.
- Select Messages.
- Enter the names of the contacts you want to collaborate with.
- Click Send a Copy and choose Collaborate instead.
- Send a message and let the recipient accept the collaboration request.

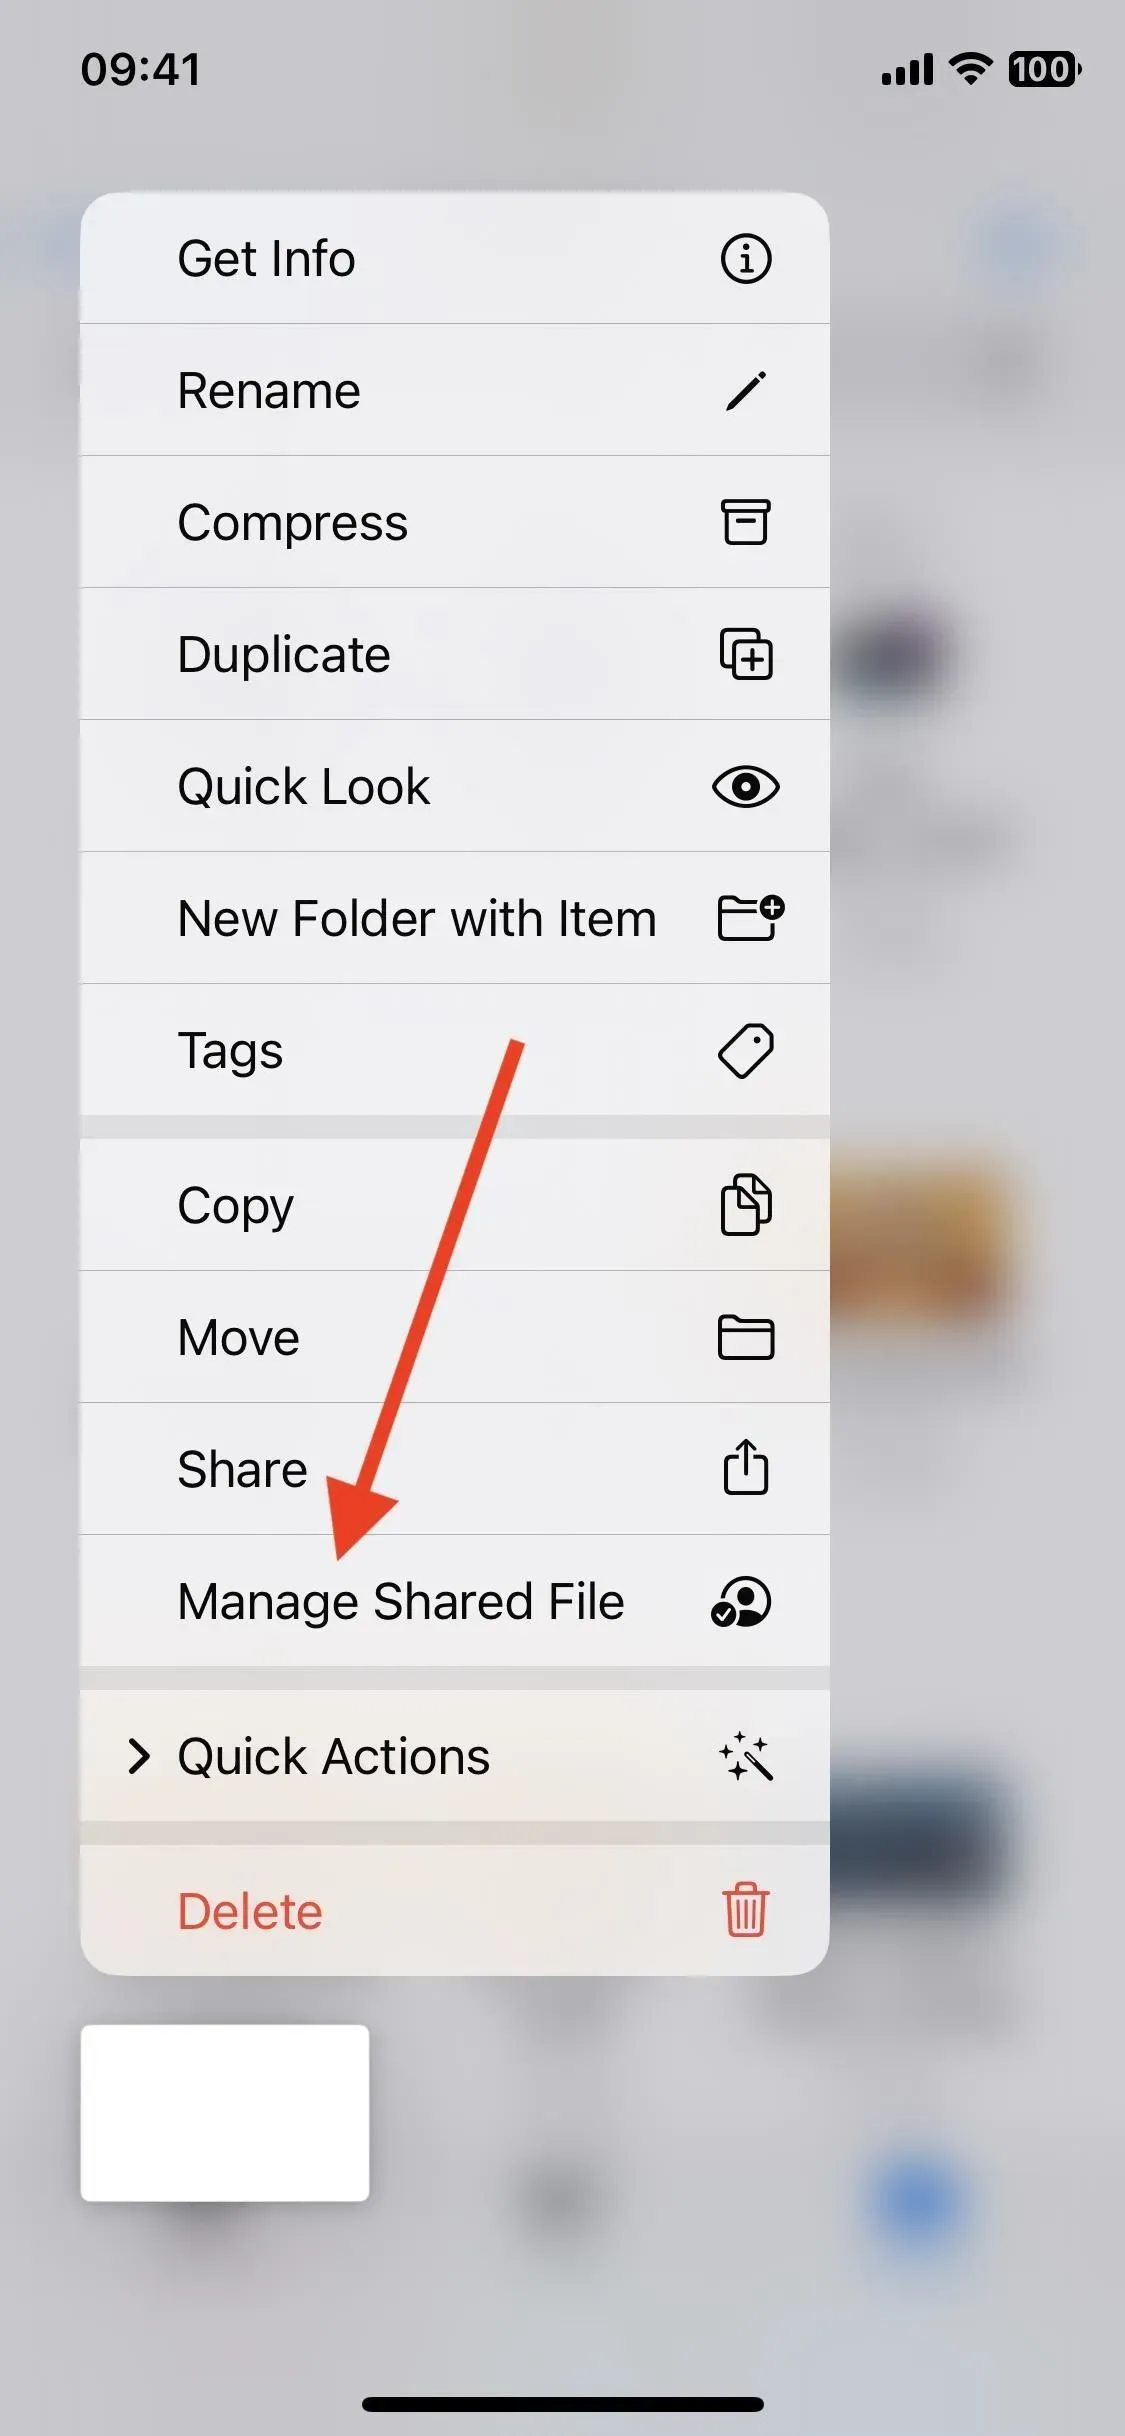
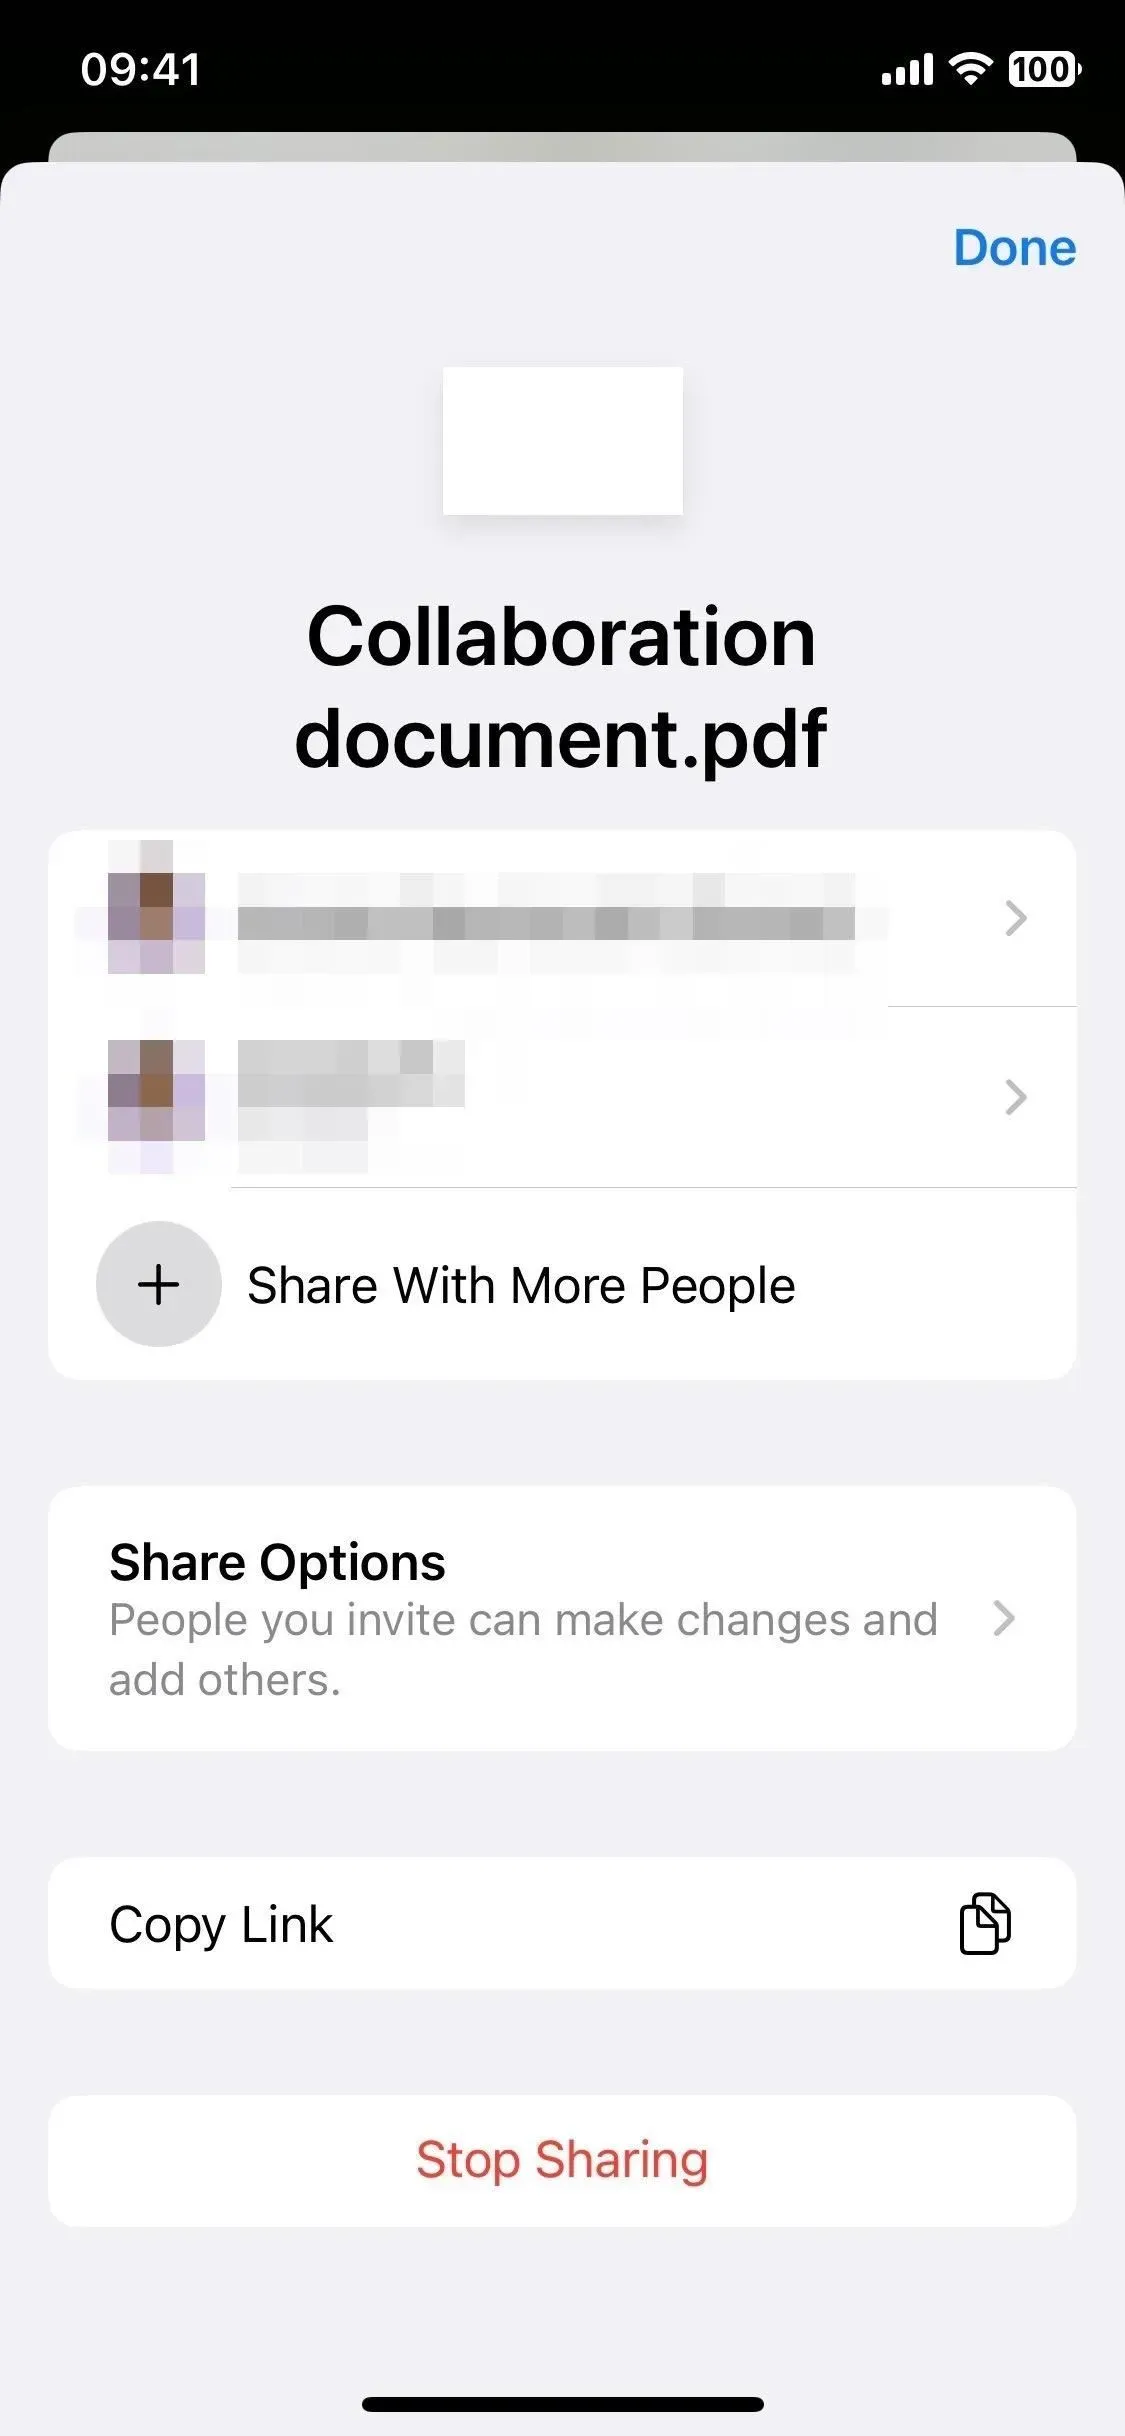
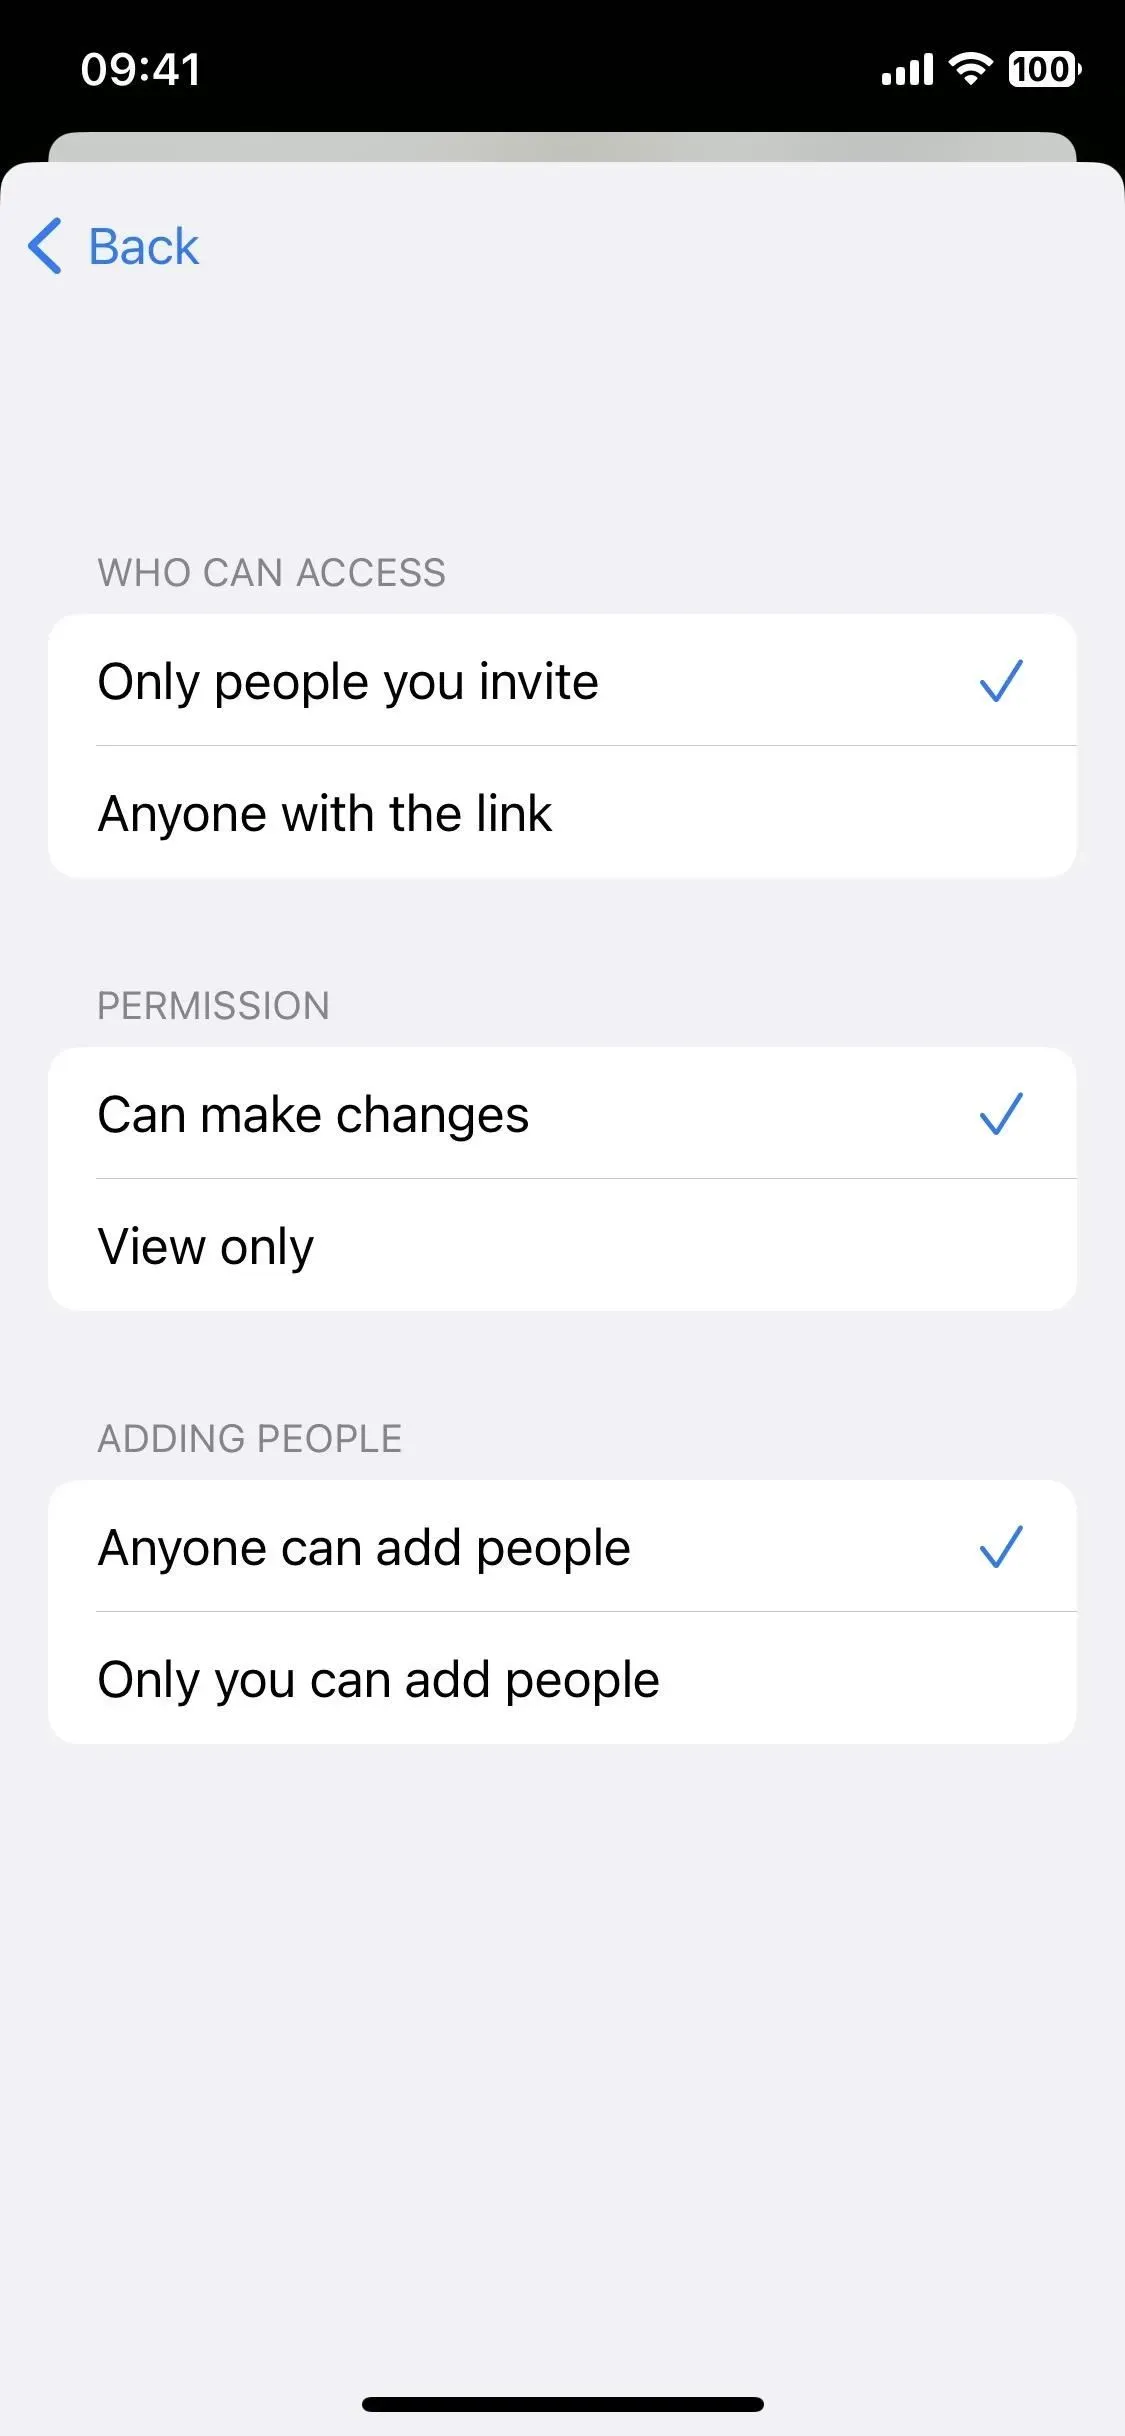
To manage a shared file, find it in the Files app, press and hold it, and tap Manage Shared File. You’ll see several options: share with other people, change permissions, copy the link to the file, and stop sharing the file.
For FaceTime collaboration, simply press the Share button during a FaceTime call to start collaborating across all the apps mentioned above.
Leave a Reply