How to disable antivirus in Windows 11/10

Windows PC comes with Windows Defender for general protection of your PC. However, antivirus prompts can sometimes be a concern. You may receive these notifications when you visit a website without an SSL certificate, download applications, or copy files from external devices to your computer. For these reasons, many choose to disable the default antivirus in Windows 10 and 11. Some disable it when installing a third-party antivirus on their PC.
Microsoft is making it more and more difficult to disable the standard Windows antivirus. In earlier versions of Windows, it was possible to disable antivirus from the Windows Defender app, but now it’s harder than ever. If you are looking for a way to disable antivirus in Windows 11/10, this article will tell you how to do it.
Steps to disable antivirus in Windows 11/10
There are two ways to disable the default antivirus in Windows 11 and 10: via Registry Editor, Group Policy Editor, or Autorun. Let’s discuss how-
Through the registry editor
The first way to disable antivirus in Windows 11/10 is through the registry editor. To do this, follow the steps given below:
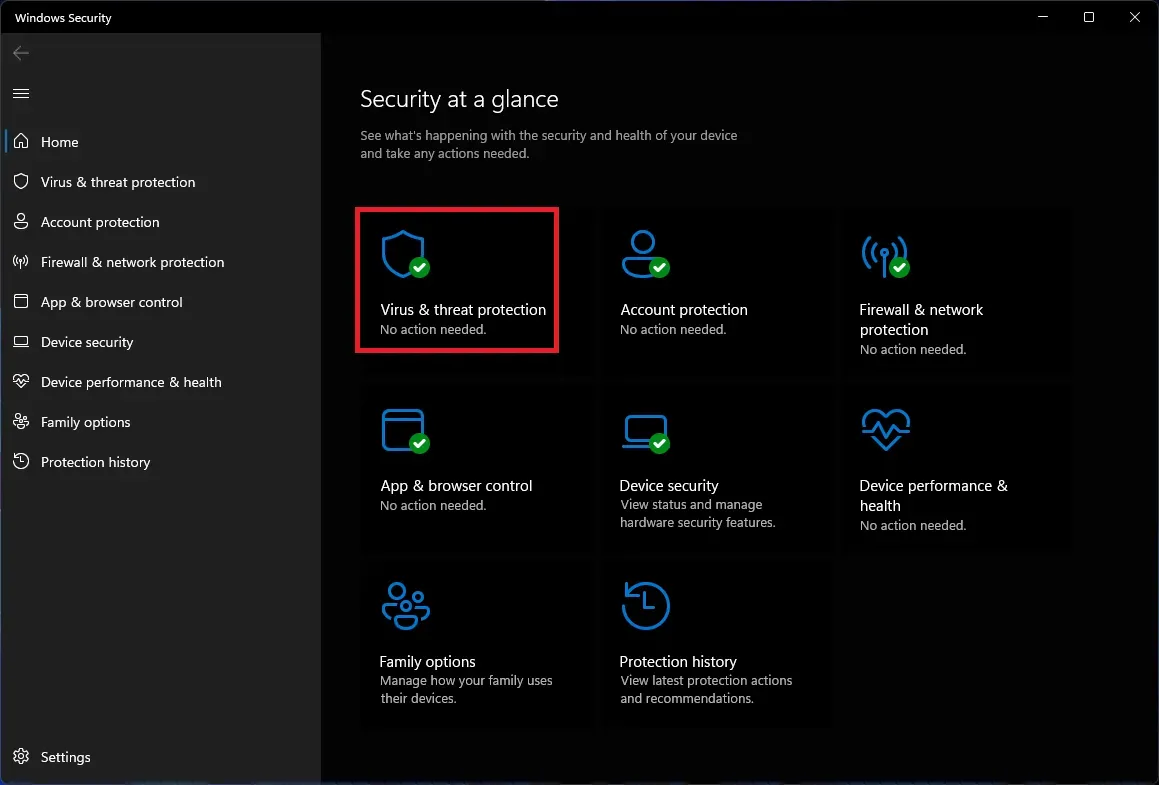
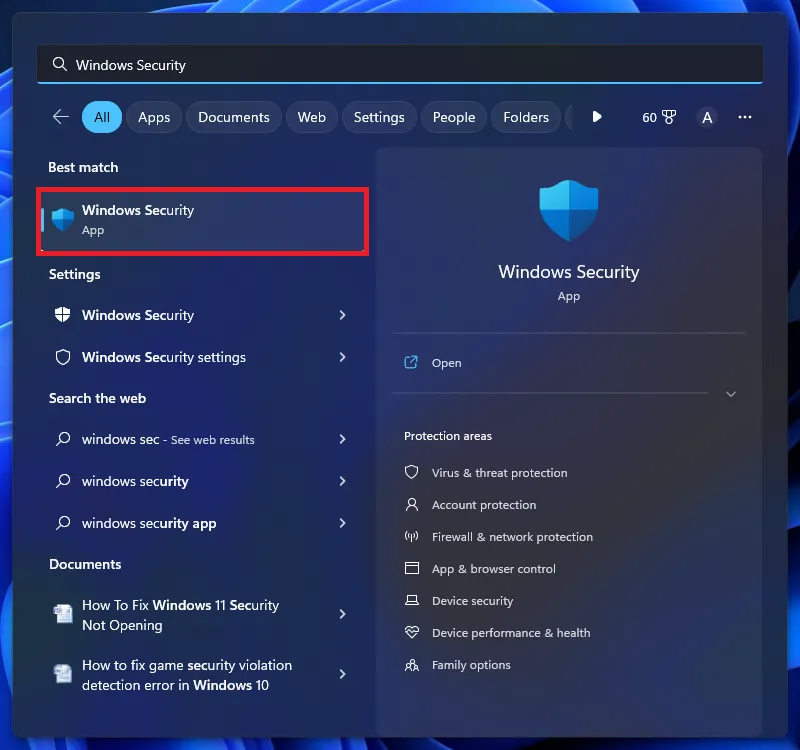
- Open the Start Menu by clicking the Start icon on the taskbar.
- Find “Windows Security” and open it.

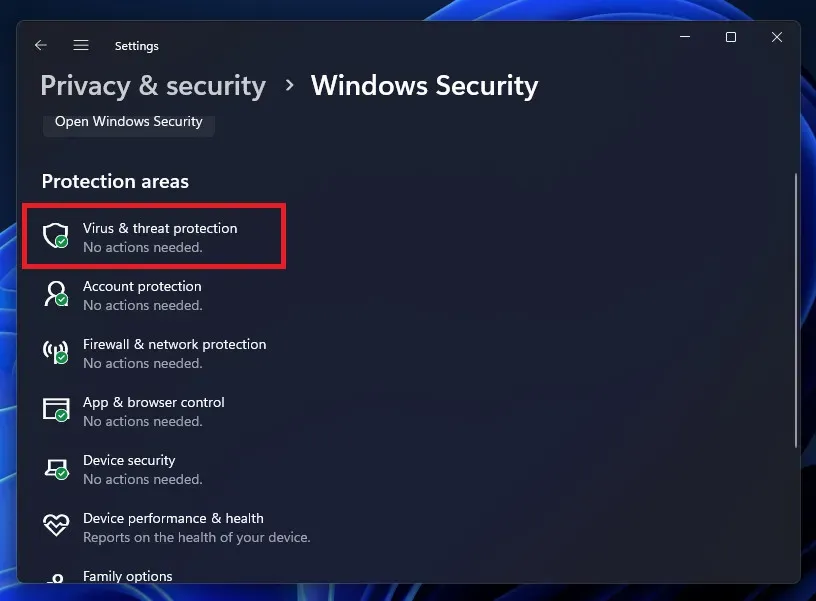
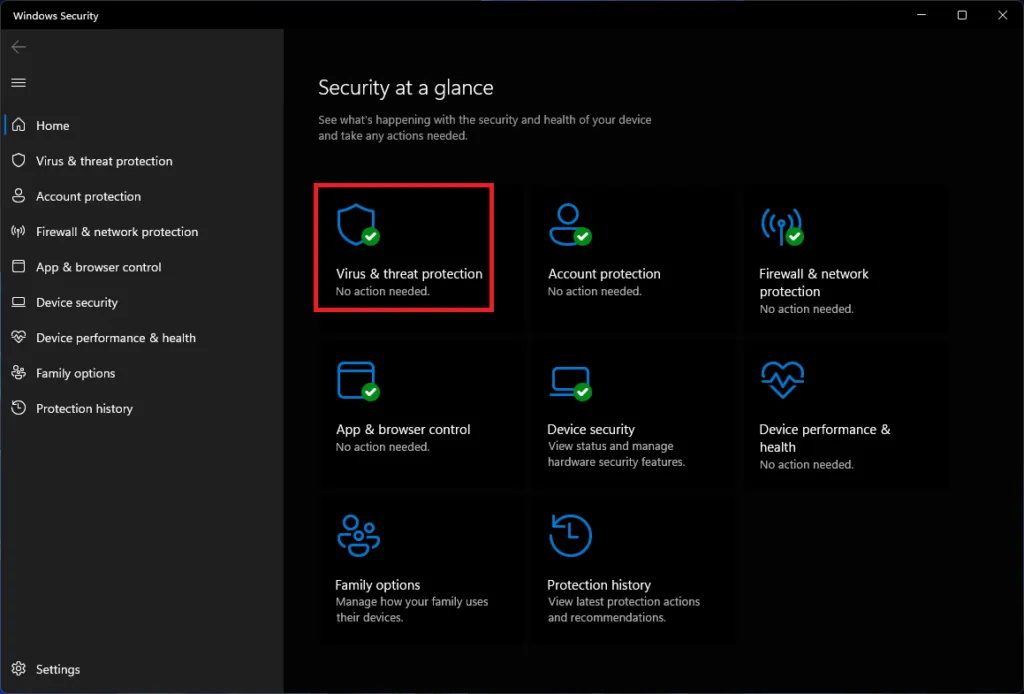
- In the Windows Security window, click Virus & Threat Protection to open it.
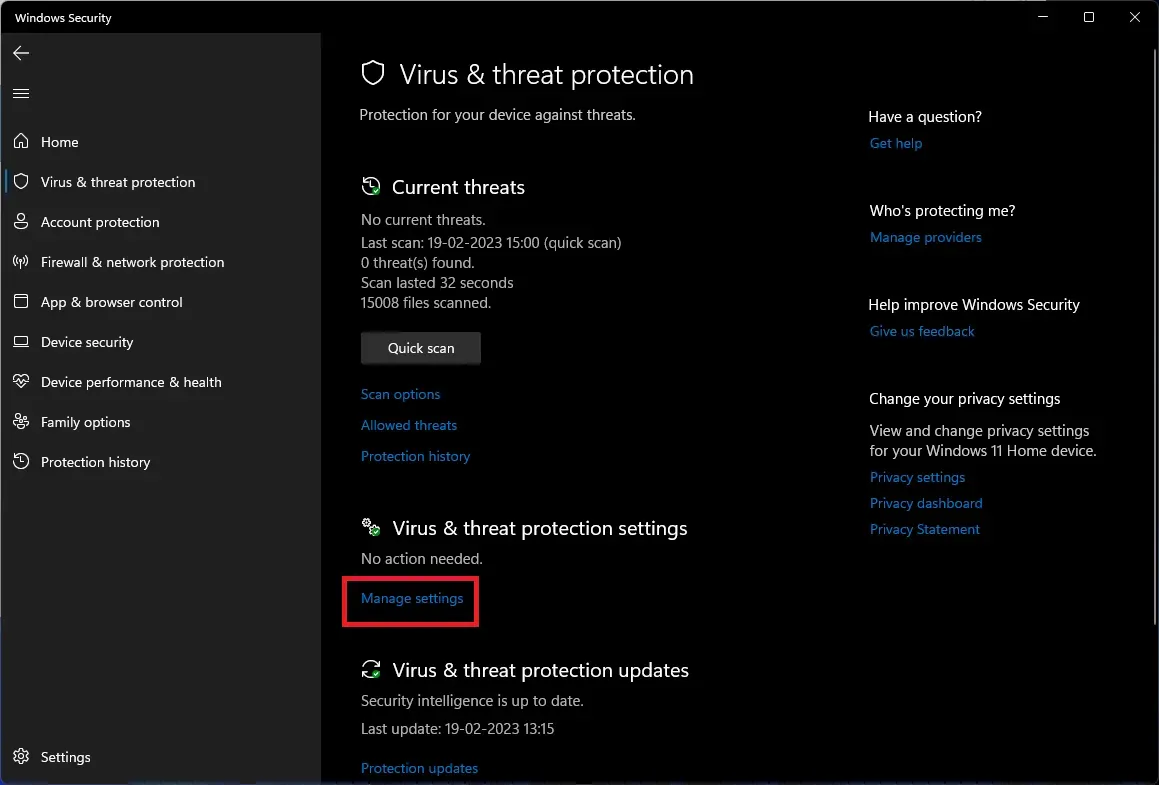
- Then click” Manage Settings “.
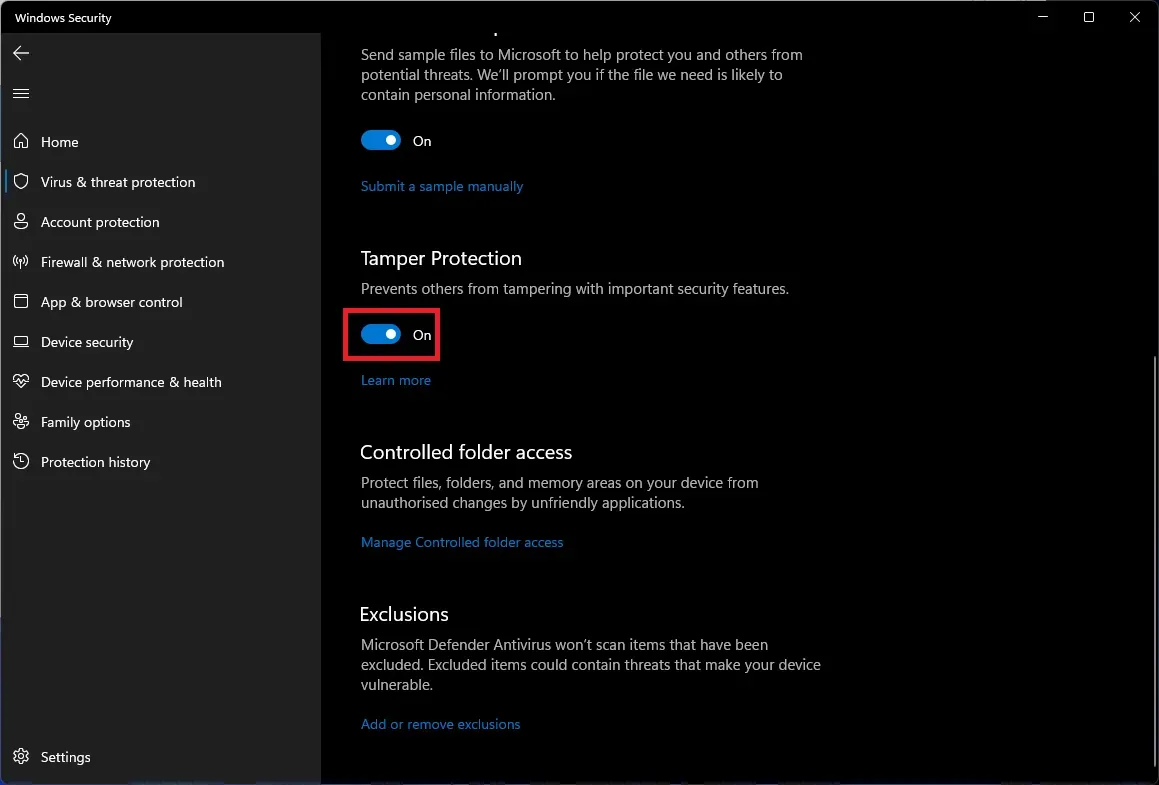
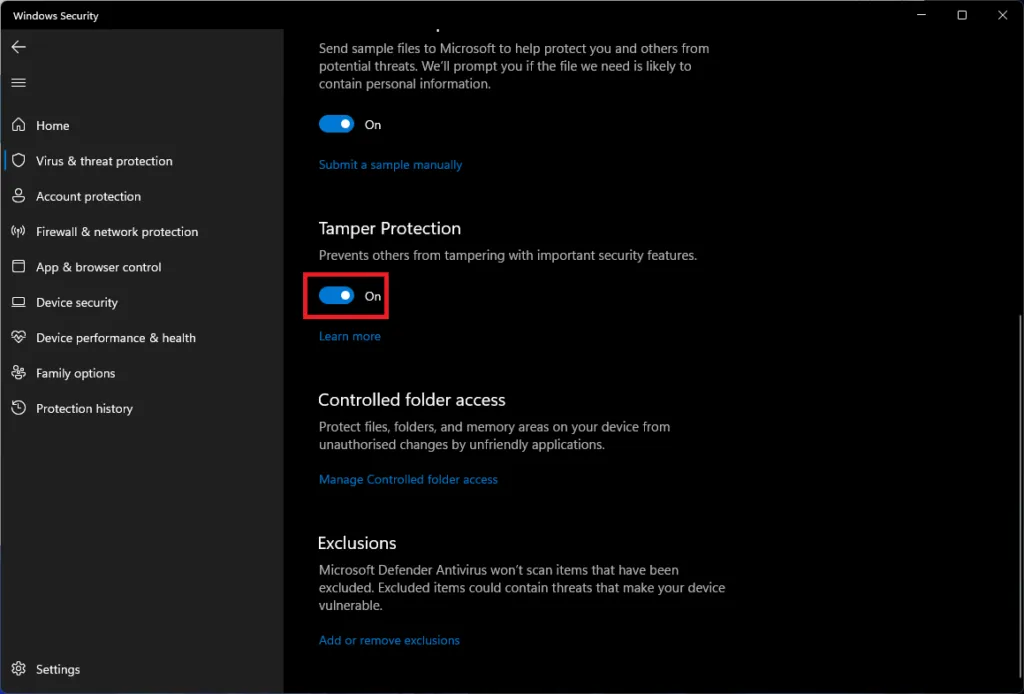
- Scroll down to the Tamper Protection section and turn off the toggle below it.

- You will be presented with a UAC prompt; click Yes to continue.
- Now press the key combination Windows + R; The Run dialog box will open .
- Here, type regedit and press Enter to open the Registry Editor .

- In the Registry Editor window , navigate to the following address:
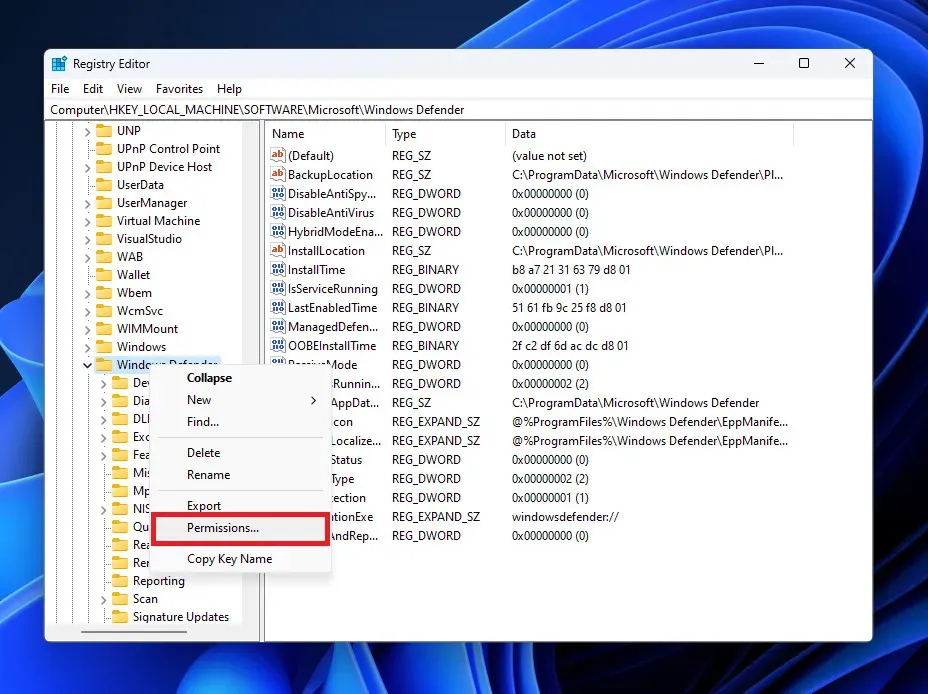
- HKEY_LOCAL_MACHINE\SOFTWARE\Microsoft\Windows Defender
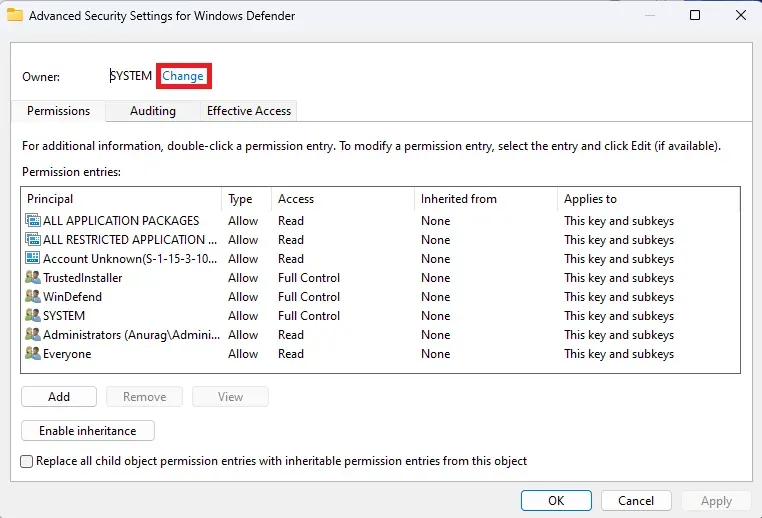
- Right-click the Windows Defender folder in the left sidebar, and then select Permissions from the context menu that opens.
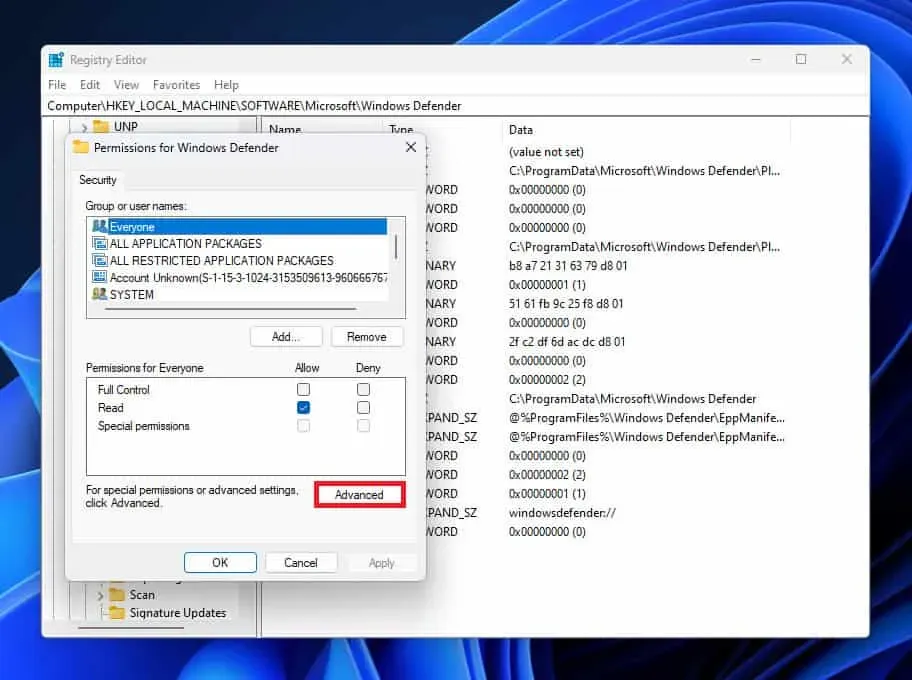
- In the Permissions window, click the Advanced button .
- Click the Change button next to the Owner option.
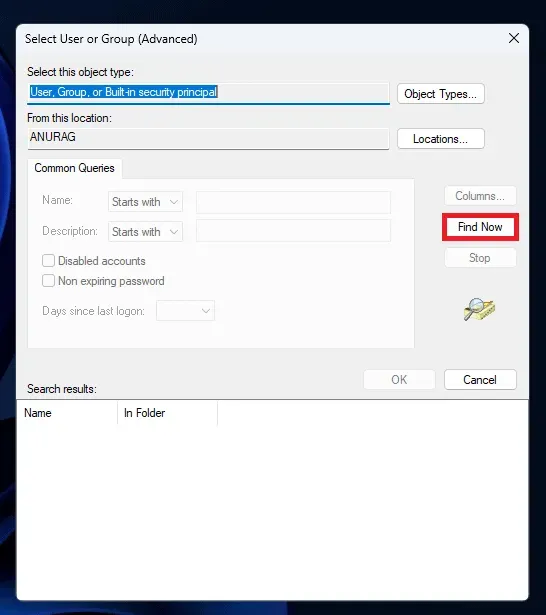
- In the next window that opens, click “Advanced “.

- Now click the Find Now button .
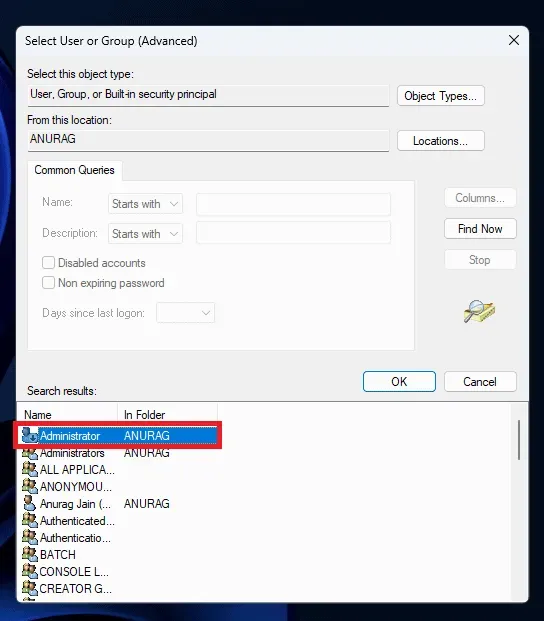
- Select an administrator account, click OK and then OK again to save your changes.
- Now check Replace owner of subcontainers and objects and Replace all child object permission entries with permission entries inherited from this object.
- Click the Apply button . You will receive a Windows security prompt; click Yes to confirm.
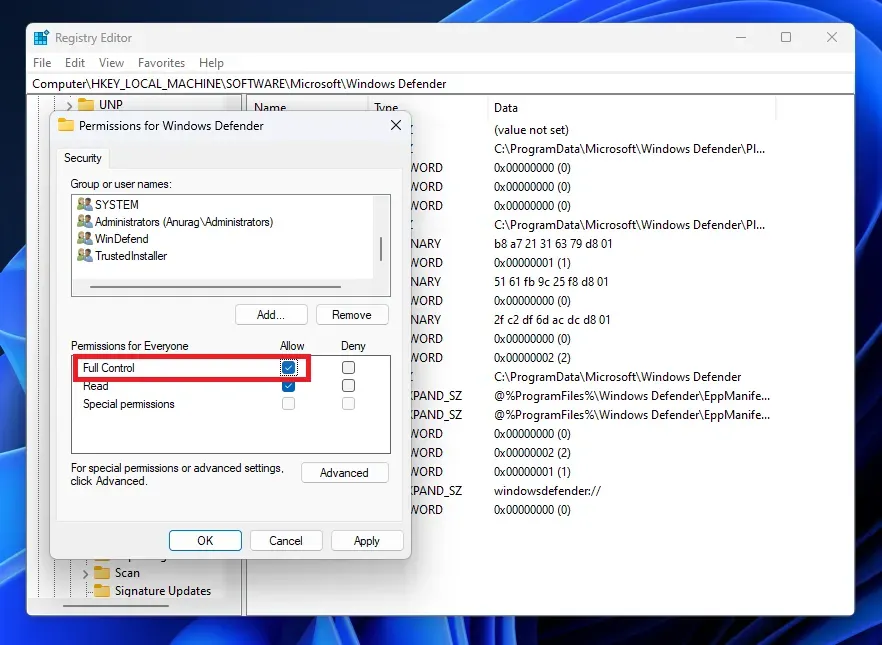
- Then finally click OK . Now only permissions for Windows Defender will remain open.
- Under Administrator Permissions, you will see specific permissions that you can choose to allow or deny. Here, check the “Allow “box next to “Full Control”. Click Apply and then OK to save your changes.
- Make sure you are in the Windows Defender folder in the Registry Editor.
- Right-click on the right, select New and then DWORD Value (32-bit) .

- Name the new value DisableAntivirus . Similarly, create two more values named DisableAntiSpyware and ServiceStartStates .
- You will need to edit all the new values you created and each of their given values by 1 . To edit a value, double click on it and you can change the value data. After that click OK.
Through the Group Policy Editor
You can also disable your antivirus in Windows 11/10 through the Group Policy Editor. Note, however, that this step can only be used with Windows Pro and Enterprise editions, not the Home edition. This can be done by following the steps given below:
- Press the key combination Windows + I to open the Settings app on your PC.
- On the left sidebar, click on Privacy and Security, and then on the right side, click on Windows Security.
- Now click “Virus and Threat Protection “.
- Then click Manage Settings under Virus & threat protection settings .

- Now turn off the switch under tamper protection . Confirm the disconnect by clicking “Yes” when the UAC prompt appears.
- Press the key combination Windows + R, type gpedit.msc and press Enter .
- In the Group Policy Editor , navigate to the following location:
- Computer Configuration>Administrative Templates>Windows Component > Microsoft Defender Antivirus
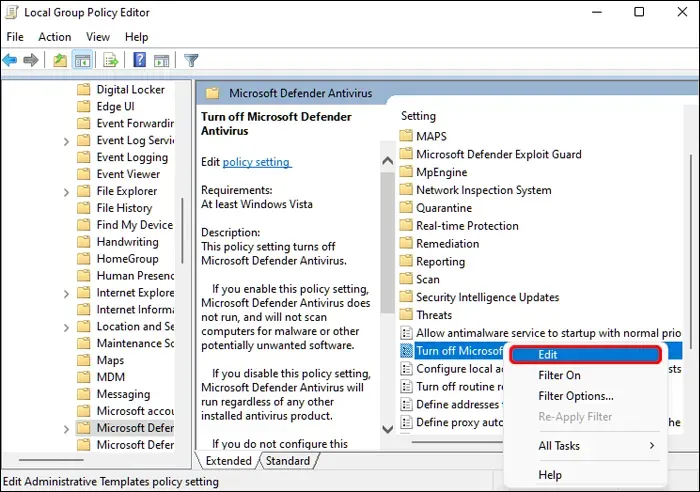
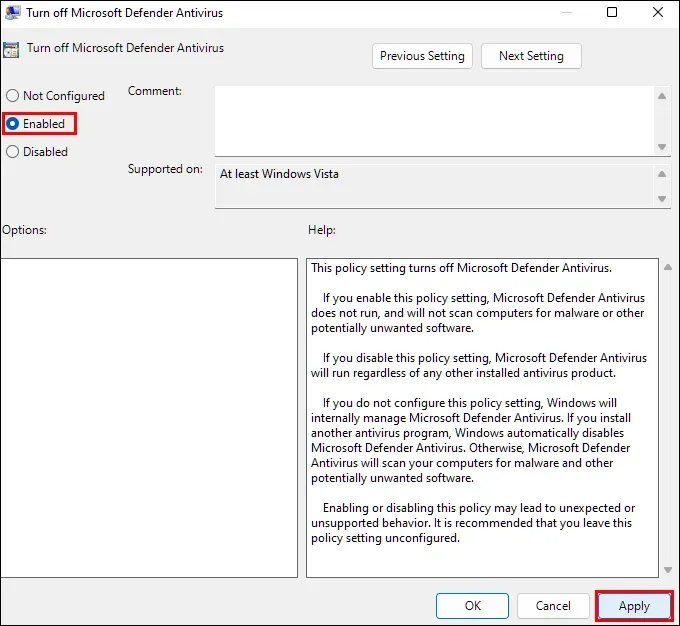
- Right-click Turn off Microsoft Defender Antivirus , and then click Change .
- Select “Enabled”, then click “Apply” and then “OK”.
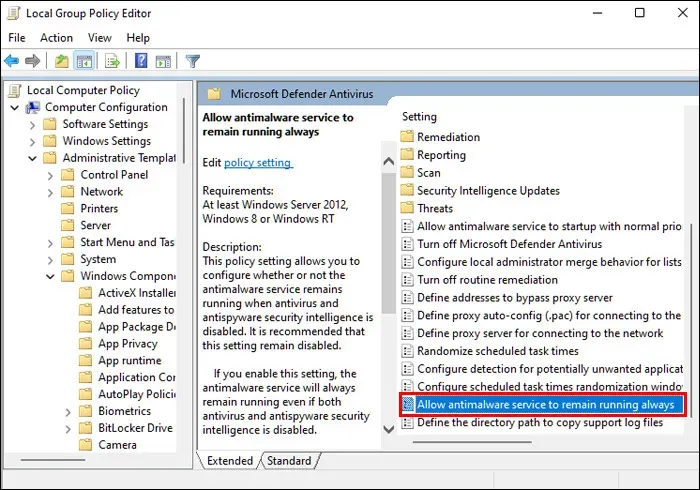
- Now, right-click on Allow the anti-malware service to always run and then select the Edit option from the menu that opens.
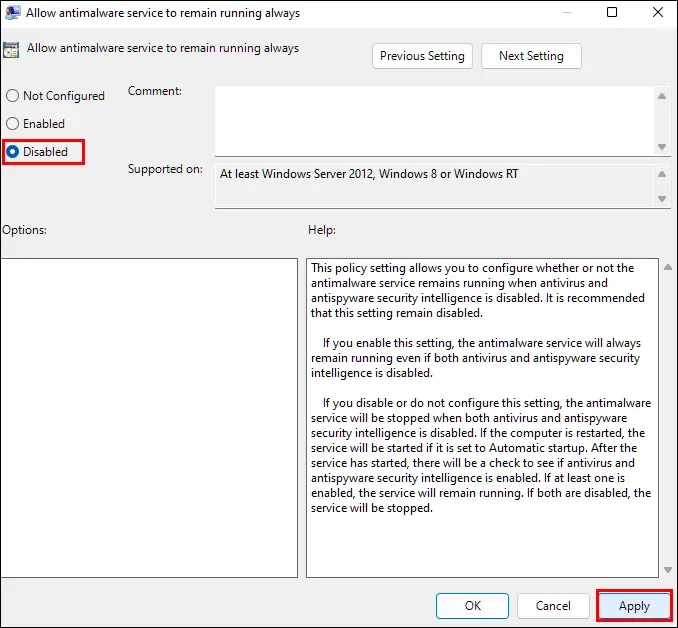
- Next, select the “Disabled” option . After that, click “Apply” and then click “OK”.
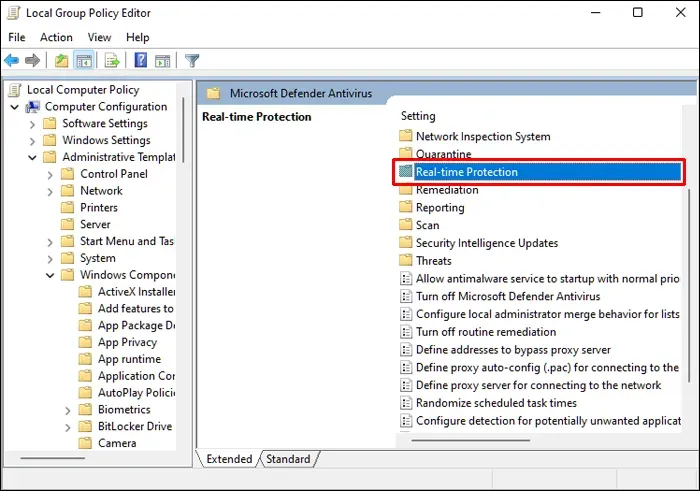
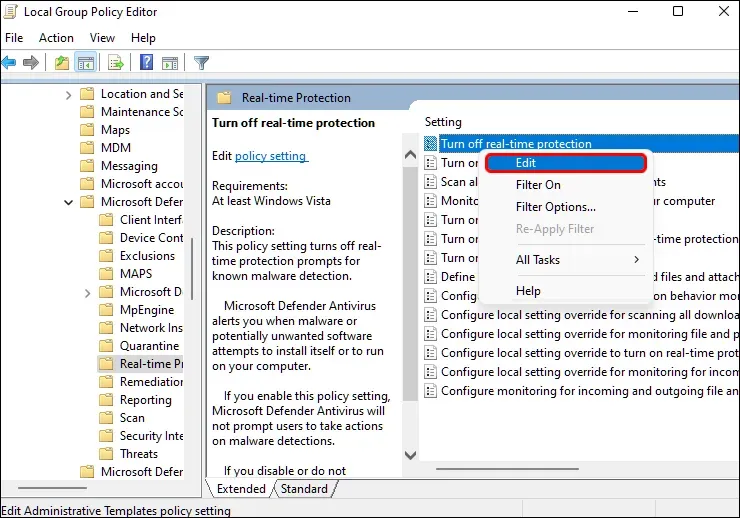
- Now double click the Real-time Protection folder to open it.
- Here, double-click “Disable Real-time Protection” to edit it.
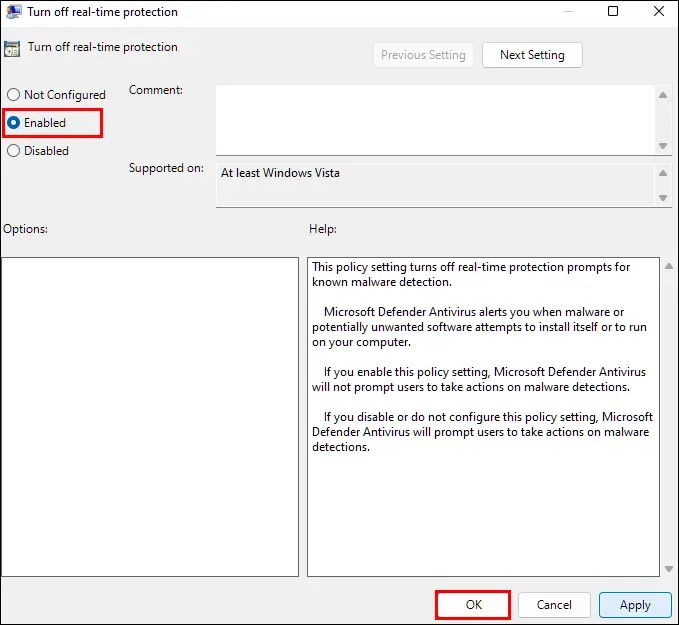
- Select Enabled , click Apply , and then OK .
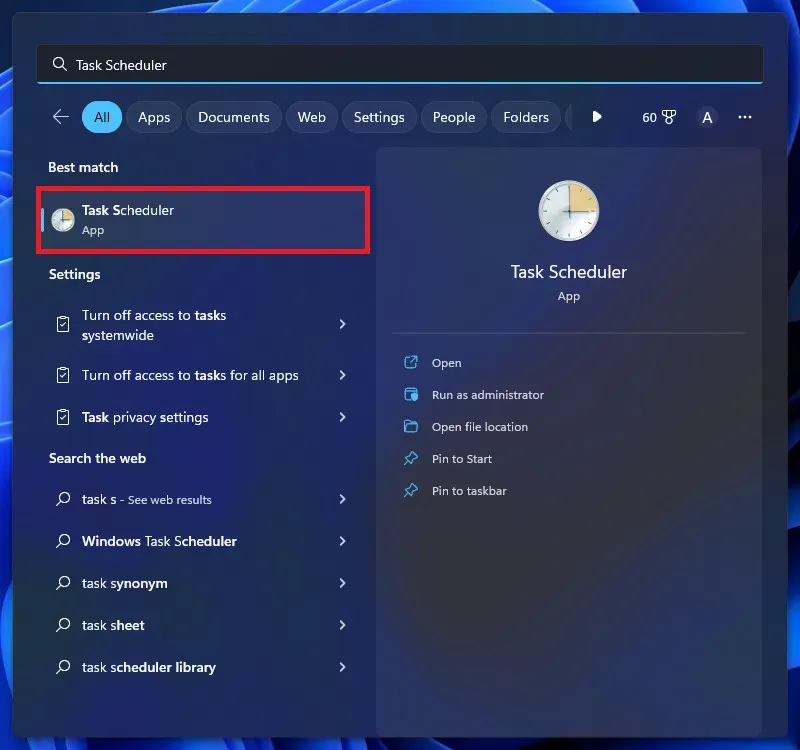
- Now open the start menu and type “Task Scheduler” in the search bar. Click on the first option that opens to open Task Scheduler.
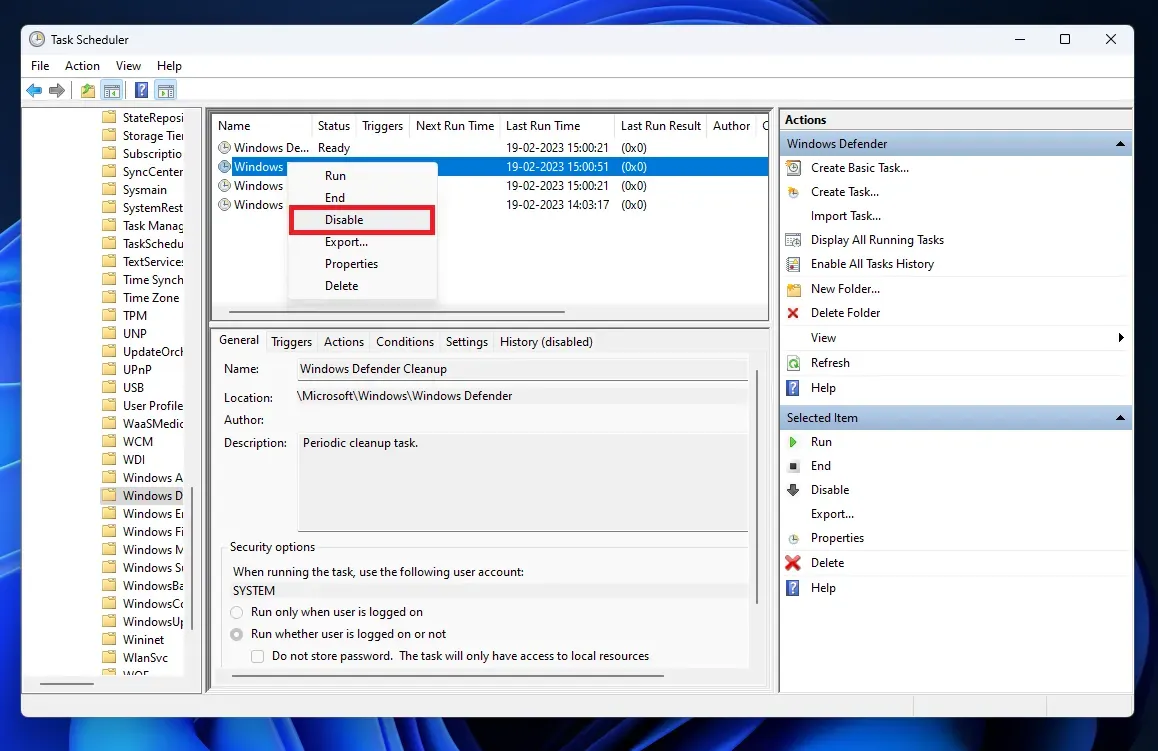
- Here, go to the following address-
- Task Scheduler Library > Microsoft > Windows > Windows Defender.
- Now right-click Windows Defender Cache Service , and then Disable in order to disable it. Similarly, disable Windows Defender Cleanup , Windows Defender Scan , and Windows Defender Scheduled Scan.
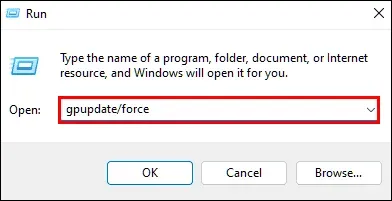
- Now press the keyboard shortcut Windows + R. In the Run dialog box that opens , type gpupdate /force and press Enter .
- Restart your computer and Windows Defender will be disabled.
Through autorun
Another way to disable antivirus in Windows 11 is through autorun. Following are the steps for this:
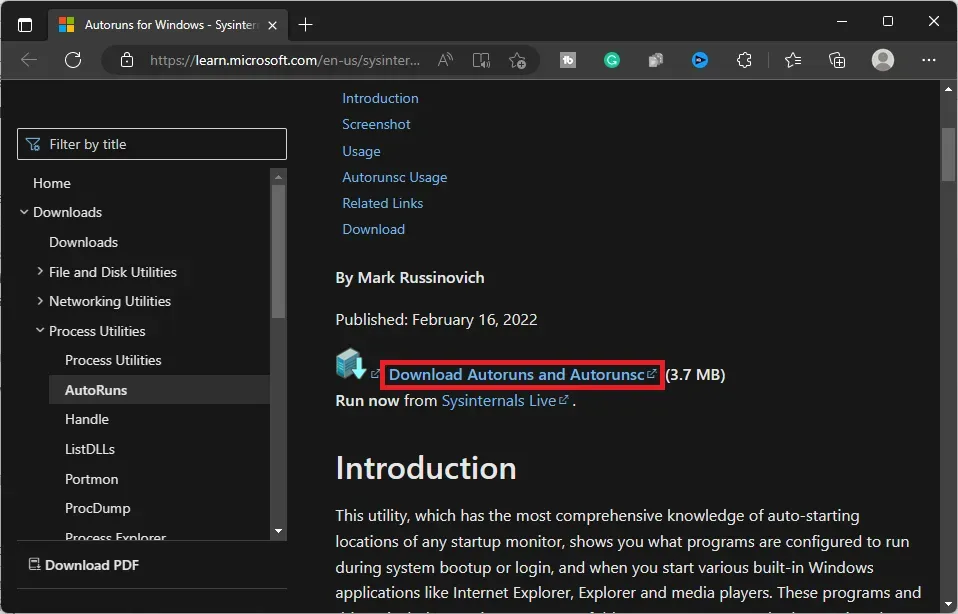
- Click on this link to go to the Autoruns download page . Click “Download Autoruns”and “Autorunsc” to download it to your computer.
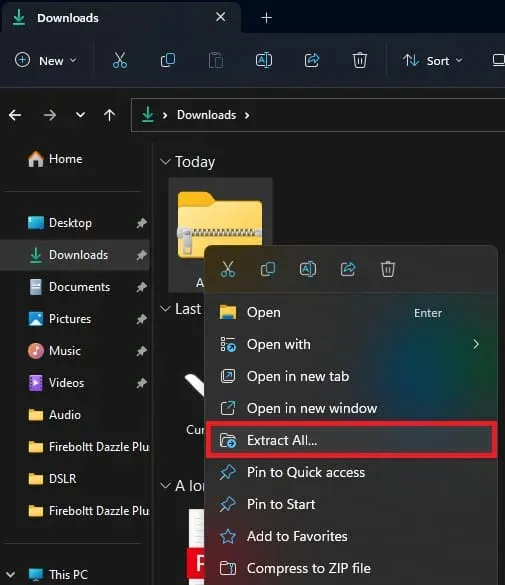
- Open Windows Explorer on your PC and click Downloads on the left sidebar to navigate to the Downloads folder . From here, extract the Autoruns ZIP file and copy it to your desktop.
Note. If the file is downloaded to a different location, navigate to that location in Windows Explorer.
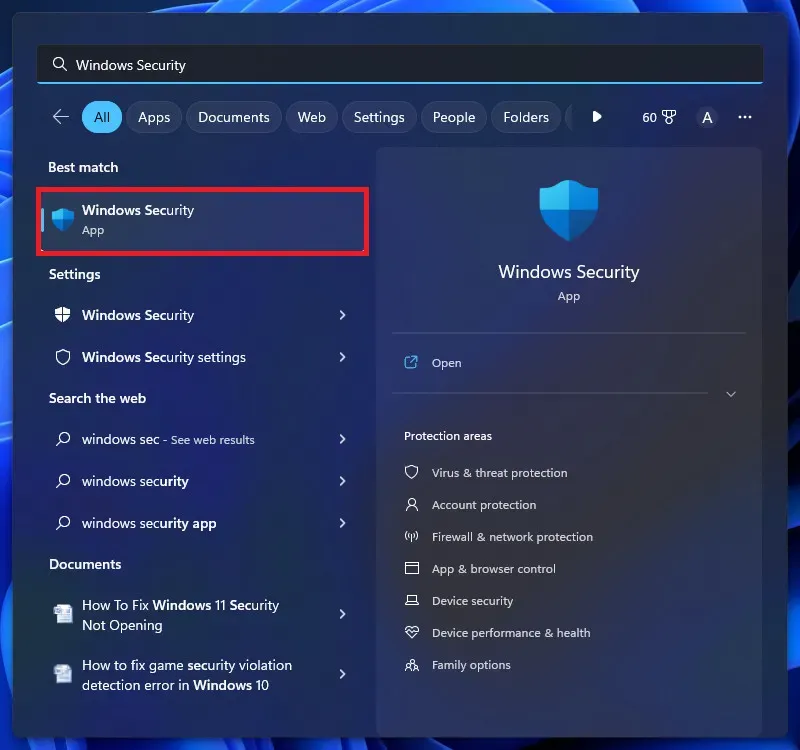
- Click the Start icon on the taskbar, type Windows Security and press Enter to open it.
- Here, click on the Virus & Threat Protection option.
- Next, click “Manage settings”; you’ll find this option under Virus & threat protection settings.

- Here, turn off the toggle for Real-time protection and tamper protection.
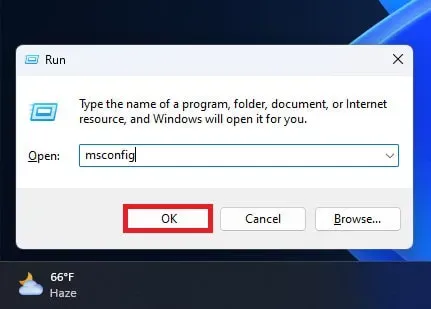
- Now open the Run dialog box on your PC. Here type msconfig and click OK .
- In the System Configuration window , go to the Boot tab .
- Here, check the Safe Boot box , and then under it, select Minimal .
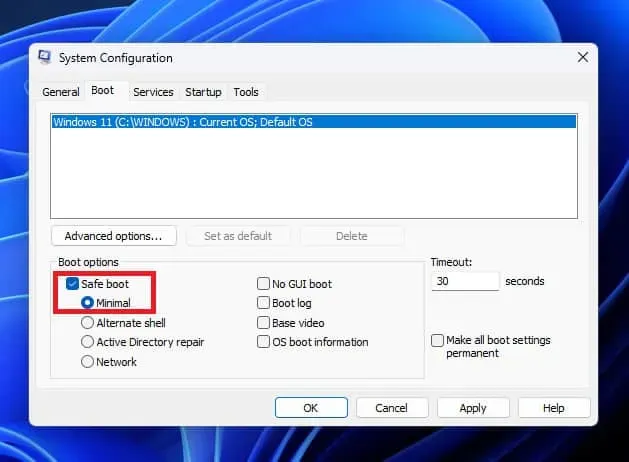
- Click Apply and then OK to save your changes.
- Restart your computer and it will boot your computer in safe mode.
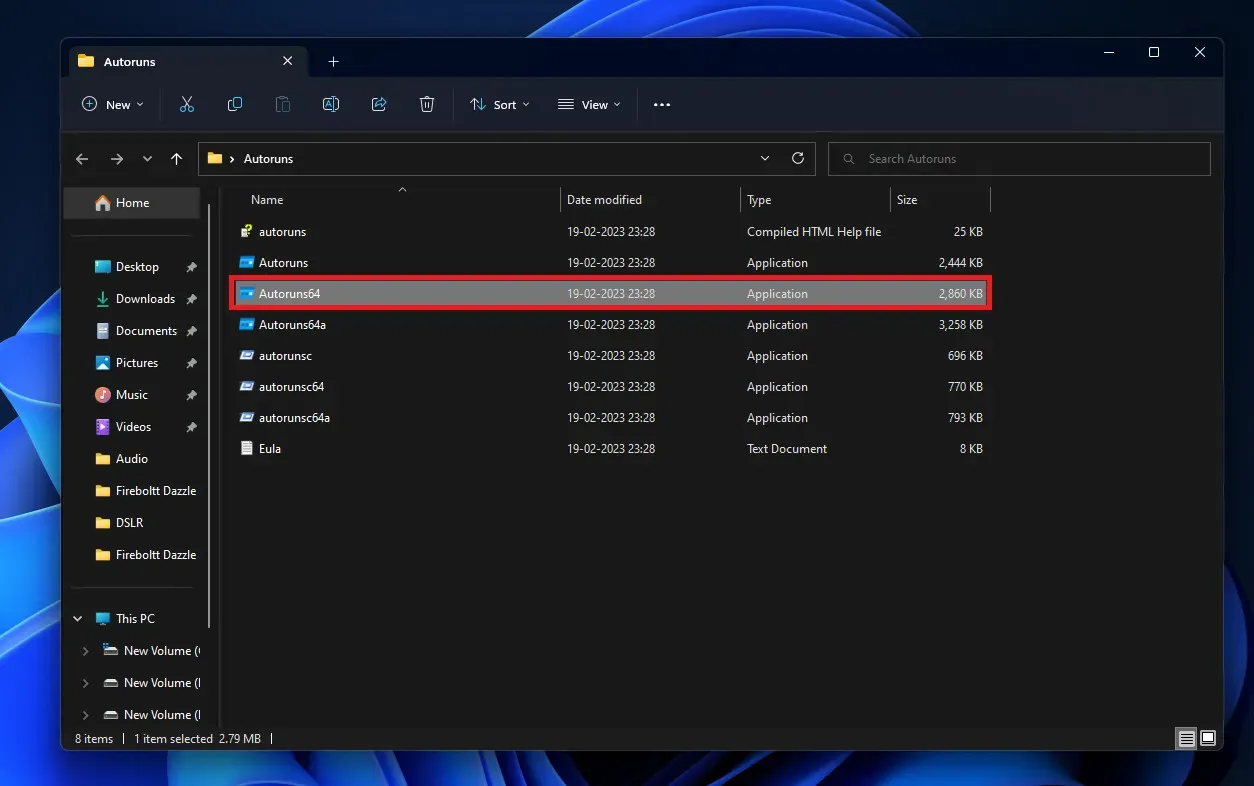
- Double click the Autoruns folder to open it. Double-click the extracted Autoruns64 file to run it.
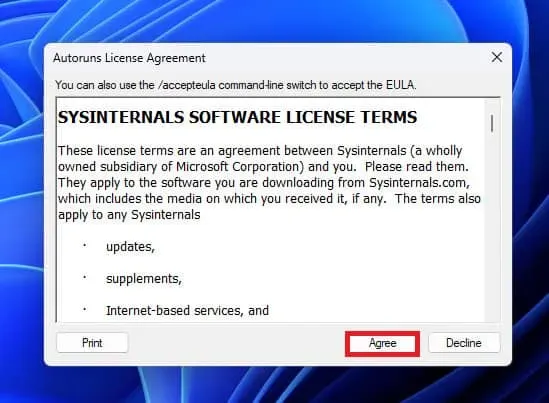
- After running the file, you will receive a license agreement; click Agree to continue.
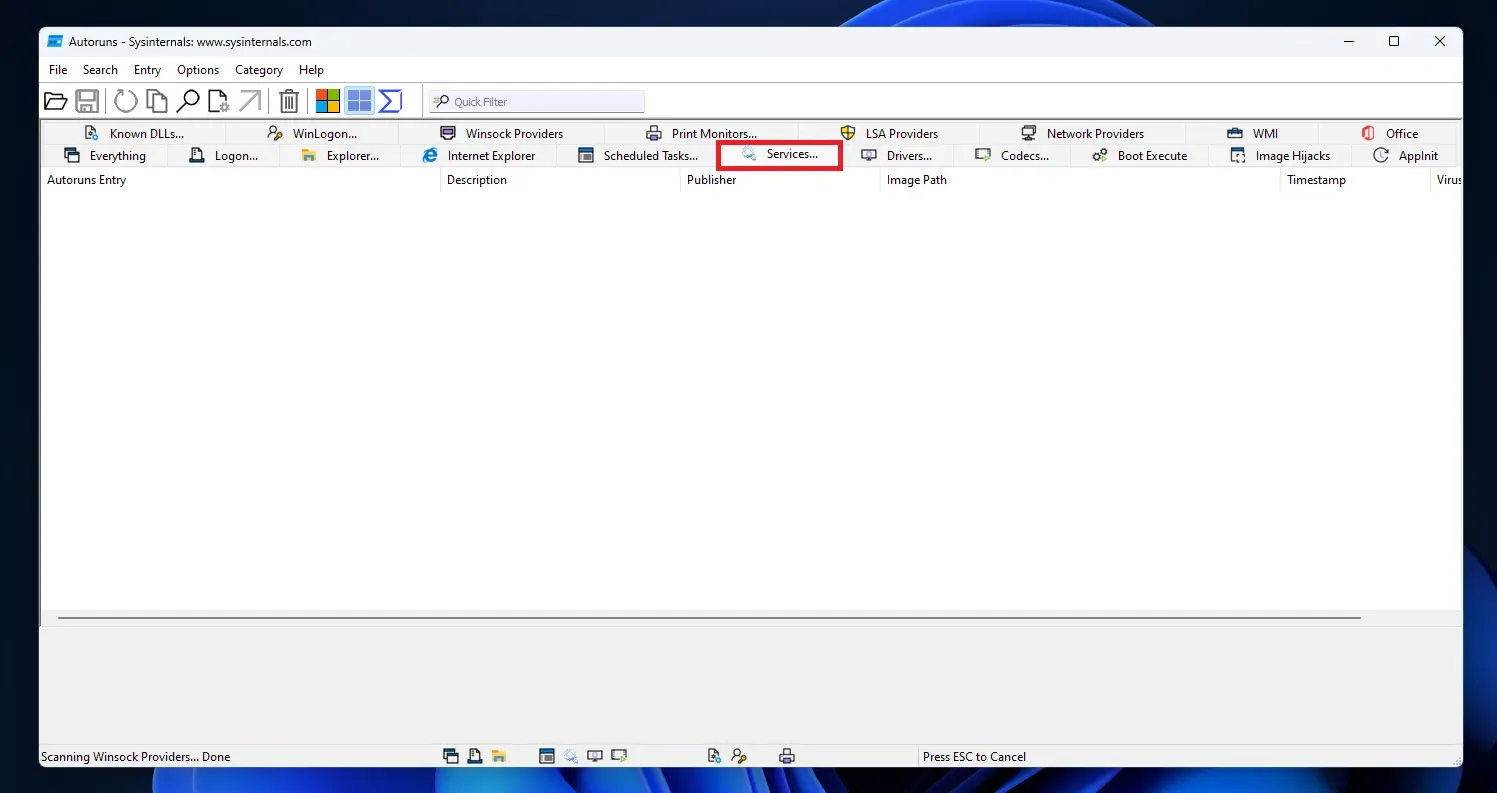
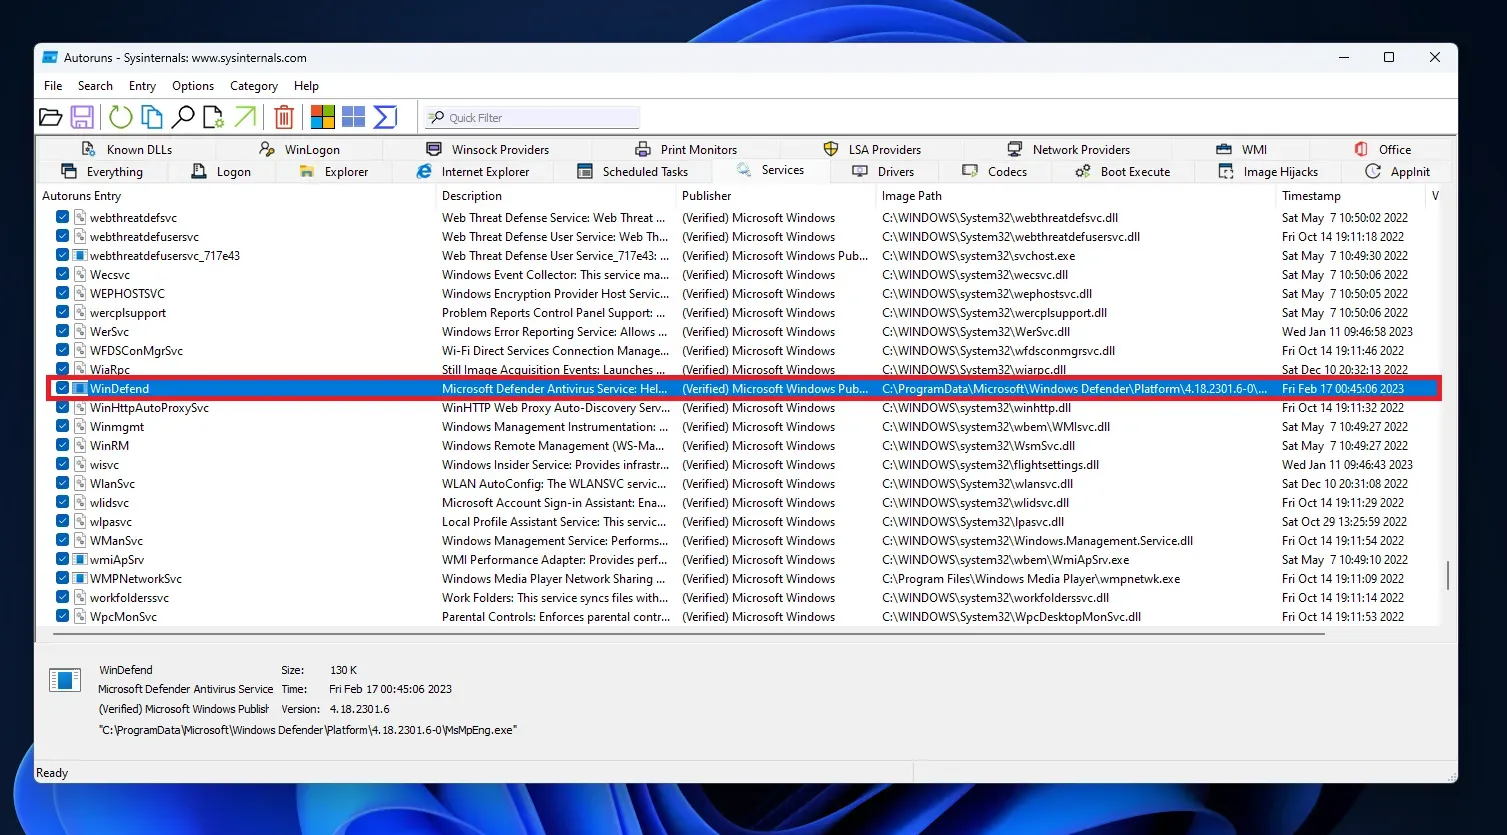
- Now go to the Services tab in the Autostart window.
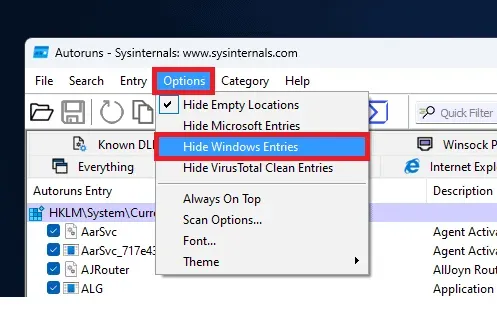
- Click Options and then uncheck Hide Windows Entries. This will show the services in Autoruns if they are hidden.
- In the list of services, uncheck the box that says WinDefend .
- Now open “System Configuration” on your PC.
- Here, on the General tab, select Normal Startup .
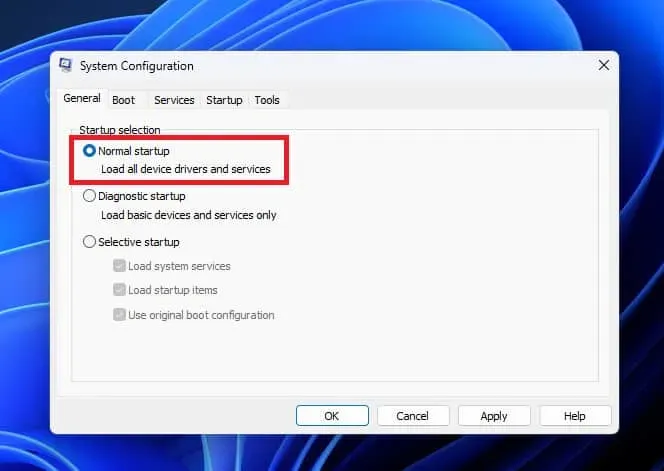
- Click Apply and then OK to save your changes.
- Now restart your computer to boot from safe mode.
- Windows Defender will now be disabled on your PC.
Conclusion
These were all the ways to disable the antivirus on Windows 11. Once you disable the antivirus on your PC, it will no longer be protected from viruses, malware and various online threats. If you disable the default antivirus, make sure you have a third-party antivirus installed on your computer to protect against cyber threats.
Leave a Reply