How to add or remove credit card information from Safari on iPhone, iPad or Mac
In this guide, we’ll show you how to manually add your credit card information to Safari on your iPhone, iPad, or Mac so you can fill it out quickly and shop online faster. We will also look at how to remove your card details.
Note. We used the word “credit card”in this article, but the steps and everything else are the same, even if you want to keep your debit card information.
Advantages
After saving the credit card:
- You do not need to fill in the card details every time you want to use it.
- This can come in handy when you want to make a purchase of an item that is in limited supply or sells out quickly. For example, this is really helpful when shopping for new gadgets on launch day.
Related: How to Add or Change Your Apple ID Shipping and Billing Address
Before you start
- Make sure you have locked your iPhone, iPad or Mac with a passcode.
- Make sure iCloud Keychain is set up (iPhone Settings > your name > iCloud > Passwords & Keychain and turn on Sync this iPhone).
Save your credit card automatically
When you first enter your card details in Safari on iPhone, iPad, or Mac, you may see an option asking if you want to save your card details for future use. Just follow this warning.
If not, you can always save the data manually, which we will explain below.
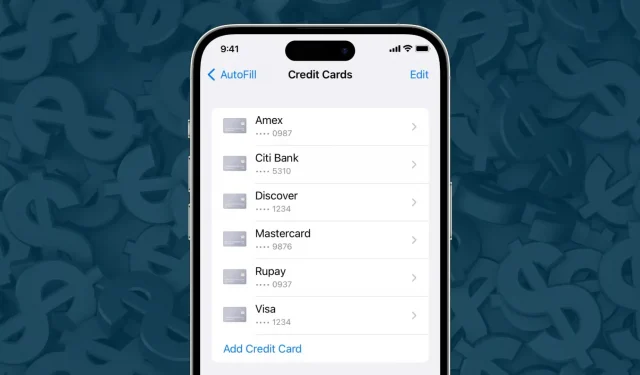
Save Credit Card Details Manually for Safari Autofill
Thanks to iCloud, any map you save on your iPhone or iPad will automatically appear on your Mac, and vice versa. Here are the steps for both.
On iPhone or iPad
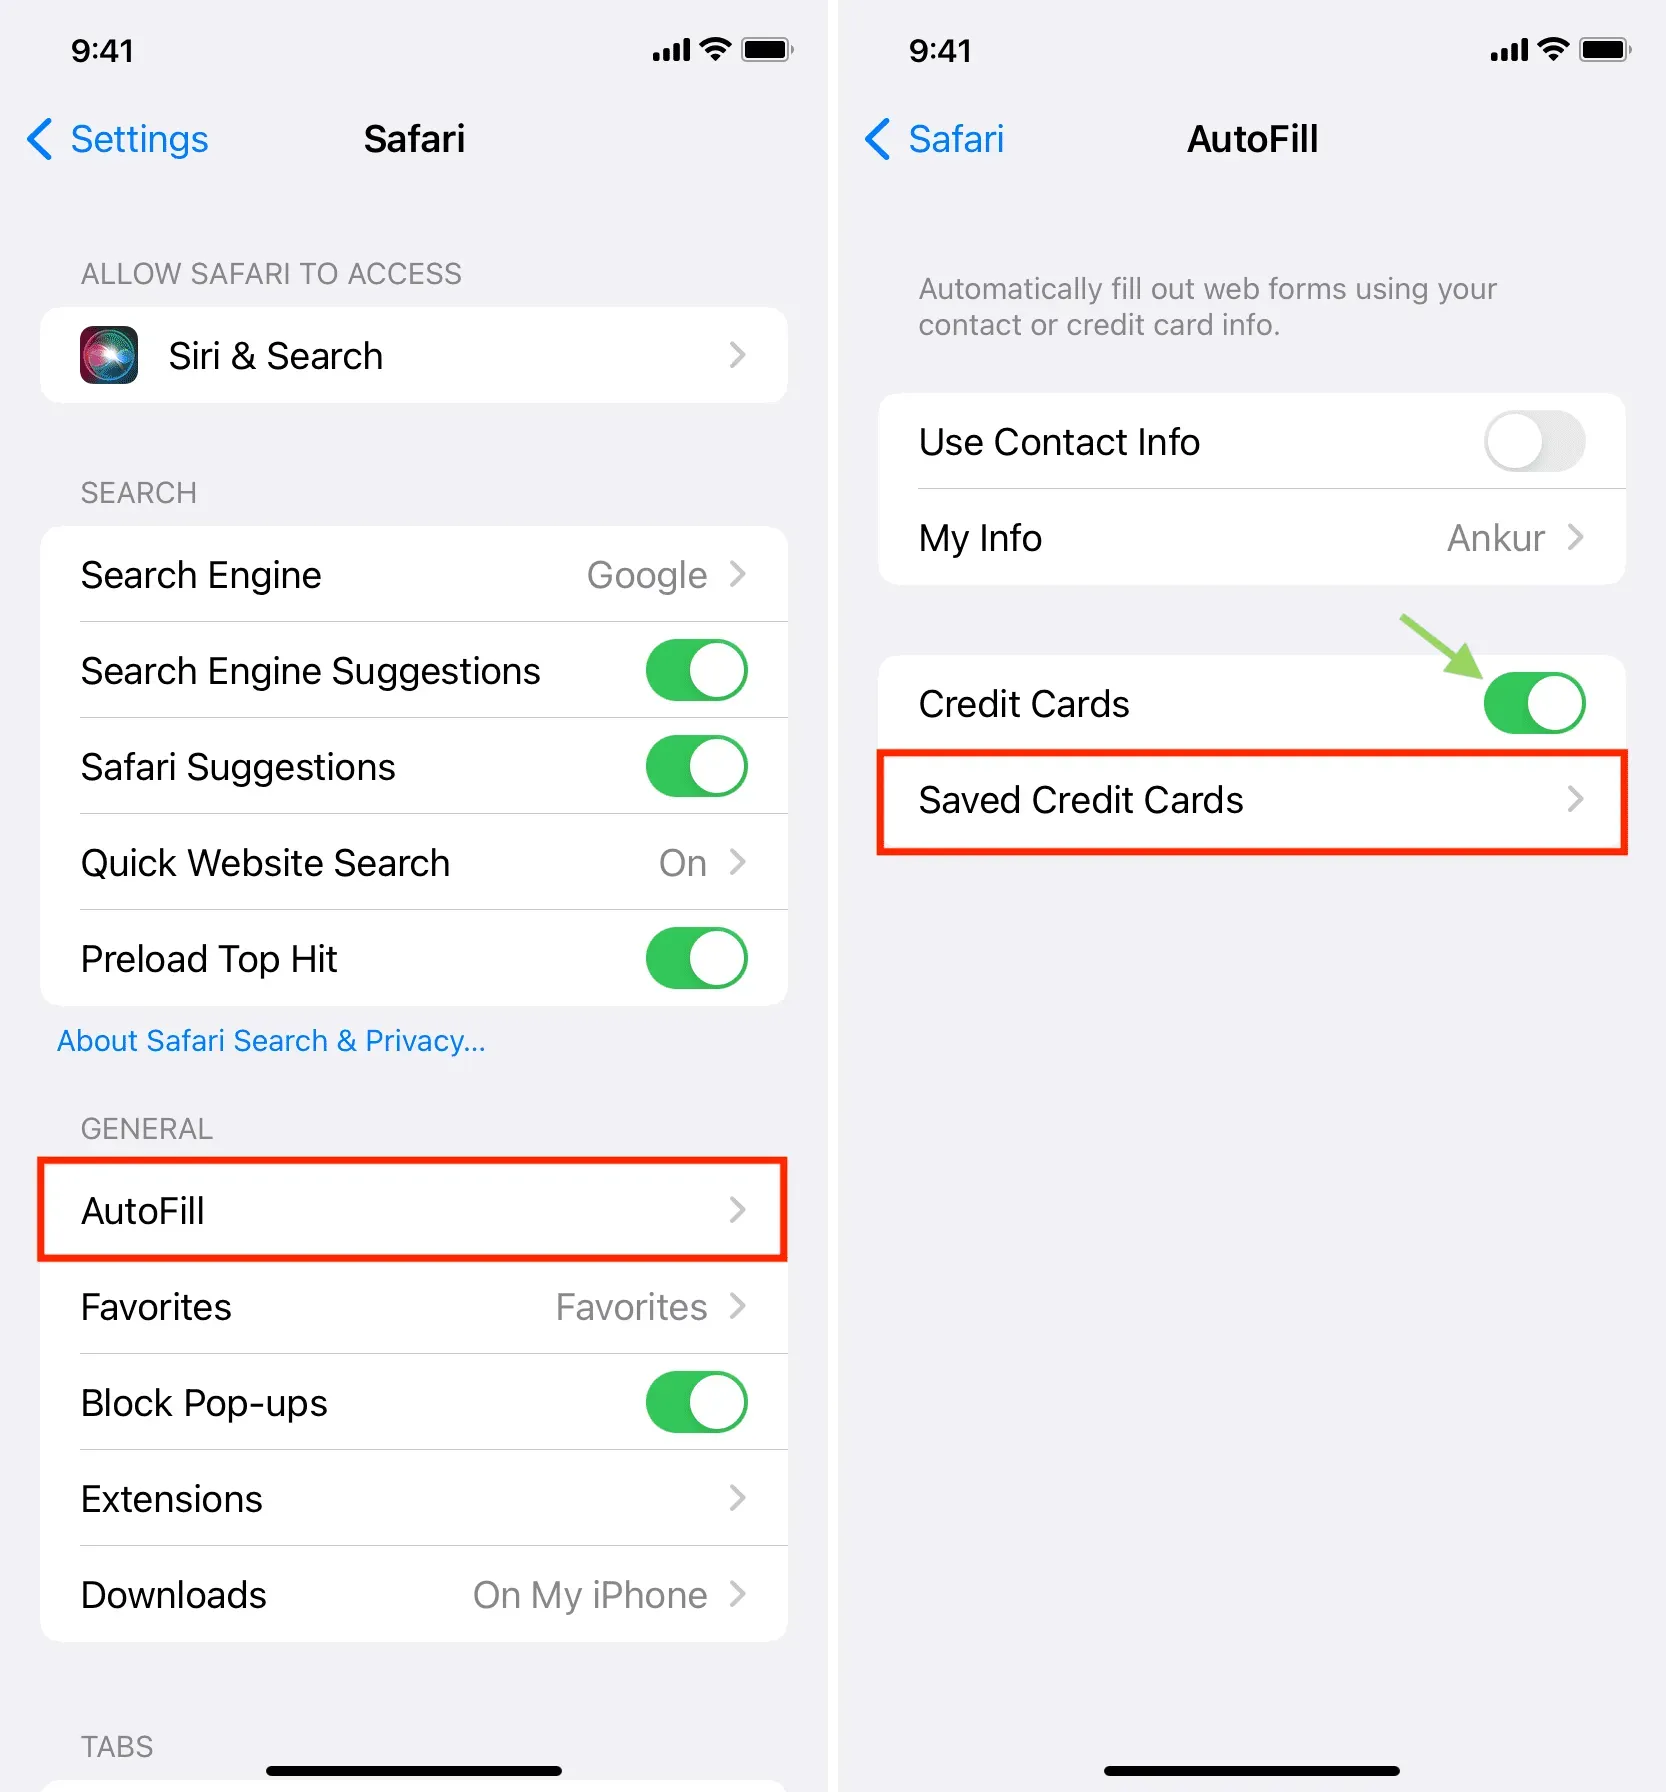
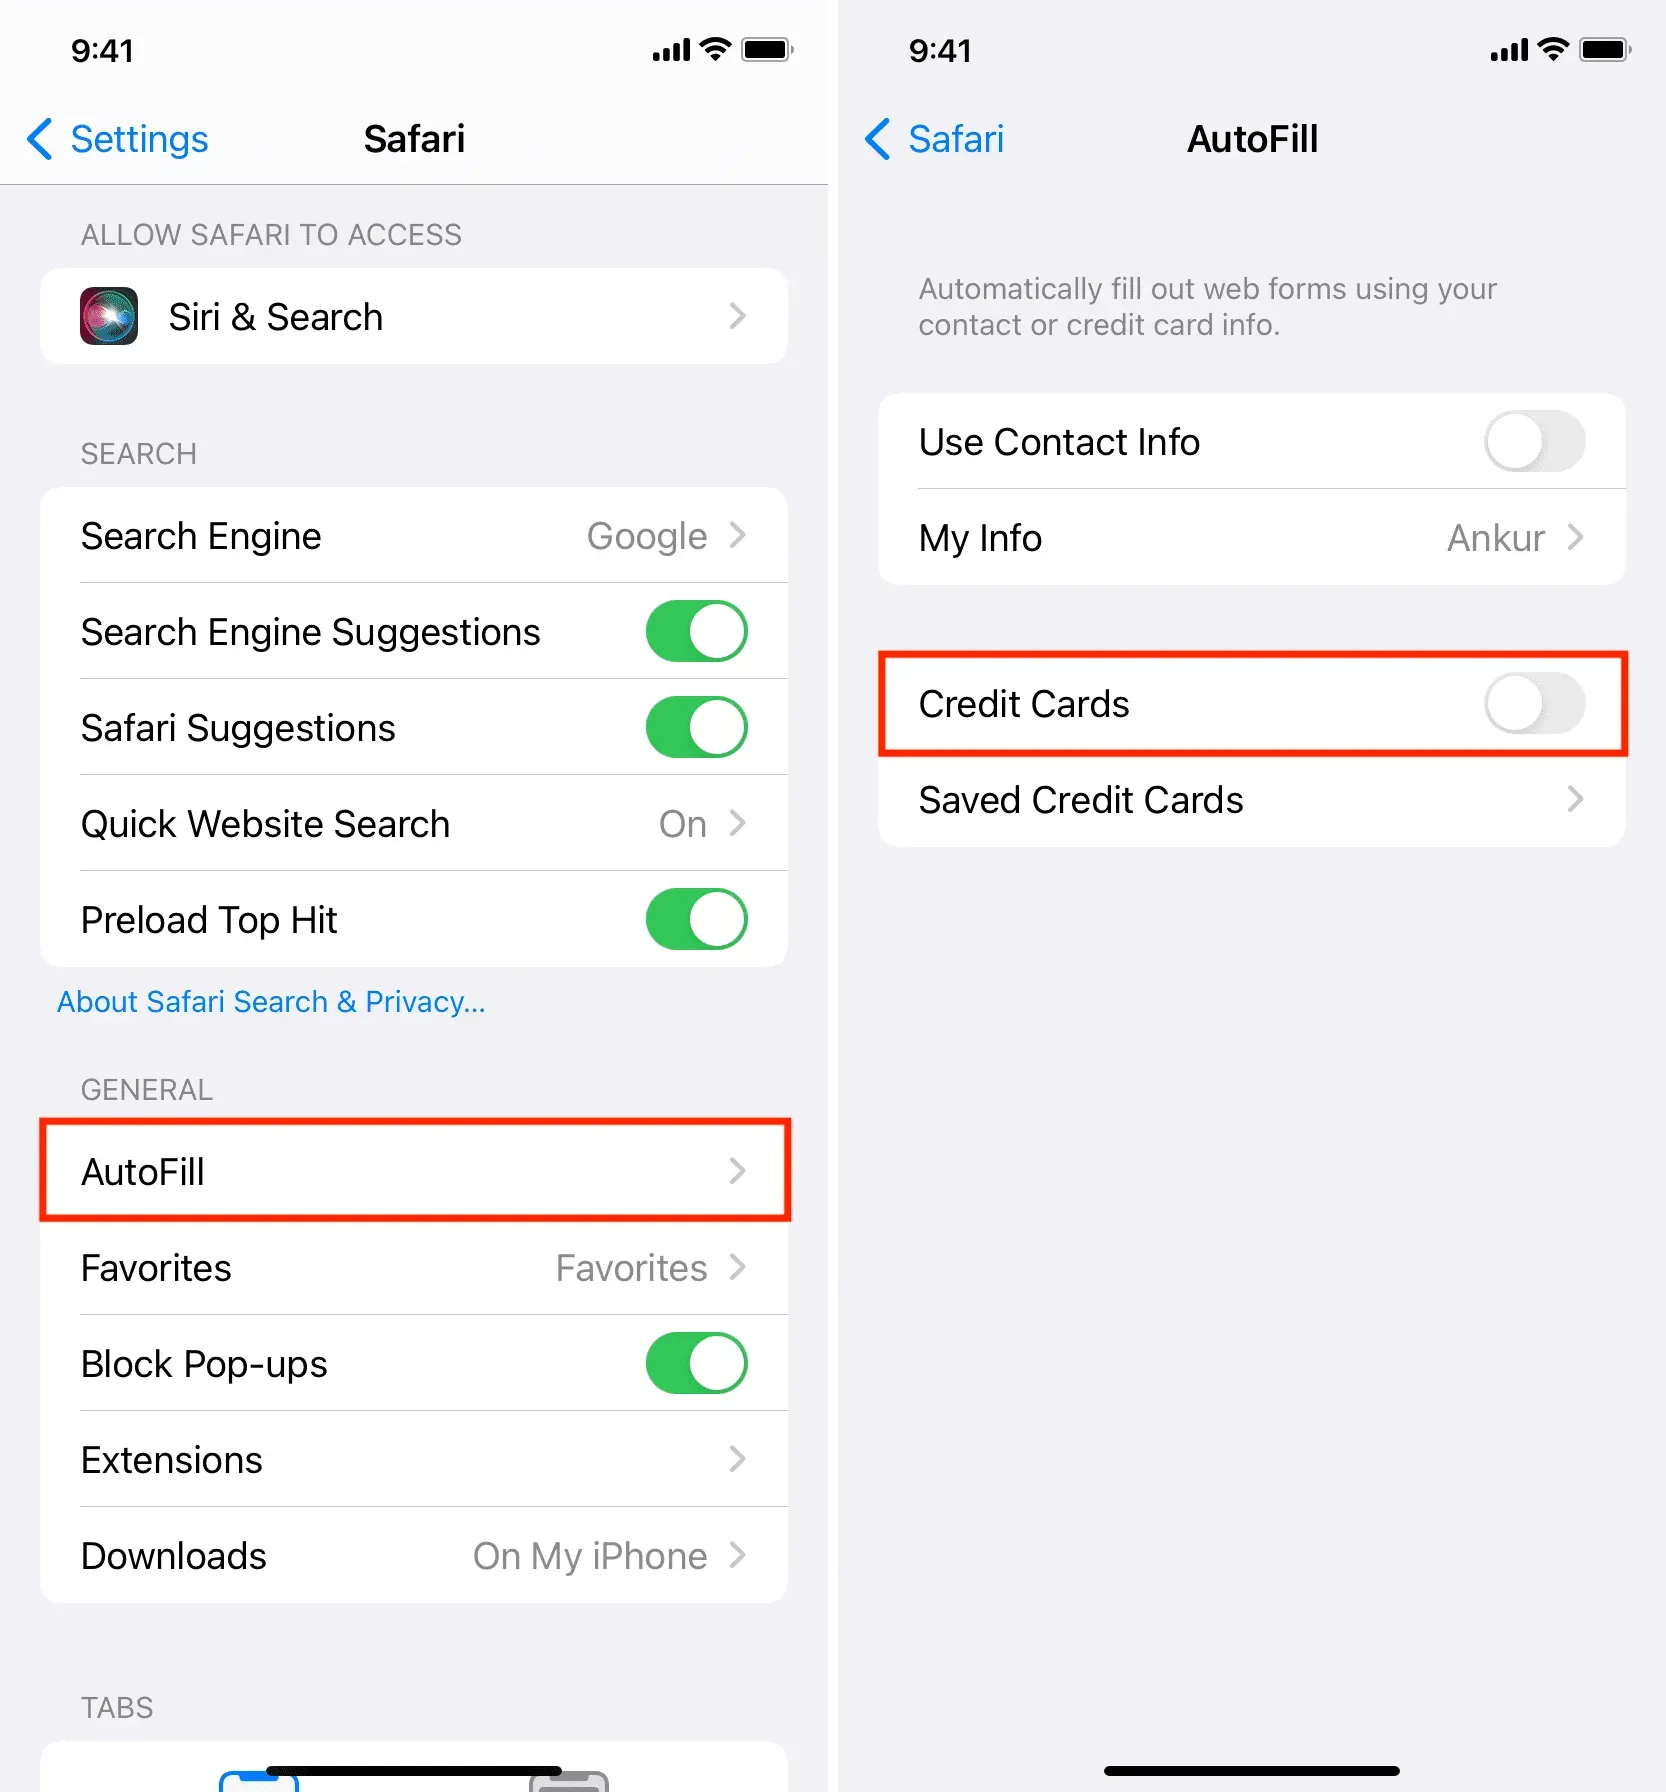
1) Open the Settings app and tap Safari.
2) Click Autocomplete.
3) Turn on the switch for credit cards. This will allow your iPhone to automatically fill in your credit card details in Safari.
4) Then tap Saved Credit Cards and authenticate with Face ID or Touch ID.
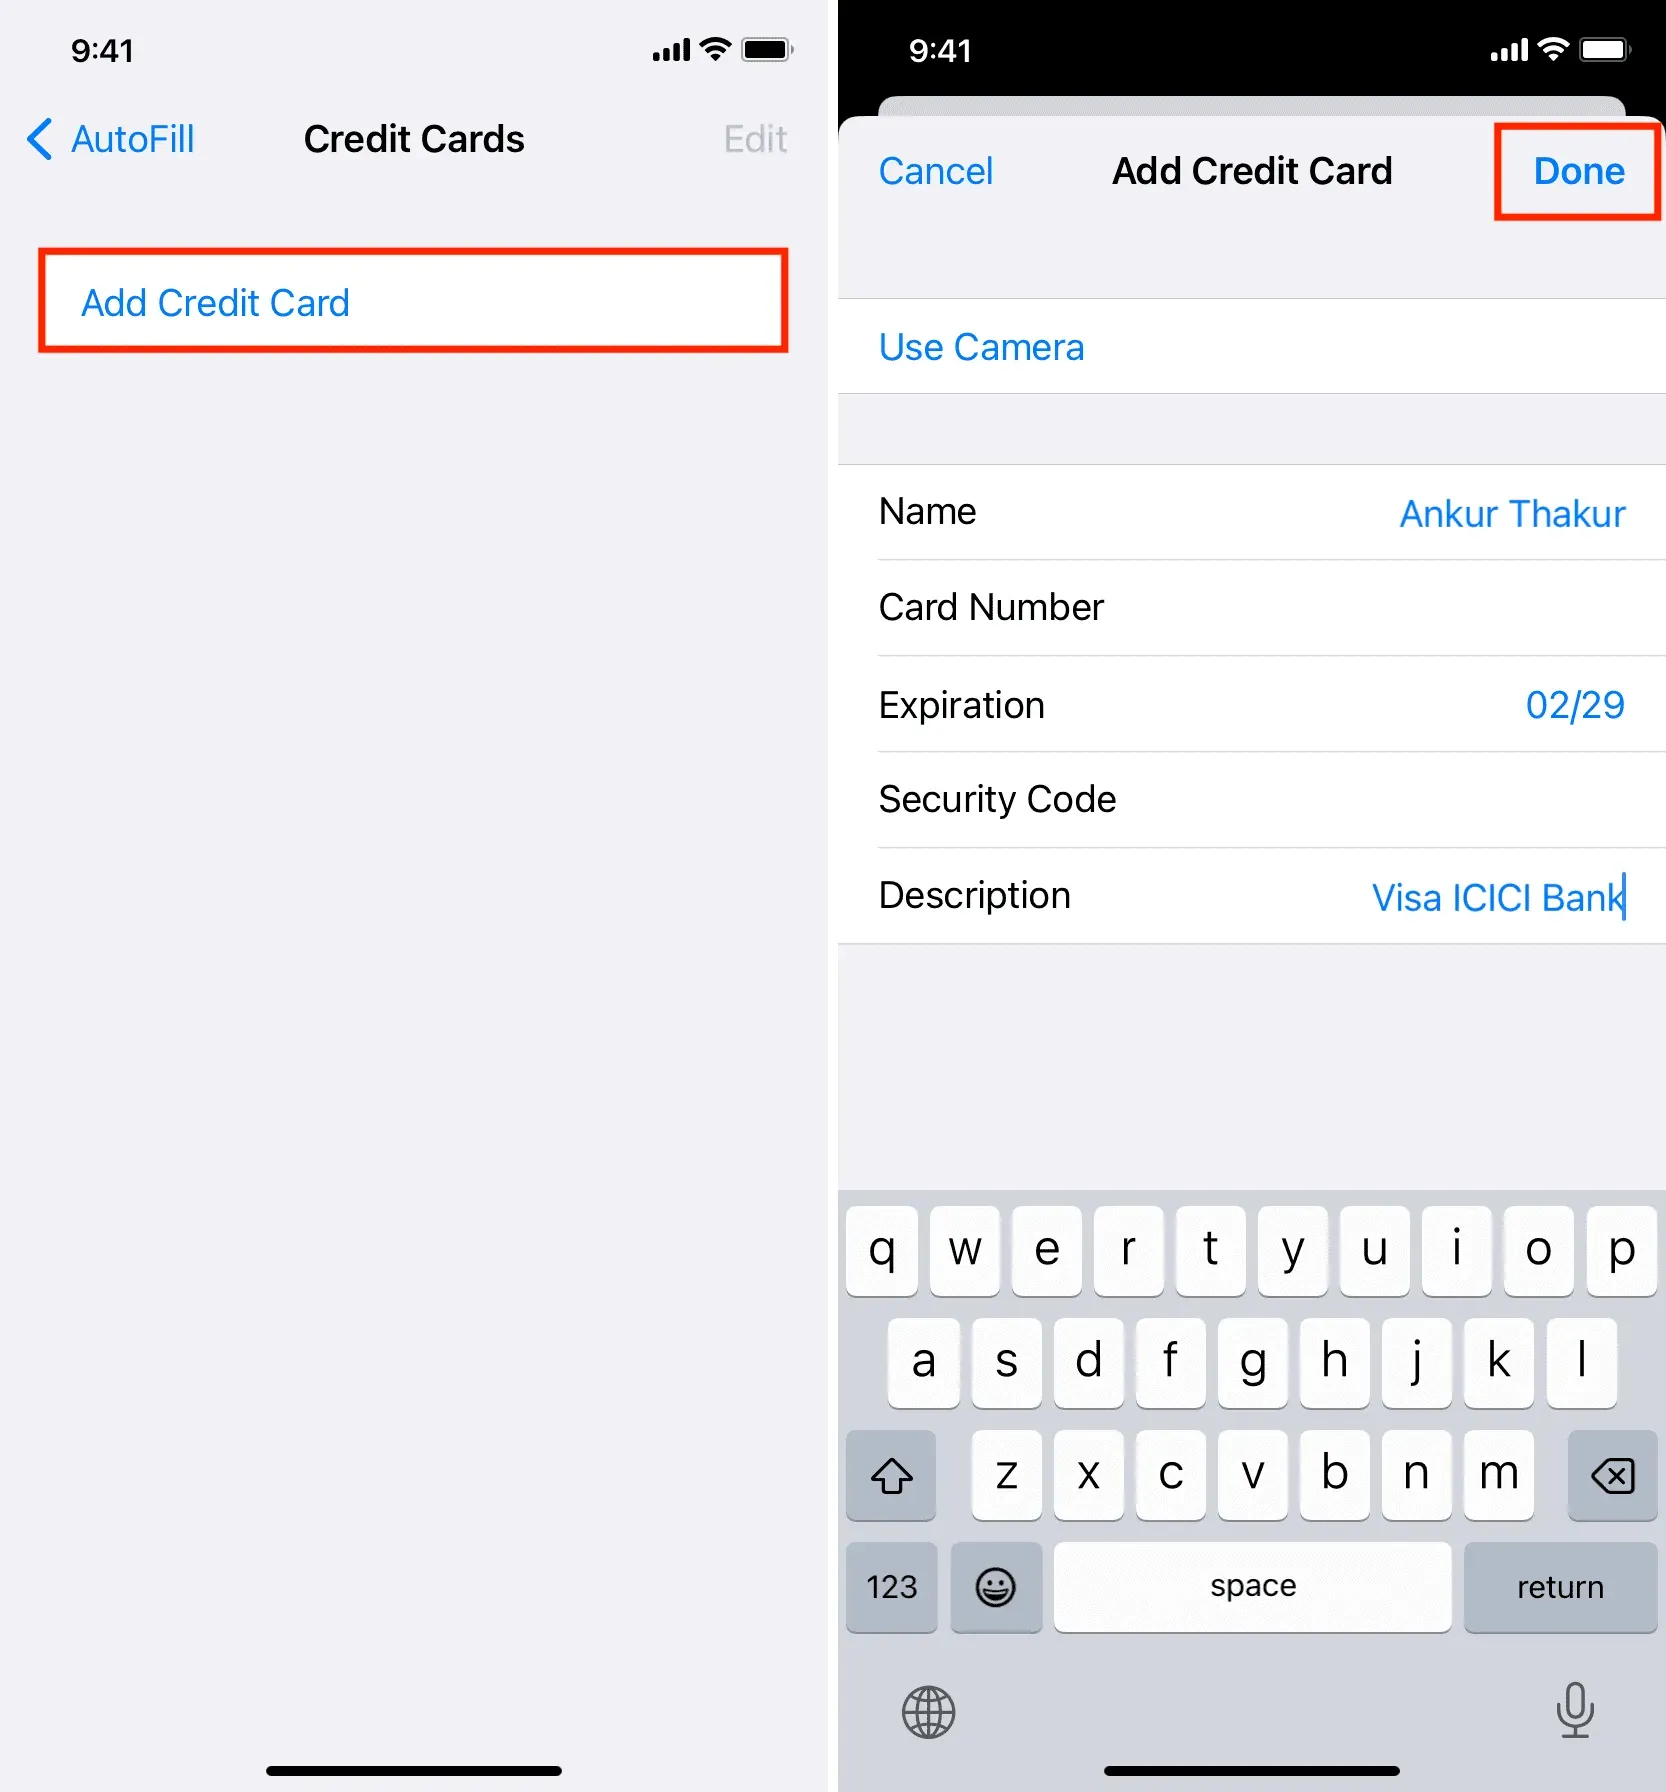
5) Click Add Credit Card.
6) You can manually enter details such as your name, card number, expiration date and security code (CVV).
Or tap Use Camera and point your iPhone at your credit card. Your iPhone will automatically fill in all or most of the data, such as card number, expiration date, and description. In the description, he will read the logo of Visa, Mastercard or another card provider and enter it. You can also change the description to something else, such as the name of your bank.
7) After filling in all the data, click “Finish”.
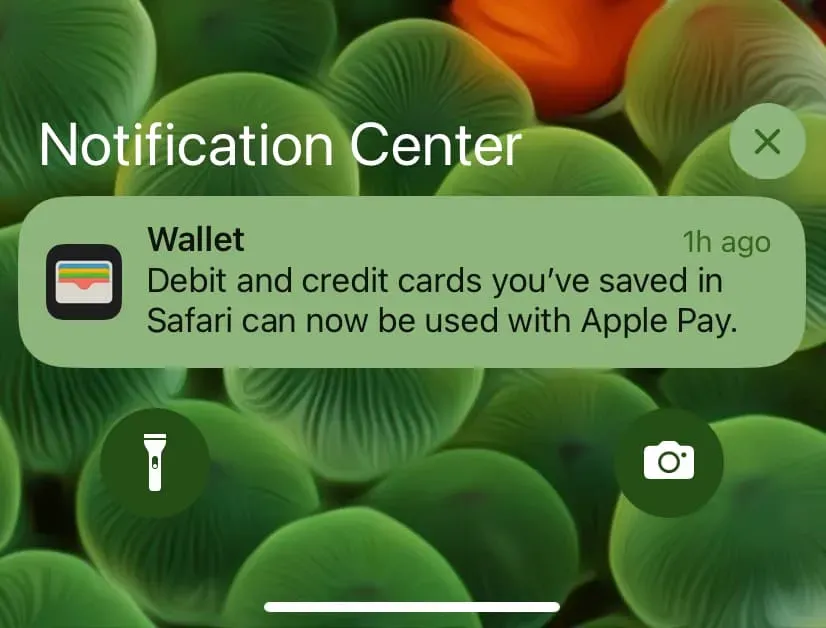
That’s all. You have successfully added your map details to Safari. After that, you may also receive a notification from the Wallet app on your iPhone saying, “The debit and credit cards you saved in Safari can now be used with Apple Pay.”If you have activated Apple Pay, this card is also available for use there. And if you don’t use Apple Pay, or if you’re in a country where Apple Pay isn’t supported, you can safely ignore this notice.
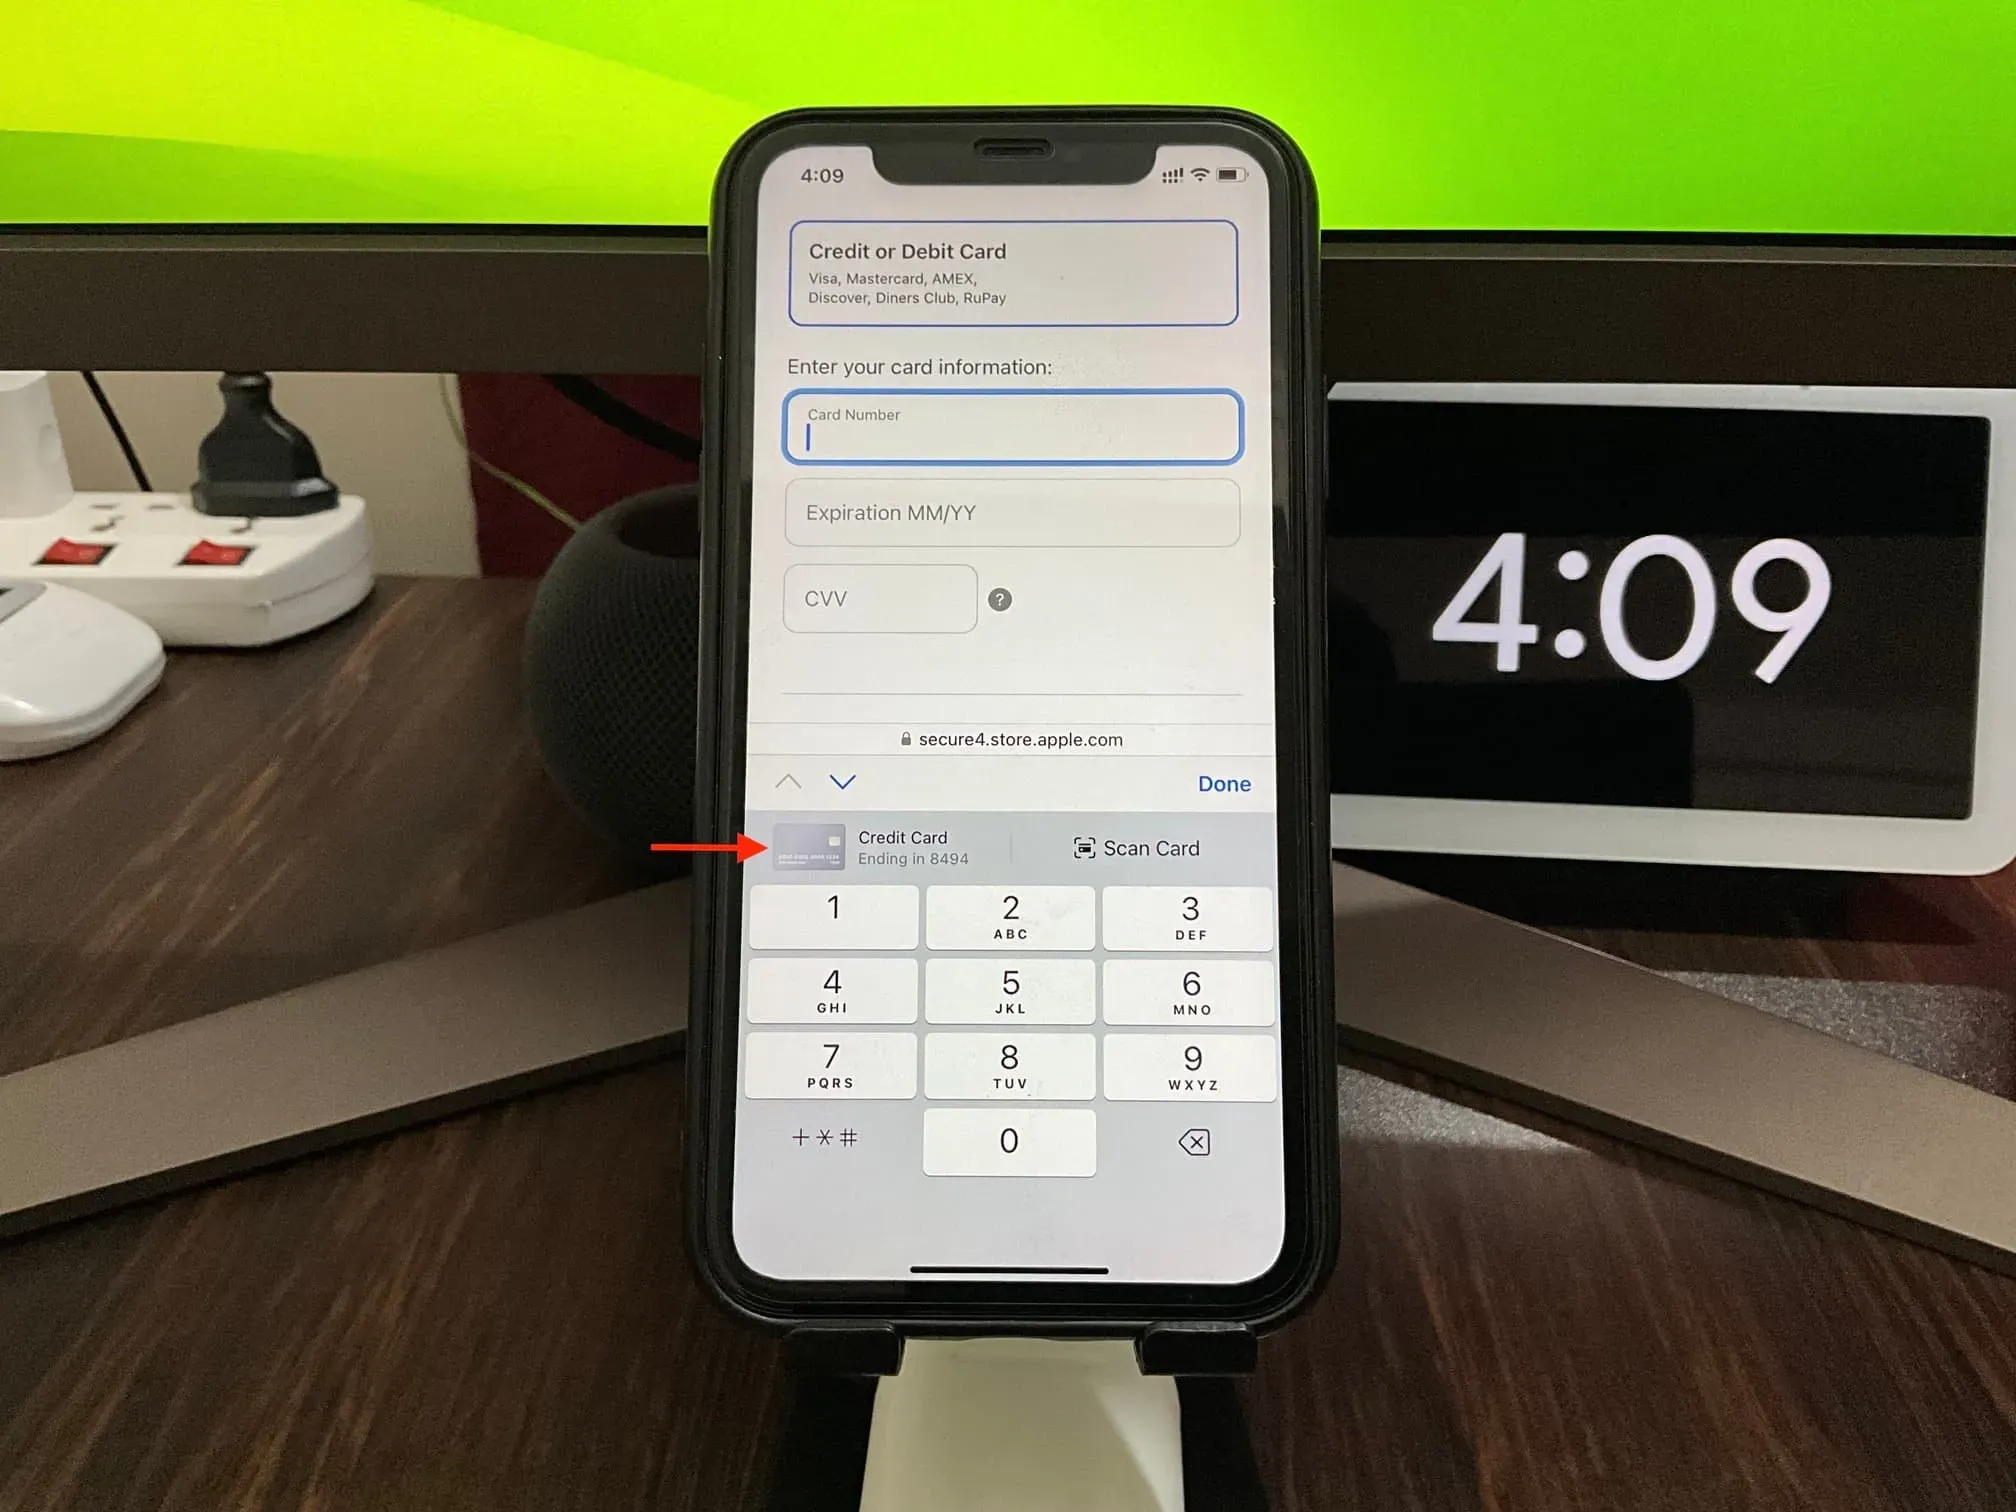
From now on, when you’re about to make a payment on a website in Safari and select a card method, your saved credit card details will automatically show up as an autofill option. Just tap it and authenticate with Face ID or Touch ID and the saved card details will appear right on the webpage for faster checkout! Here’s what it looks like:
On Mac
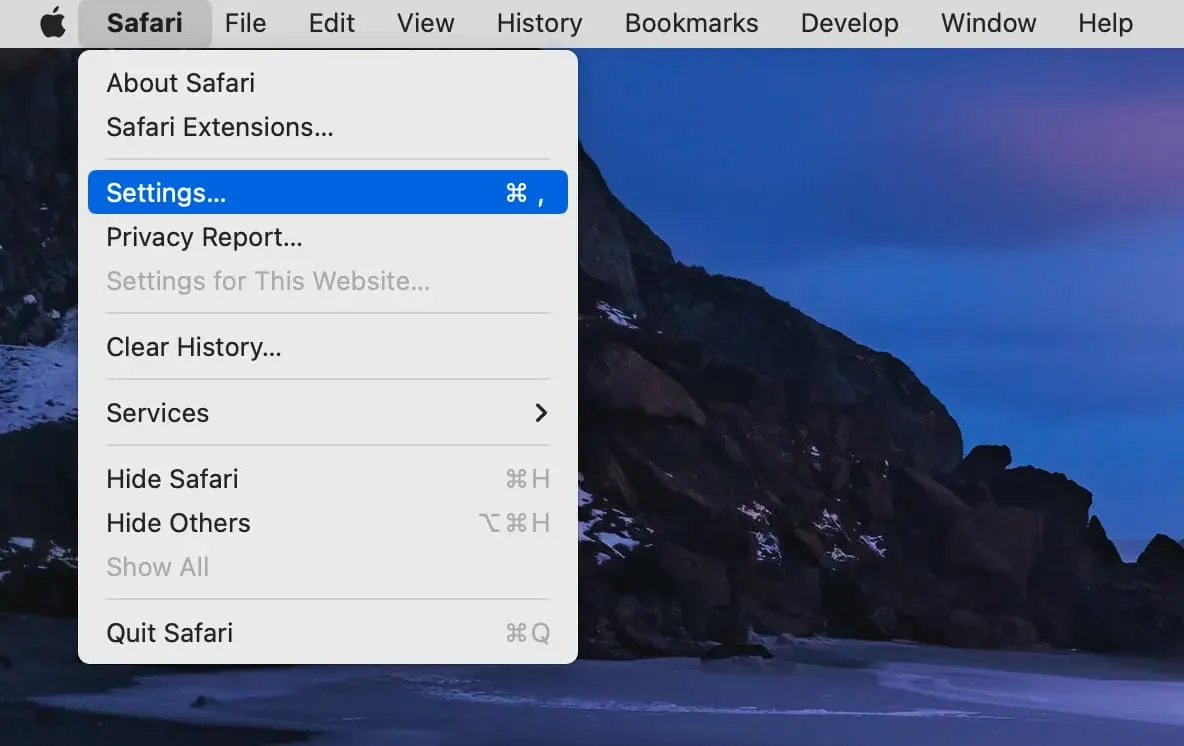
1) Open Safari and click Safari > Preferences or Preferences from the top menu bar.
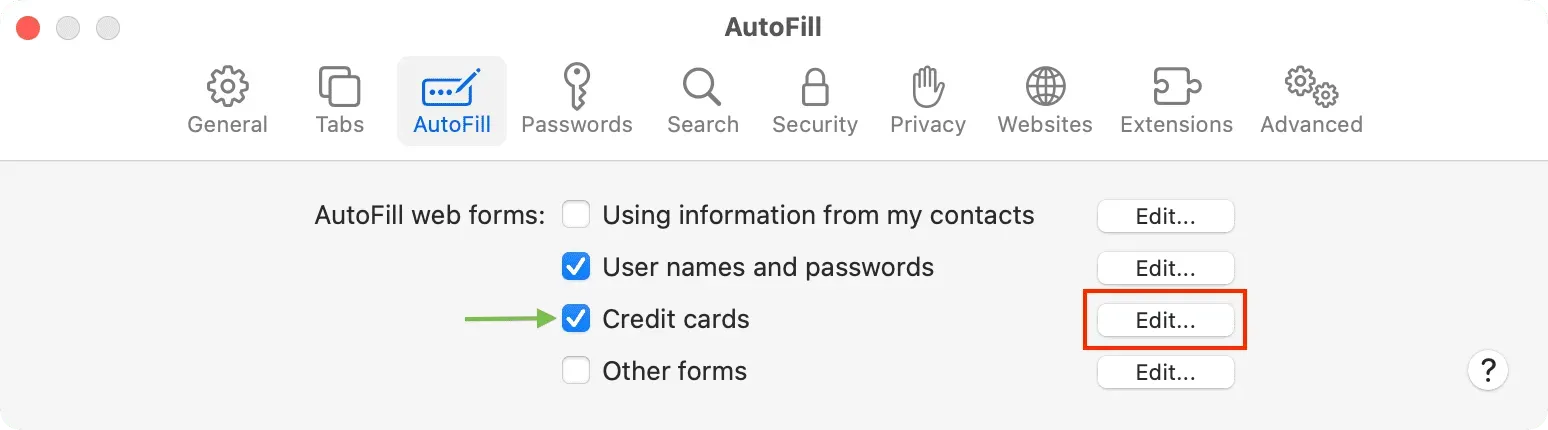
2) Go to the Autocomplete section.
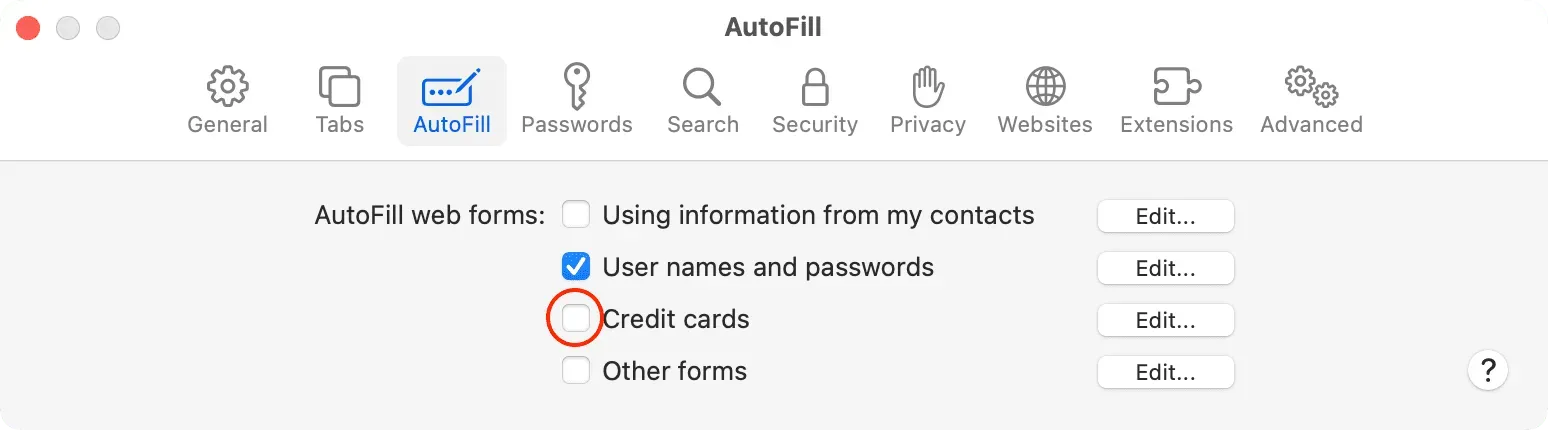
3) Check the Credit Cards box to enable autofill.
4) Click “Change”next to “Credit Cards”and authenticate with your Mac’s Touch ID or password.
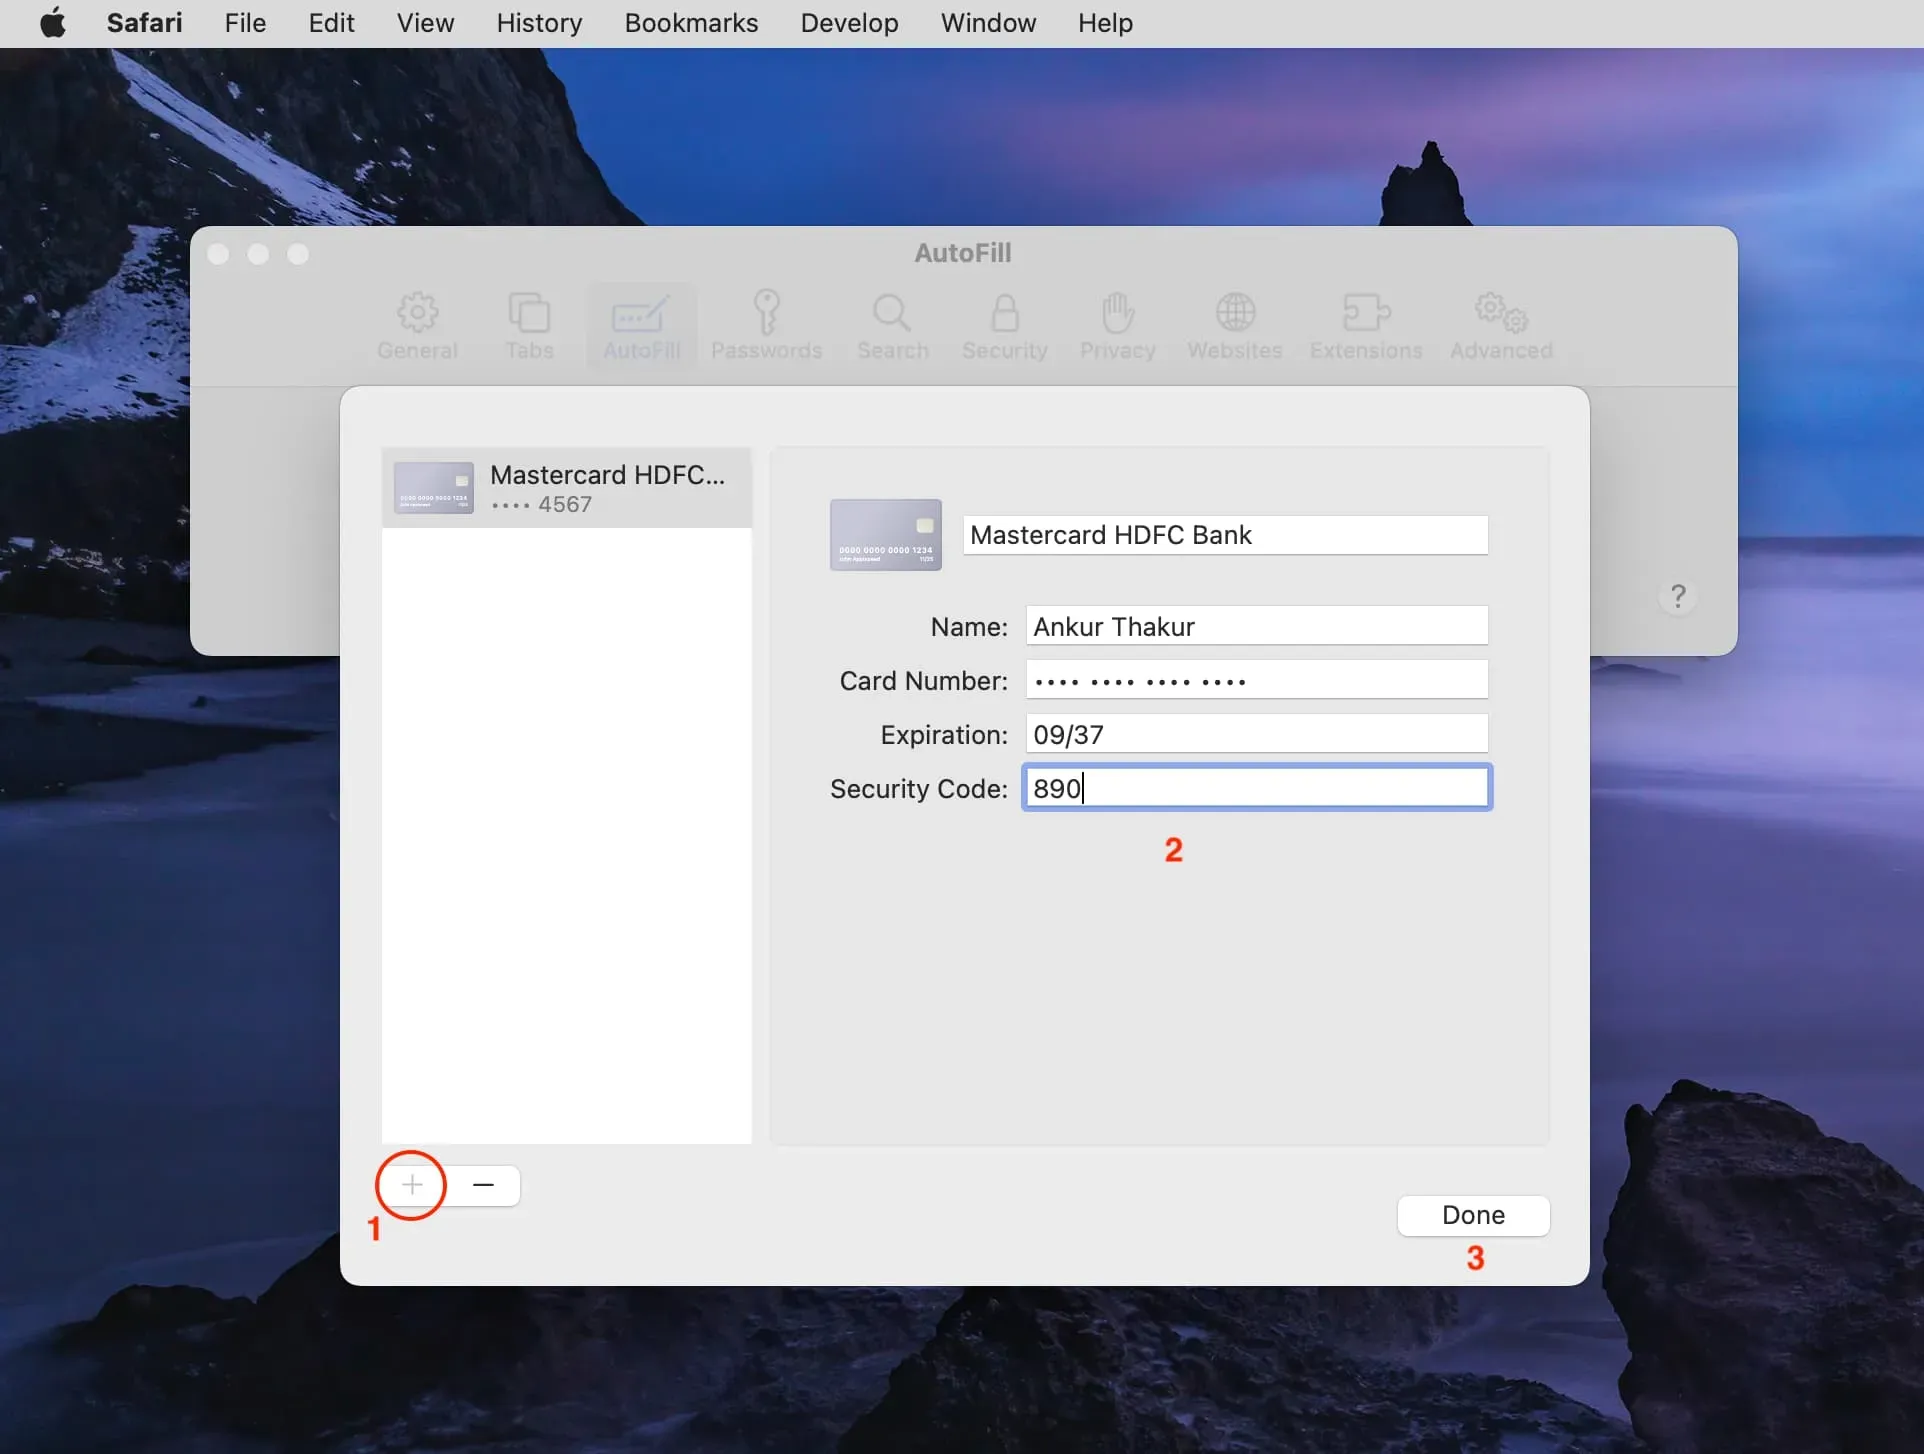
5) Click the plus (+) button at the bottom left.
6) Fill in your credit card details and click Done.
You have successfully saved your card details in Safari on Mac and can use them to quickly checkout while shopping.
Edit Saved Map Data
You can easily change the details or description of a saved map. Here’s how:
On iPhone or iPad
- Go to the Settings app > Safari > Autofill.
- Click Saved Credit Cards.
- Choose a card.
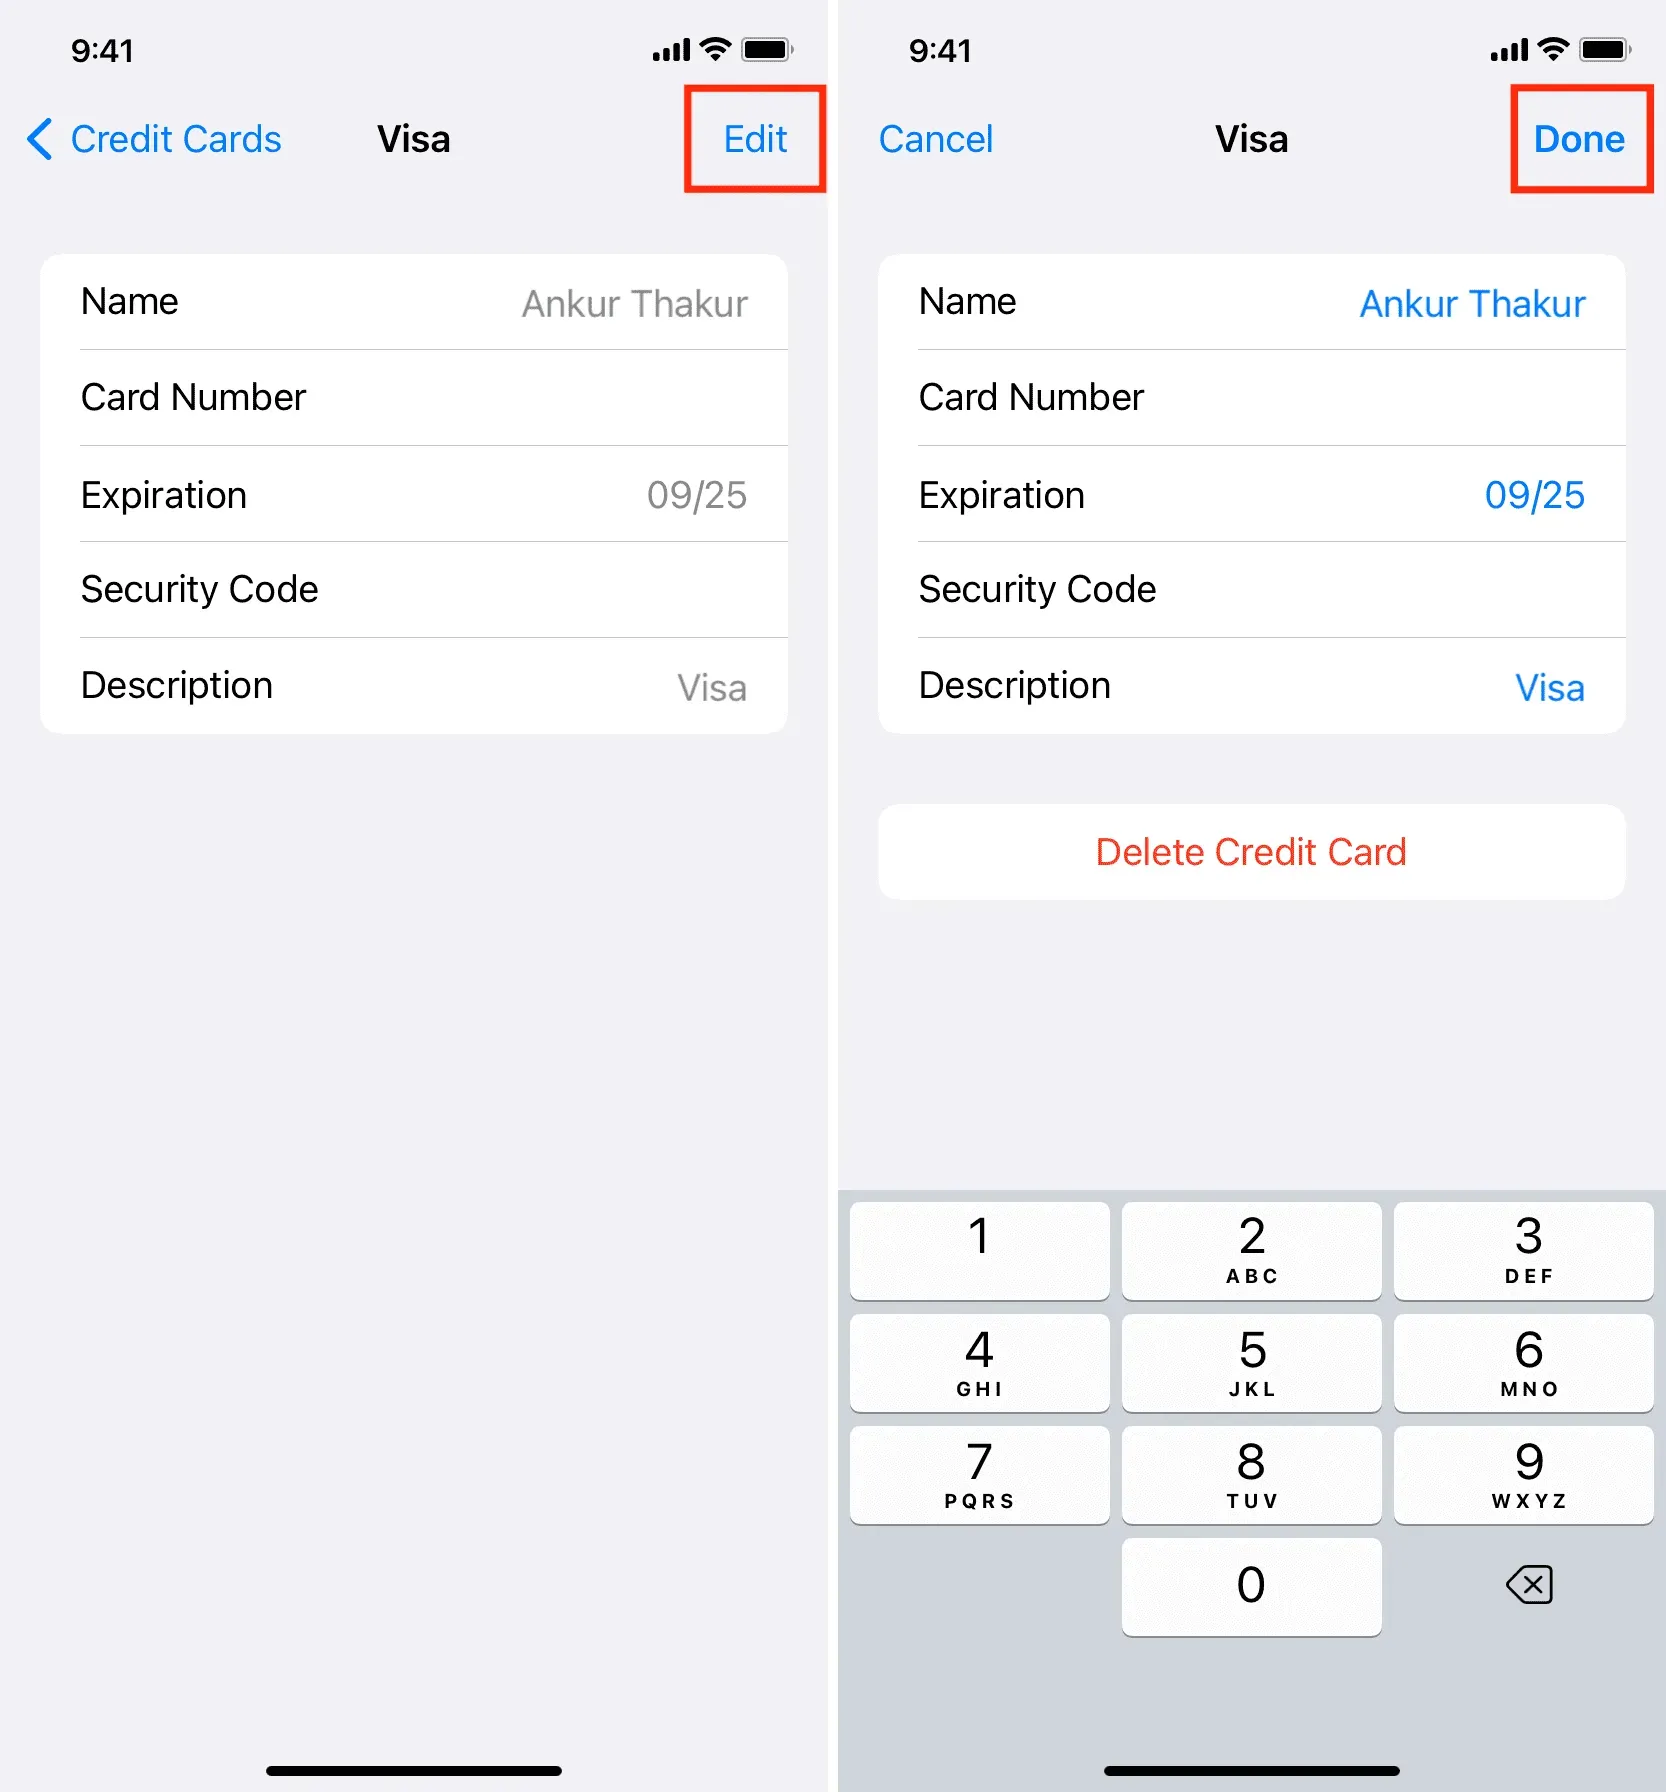
- Tap Edit.
- Make your changes and click Finish.
The new data will soon be synced to all your devices via iCloud.
On Mac
- Launch Safari and go to its settings.
- Click Autocomplete.
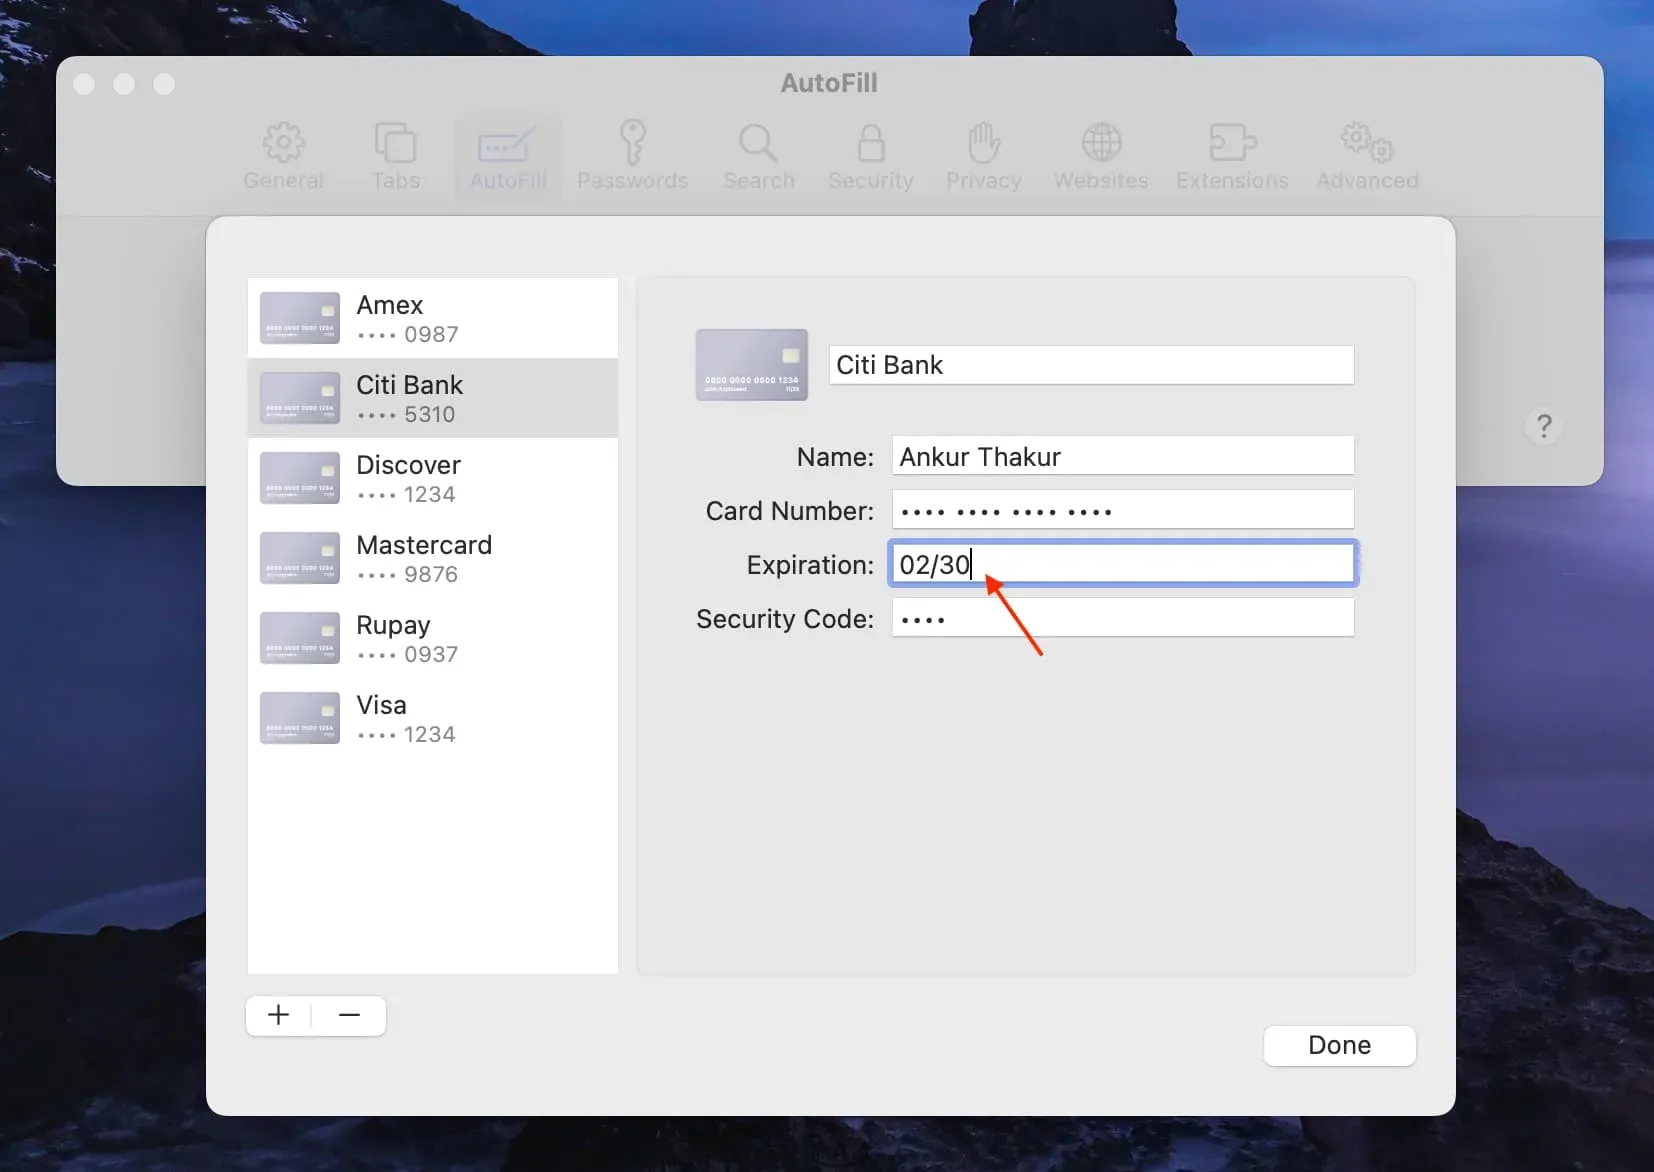
- Click “Change”next to “Credit Cards”.
- Select the card on the left side.
- Enter new data and click Finish.
Do you have security issues?
According to Apple, your card data is encrypted with 256-bit AES encryption during storage and transmission. As a result, your card details cannot be read by Apple.
However, if you have reservations, you can keep your name, card details, and expiration number, but do not provide a security code (CVV). You can manually enter a three or four digit CVV number on the checkout page when making a purchase.
Stop credit card autofill in Safari
Follow these steps if you want to temporarily stop showing saved credit cards as an autofill option in Safari when making a payment. Unlike all the other steps in this article, this one is device specific and only applies to that specific phone or computer.
On iPhone or iPad
- Open the Settings app and tap Safari > Autofill.
- Turn off the toggle for credit cards and now you won’t see saved cards as an autofill option.
On Mac
- Go to the Safari browser and click Safari > Preferences or Preferences.
- Click Autocomplete.
- Clear the checkbox for credit cards.
Remove Saved Credit Card from Safari Autofill
If you want to permanently remove a saved card from Safari’s autofill, you can remove it by following these steps.
On iPhone or iPad
- Open the Settings app and tap Safari.
- Go to AutoFill > Saved Credit Cards.
- Tap Edit.
- Select all the cards you want to remove.
- Finally, click “Delete”and confirm.
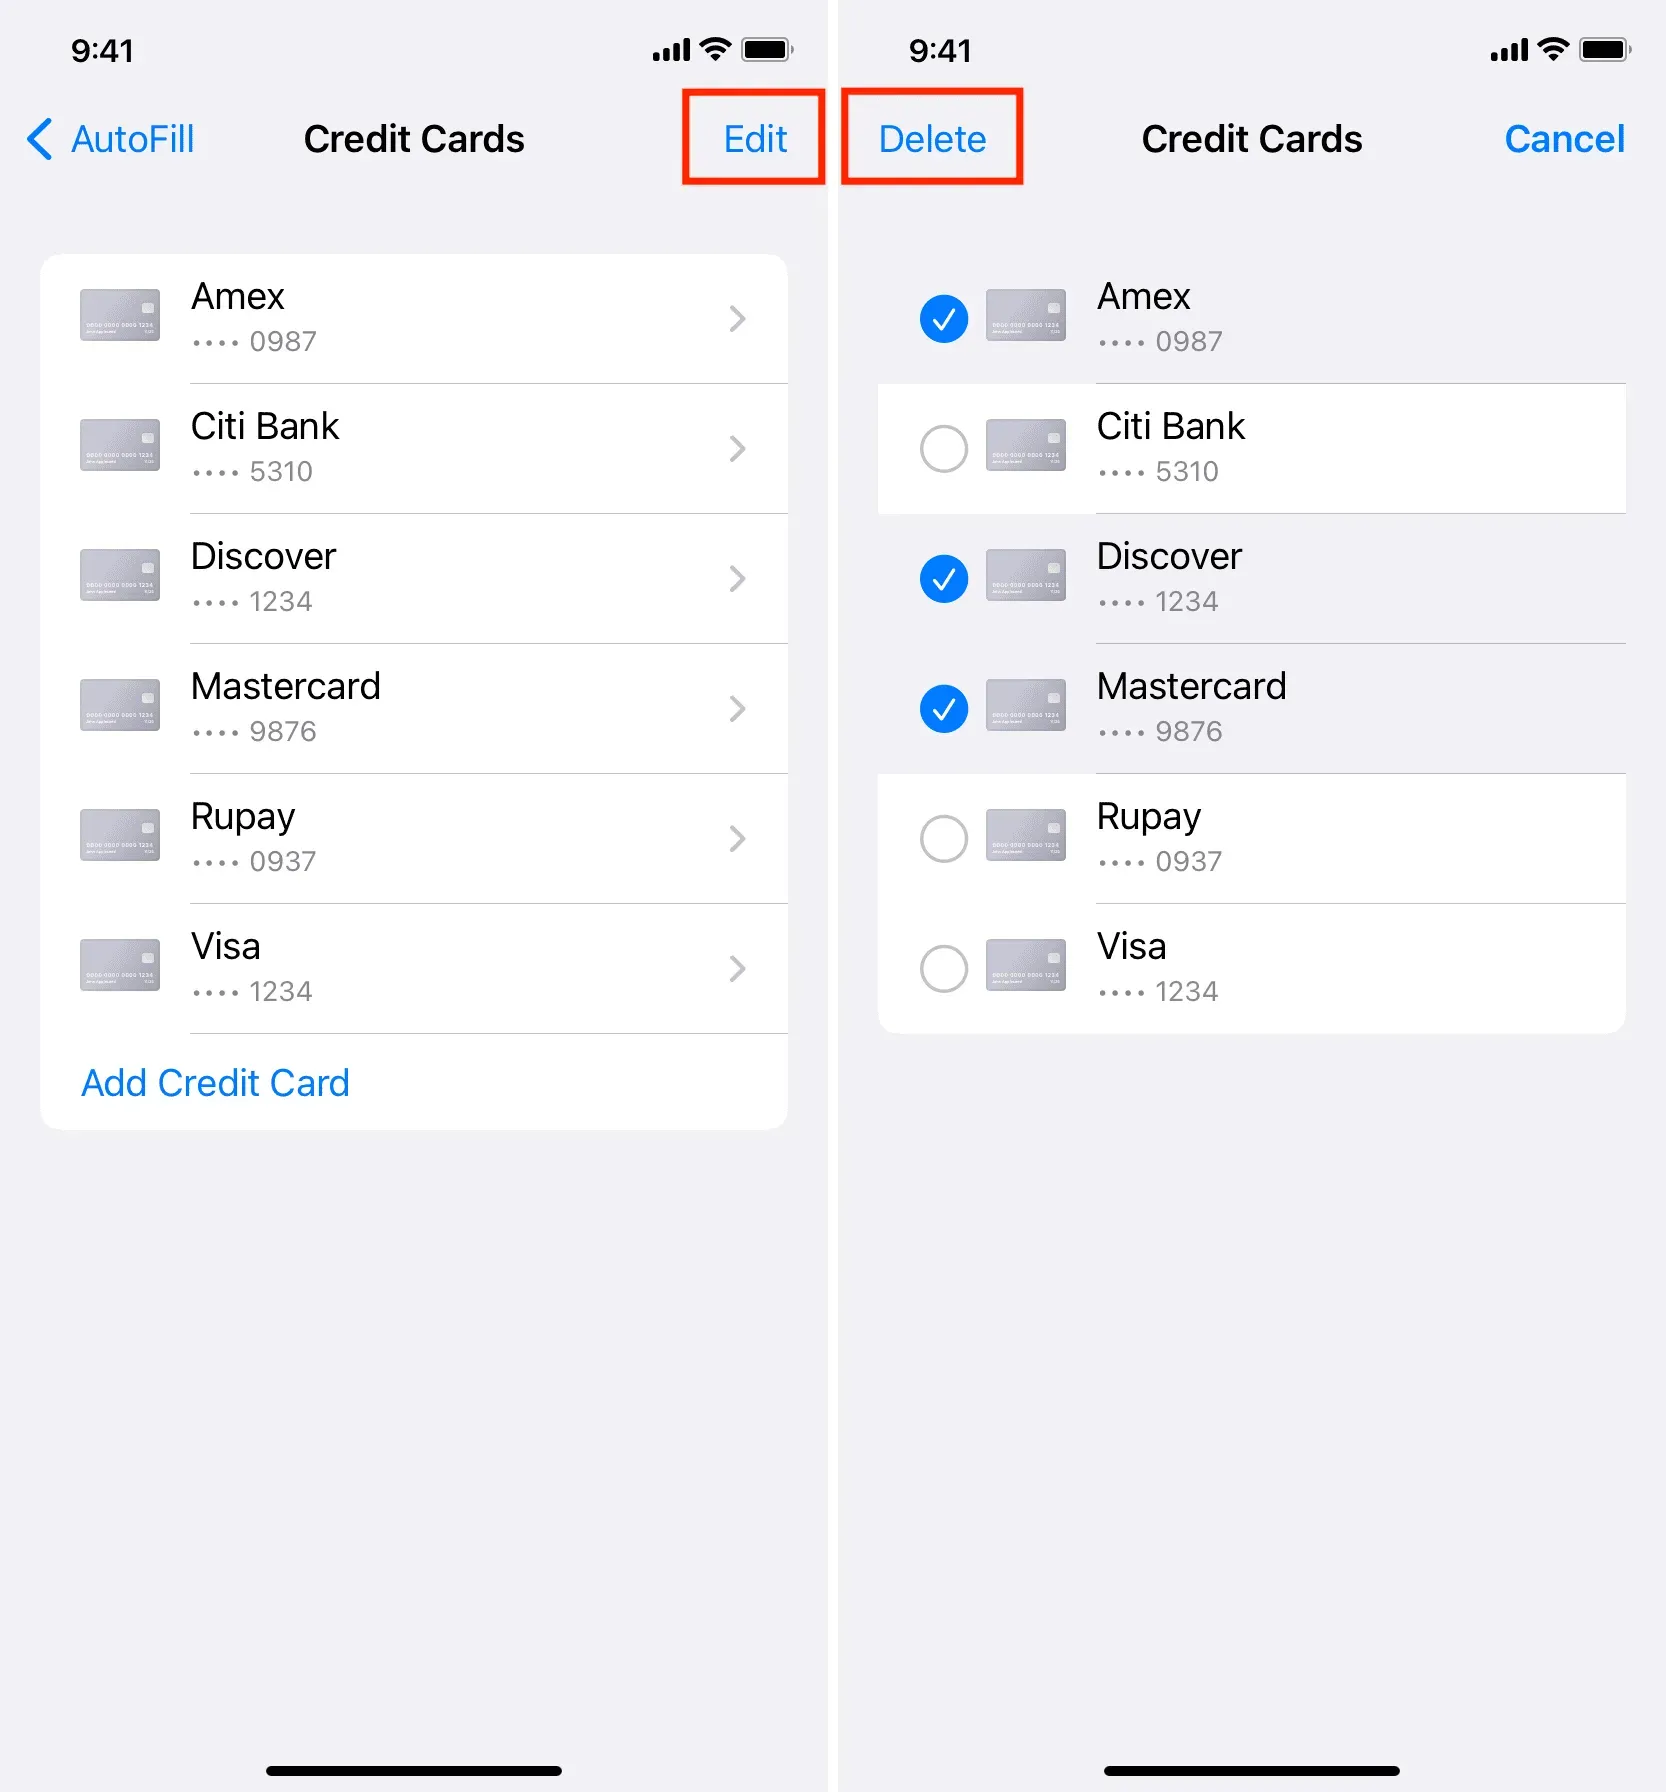
This card will be removed from all your Apple devices.
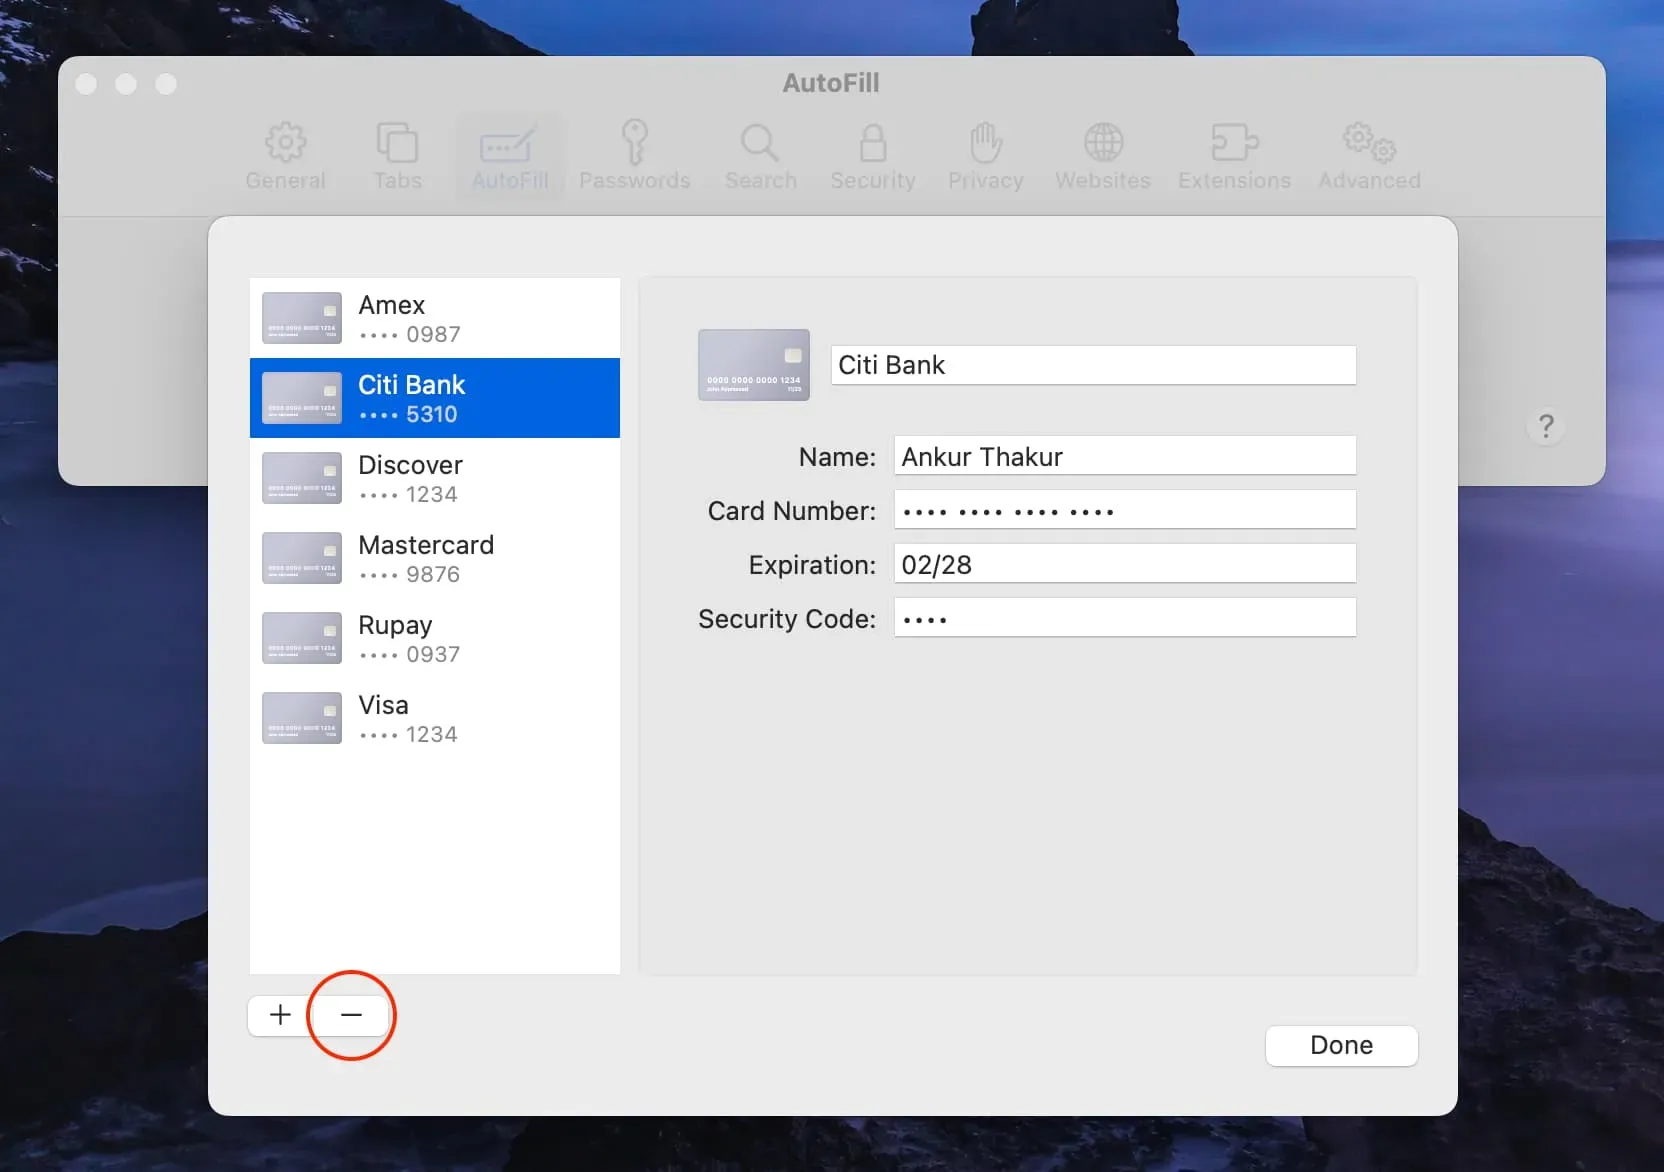
On Mac
- Open Safari and go to its settings.
- Click Autocomplete.
- Click the Change button next to Credit Cards.
- Select a card and click the minus (-) button to remove it.
- Finally, click Done.
Leave a Reply