iOS 15 gives you more reasons to use your iPhone’s accessibility shortcut
I use the accessibility shortcut on my iPhone almost every day, whether it’s dimming the screen below the default threshold, restricting my child’s experience to a certain app, or opening a fake magnifying glass. But with iOS 15, there are at least three more things I can use it for, and one of them is really good.
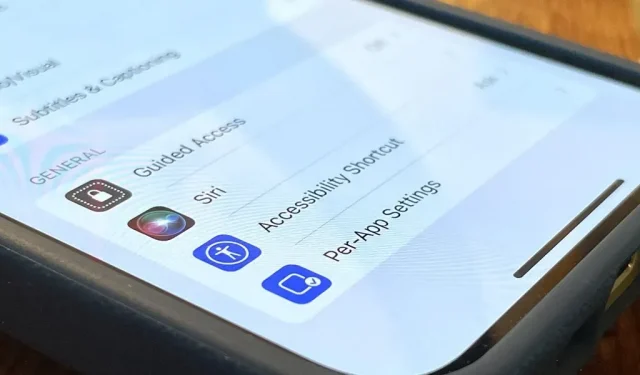
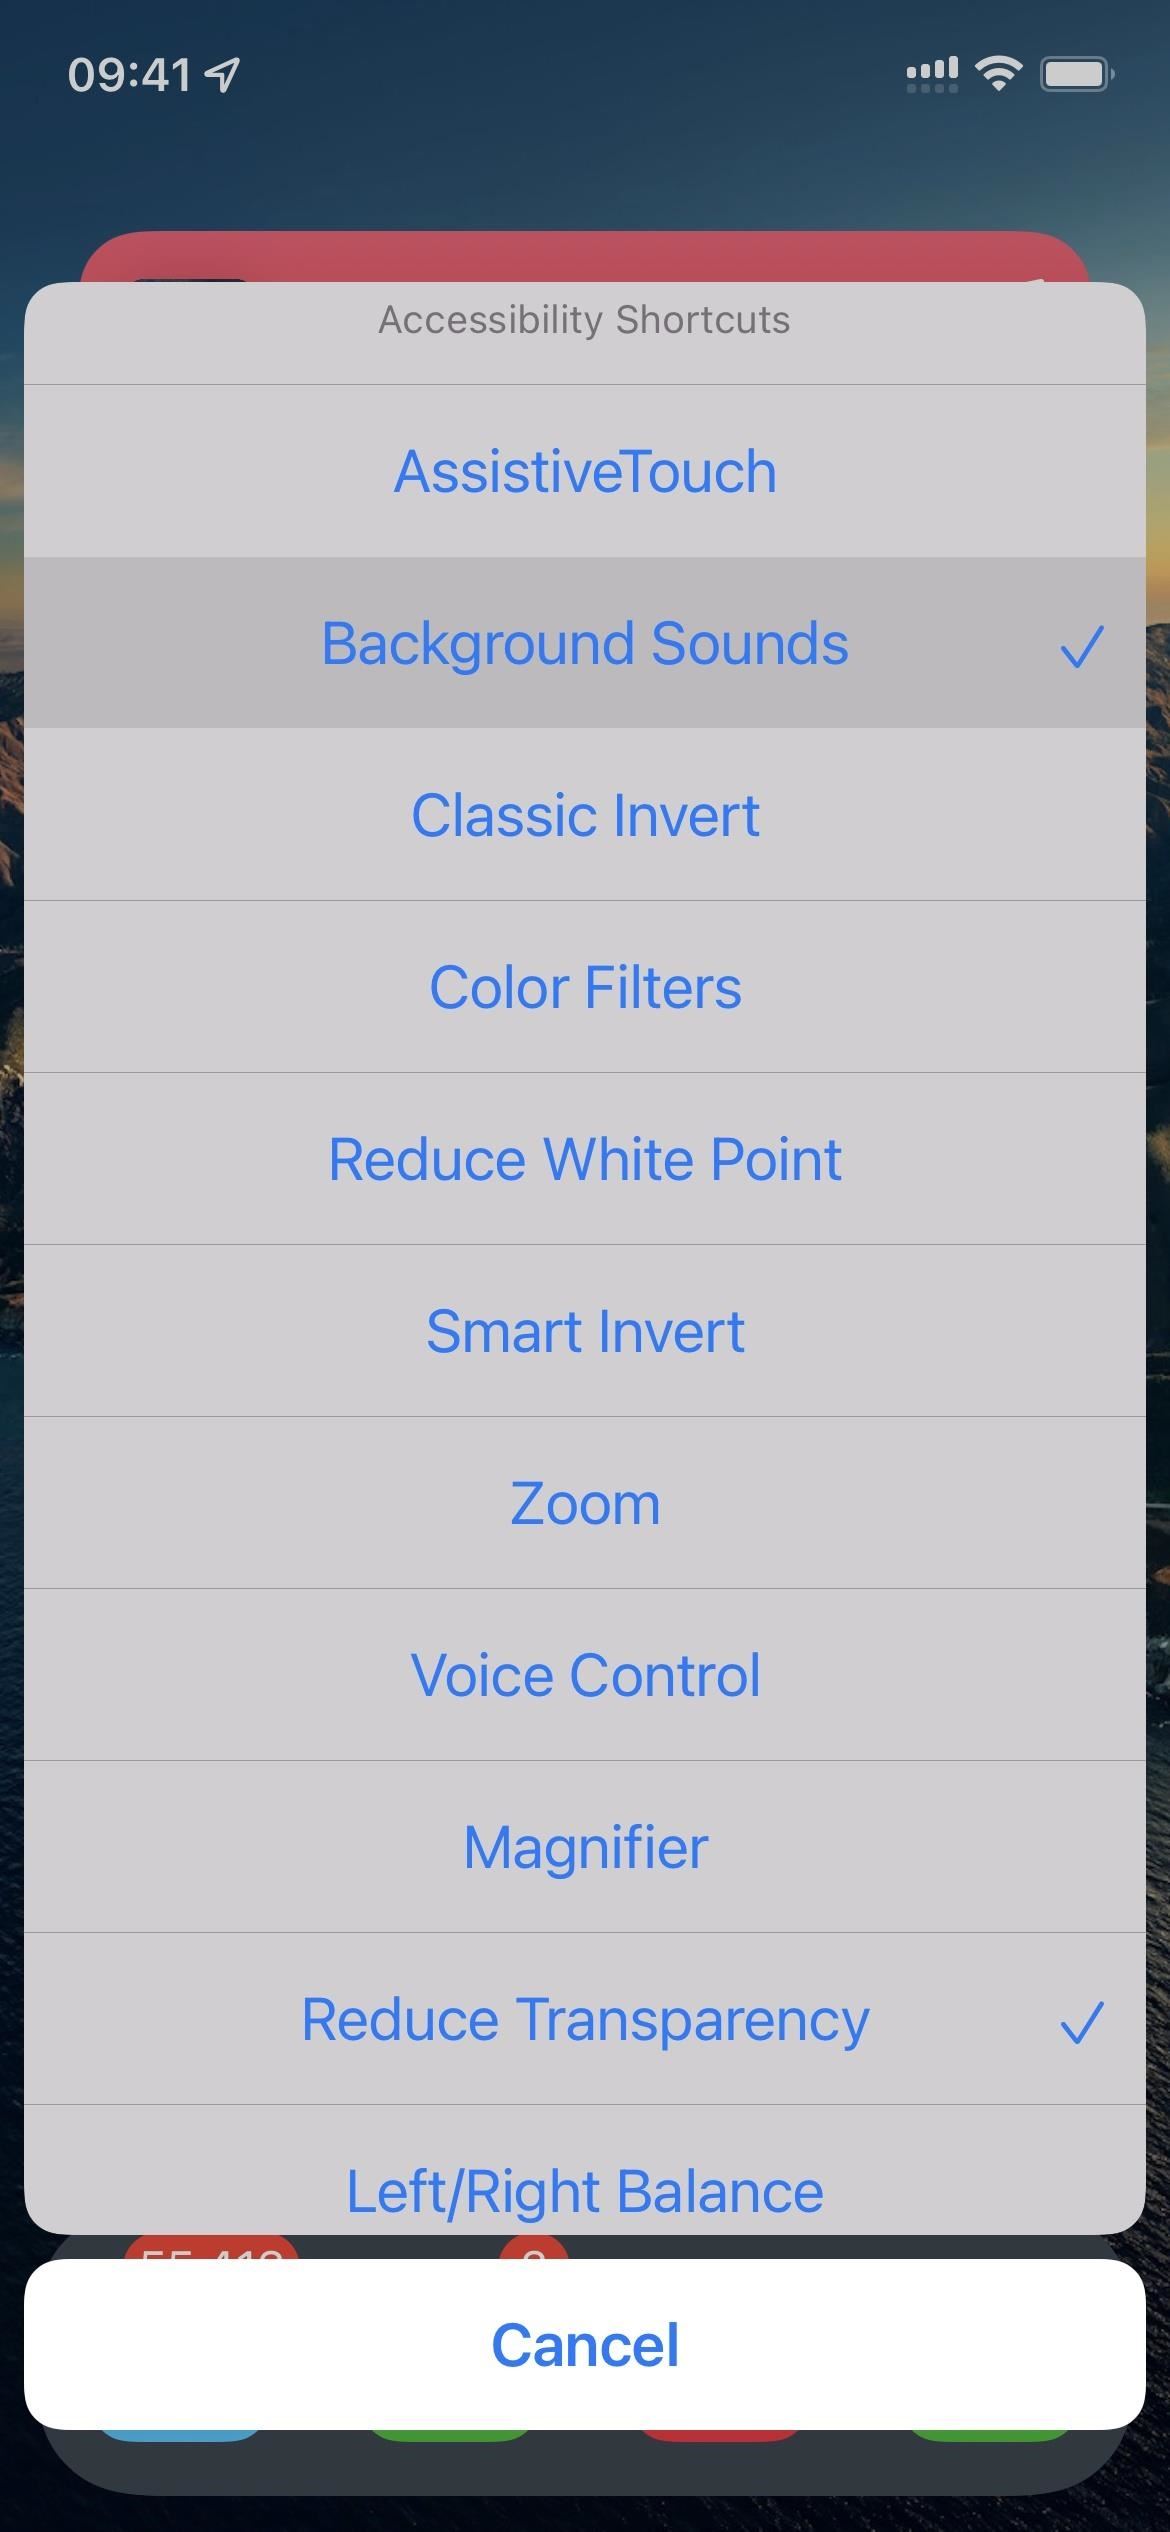
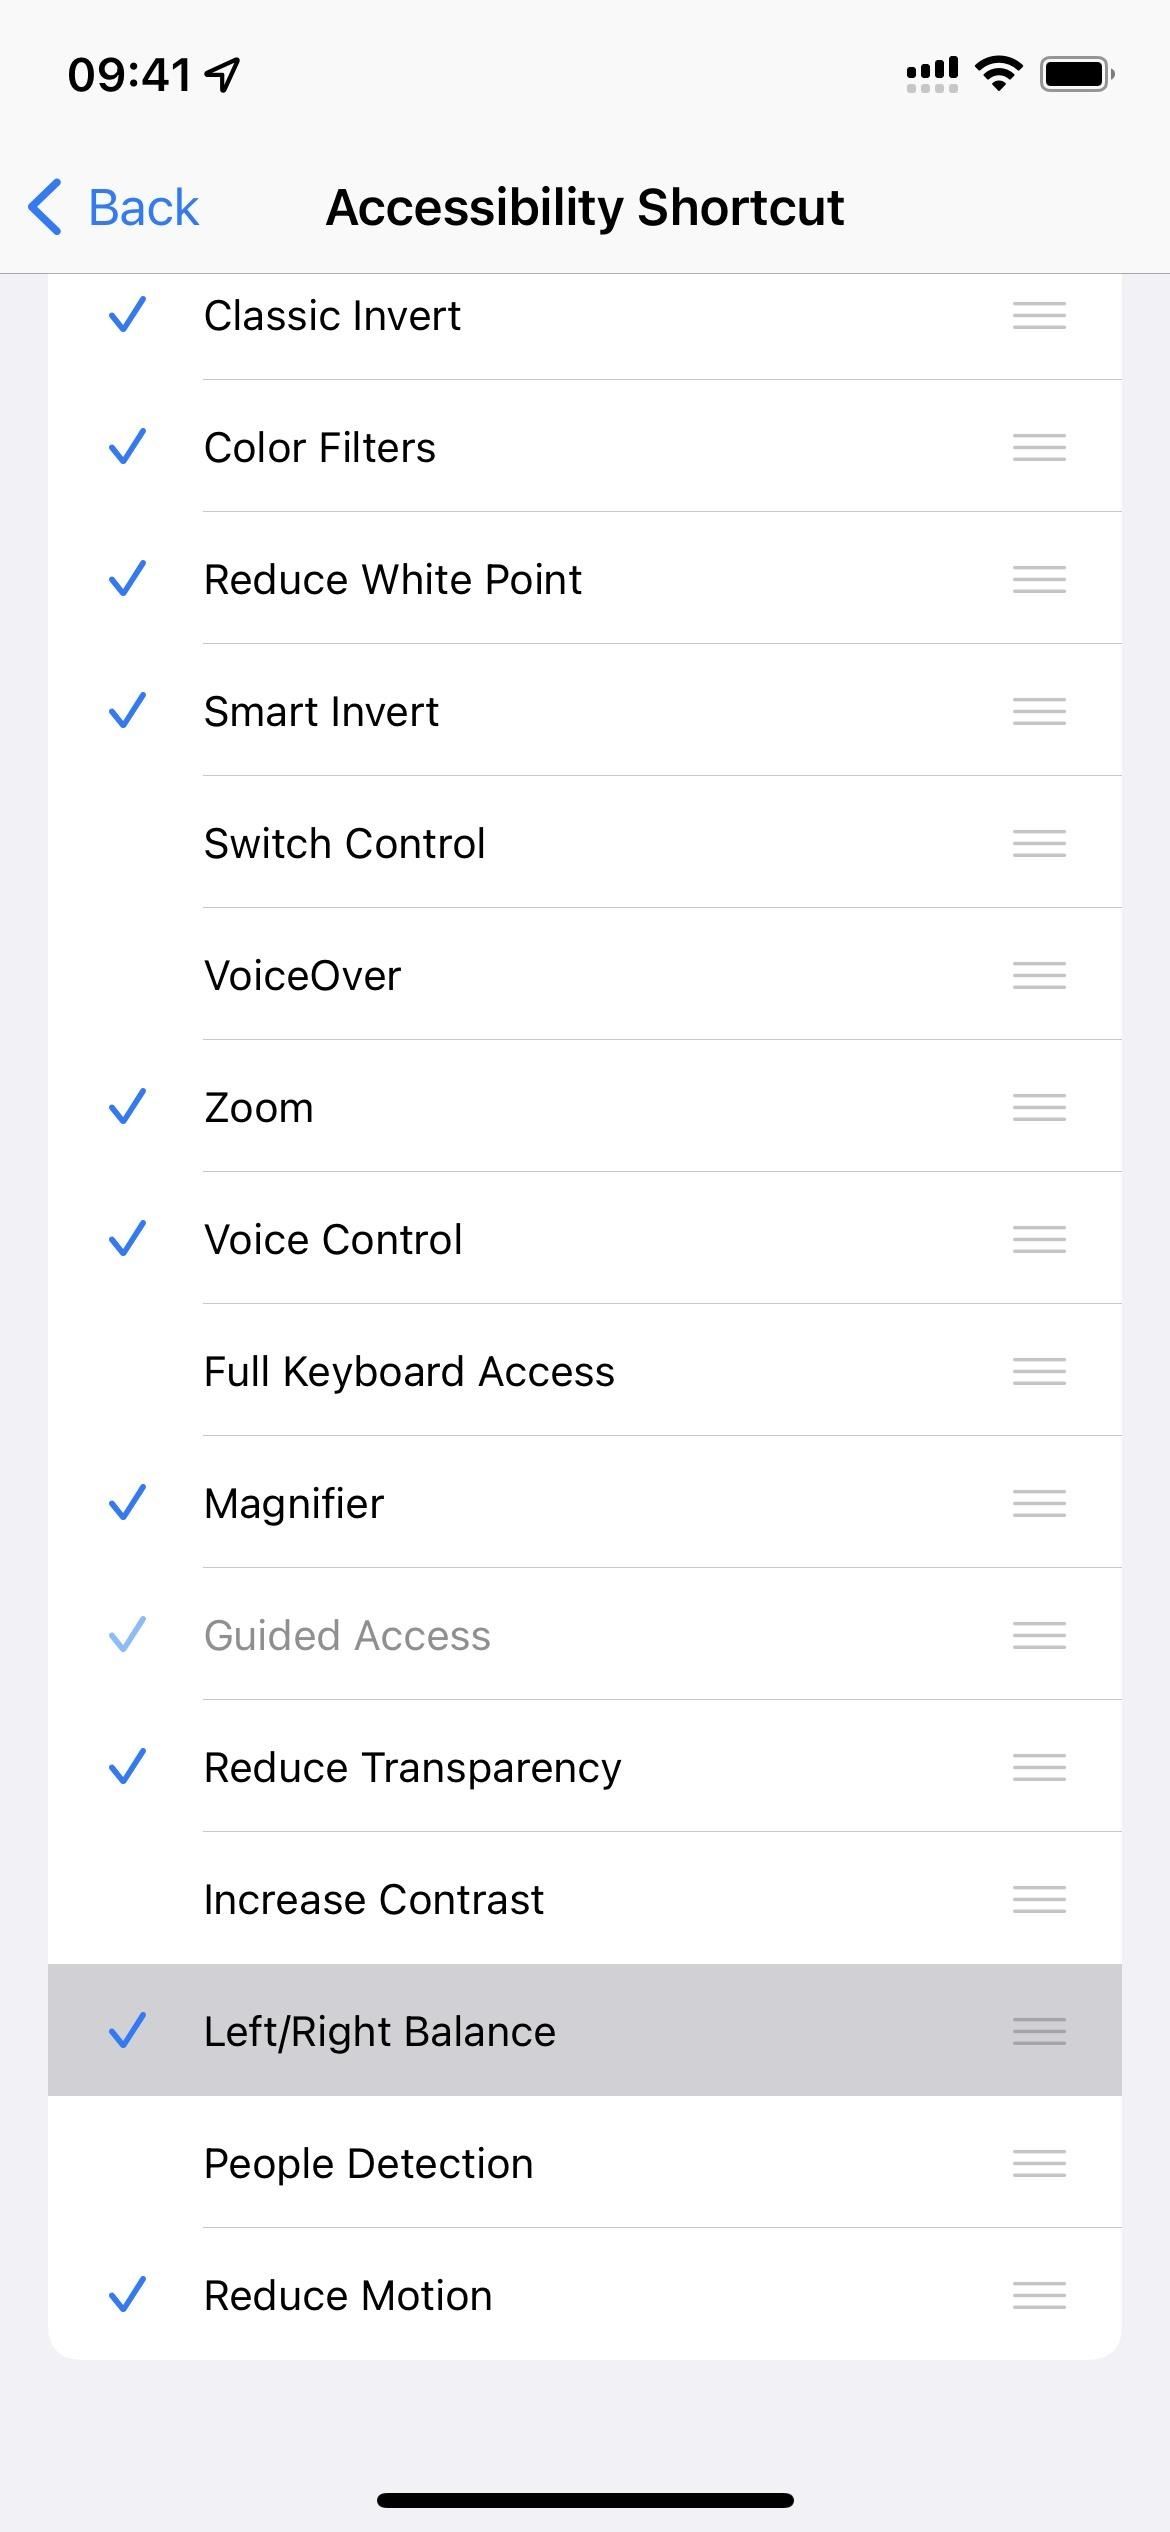
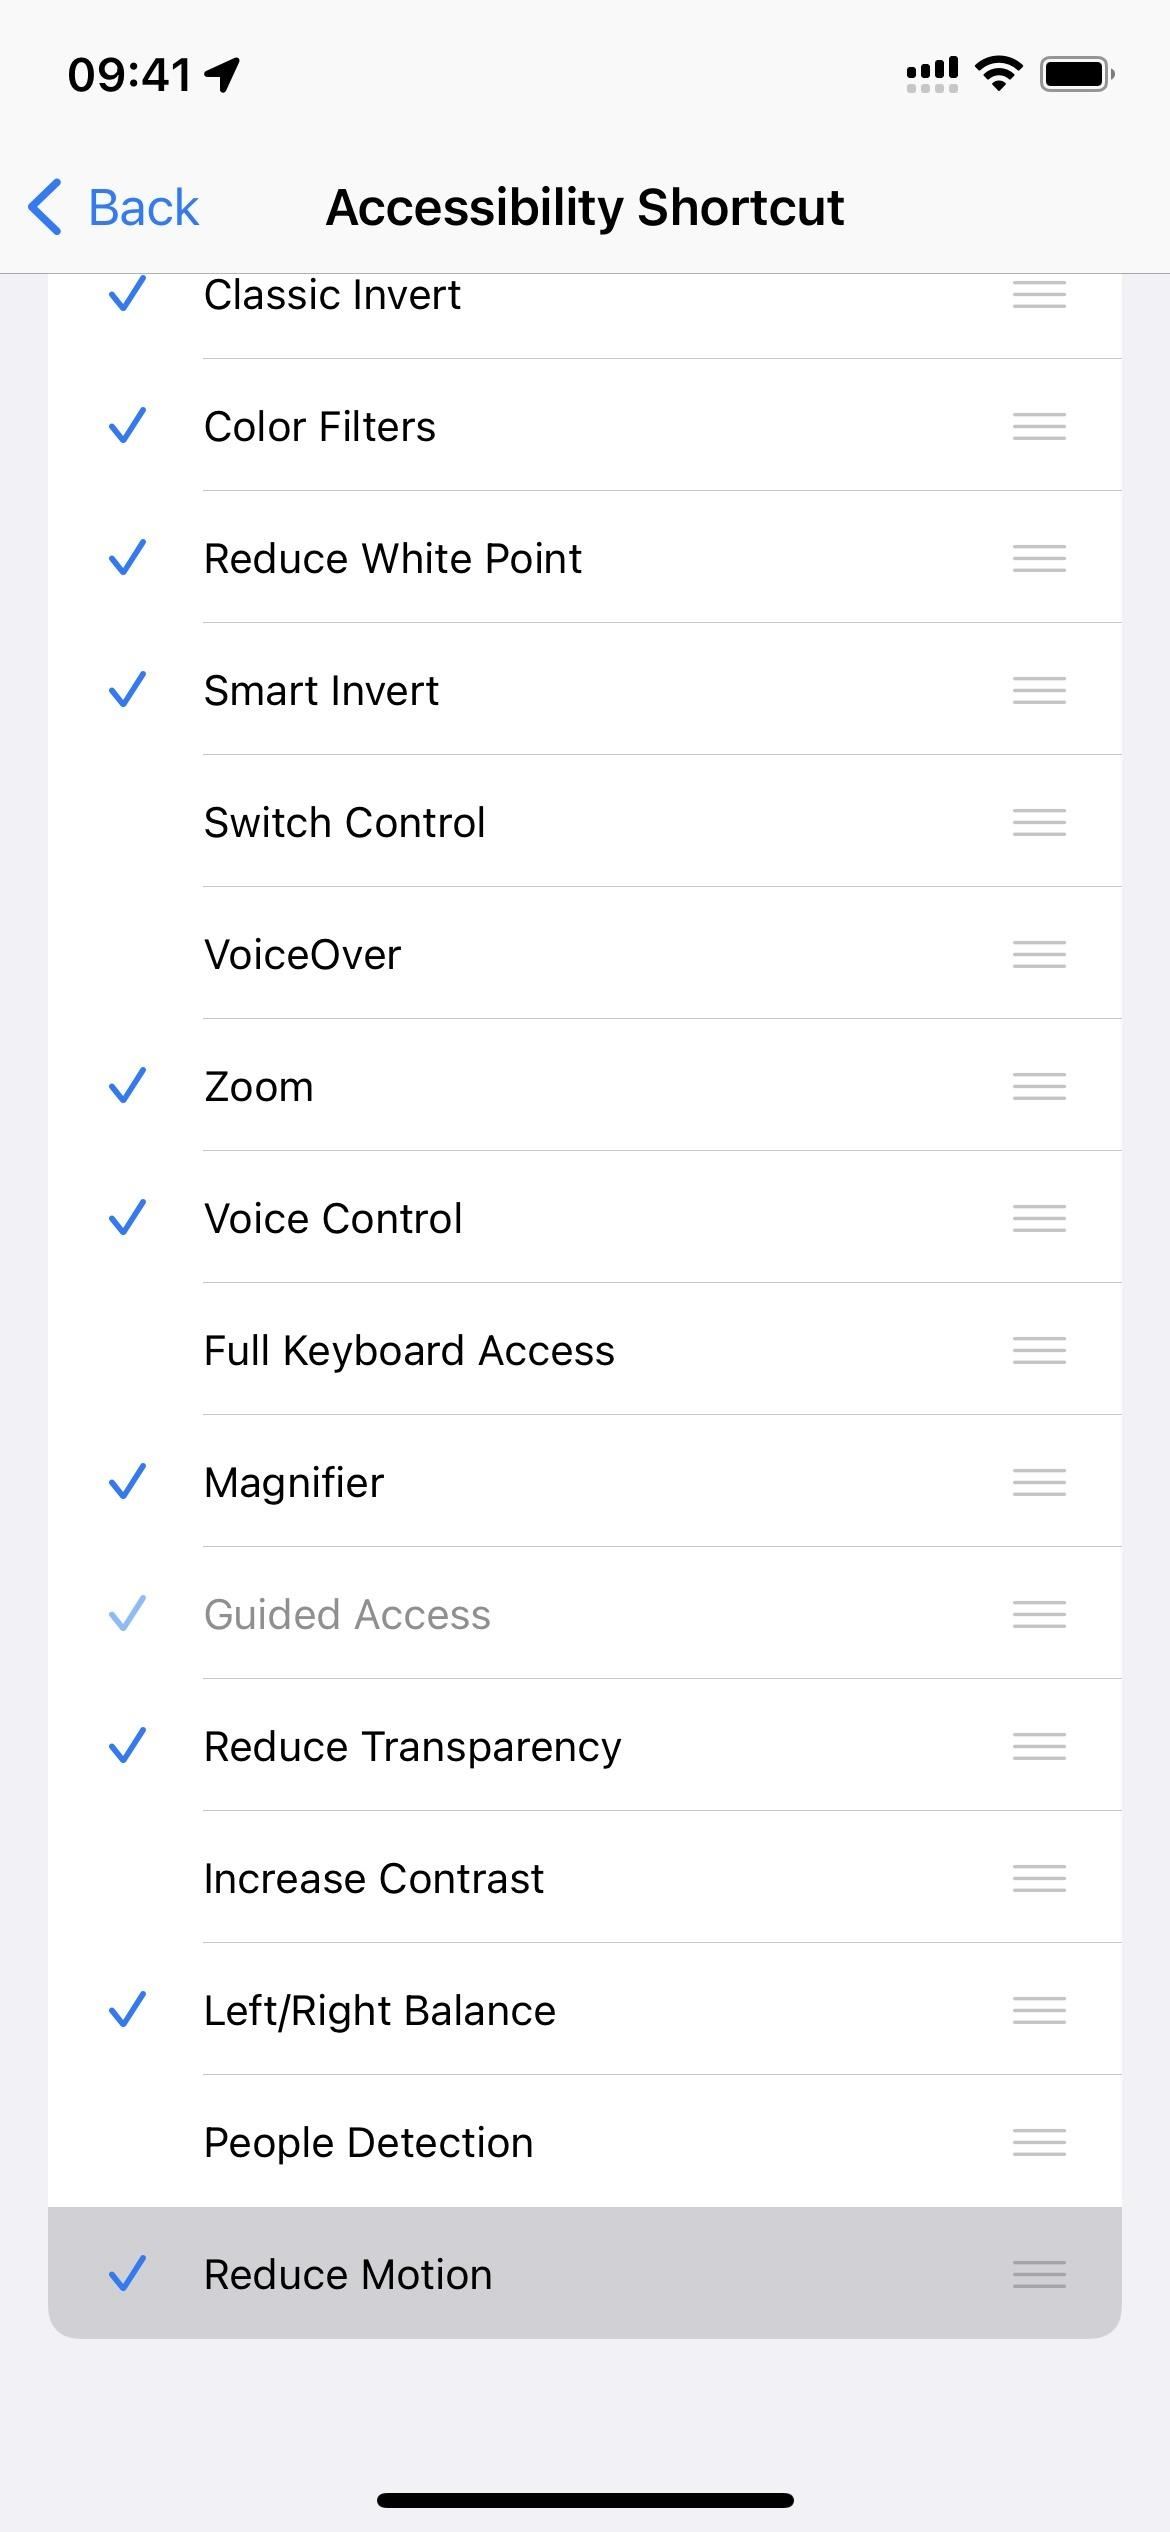
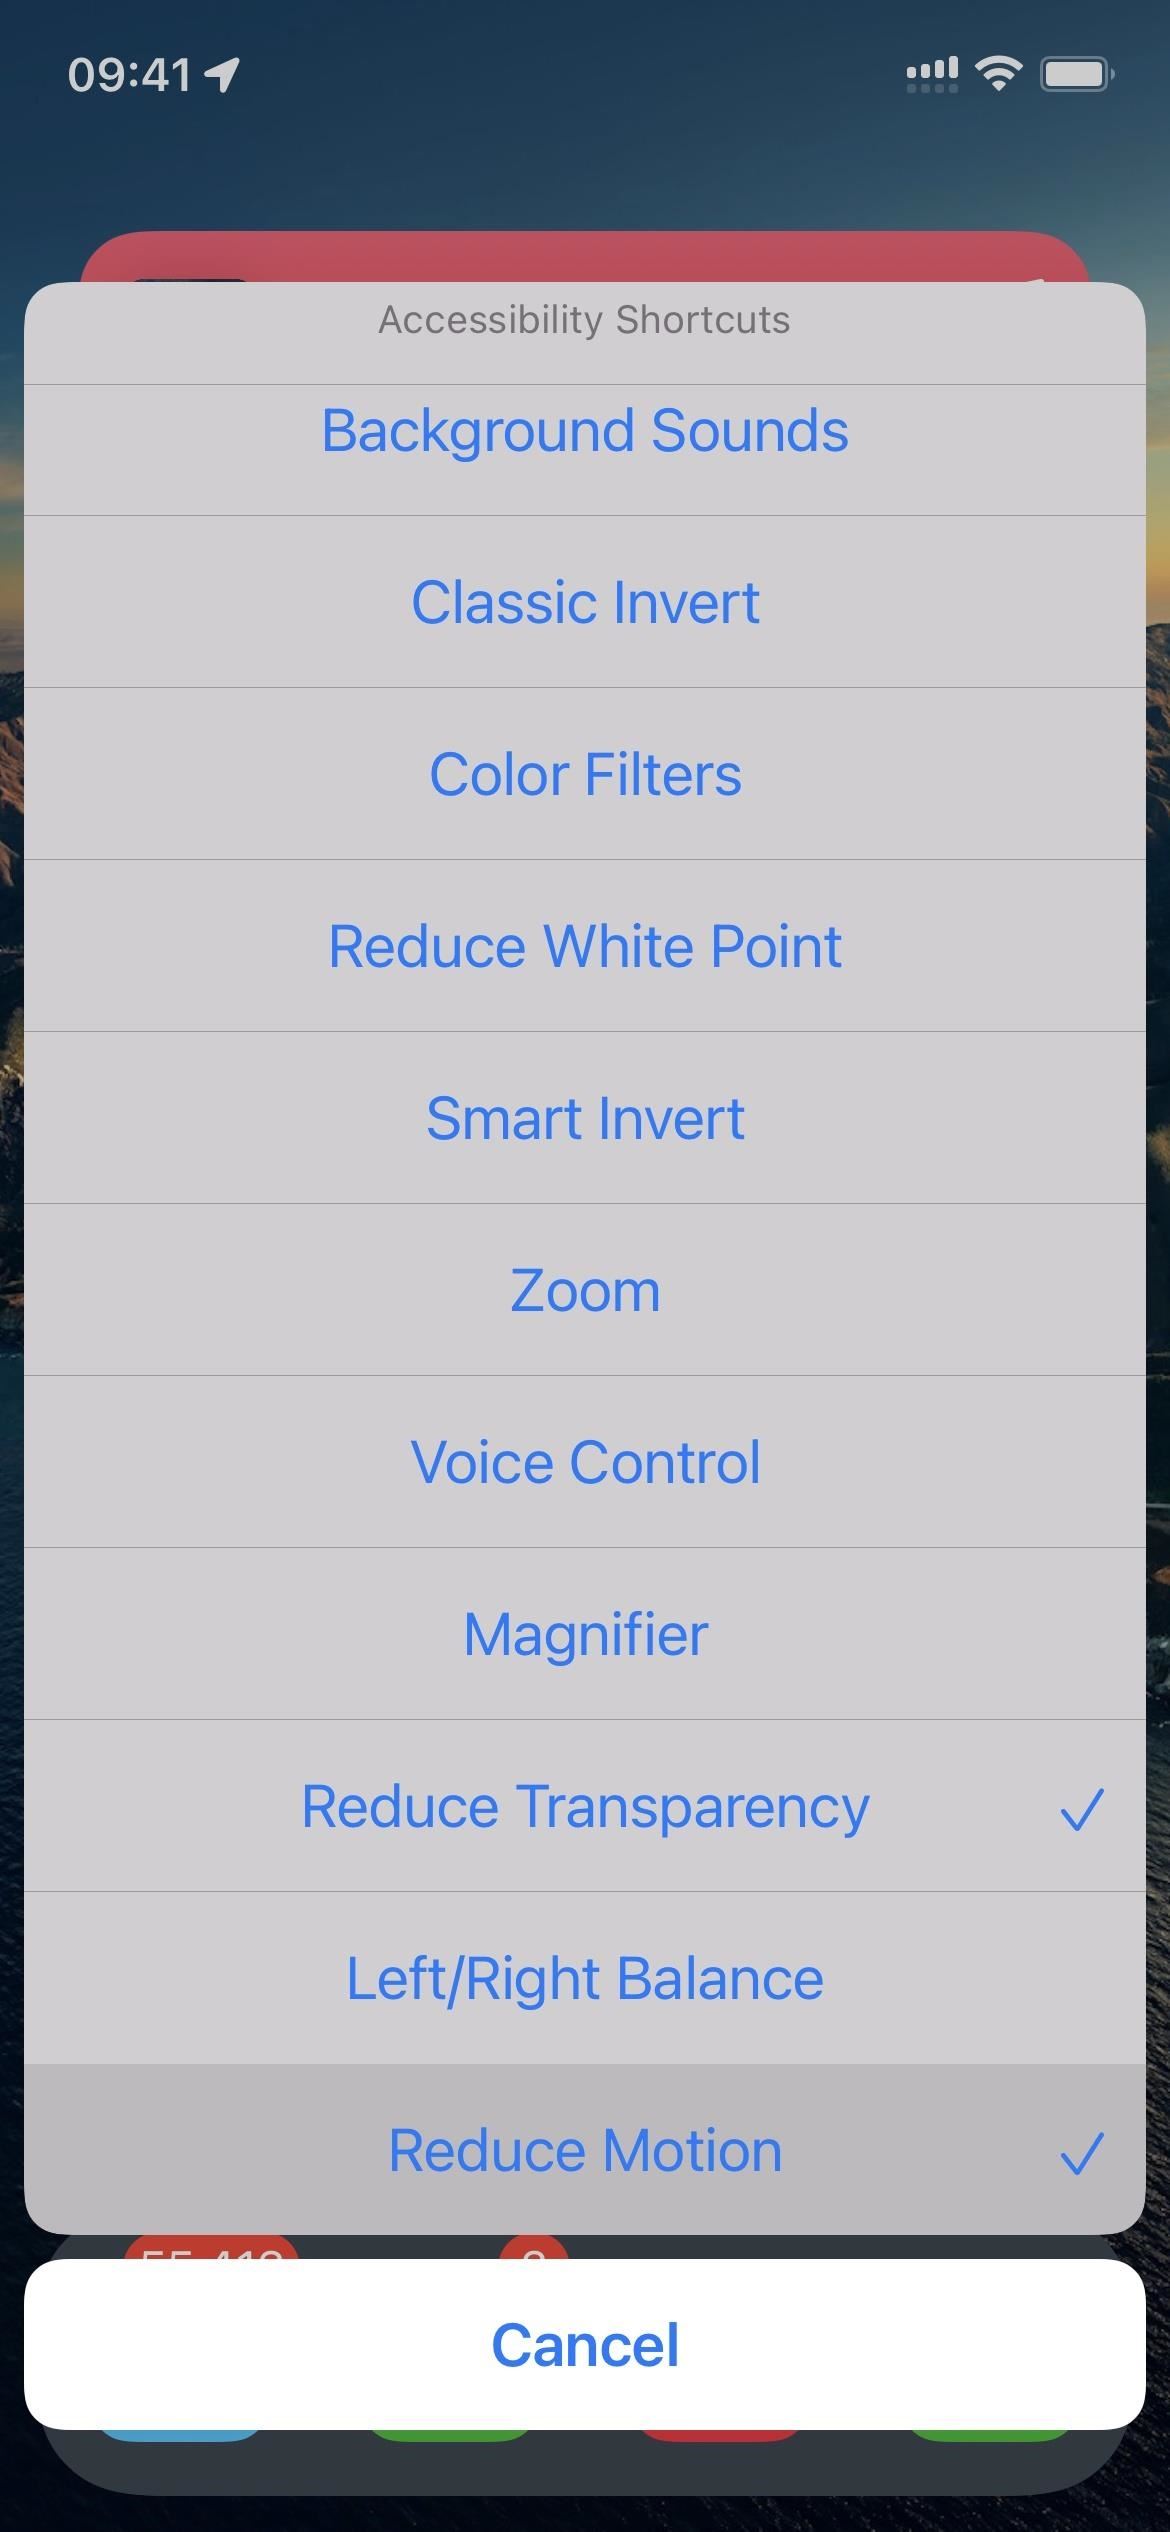
First, in case you didn’t already know, Accessibility Shortcut allows you to triple-click your hand or the Home button on your iPhone to toggle your selected accessibility options on and off. It’s better than having to delve into the Settings app every time you want to access a certain feature, and you can customize it via Settings -> Accessibility -> Accessibility Shortcut.
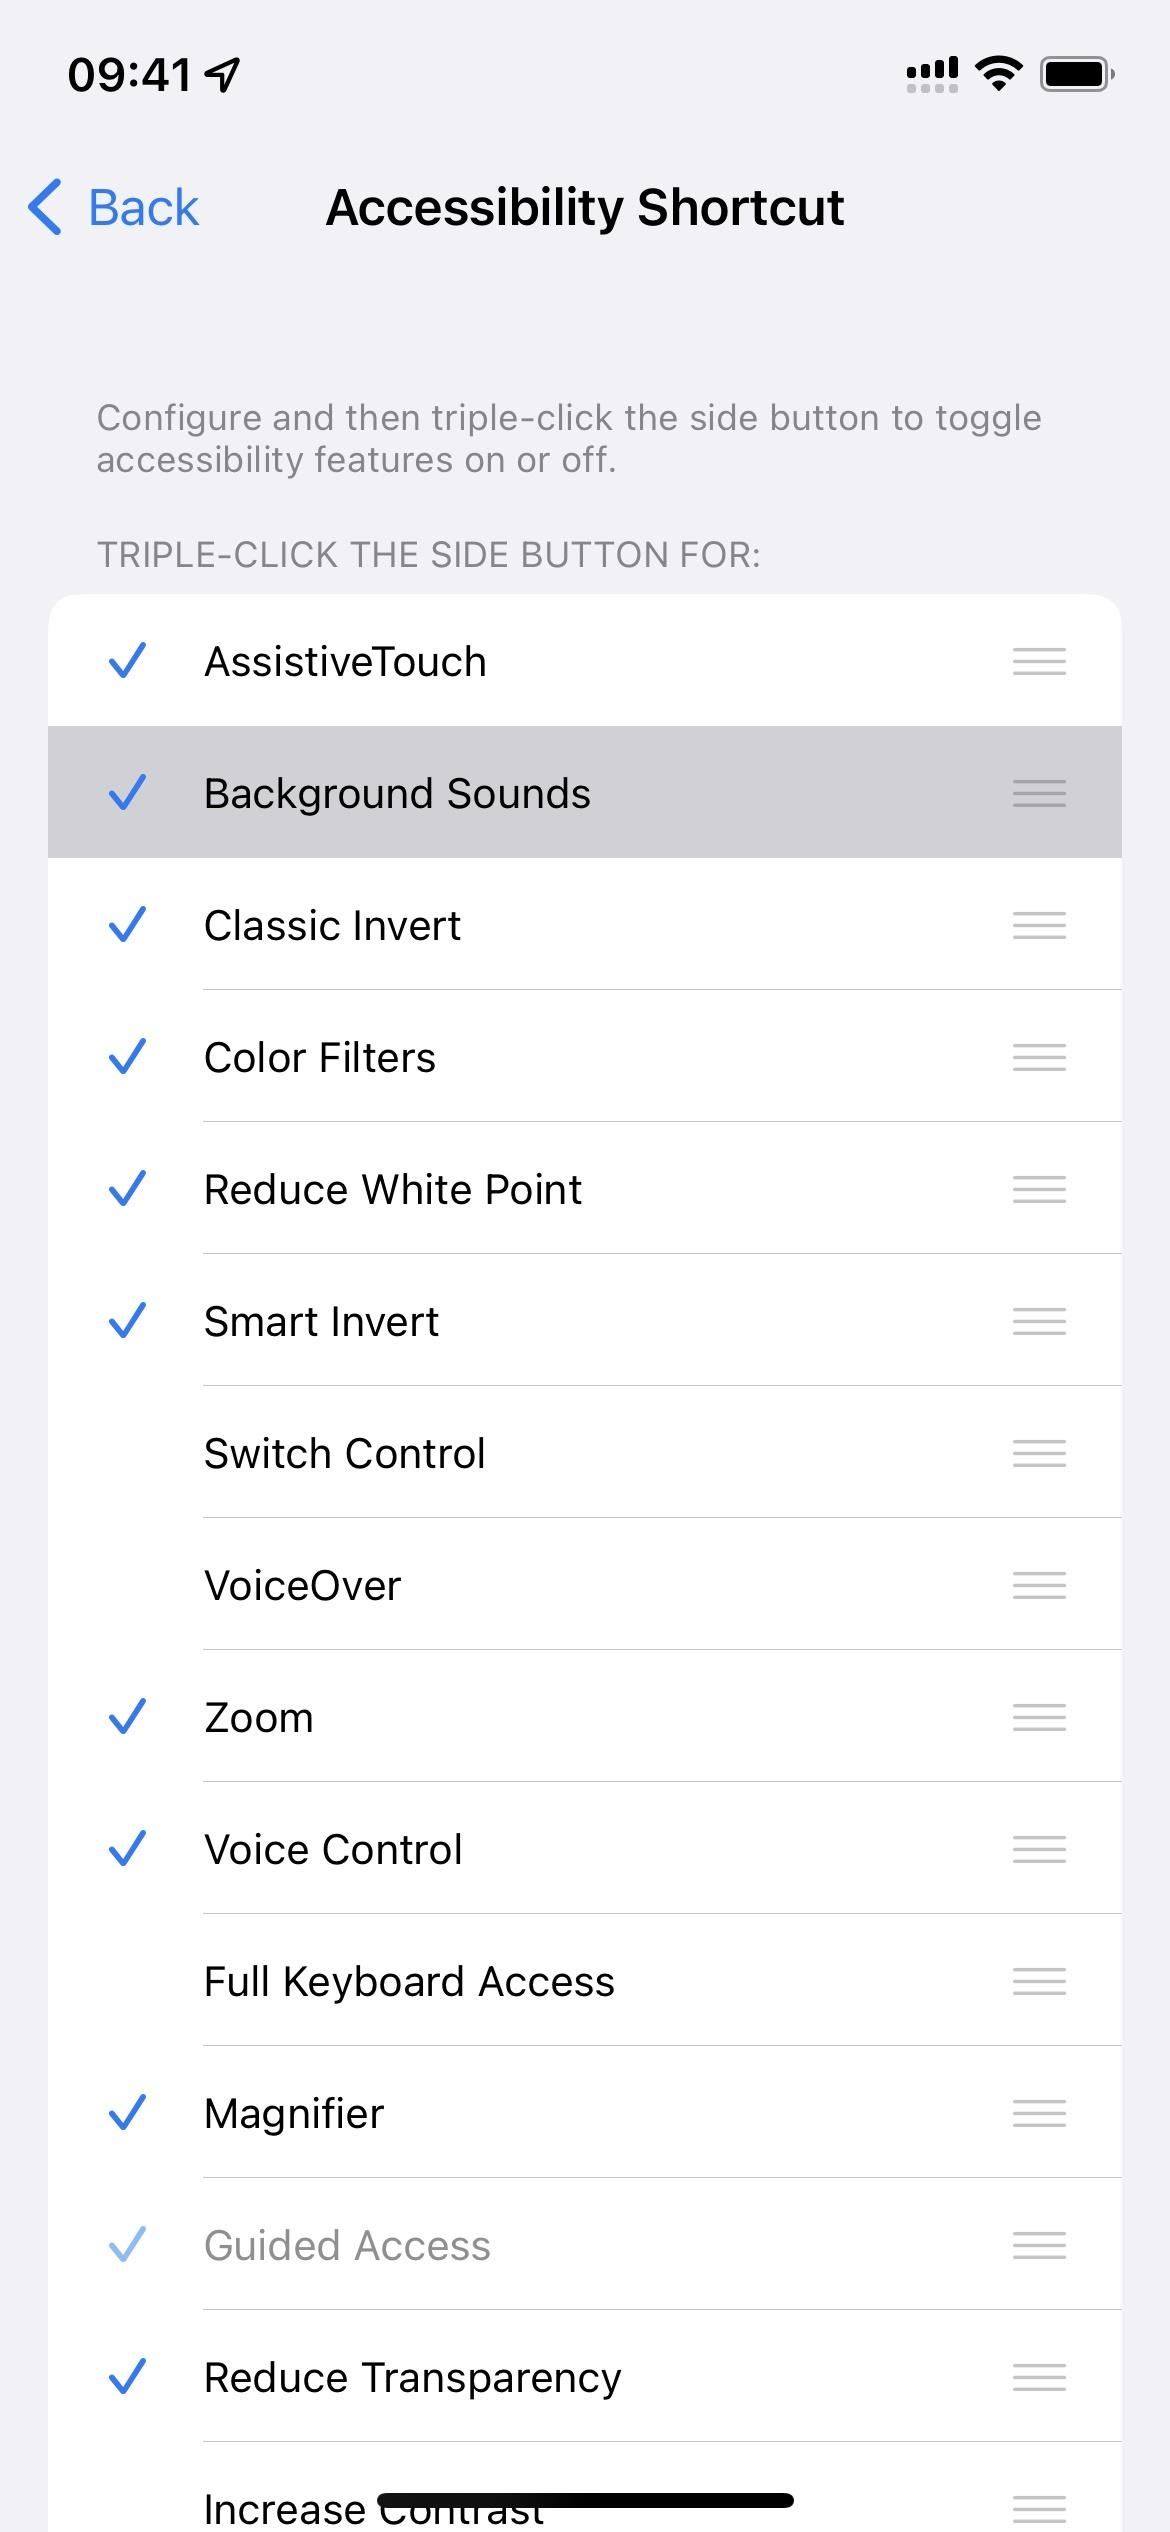
The accessibility return options you can choose for an accessibility shortcut include all of the following:
- AssistiveTouch
- Classic invert
- Color filters
- Reduce white point
- Smart Invert
- control switch
- VoiceOver
- Increase
- Voice control
- Full keyboard access
- magnifying glass
- Managed Access
- Reduce transparency
- increase the contrast
But there are three new ones for iOS 15 as well as iPadOS 15 for iPad that you need to know about. My favorite is definitely the first one below.
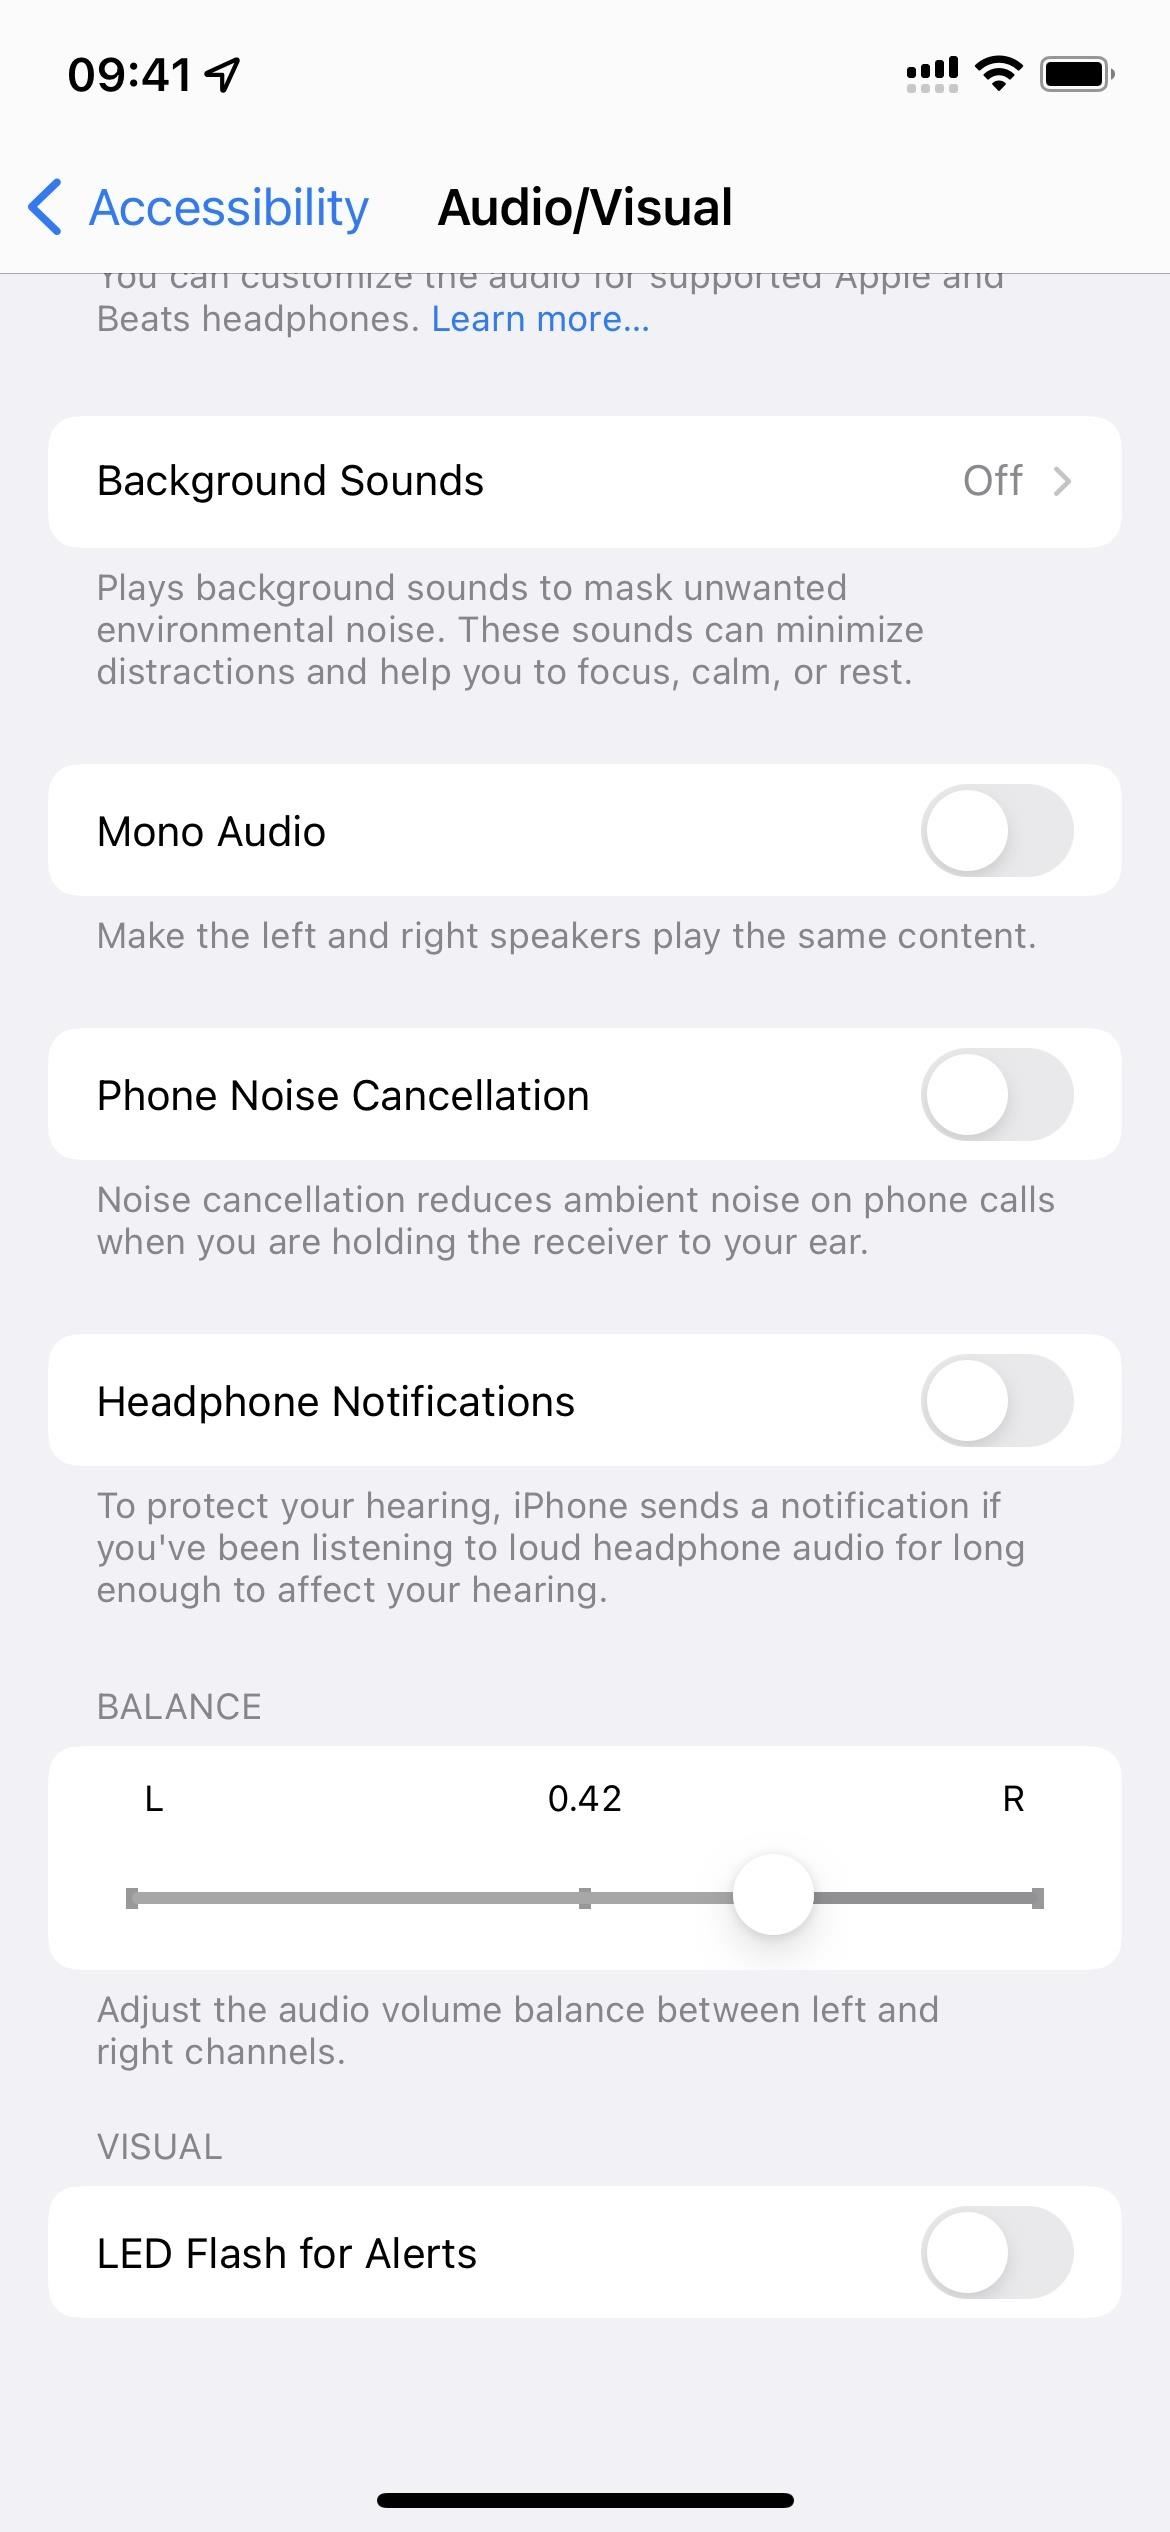
Background sounds
Background Sounds is a new feature that can play various background sounds to mask unwanted environmental noises such as construction work, a loud neighbor, or a noisy animal. It can even distract you from your snoring partner in bed by acting as your personal sound machine.
The tool can help you focus, stay calm, and relax while minimizing distractions and outside noise with a variety of sounds to choose from, including balanced noise, bright noise, dark noise, ocean, rain, and stream. And it won’t mask any other sounds your iPhone or iPad makes because “sounds are mixed or drowned out by other audio and system sounds when you use your device.”
Instead of going to Settings -> Accessibility -> Audio/Video -> Background Sounds every time you want to turn it on, the Accessibility shortcut makes it easy to access it from anywhere on your device.
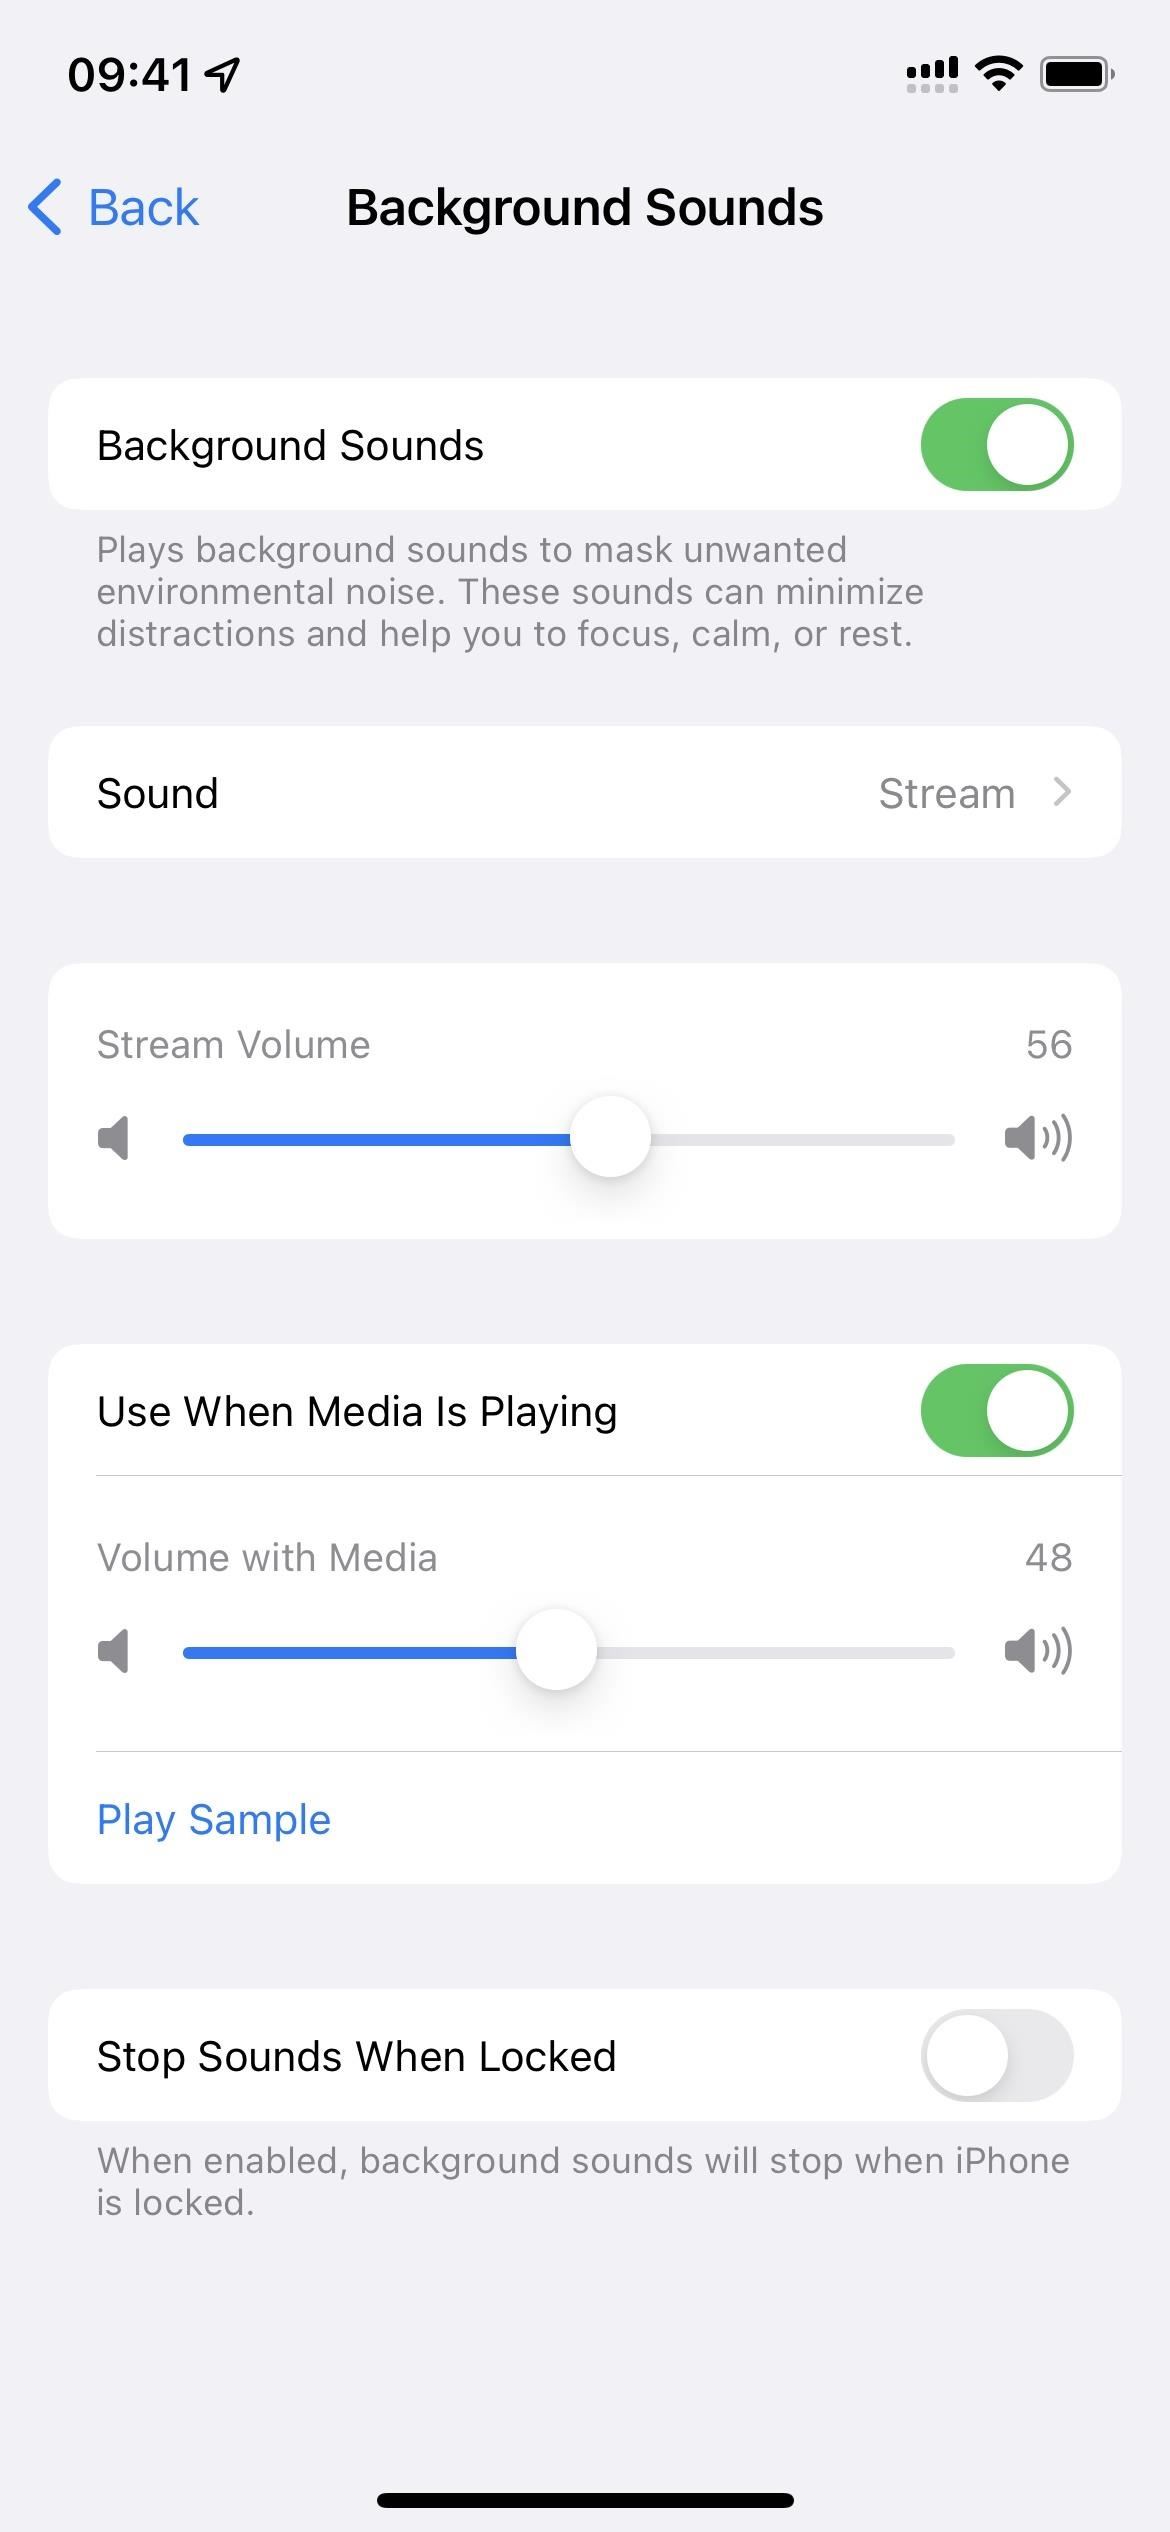
You can also toggle background sounds from the Control Center using the hearing control, but sometimes it’s faster to use the accessibility shortcut. If you need to adjust the volume or sound, the hearing control comes in handy.
Left / Right balance
This new shortcut switches to your individual sound balance. In Settings -> Accessibility -> Audio/Video -> Balance, your default configuration is where you set the slider. Enable the Left/Right Balance shortcut and you can drag the slider to the left or right channel and it will remember it.
Disable the “Balance Left/Right”shortcut and it will revert to default balance. Turn it back on and it will rebalance the sound to suit your individual settings. This is most useful when you frequently switch between two different audio sources (such as music, a phone call, or a TV show).
Adjusting the balance helps people with hearing loss in one ear so they don’t damage their good ear when turning up the volume. It’s also good for everyone when dealing with unbalanced audio; try it the next time you watch a Christopher Nolan movie where the dialogue is fuzzy due to heavy sound effects. You can also use the balance tool to isolate the left or right channel when needed.
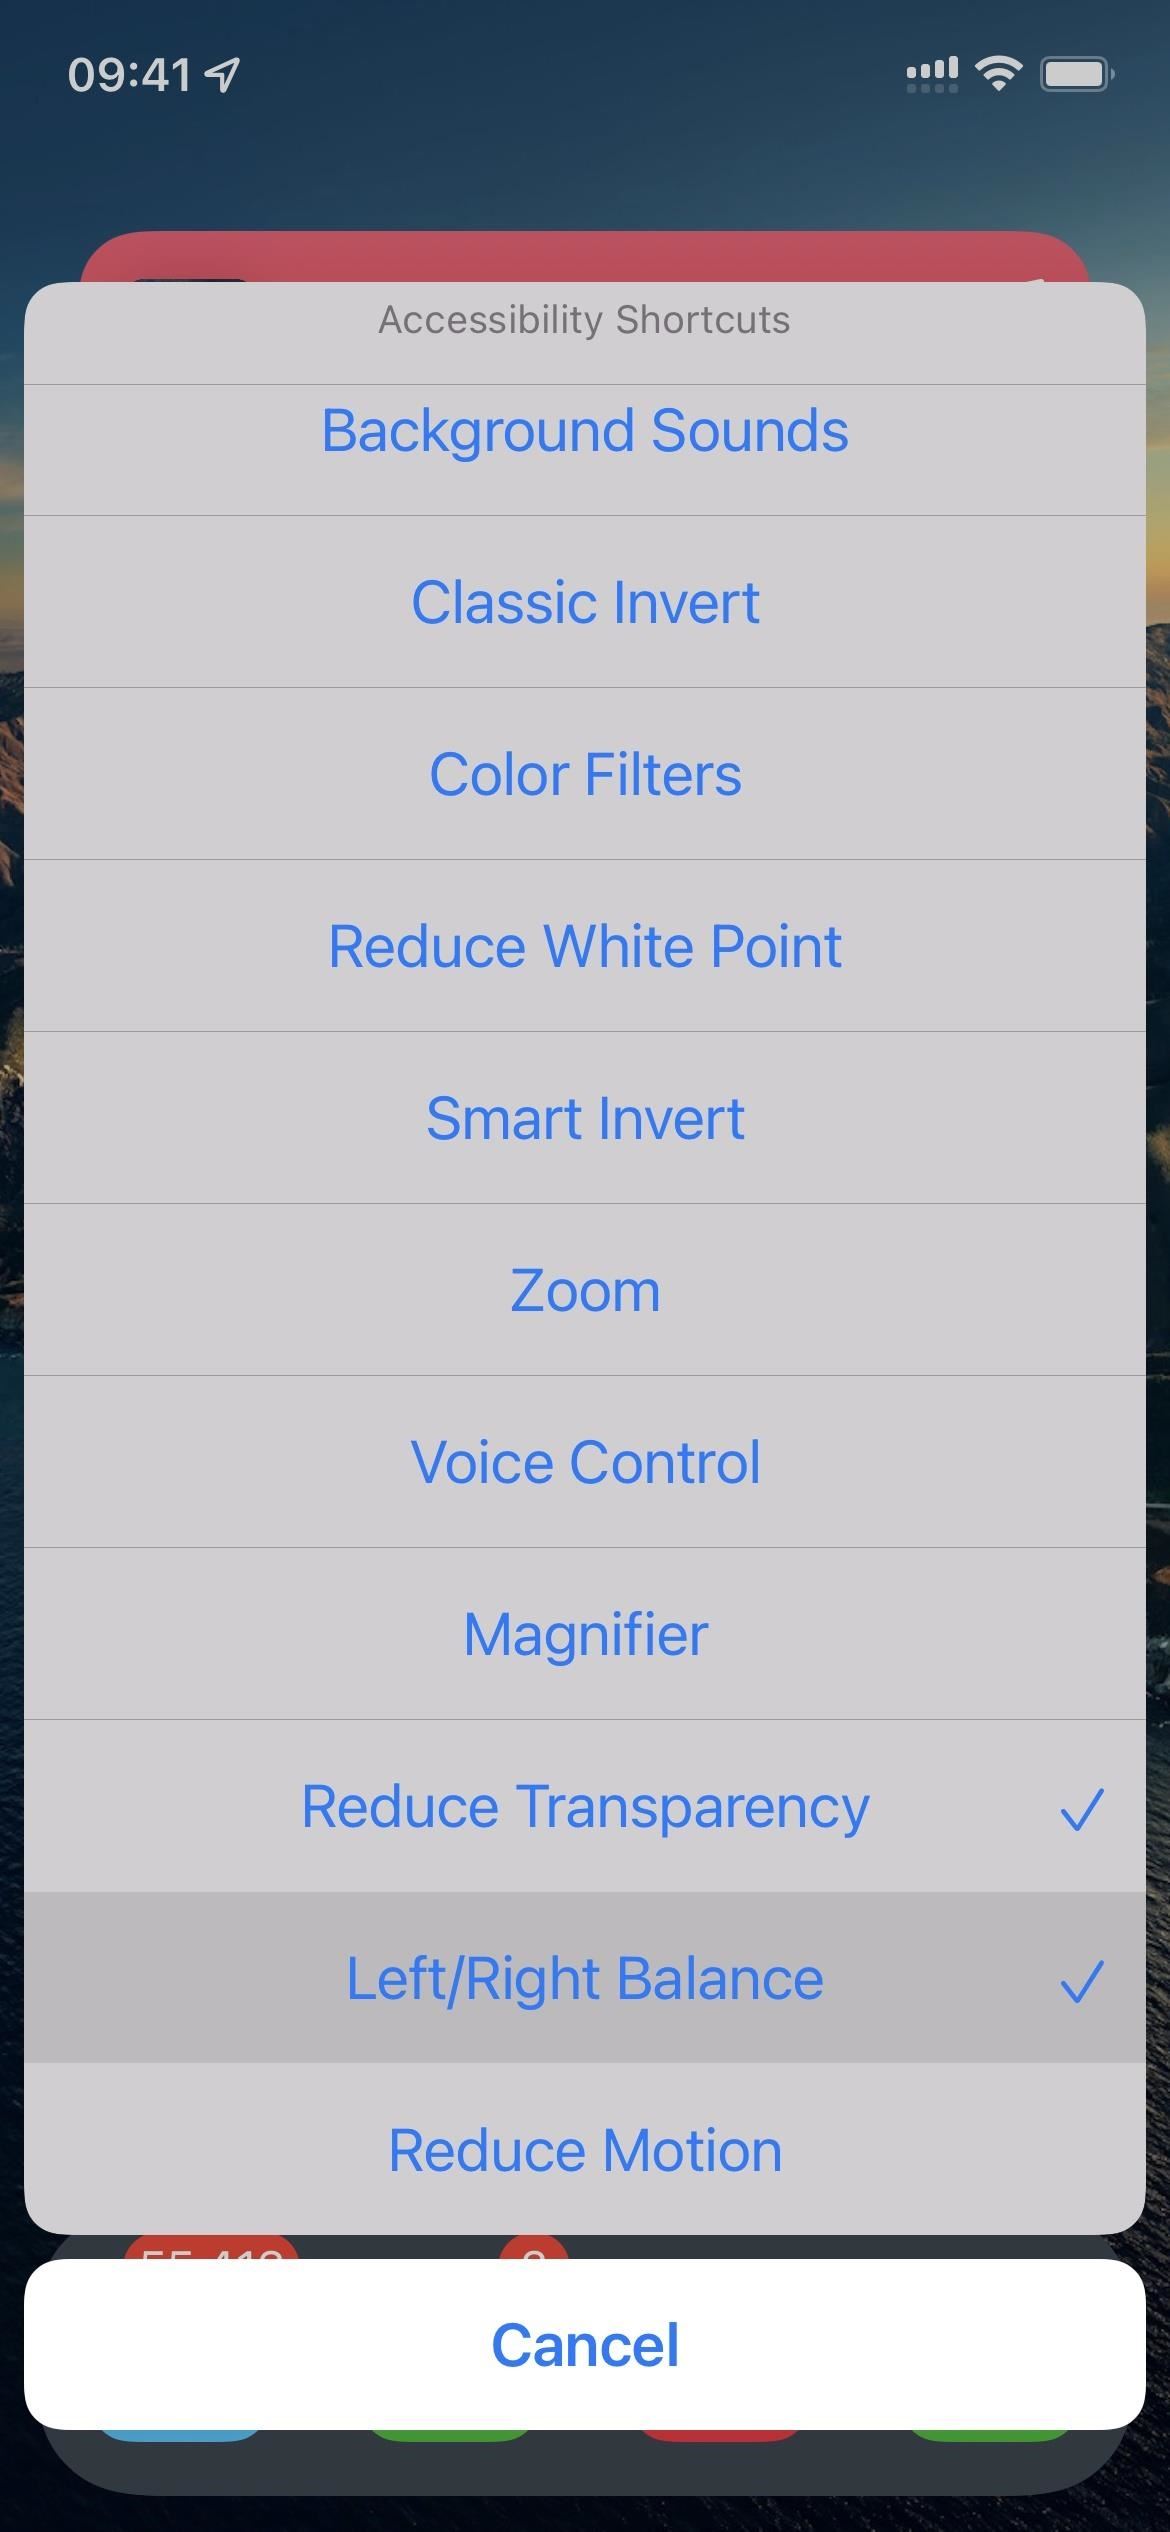
Reduce movement
The Reduce Motion option has been available in iOS since 2013, and enabling it disables the parallax effect (defined below) and other on-screen motion effects. Some of these include weather animations in the Weather app, zoom and slide effects for screen transitions, bubble and full screen effects in Messages, and most in-app animations.
The parallax effect moves your home screen wallpaper (if you installed it with perspective scaling enabled) and interface elements based on motion data provided by the accelerometer and/or gyroscope. The background moves much faster than the top layer of home screen icons, widgets, alerts, notifications, page dots, and the dock, creating a three-dimensional illusion of depth and space.
When you turn it on, Reduce Motion affects everything on your iPhone, but in iOS 15, you can adjust the Reduce Motion settings on a per-app basis. Thus, if you enable Reduce Motion for the entire system, but don’t want it to work in certain applications, you can set it up that way.
Due to the new per-app accessibility settings, Apple has added “Reduce Motion”as an option for the accessibility shortcut to make it easier to toggle instead of going to Settings -> Accessibility -> Motion -> “Reduce motion”.
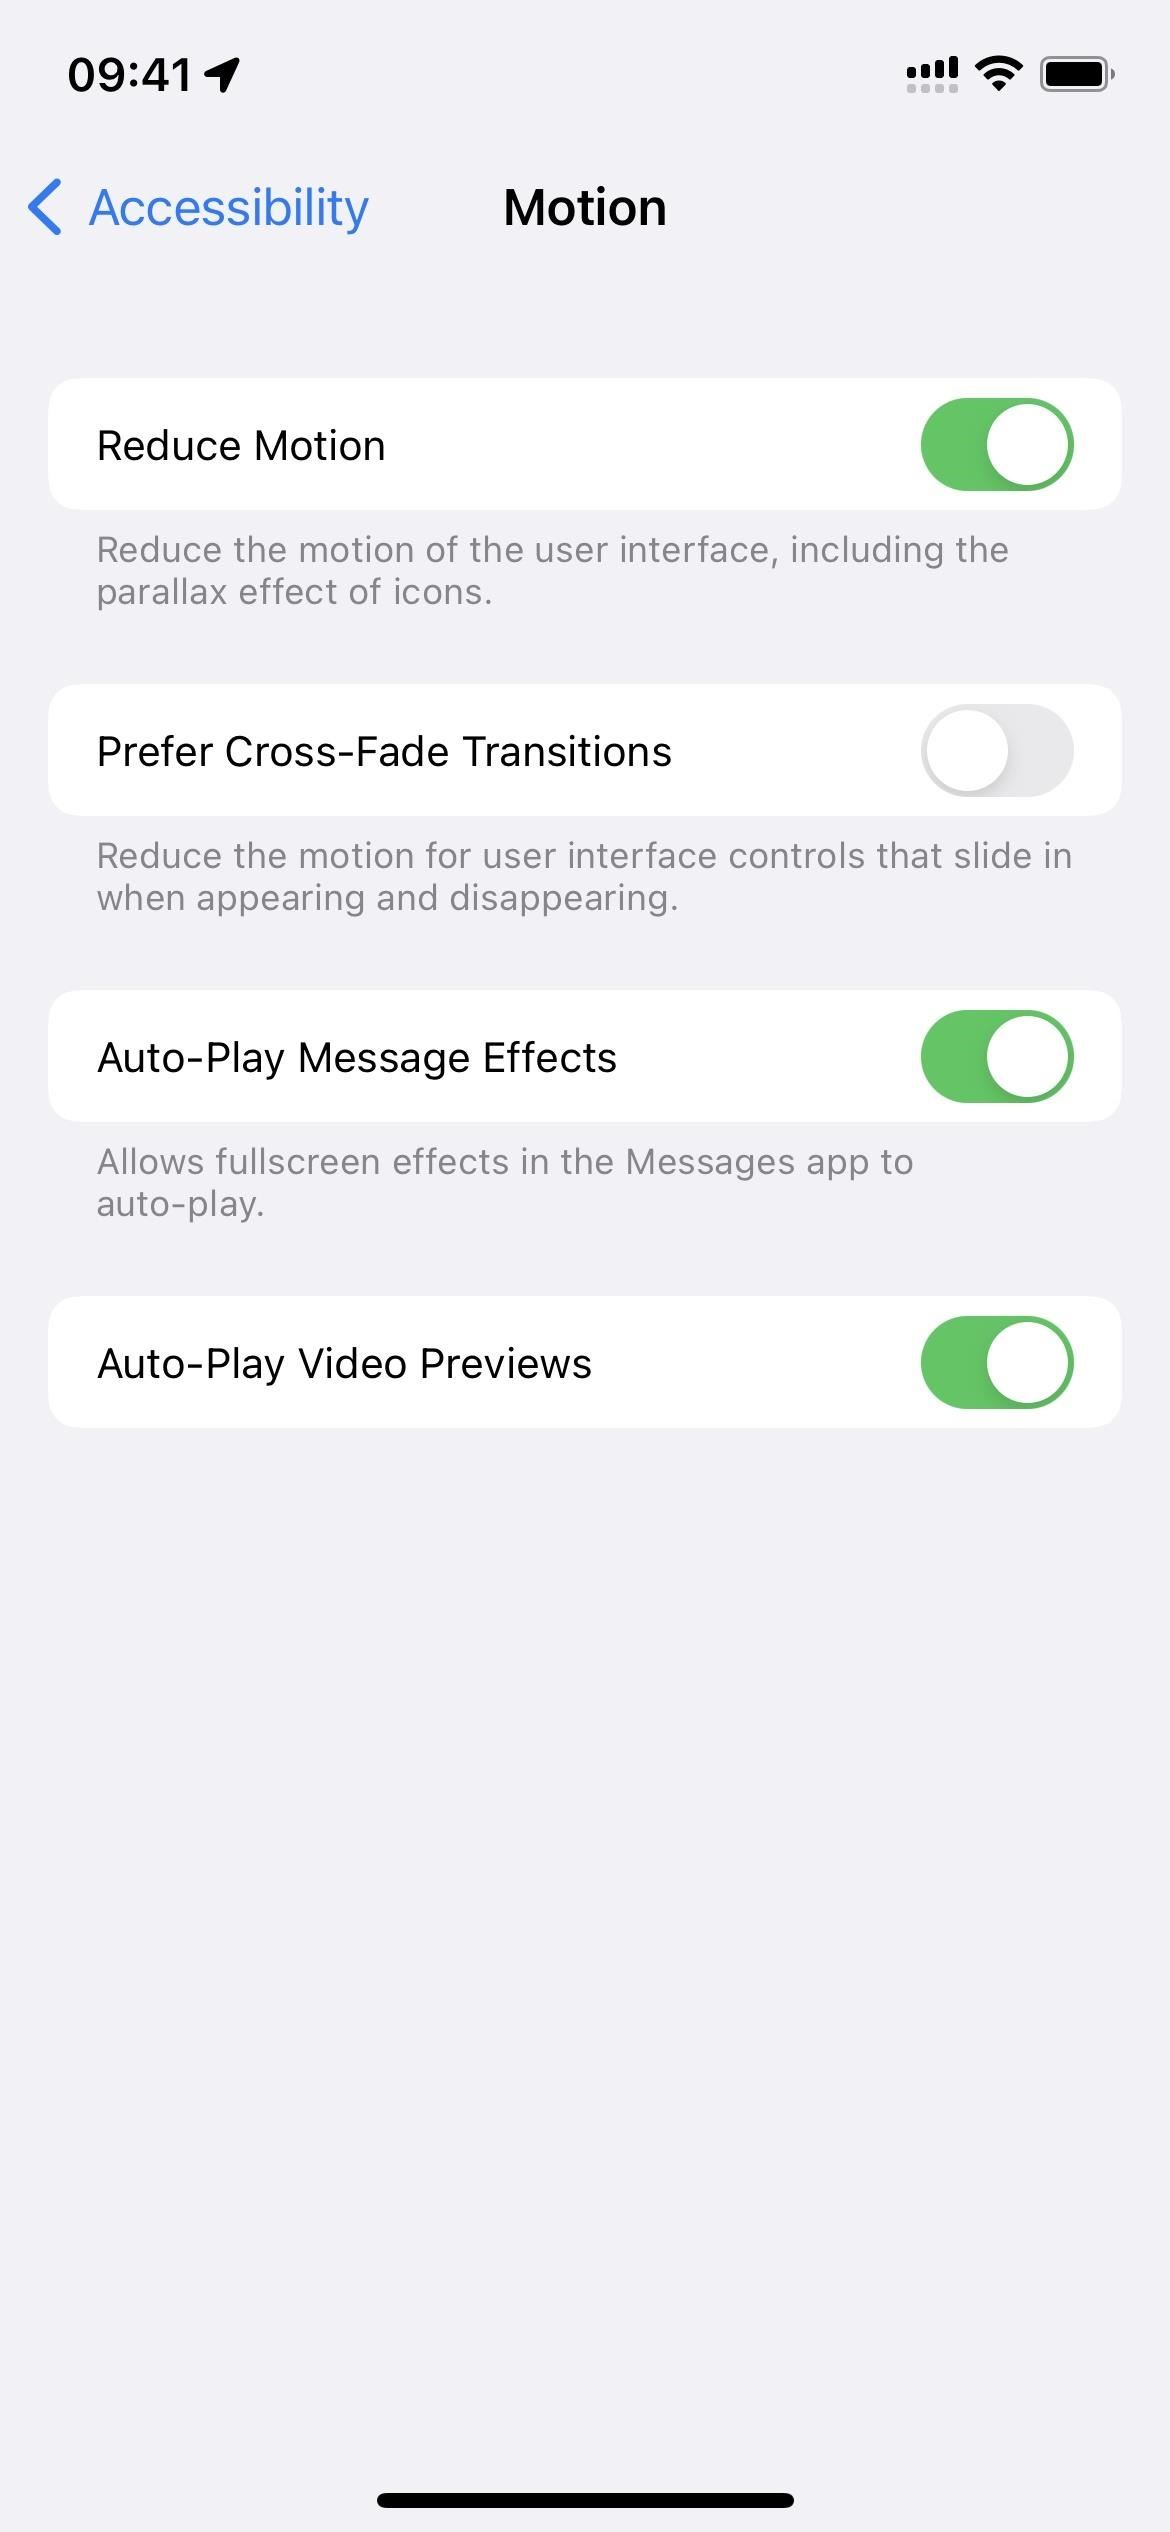
The new “Reduce Motion”shortcut also has a hidden benefit: Turning it on or off will keep your preference for “Prefer Smooth Transitions”. If you go to Settings -> Accessibility -> Motion -> Reduce Motion, turn it on and then turn on “Prefer smooth transitions”whenever you also turn off Reduce Motion ”, he will not remember that you like the cross. – Dims when turned on directly. If you prefer crossfades, enable it in the settings and then only toggle “Reduce Motion”via the shortcut.
Leave a Reply