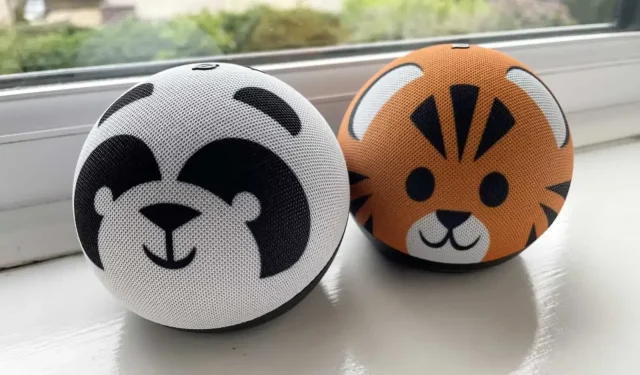
How to set parental controls on connected speakers

If connected speakers are very useful in everyday life with children, the use of these devices should be somewhat limited. Here’s how to set up parental controls.
If you have one or more speakers connected and kids, you know they have no problem using these devices asking Alexa, Siri or Google Assistant for this or that as if it were second nature to them. And even if your dear darlings know more about the subject than you do, it is not at all necessary that they have access to this or that information, whether it be inappropriate music or your schedule. This is where parental controls come in. Here’s how to set it up.
Google Nest
If you have a Google Nest (formerly Google Home) speaker, you have a few options to narrow things down for your kids. Open the Google Home app on your phone, then tap Settings and Digital Wellbeing. There you can set filters and time range for your columns. Filters support music, podcasts, news, calls and messages. You can also restrict the attachment to “family activities”.
You can find additional settings by selecting your Nest speaker from the first page of the Google Home app and then tapping the gear icon in the top right corner of the screen. Select Notifications and Digital Wellbeing and you’ll find the previous options as well as alerts, night mode, do not disturb mode, and more.
If you need advanced parental controls for your Google Nest speakers, you can create your own account for your kids and add them to a Google Family Link group. The speakers are smart enough to recognize your children’s voices and respond accordingly. In the Family Link app on your phone, select “Manage settings”, “Google Assistant”, and “Add child to new devices”.
Amazon Echo
Parental controls on Amazon Echo speakers are pretty self-explanatory – there’s even a version specifically for kids – and they choose settings in the Alexa app on your smartphone and in the Amazon Parents dashboard on the web.
In the Alexa app, tap Devices, Echo & Alexa, then select the appropriate speaker. Tap the gear icon to open the settings screen, scroll down and select Amazon Kids. Activate the feature. If you do not have a child account associated with your main Amazon account, you will be prompted to do so.
After that, tap “Amazon Kids Settings”on the same screen to control what your kids can do. These settings cover device time limits, content genre, and more. Click on the Echo speaker to set up that particular device: you can enable an explicit filter for music and enable or disable communication features such as calling and messaging.
Log in to your Amazon Family web interface and you can find all the settings available on your smartphone and some additional features. The echo you have specified as available for your child can also be found here, and multiple children can be added to the same speaker.
Apple HomePod
If you have a HomePod or HomePod Mini, parental controls are out of the question, but you can set the speaker to be child-friendly. On iPhone, iPad, or Mac, find HomePod or HomePod Mini in the Home app, then tap or click its icon.
Then click or tap on the gear icon at the bottom right corner of the screen to access your HomePod or HomePod Mini settings. The first interesting item is called “Allow explicit content”, which you need to turn off if you do not want the kids to hear obscene words. Music and podcasts marked as “explicit”will not be played.
Next on the menu, tap or click on Personal Requests and turn off this option. Then your kids won’t be able to send messages, make calls, or create reminders using the Apple ID associated with the HomePod or HomePod Mini. You won’t be able to access it either, but that might be a good thing.
Depending on where the speaker is located and how you use it, you can also assign your child’s Apple ID if you’ve set up family sharing. You can change the Apple ID that HomePod or HomePod uses to manage music and podcasts by tapping Primary User in Settings and choosing someone in your family or shared HomePod account. This account is used only if Siri’s voice recognition cannot recognize the speaker.
Leave a Reply