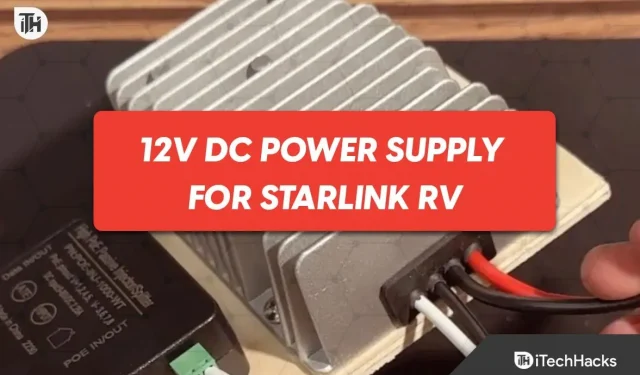
12V DC power supply for Starlink RV tutorial
Since its inception, Starlink has changed the face of the entire internet industry. In addition, it offers many more features and many plans for every taste. However, there are many digital nomads who live with Starlink RV. With the motorhome now in place, using Starlink could take its toll on the battery, if not the generator. That’s why many people want to know about the 12V DC power supply for Starlink RV. Here is our guide to help you do it in an easy to understand way.
How does Starlink work on 12V DC?
Starlink will work normally on 12V DC, just like normal household electricity, whether it’s 110V or 220V. Depending on your country of residence, you can have anything from 110V to 220V. We highly recommend that you follow this guide if you don’t want to use an inverter or something like that.
Batteries are generally used to power everything from RVs and vans to land-based drilling rigs and even self-contained cabins. However, efficiency is very important to make the most of the available energy.
The Starlink RV router itself can power the Starlink dish because it gets electricity from a standard wall outlet and changes it to 48V DC power for the dish. For home use, where AC is readily available from the mains, this is perfectly fine.
On the contrary, an inverter is required for AC power when using a stand-alone battery system. So in the router, DC will be converted to AC and then back to DC. Converting to AC a second time is inefficient and wastes energy.
How to Connect Starlink RV Internet with 12V DC Power Supply
Now that you know why DC is important during your off-grid travels, you can use a 12V DC source in your setup. Here are the necessary steps you need to take to power your Starlink RV with 12V DC. But first, let’s look at the prerequisites:
Prerequisites:
- Starlink Ethernet Adapter: This is a required component if you want to use a 12V DC source to power your Starlink. We have created a dedicated guide to help you purchase and set up a Starlink Ethernet cable.
- 48V DC to AC Converter: The Starlink dish runs on a 48V power supply. This DC/DC power supply accepts 12V or 24V from your battery. You can skip this product if your battery is already running at 48V.
- Wi-Fi Router: You cannot use the original Starlink router for 12V power supply. Instead, you will need to bypass your Starlink and use a third party router.
- Connection Connectors: These will be used to connect the POE injector and DC wire.
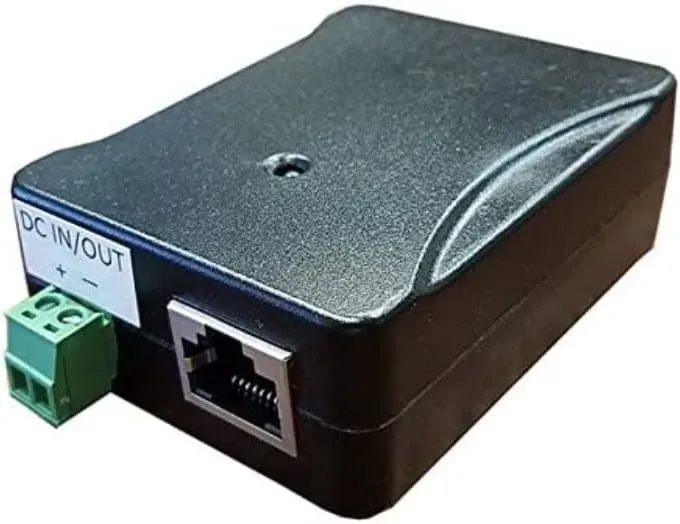
- POE Injector: 48V from the DC power supply will be passed to the Starlink dish via POE. POE stands for Power over Ethernet. Both the satellite modem and the wireless router can be connected to its two Ethernet ports.
- RJ45 crimping tool/cutting pliers: used for cutting wires. Regular pliers cannot be used.
- RJ45 connectors: used to connect the Ethernet ports and the router to the dish.
- Ethernet cable (preferably CAT 6): This will be used to connect the router to the POE injector, you will need an Ethernet patch cable. One is usually included with the router. Make sure the cable is CAT 6 compatible due to high speed internet.
Once you have all the components, you are ready to start.
Step 1: Starlink Adapter Modification
Once you have collected all the materials needed for the transformation task, you are ready to begin. So, first we need to replace the Starlink connector on the Ethernet adapter, which is proprietary, with a shielded RJ45 connector. This modification will allow the dish to be powered by our own power source and not by the Starlink router.
If you choose to skip the ethernet adapter and change the Starlink cable directly, the process remains the same. We recommend not cutting the Starlink cable to avoid warranty issues.
Starlink uses a POE (Power over Ethernet) pinout that is different from the standard POE pinout. However, this problem can be easily solved by adjusting the wiring of our RJ45 connectors, which is different from the T-568B standard traditionally used for terminating RJ45 connectors.
Step 2: Prepare the cables
Using wire cutters, disconnect the Starlink router connector from the Ethernet adapter (or Starlink cable). Then remove approximately 2 inches of insulation to expose the conductors and shield. Most crimping tools have a wire stripping blade specifically designed for this task.
Peel back the protective film and fold it down over the cable; we’ll deal with that later. Find the ground wire, that is, the bare conductor, and temporarily bend it to the side. This leaves us with 8 twisted pairs, for a total of 16 wires. Four pairs have a larger wire, and the other 4 smaller ones. Discard smaller pairs as they are not needed.
Unwind all 4 pairs and straighten each of the 8 wires as best you can. Hold the cable in your left hand with the wires pointing to the right. Arrange the wires in the order shown in the pinout above.
Once they are in the correct order, use your left thumb and forefinger to flatten and straighten them, making sure they fit snugly together and in the correct order.
Step 3: Installing the RJ45 Connector
Continue to hold the wires with your left thumb and forefinger, making sure that all 8 wires are in the correct order, flattened and straightened out. Using wire cutters, make flush cuts on all wires, removing about half an inch. This leaves you with a clean, straight finish.
Take the RJ45 connector and insert it into the wires, making sure the tab side is facing down after inserting the connector, make sure the wires are still in the correct order. When you hold the cable in your left hand, the order from top to bottom should be white/orange, orange, blue, white/green, green, white/blue, white/brown, and brown.
At this point, fold the foil and ground wire back along the cable. Slide the RJ45 connector back, making sure that as much of the cable jacket, foil, and ground wire as possible is inserted into the connector. Use a crimping tool to crimp the RJ45 connector to secure the cable. Trim any remaining excess wire, as well as the foil and drain wire protruding beyond the connector.
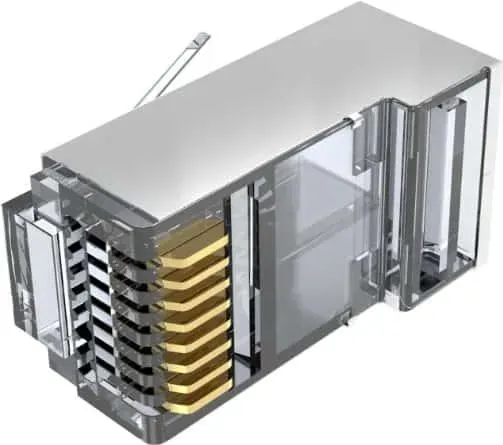
Step 4: Building a Power Supply for Starlink

Now you need to build a Starlink power supply. First, check the DC/DC converter wires. Input and output must be clearly marked on these cables. Place the voltage input wires in a safe place because you will need them to connect your battery system. Pay attention to the voltage output wires. White is positive, black is negative.
The DC input of the POE injector must be connected to the voltage output wires, with the white wire connected to the positive terminal and the black wire to the negative terminal. It may be necessary to remove about a quarter of an inch of insulation before securing the wire with a screwdriver. Make sure the polarity is correct by carefully checking it.
Connect the last two wires of the DC/DC converter to the battery system after the power supply phase of the project is completed. Find the best way to supply DC voltage to your Starlink DC power supply which depends on your use case. For example, in a motorhome, you can install a fuse box and connect the wires together. To avoid accidentally turning your project on too early, remove the fuse first.
Before touching the cables, you need to complete the setup and configuration of the router. To avoid problems in the future, it’s best to do the initial setup now. To properly configure your router, you should refer to the documentation provided by the manufacturer. If you want to test the power supply immediately after connecting it, set up a Wi-Fi name and password on the router.
Step 5: Prepare the Router’s Ethernet Cable
We are now nearing the end of this full customization. Now we need to connect the POE injector to the router. To do this, we need to change one end of the Ethernet cable. If you purchased an aftermarket router, it probably came with an ethernet cable that you can use. If not, you can easily find one at an electronics store or at home.
Similar to what we did before, but now we only need to change one end of the Ethernet cable to match the Starlink POE pinout. The pinout will be the same as the modified end of the Starlink cable. Unlike a shielded Starlink cable, an Ethernet cable will not have a foil or drain line conductor, but you can still use shielded RJ45 connectors.
Connect the end of the Ethernet cable with the modified RJ45 connector to the POE injector, and connect the other end of the Ethernet cable to the Wi-Fi router. The POE injector is now connected to the router, completing the setup process.
Last step: connect everything
If you have followed the above steps carefully, you are now ready to start testing. Connect the battery in any way convenient for you to the input of the DC converter. Getting power back into my Starlink DC power box is as easy as replacing a fuse in my RV’s fuse box.
Connect the Starlink Antenna Cable to the Ethernet Adapter if you are following this guide. After that, connect the Starlink Ethernet adapter (or Starlink cable) to the power port of the POE injector via the modified RJ45 connector.
The next step is to configure the router. The data port of the POE injector must be connected to the WAN or Internet port of the router with an Ethernet cable. Also connect the power supply of the router. First, make sure the router is turned on. You should go through the router setup process now if you haven’t already. To do this, refer to the manual that came with your router.
check it

Now it’s time to test the setup. Make sure you put the Starlink outside. Don’t forget the installation instructions.
Then make sure the Starlink dish is on and receiving a signal. What’s more, there aren’t any lights or other indicators, but once the Starlink cable is connected, the dish should automatically rotate to the upright position unless you move it to the retracted position.
It searches for satellites and then points in the right direction. The Starlink app, accessed on a smartphone (connected to the router’s Wi-Fi network, of course), can be used to check if the dish is active. Alternatively, you can access http://dishy.starlink.com/ from any device on your Wi-Fi network using an internet browser.
bottom line
Well, that’s all we have on how you can power your Starlink RV with a 12V DC power supply. We hope this guide has helped you. If you still have any doubts or questions, you can leave a comment below for help.
Leave a Reply