What is security check on iPhone and how to use it
Security Check is a security feature on your iPhone in iOS 16 that lets you quickly see what information you’re sharing with people and what permissions you’ve given apps. From here, you can instantly revoke all permissions for all people and apps, or view them for each person, app, or information type.
In this guide, we will tell you everything you need to know about the security check and how to use it to keep yourself and your data safe in unexpected situations.
When do I need to use a security check?
During a relationship, you can share things like location and iCloud photos with your significant other. It’s also likely that the other person’s Face ID or Touch ID has been added to your iPhone. Or they know your Apple ID password and iPhone password.
If at some point the relationship ends and things get worse, your iPhone now prompts you to instantly revoke all shared permissions. And you can do it all in one go, with just a few taps. Or, if you have time, you can slowly check all permissions and revoke them for every person, every feature (like location), or every app.
In addition to bad relationships, Security Check can also be used to check and manage all the permissions of your application. In addition, you can use it in general to increase the security of your device by changing your Apple ID password, resetting Face ID, updating emergency contacts, and more.
Overall, this is one of the important features that every iPhone user should know about. And we’re here to tell you all about it.
How to use security check on iPhone
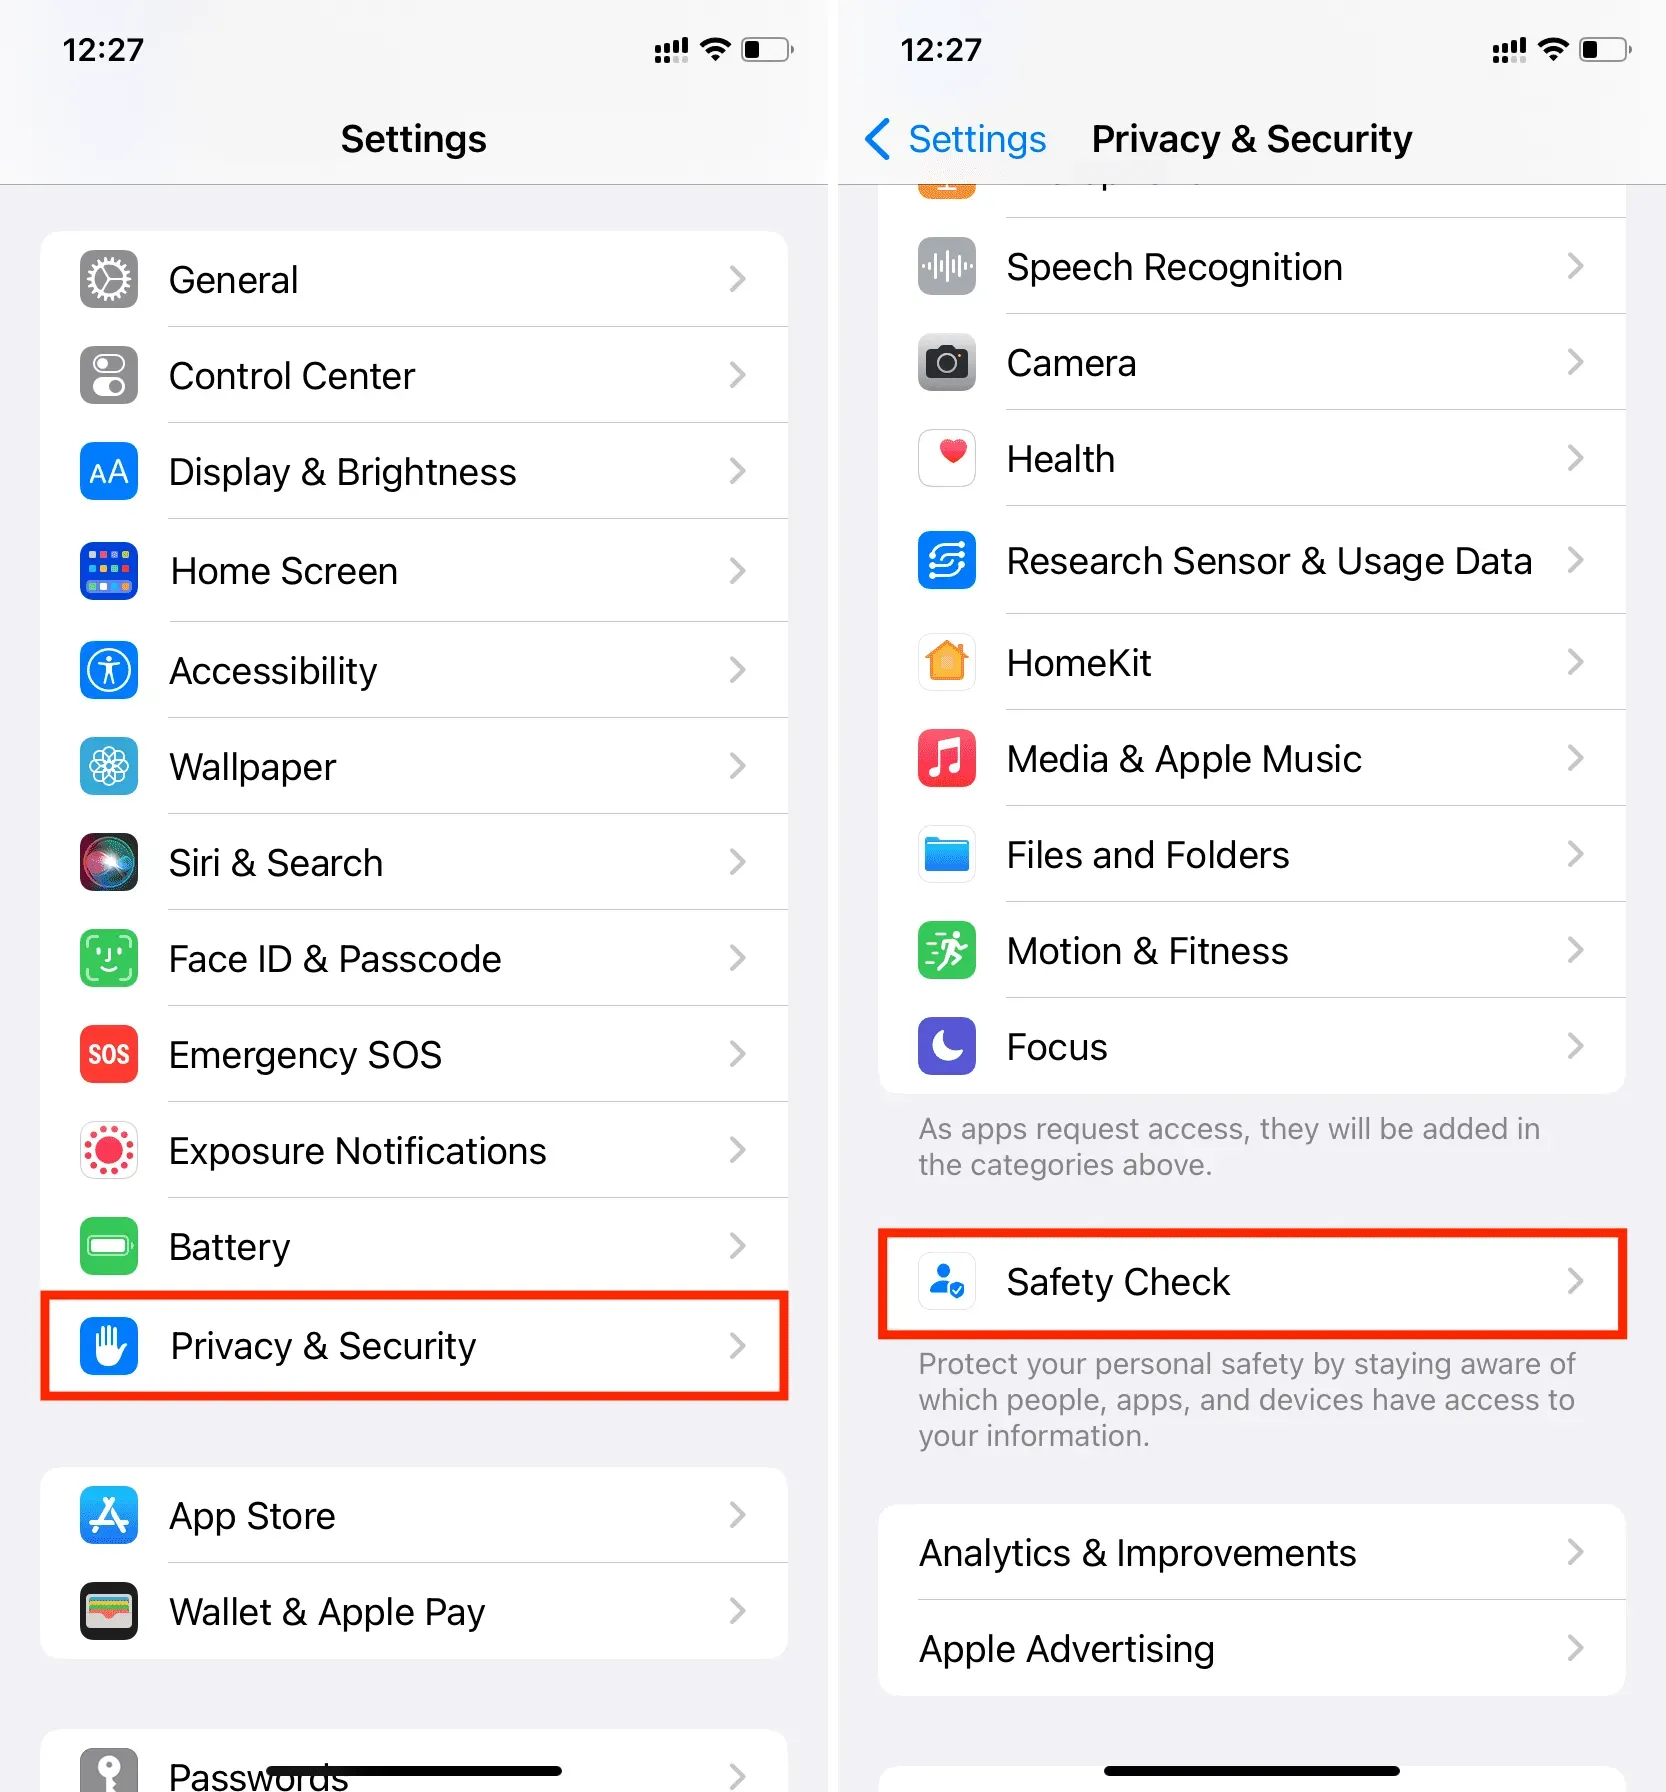
1) Open the Settings app and tap on “Privacy & Security”.
2) Scroll down and click Security Check.
3) Here you have three options, which we will go into in detail:
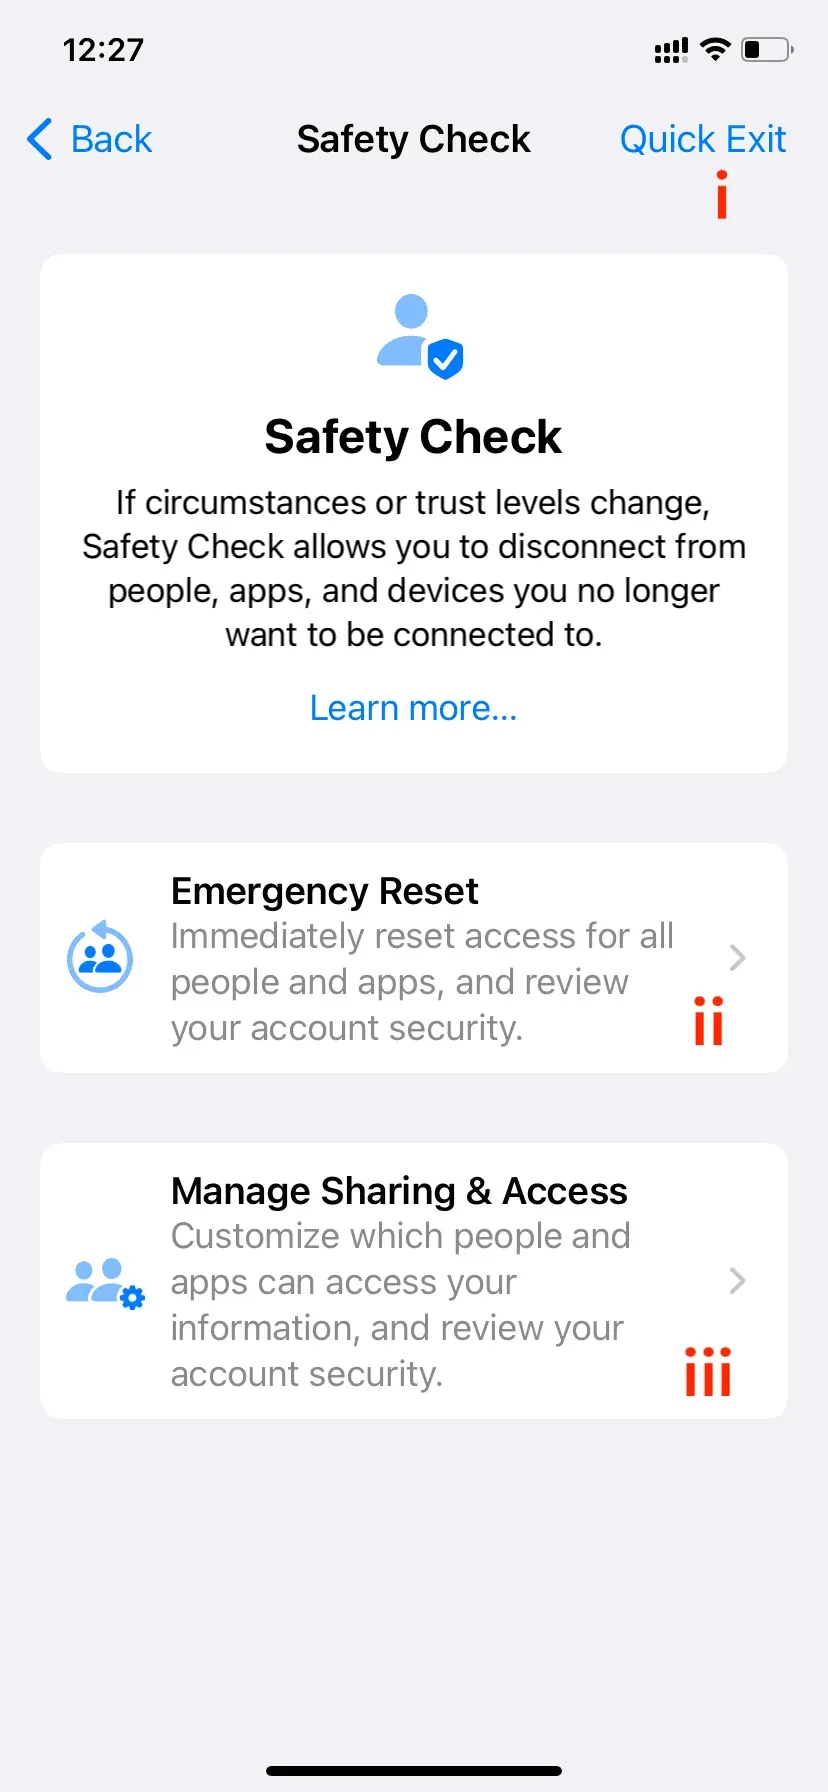
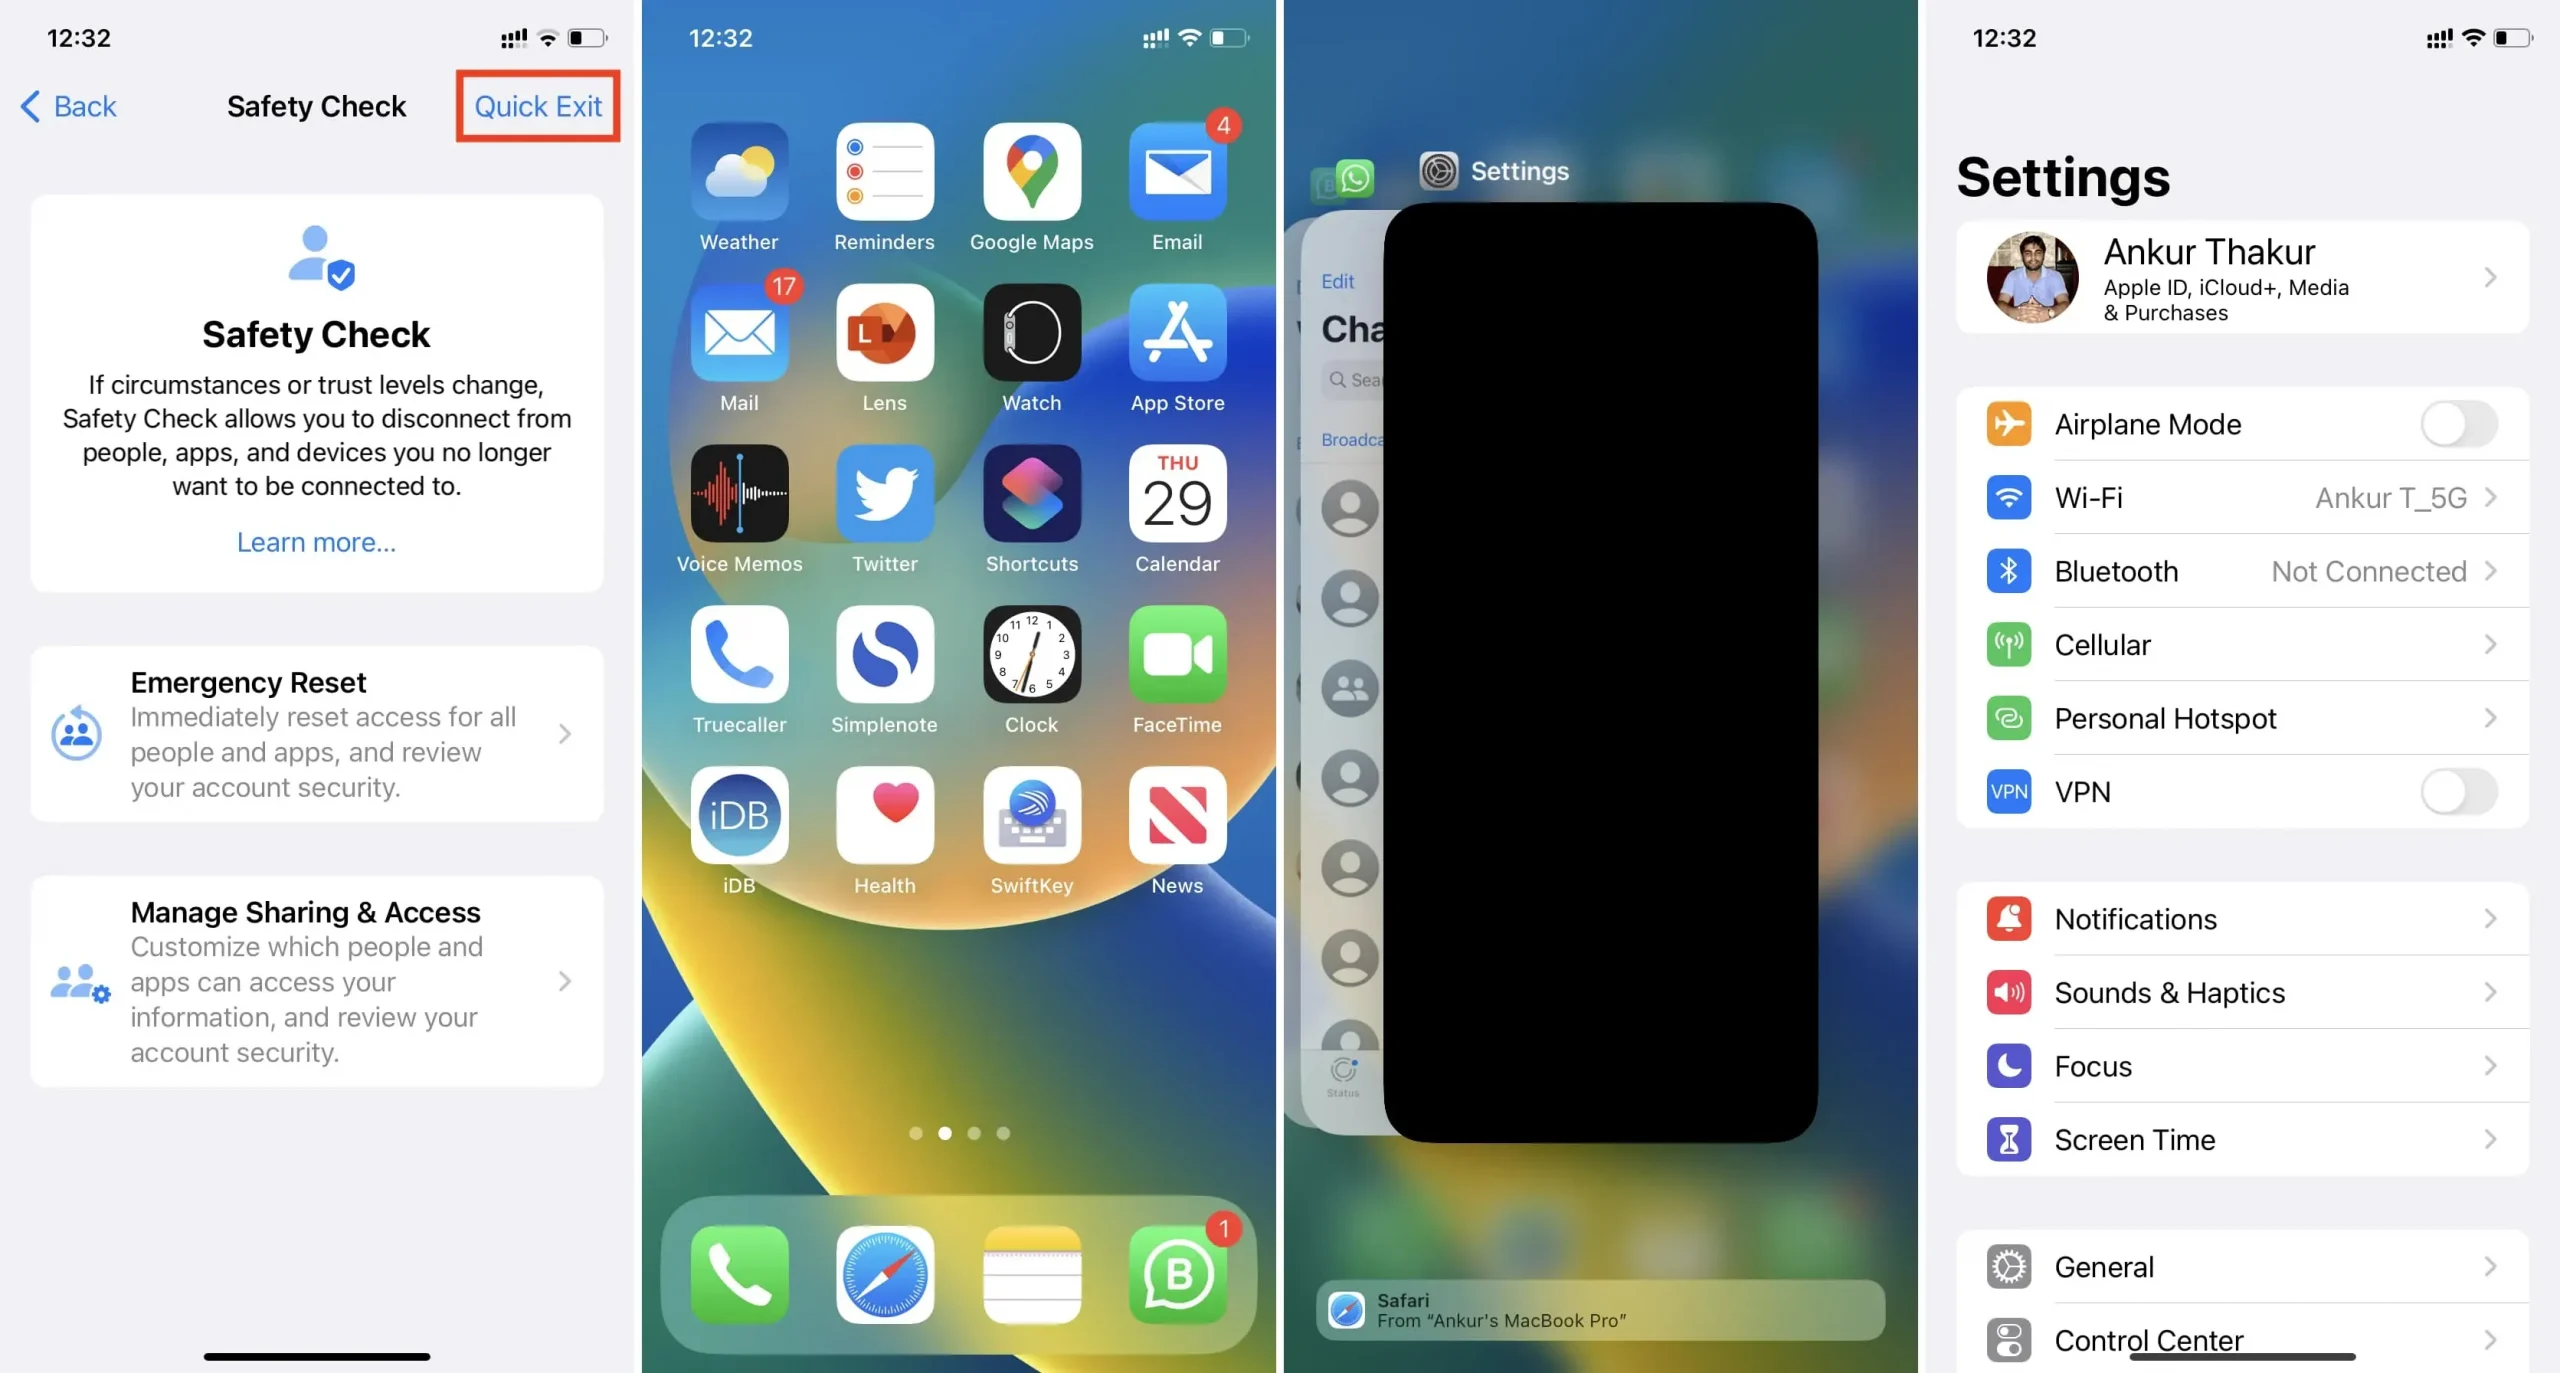
Quick Exit
The Quick Exit button is in the top right corner, and clicking on it saves all the changes you’ve made up to that point and instantly takes you out of the Settings app to the home screen. It kills the Settings app and doesn’t show what you were doing there. If you or someone who has physically gained access to your iPhone re-opens the Settings app from the app switcher, it shows the first page of settings, not the Security Check page. So they can’t know what you were doing!
II. Emergency reset
As the name suggests, emergency reset should be used in serious situations where you don’t have time to individually review the permissions of people, apps, and devices.
Start by tapping “Emergency Reset”and authenticate with Face ID or Touch ID. Then click “Start emergency reset”.
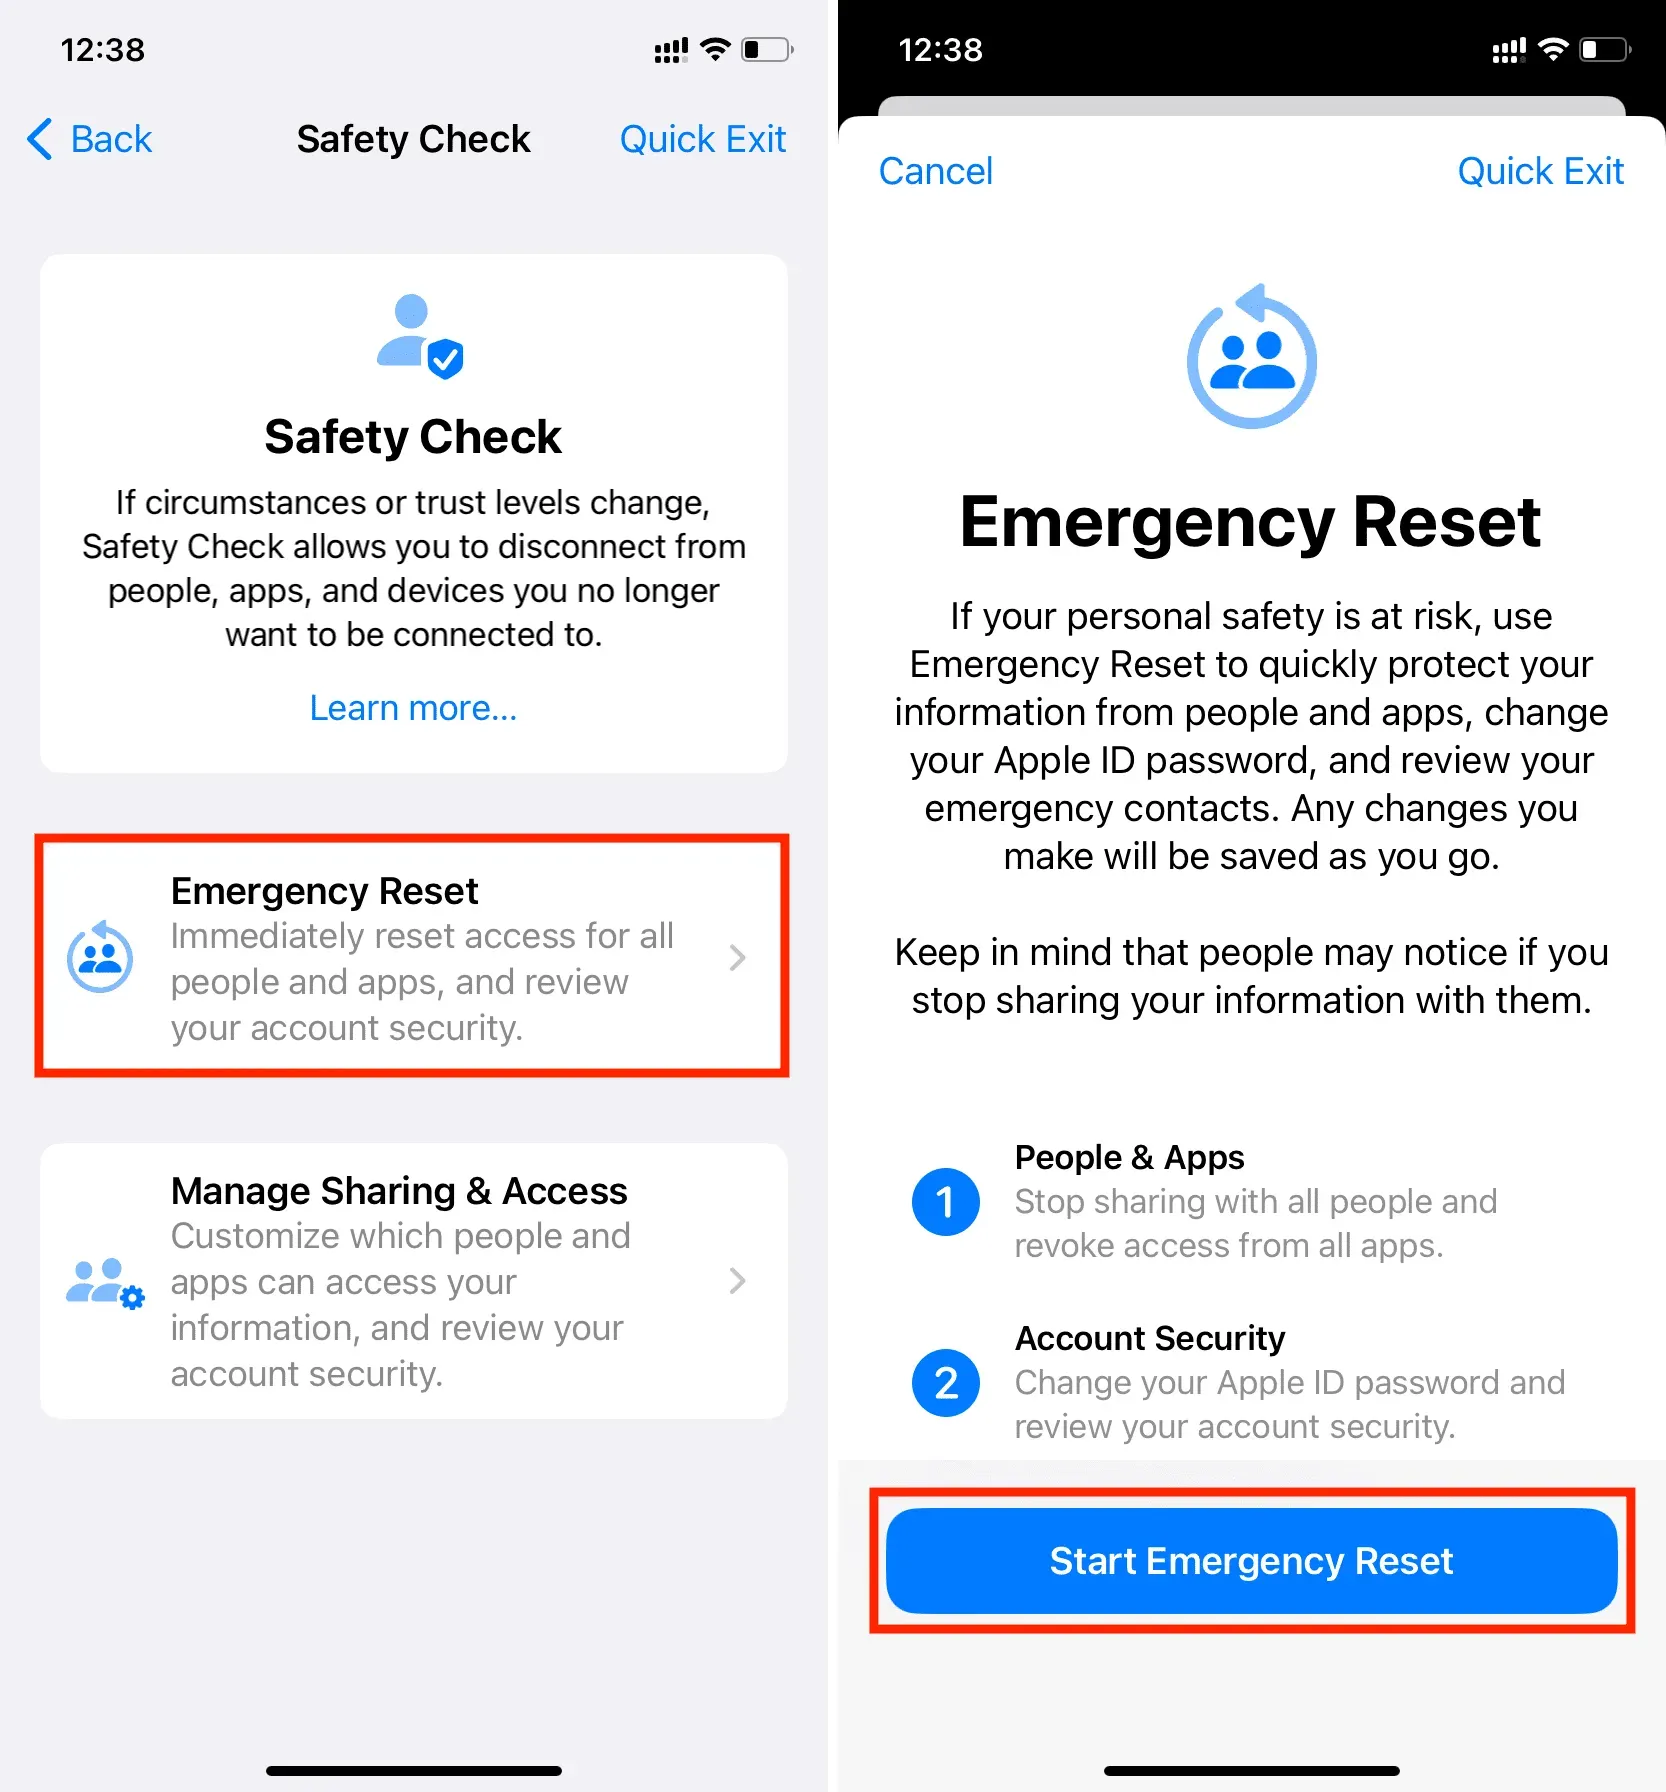
First, you have the option to reset people and apps. If you press the blue “Reset People & Apps”button, it will immediately stop sharing anything you’re currently sharing with other people, such as your location. All app permissions will also be revoked.
The next step is about account security. With this, you can change your Apple ID password and check the security of your account. If you have shared your Apple ID password with anyone, make sure you do so so they can no longer sign in to any device or iCloud.com using your Apple ID. This will prevent them from accessing your iCloud notes, contacts, passwords, photos, and other data stored in your iCloud and iCloud Drive.
Finally, you have the Emergency Contacts screen. This allows you to add or remove emergency contacts. When you were in a relationship, you could add that person’s phone number as an emergency contact. But since the situation has changed, you can remove their number and use the phone number of a family member, friend, or other trusted person as an emergency contact.
So, once the emergency reset is complete, your iPhone will do the following:
- If you were to share your location with Find My, it would stop immediately.
- All app privacy permissions such as Bluetooth, contacts, calendars, location, microphone, camera, etc. will be reset. Apps will need to ask for your consent to reuse them the next time they are launched.
- If you use iMessage and FaceTime on other devices (such as a Mac, iPad, or other iPhone), they will no longer work on those devices and will only work on the iPhone that you chose to reset from.
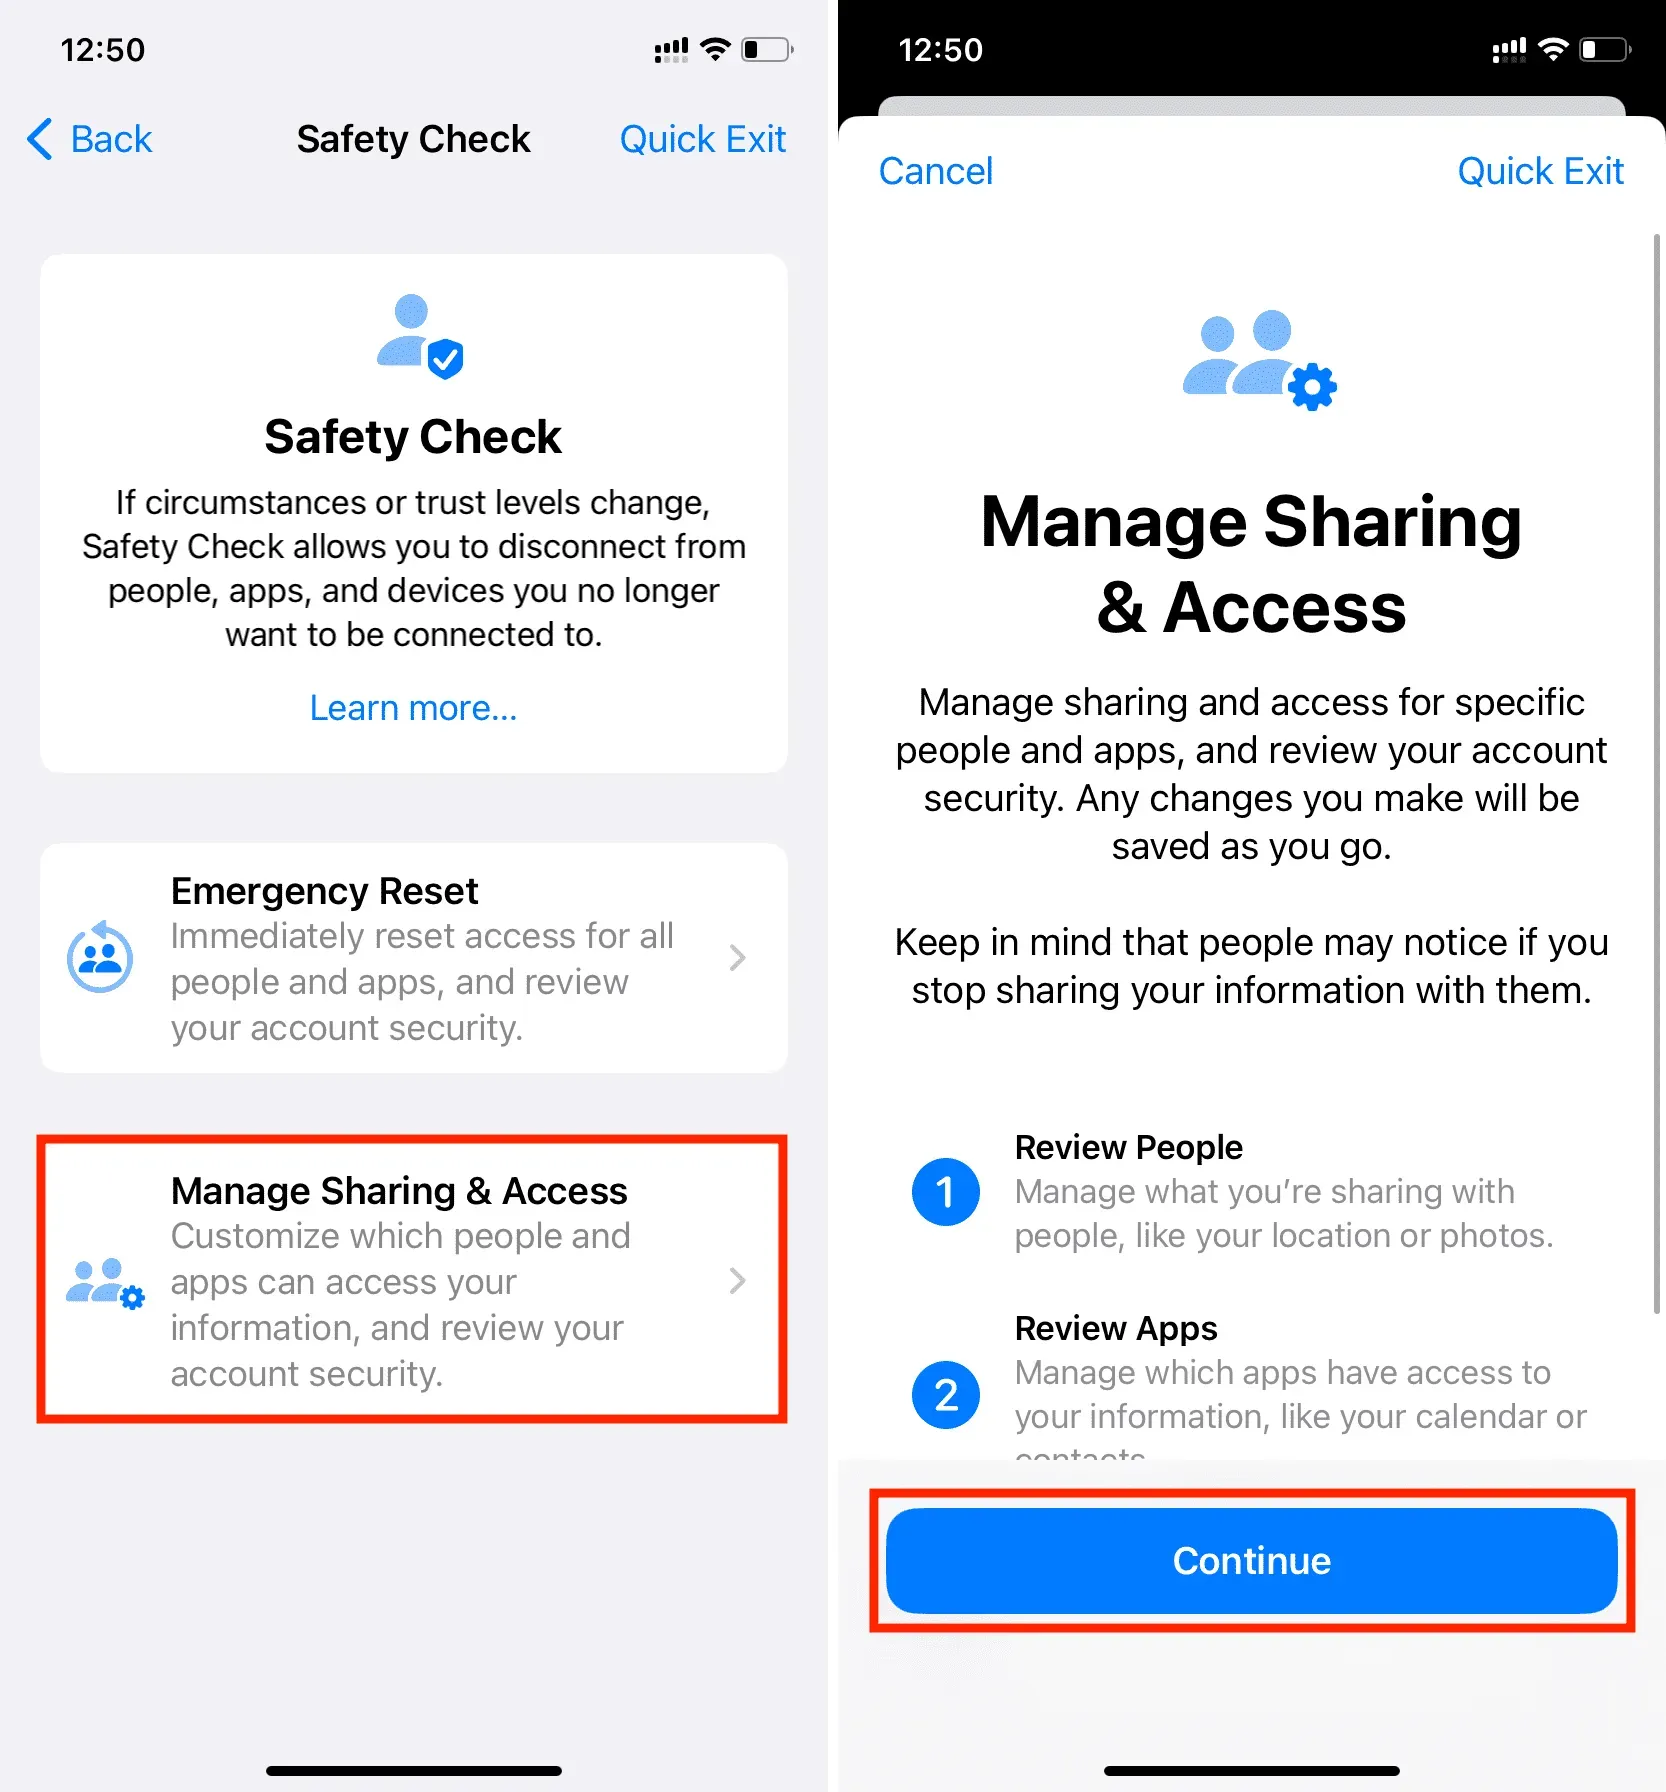
III. Sharing and Access Management
Finally, you have the ability to manually check people and applications and revoke their privileges on a case-by-case basis. In the end, you can also check the security of your account and change your device or Apple ID password if necessary.
Start by tapping Manage Sharing & Access and authenticate with Face ID or Touch ID. After that, click Continue.
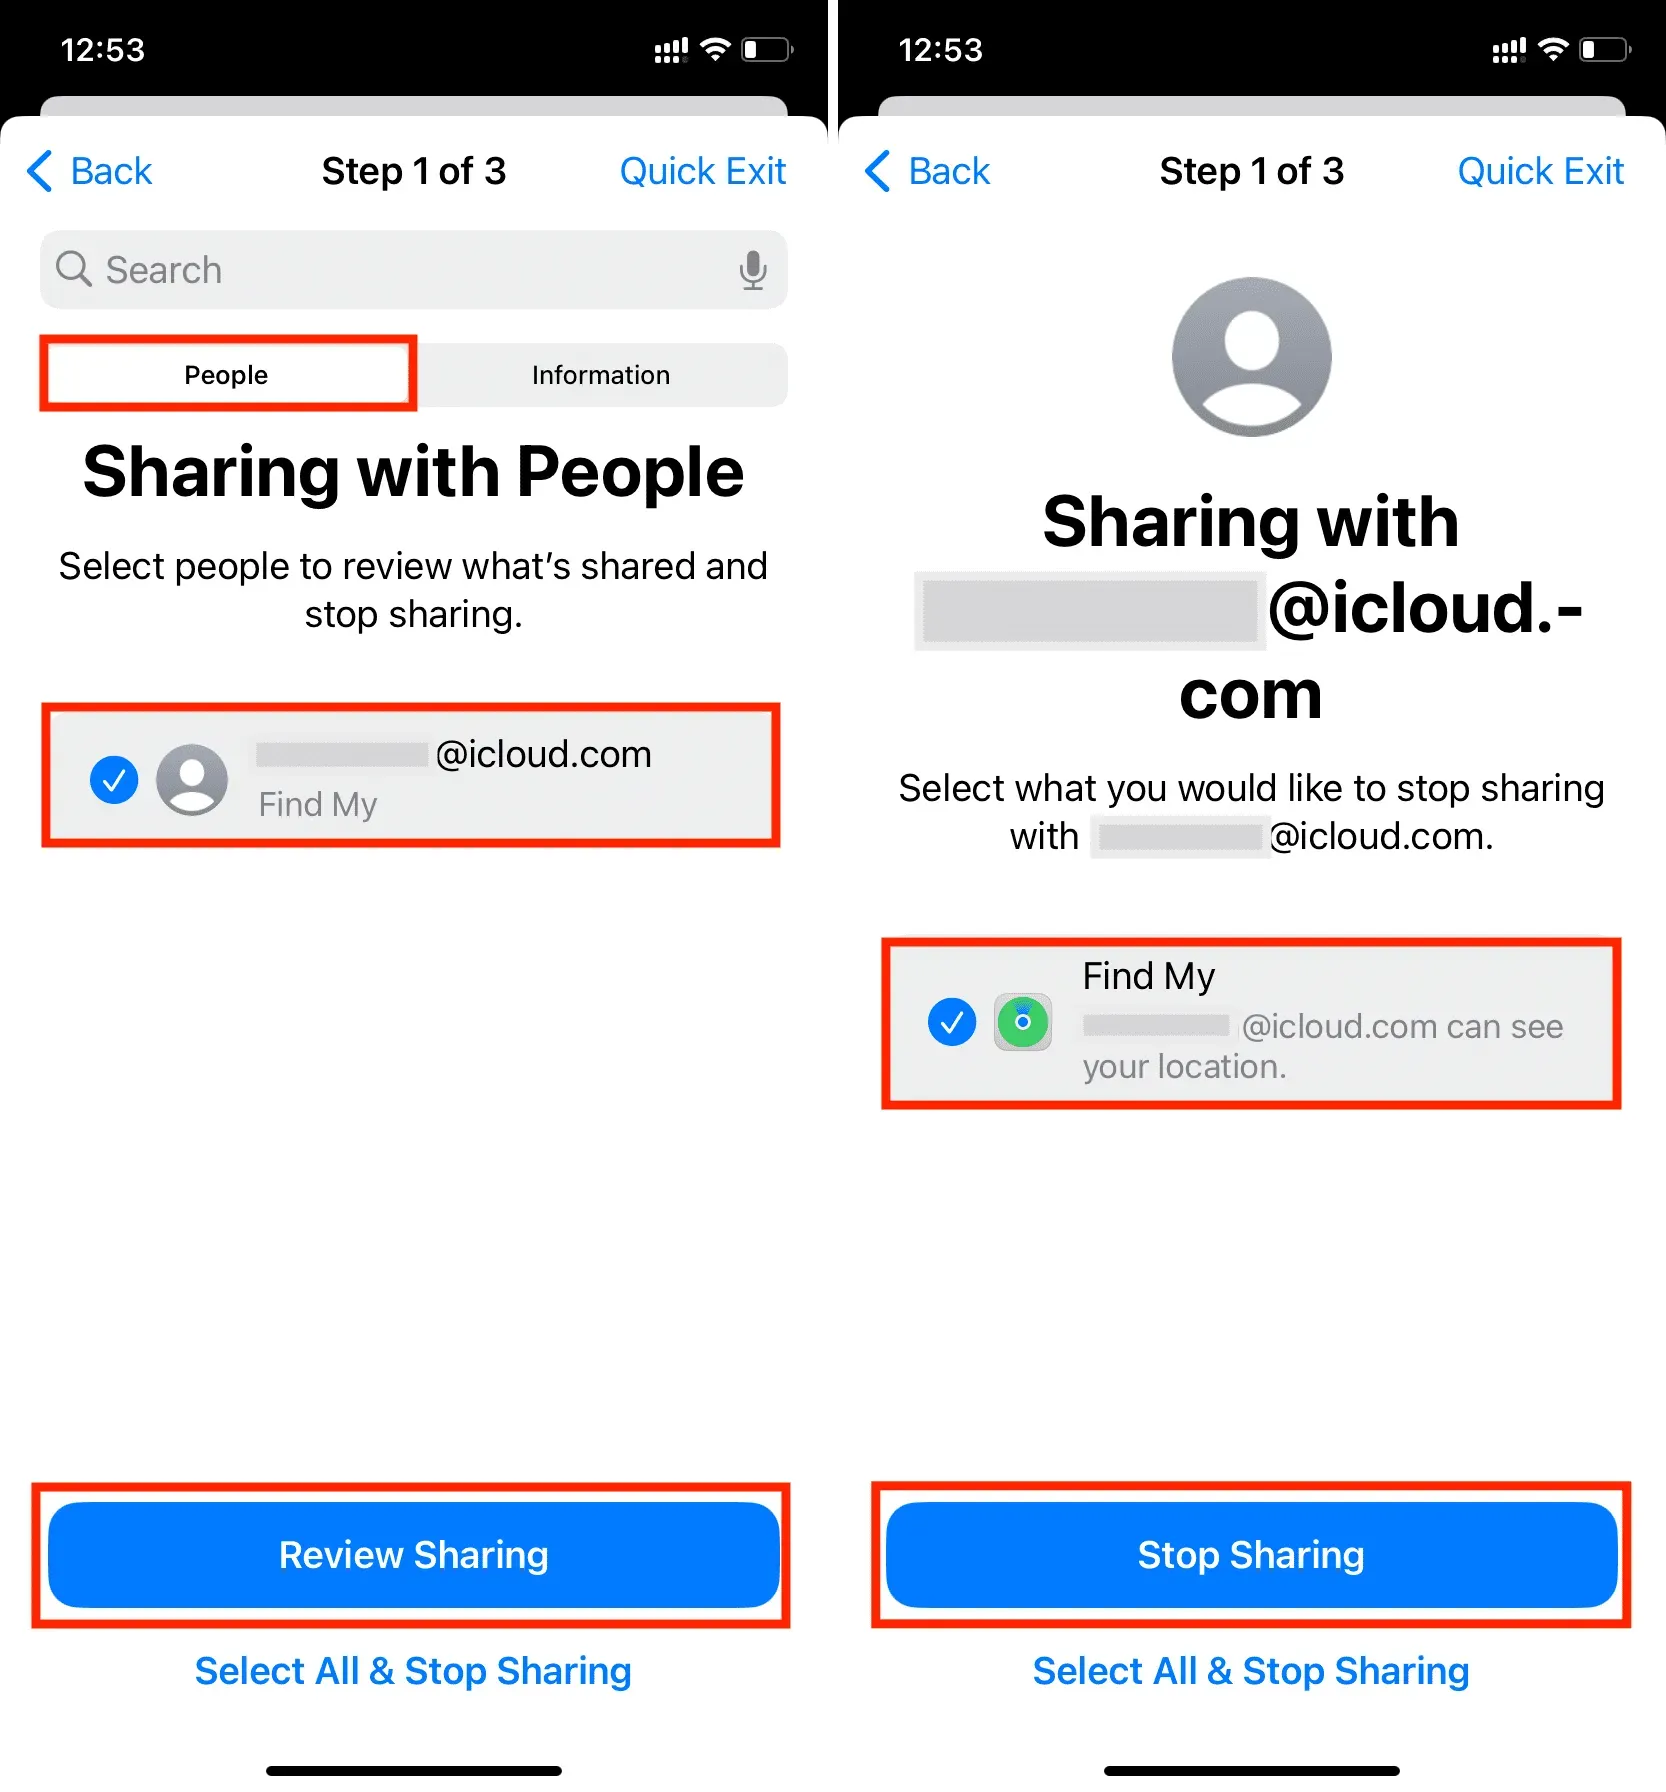
Step 1. Share with people
People: You can see what you share with people. Tap the person’s name and select General View. After that, select what you want to stop sharing (for example, Find My Location, Health Data, Notes, Photos, Calendar) and click Stop Sharing. You can then continue auditing or review permissions for more people.
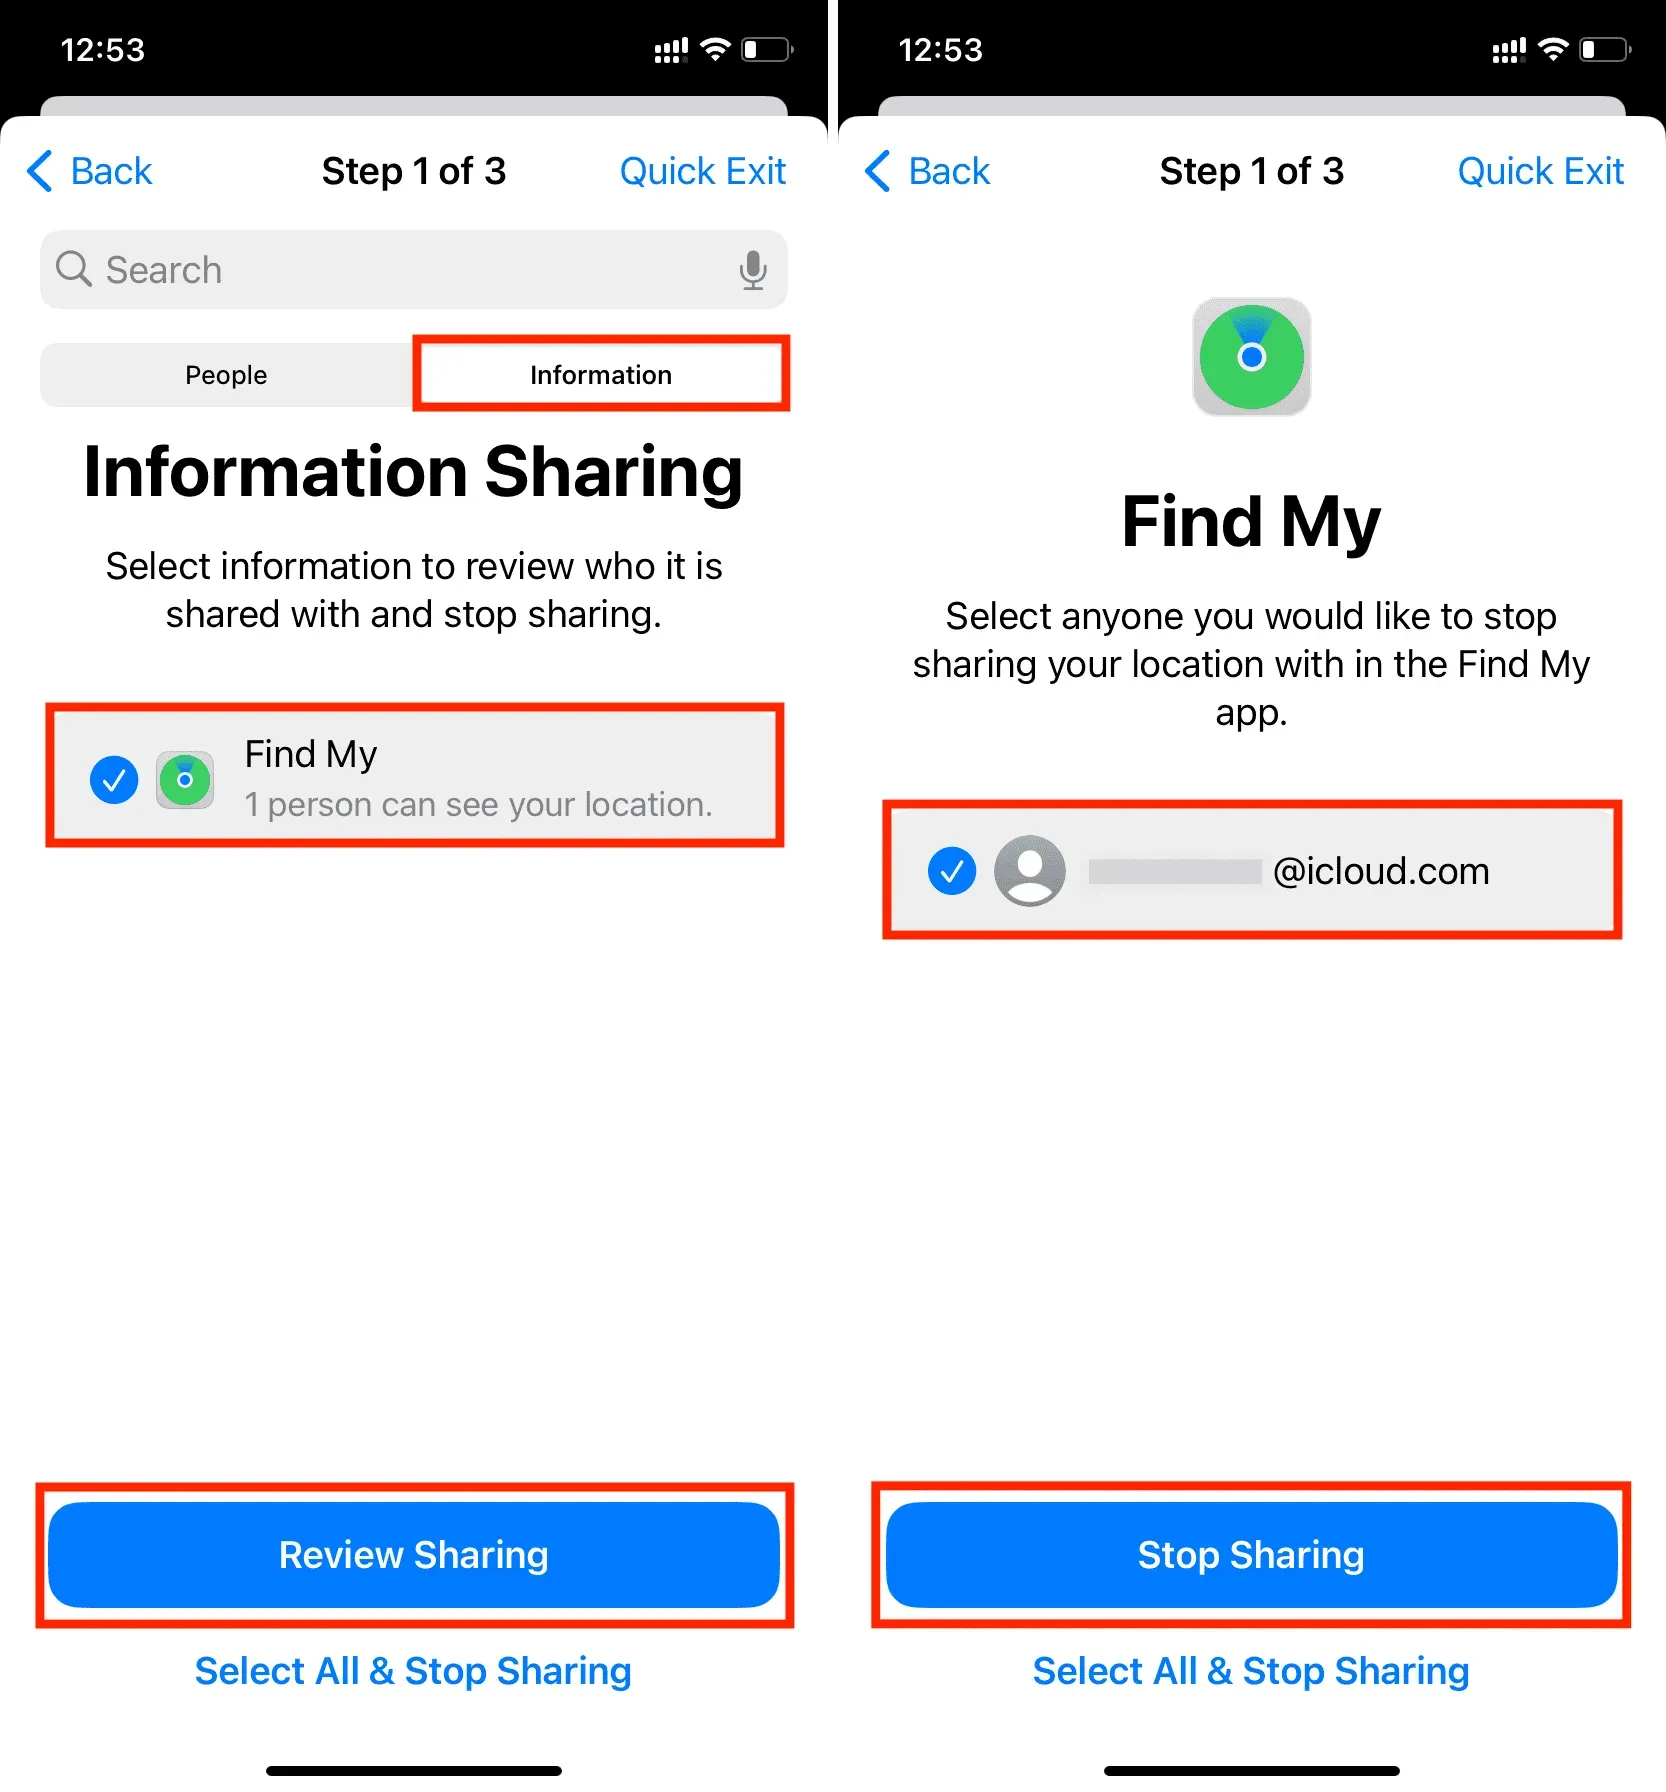
Information: If you want to view and revoke permissions based on a type of information (such as location sharing) instead of people, tap Info at the top. Here, select an information category such as Find My Location, Health Data, Shared Photo Album, Shared Calendars, and click View Sharing. Then select the person you want to stop sharing this information with and click Stop Sharing.
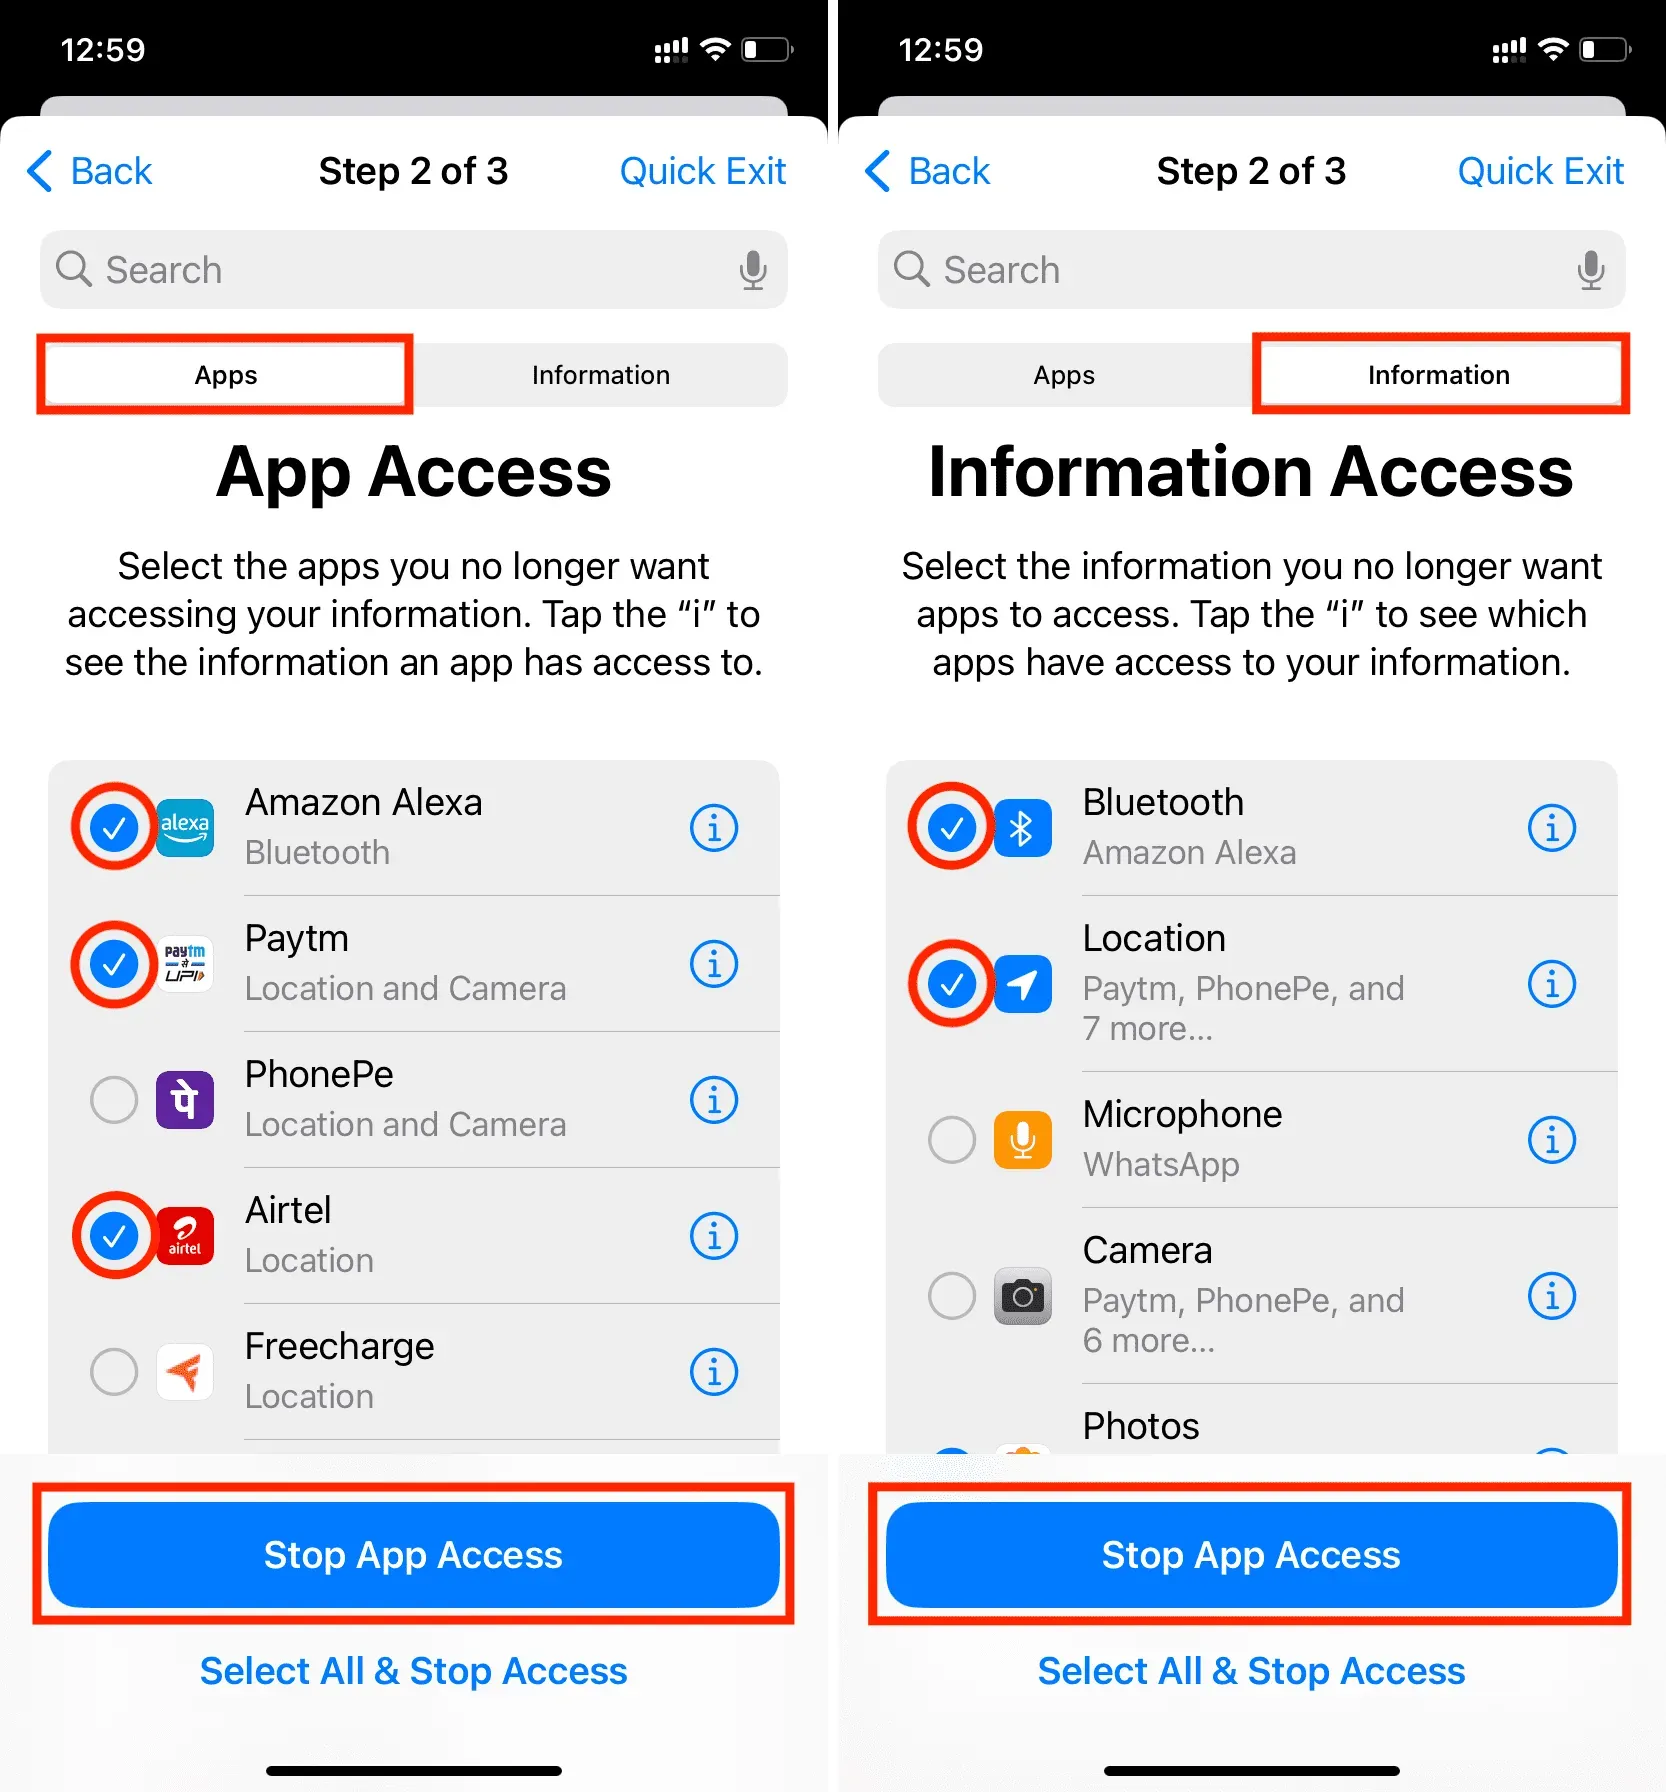
Step 2: Accessing the Application
Once you’re done checking what information you’re sharing with people, you move on to the second step, which lets you see what you’ve allowed apps to access.
From here, you can select one of several apps and stop the app from accessing the information (Bluetooth, location, camera, microphone, photos, contacts) they have access to.
Instead of an app, you can also tap Info and prevent all apps from accessing it. For example, you can select Location and click Stop App Access. This will terminate location privileges for all apps that currently have access to your location.
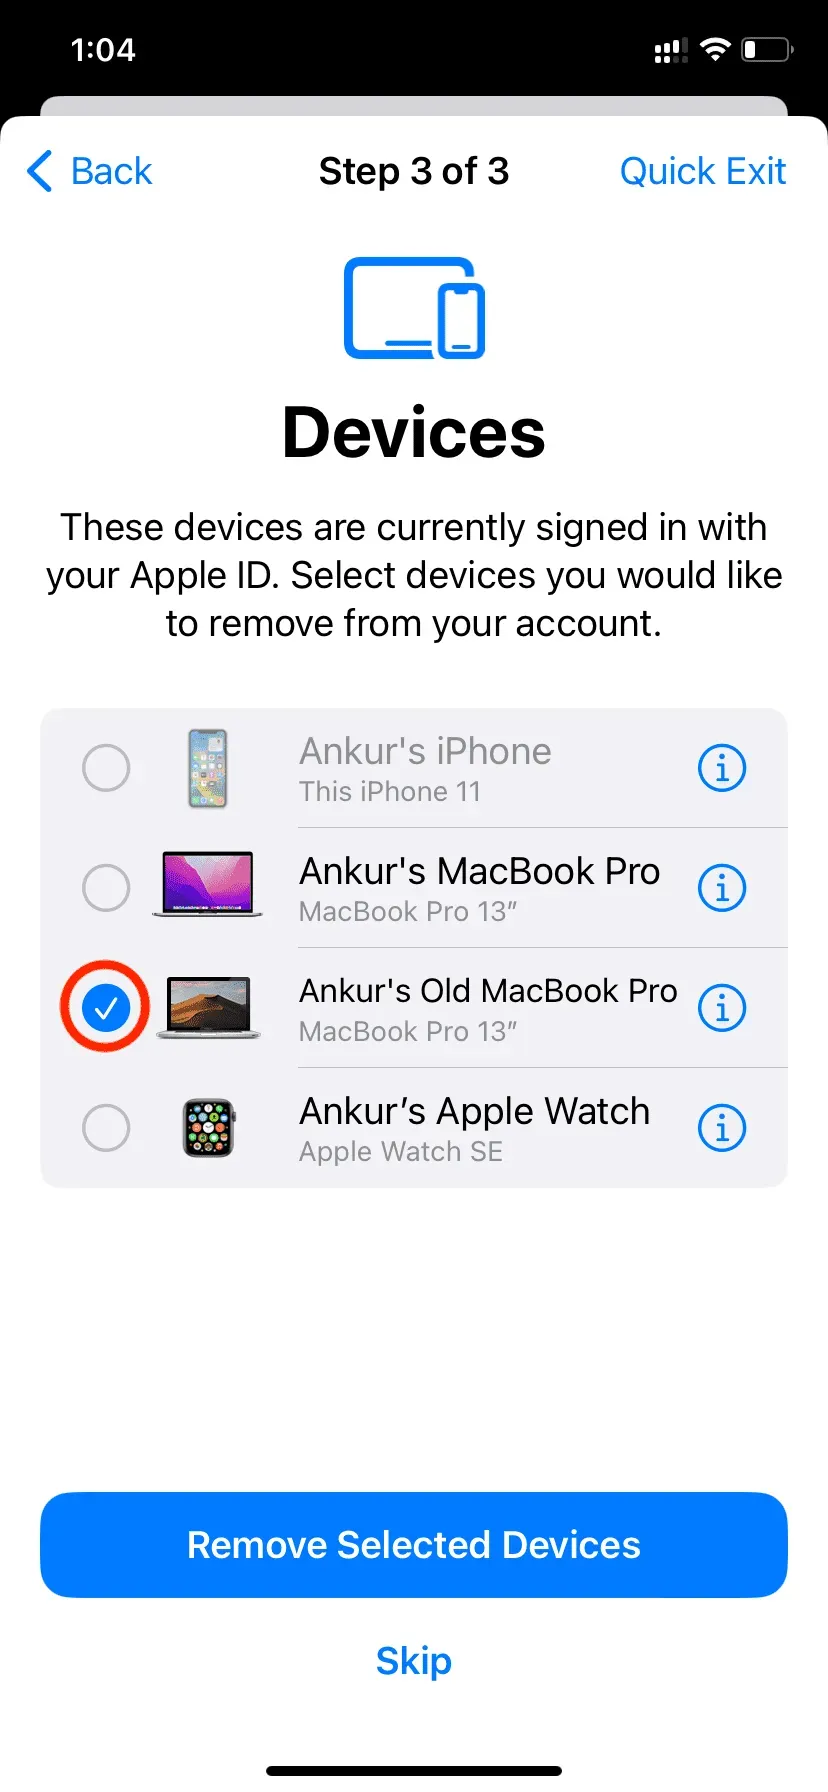
Step 3: Devices
Finally, in the last step, you can manage your Apple devices and personal settings.
Here you will see all the devices you are signed in to with your Apple ID. If you think there is a device that you no longer have access to or that other people are using (such as an iPad with your Apple ID that is always in your living room), you can select it and click Remove Selected Devices. This will prevent sign-in codes from being sent to that device, and your iCloud services won’t work on it either until you sign in again.
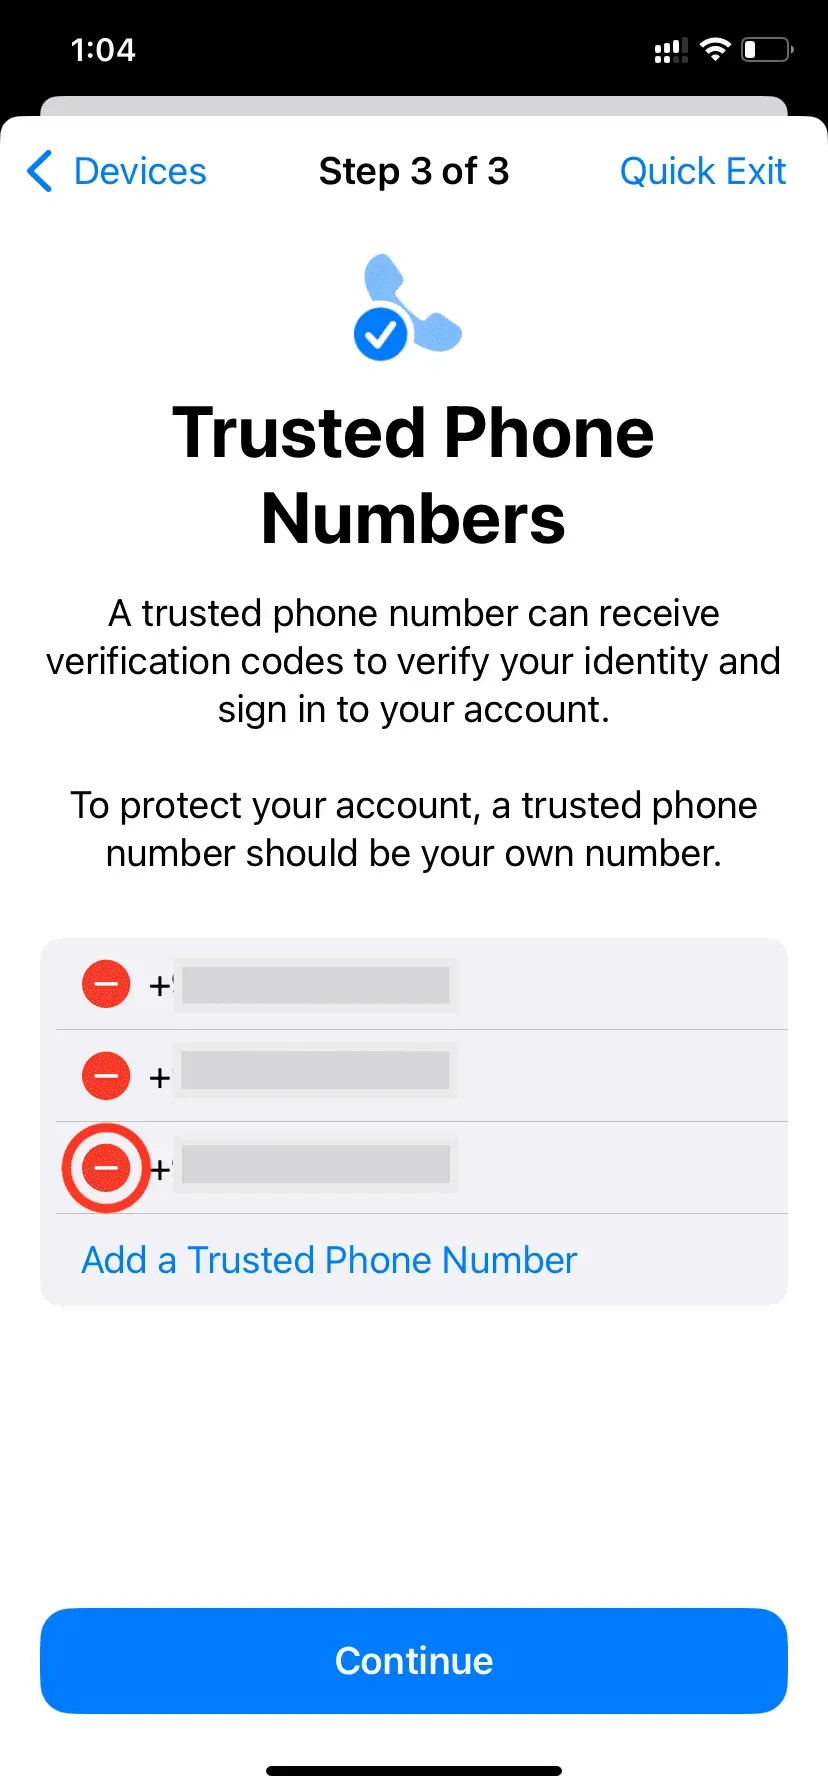
Next, you will be taken to the Trusted Phone Numbers screen. During a relationship, you may have added that person’s phone number as a backup to receive 2FA codes. From here, you can remove this by clicking the red minus button. You can also add another trusted number.
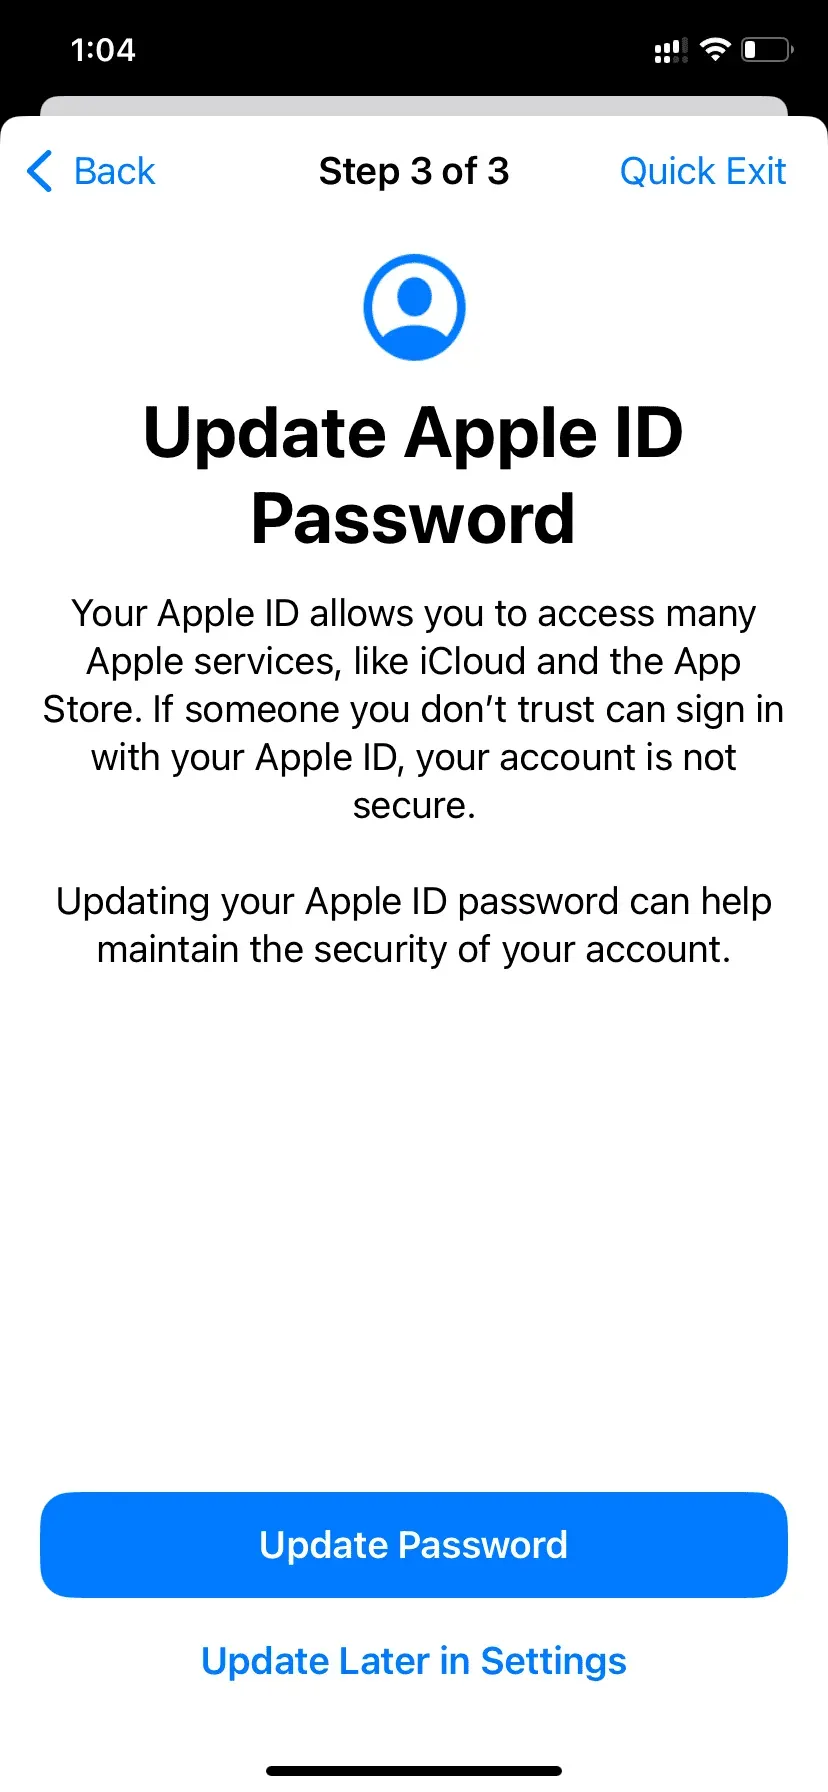
You will then be given the option to update your Apple ID password. If you think the other person knows your Apple ID password, click Update Password to change it.
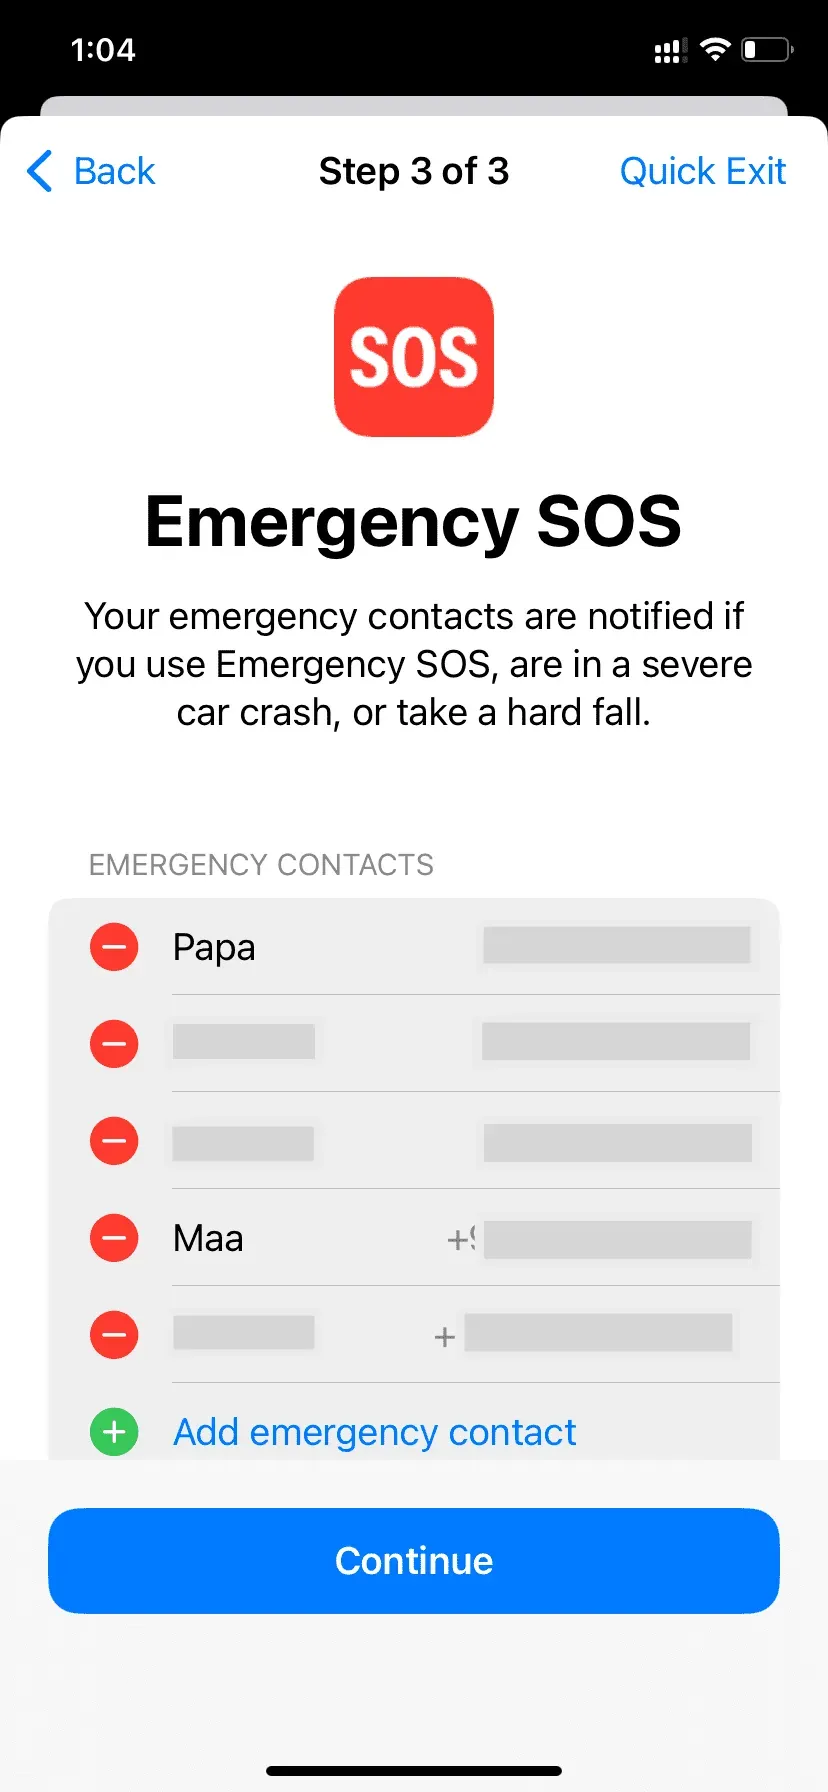
Next you see the Emergency SOS screen. From here you can delete and add emergency contacts.
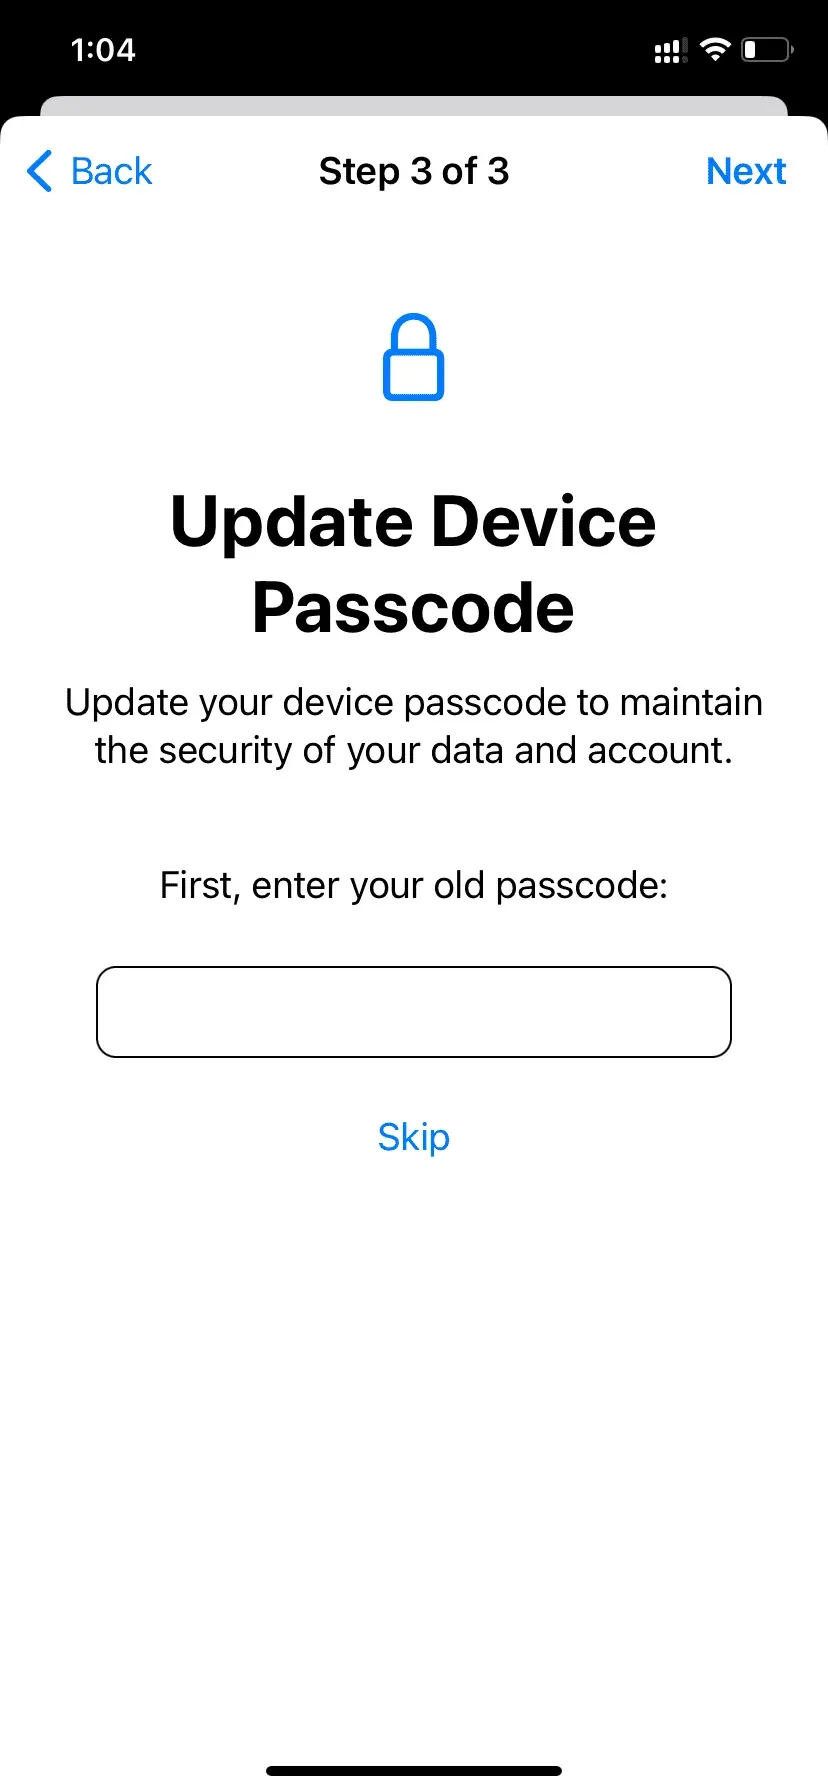
Once this is done, your iPhone will give you the option to update your device passcode. While you were in a relationship, the other party probably knew your iPhone passcode. If someone knows your device password, they can access almost everything on your iPhone. To prevent this from happening, it should be changed.
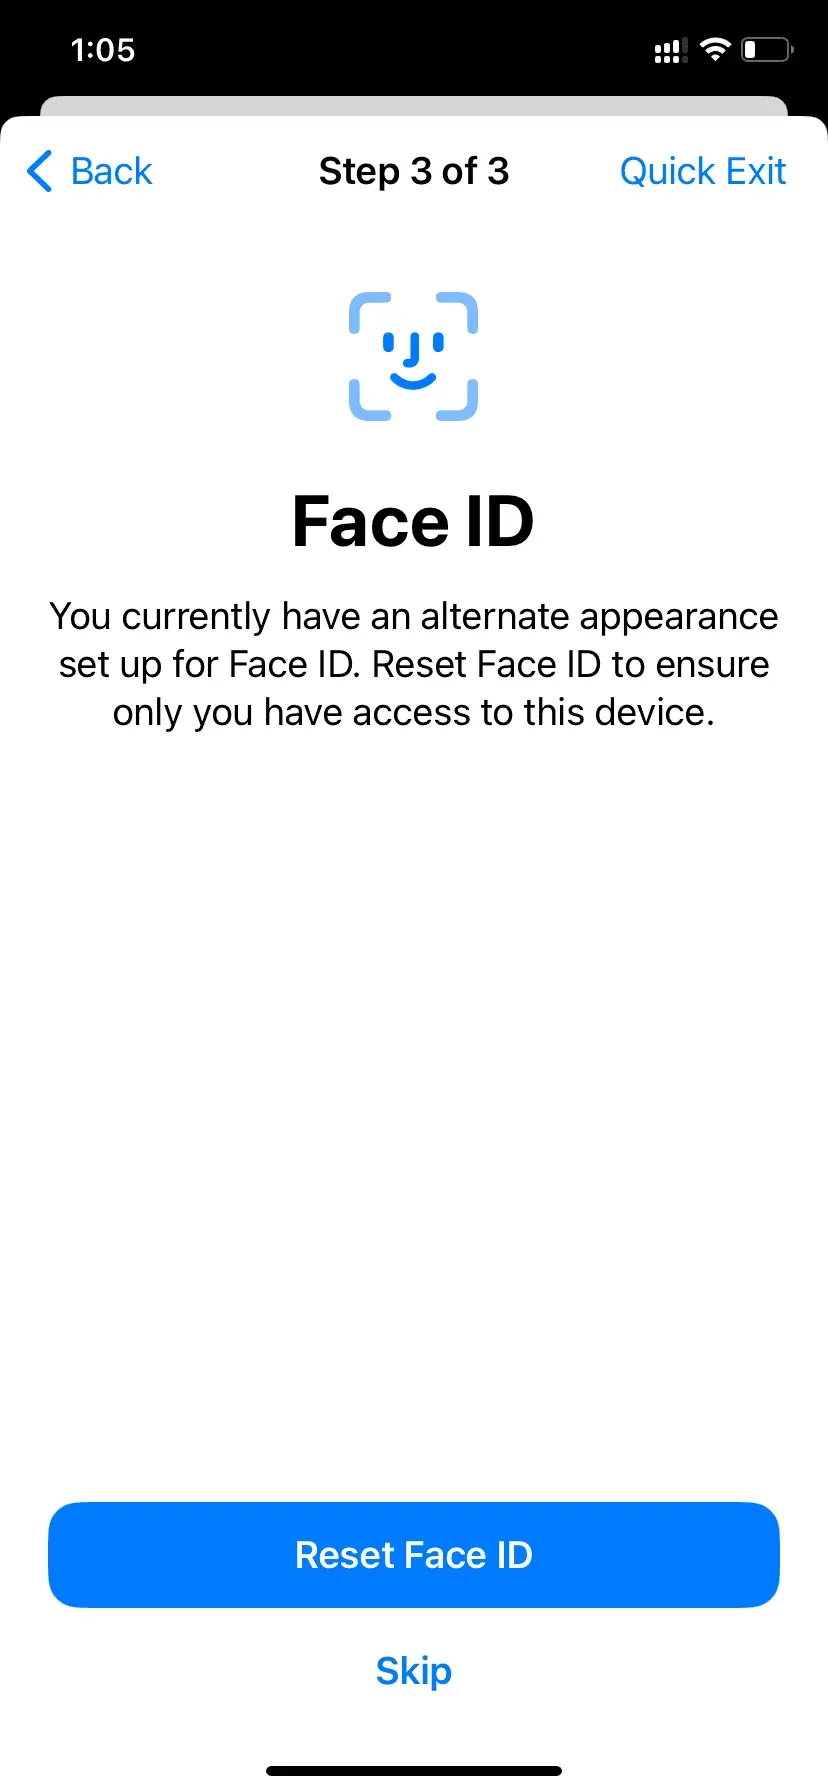
If you have set another person’s Face ID as an alternate appearance, you will have the option to reset the Face ID. After that, the other person will not be able to get inside your iPhone through Face ID authentication.
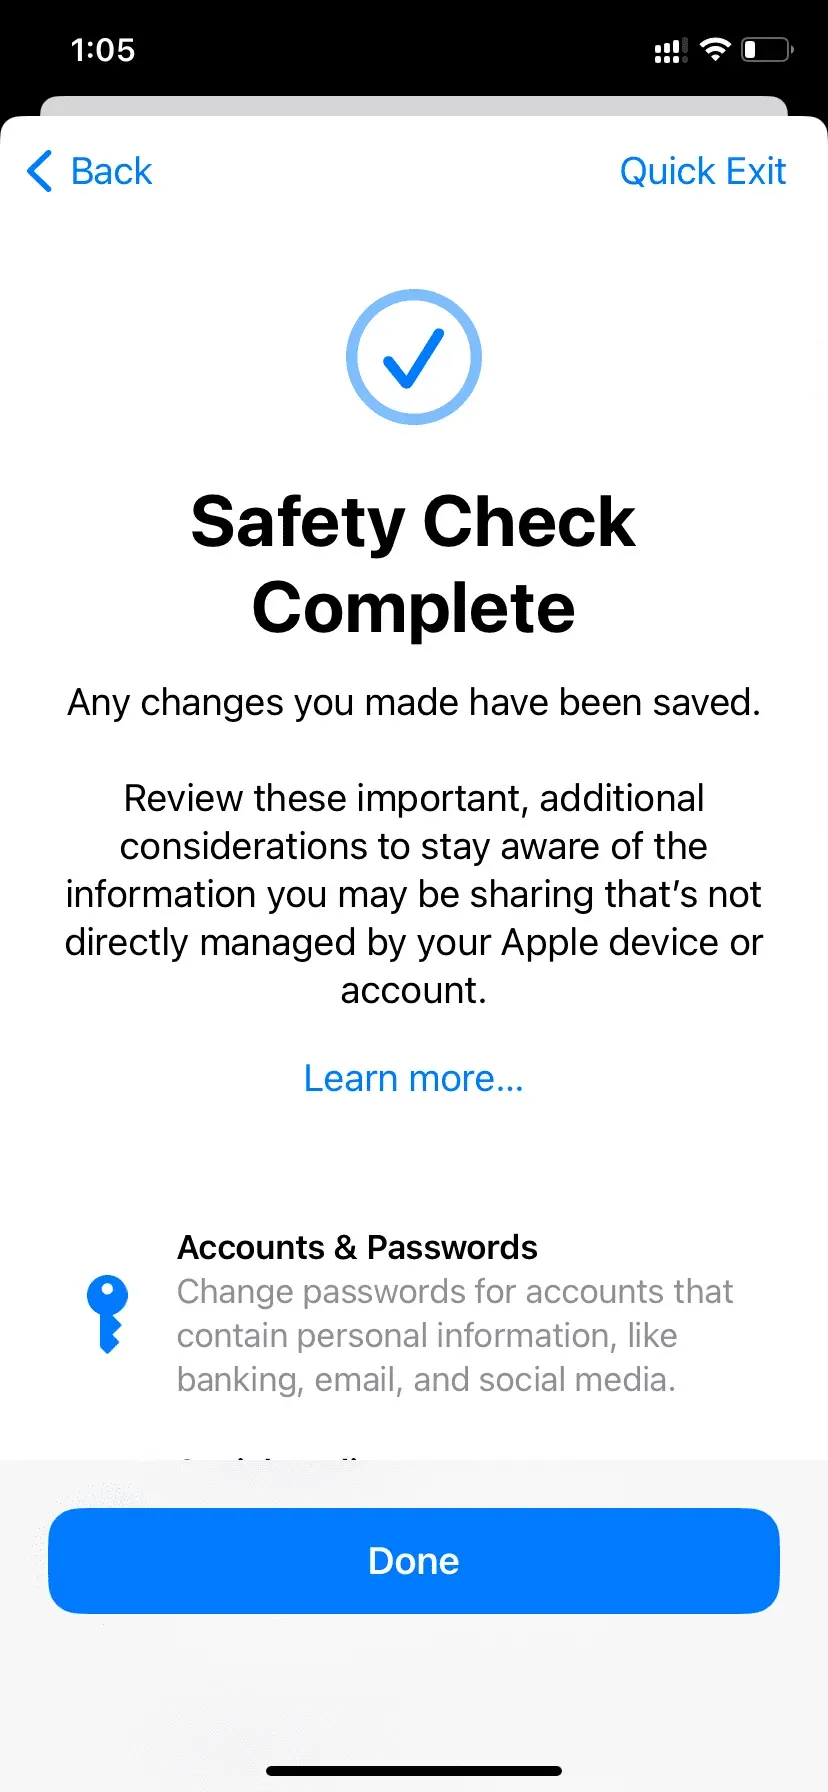
After completing the above checks, you will see the “Security check completed”screen. Any changes you may have made earlier will take effect. On this screen, you can also check out some additional tips for protecting your account, data, and devices.
The security check is a great addition that people should be aware of.
Here’s how to use iPhone security check in iOS 16 to keep yourself and your data safe.
I hope this tutorial was helpful to you. If you think that someone you know might benefit from this, please share this post with them.
Leave a Reply