If you store valuable information in Apple Notes, you need to read this.
The Apple Notes app has an important feature that many users overlook, but it’s arguably the most important thing you should use for all your notes synced across iOS, iPadOS, macOS, and iCloud.com. And Apple’s latest updates make it much easier to use than before, so there’s no reason why you shouldn’t use it.
How Apple Protects Your Notes
If you sync the Notes app with iCloud, all your notes will be protected with your device passcodes and passwords, and you’ll be able to unlock your devices much faster with Face ID or Touch ID. When you access them from iCloud.com, you need your Apple ID password to see them. Pretty safe, right?
Apple updates for iOS 16.2, iPadOS 16.2, and macOS Ventura 13.1 provide enhanced security with Advanced Data Protection for iCloud. When enabled, all your notes are end-to-end encrypted via iCloud and you can only access your notes on trusted devices. You can even turn off access to notes on iCloud.com for more protection, but it’s not required.
Why you should add even more protection
Even with all this security, people can access your notes. For example, if you’re working on your Mac and your notes are visible, anyone nearby can view them if you step back for a minute without leaving the lock screen. This can happen at work, at school, or even in your home. While it’s unlikely you’ll leave your iPhone lying around, your iPad may be a different story.
To protect your notes in such cases, you should lock the Notes app. While you can technically lock the entire app itself, it’s best to lock each note with a passcode and Face ID or Touch ID if you plan on syncing notes between iCloud-connected devices.
Password-protected notes and optional Touch ID unlock have been available since iOS 9.3 and Mac OS X El Capitan 10.11.4, with Face ID support coming later. If you want maximum security, you can even choose different passwords for each note instead of one for all. But either one makes the possibility of blocking your own notes much higher if you don’t have a secure way to write them down.
Apple’s iOS 16, iPadOS 16, and macOS Ventura 13 make it easier to use secure notes by allowing you to lock notes with your device’s passcode or password, rather than a Notes-specific one. If you use a strong password for your devices, it will be almost impossible to hack them.
Go to section
- How to Use an iPhone or iPad Passcode to Lock Notes
- Option 1: Switch from Notes-specific passwords
- Option 2: Using password protection for the first time
- How to Lock and Unlock Notes on Your iPhone or iPad
- How to use sign-in on Mac to lock notes
- Option 1: Switch from Notes-specific passwords
- Option 2: Using password protection for the first time
- How to Lock and Unlock Notes on Your Mac
1. How to use iPhone or iPad passcode to lock notes
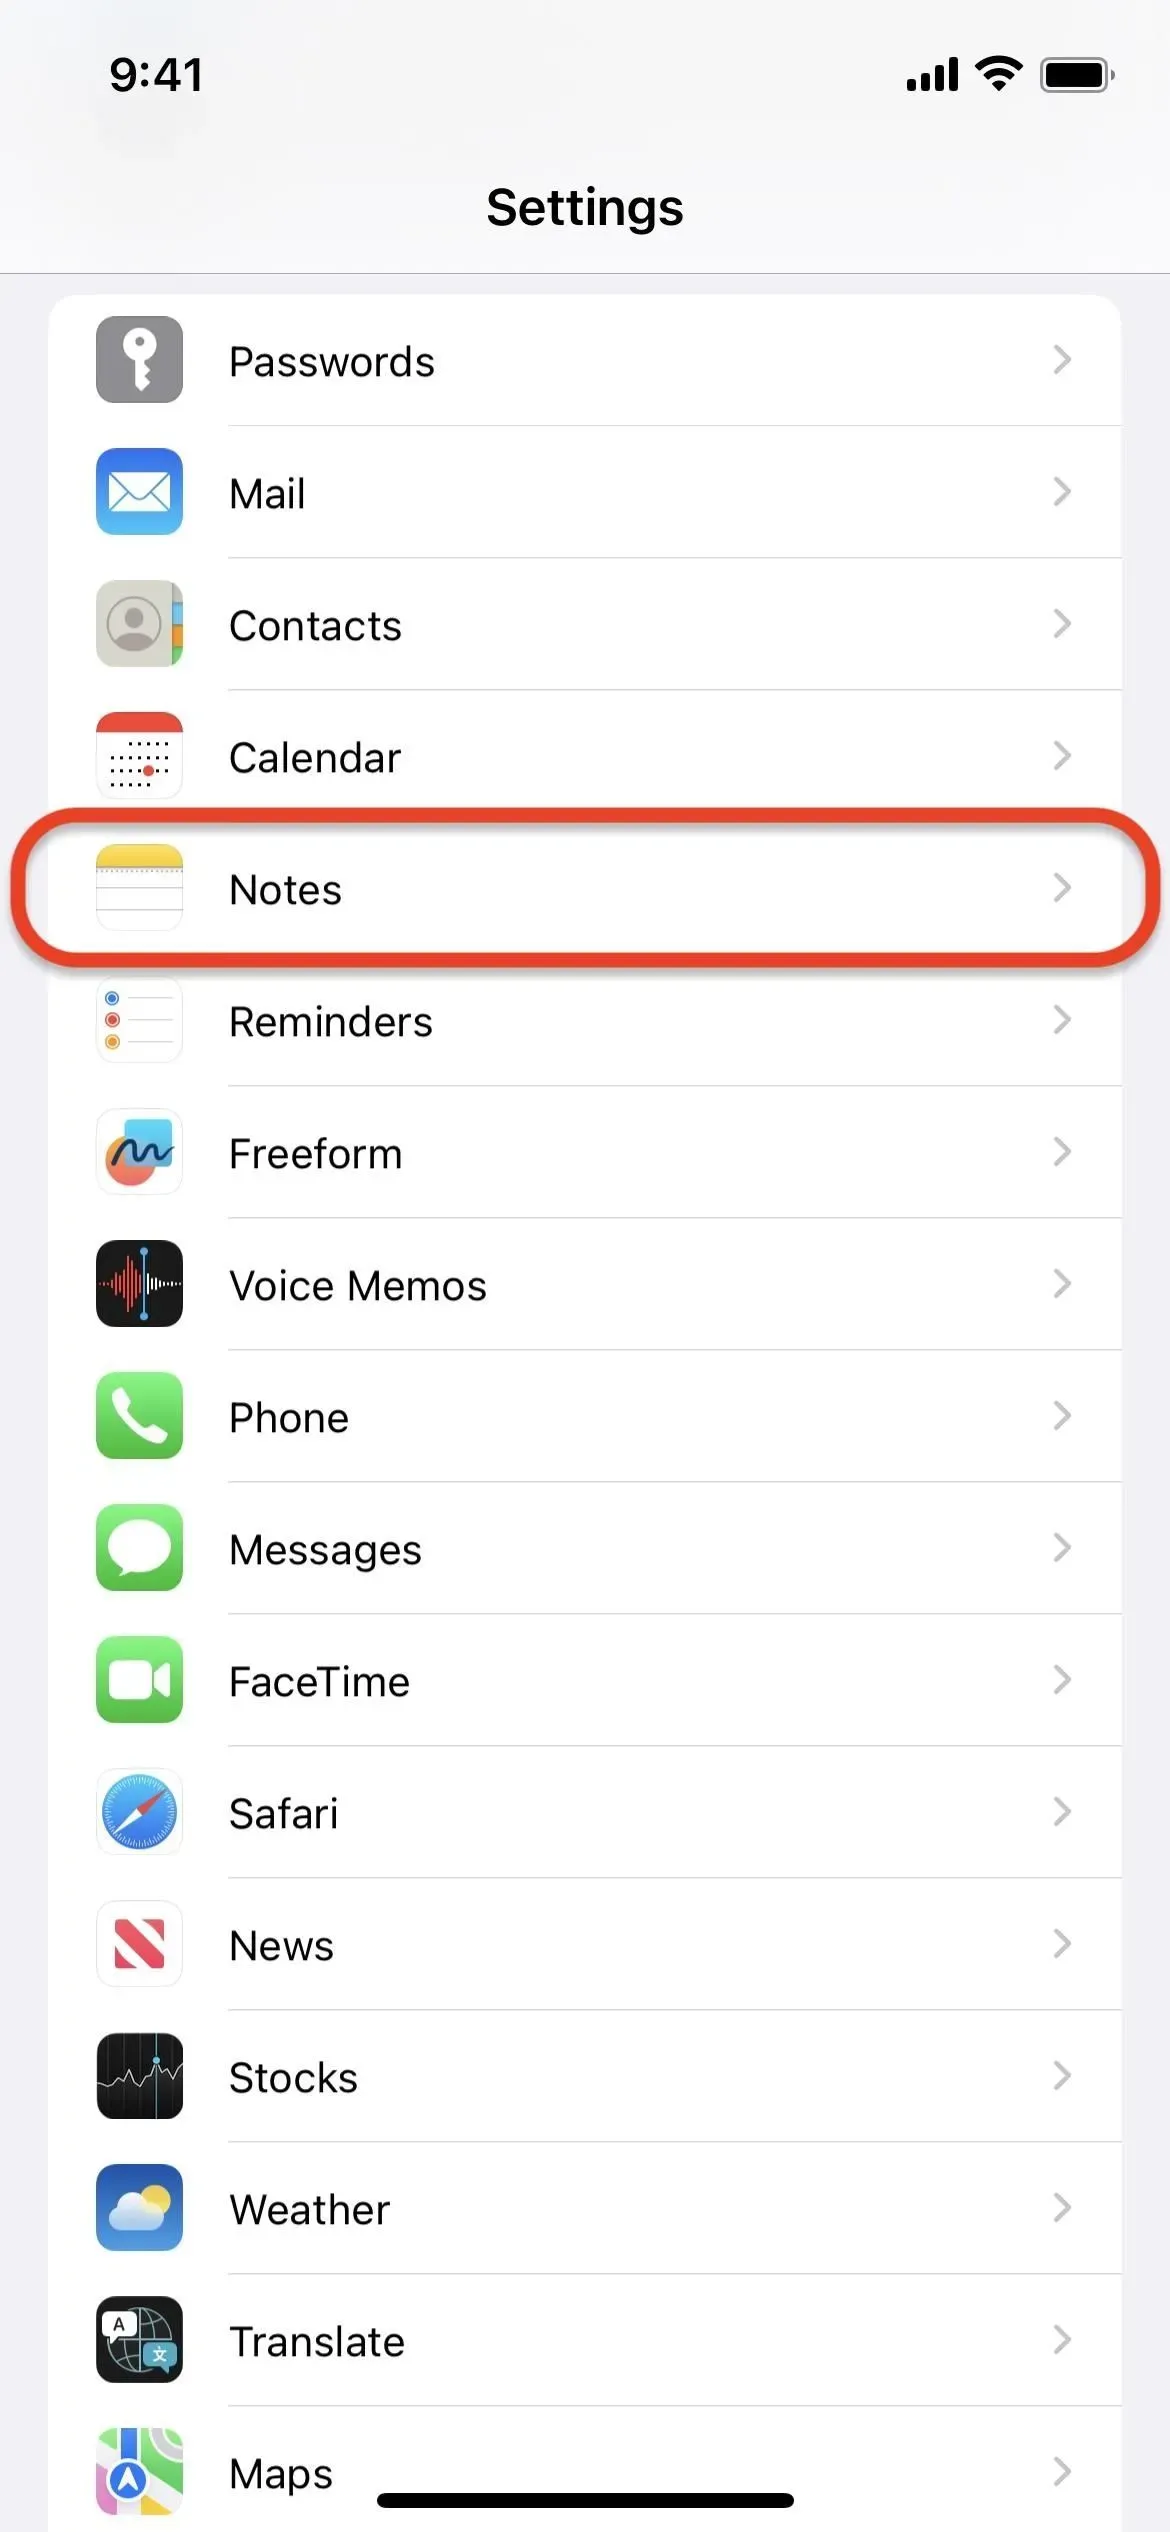
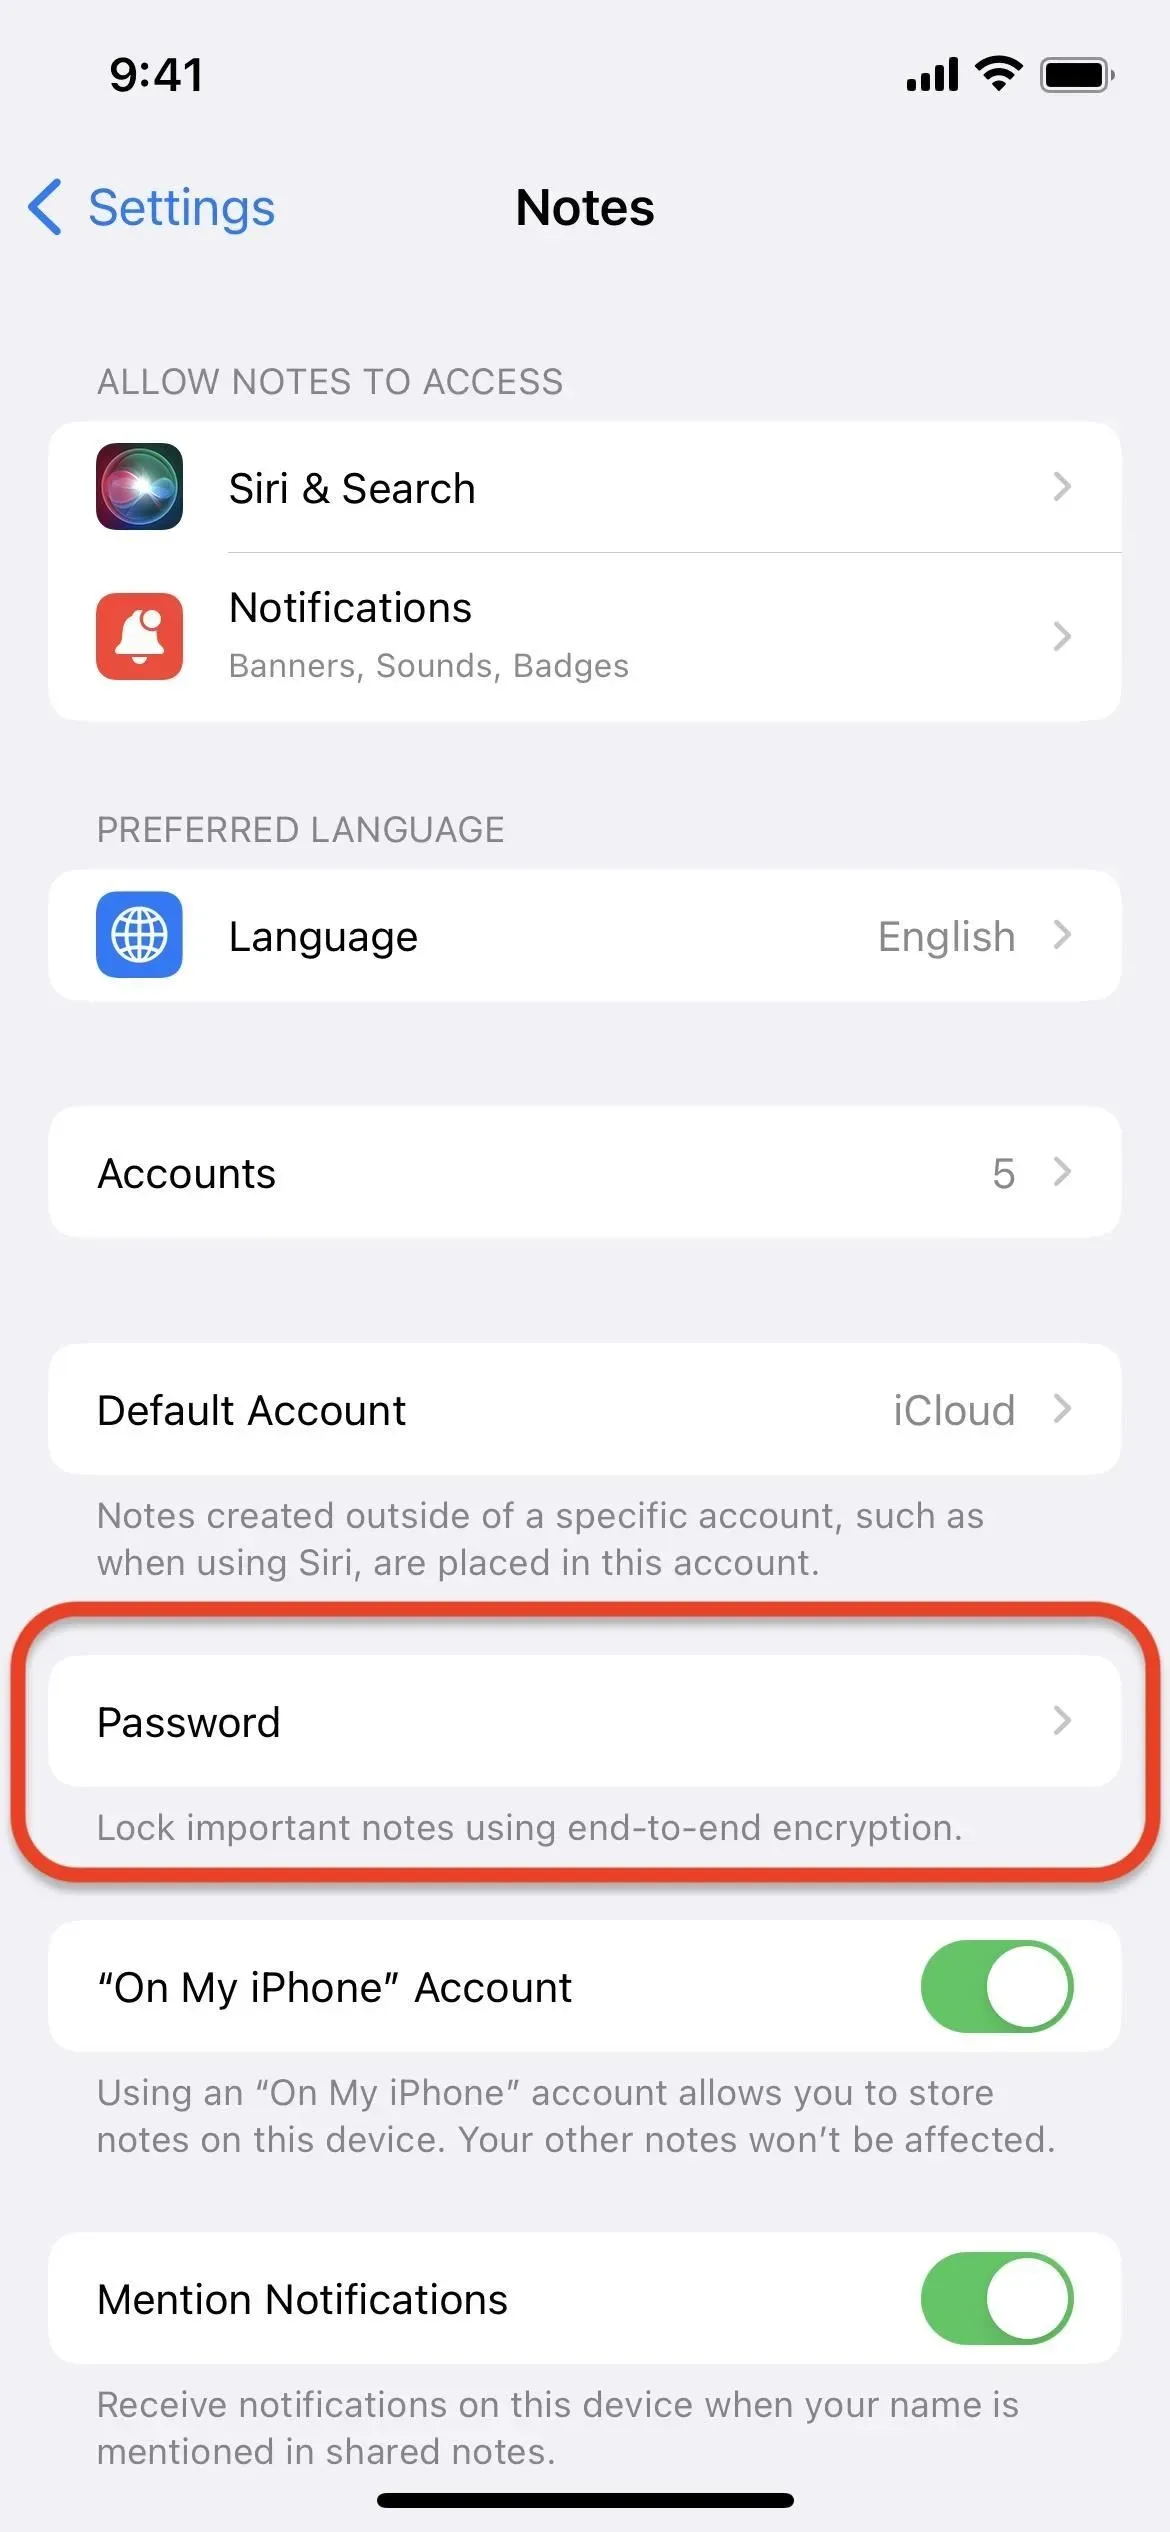
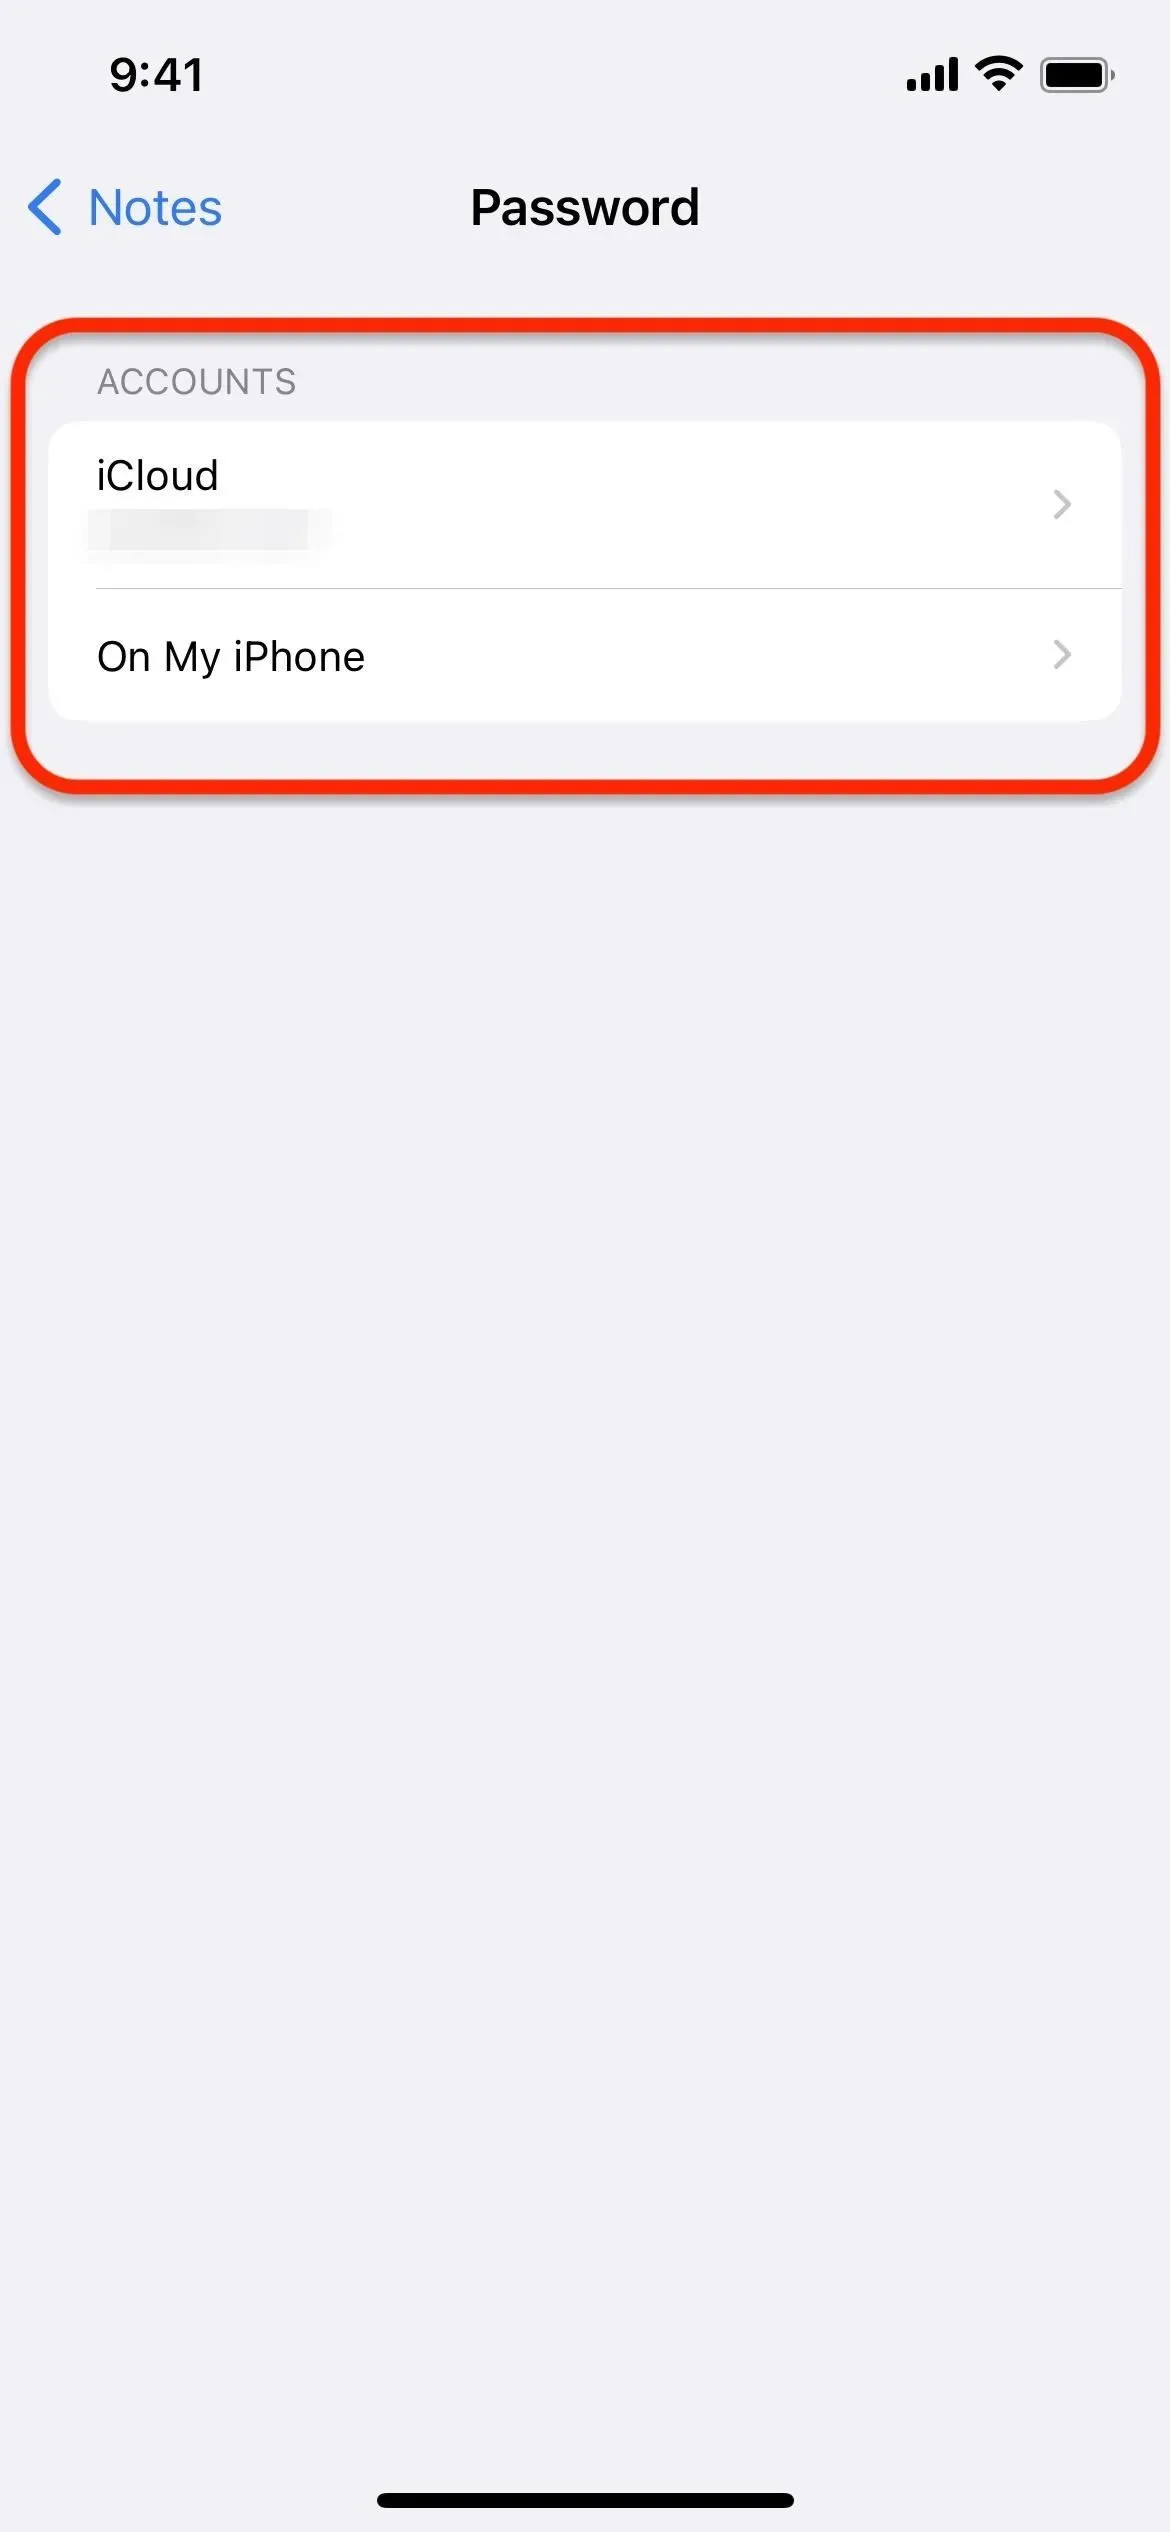
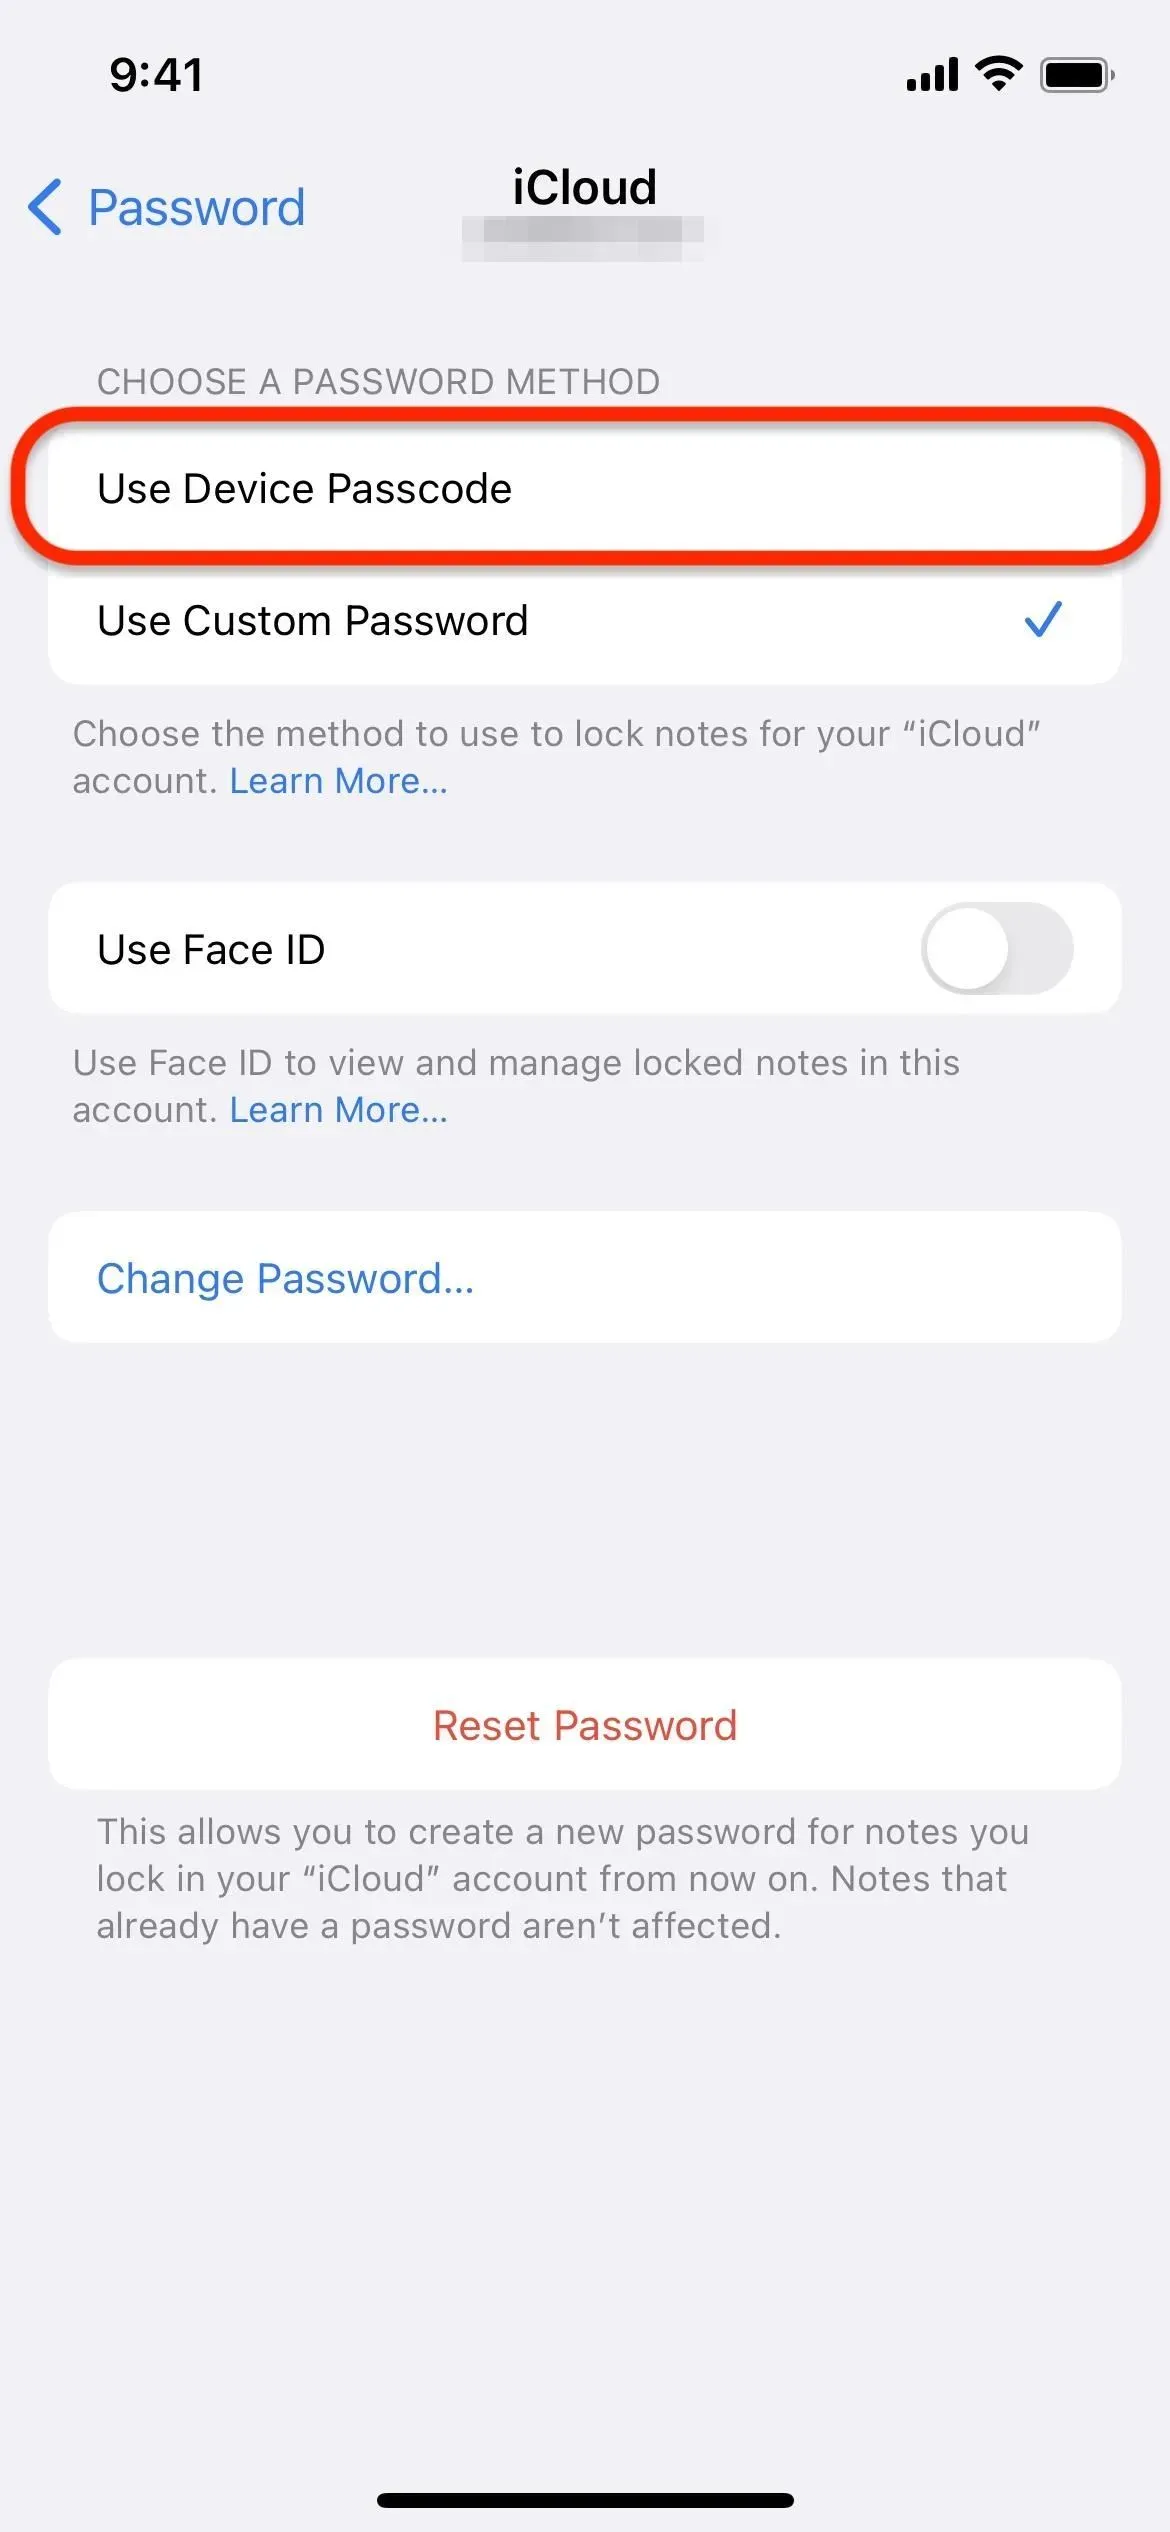
Whether you already use Notes passwords for your iCloud accounts, On My iPhone, or On My iPad, go to Settings -> Notes -> Password on your iPhone or iPad, then select your iCloud account or on your device..
Option 1: Switch from Notes-specific passwords
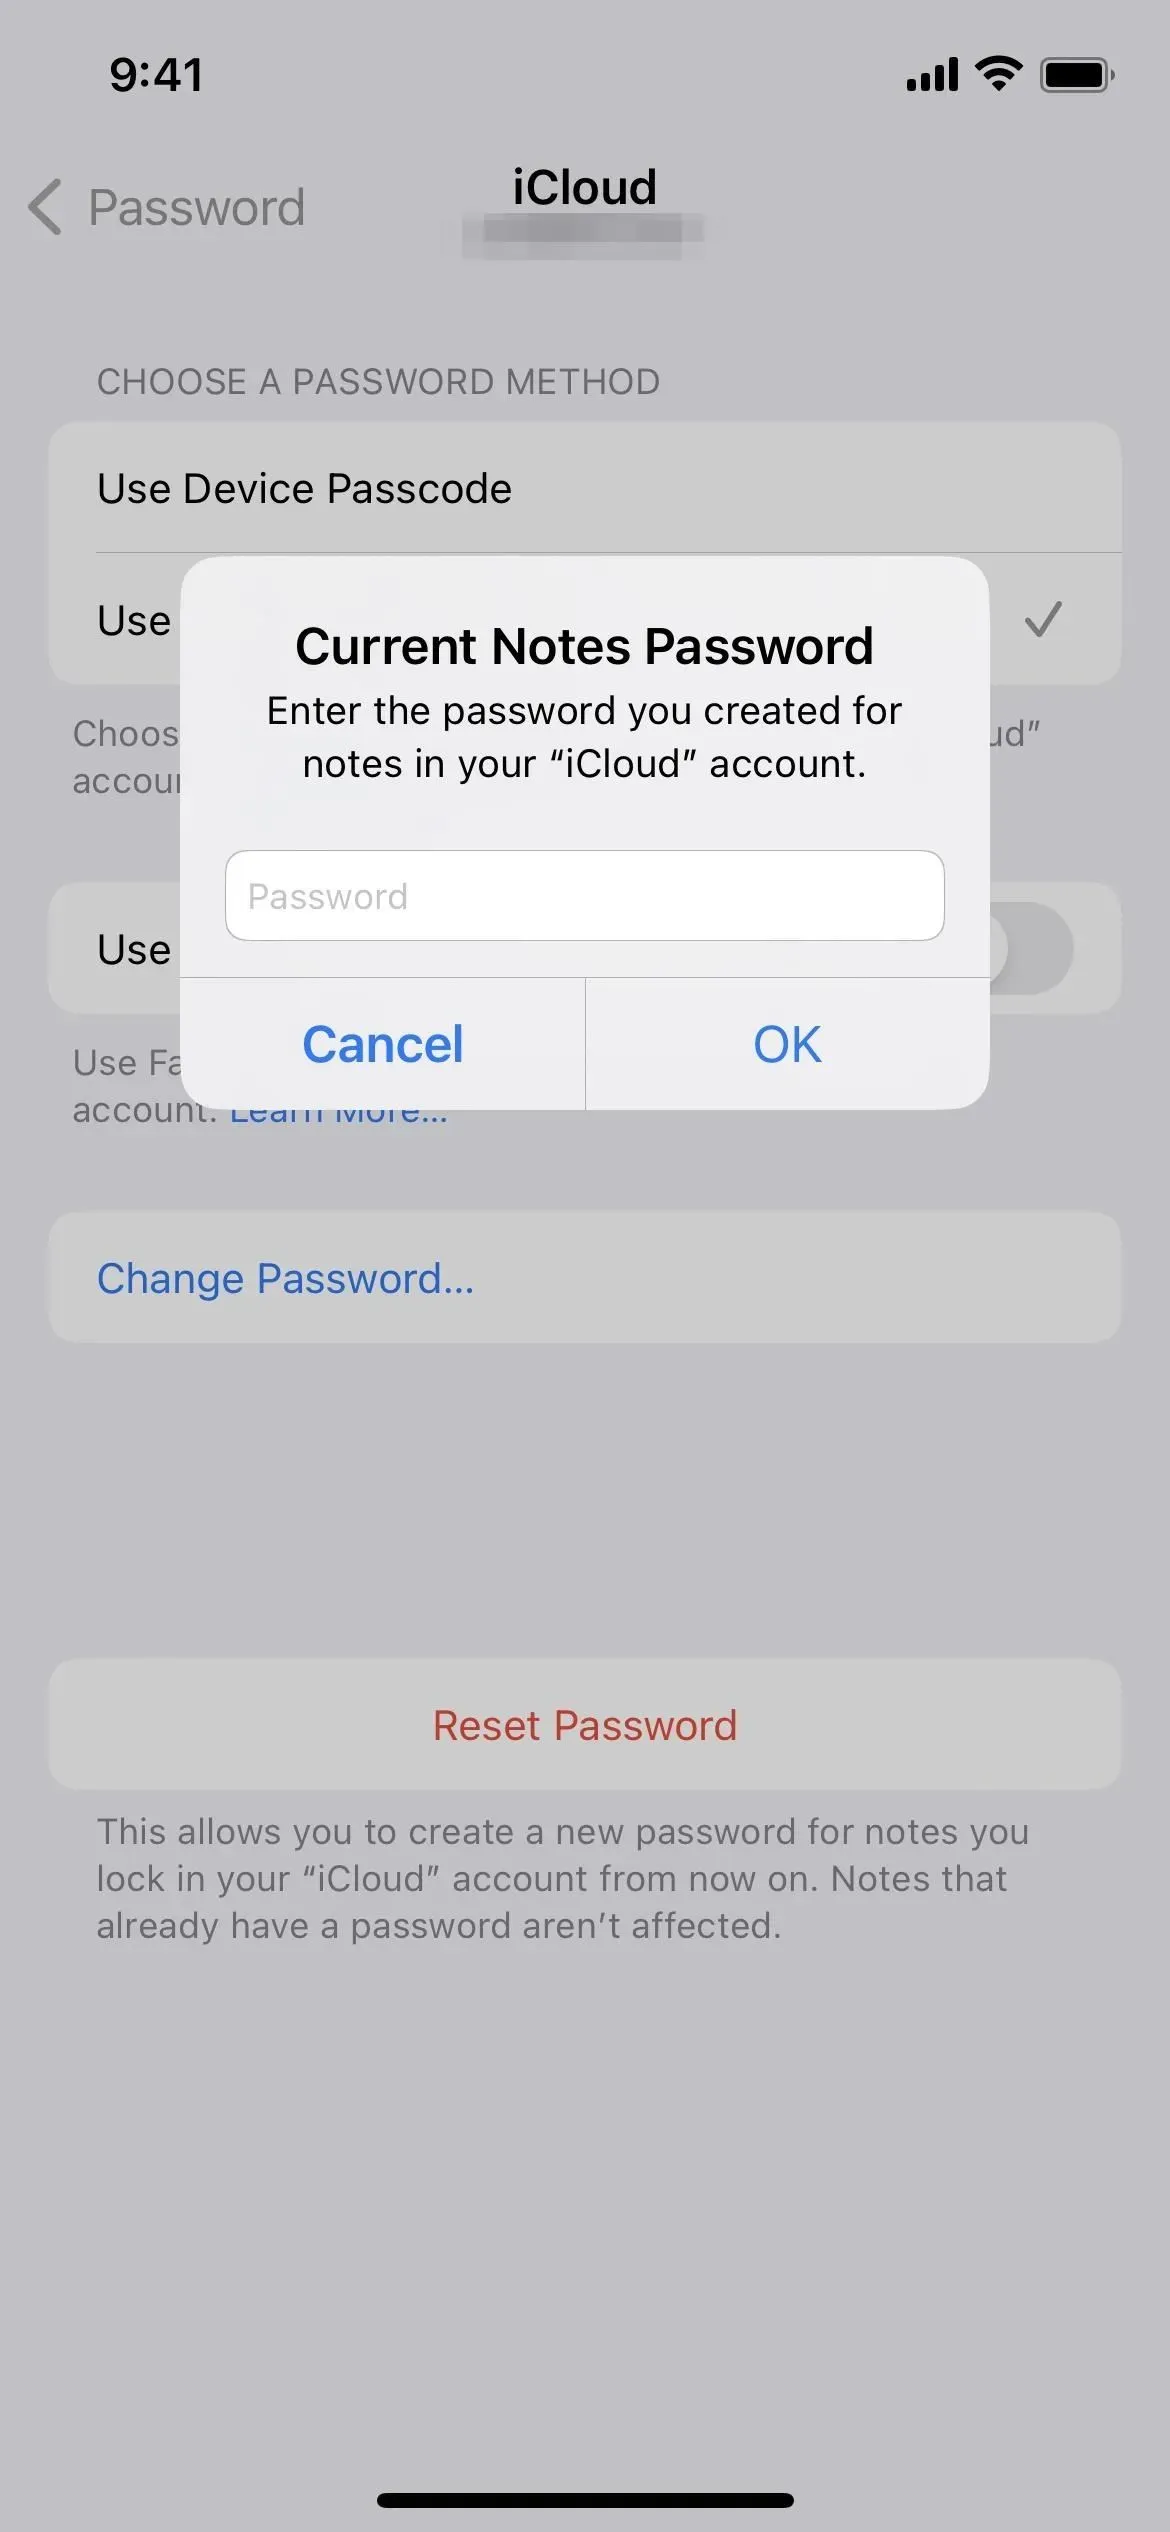
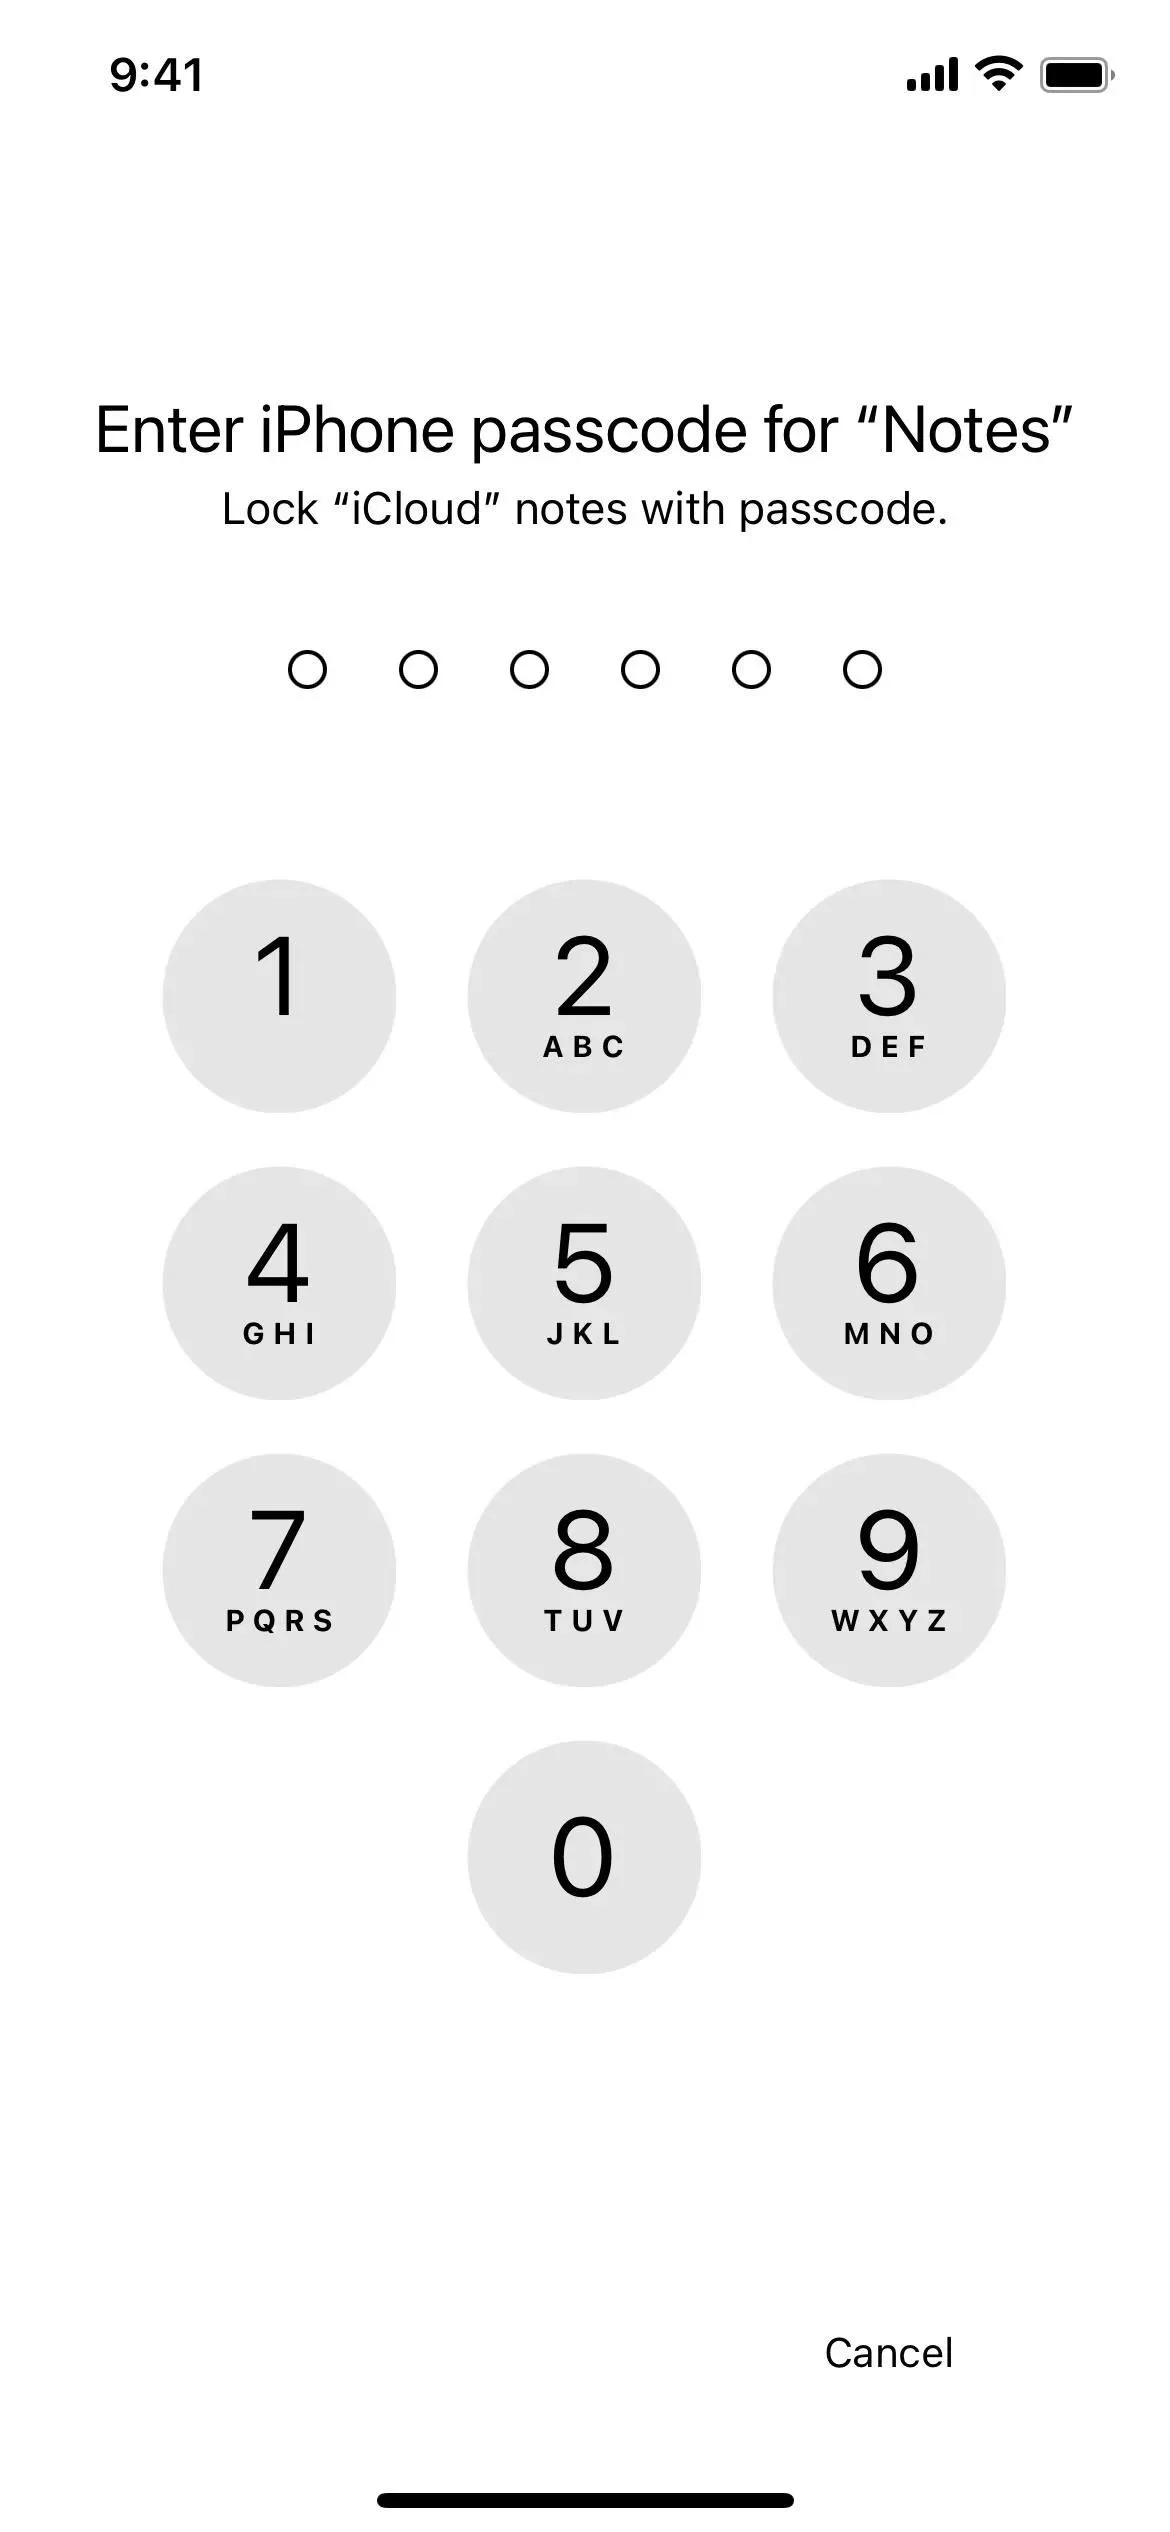
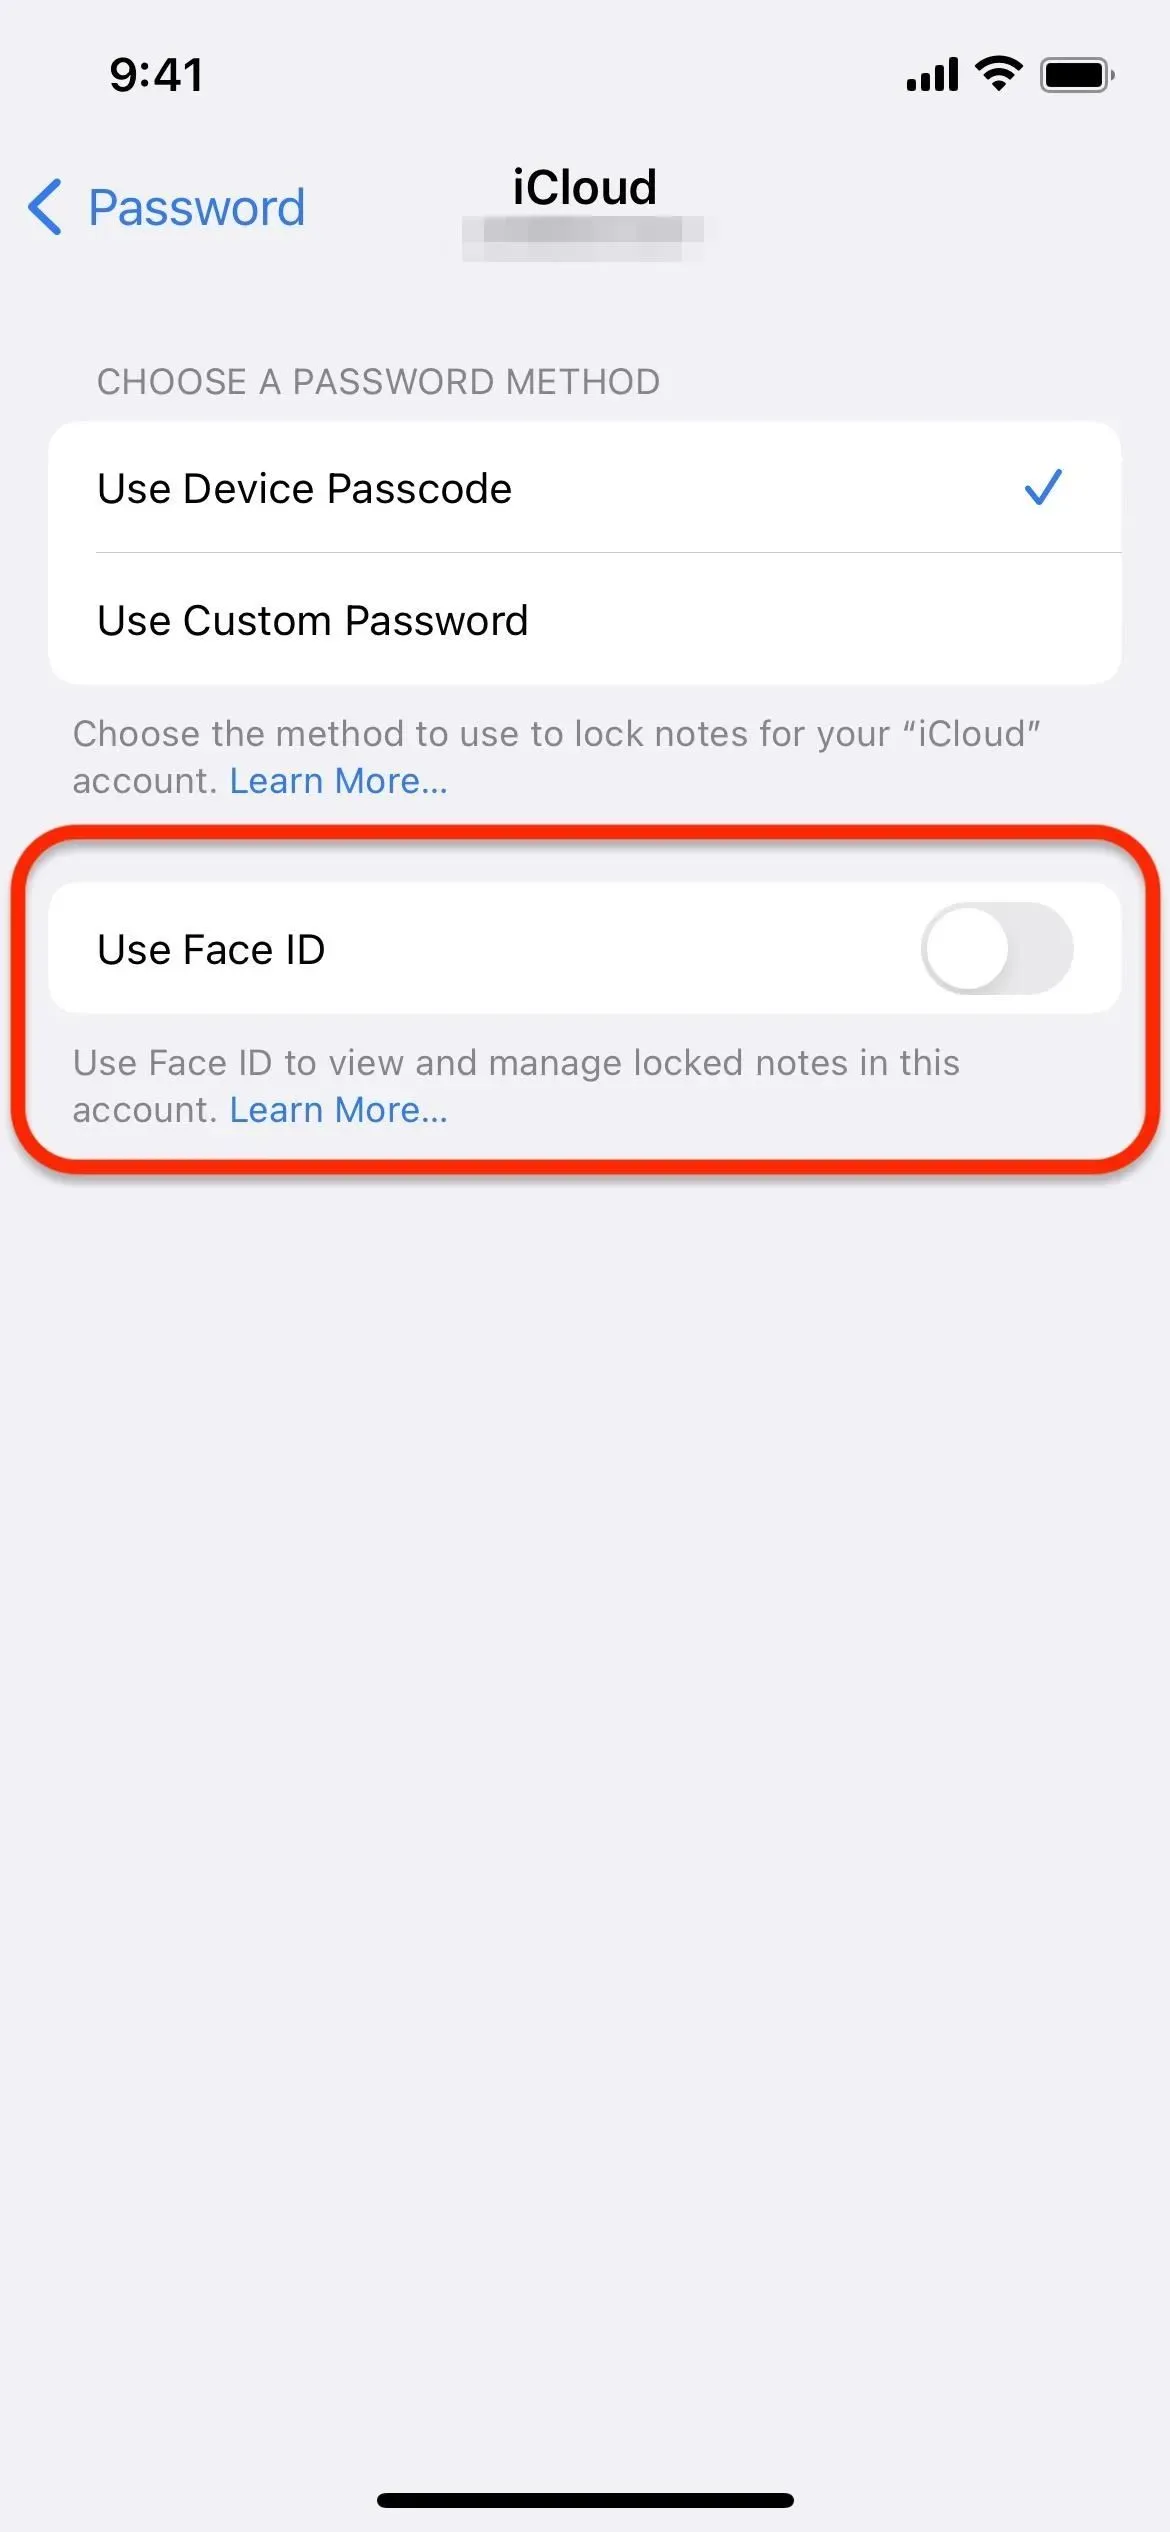
If you’re already using passwords for Notes, you can switch to the new device passcode option. Select Use Device Password, then enter your current Notes password. Instead, you may be prompted to use Face ID or Touch ID, if enabled. Then click OK and enter your device password.
If it’s your iCloud account, you may see a warning that some of your devices won’t be able to see locked notes unless they’re running iOS 16, iPadOS 16, or macOS 13. Tap Continue if everything’s fine. with you.
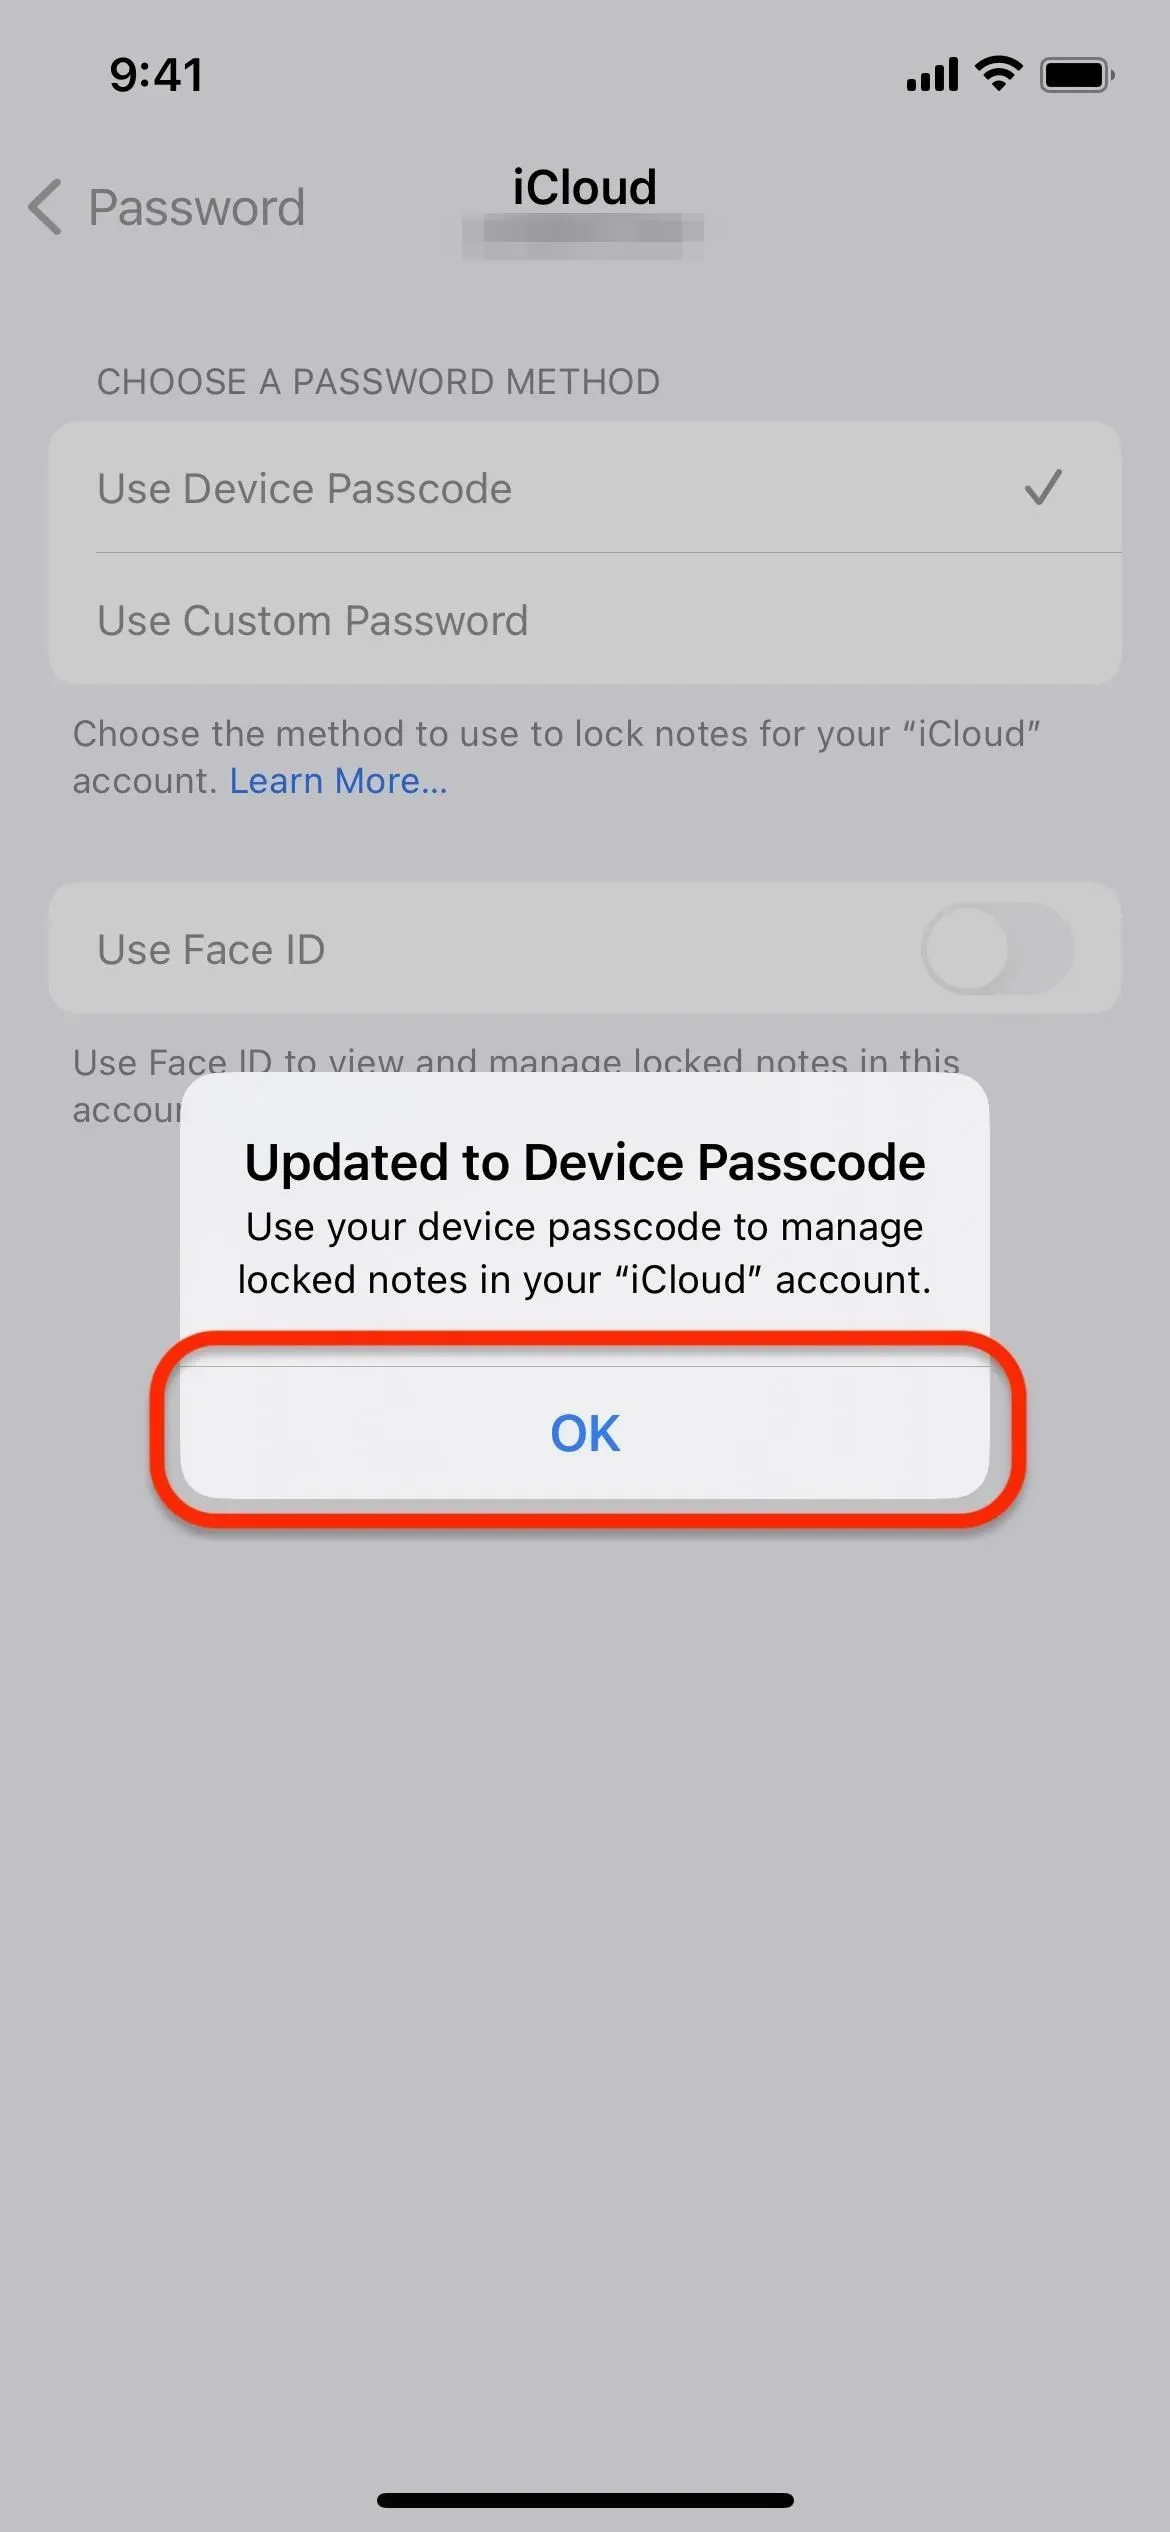
Click OK when a message appears stating that you have updated your device passcode. To make unlocking your notes more convenient, turn on the Use Face ID or Use Touch ID switch if it’s not already on, then enter your device passcode again to confirm.

Option 2: Using password protection for the first time
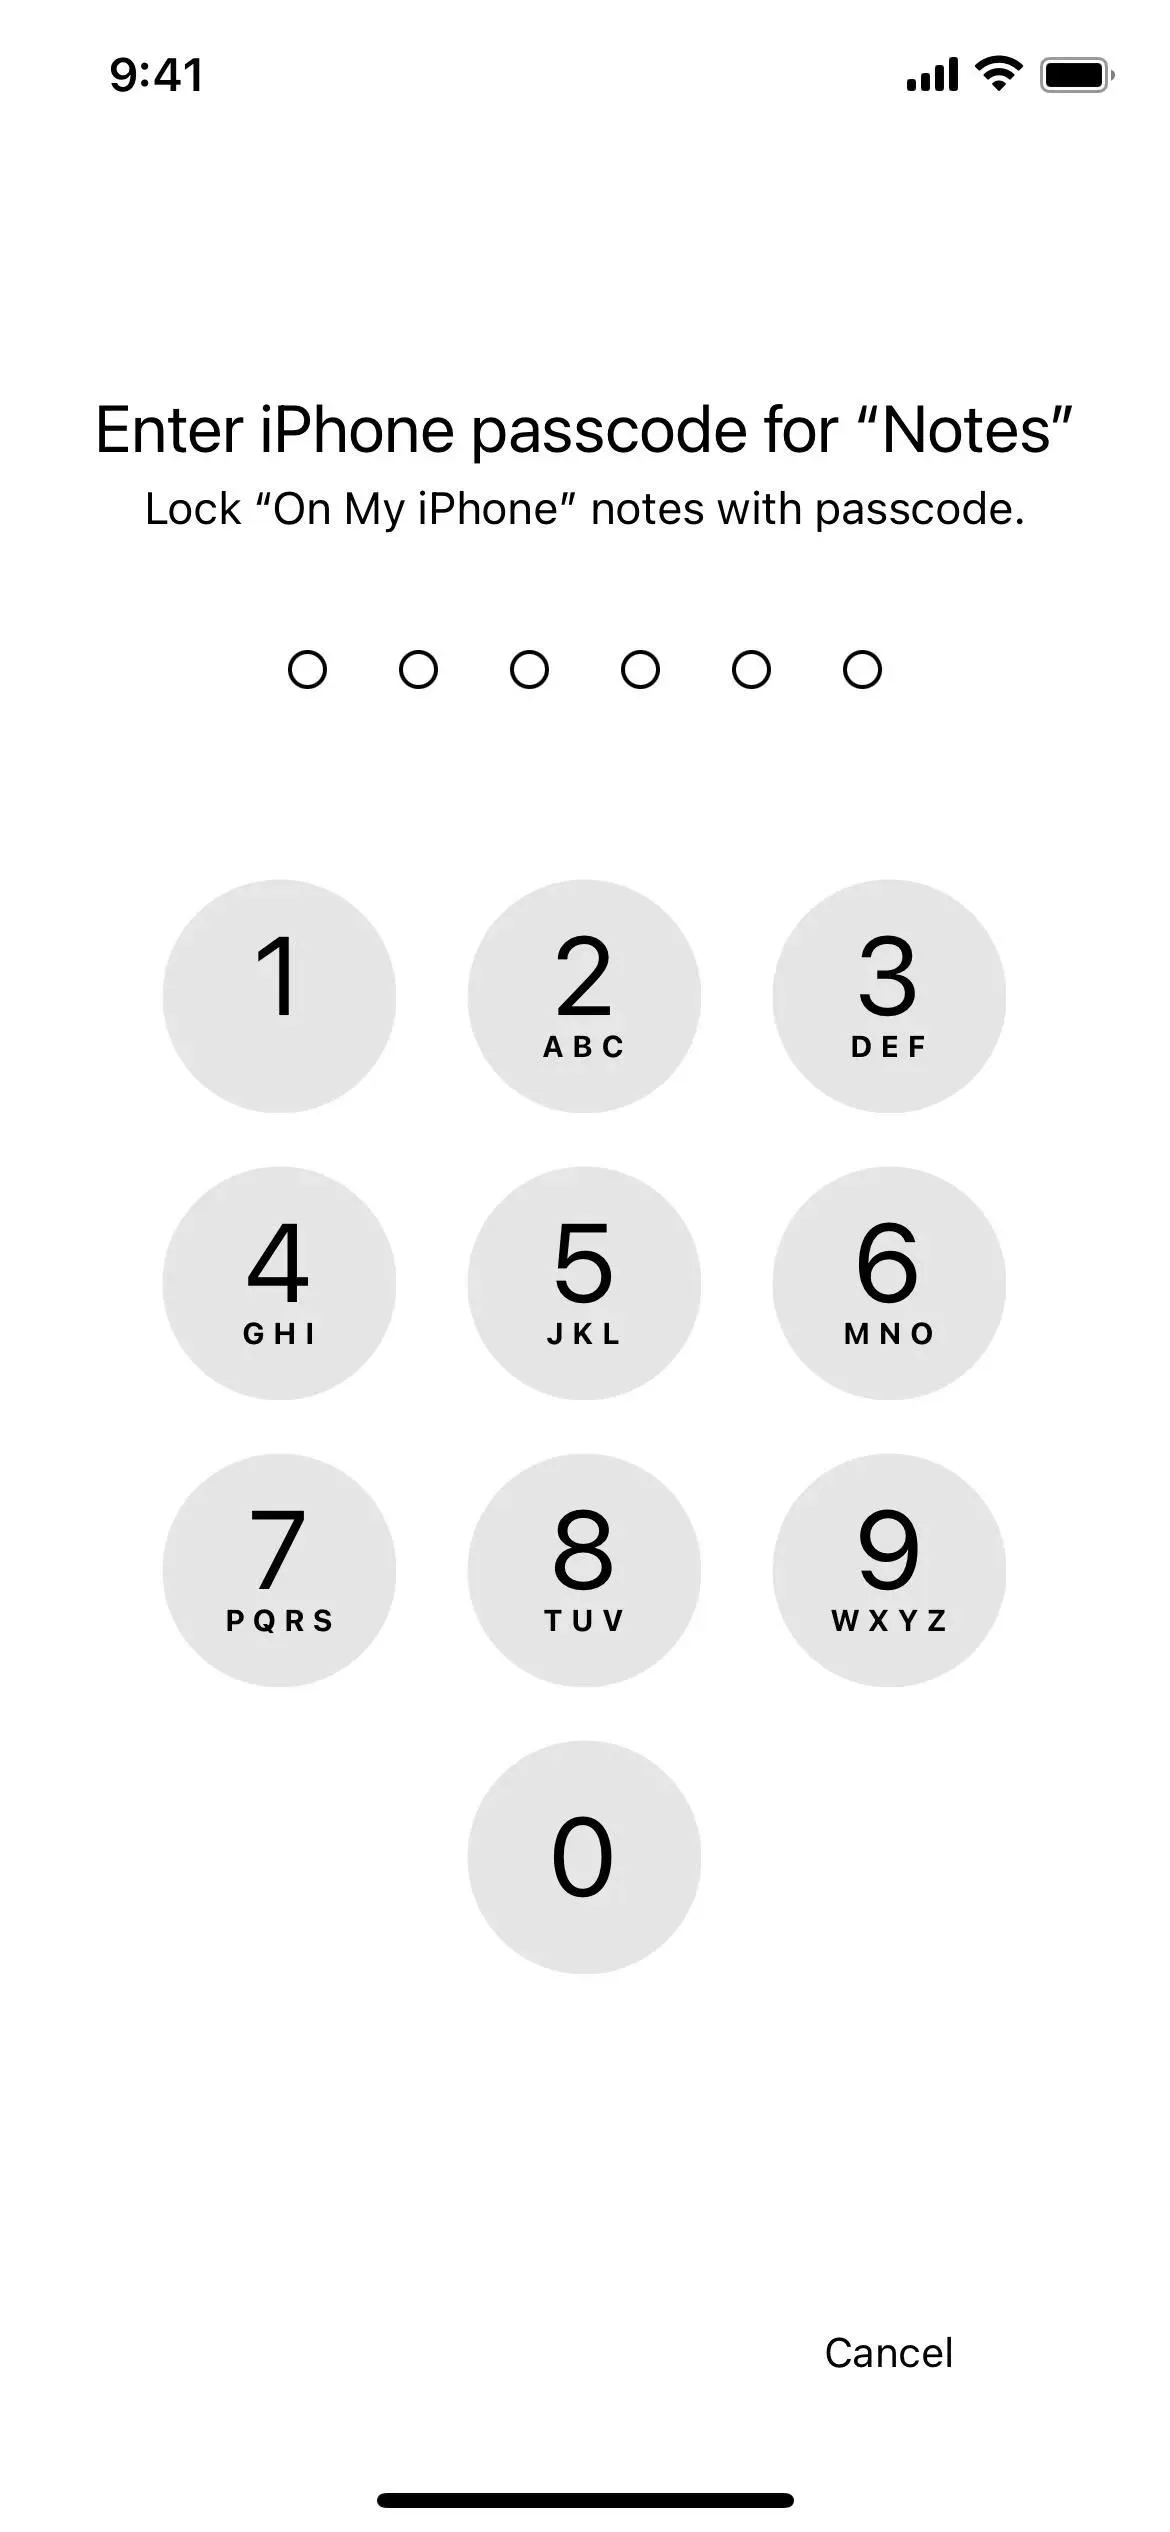
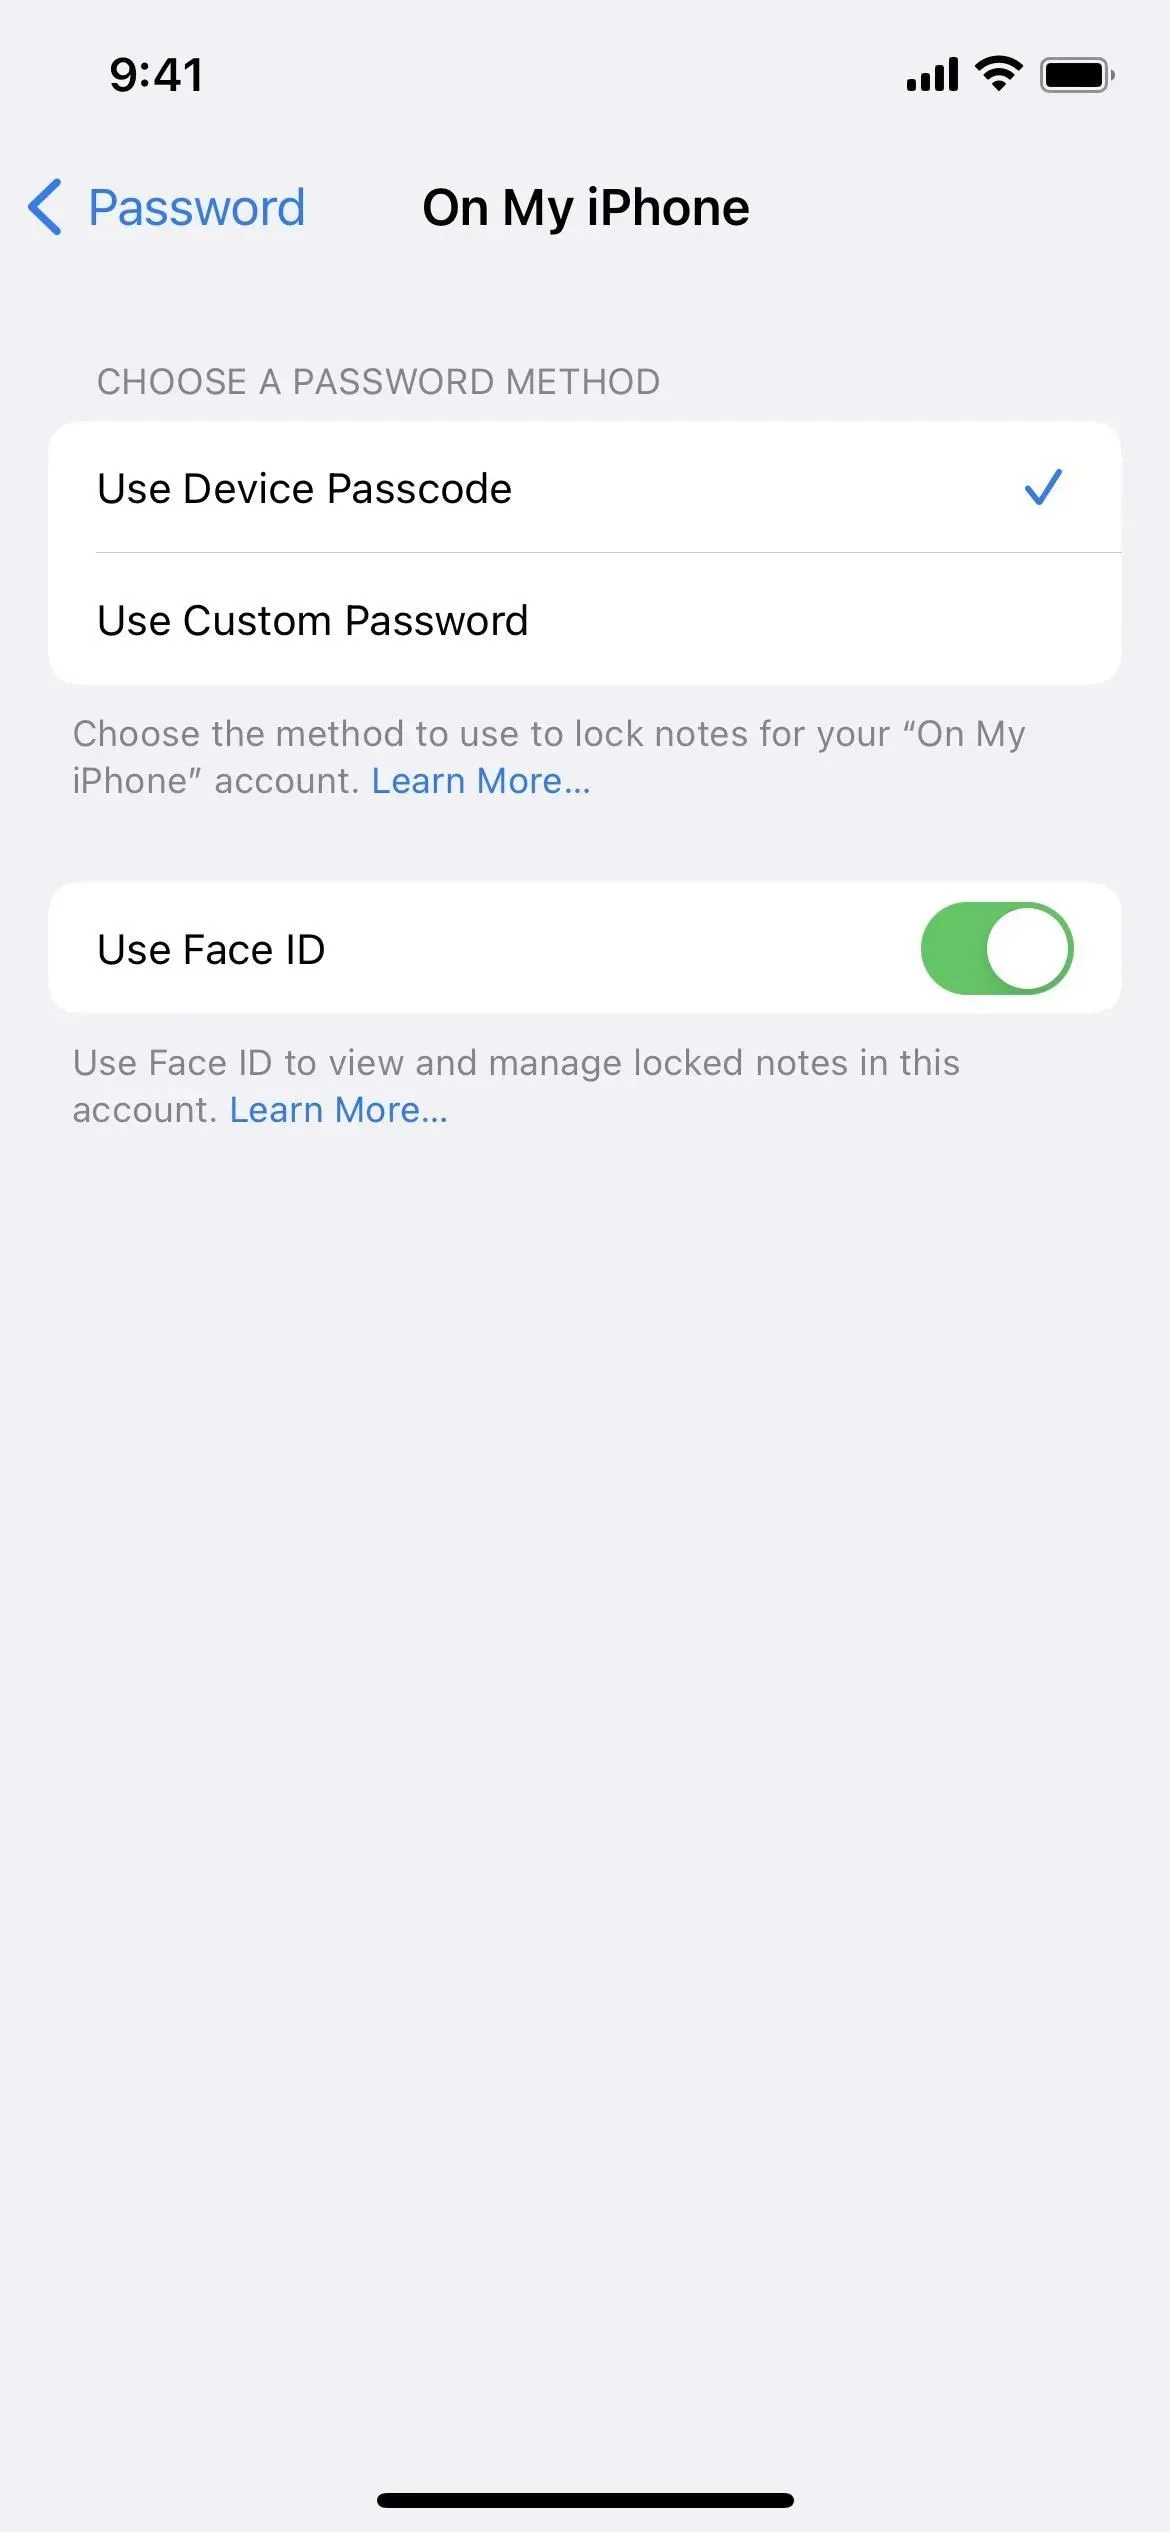
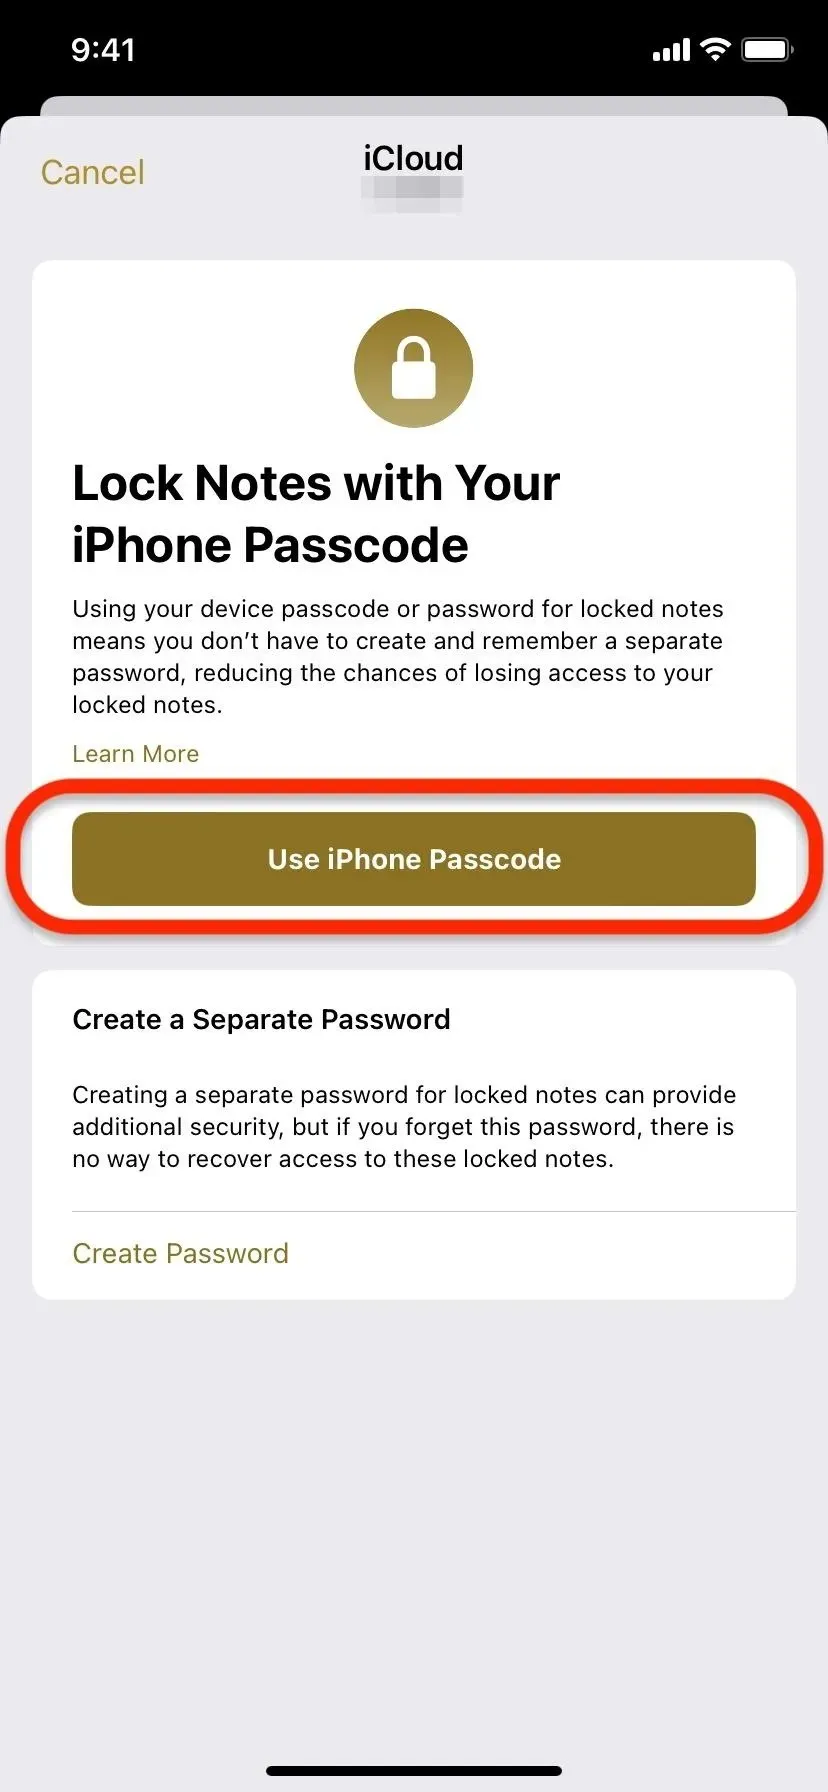
If you’ve never locked a note on your iPhone or iPad, you might see a page about the new feature. If so, click “Use iPhone passcode”and enter your device passcode. You can then turn on “Use Face ID”or “Use Touch ID”(you’ll need to enter your passcode again) if you’d like to access your notes more easily.
At some point, you may see a warning that some of your devices won’t be able to see locked notes unless they’re running iOS 16, iPadOS 16, or macOS 13. Tap Continue if you’re happy with that. You You won’t see this warning if you’re protecting On My iPhone or On My iPad notes.
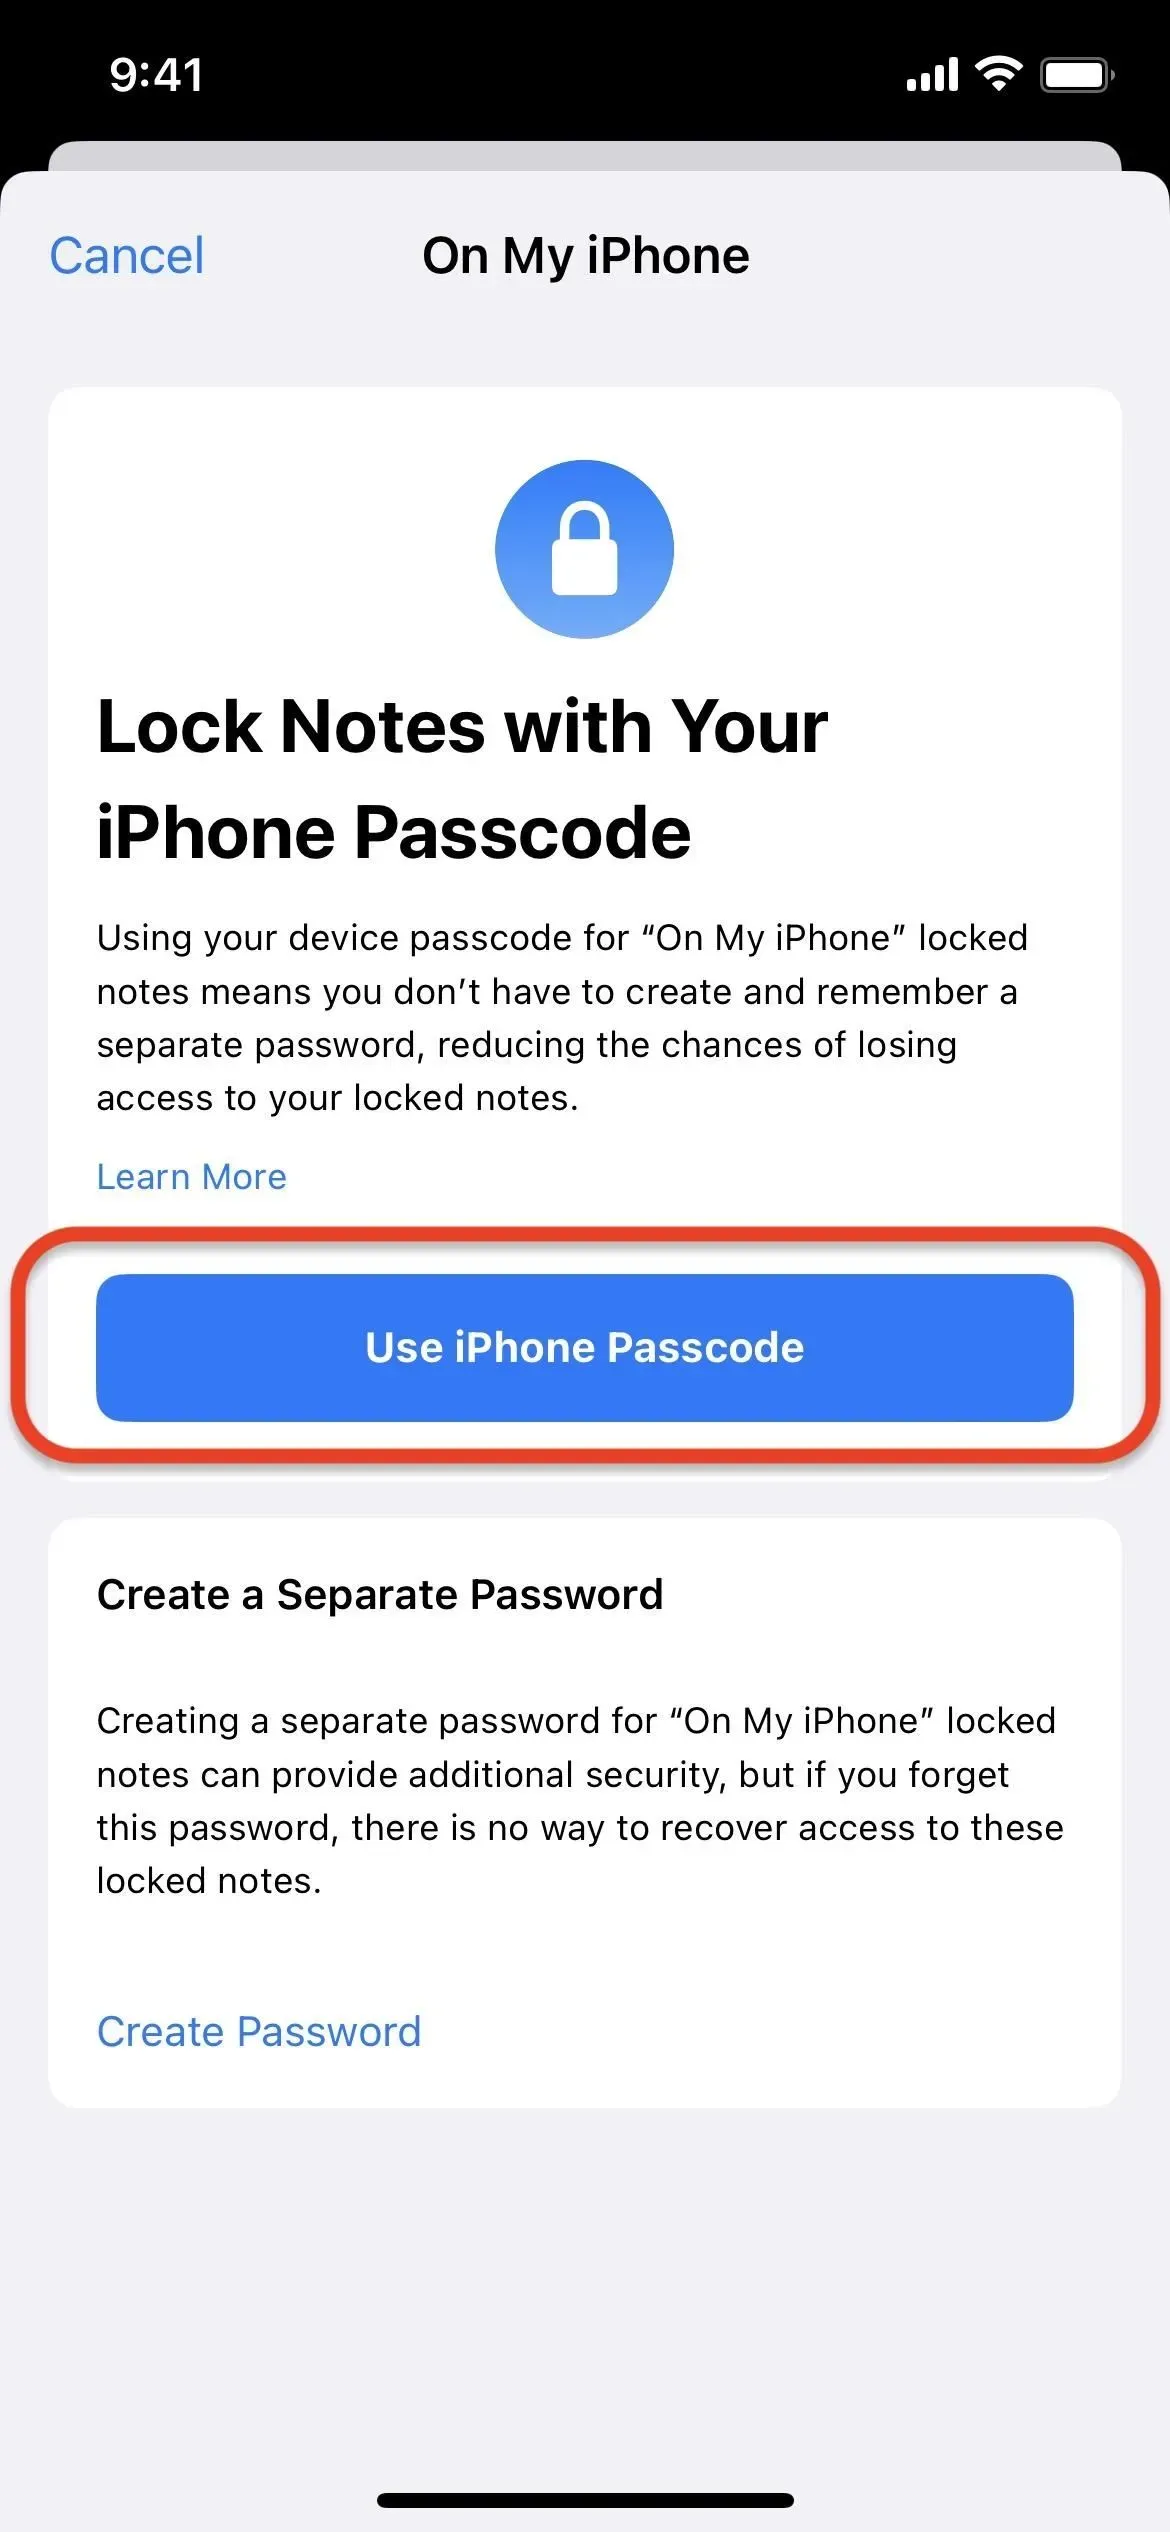
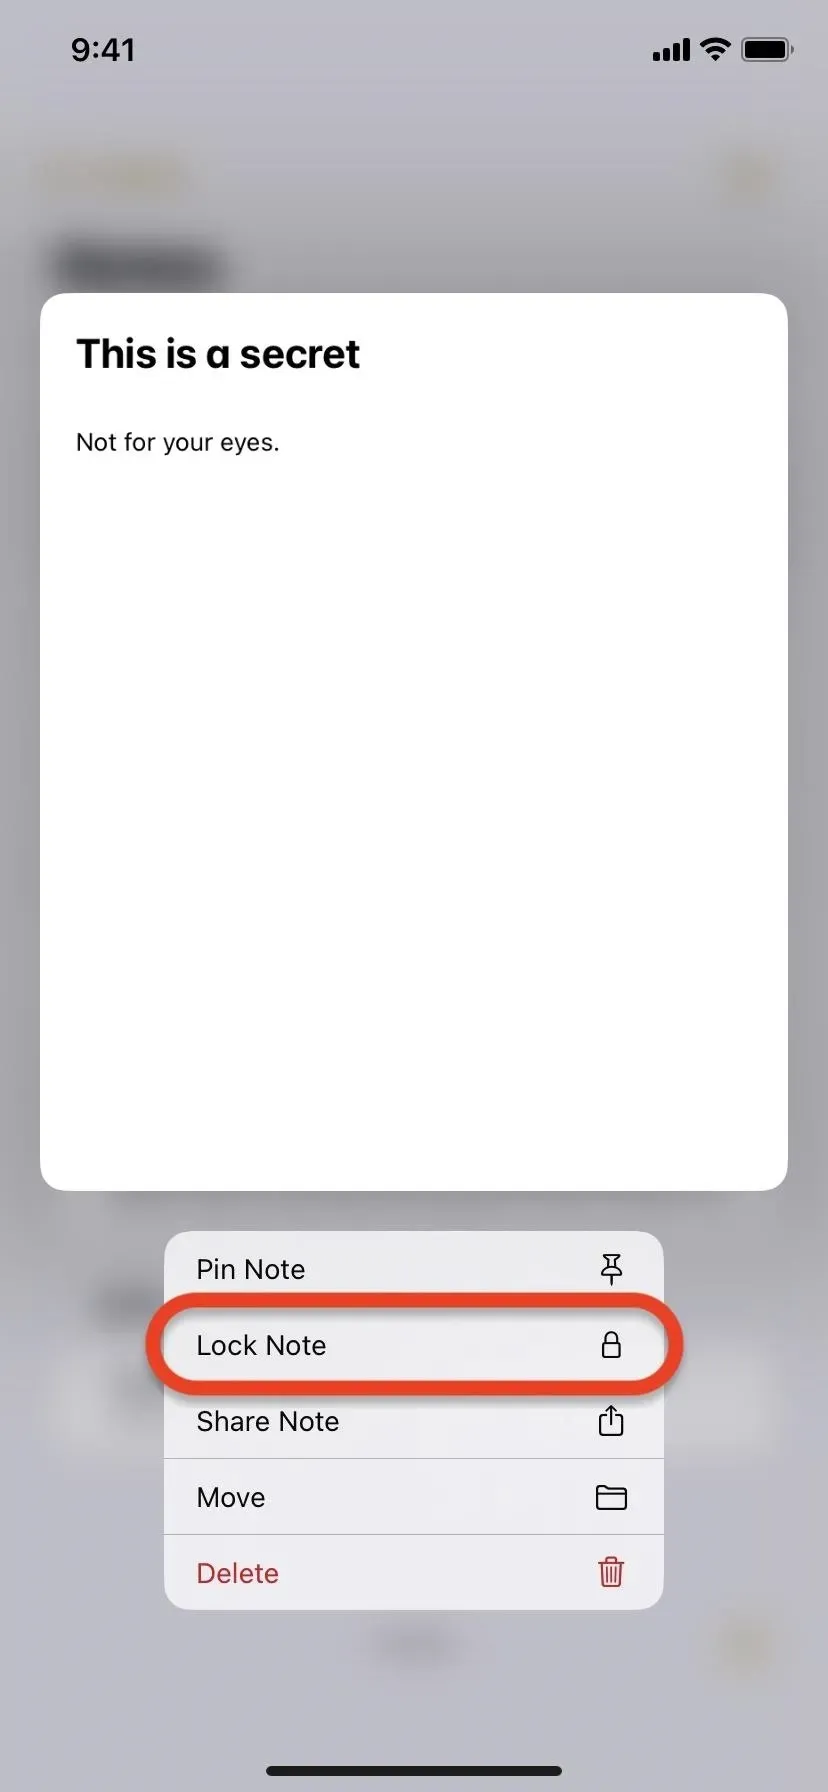
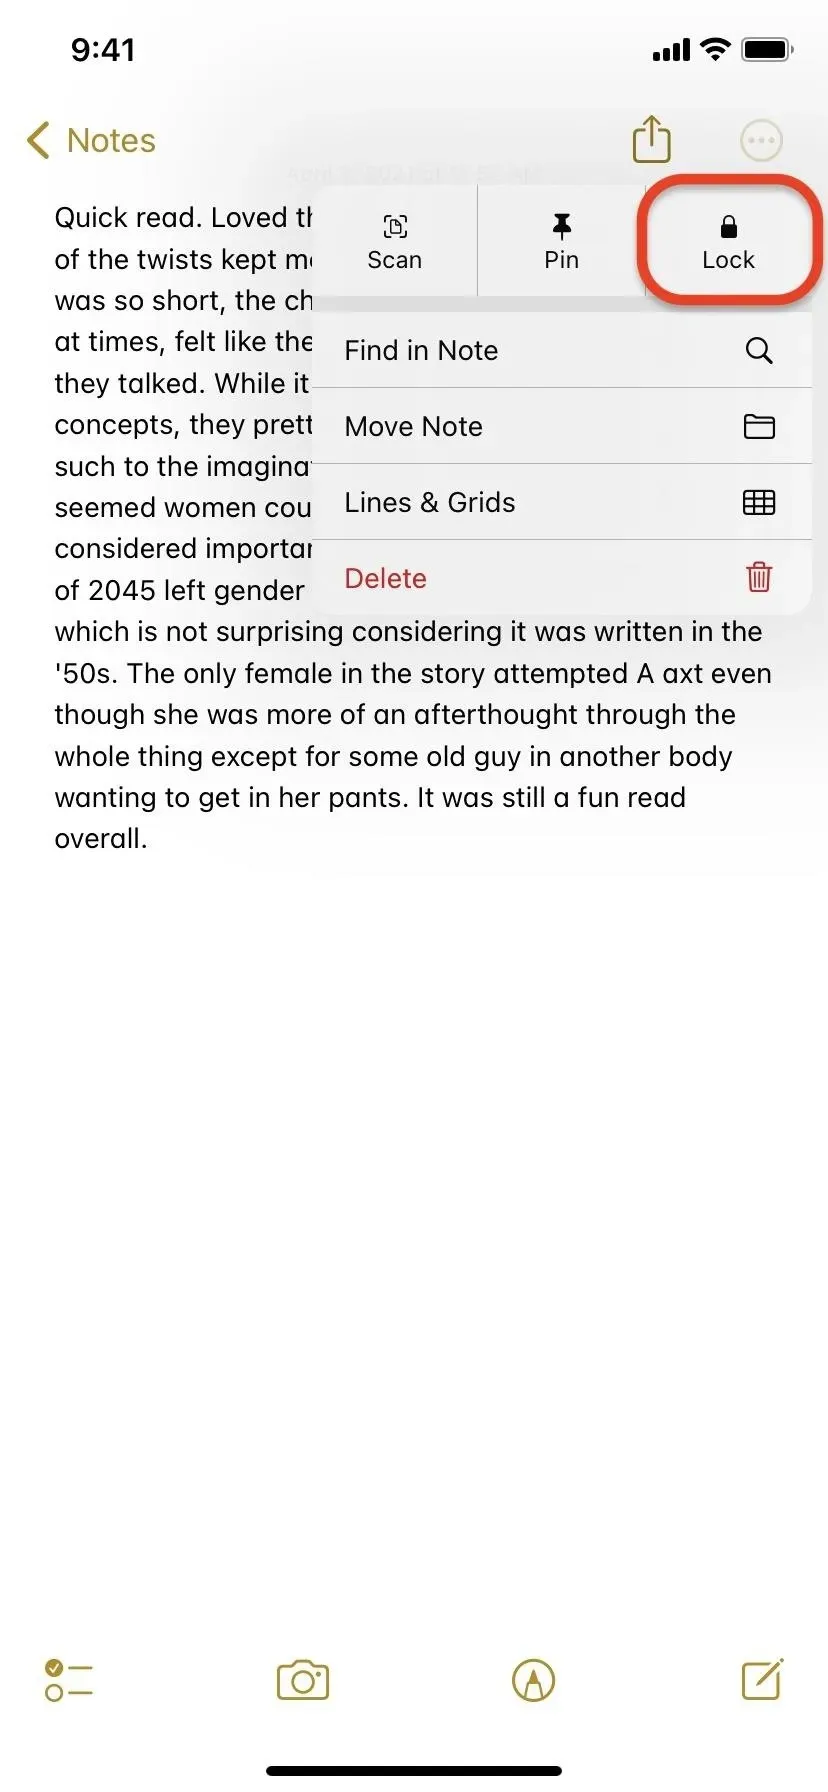
Alternatively, you can skip the Settings menu and go directly to the note. Press and hold it in the folder view, or tap the ellipsis (•••) in the note itself, then tap Lock Note or Lock. You should see a page about the new feature; Click “Use iPhone passcode”on it.

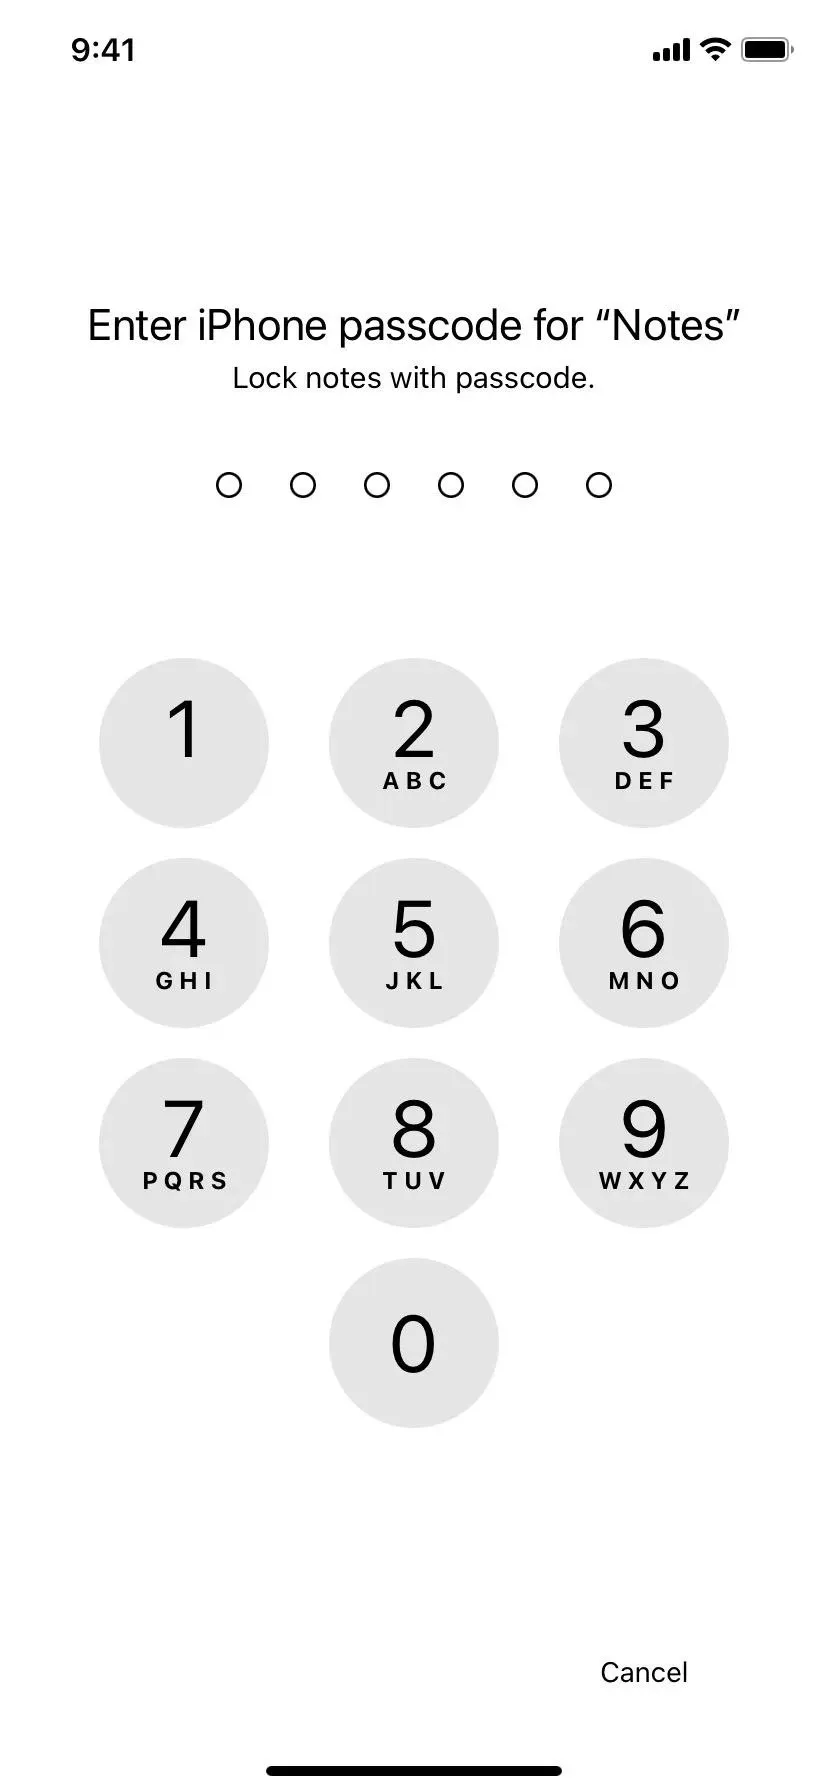
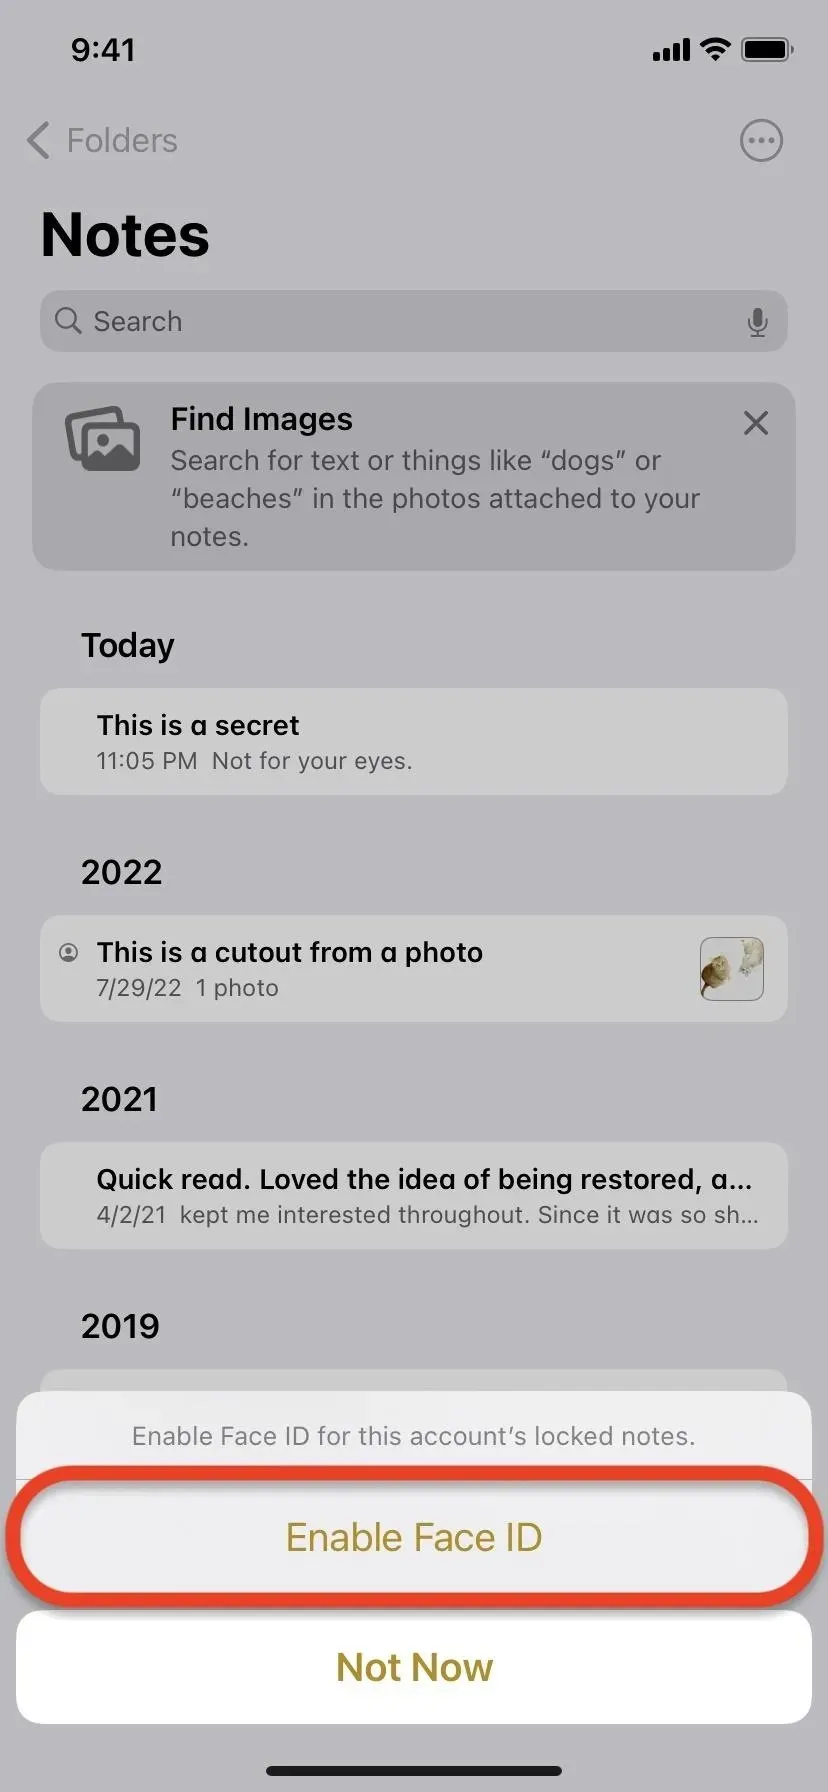
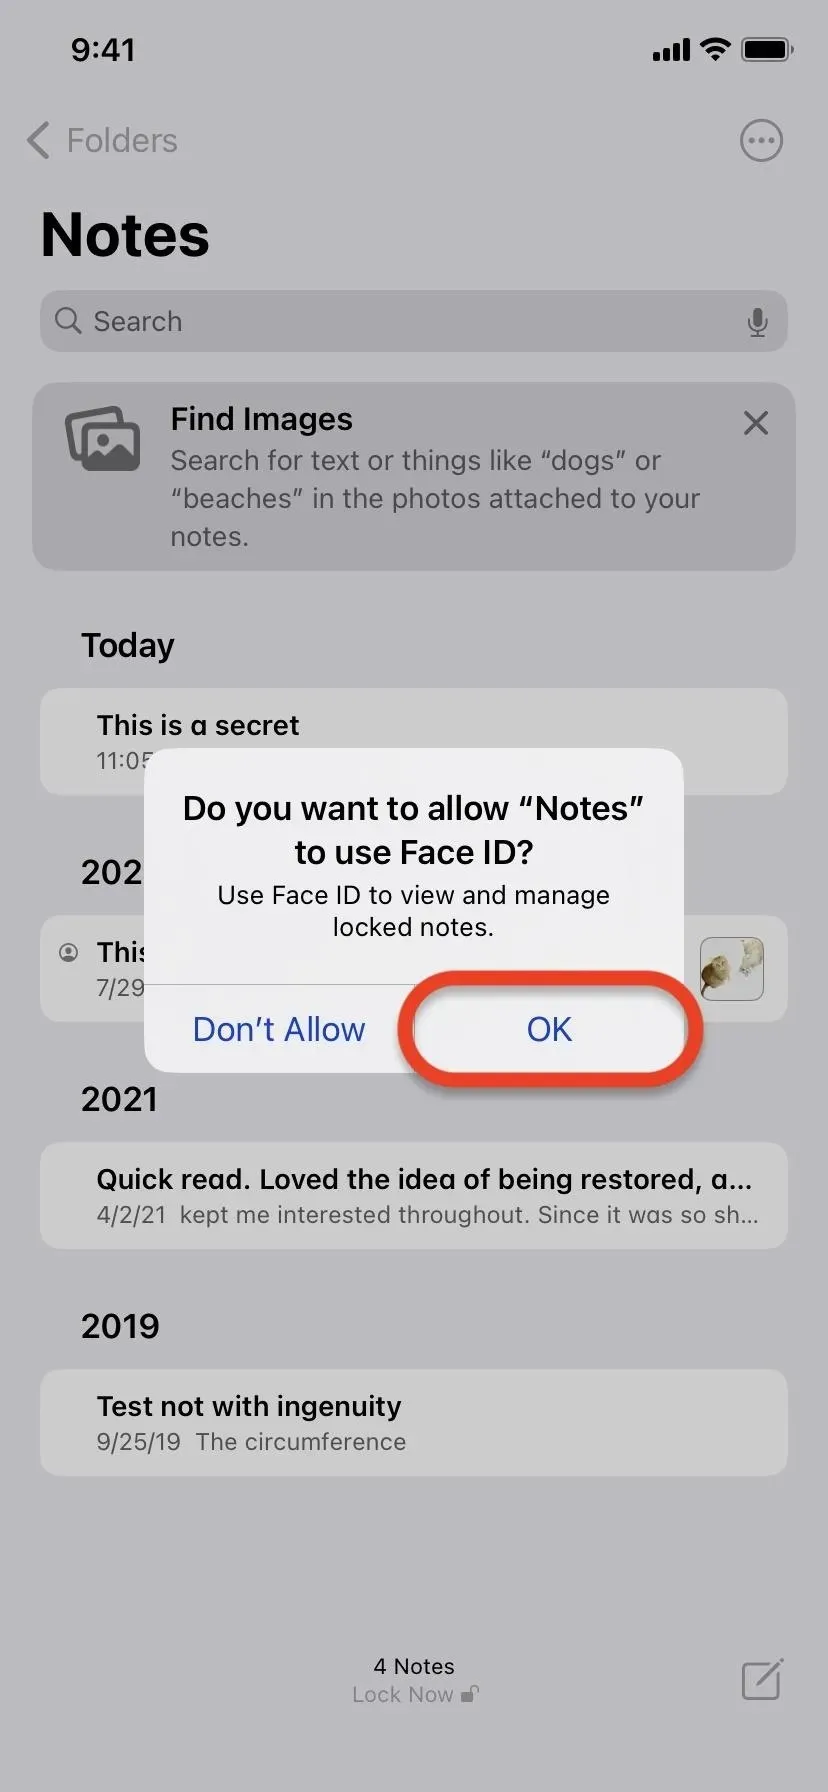
Then enter your device password. After that, it will ask if you want to enable biometrics; Tap Use Face ID or Use Touch ID, then tap OK when prompted for permissions.
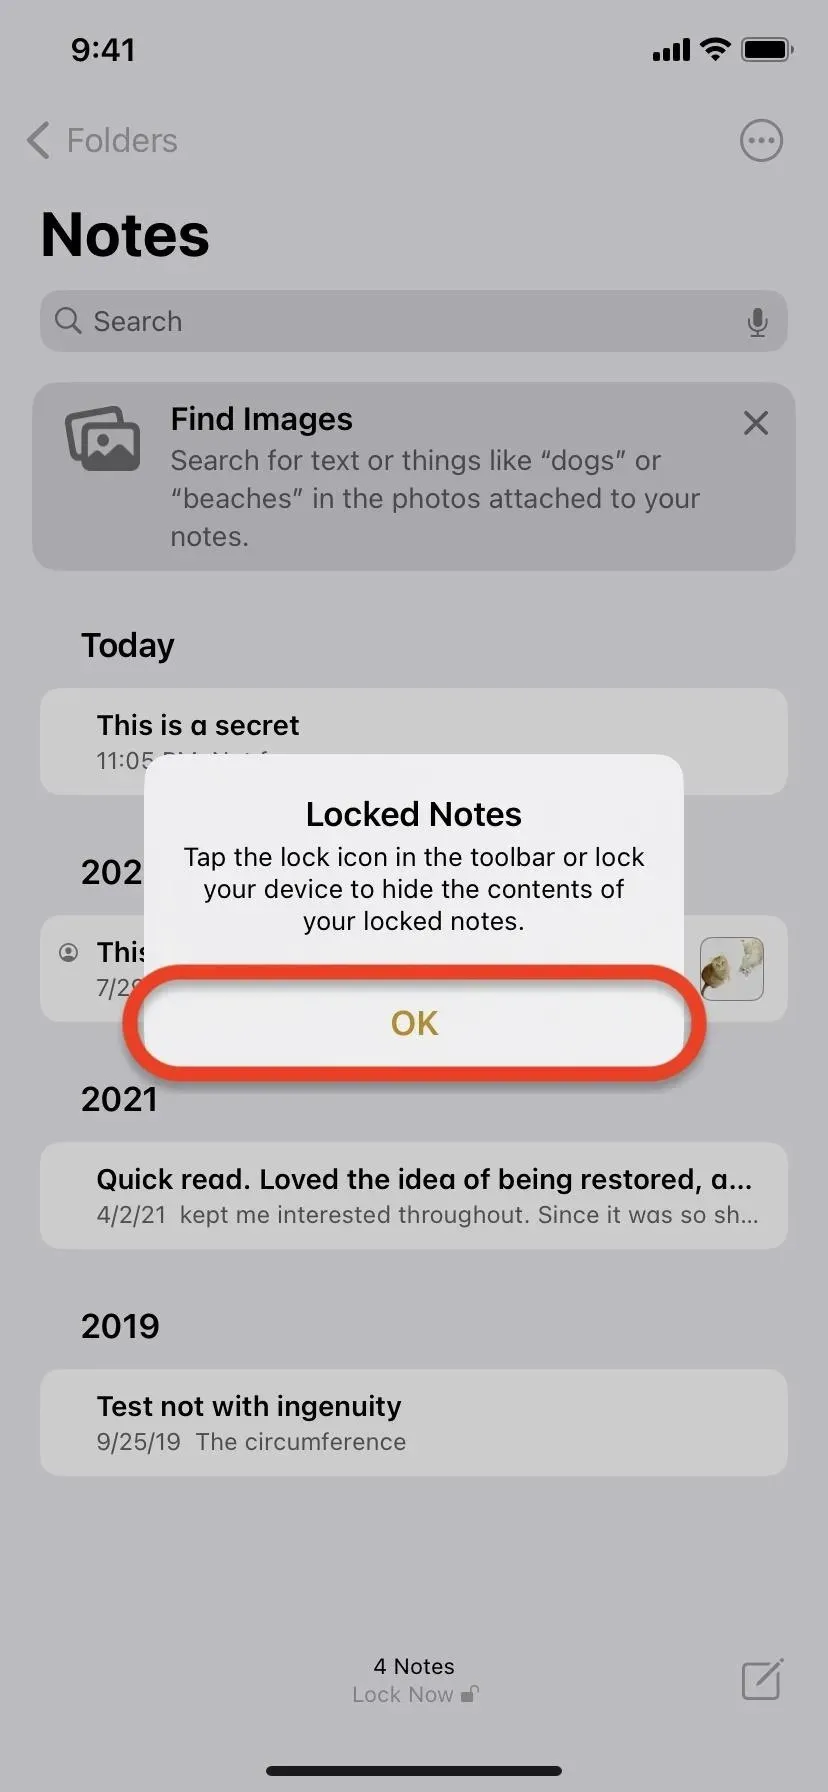
You will see a quick message on how to close all locked notes at once. Click “OK”and you will return to the folder or note you were in before with the note unlocked.
2. How to lock and unlock notes on your iPhone or iPad
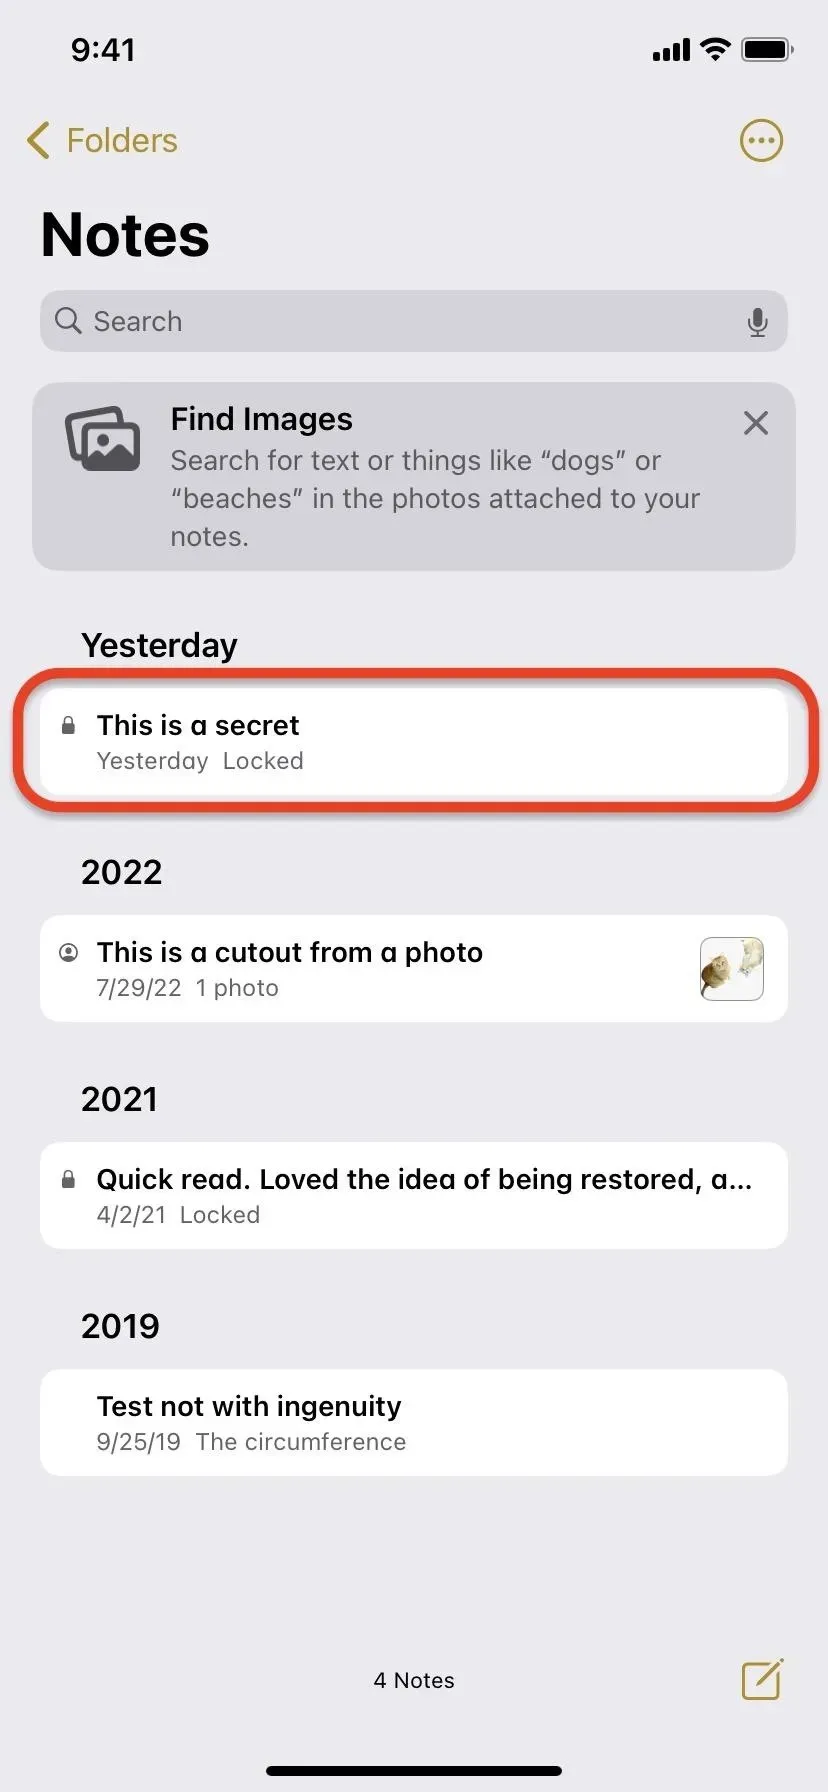
To lock notes on your iPhone or iPad, you can press and hold one of the folders, or tap the ellipsis (•••) on the note itself and then tap Lock Note or Lock. You may need to use your device’s biometrics or password for verification.
You can’t lock multiple notes at the same time, so just one at a time. And you can’t lock notes with collaborators, notes in third-party accounts, quick notes, or notes with attached PDFs, audio, video, Keynote, Pages, or Numbers documents.

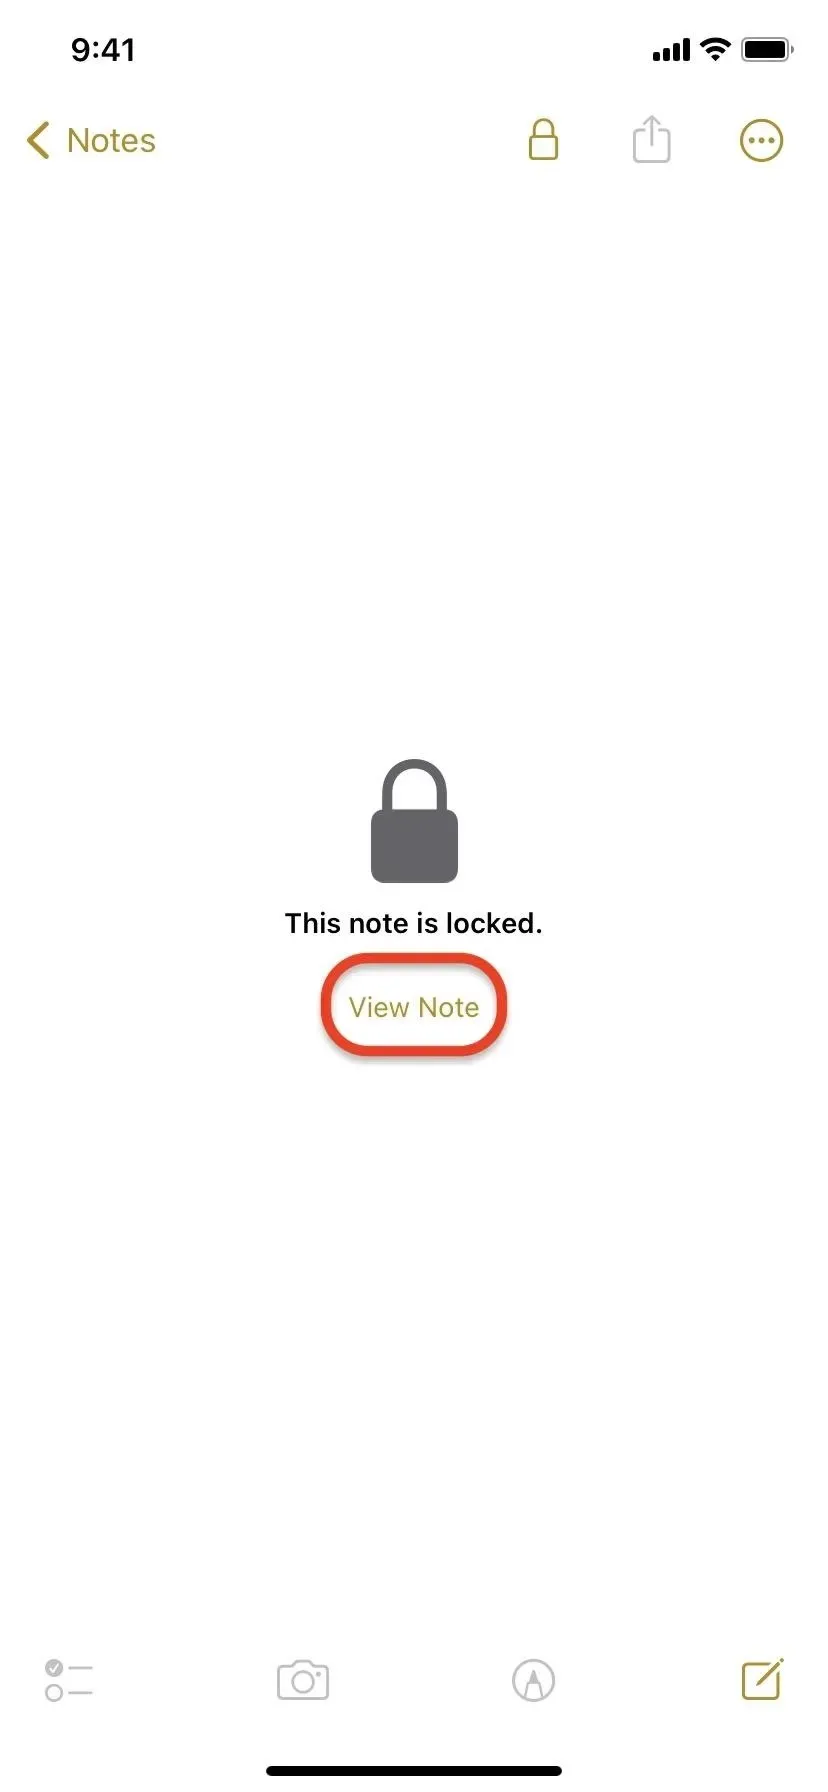
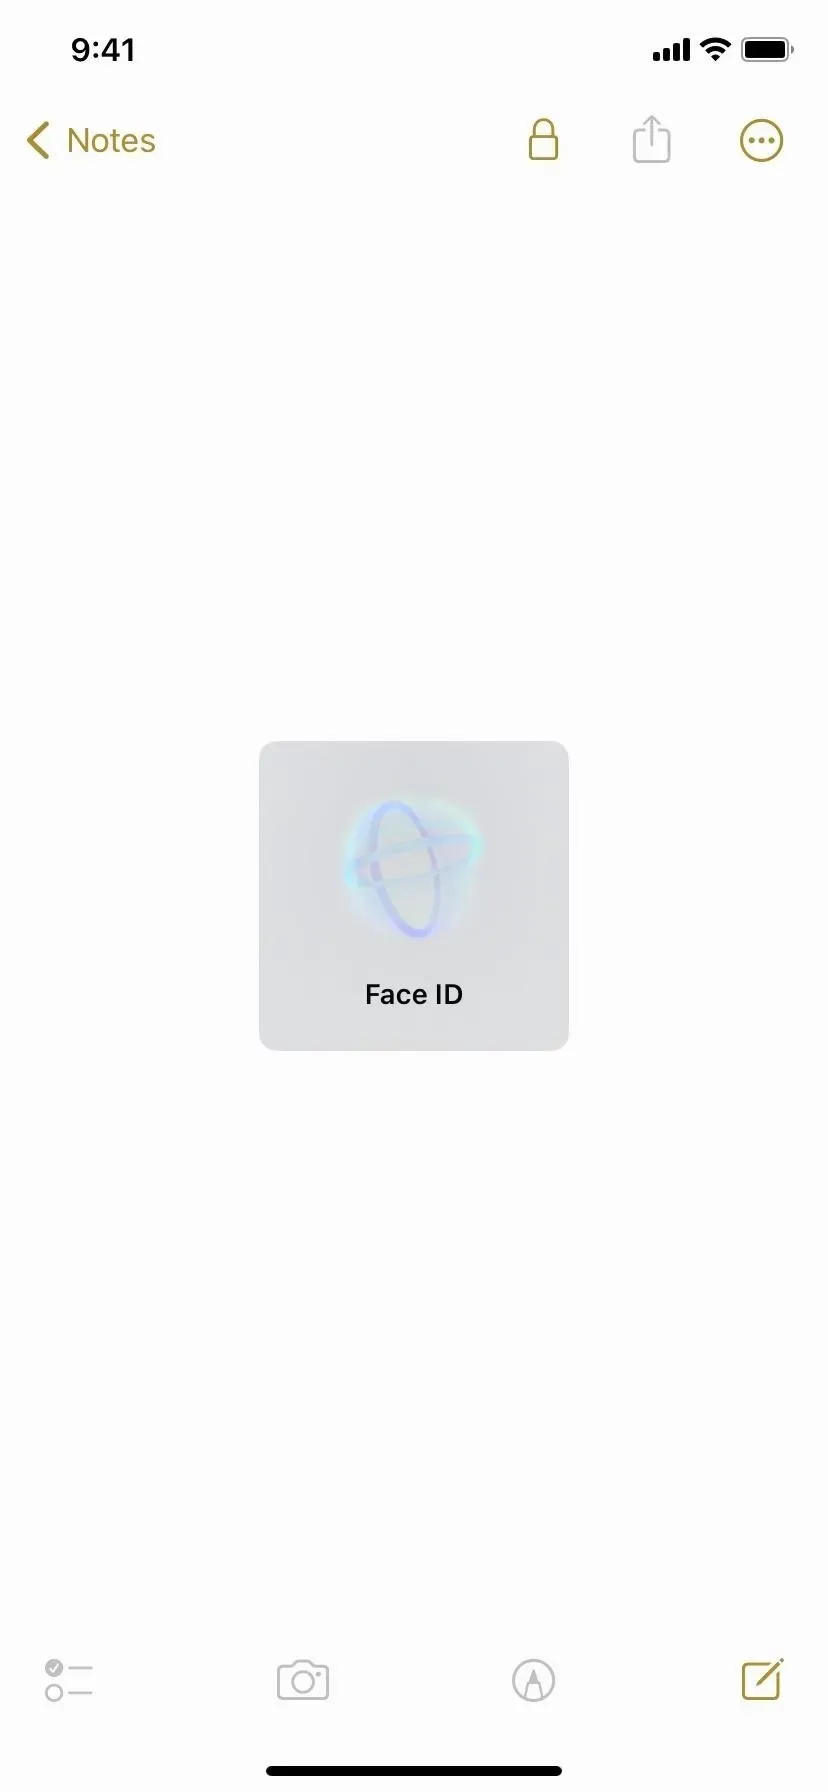
To open notes when they’re locked, simply open the note, select View Note, then authenticate with Face ID, Touch ID, or your device’s passcode. Unlocking one note will unlock all notes assigned to your device’s passcode. However, there may still be some notes that use unique passwords if you have previously locked notes using more than one password and they will remain locked until you manually open them. You can then switch them to your device’s passcode if required.
Note that you can access your locked notes from any device using device passwords or login passwords for each. If you have access to notes on iCloud.com, you must use your Apple ID password.
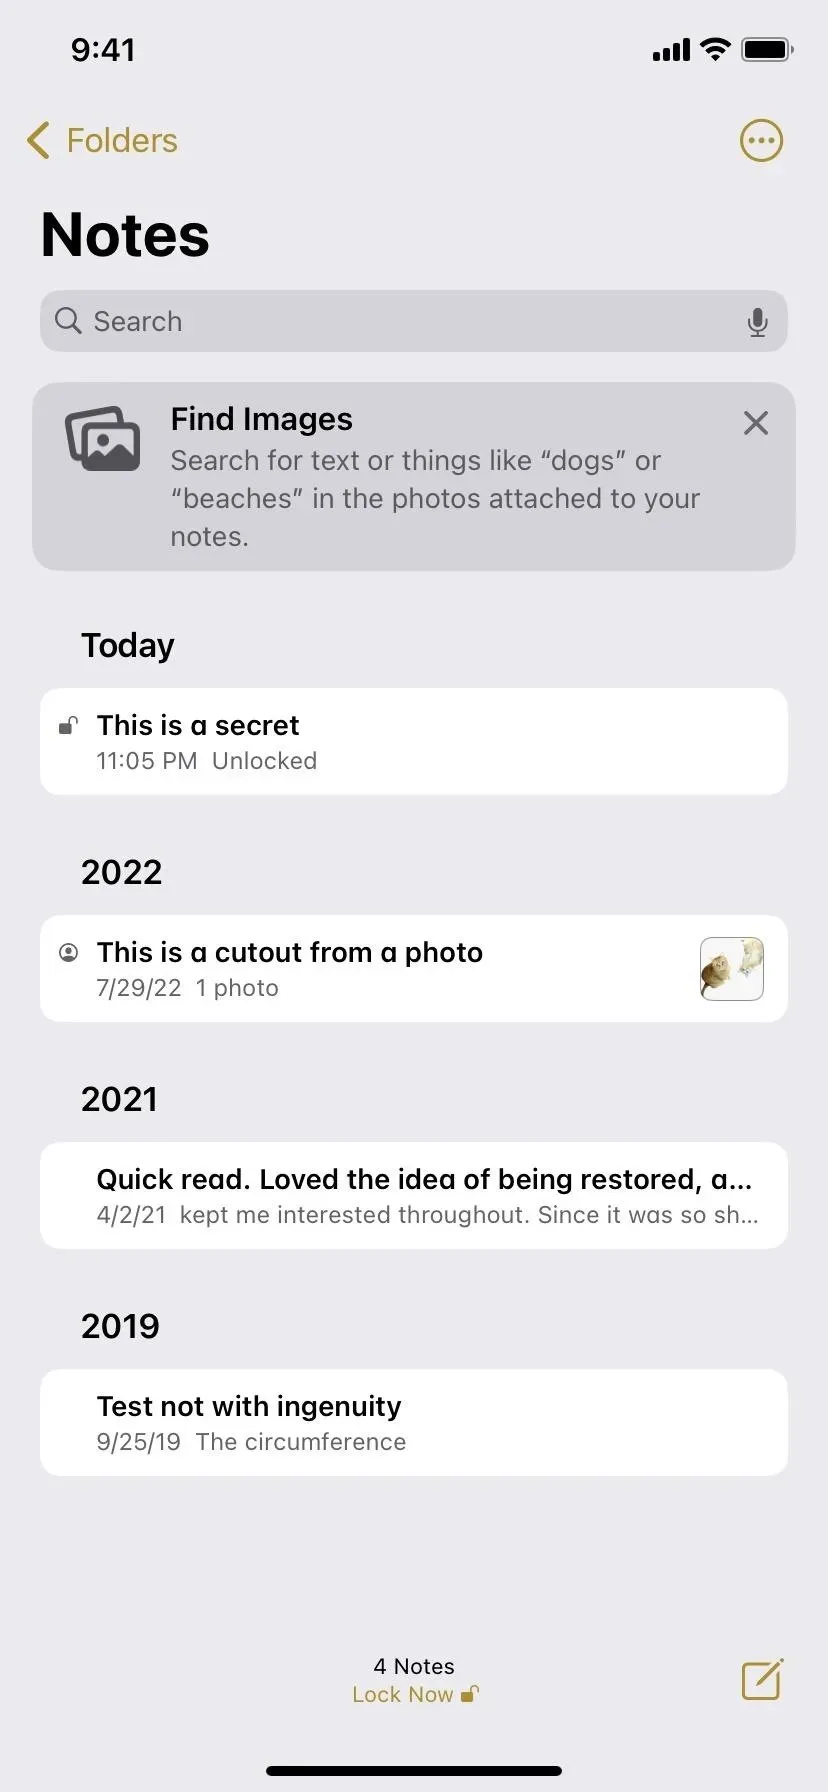
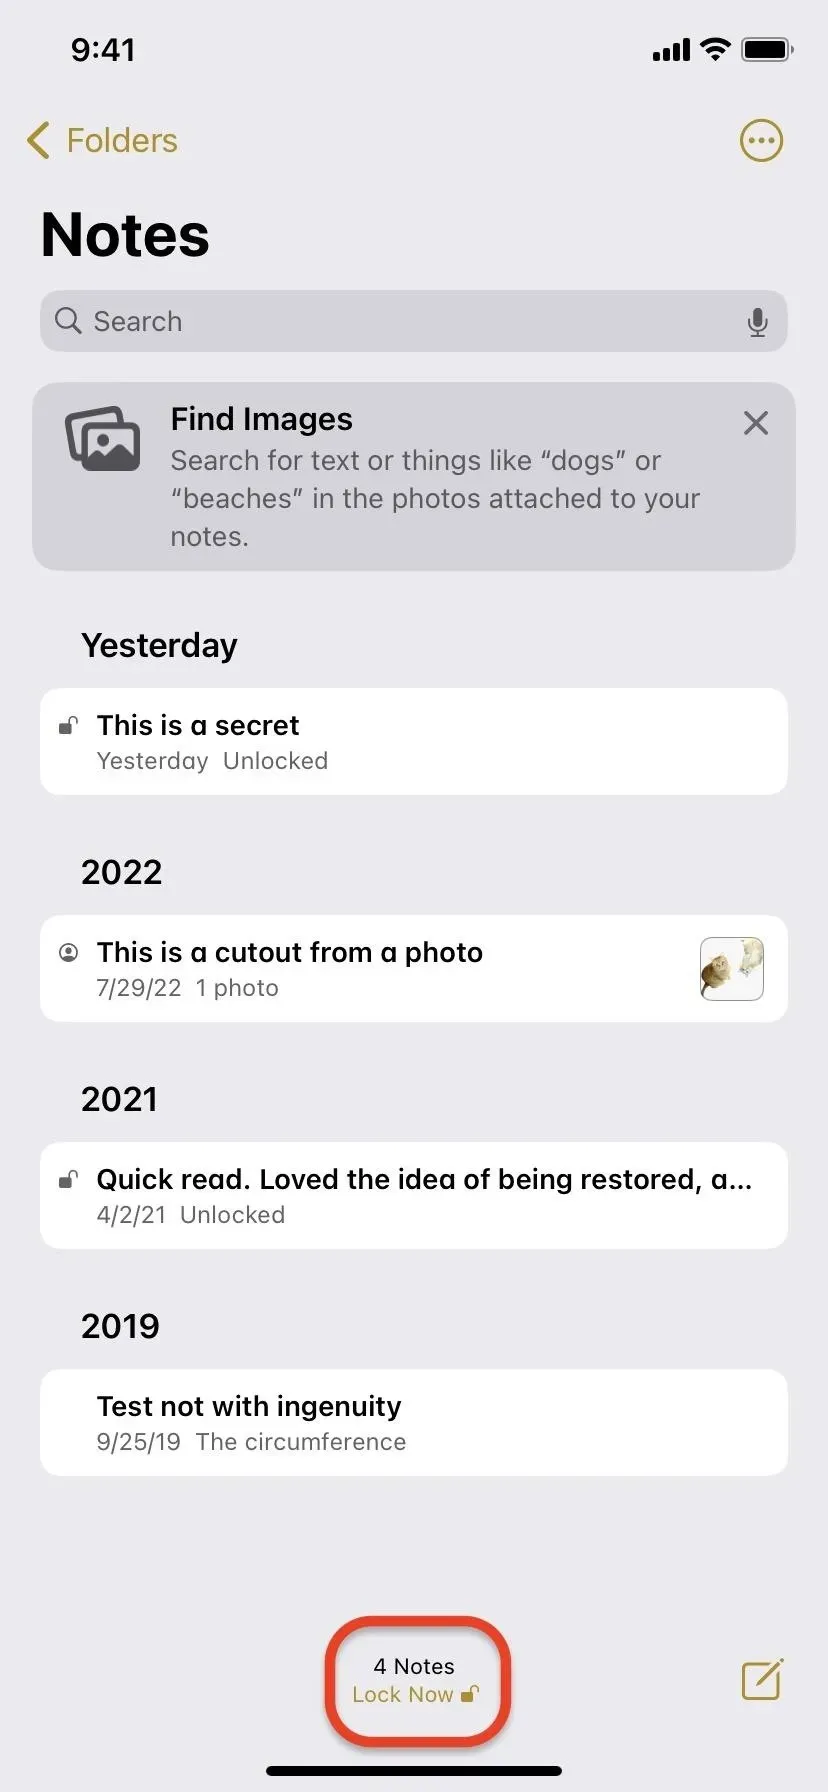
To lock all secure notes in the app, you can click the unlock icon in an open note, click “Lock Now”in the toolbar at the bottom of the folder view, click the side or top button to lock your iPhone or iPad, lock your iPhone with a shortcut via Back Tap if you have configured it, or force quit Notes. If you have different notes unlocked that use different passcodes or passwords, they will all be locked.

3. How to Use Mac Sign In to Lock Notes
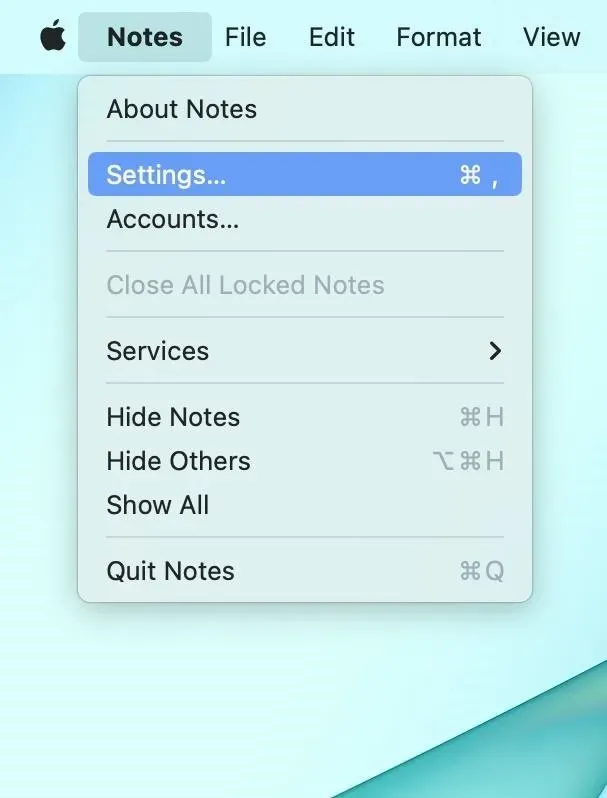
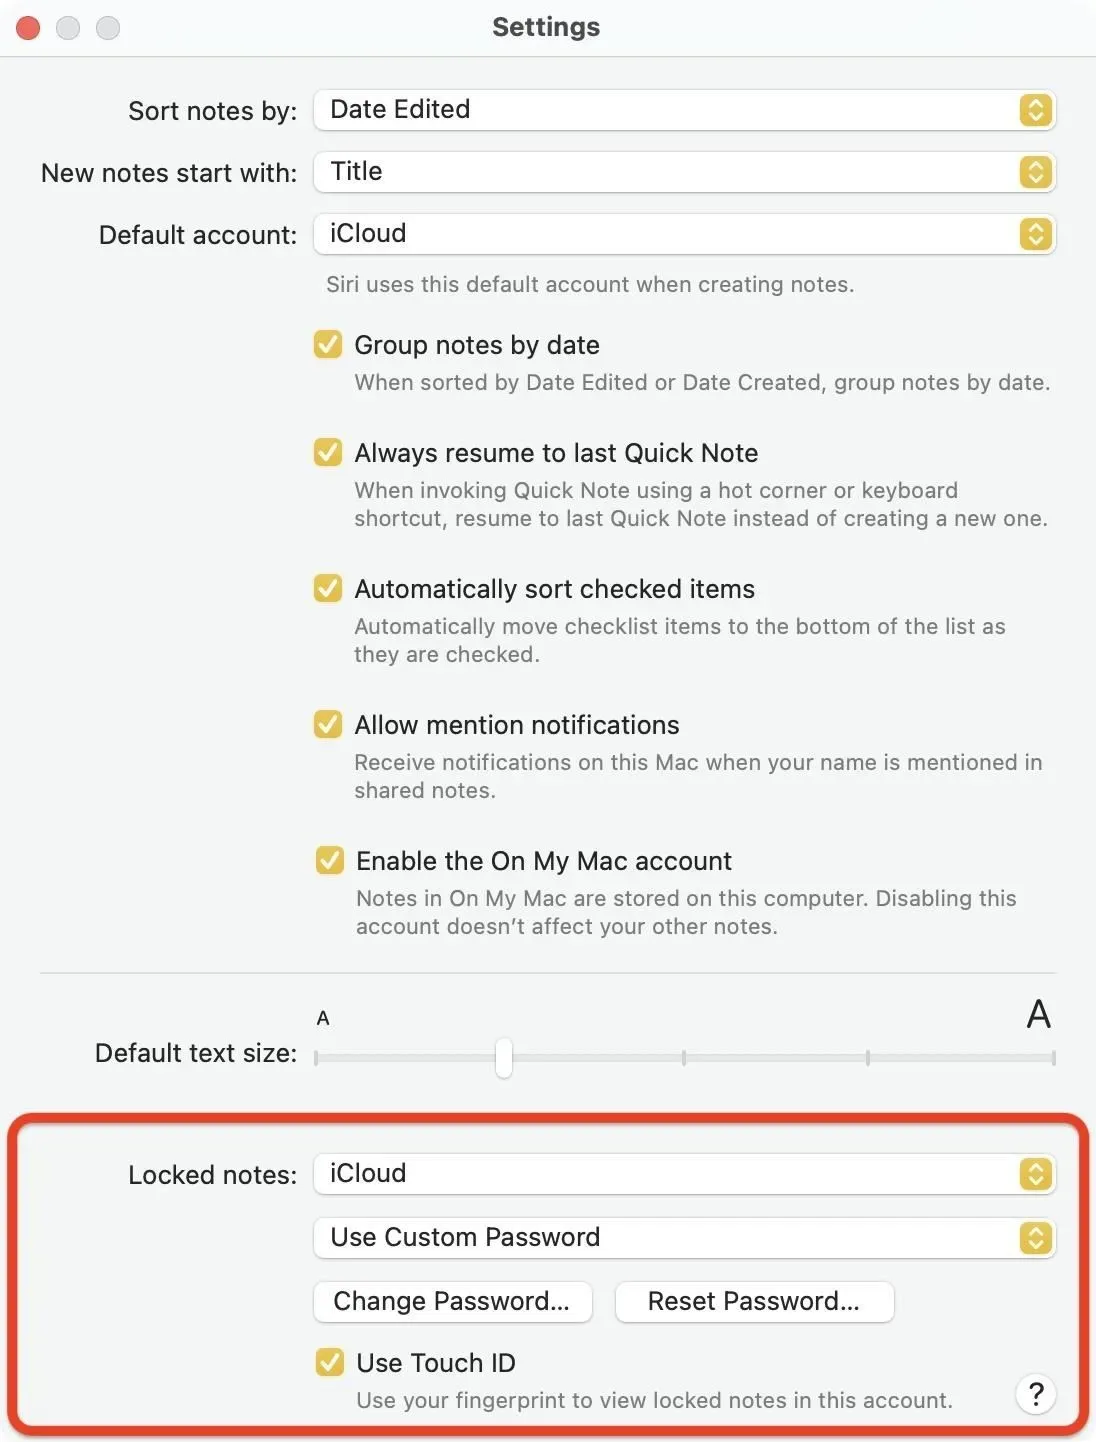
Whether you’re already using Notes passwords for your iCloud or On My Mac accounts, open Notes and go to Notes -> Preferences in the menu bar, then look for the Locked Notes section. If On My Mac is enabled, use the top dropdown in this area to choose between your iCloud account and On My Mac account.
Option 1: Switch from Notes-specific passwords
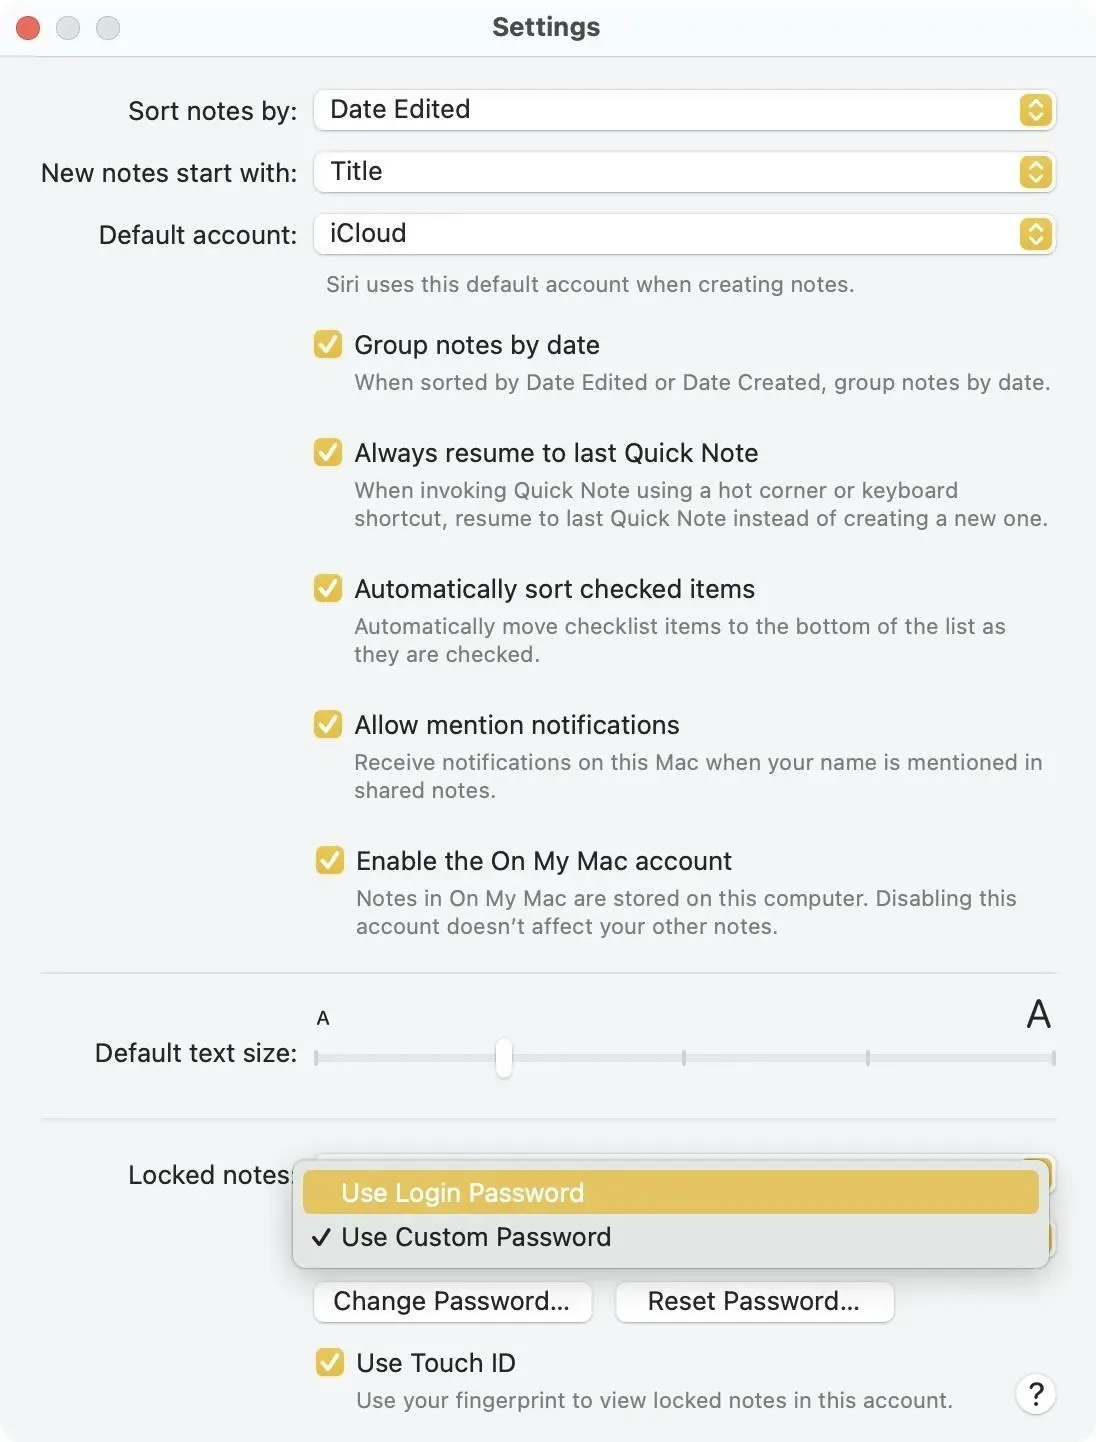
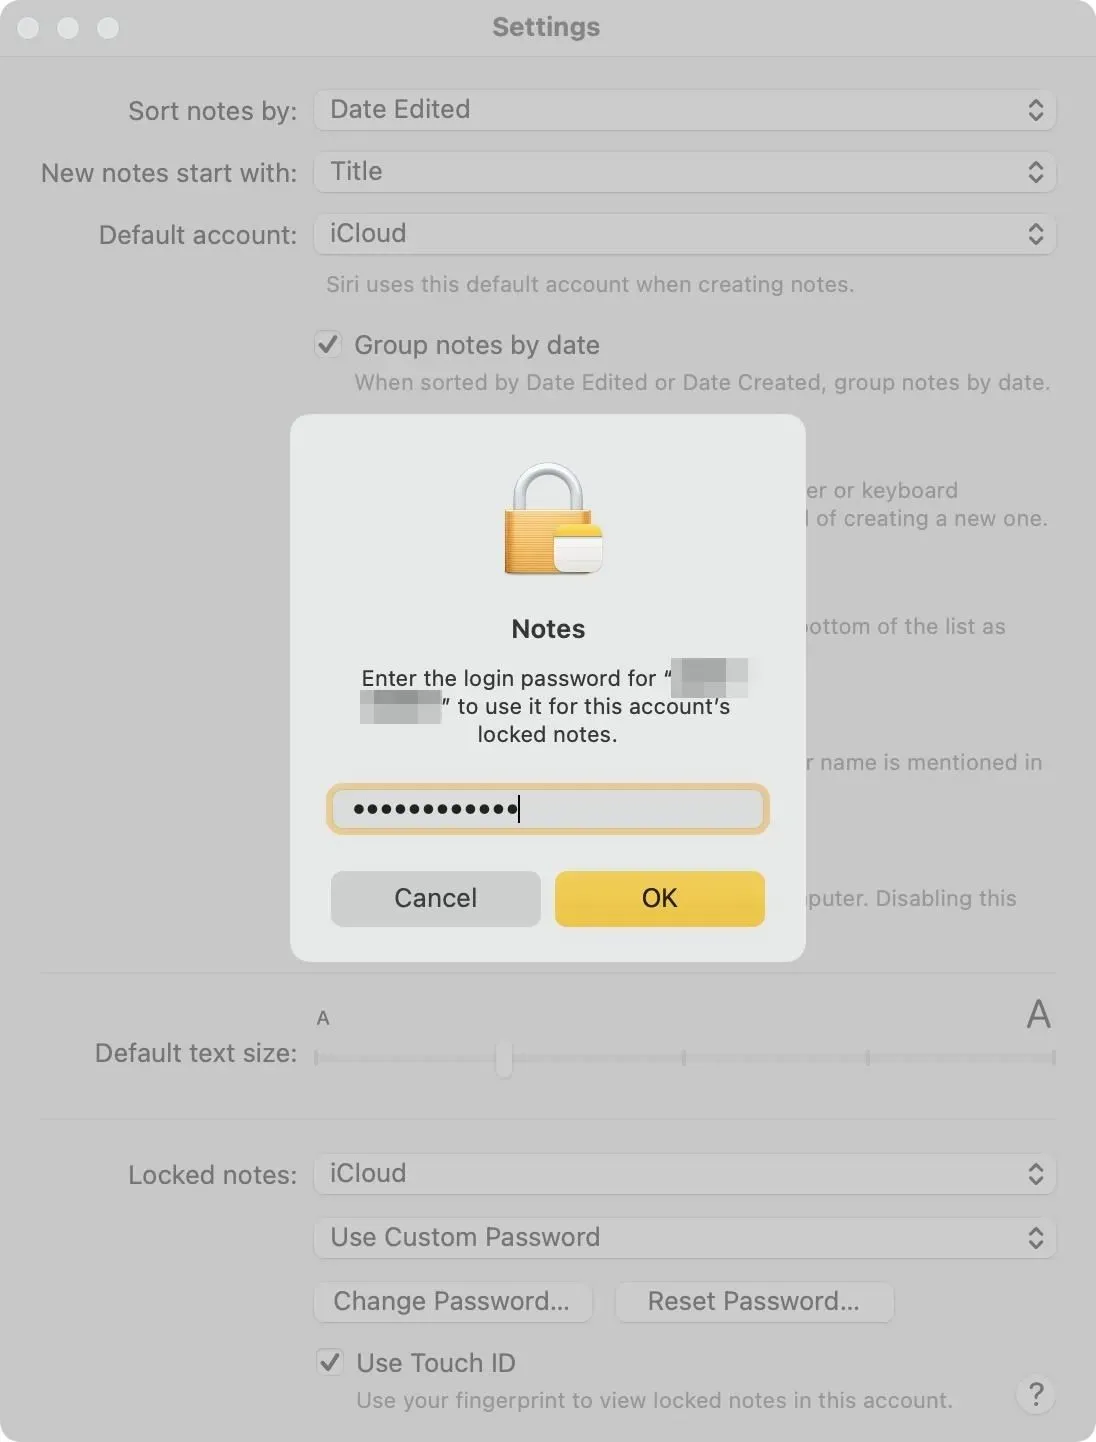
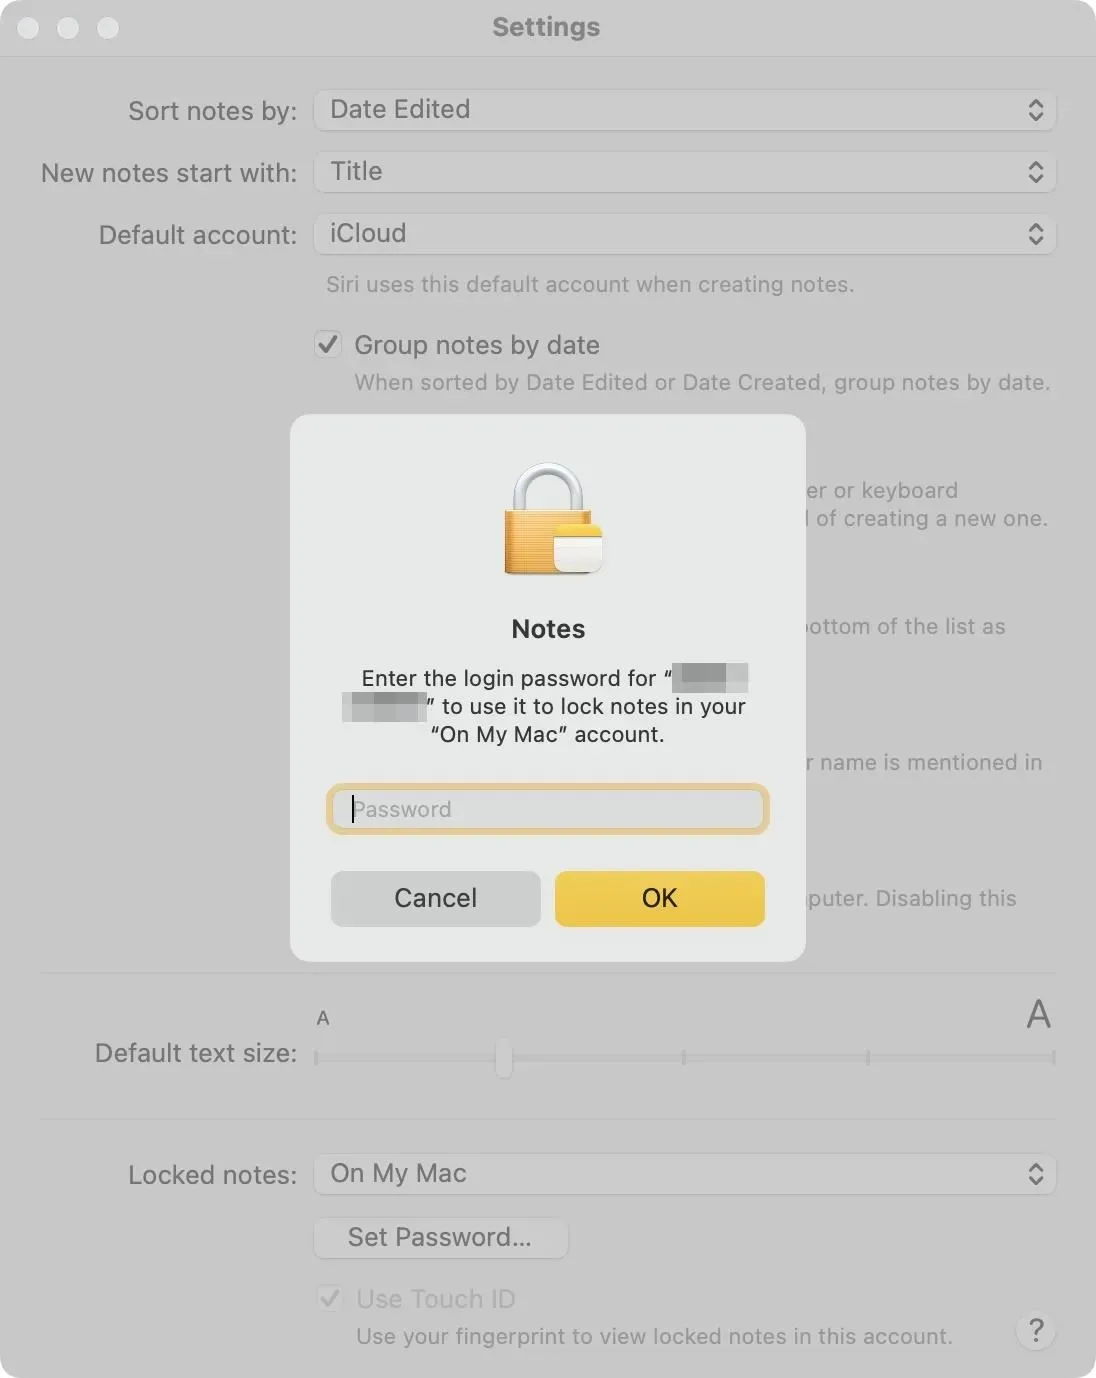
If you’re already using passwords for Notes, you can switch to a new password to sign in to your device. Click “Use a custom password”from the drop-down menu, select “Use a password to sign in,”then enter your current Notes password. Instead, you may be prompted to use Touch ID if it has been enabled. Click OK, enter your Mac login password, and click OK.
If it’s your iCloud account, you may see a warning that some of your devices won’t be able to see locked notes unless they’re running iOS 16, iPadOS 16, or macOS 13. Tap Continue if everything’s fine. with you.
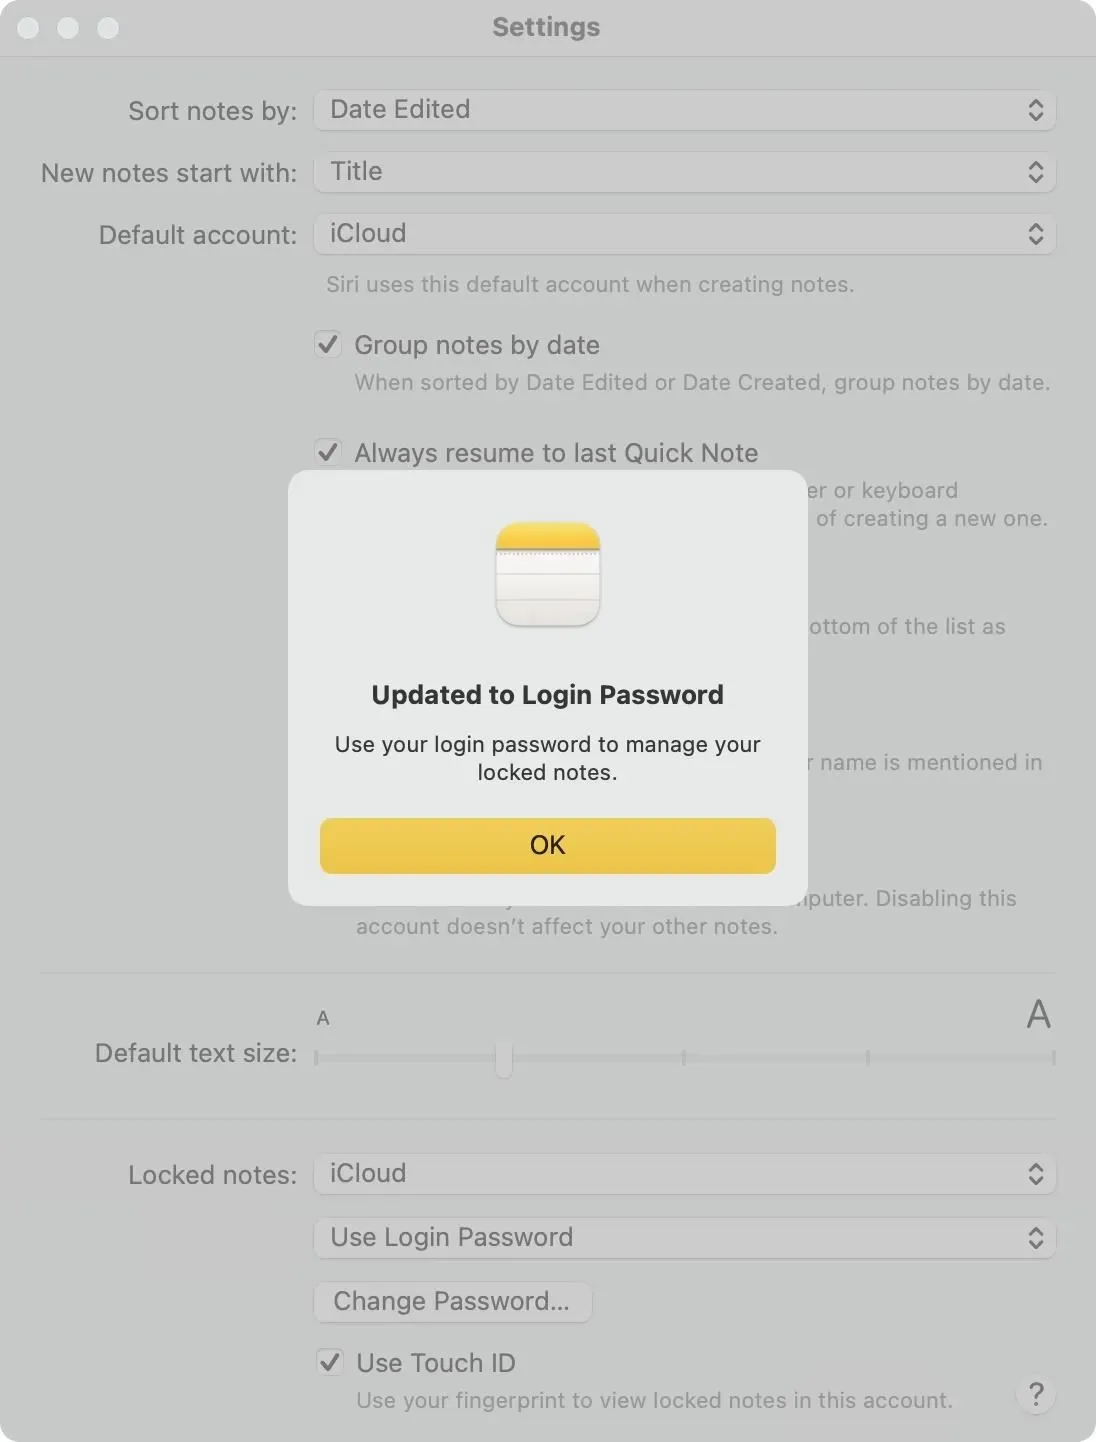
You will see a note on how to close all your locked notes at once and that this will be done automatically after a certain period of inactivity. Click OK, then click OK again when a message appears stating that you have upgraded to using device login. To make unlocking your notes more convenient, check Use Touch ID if it’s not already checked, then enter your login password again for confirmation.

Option 2: Using password protection for the first time
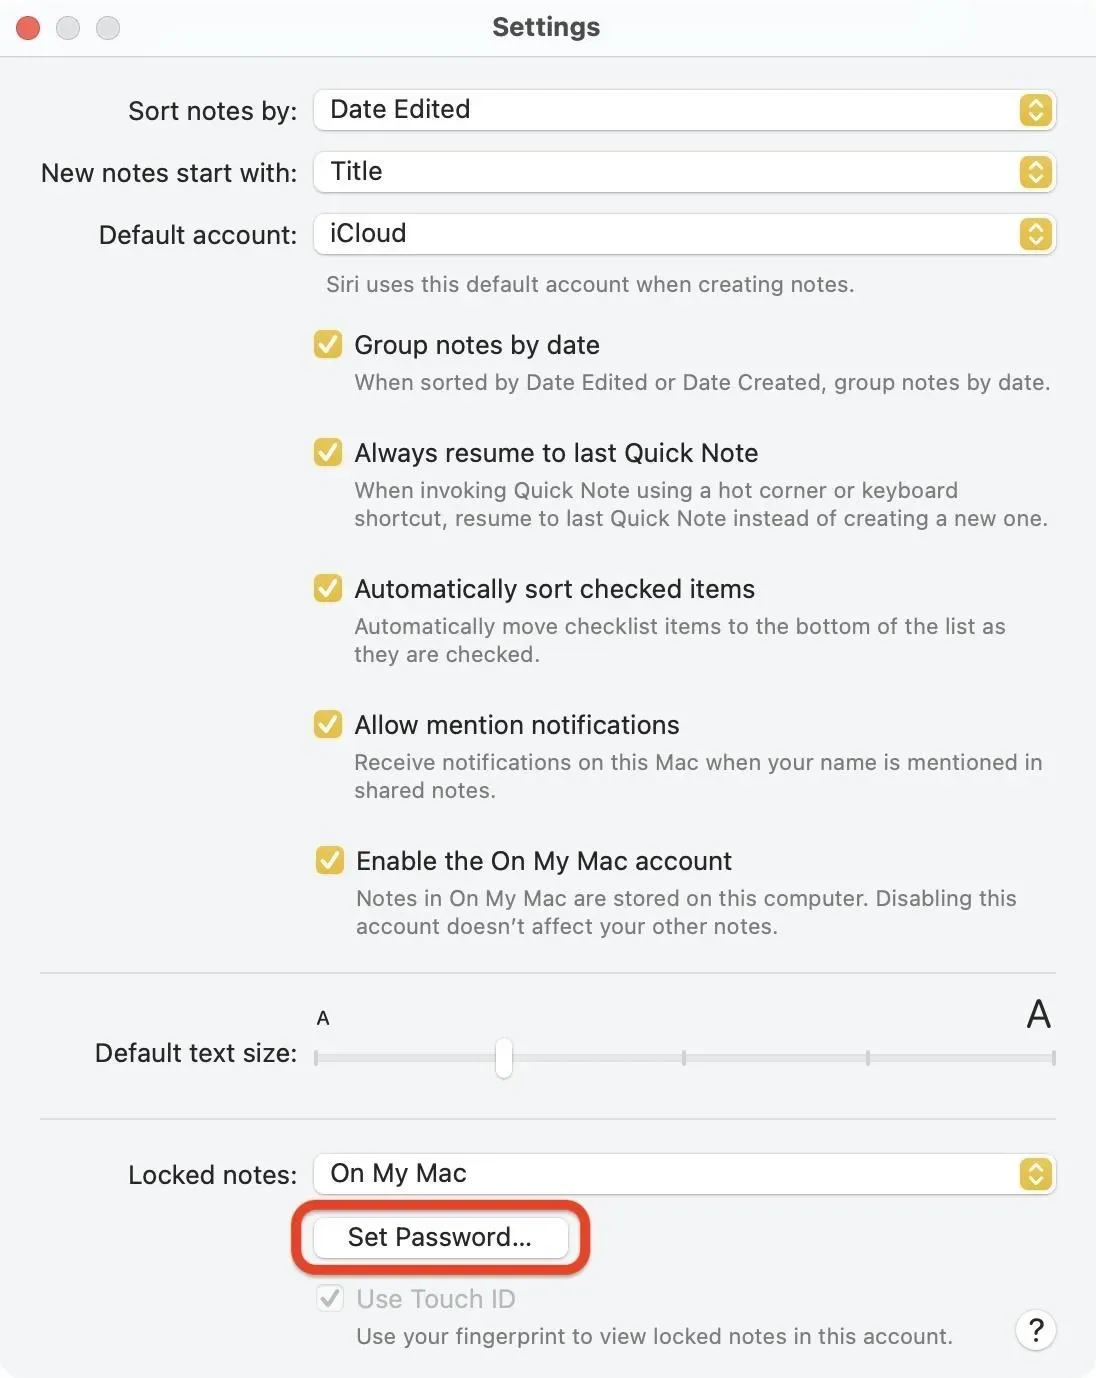
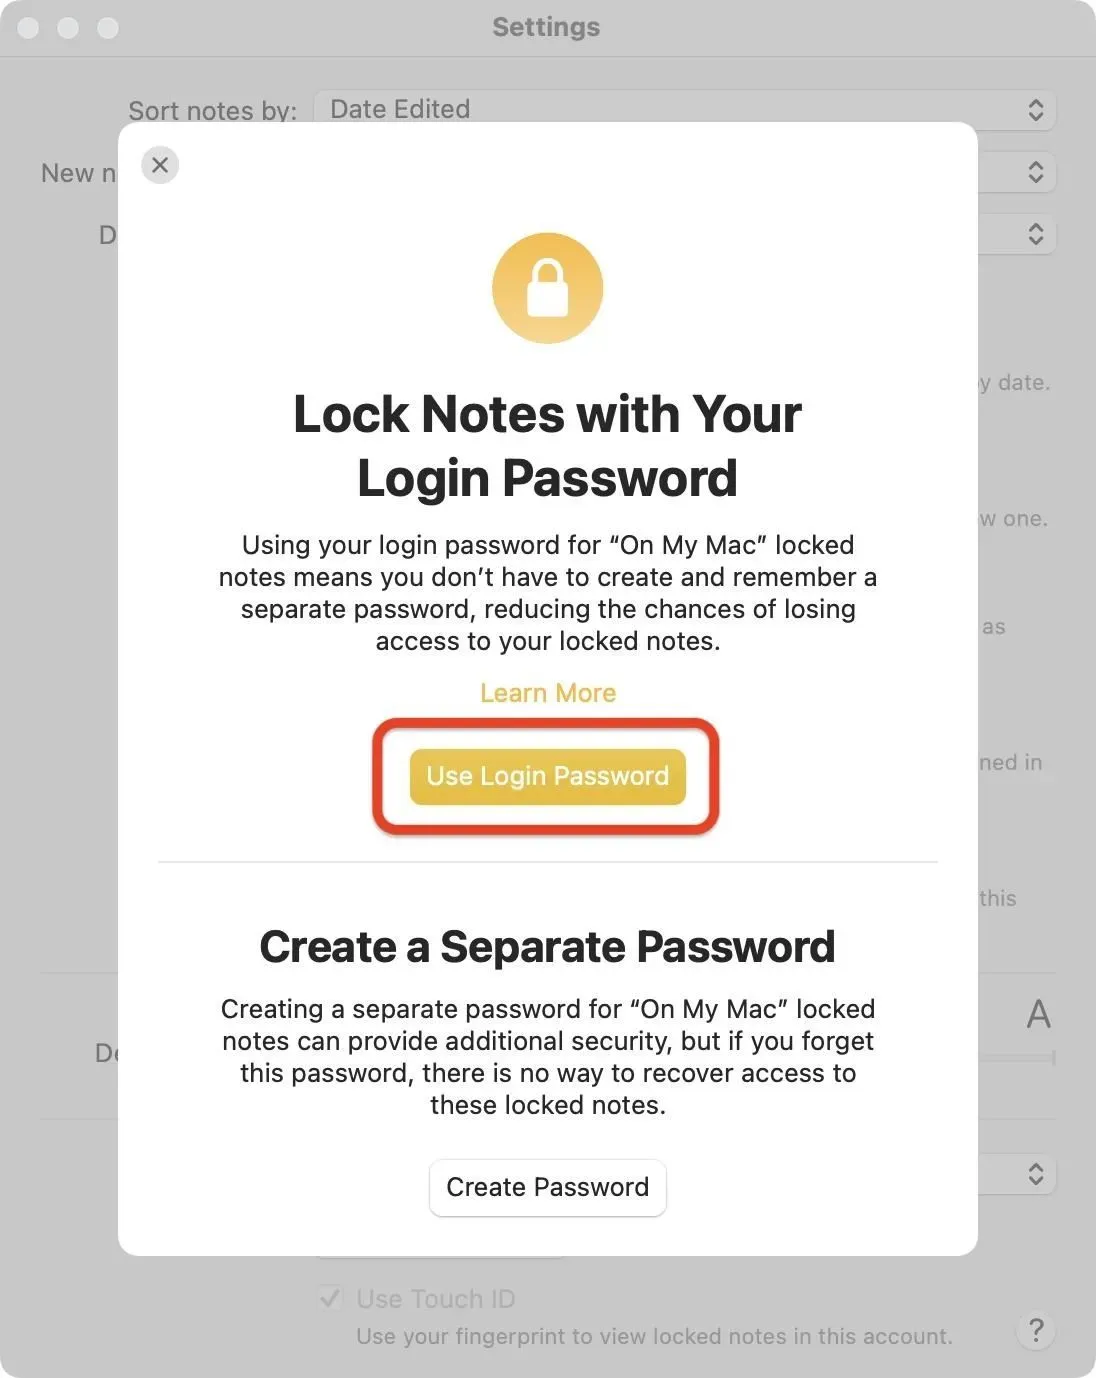
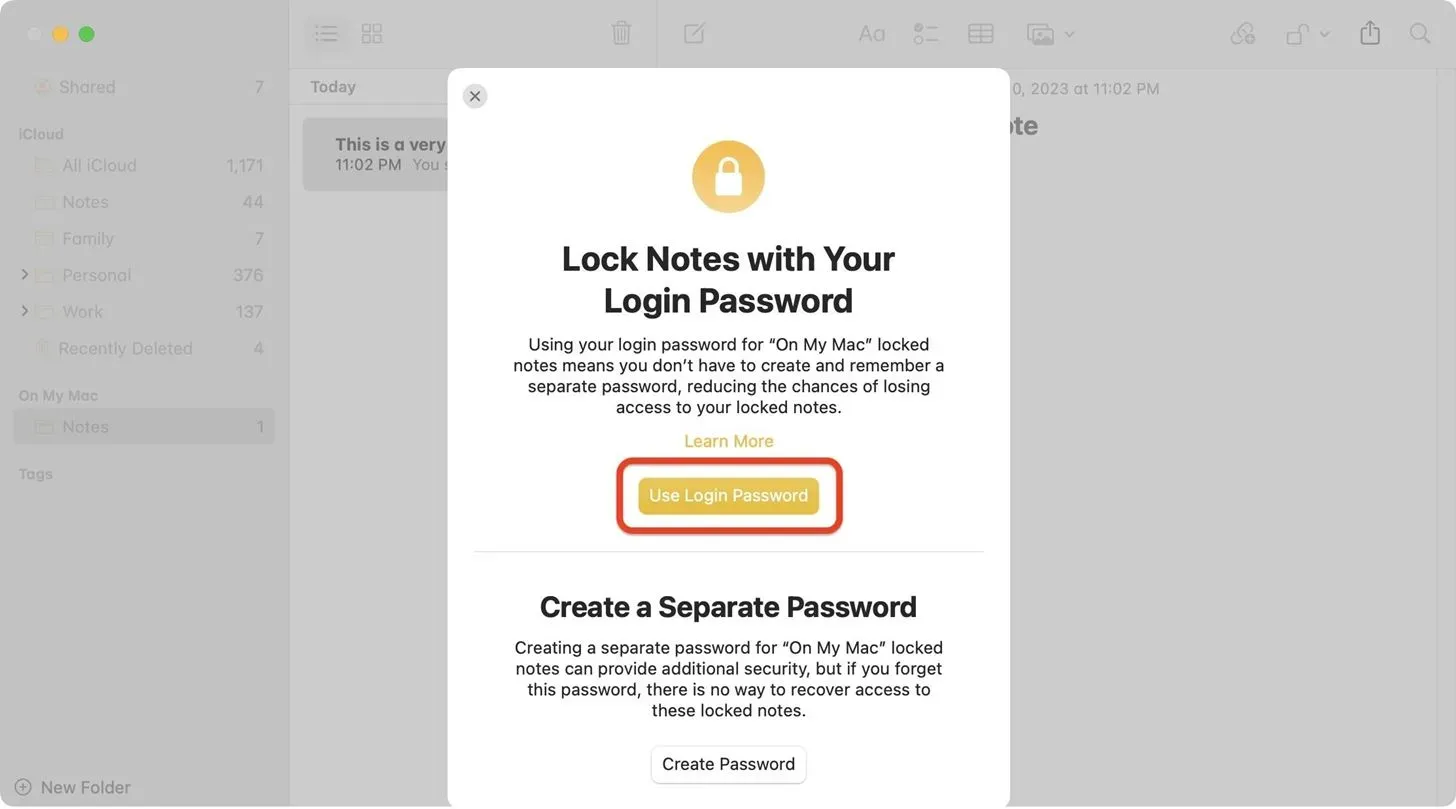
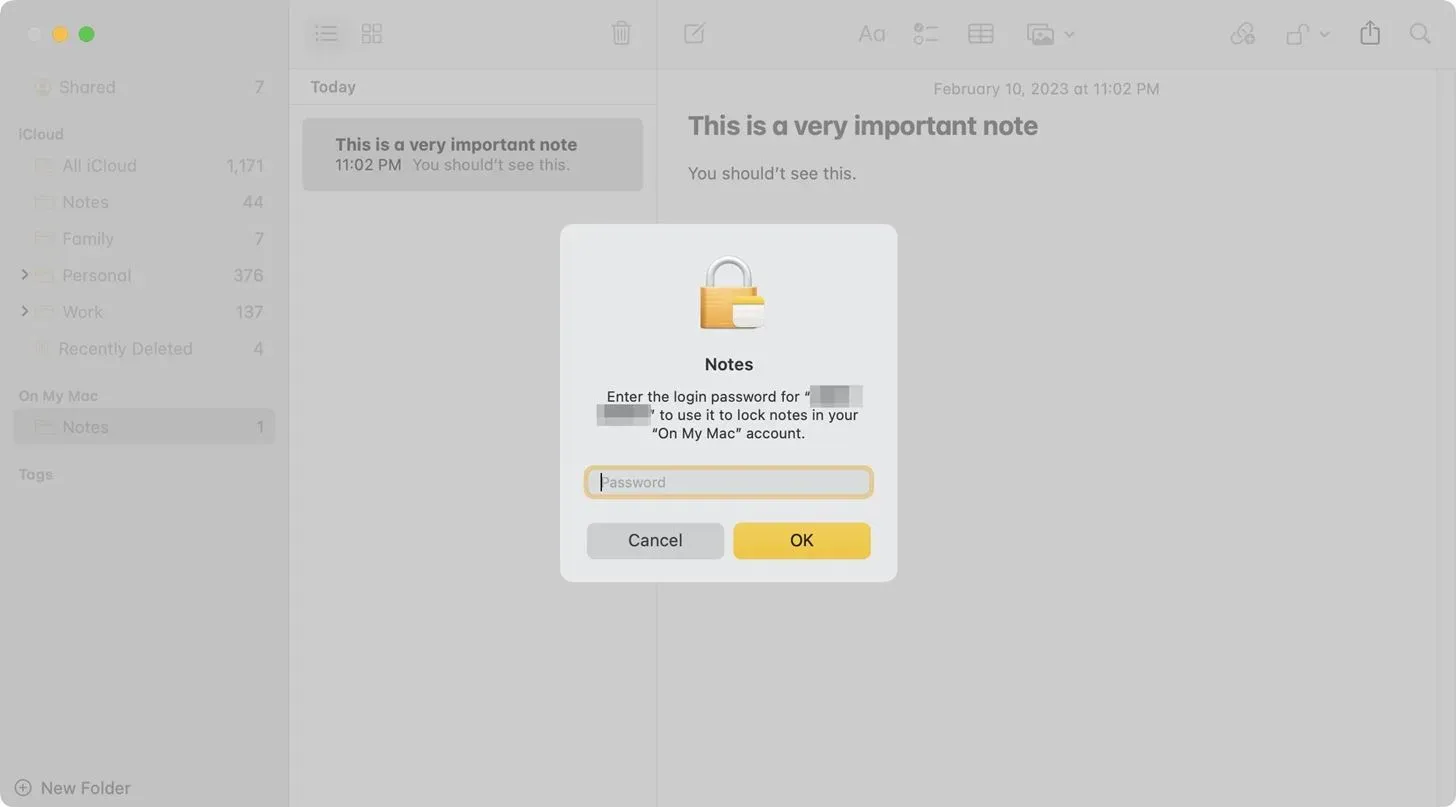
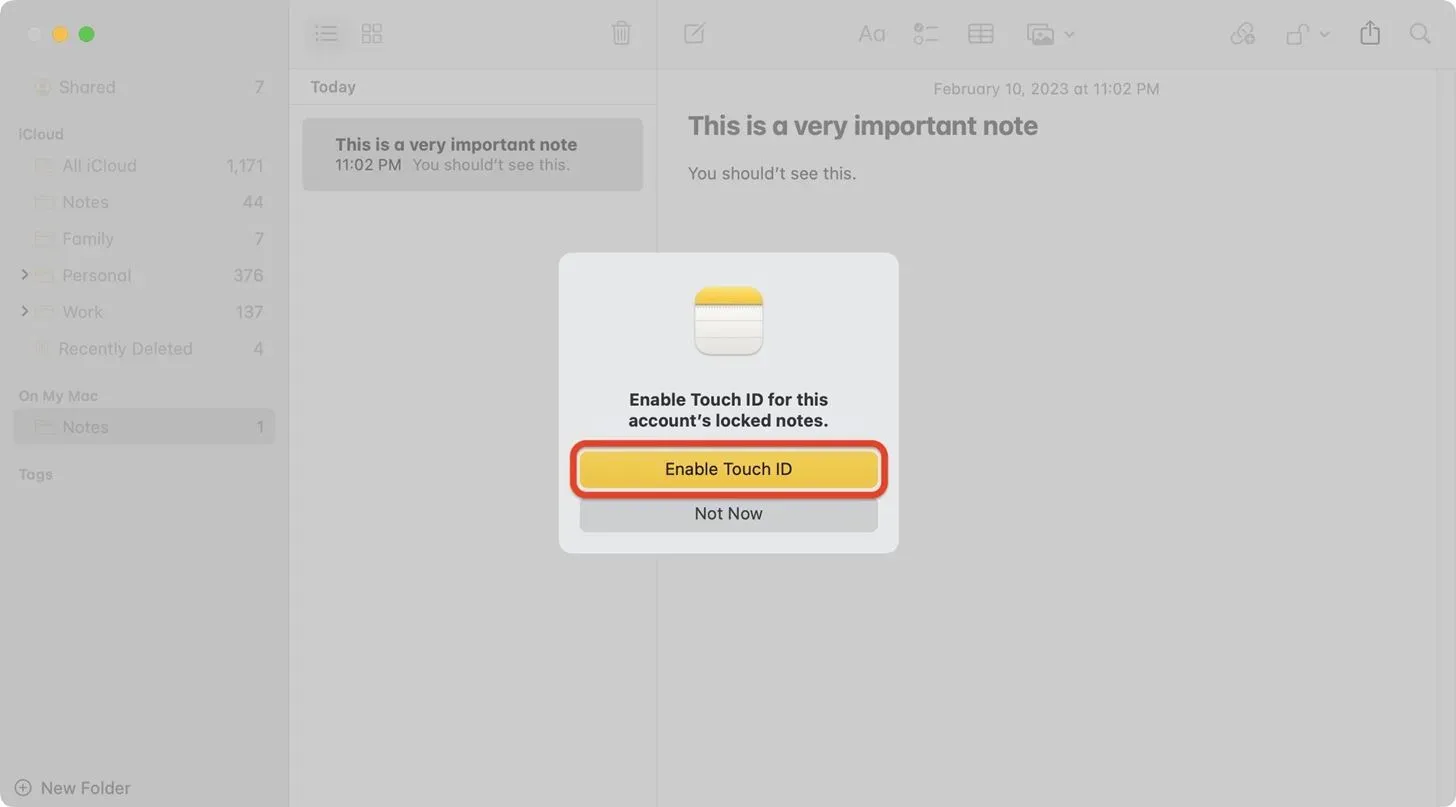
If you’ve never locked a note on your Mac, click Set Password. You will see a page about the new feature; Click “Use Login Password”and enter your Mac login password. Touch ID may be enabled automatically, but if not, check the “Use Touch ID”box and confirm your login password.
At some point, you may see a warning that some of your devices won’t be able to see locked notes unless they’re running iOS 16, iPadOS 16, or macOS 13. Tap Continue if you’re happy with that.. This the warning will not appear if you are protecting “On My Mac”notes.
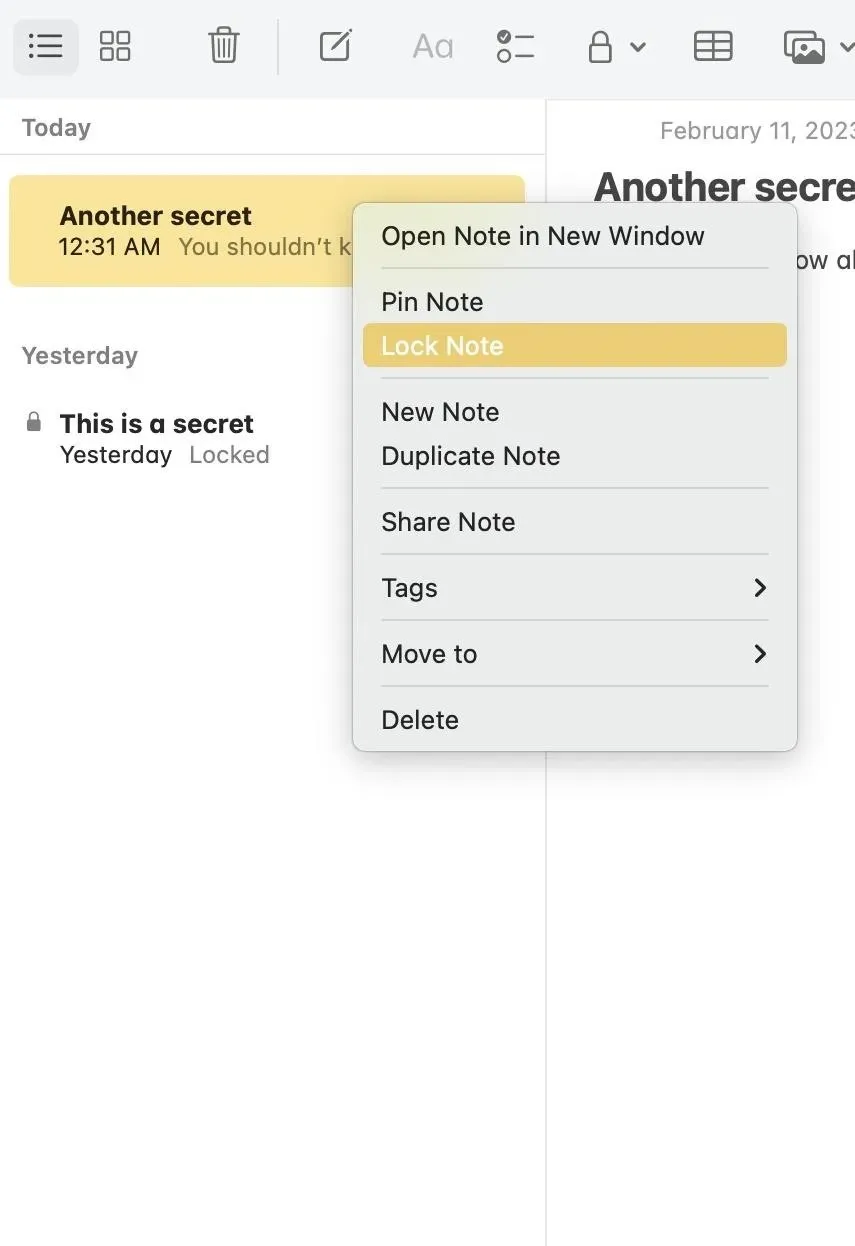
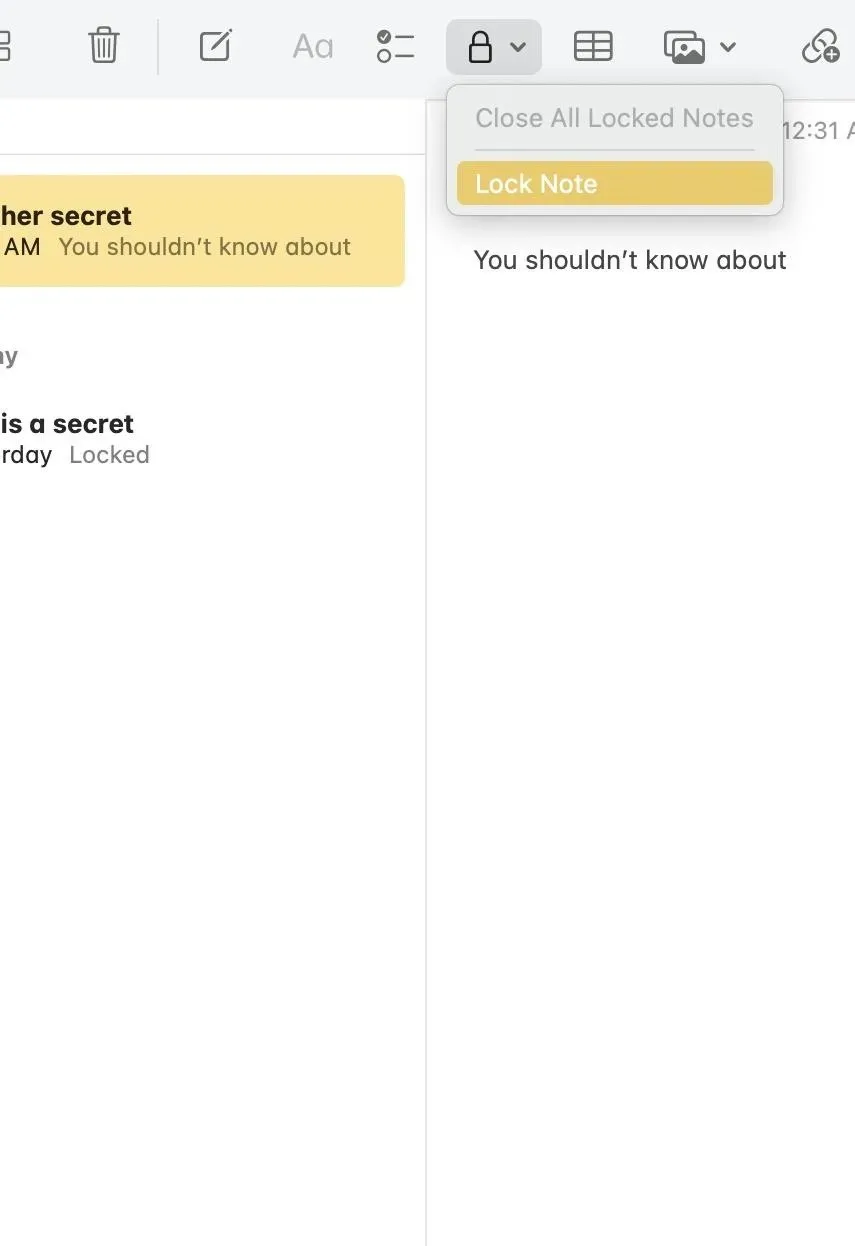
Alternatively, you can skip the Settings menu and go directly to the note. Right-click it in the folder view, or open a note and click the padlock icon in the toolbar, then choose Lock Note.

You should see a page about the new feature; Click “Use Password to Login”.
Then enter your Mac login password and click OK.
After that, it will ask if you want to enable biometrics (unless your Mac doesn’t have it); Tap Turn on Touch ID. You may need to give Notes permission to use Touch ID.
4. How to Lock and Unlock Notes on Your Mac
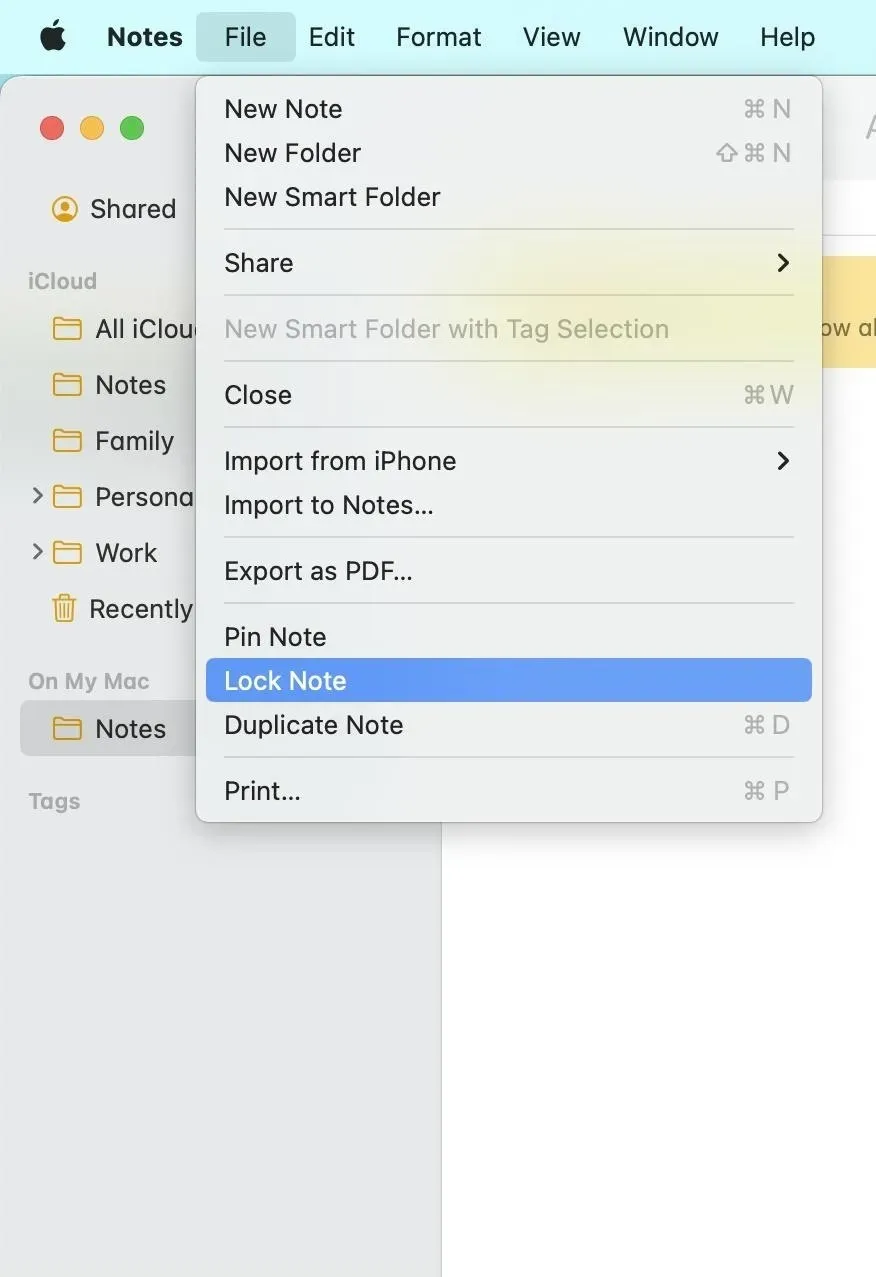
To lock notes on Mac, you can right-click one of the folders, open the note and click the padlock icon in the toolbar, or open the note and click “File”in the menu bar. Either way, select “Lock note”. You may need to use a biometric or login password to verify.
You can’t lock multiple notes at the same time, so just one at a time. And you can’t lock notes with collaborators, notes in third-party accounts, quick notes, or notes with attached PDFs, audio, video, Keynote, Pages, or Numbers documents.
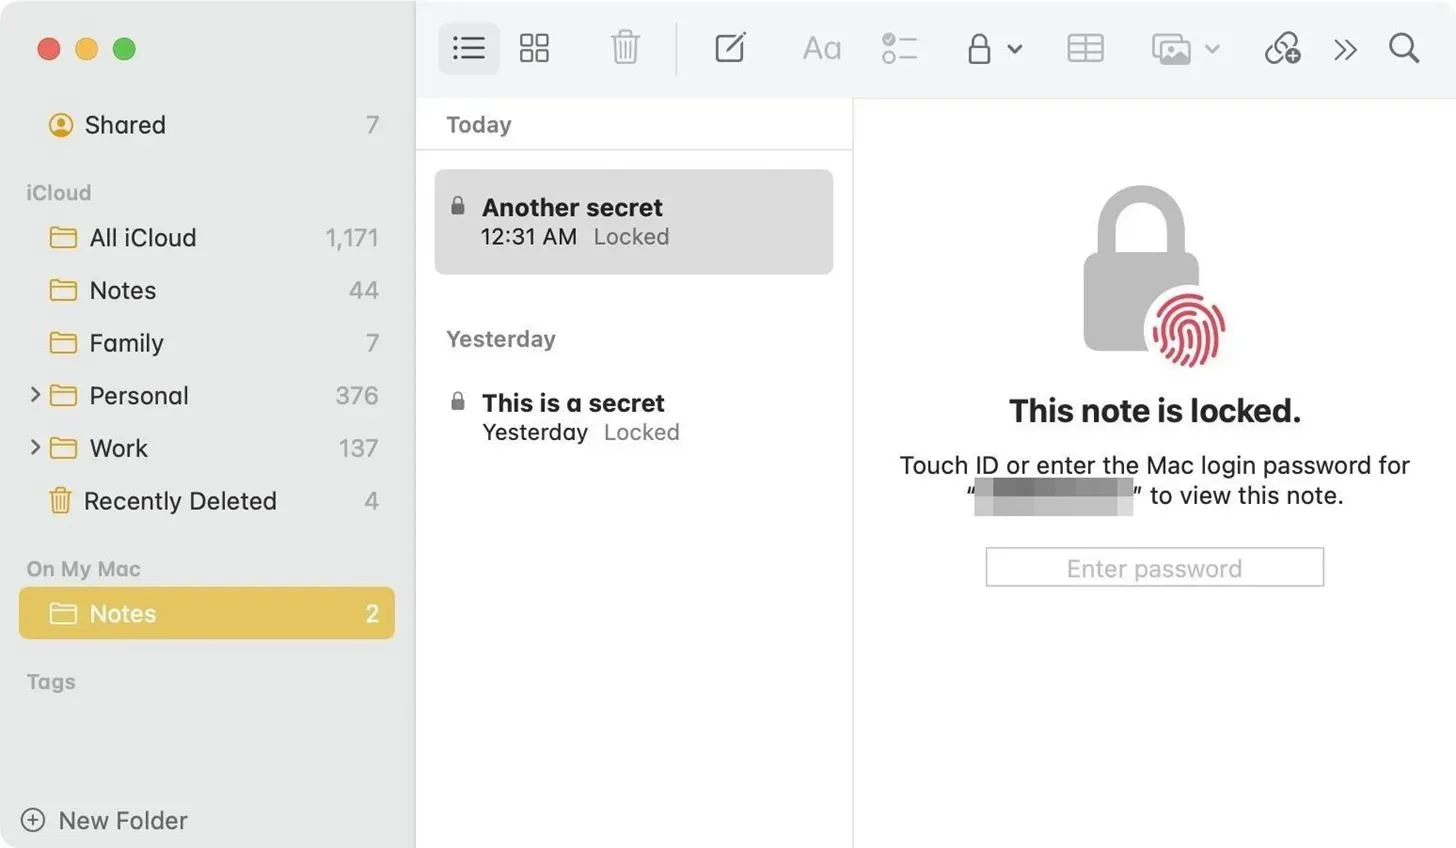
To open notes when they’re locked, simply open the note, then enter your Mac login password or use Touch ID. Unlocking one note will unlock all notes assigned to your device’s passcode. However, there may still be some notes that use unique passwords if you have previously locked notes using more than one password and they will remain locked until you manually open them. You can then switch them to your device’s passcode if required.
Note that you can access your locked notes from any device using device passwords or login passwords for each. If you have access to notes on iCloud.com, you must use your Apple ID password.
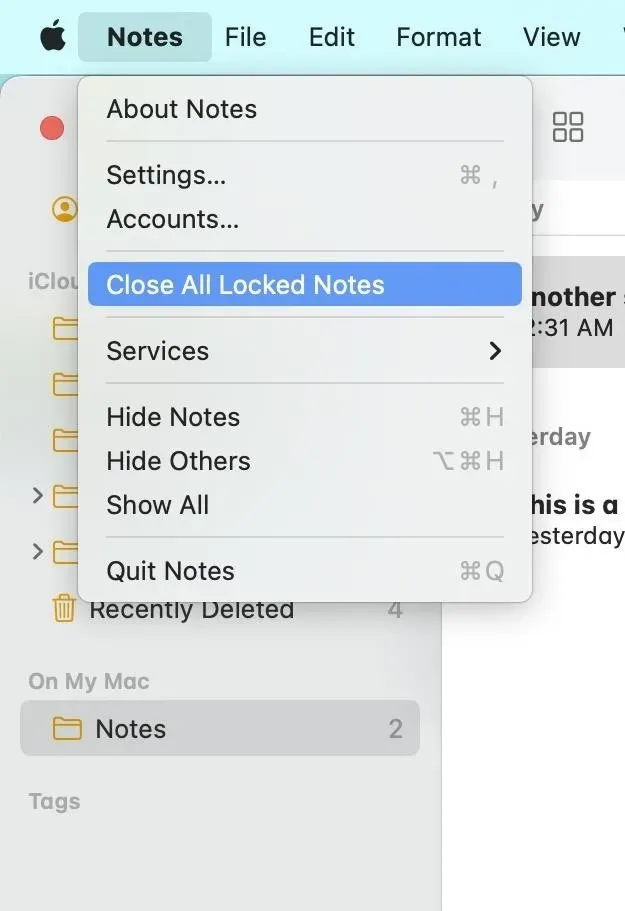
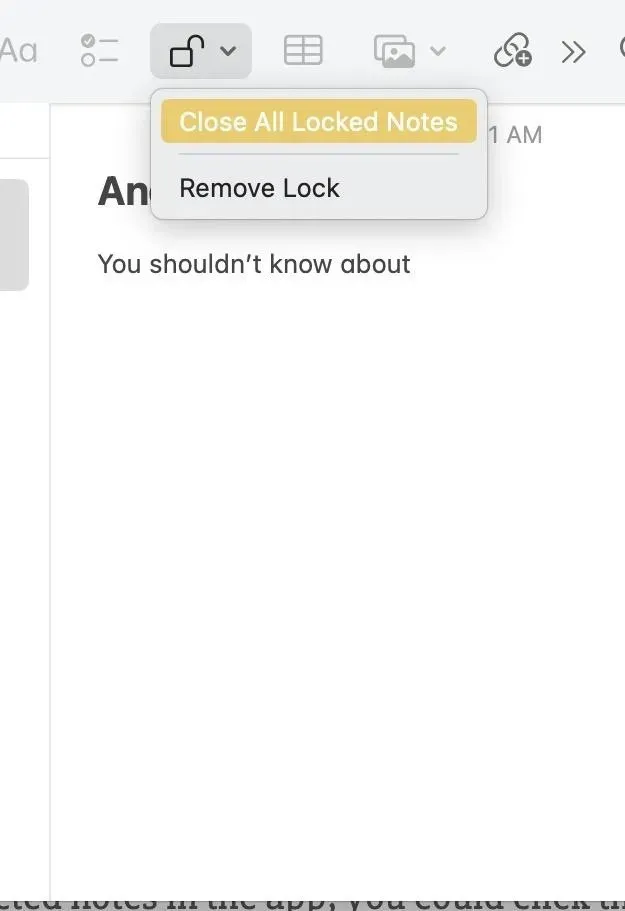
To lock all secure notes in the app, you can click the unlock icon in an open note and then “Close All Locked Notes”, go to “Notes”in the menu bar and click “Close All Locked Notes”or lock your Mac. If you have different notes unlocked that use different passcodes or passwords, they will all be locked.
Leave a Reply