How to Correct Error 740 While Installing a Printer in Windows 10 or 11
Windows users are irate over a recent problem that prevents them from adding the printer on Windows 11 or 10. They encounter Error 740 whenever they attempt to add the printer in Windows 10 or 11. Even with numerous new updates, Windows 11 still has flaws and problems. Many users are having problems with different aspects of Windows, as evidenced by the complaints made by users in the Windows Community.
Error 740 has been reported by the printer’s users, who will add the device to the Printer Wizard Menu. When they add the printer to Windows 10 or 11, they cannot figure out why they see this issue. Windows 10 users have also mentioned the problem. We are here to provide a guide on how to resolve the Adding Printer Error 740 problem. We will also discuss the causes of the problem you are experiencing. In order to discover how to fix the problem, let’s start with the tutorial.
What does Windows 11 Add Printer Error 740 mean?
Error 740 Installing Printer has been reported by customers who are attempting to add a printer on Windows 11. If you are experiencing the same problem, you may have received the warning describing the administrator or network privileges. There is a probability that the problem could be occuring for a number of causes. Below, we’ll provide a list of the typical causes of the problem. You can verify them because doing so will make the problem easier to tackle.
- The printer is not connected properly.
- There are some network driver issues with Windows 11.
- The printer driver is not installed on the device properly.
- The printer wizard is not getting administrative privileges.
- There are some problems with the printer.
While Adding Printer on Windows 10/11, Fix Error 740
There are many of you who are annoyed by the Error 740 Adding Printer problem. The solution to the problem is not particularly difficult. With the aid of the techniques we shall provide below, you can solve it with ease. You must make sure they are successfully implemented on your system.
Verify the Printer’s Connection
Users are responsible for making sure the printer they attempt to add is properly connected to their system. If you’re unaware, the printer occasionally has loose cords that prevent it from properly connecting to the system. Additionally, it’s likely that you will experience the error 740 adding printer if you are using a cable that has physical damage or other problems. Before launching the printer wizard, we advise you to verify the printer’s connectivity on your PC. From the Control Panel’s Devices and Printers, you can quickly check it.
Check For Cables

We advise you to examine the cords that came with the printer. Additionally, make sure the power cable is in good working order. The error 740 attaching printer can occur when the printer does not receive a sufficiently stabilized power supply owing to a problem with the power outlet or cable. As a result, we advise you to make sure the printer cords are in good working order. You must have it fixed if there is any physical damage.
Turn off User Account Control
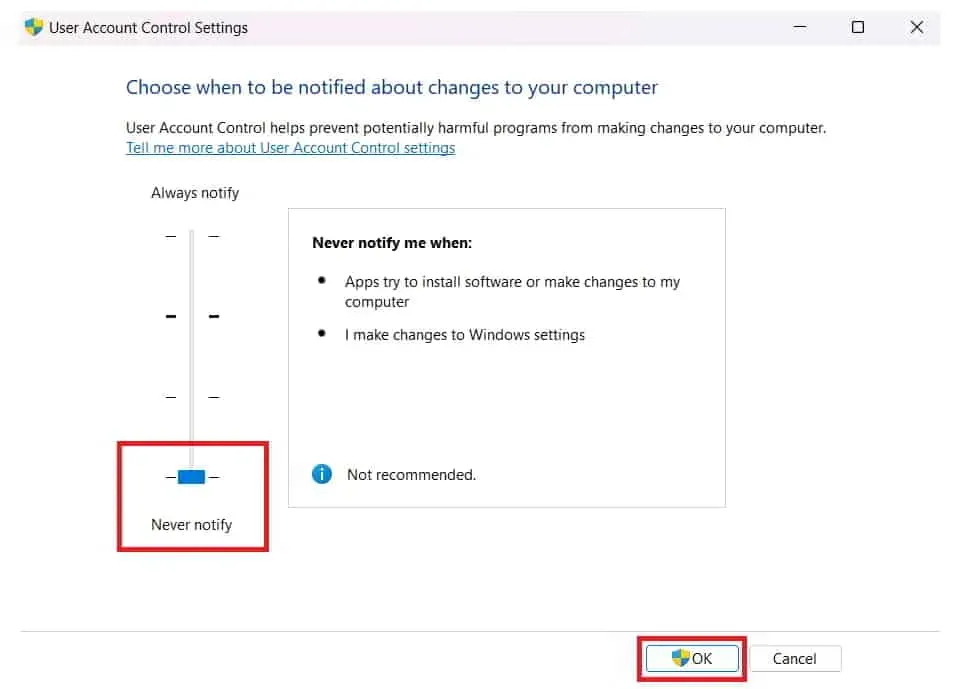
While installing the printer, you can also turn off Windows’ User Account Control. There is a potential that installing the printer will result in conflicts since the User Account Control prevents programs from making changes. As a result, we advise you to try disabling User Account Control using the accompanying instructions to see if the problem has been fixed.
- To open Run, press the Windows key and R.
- Press Enter after typing useraccountcontrolsettings.
- Drag the slider to Never Notify after that, and then click OK to save the changes.
- Re-adding the printer will allow you to verify whether the problem has been fixed.
- Set the slider back to its default settings after adding the printer.
Activate the Windows Printer Troubleshooter
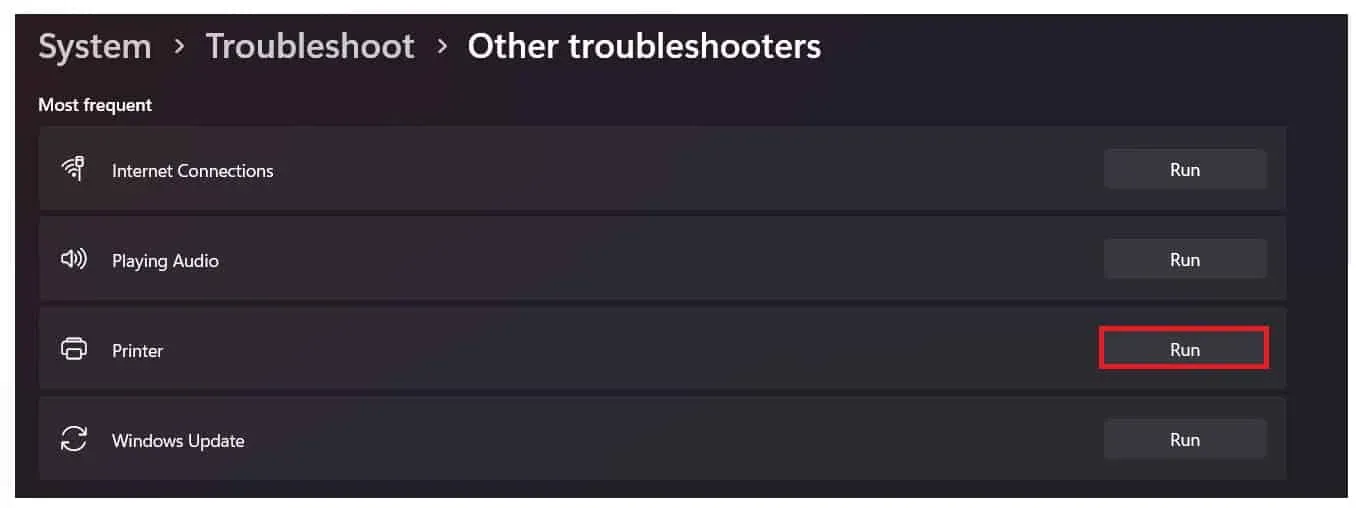
To determine if the printer has any hardware or software issues, you may also try running the Windows Printer Troubleshooter. Users have access to a feature in Windows that allows them to independently troubleshoot the printer. For you, the procedures will be extremely straightforward. The Windows Printer Troubleshooter simply needs to be started once for it to begin looking for potential problems. The troubleshooter will display any faults found on the screen if they are discovered. If it is a software issue, it will also fix the problem. You must get in touch with the service center if the issue is hardware-related. To use the Windows Printer Troubleshooter, just follow the instructions provided below.
- To access Settings, press Windows + I.
- Scroll down to the System section and then click Troubleshoot.
- Pick Other Troubleshoot from the menu.
- After that, select the Run option, which is located next to Print.
- Wait for the process to finish before following the directions displayed on the screen.
Examine the printer drivers
There is a possibility that a driver issue is preventing you from using the printer. We assume that since you are experiencing these problems, your system’s printer drivers may not have been installed. We advise you to open the device manager and verify the printer drivers. Update it if it hasn’t been updated for a while. To make sure there are no software problems, delete the driver if it has been updated, then reconnect the printer and install the driver once more. Restart the computer after deleting or updating the printer’s driver, then perform another check.
Examine Windows Update

Your outdated version of Windows may occasionally make adding a printer difficult. We are all aware that Windows is essential for the functionality of all applications and devices. You will probably experience problems with your computer if you are not running the most recent version of Windows. To make sure you are running the most recent version of Windows, we advise you to check for updates on your PC. Download and install any system updates that are available. Reconnect and add the printer to your system after that.
Conclusion
Customers complain that they keep getting the Windows Error 740 Installing Printer. Many users have looked online for instructions on how to solve the problem and easily add the printer to Windows. Despite numerous attempts, they were unable to succeed. We have provided a list of solutions to your problem in this guide.
Leave a Reply