In Microsoft Word how to double space
Word documents are frequently created for a variety of purposes. For submitting assignments like projects, reports, practicals, etc. We modify our Word documents as we create them so that they are appealing to the reader or recipient to whom we are submitting them. There are several ways to customize Word documents to give them a more professional appearance. We use a few of them, but we are unaware of many customizing options. The primary goal of modifying our publications is to make them easier for the reader to read.
You could have noticed reduced line spacing or less padding between lines if you created the document using the default options. Many readers don’t like to view the document looking unkempt and crowded. We don’t want to read the document because it looks less interactive as a result of this. But did you know that Word enables you edit the document’s space? If not, stick around until the end since we have a guide on “How to Double Space in Word” here.
What Does Word’s Double-Spaced Mean?
Many people are unaware of the significance of double space in Word documents. Using the New Blank Document Template, we all begin creating our documents. Therefore, the settings that are most frequently used and ideal for users are added. But users can also alter it to suit their requirements. When users begin to post content on it, many things need to be changed. Page size, page margin, header and footer, among other significant adjustments made by users, are just a few.

These are all carried out as necessary. To make the paper easy to read when readers take out the prints, many users additionally alter the line spacing. Word documents look more professional and are easier to read when double line spacing is included. So, if a document has double spacing, it uses double line spacing. Let’s move on to the following heading: Double-spacing in Microsoft Word.
Different Ways to Double Space in MS Word

There are several options for “How To Double Space In Word.” Users can choose the route that is easiest for them to follow. The various methods for adding double space in Word will all be listed here. Additionally, you don’t need to be concerned about whether you can do it before or after adding content to the document. Such demands do not exist. With the aid of the procedures that are given below, you may add double space in Word whenever you need to. Without going into further detail regarding the double space, let’s look at how we’ll implement it.
From Design Tab
The first method makes adding double space to a Word document quite easy. Microsoft Word has a Design Tab that we will use to complete the task. Let’s look at the procedures that must be followed in order to add double space in Word.
Recent versions of Word
- Start by opening the Word document.
- See what the line spacing is set to by default by adding content.
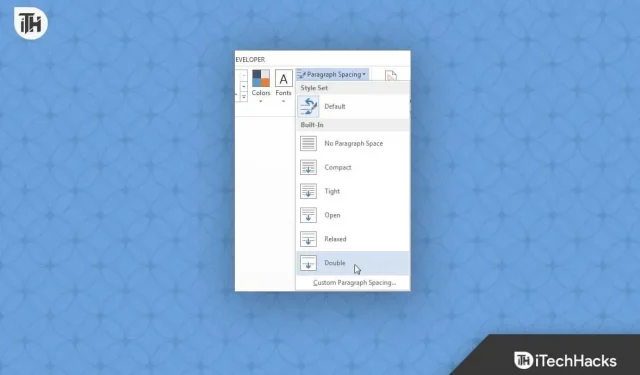
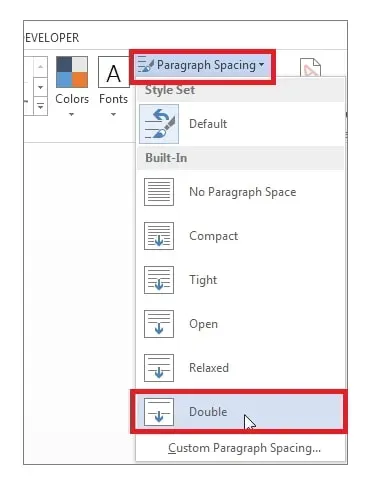
- Then select the Design Tab.
- Choose the Text in the Word Document to which you wish to add double spacing (If you have started adding the content).
- Select the Paragraph Spacing option if the document is empty of content.
- Select “Double”
- Check to see if the modifications are now discernible.
Word 2007-2010
- Start by opening the Word document.
- See what the line spacing is set to by default by adding content.
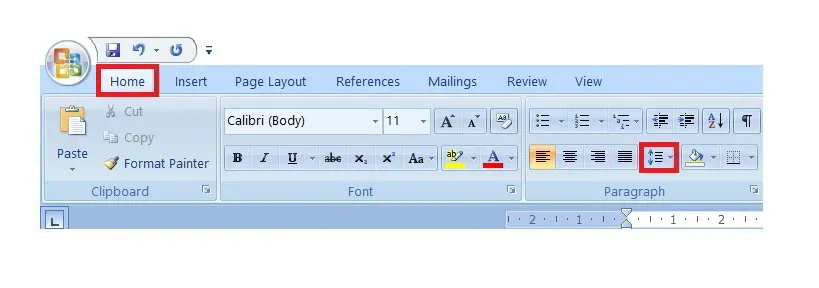
- Go to the Home Tab now.
- Choose the Text in the Word Document to which you wish to add double spacing (If you have started adding the content).
- Go to the Paragraph Section if you haven’t added anything to the document yet.
- Select Line Spacing from the menu.
- Choose Option 2.0.
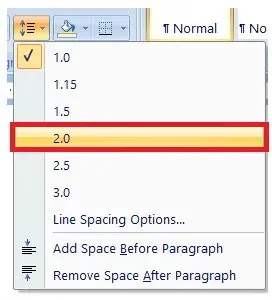
- Now enter the content, and you’ll see that a double space has been added.
From Page Layout
The Double Space setting in Page Layout can also be customized by users who are editing Word documents. You can add Line Spacing using the Page Layout option, depending on your requirements. This method of adding double space in Word is efficient. So let’s look at our options.
When new content has been added
Users who have previously added material to a Word document can add double space by following the instructions indicated below.
- Start by opening the Word document.
- Choose the Content to which you wish to apply the Double Space customizations.
- Go to the Page Layout Choice at this time.
- The Section on Spacing will appear.

- Now, there will be two fields.
- Before: If you want to add space before the line you have chosen for the content, you can change the value according to your need.
- After: The users who want to add the space after the content can change the value for this field.
- We suggest you change the value of both options to get proper spacing for your Word Document. That’s it.
For New Document
Users who haven’t added content to their Word documents can add double space by following the instructions indicated below.
- Start by opening the Word document.
- Activate the Page Layout option.
- The Section on Spacing will appear.

- Now, there will be two fields.
- Before: If you want to add space before the line you have chosen for the content, you can change the value according to your need.
- After: The users who want to add the space after the content can change the value for this field.
- You can change the value for both fields to get the best Word document spacing.
Conclusion
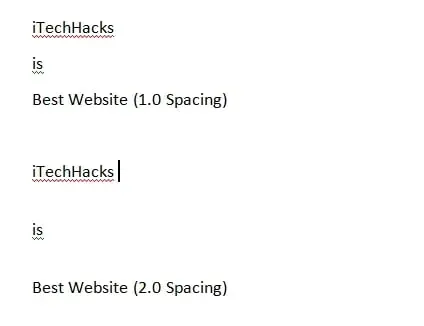
The instructions on how to double space in Word were much sought after. Users may find it easier to read the document because of the double space. Thus, we have included in this guide instructions on how to add double space in Word. You will receive a Word document with a default setting of 1.0. As a result, you can modify it to suit your needs. Please let us know in the comment box below if you have any questions.
Leave a Reply