How to activate and use Stage Manager on macOS
Stage Manager is an alternative interface for multitasking on Mac, a solution worth trying at least once. Here’s how to enable, disable and use it on your computer.
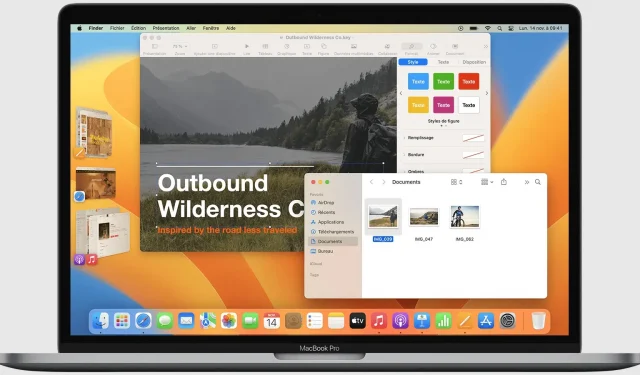
Stage Manager is an alternative interface for multitasking on a Mac that allows the user to switch between active applications in different ways. It’s a bit more minimal because the Stage Manager is hidden by default and displays up to four apps at once, forcing you to focus on what you’re doing. Recently used apps are displayed on the left side of the screen for quick and easy switching.
Stage Manager for Mac is very interesting. Feel free to experiment to see if it suits your style of work. If you have a machine running macOS Ventura 13 or later, here’s how to enable/disable this feature and especially how to use it.
How to activate Stage Manager on macOS
Activating Stage Manager for macOS is very easy from the Control Center:
- Click the Control Center icon in the menu bar.
- Click “Stage Manager”to enable this feature on your computer.
Now you can enjoy Stage Manager on your Mac.
Use Stage Manager on your Mac
Once Stage Manager is activated, you’ll immediately see the last four active apps grouped along the edge of the screen, with one app in the center.
Click any in the left pane or open a new app in the Dock to switch to that app.
You can drag windows from the left menu to the front to bring another window or application to the front of the Stage Manager and bring them back there whenever you want.
Stage Manager is easier to understand using it, feel free to test it. Moreover, its deactivation is very simple.
How to disable Stage Manager on macOS
Disabling Stage Manager is also very easy, always through the Control Center:
- Click the Control Center icon in the menu bar.
- Click “Stage Manager”to disable this feature on your computer.
After disabling, all groups of windows and applications return to their pre-Stage Manager state, nothing is closed, rearranged, or lost.
How to set up the scene manager
Some Stage Manager elements can be customized:
- Click the apple icon in the upper left corner of the screen, then select System Preferences.
- Then click “Desktop and Dock”in the left menu.
- Scroll down to find Stage Manager and click Customize.
- Customize the settings as you like to show/hide the desktop, recent apps, etc.
How to enable/disable Stage Manager via settings
Mac users can also enable and disable Stage Manager through System Preferences, although the easiest way to do this is through the Control Center:
- Click the apple icon in the upper left corner of the screen, then select System Preferences.
- Then click “Desktop and Dock”in the left menu.
- Scroll down to find Stage Manager and click the toggle to turn it on or off.
You can also enable Stage Manager via Settings and disable it via Control Center and vice versa.
If you have an iPad, Stage Manager also exists on a tablet, where it’s arguably even more useful, as multitasking on the iPad is still very concise. Mac’s native windowing system, combined with Mission Control, provides one of the best windowing and multitasking controls available today. So the Stage Manager is probably less of an improvement and more of an alternative. Try!
Leave a Reply