How to Automatically or Manually Change the Date, Time, and Time Zone on iPhone, iPad, Mac, Apple Watch, and Apple TV

Keeping the date, time, and time zone settings on your devices up to date is critical to ensure accurate scheduling, time reminders, and the smooth running of various applications.
Apple devices such as the iPhone, iPad, Mac, Apple Watch, and Apple TV offer several ways to change your date, time, and time zone settings, both automatically and manually. In this article, we’ll look at various ways to update the time and date settings on your Apple devices so you can stay on top of your busy schedule and never miss an important event.
Set timezone automatically
Make sure the device you’re following these steps on is connected to the Internet via Wi-Fi, cellular, or Ethernet.
On iPhone, Apple Watch and iPad
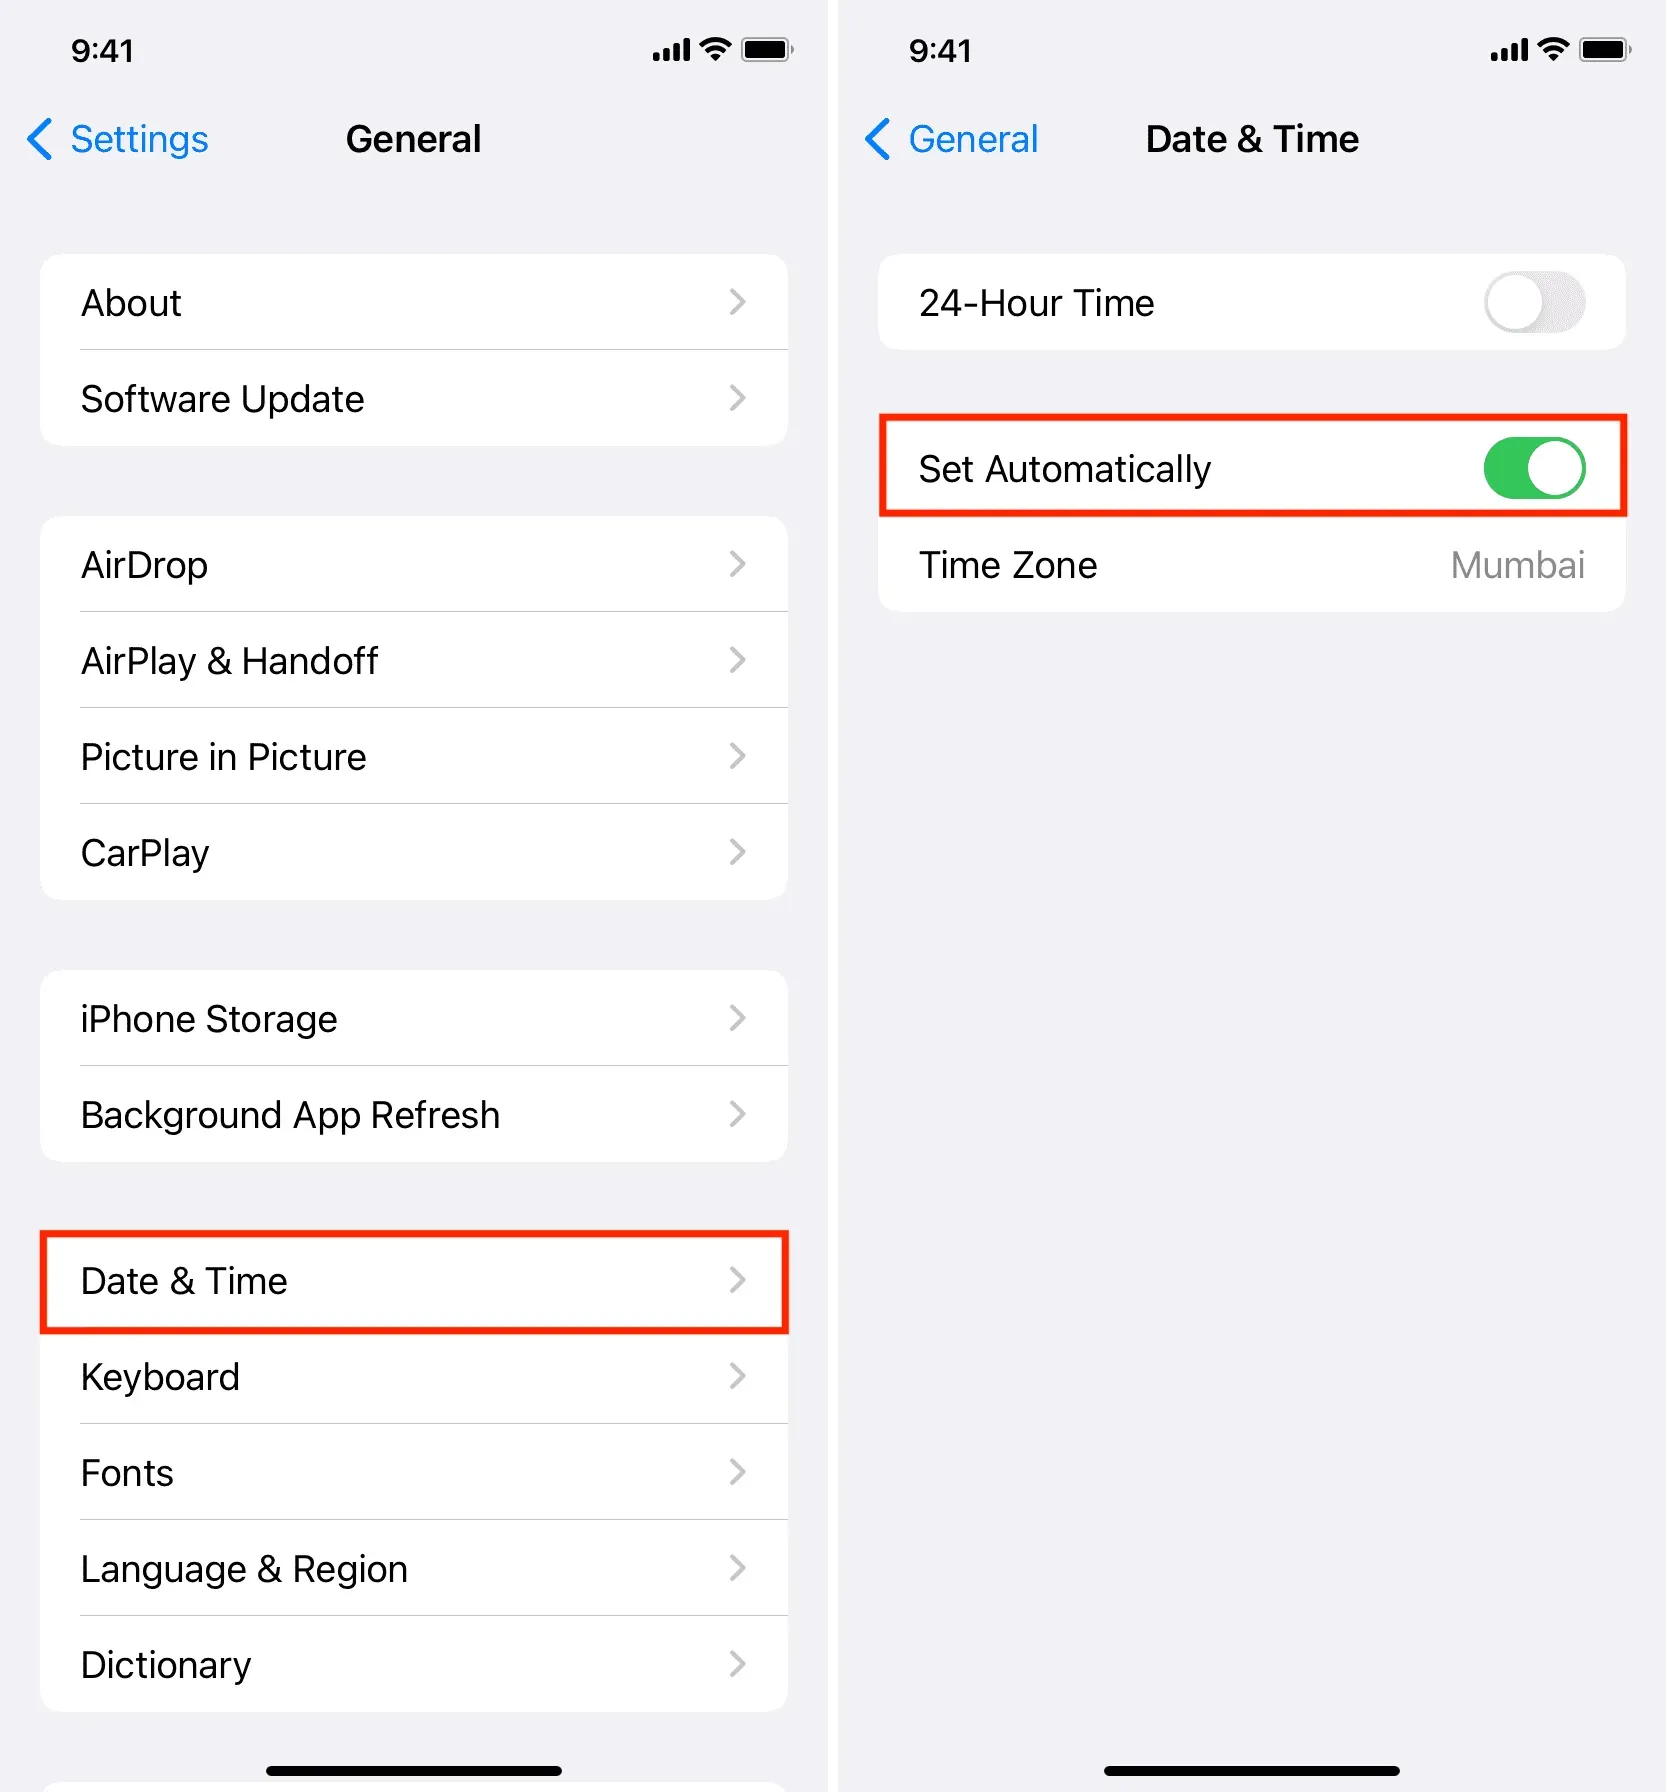
- Open the Settings app on your iPhone or iPad.
- Click General > Date & Time.
- Turn on the switch next to Install automatically.
- Now restart it and once it’s done your device will automatically show the correct date, time and time zone. In the future, even if you travel to a different time zone, your device should automatically update to display the correct date and time based on your location.
Note:
- Once restarted, go back to Settings > General > Date & Time and make sure you see the correct city, country, or region on the Time Zone tile.
- Your Apple Watch uses the time zone specified on your paired iPhone. Restart the watch if the date and time are different.
On Mac
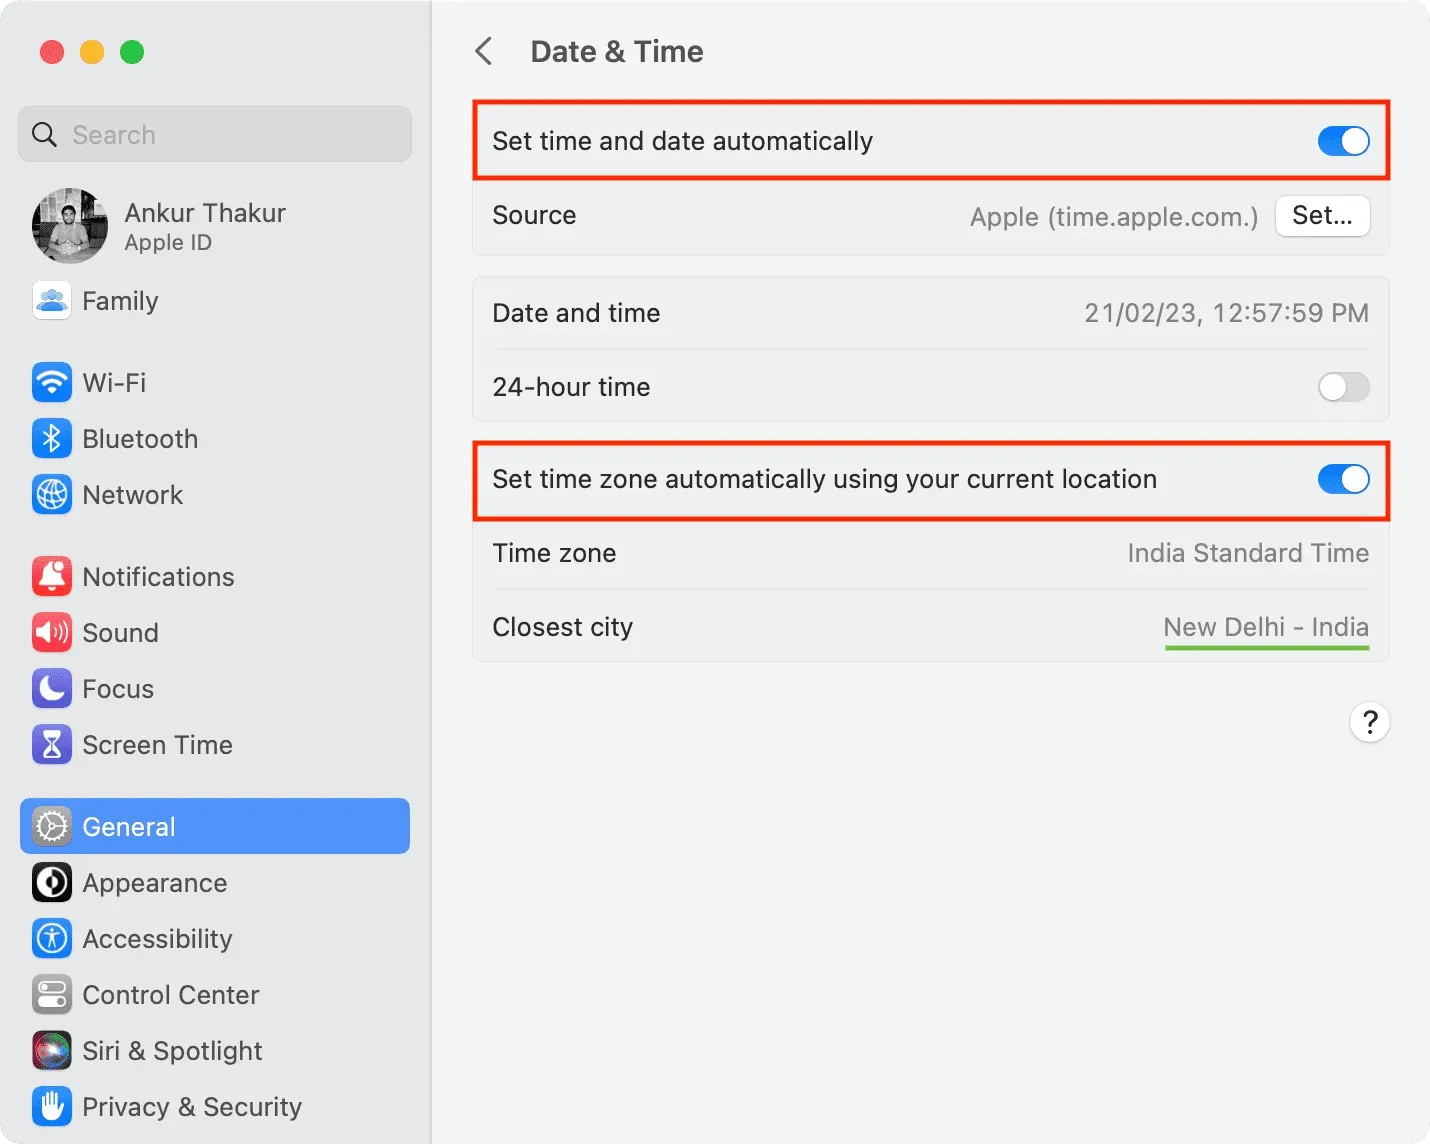
- Open System Preferences and select General > Date & Time.
- Turn on the switch next to “Automatically set the time zone based on your current location.”
- After that, turn on the “Set time and date automatically”switch.
- Finally, restart your Mac.
On Apple TV
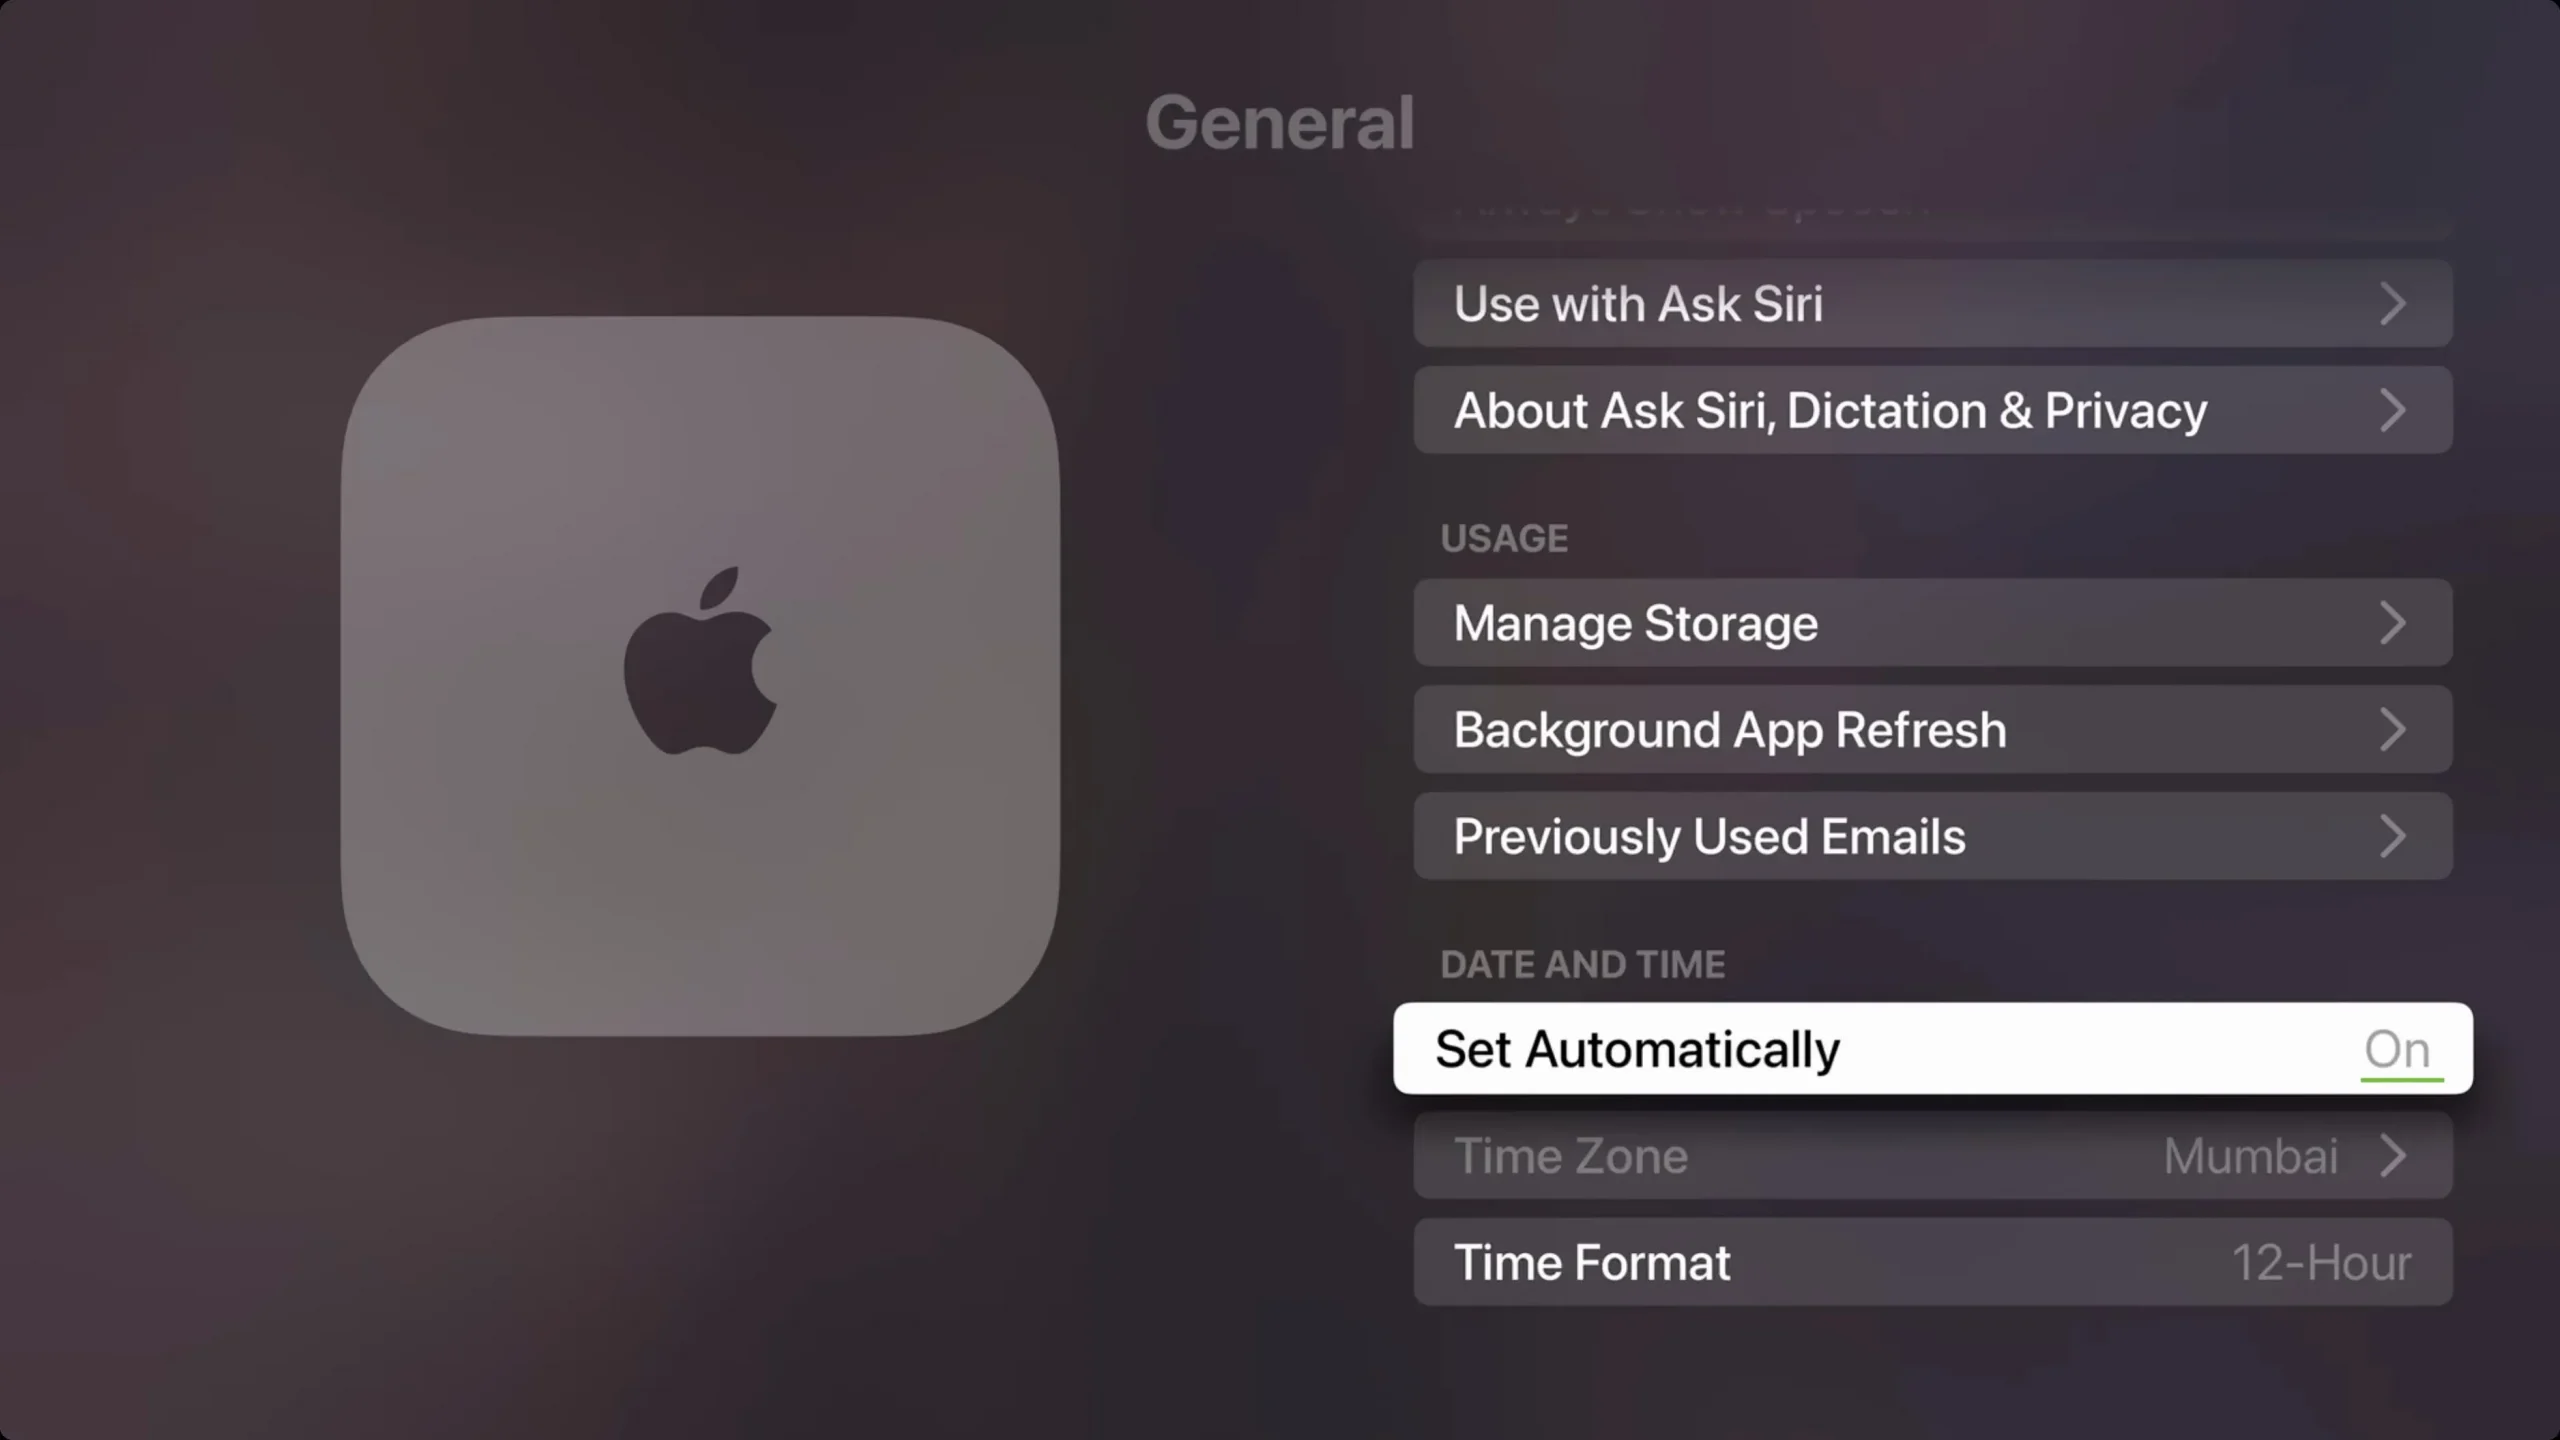
- Go to the Settings app and select General.
- Scroll down and select the “Install automatically”option so that it says “On”next to it.
- Turn your Apple TV off and on again.
Automatic timezone not working or updating?
Check your internet
- Make sure your device is connected to the Internet.
- Disable VPN if you are using one.
- Restart your Wi-Fi router.
Reboot your device
Turn your iPhone, iPad, Mac, TV, and Apple Watch off and on again. This is required if you see a message that an updated time zone is available.
Allow location access
Turn on location services on your device and make sure Set Time Zone is allowed to access your location. Here’s how to do it:
On iPhone (and Apple Watch) and iPad:
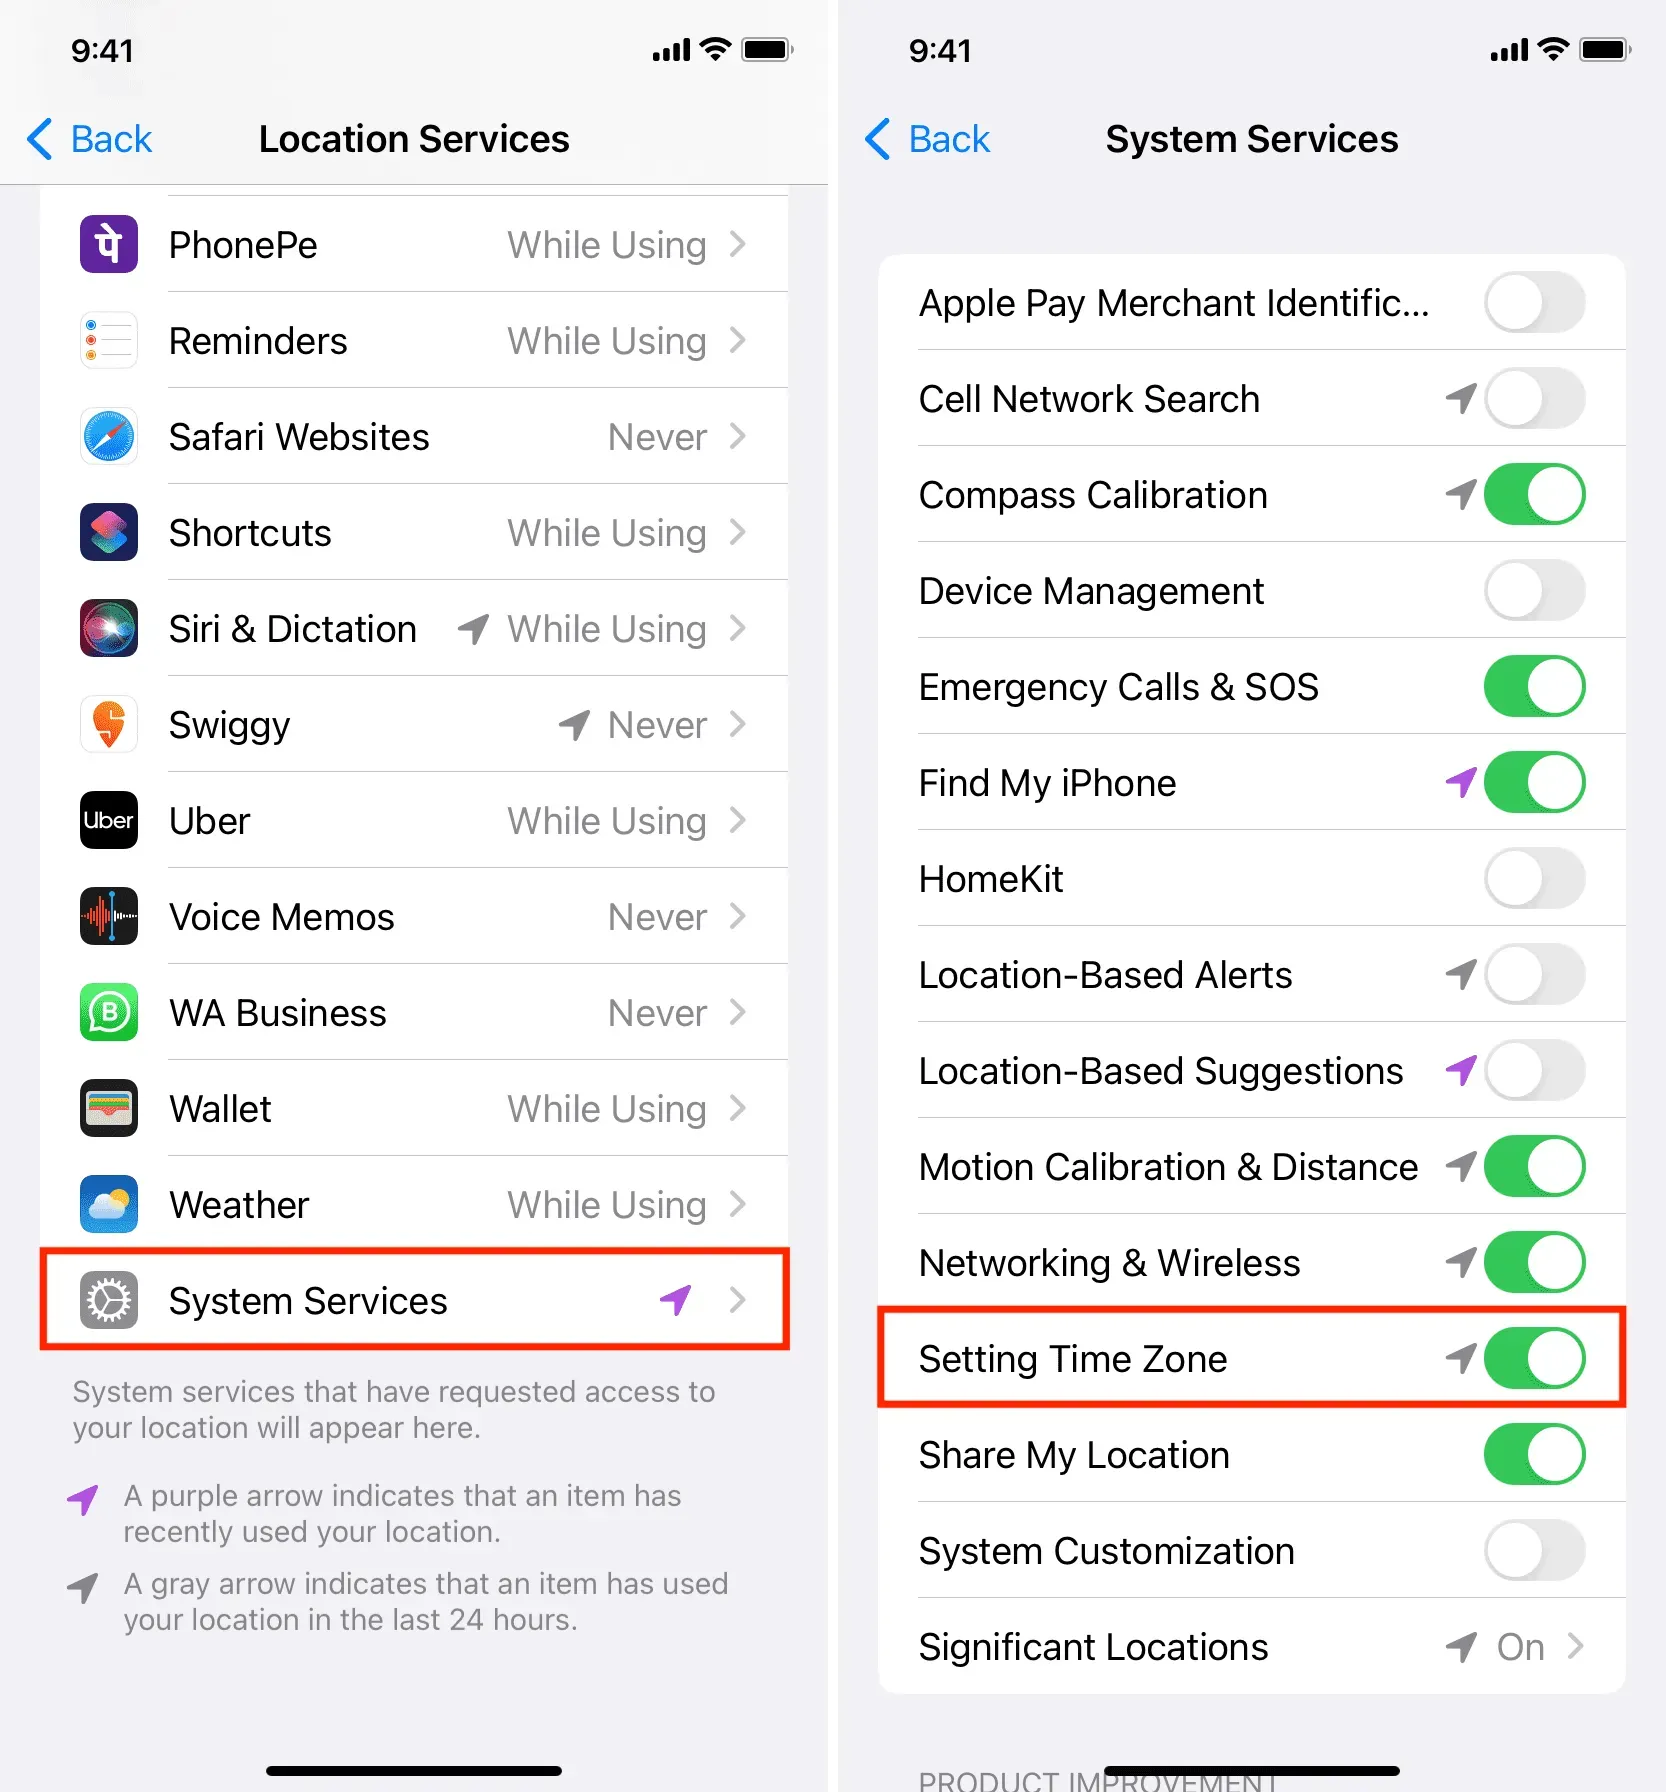
- Go to Settings > Privacy & Security > Location Services.
- Make sure Location Services is turned on.
- Scroll down and click System Services.
- Make sure the switch next to “Time Zone Settings”is green.
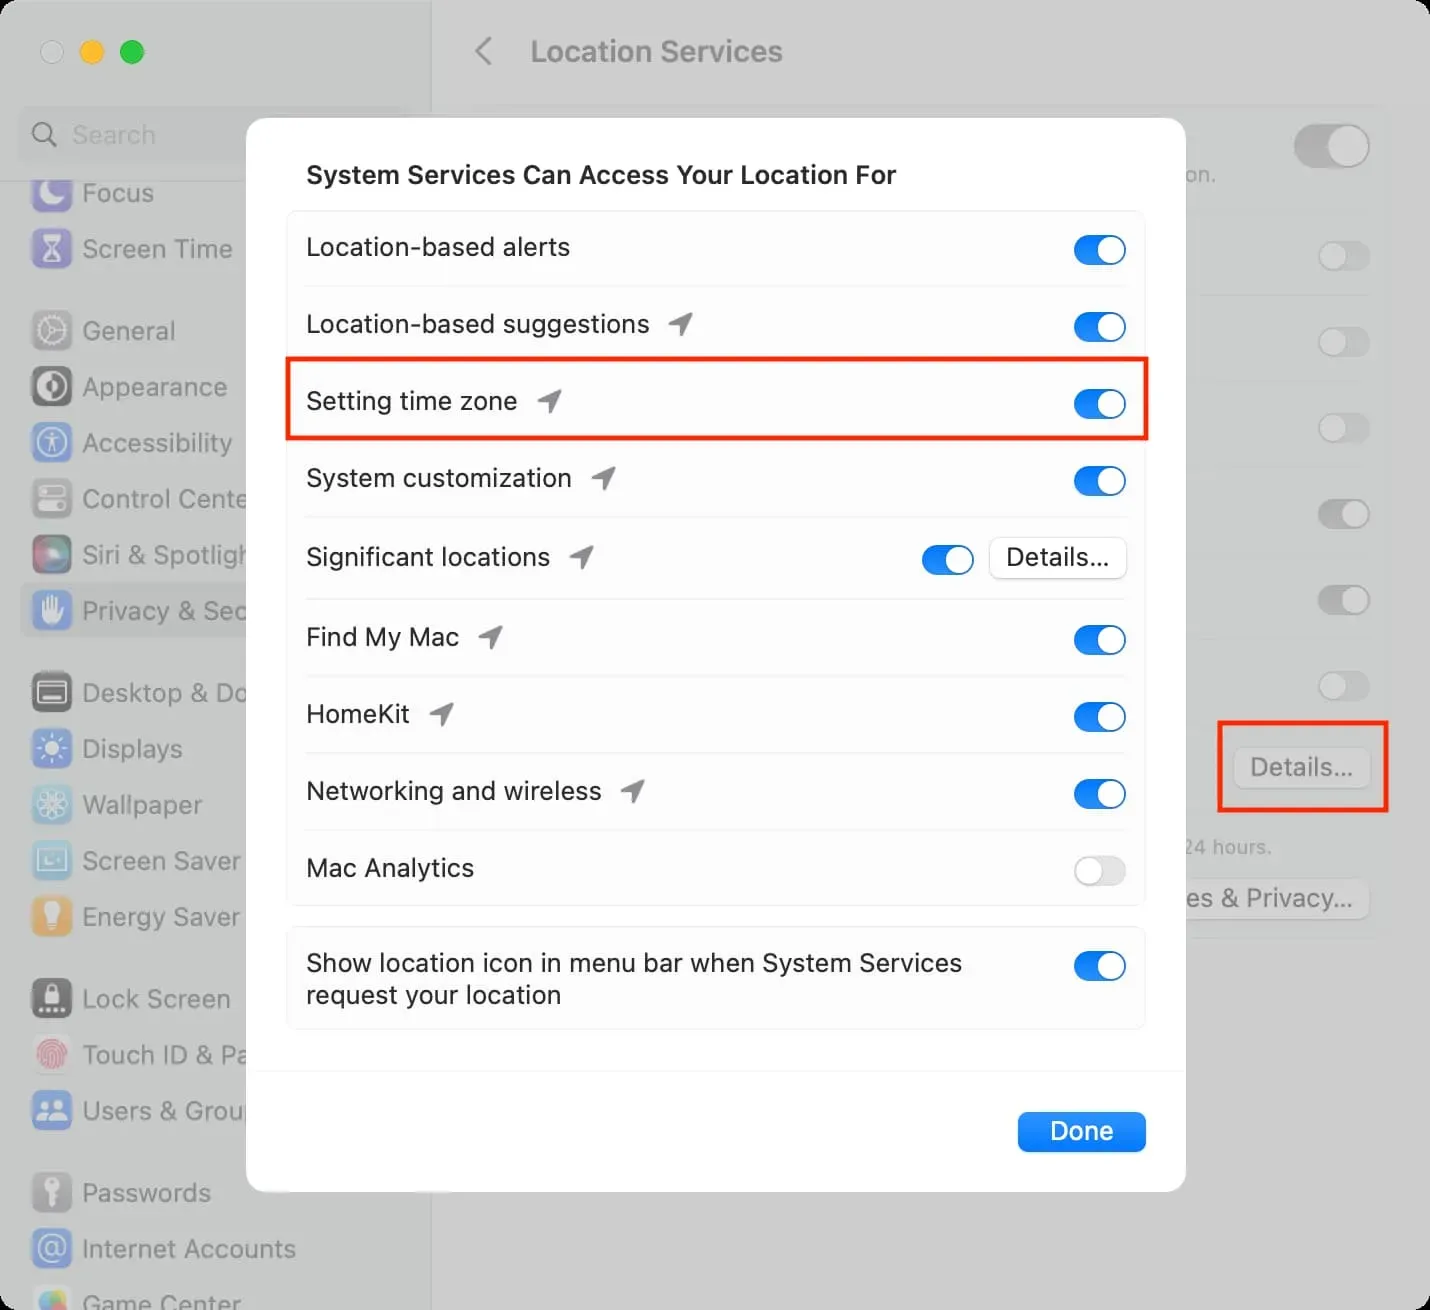
On Mac:
- Open System Preferences and select Privacy & Security > Location Services.
- Make sure Location Services is turned on.
- Click More Details next to System Preferences.
- Turn on the “Set time zone”toggle and click “Finish”.
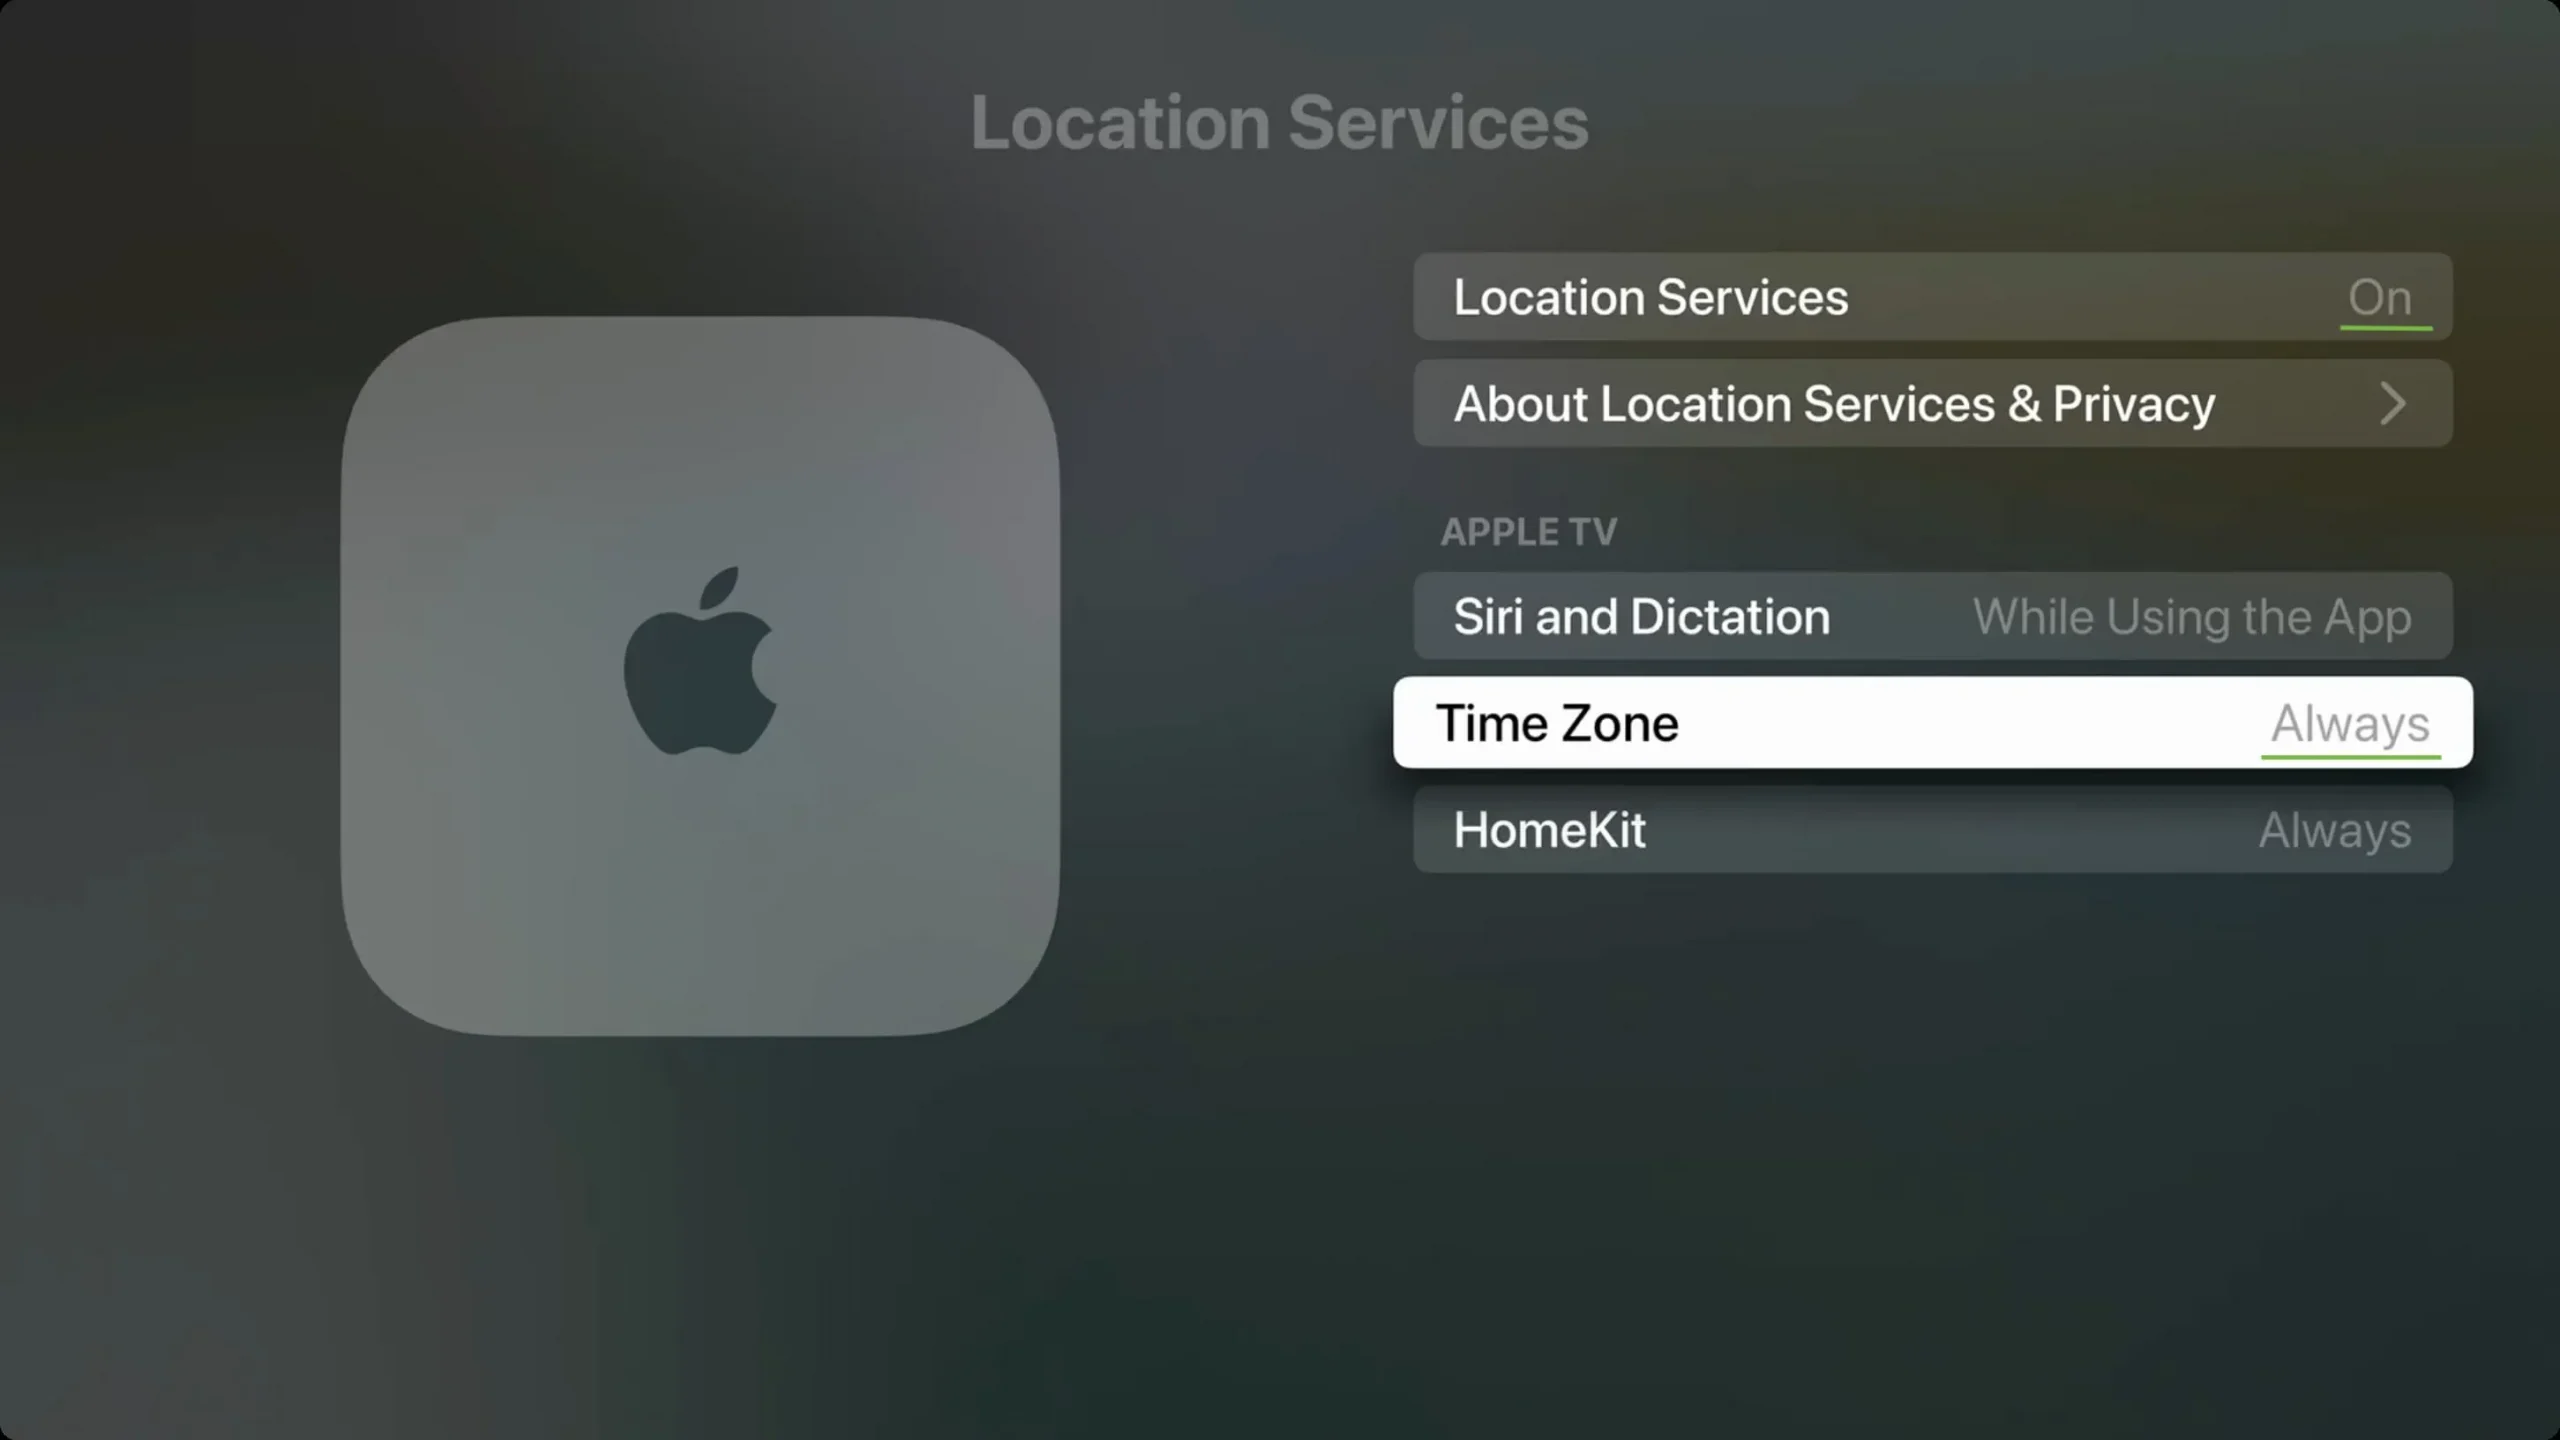
On Apple TV:
- Go to Settings > General > Privacy > Location Services.
- Make sure Location Services is turned on.
- After that, click “Time Zone”and select “Always”.
The Install Automatically option is greyed out or unavailable
If the option to set the time, date and time zone is blocked, dimmed or greyed out, it may be due to the following reasons:
- Screen time. To fix this problem, go to Settings > General > Screen Time and disable it temporarily.
- Corporate profile. If you use a specific school, office, or institution profile on your device, you may not be able to change your time settings until that profile is deleted. You can see this in Settings > General > VPN & Device Management.
- Operator or country: Some mobile operators and regions/countries may block the change using the “Install automatically”button.
Set timezone manually
Some apps and services, such as reminders, cellular data, and Wi-Fi, may not work if your device has the wrong date and time. So it’s best to let your devices install them automatically.
However, you have the option to change the time manually if:
- Your iPhone, iPad, Mac, watch, or TV is showing the wrong time, date, and time zone, and you can’t set it to update automatically.
- The time has changed due to government regulations or daylight saving time, and your device cannot set the new time by itself.
- You want your devices to be 5 or 10 minutes ahead of time. (Note: You don’t need to change the time on your iPhone to advance the time on your Apple Watch.)
- Not recommended, but some people may want to tweak the device’s time to change the app’s behavior (for example, trick a game app into unlocking certain benefits after a certain amount of time).
With that said, here’s how to manually set the time zone, date, and time on Apple devices.
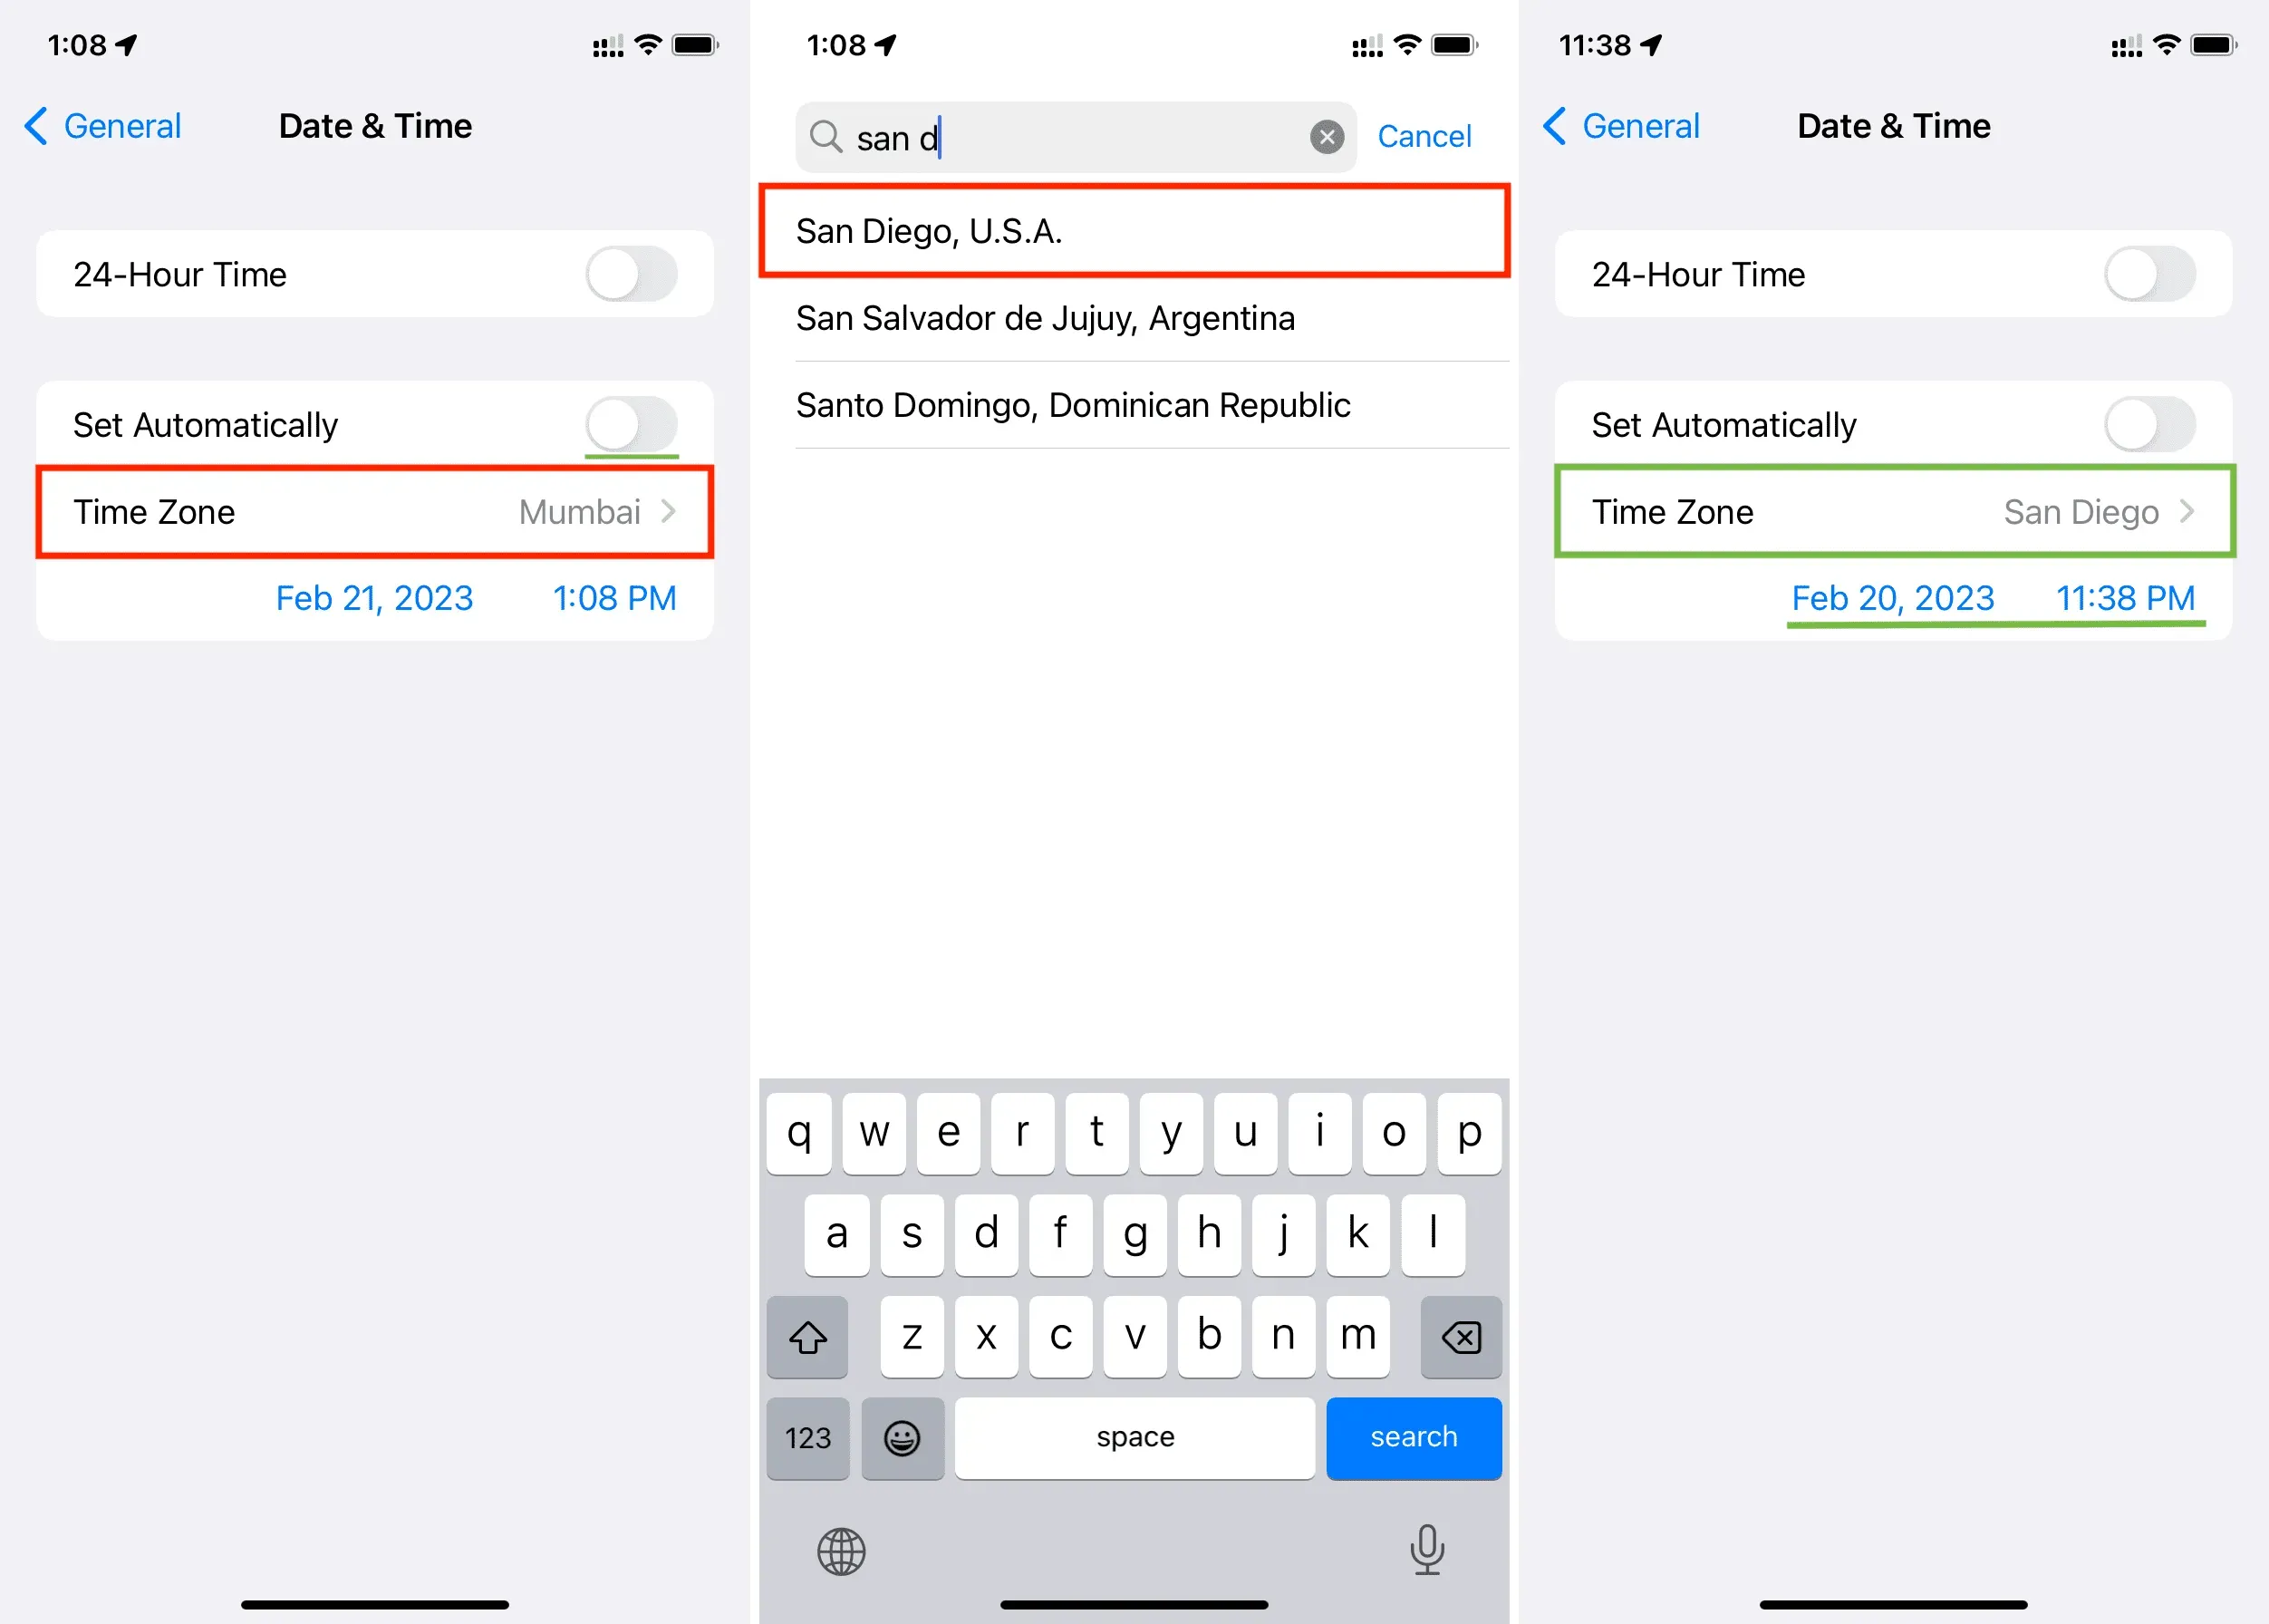
On iPhone, Apple Watch and iPad
- Go to Settings > General > Date & Time.
- Turn off the switch next to Install automatically.
- Tap Time Zone.
- Now enter the name of your city or country and select it from the options provided.
- The moment you change the time zone, the date and time shown below the time zone tile will also change. If not, restart your device. You can also click on the blue time and date to set it manually.
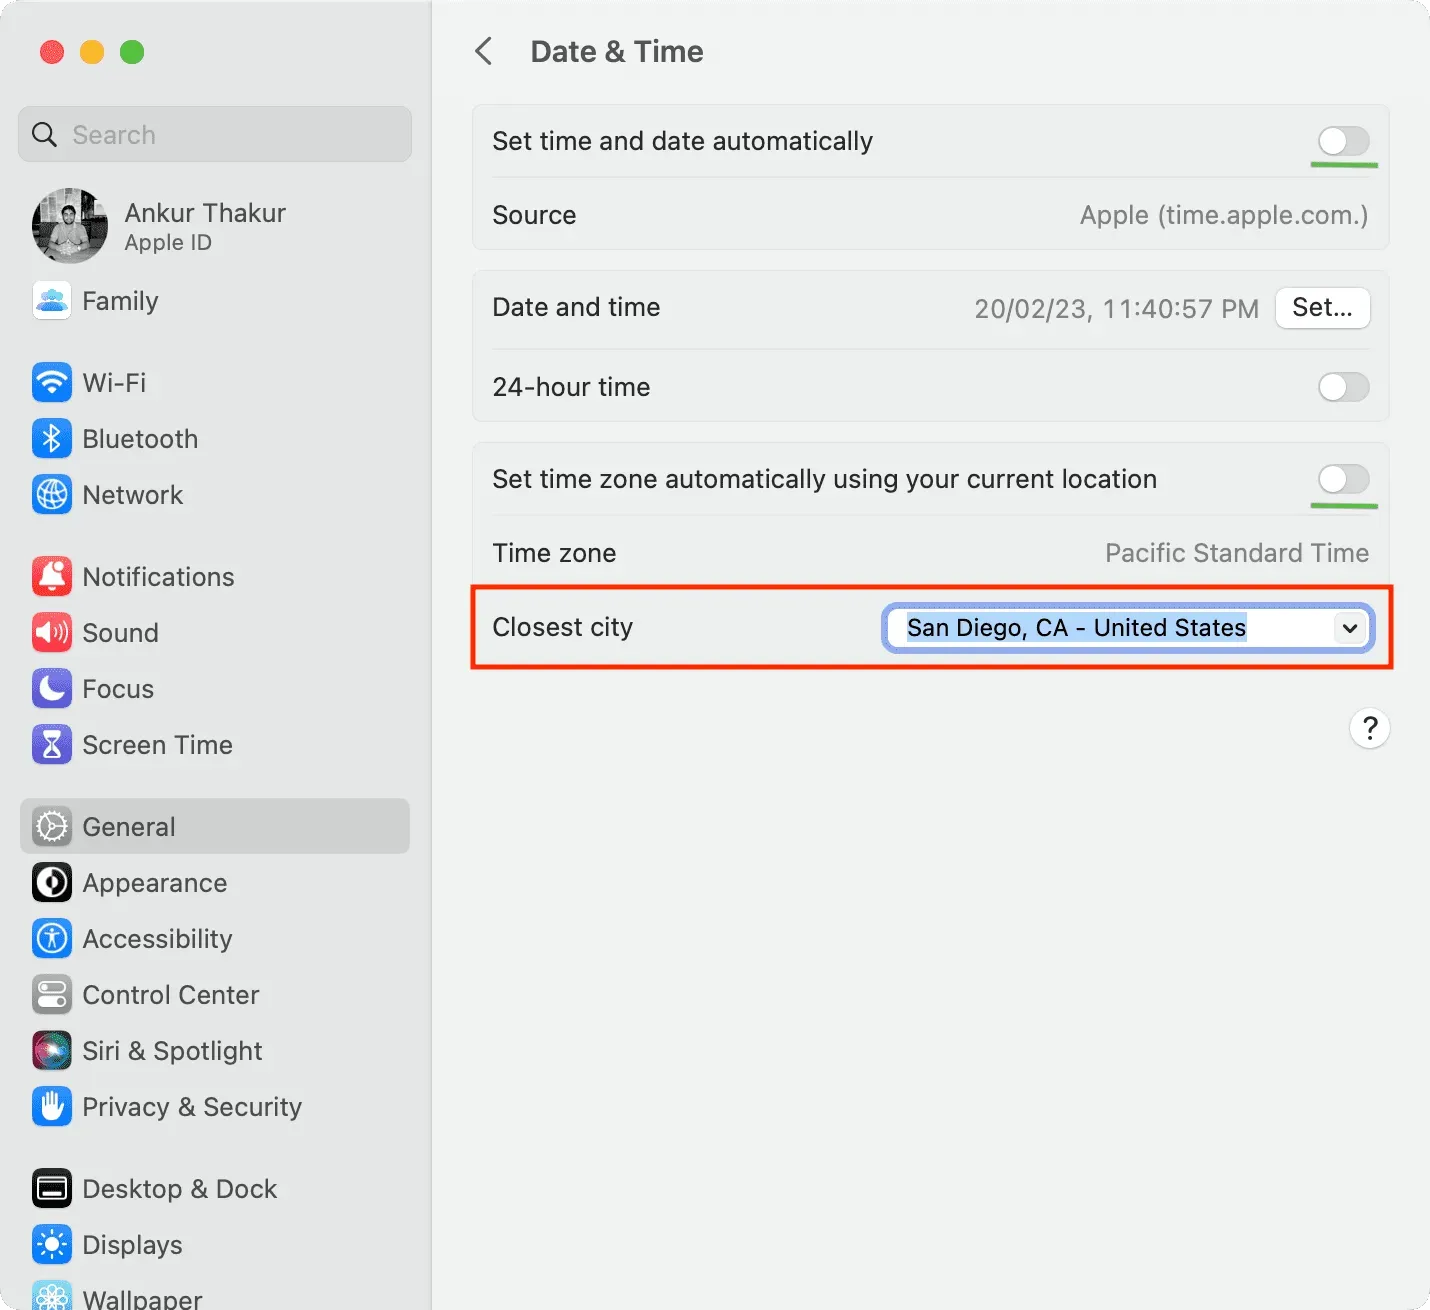
On Mac
- Choose System Preferences > General > Date & Time.
- Turn off the switch next to “Automatically set time and date”and “Automatically set the time zone based on your current location.”
- Click the arrow in the drop-down menu next to the nearest city and select a city. You can also enter a city name in this field and press the return key.
- Right away, you should see the updated time on your Mac’s top menu bar.
On Apple TV
- Go to Settings > General and scroll down to the Date & Time heading.
- Disable Install automatically.
- Then click the Time Zone option, enter the initials of the new city or country, and choose from the options provided.

Leave a Reply