How to Add Text or Image Watermark to PDF for Free on iPhone, iPad and Mac

You can watermark a PDF with text, a logo, or an image to let people know the PDF is private, confidential, or created by you or your organization. While a watermark cannot prevent content from being stolen, it can certainly prevent misuse and help show that you are the creator or owner of that PDF.
So, whether for school, work, or personal use, this guide will show you how to watermark PDF files for free on your iPhone, iPad, and Mac.
Add a watermark to PDF on Mac
1. Use a PDF Stamp
Notable features of this app:
- Add a watermark with text or logo
- Change transparency
- Use a mosaic watermark that repeatedly adds text or logo across the entire PDF page.
- Allows you to add watermarks to multiple PDF files at once.
- Free use
To use this application:
1) Download the PDF Stamp app from the Mac App Store and open it.
2) Click “Add PDF”, select the file and click “Open”.
3) After that, click Continue.
4) In the upper right corner, select “Text Watermark”or “Image Watermark”:
Text watermark:
- Replace the sample watermark with the text you want to use, such as a name or words like “Private”or “Confidential.”
- Then choose the font and text color.
- Use the transparency slider to adjust it accordingly.
- Optionally, you can also enable rotation and adjust the angle of the watermark.
- Select the location of the watermark.
- Then decide if you want to use a mosaic watermark.
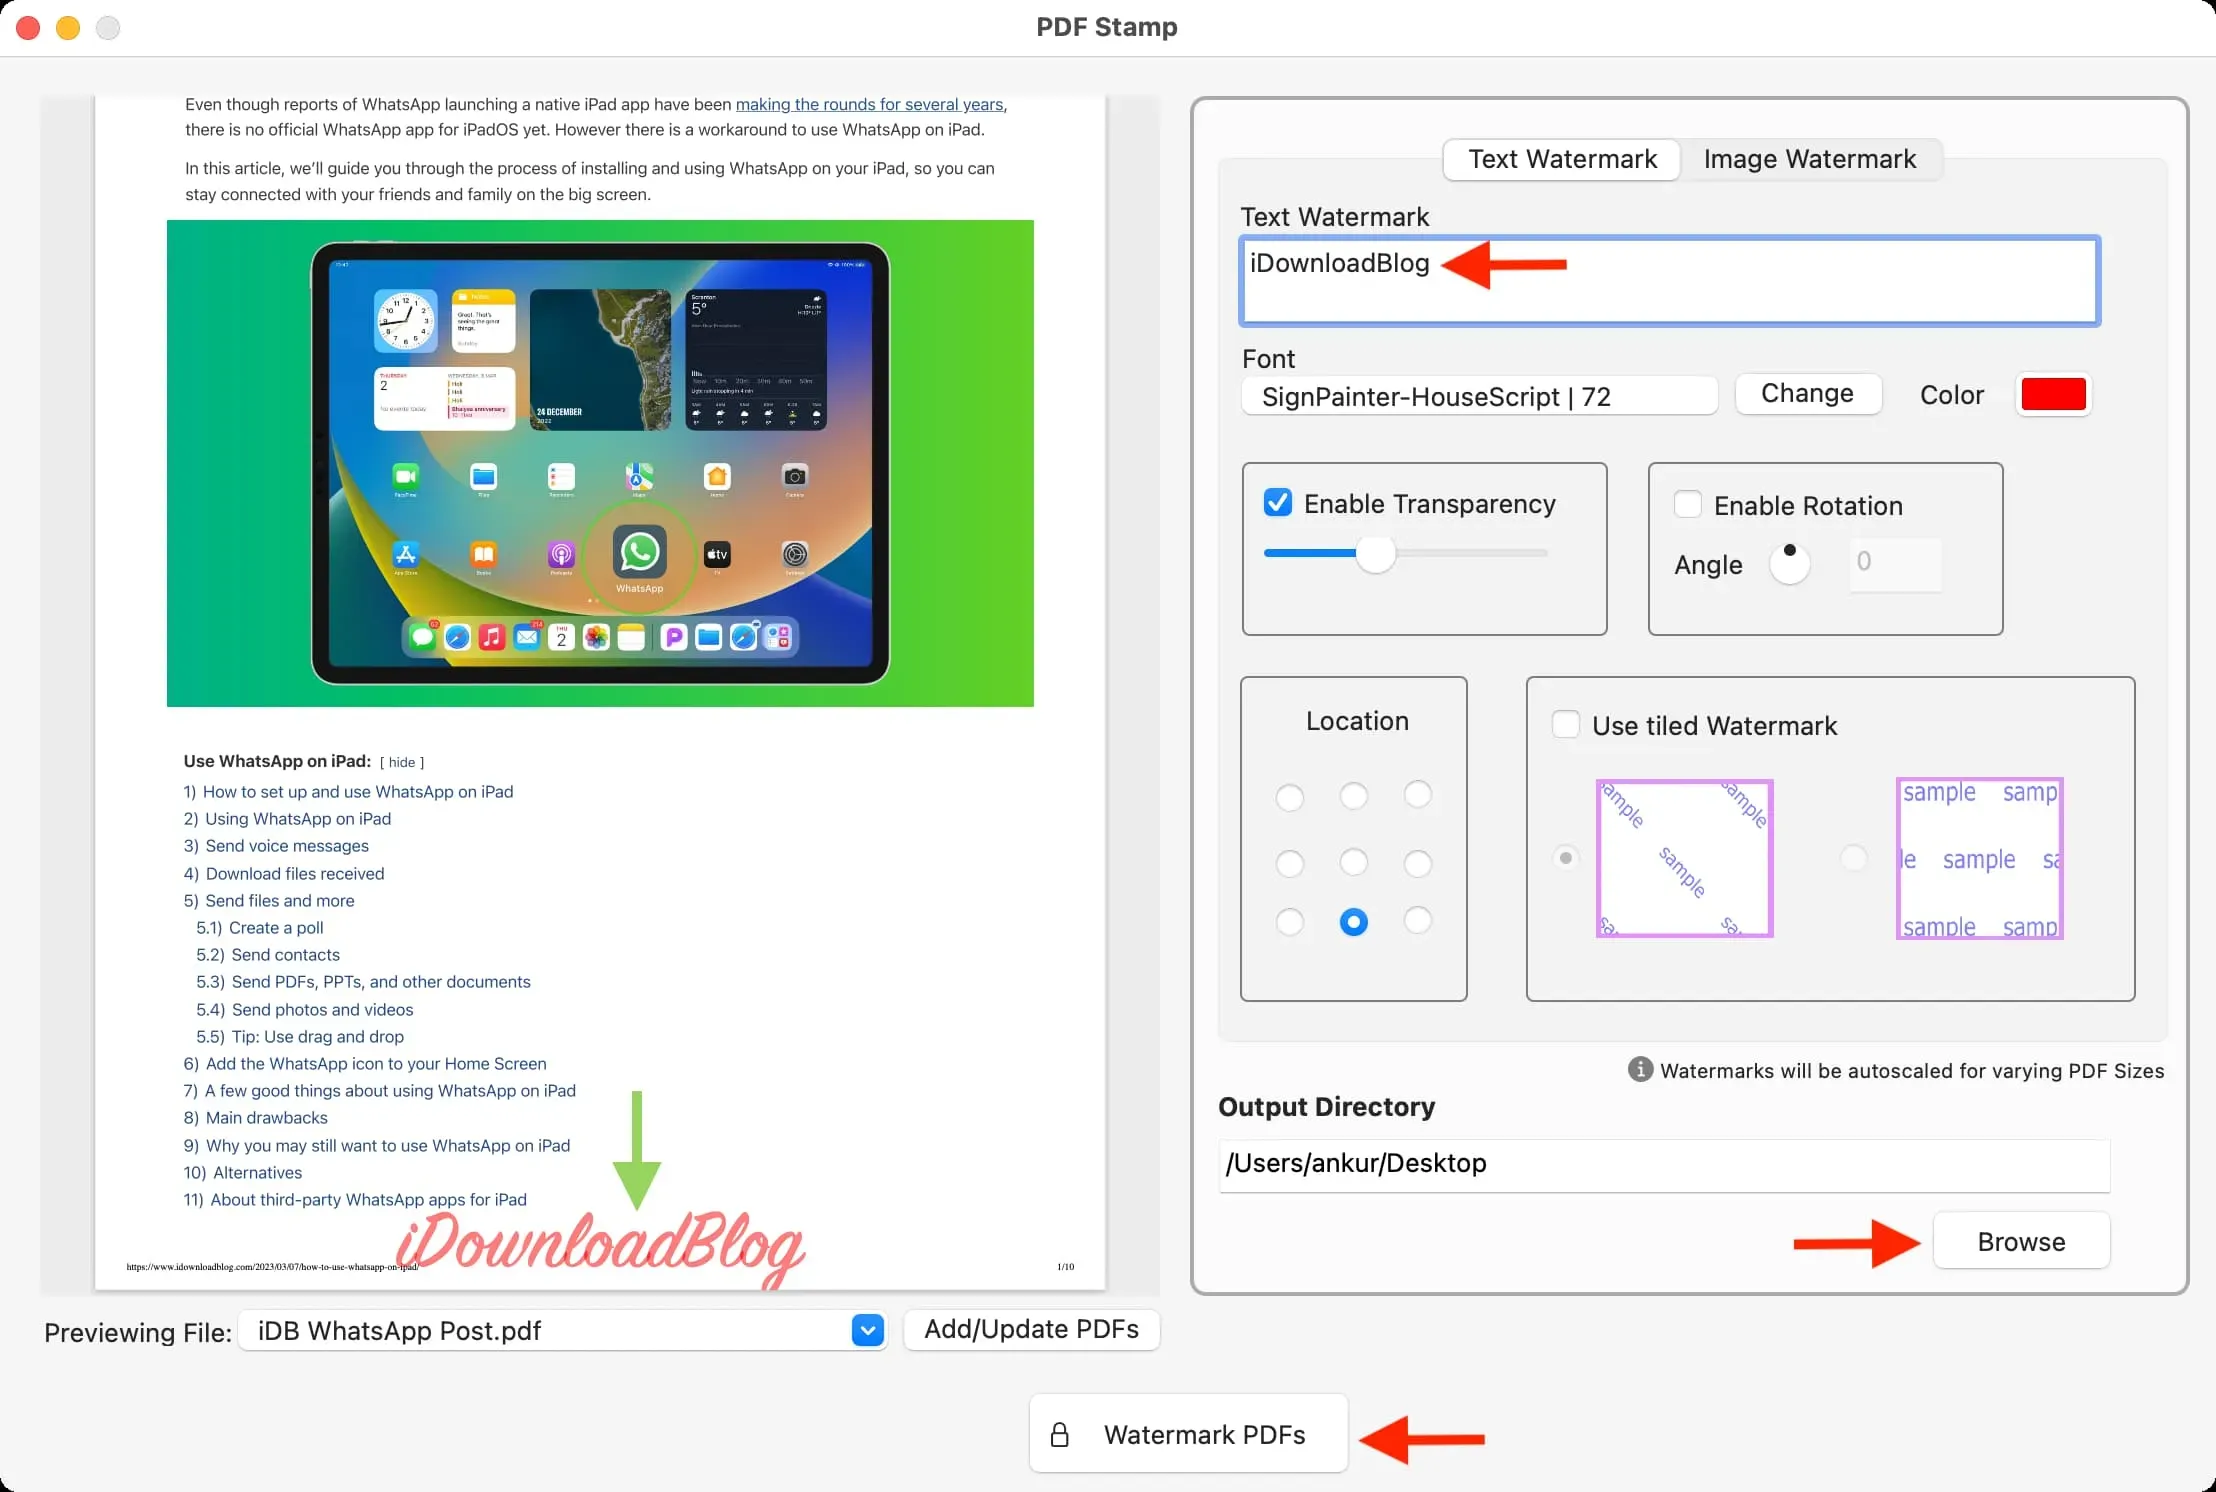
Image watermark:
- Click “Open”and select the image you want to use as your watermark.
- As with the text watermark, you can customize the size, transparency, rotation, position, and style of the logo watermark.
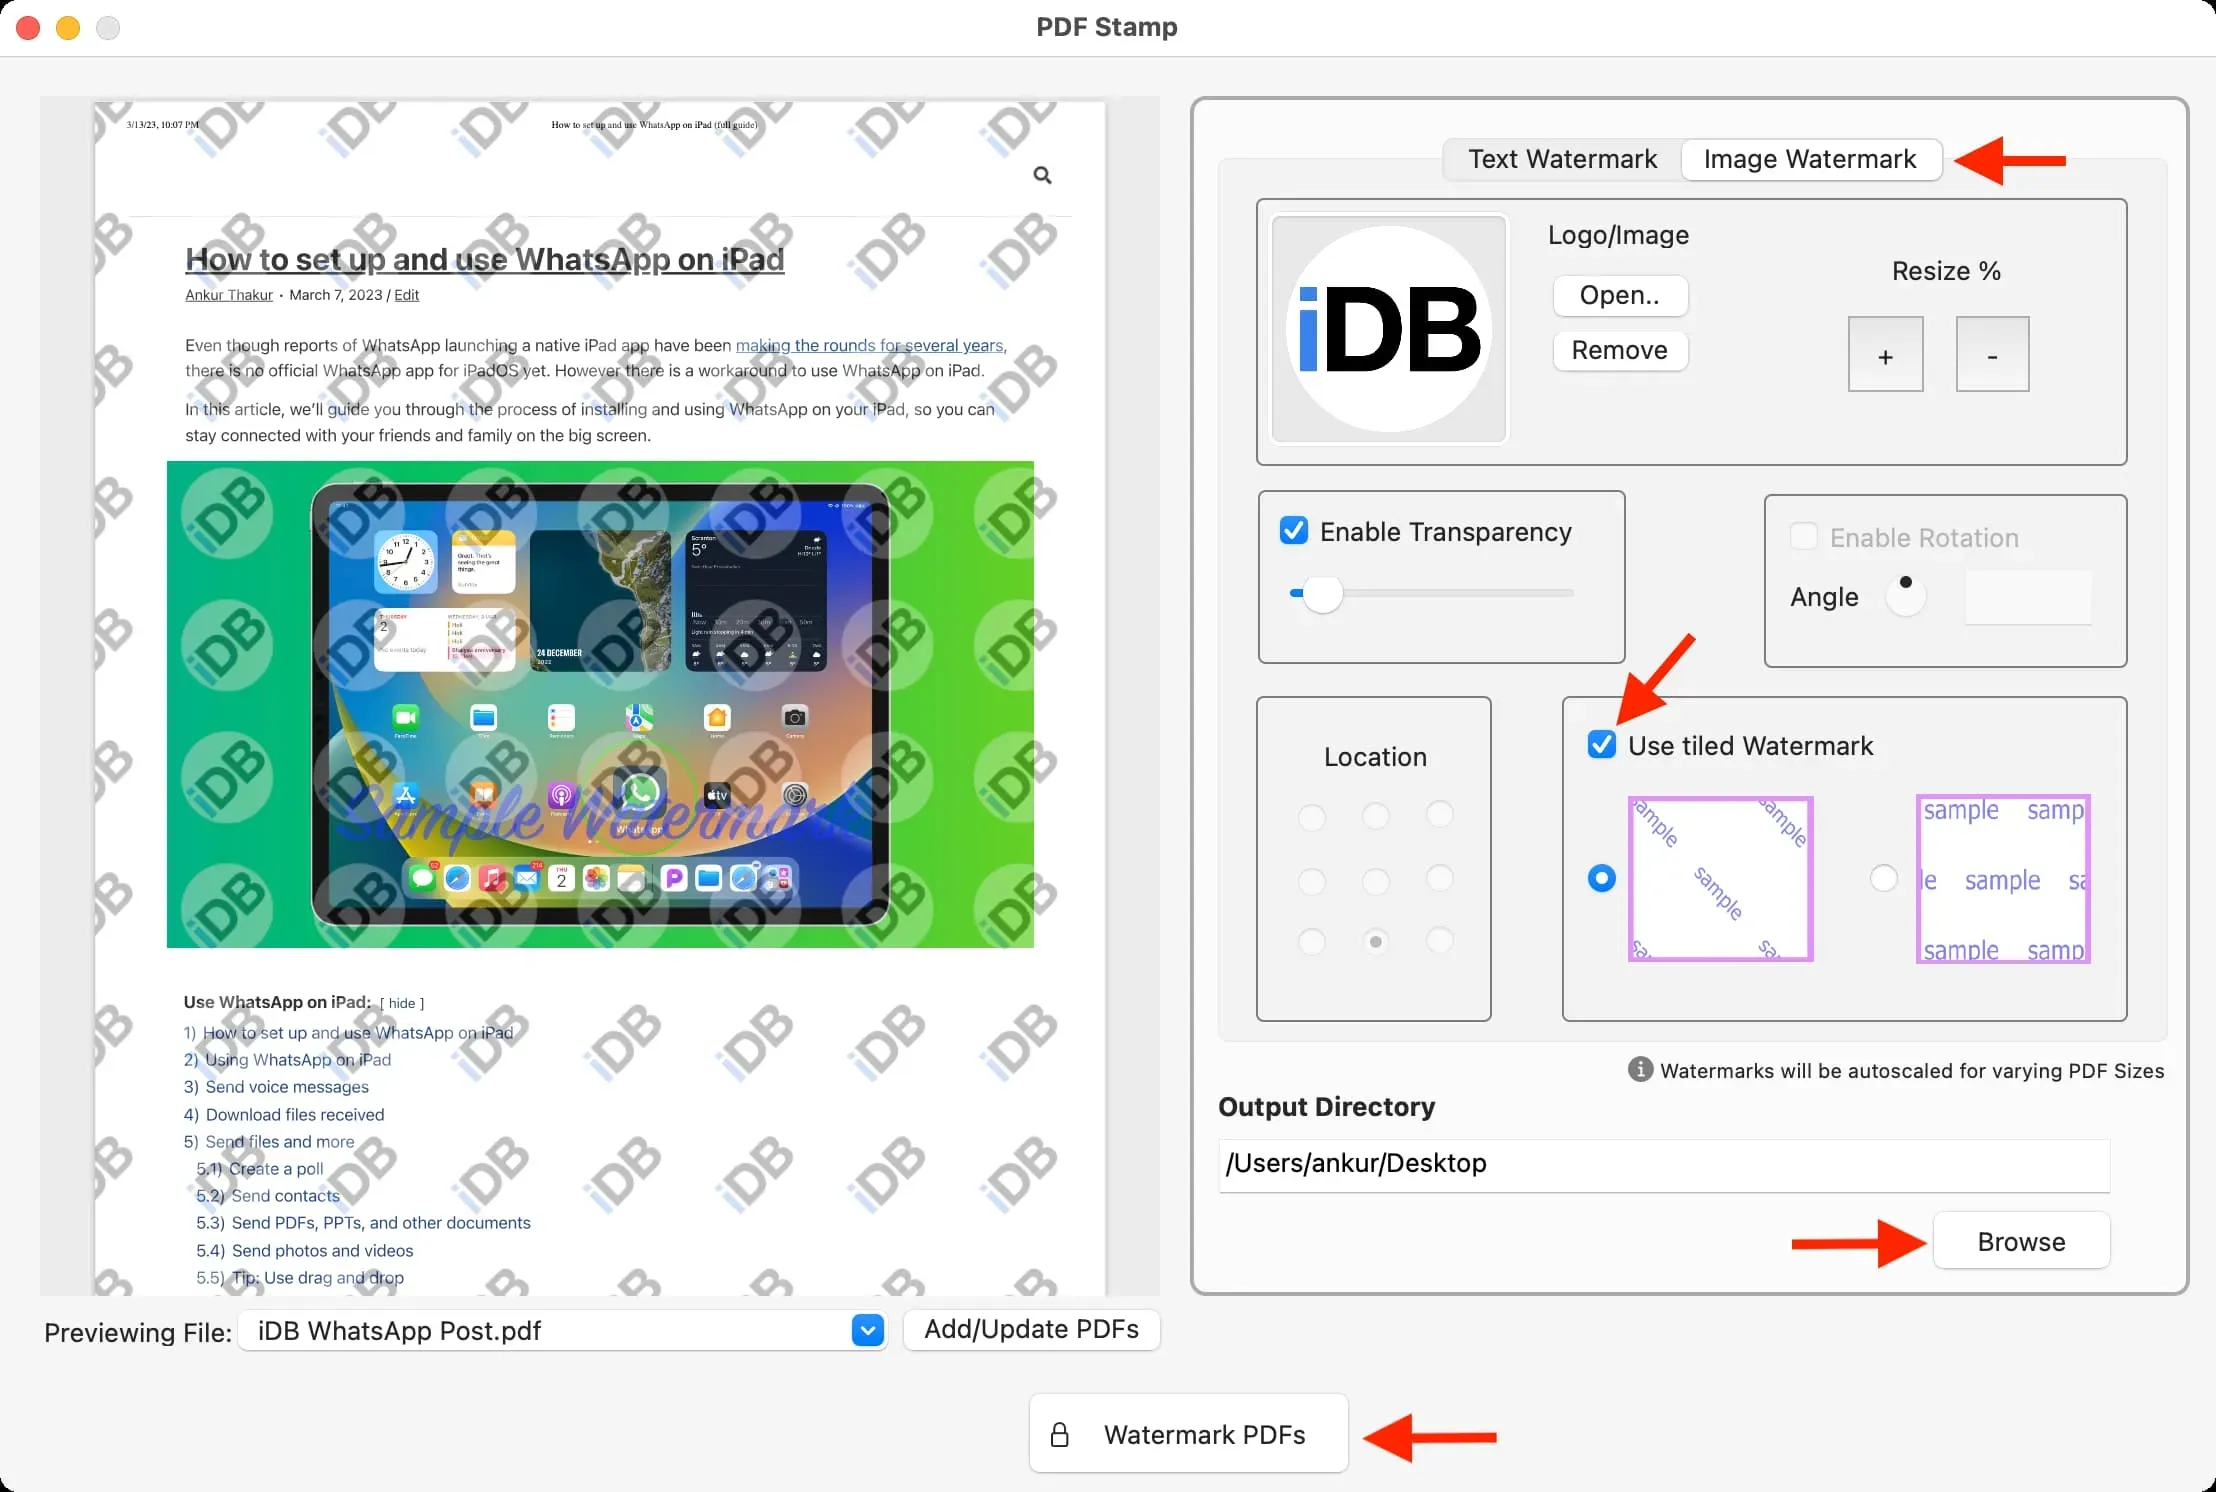
5) Optional: If you want to add the same watermark to multiple PDFs, please click “Add/Update PDFs”and add additional files to it. They will all have the same watermark that you have added and customized with the four steps above.
6) Click Browse and select an output folder.
7) Finally, click “PDF Watermark”.
The application will watermark your PDF files and save them in the selected location.
2. Use a preview app
Notable features of this app:
- Comes preinstalled on your Mac
- It can be used to add a simple text watermark to a PDF file with one or more pages.
- No fancy watermark options
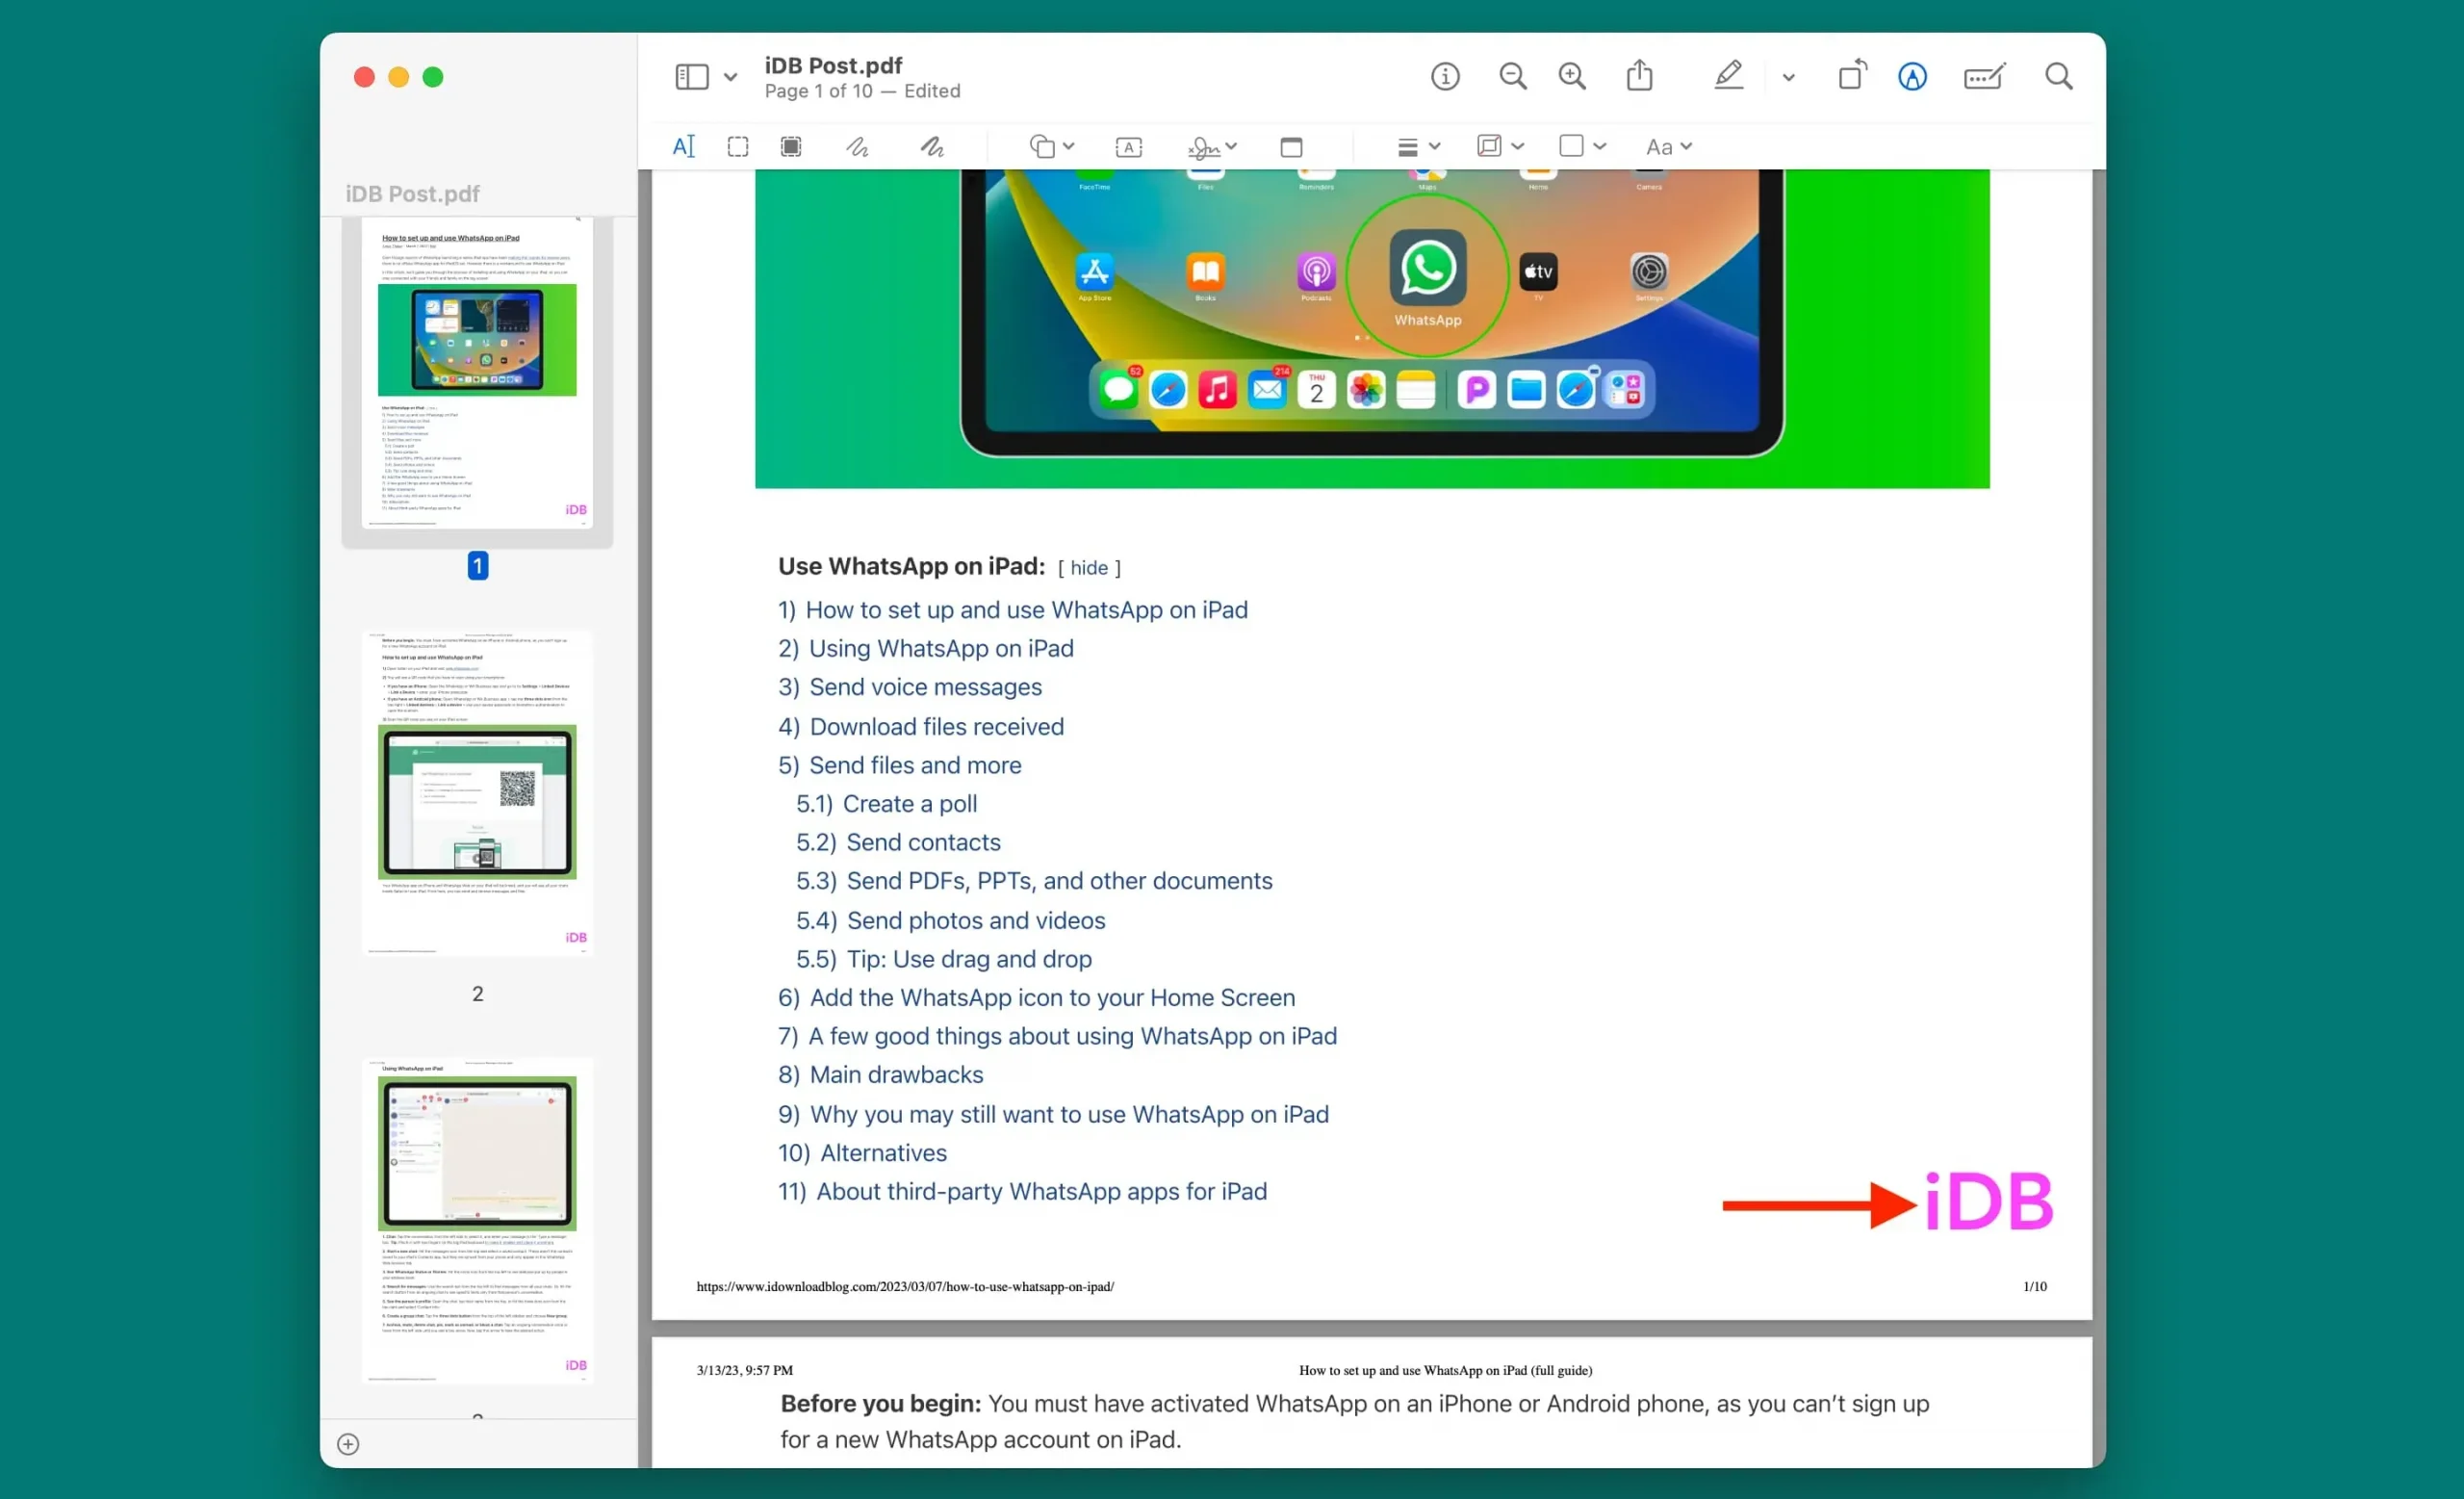
While this superstar app lets you add a signature to your PDFs (which can itself be used as a watermark of sorts), annotate them, and more, it lacks a robust watermark option. However, you can use it to add plain text to PDF pages, which can work as a watermark. Here’s how:
1) Double click the PDF file to open it in preview mode. You can also right-click a PDF file and choose Open With > Preview.
2) On the top menu bar, click Tools > Annotations > Text.
3) Add your own text in the “Text”field.
4) While the cursor is still inside the “Text”field, click Aa on top to adjust the text. You can choose a different font, text color, size, bold/italic/underline style, and text orientation.
5) Then drag the text to the place where you want to place it. Most people like to keep it in the bottom right corner.
6) Once you have decided on the look and position of the watermark on the page, select it and press Command + C to copy it.
7) Scroll to the second page of the PDF and press Command + V to paste it. You will notice that the text is pasted in the same place (bottom right, for example) as the first page. You can repeat the Command + V process to add this text to all of your PDF pages.
8) Click “File”> “Export”or click “File”> hold the “Option”key to open “Save As”and select it.
9) Make sure PDF is listed next to the format and click Save.
3. Use iLovePDF.com
Notable features of this website:
- Add text or image watermark
- Change transparency
- Use rotation
- Ability to watermark above or below content
- It can batch up to 3 PDFs in the free version.
- There is no need to download and install any application, making it ideal for adding quick watermarks.
This site is free, fast and reliable. However, you should be aware that you are uploading a PDF to this site’s server, and while its privacy policy states that files are encrypted and deleted after two hours, you may want to be a little careful before using it for sensitive PDFs.
1) Visit iLovePDF.com and add your PDF here.
2) Select a watermark based on text or image.
3) Customize your watermark with various tools. You can also choose whether you want to exclude the first few pages or the last few pages from the watermarks.
4) When done, click the “Add Watermark”button.
5) Finally, click “Download Watermarked PDF”.

Note. iLovePDF also has apps for Mac and PC that work offline.
4. Use the Pages app.
You can add a watermark to existing PDFs using the methods above. However, if you’re starting from scratch and drafting your document, you can use the Pages app to add a watermark. Once this is done, export the document as a PDF and it will be watermarked.
Add a watermark to a PDF file on iPhone and iPad
I’ve spent a lot of time trying dozens of apps and picking out the ones that work best when they’re free (completely free or ad-supported). I recommend that you try all of these apps and stick with the one you are most comfortable with.
1. PDF Scanner
Notable features of this app:
- Works offline
- Free use
- Select a watermark for all or specific pages.
- Ability to set the opacity/transparency of the watermark
- Various customization options such as font size, color, style and position.
- Unfortunately, there is no preview when setting up the watermark.
- It cannot add an image-based watermark
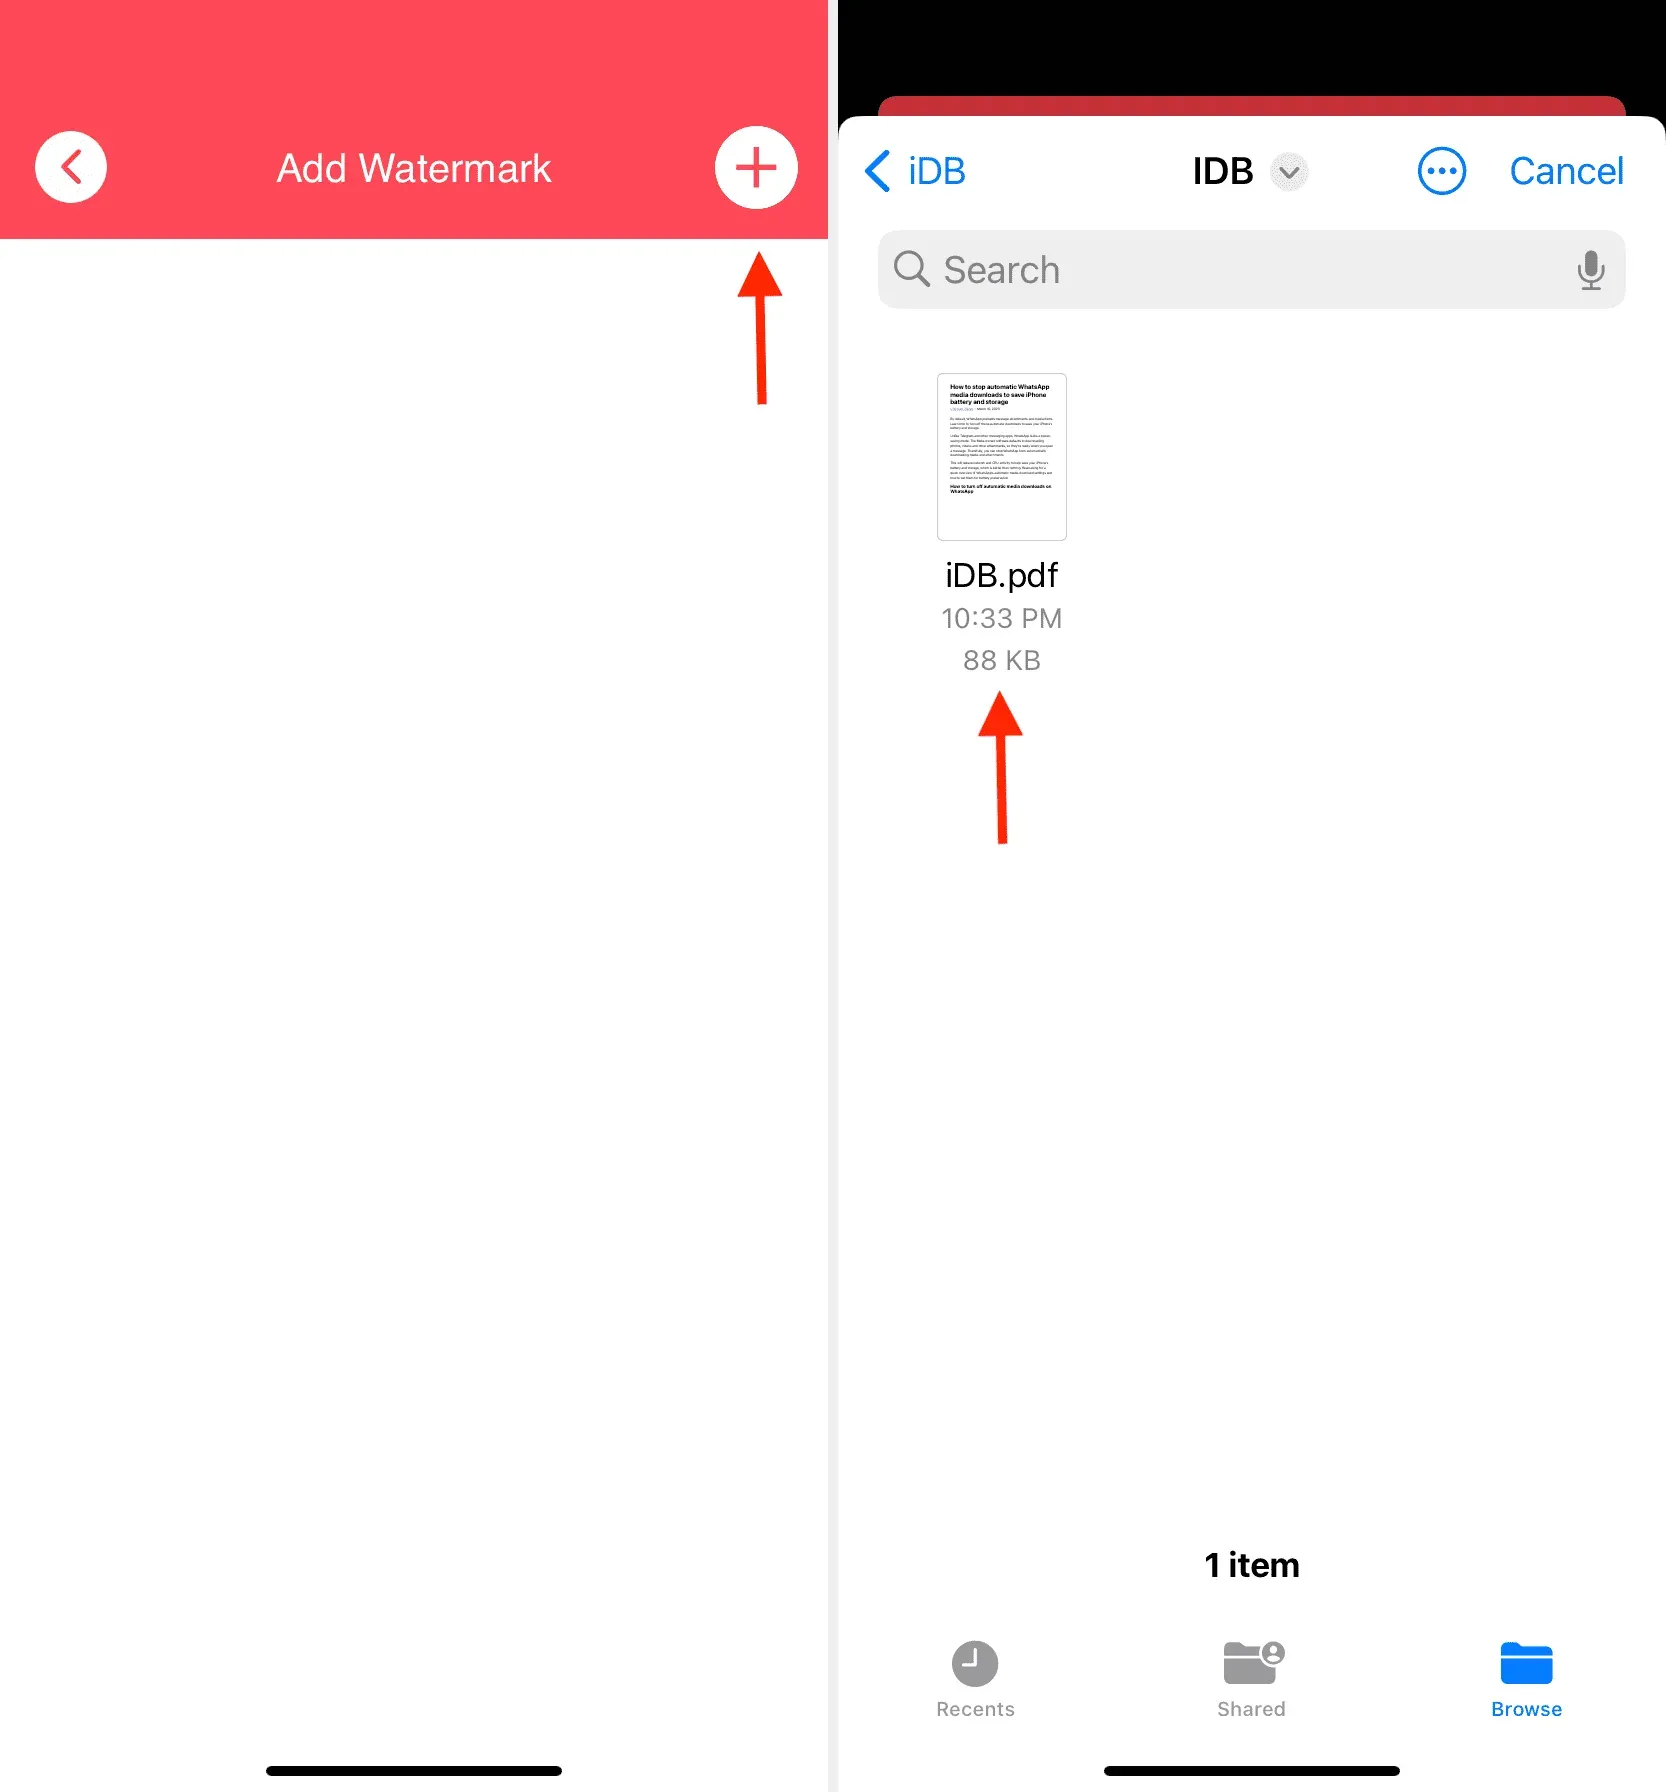
1) Download PDF Scanner for free from the App Store and open it.
2) Click PDF Tools > Add Watermark.
3) Click the plus icon on the top and select your PDF in the Files app.
4) Click on the added PDF file to open the watermark tools.
5) Select “Entire Page”or “Specific Page”.
6) Enter the watermark text and follow it by specifying the font size.
7) Now select the font family, style and color.
8) Select the location where you want to place the watermark.
9) Next, set the opacity or transparency level.
10) When done, click on the save icon in the top right corner.
11) Here you will see a preview of the added watermark. If something needs to be changed, go back and tweak it. And if everything is ok, click the share icon > save to files > choose a location > save. The PDF file is watermarked and saved in the Apple Files app.

2. PDF tools
Notable features of this app:
- Works offline
- Simple, fast and free
- Only text watermark can be added
- You can preview the watermark while setting it up.
1) Get the PDF Tools app from the iPhone or iPad App Store and open it.
2) Click Add Watermark.
3) Click the big plus (+) button on the top and select the PDF you want to watermark.
4) Select PDF and click the arrow button.
5) Select “All Pages”or “Specific Pages”and set the range.
6) Enter the text you want to add as a watermark.
7) Adjust the watermark text font style, size, color, opacity and position. You can see the changes in the small preview thumbnail at the top.
8) When you’re done, click Add Watermark.
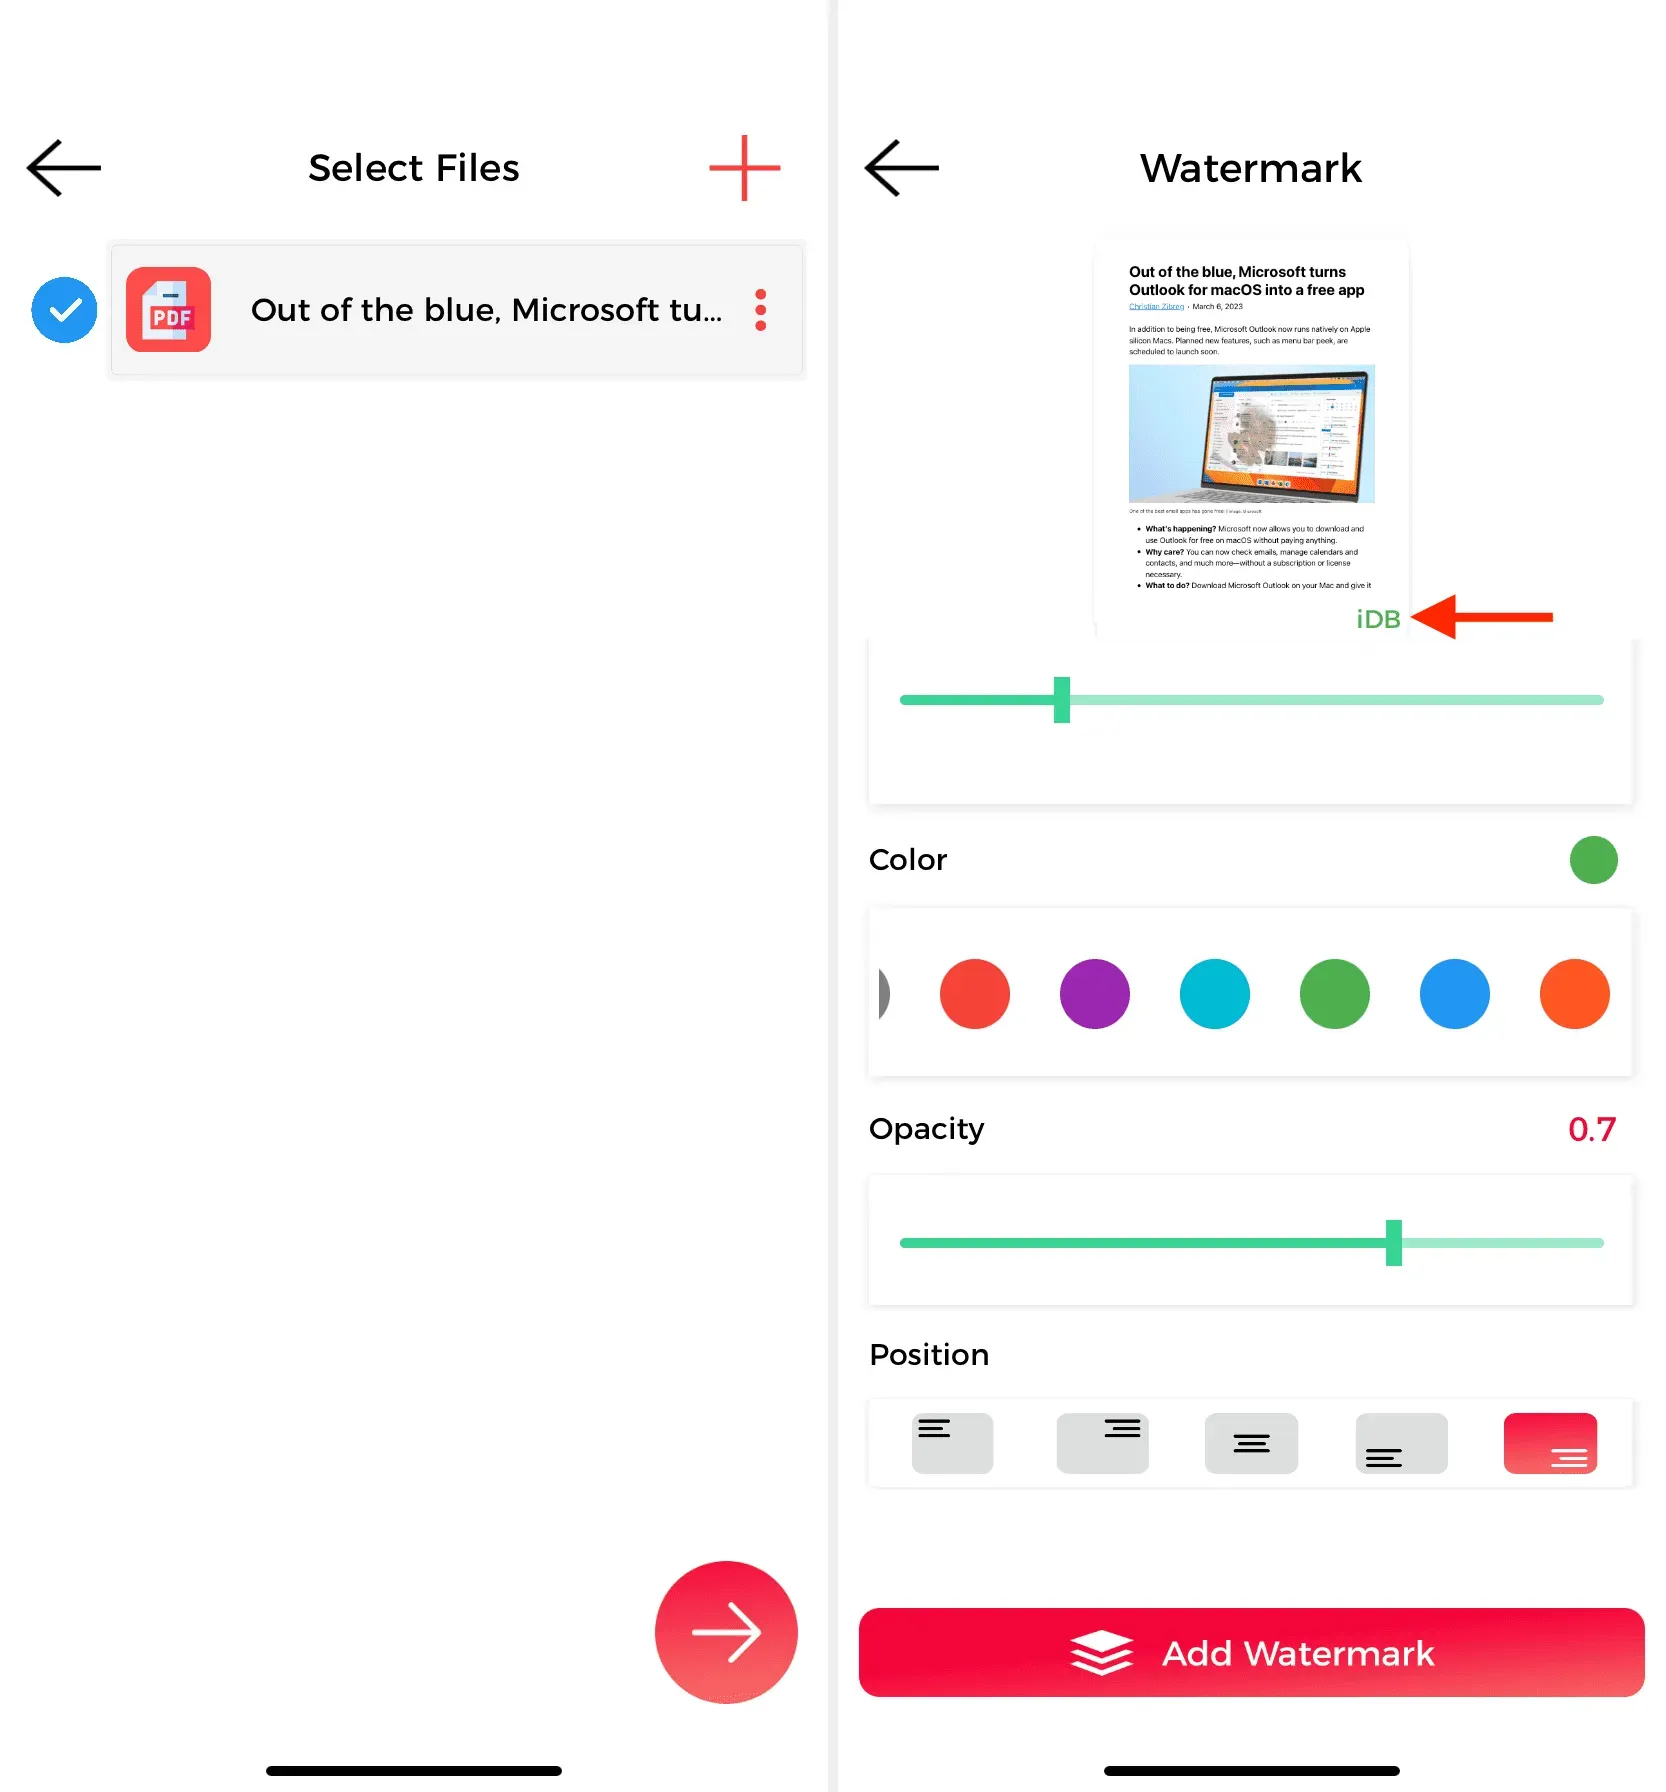
9) Enter a name for the file and click Finish.
10) Tap the three dots icon next to the watermarked PDF and select Show File > Share > Save to Files > select a folder > Save.
3. Watermark Lite
Notable features of this app:
- Works offline
- Add text or image watermark
- Set the correct opacity of text or image
- Add a QR code as a watermark
- You can convert PDF to image format
- No preview in free version
1) Open the WatermarkLite app on your iPhone or iPad.
2) Tap the “Click to select a PDF”field to add a watermark, and select a PDF file in the Files app.
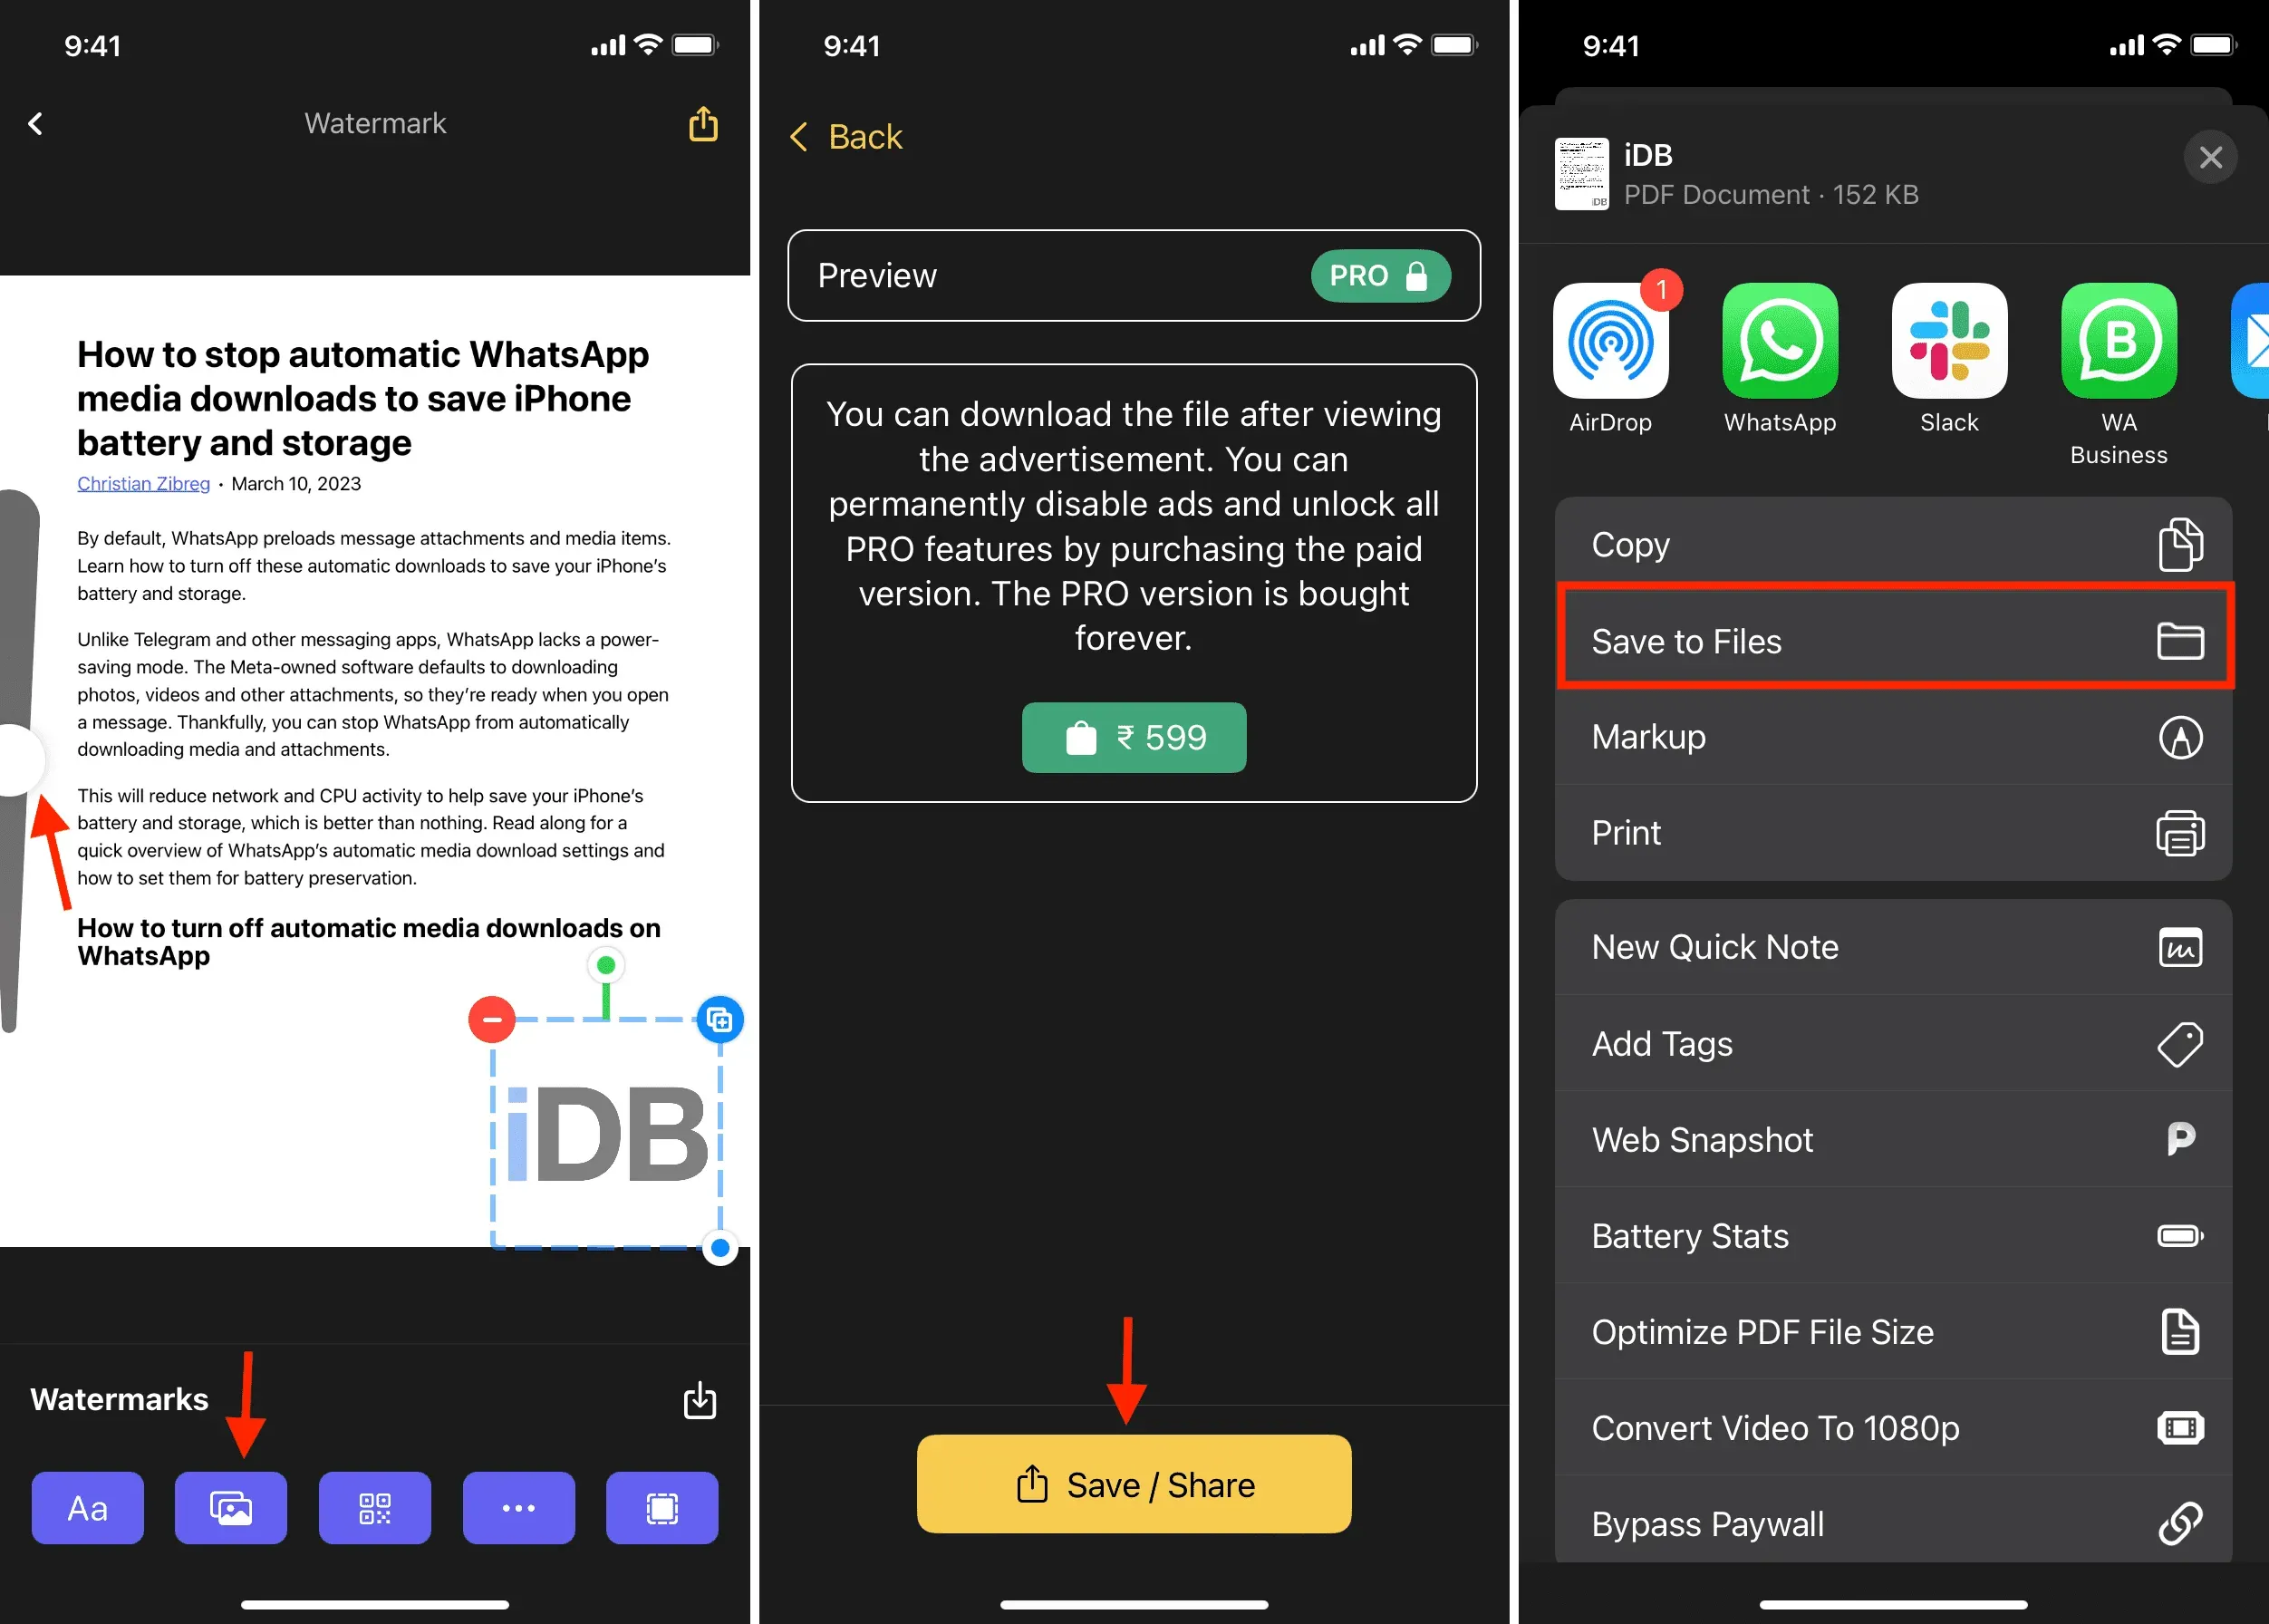
3) Press Aa for a text watermark, or use the photo icon to add a logo or image as a watermark. We choose an image.
4) Use the slider on the left to set the transparency. After that, adjust the size and placement of the watermark.
5) Tap the yellow share icon at the top.
6) Click Save/Share > Save/Share.
7) Select “Save to Files”on the shared sheet and select a location in the “Files”app to save the watermarked PDF.
4. Watermarks
Notable features of this app:
- Doesn’t work offline
- You can add text and image watermarks
- Watermark can be added under PDF text
- With one click, the app can remove the background of an image that is being used as a watermark.
- Unique tools like over-tiling, spacing, rotation, effects, etc.
1) Open the Watermarkly app and click “Choose Files”> “Choose PDF”. Now select the PDF file in the Files app and click Open.
2) Tap the PDF file and then tap “Next Step”on the top.
3) Click “Text”or “Logo”. We select Logo and then From My Phone. Then select the image you want to use as a watermark in the Photos app and click Add.
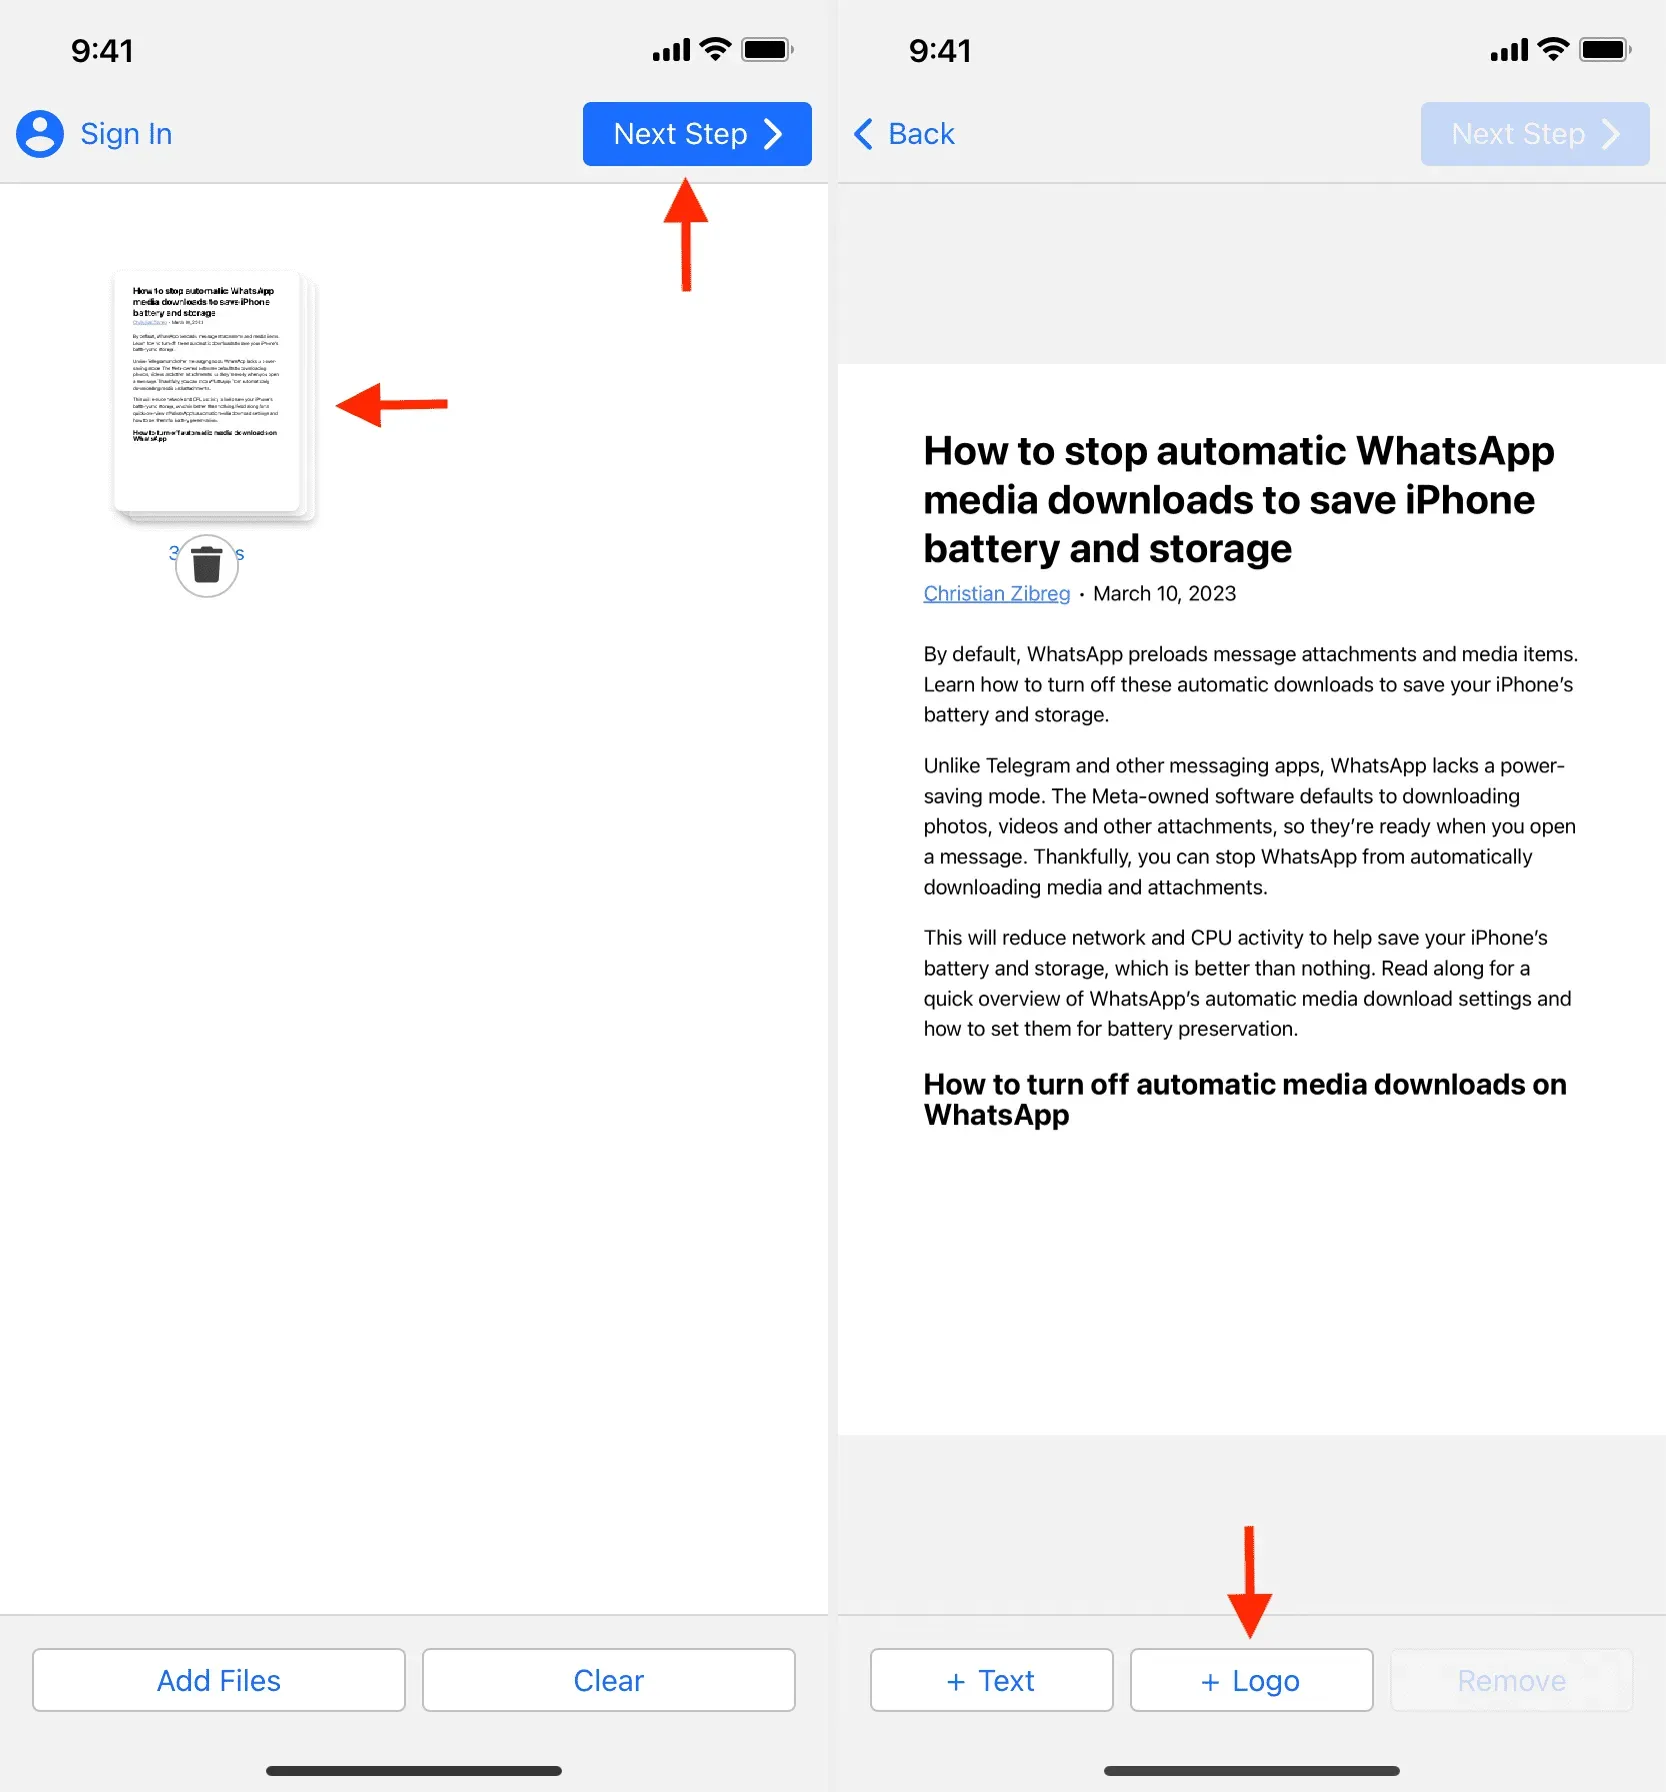
4) Use tools to customize your PDF. Try them. You can always hit the back button and restart if something goes wrong.
5) When everything is ready, click “Next step”.
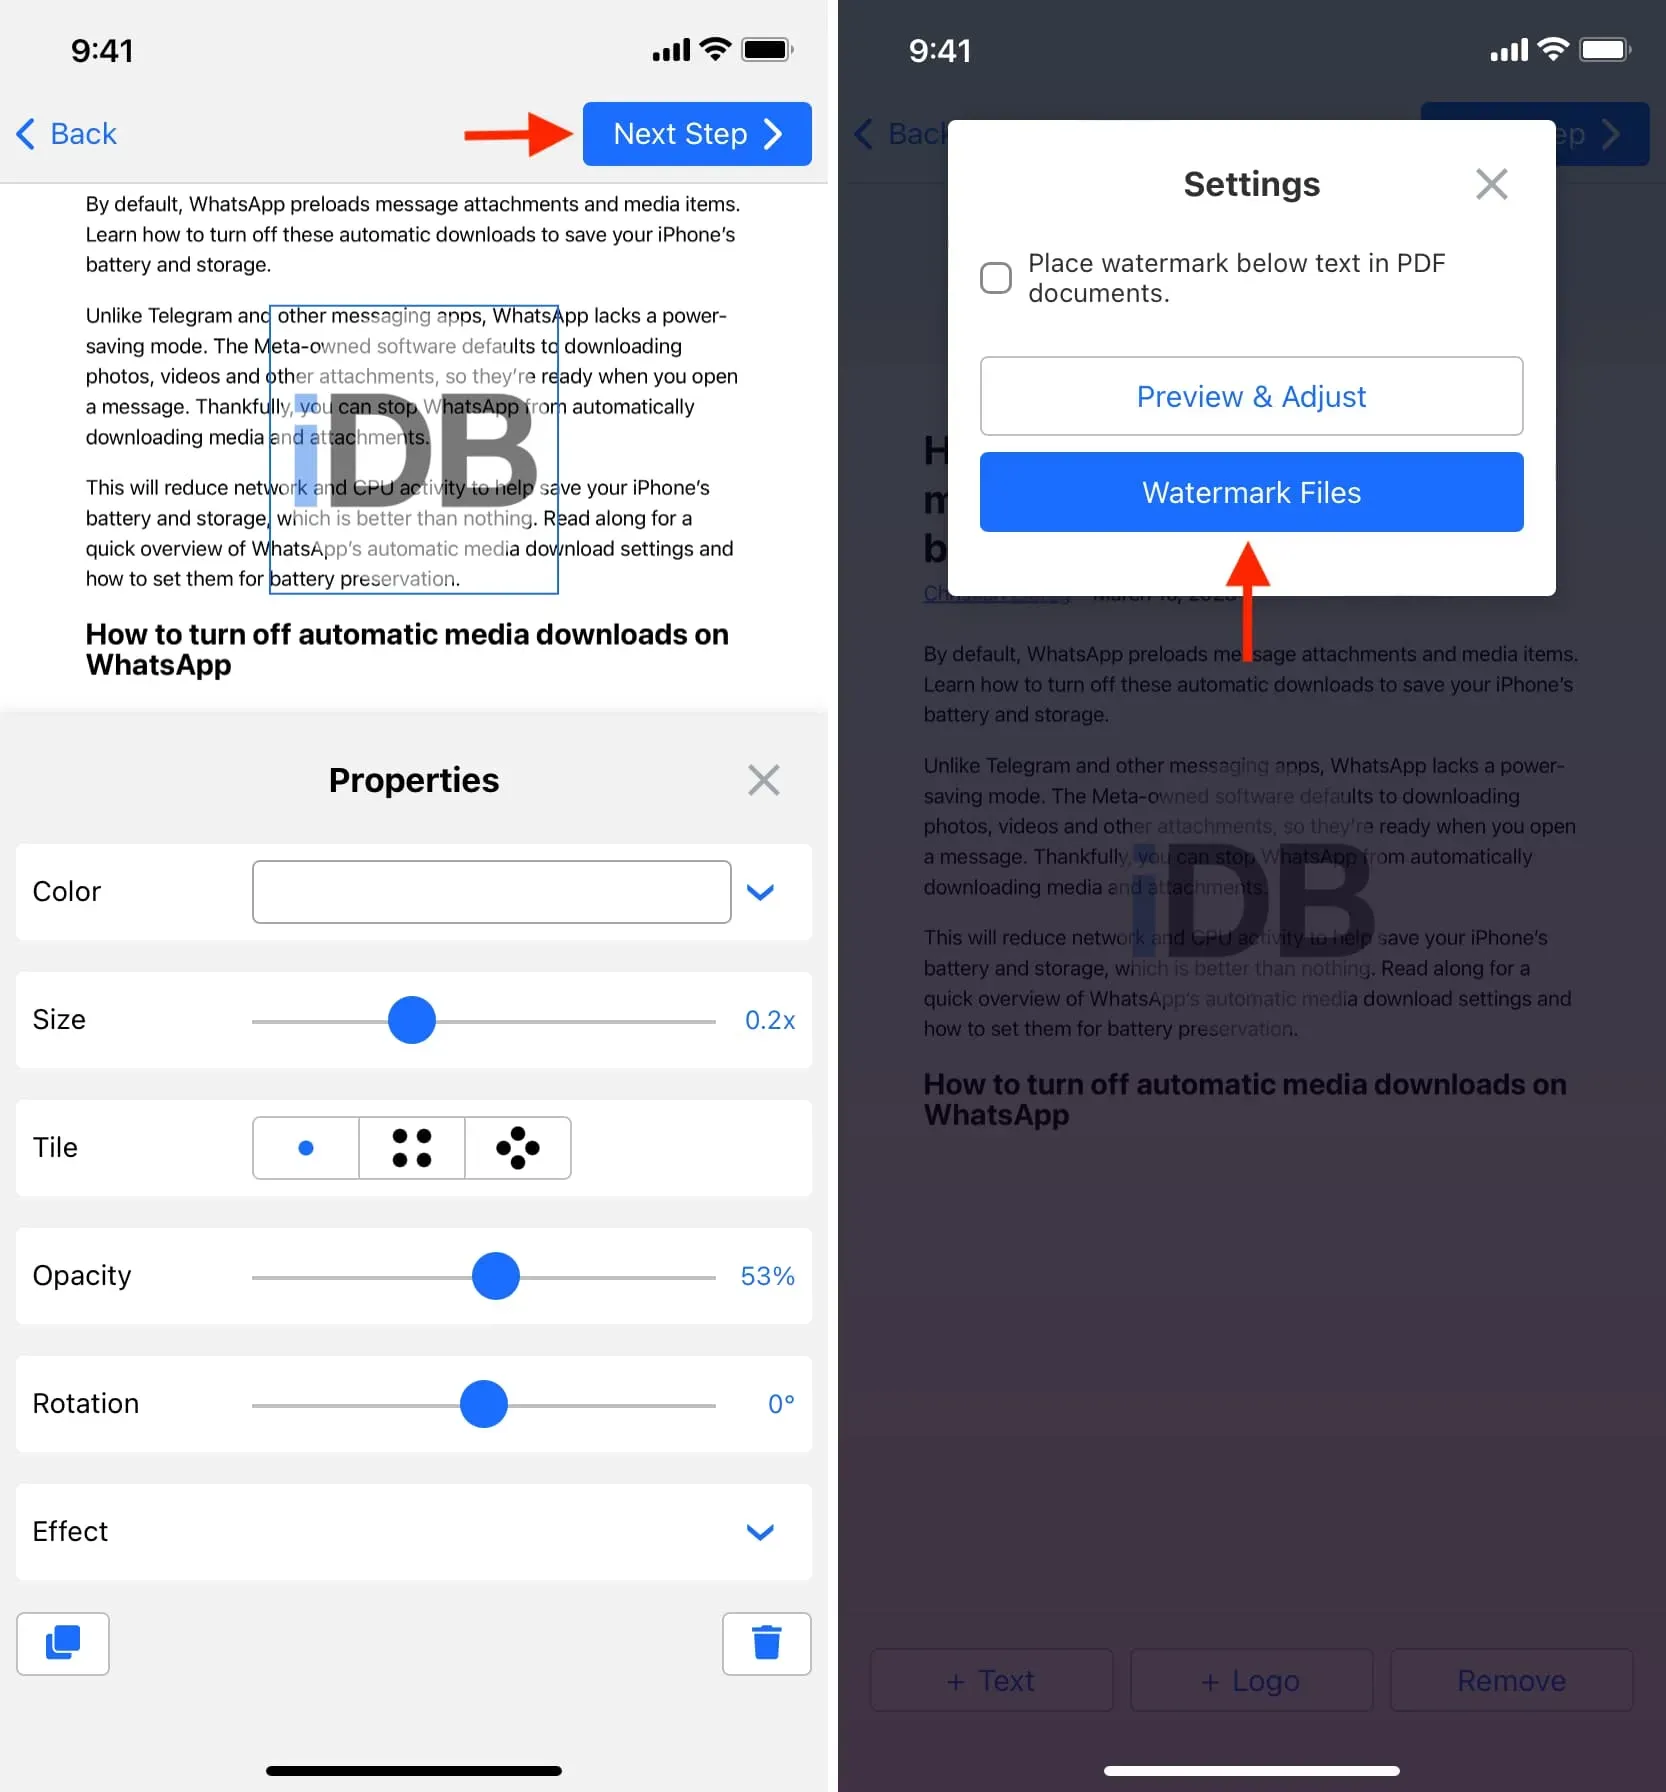
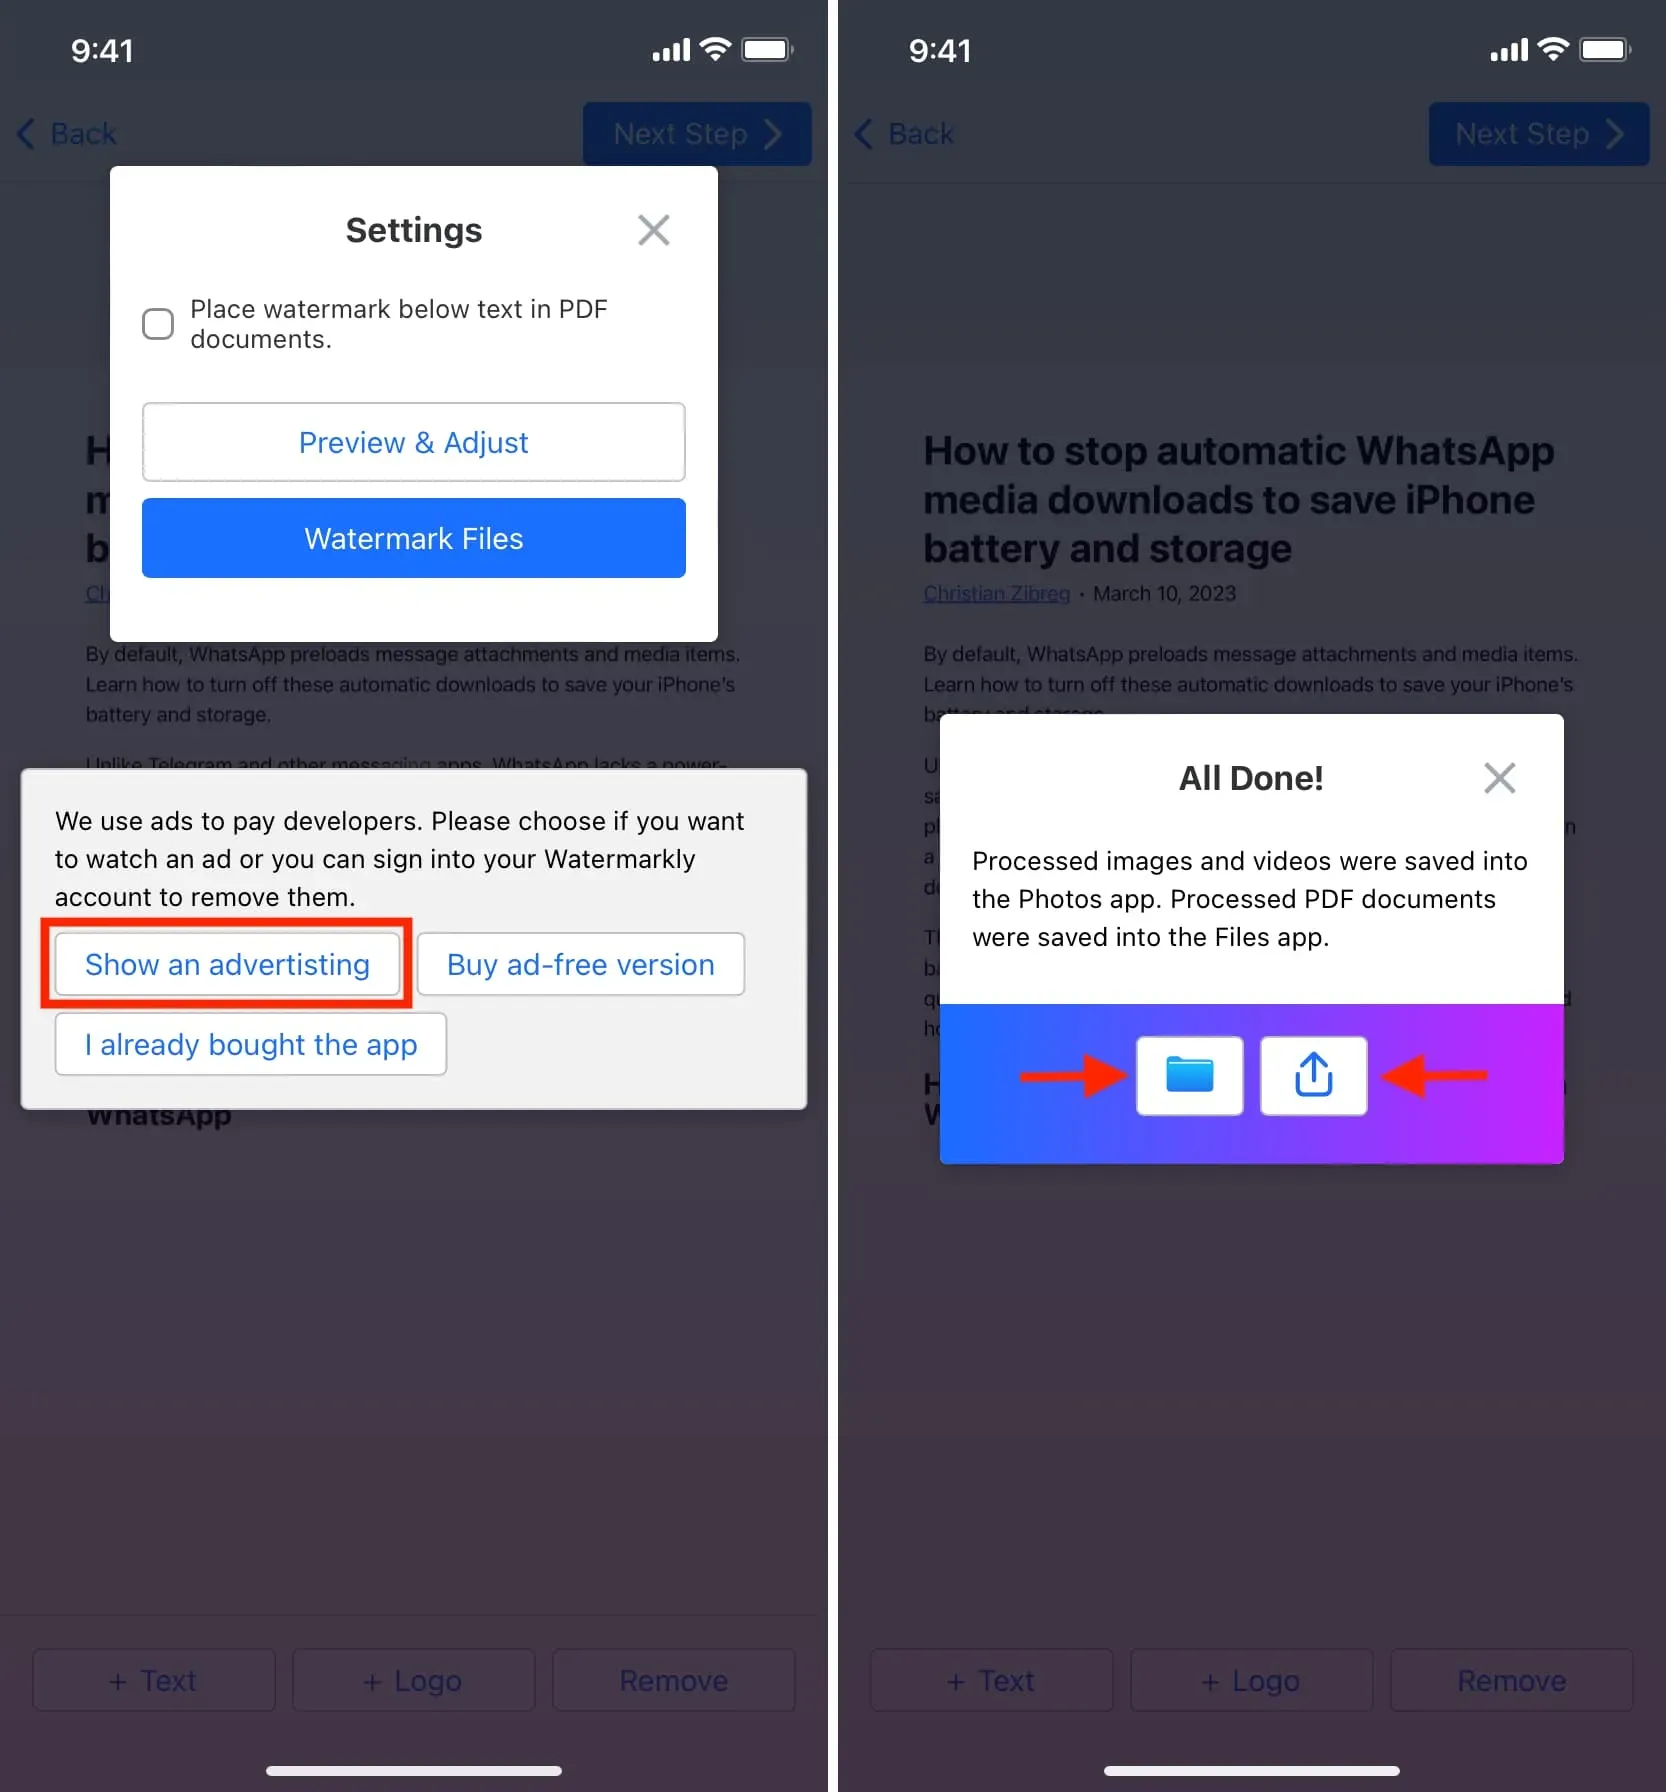
6) Review the options here and click Preview and Customize. If everything looks normal, press X to return from the preview screen. Now click Watermark Files > Show Ads.
7) Once the ad ends, close it and click:
- The Files app icon, which will take you to the Watermarkly folder in the Files app on iPhone/iPad. You can access the watermarked PDF at any time in this folder of the Files app.
- Share button > Save to Files and save the watermarked PDF in the location of your choice.
Leave a Reply