How to seamlessly use your Mac’s keyboard and mouse on your iPad or another Mac
With the release of iOS 15.4, iPadOS 15.4, and macOS 12.3, Apple has introduced a ton of new features. We saw a preview of one of the most anticipated new features back in June 2021 when it was announced at WWDC, and now it’s finally available for anyone with an iPad and Mac.
Universal Control lets you use your Mac’s keyboard, mouse, and trackpad on your iPad or other Mac—up to three different devices at the same time. The screens are not shared, only text input and the mouse cursor, so you can move the cursor’s attention to another device by simply dragging it off the screen towards the other device. You can even drag and drop content between devices.
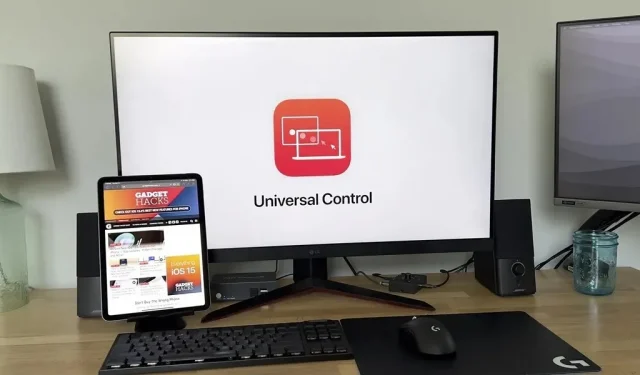
An example of universal control at work
In my video below, I show you the basics of Universal Control in action – you can type, use your cursor, and scroll smoothly on your iPad and Mac. I’m using a 2020 M1 Mac mini and a 2021 iPad Air (4th generation), but as you’ll soon see, it will work with many different devices.
Supported Mac and iPad Models
Universal Control supports most new devices. Device must be listed below and must be running iPadOS 15.4 or later or macOS Monterey 12.3 or later.
- MacBook Pro (2016 and newer)
- MacBook (2016 and up)
- MacBook Air (2018 and up)
- iMac (2017 and up)
- iMac (5K Retina 27″Late 2015)
- imac pro (2017)
- Mac mini (2018 and up)
- Mac Pro (2019)
- Studio Mac (2022)
- iPad Pro (all models)
- iPad Air (3rd generation and later)
- iPad (6th generation and later)
- iPad mini (5th generation and later)
It’s worth noting that Universal Control doesn’t work between two iPads, but it does work between two Macs. Devices also cannot be more than 30 feet (10 meters) apart.
Universal control against the stroller
While both are part of Apple’s Continuity features, Universal Control and Sidecar are two different features potentially aimed at different audiences.
Universal Control allows you to seamlessly use your mouse or keyboard on another device without having to disable them first. Plus, it makes it easy to send data back and forth from each device without using AirDrop or a similar method.
Sidecar always allows you to expand or mirror your Mac screen display with an iPad. Simply put, you can use your iPad as a secondary display with Sidecar. However, you can also use your Apple Pencil on the iPad screen.
Is universal control stable?
While Universal Control is still in beta, this feature is pretty stable. I had problems with Universal Control’s auto-connect feature, but after a few minutes it seems to connect and work flawlessly.
Another issue I’ve run into is that keyboard shortcuts and scrolling with the mouse stop working intermittently. I usually have to restart my iPad to fix this.
I have also seen my iPad’s battery drain a little faster than usual. However, this may be due to several factors, not just universal control.
How to enable and configure universal control
When Apple announced Universal Control at WWDC 2021, they said that Universal Control is very easy to use and set up and it’s not a joke. Enabling universal control is very simple. You just need to add your device to pair your keyboard and mouse. However, you need to make sure a few settings are enabled before it will work.
According to Apple, you can’t share your iPad’s cellular connection during Universal Control, and your Mac doesn’t have to share its internet connection.
Connect both devices to the same Wi-Fi network
Make sure all the devices you want to use with Universal Control are on the same Wi-Fi network. In my example below, both devices are connected to Friendly Neighborhood SpiderLAN.
- macOS: System Preferences -> Network -> Wi-Fi
- iPadOS: Settings -> WiFi
Check your Apple ID
All devices must be signed in to the same Apple ID account. In the examples below, I confirmed that both devices logged into the fake email @gadgethacks.com.
- macOS: System Preferences -> Apple ID
- iPadOS: Settings -> [your name]
Make sure all universal management settings are enabled
You must also enable Handoff on your Mac and iPad. On your Mac, you must also enable Universal Control.
- macOS: System Preferences -> General -> Allow handover between this Mac and your iCloud devices.
- macOS: System Preferences -> Displays -> Universal Control -> Allow cursor and keyboard to move between any adjacent Mac or iPad.
In the Universal Control settings, you should also see “Press the edge of the display to connect the nearest Mac or iPad”and “Automatically reconnect to any nearby Mac or iPad”. Both should be enabled after enabling Universal Control, but if they are not, be sure to enable them.
To use Universal Control, you must enable the “Cursor and Keyboard (beta)”option in addition to Handoff.
- iPadOS: Settings -> General -> AirPlay and Handoff.
Add a device as a display
This is the step we’ve all been waiting for when you turn on Universal Control by adding an additional device to your Mac’s list of displays.
- macOS: Settings -> Displays -> Add Display -> [Your Device Name]
Change the display layout
Once the device is connected, you can navigate to where you can scroll to the device. To do this, simply click and drag to where you want the device to be relative to your other monitor(s).
- macOS: System Preferences -> Displays
How do you use universal control?
When you hover over an iPad or second Mac for the first time, you will feel a slight resistance and the other device will indicate that the cursor is starting to focus. If you don’t get past the barrier, you won’t be in control of another device, so break through until you see the cursor move across the display.
Universal Control will remember the paired device unless you’ve disabled “Automatically reconnect to any nearby Mac or iPad”so you don’t have to click again if you don’t have “Push the edge of the display to connect the nearest Mac or iPad.””disabled person.
Typically, you just use your pointer or mouse as your finger. On your iPad, you can click on anything you normally click on. The same goes for clicking on other Macs. You can also enter any text fields that you can enter from the keyboard.
On iPad, other actions are very similar to how you normally use iPad, but with a little twist.
Back to main screen
When you are in the app, you can click on the bottom home bar to go to the home screen. Also, you can keep moving the mouse down until it closes the app, but I find this to be more work than just clicking on the home bar.
Application switcher
You can activate the app switcher by clicking and holding the home bar while swiping up until the app switcher appears. If you’re on the home screen, you can activate the app switcher by continuing to move your mouse pointer down the center of the screen.
Closing App Switcher apps can be tricky, but it’s just like you would normally do by clicking and swiping up. It may take a few times to get used to this movement.
Control center
To go to the Control Center, click on the status bar icons in the upper right corner of the screen. Or you can keep moving the mouse to the top right corner of the screen.
Lock screen
Very similar to the Control Center, to get to the lock screen, click the time and date in the top left corner of the screen. To get back to where you were, tap on the main bar or keep swiping down to the middle of the screen.
Universal Management Settings
You may want to make sure you have a few tweaks to make sure it works properly and the way you want. Apple doesn’t provide too many customizable options, but there are enough to keep things running smoothly.
- macOS: System Preferences -> Displays -> Universal Management…
- iPadOS: Settings -> Accessibility -> Pointer Control.
Useful keyboard shortcuts
If you’re like me, you’ll find yourself using many different keyboard shortcuts to control your workflow. There are many different keyboard shortcuts to help you use Universal Control.
You can invoke some keyboard shortcuts by holding Command, but most of them don’t work. However, most of the keys that appear when you hold down the function key or the globe key work. Also, the help screen has more keyboard shortcuts that appear with Tab-H.
- Tab-H: Help screen (shows some keyboard shortcuts)
- Command-H or Function-H: Home
- Command-Tab: Application switching
- command-space: Spotlight search
- Command-[arrow keys]: Switch pages on the home screen.
- Function-A: show dock
- Function-S: Siri
- Function-C: Control Center
- Notification Center Function-N
If you would like to change some of these labels to something that suits you better, you can do so; Just go to Settings -> Accessibility -> Keyboards -> Full Keyboard Access -> Commands. You can even add keyboard shortcuts for Apple shortcuts, gestures, and even device functions like rebooting the device.
Leave a Reply