How to use the Weather app on iPhone and iPad like a pro
The iPhone Weather app debuted alongside the original iPhone in 2007. While it seems like it has been around for ages, chances are you may not know everything it has to offer. After some research, I compiled a list of all the features of the Weather app. This app is a classic example that there is always more than meets the eye.
- The Weather app is finally available on iPad
- How to check the weather on iPhone?
- How to add and check the weather in other places on iPhone
- View weather maps on iPhone
- What do the weather icons mean in the Weather app?
- What are the colored bars in the Weather app?
- How to receive bad weather warnings
- Add weather widgets to your iPhone lock screen
- How to set dynamic weather lock screen wallpaper?
The Weather app is finally available on iPad
On March 7, 2012, Apple introduced the iPad. Since launch, successors to the original iPad have progressed to the point where Apple is touting these iPads as a replacement for your personal computer. But it lacked basic features like the ability to calculate numbers or even check temperatures. The latter, however, is changing with the iPadOS 16 update, and Apple has finally released a native Weather app for the iPad a decade later.
How to check the weather on iPhone?
However, sometimes the app may not show the location, in which case the first step is to make sure that the location services for the Weather app are turned on. For this:
- Open “Settings”on your iPhone.
- Navigate to Privacy and Security.
- Tap Location Services.
- Select Weather.
- Now turn on the Precise location toggle. In the “Allow location access”section, you can select “Always”or “When using the app or widgets”.
Once you’ve completed these steps, viewing the weather at your location becomes easy. Since the app detects your location automatically, it will display the weather based on your location.
How to add and check the weather in other places on iPhone
The options for using the Weather app can be subjective, but I love that you can add more places and view the weather for those places. You can add about 19 other locations to the Weather app. This is very useful if you are a frequent traveler and want to keep track of where you are going.
Let’s walk through the process of adding other places and viewing their weather through the iPhone Weather app.
- Open the Weather app on your iPhone.
- Tap the list menu in the lower right corner. (You can also swipe left to view already added locations)
- On the next page, you can view all the locations already added. To add another location, tap the search bar, enter your location, and select a result.
- Now click “Add”in the top right corner.
- You can view the location added to the list.
From now on, you can either swipe left on the main page of the weather candidate ion or tap the list menu to view all locations.
View weather maps on iPhone
The Weather app has a dedicated Weather Maps feature. You can view the temperature, rainfall, and air quality of your location and surroundings, so much so that you can zoom out to view these meteorological parameters for your country as a whole. With that said, here’s how to view weather maps on iPhone.
- Open the Weather app on your iPhone.
- Tap the map icon in the lower left corner. The next page will display a weather map. You can also refer to the pointer in the upper left corner.
- To switch between precipitation, temperature and air quality, tap the layers icon in the upper right corner below the list menu.
- Squeeze to zoom in or out to view the map.
What do the weather icons mean in the Weather app?
I find the icons in the Weather app very confusing. Sunrise, Sunset, Snow, etc. can be some of the easiest to understand. However, Dust, Haze, Rain, Heavy Rain, Drizzle, etc. are difficult to understand. If you’re in the same boat as me, I recommend you check out Apple’s official guide to help you figure out the weather icons on your iPhone.
What do the colored bars in the Weather app mean?
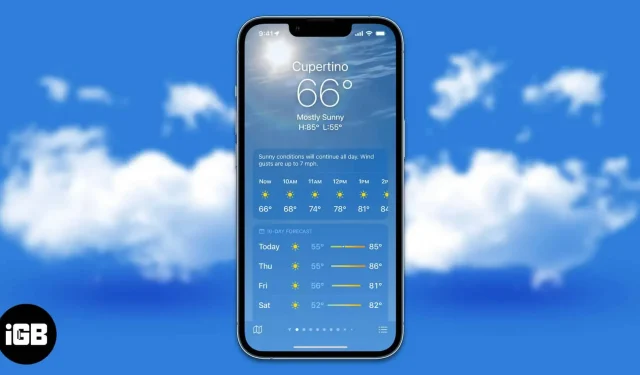
The Weather app has received a major design change with the iOS 15 update. Color bars are here for the first time, and the main purpose of these bars is to display more information at a glance. Simply put, the colored bars represent the temperature range over the next 10 days.
First, the length of the colored bar represents the change in temperature during the day. The length of the colorless background bar represents the change in temperature over 10 days. The white dot represents the current temperature based on the forecast.
Now the colors of these bands represent temperature. It ranges from deep blue to red, denoting a very cold and very hot color, respectively. Here is a list of all colors and their respective temperatures.
- Dark blue: very cold (below 32°F or 0°C)
- Blue: Low temperatures (32 to 59°F or 0 to 15°C).
- Green: Moderate temperatures (in the range of 59–68°F or 15–20°C)
- Yellow: Slightly warm temperature (in the range of 68–77°F or 20–25°C).
- Orange: warm temperatures (in the range of 77–86°F or 25–30°C)
- Red: very high temperature (above 86°F or 30°C)
How to receive bad weather warnings
In addition to displaying the weather and the weather forecast for the next 10 days, the Weather app can notify you of severe weather. These notifications will be sent when the Weather app detects rainstorms, hurricanes, heatwaves, and more. It’s also only available in select countries. To learn how to turn on severe weather alerts on iPhone and iPad, check out our detailed guide on How to Get Severe Weather Alerts on iPhone and iPad.
Add weather widgets to your iPhone lock screen
If you haven’t been living under a rock yet, you already know about the wave of lock screen customizations that Apple has brought with iOS 16. Adding widgets to the lock screen is one of the most useful additions as it displays information in a glance that further encourages users not to unlock. your devices. If you want to always be aware of the weather in your area, here’s how to add the Weather widget to your iPhone lock screen.
Note. There are no widgets on the lock screen on iPadOS 16. We hope Apple will change this in the next update.
- Open “Settings”on your iPhone.
- Go to wallpaper.
- On the next screen, select the “Customize”button below the lock screen preview.
- Now click + ADD WIDGETS. You can select widgets from the displayed widgets, or scroll down, select “Weather”and select any widget of your choice.
- You can also add weather widgets above the Time section. To do this, click on the bar above the time and select weather widgets from the suggestions, or scroll down and select Weather from the dedicated tab.
- After making the necessary changes, click “Finish”in the upper right corner.
How to set dynamic weather lock screen wallpaper?
Wait, adding widgets to your lock screen to check the weather didn’t satisfy you? If so, Apple has your back. They introduced dynamic wallpapers with the iOS 16 update. These dynamic wallpapers include astronomy, weather, and a combination of astronomy and weather.
Note. iPad does not support dynamic wallpapers in iPadOS 16 because lock screen customization is only available for iPhone with iOS 16.
- Open “Settings”on your iPhone.
- Go to wallpaper.
- Click + Add New Wallpaper.
- Now there are two ways to add a dynamic weather wallpaper:
- Swipe right on the icons at the top of the screen and select Weather.
- In the Favorites section, select the Weather option.
- On the next screen, click “Add”in the top right corner.
The Dynamic Weather wallpaper does not apply to the lock screen. You can also make other changes like adding widgets and changing the Time font.
It’s a wrap!
Weather on iPhone and iPad is a truly feature rich app that displays important information. If you scroll down the home page, you will find the UV index, estimated sunset time, wind flow and speed, humidity levels, visibility, etc. If you think we missed any features, please let us know in the comments below and we will try to add them to the article.
Leave a Reply