How to Use Sound Checker on iPhone, iPad, Mac and Apple TV

Each piece of music has its own studio recording volume; thus, some are louder than others. However, sound vibrations can interfere with listening to music and worsen mental health. Thus, it is very important to maintain a stable sound regardless of the volume of the music, and this is where the iPhone sound check feature comes in handy.
So what is Sound Check on iPhone and how to use it? Keep reading to find out.
- What is sound check on Apple devices?
- How to Enable/Disable Sound Check on iPhone or iPad
- How to enable/disable sound checking on your Mac
- Enable/Disable Sound Check on Apple TV
What is sound check on Apple devices?
Sound Check is a feature exclusive to Apple Music that helps you maintain a consistent music volume regardless of the original studio volume. Thus, your eardrums do not suffer during music switching.
How Sound Checker Works on iPhone
The eardrum has a limit on the volume it can absorb. Apple is adding a Sound Check feature to iPhone that helps you turn up or down the playback volume to find a balance between high and low playback. So this is an intuitive feature as it reduces human intervention in adjusting the music volume.
Sound check does not change the original quality of the music, as some users mistakenly believe. But instead, it flags information about the volume of the music during playback. Therefore, when you play a song on your iPhone, iPad, Mac, or Apple TV, Sound Check only detects the volume level at that moment and adjusts it to the limit.
How to Enable/Disable Sound Check on iPhone or iPad
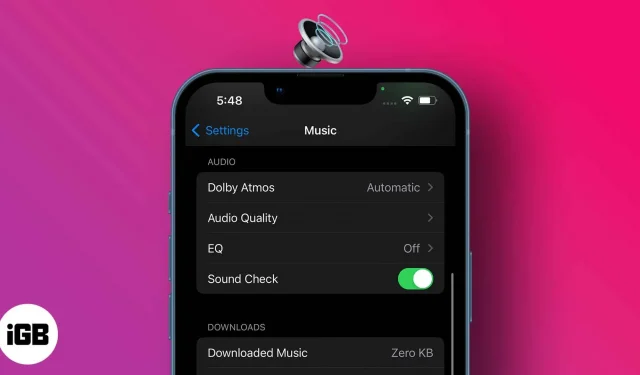
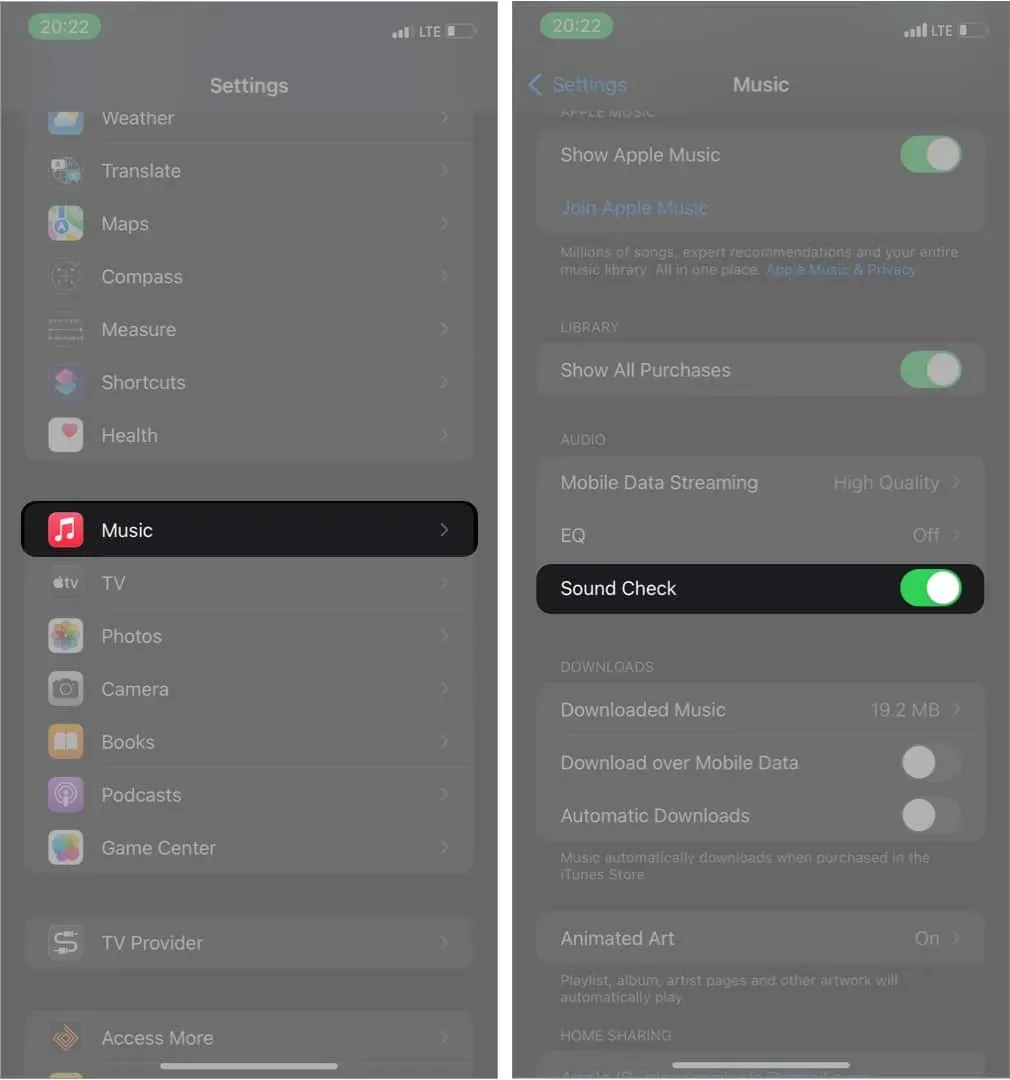
- Open iPhone settings → Music.
- Turn on the switch to the right of Sound Check.

To disable Sound Check and listen to original music volumes instead, simply open iPhone Settings → Music → turn off the Sound Check switch.
How to enable/disable sound checking on your Mac
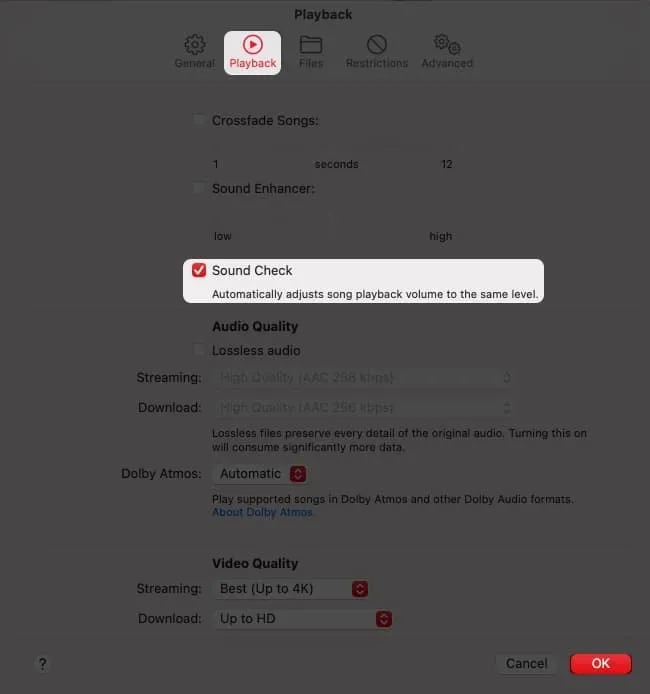
- Open the Music app.
- Go to Music → Preferences from the menu bar at the top.
- Click “Playback”then “Sound Check”to activate it: follow the same steps to turn off the sound check.

Enable/Disable Sound Check on Apple TV
- Go to settings.
- Tap Applications → Music.
- Select “Sound Check”from the settings list to enable it.
For Windows User: If you are using a Windows device, go to iTunes → Edit menu → Preferences → check Sound Check.
FAQ
Using the sound check feature on iPhone is a choice. But, as mentioned earlier, it helps to keep the volume of music playing at an optimal level. So expect surprises from low to high volume for different songs when it’s turned off.
The iPhone sound check feature is itself a volume equalizer. However, pairing it with an audio equalizer from your list of equalizers can help you customize playback to suit your preferences. You can also link the setting to third party equalizer apps for better control.
Now that you’ve seen how to activate and deactivate the sound check feature on iPhone, iPad, Mac, and Apple TV, I bet you can turn it on and off as you see fit. In addition, the process is simple, although it adds more options for adapting to playback.
Have questions or comments? Let me know in the comment box below.
Leave a Reply