How to use Switch Control on iPhone and iPad in iOS 16
Approximately one in seven people are unable to interact with their devices and the environment due to some form of disability. Because of this, Apple has made every effort to ensure that all of its users, regardless of their abilities, can interact with their devices in a way that is convenient for them.
One of the lesser-known accessibility features is “Switch Control”. It allows people of all abilities to interact with their iPhones, whether through tongue flicking, head movement, or back tapping. Read on to learn more about how to set up switch control on iPhone and iPad for people with limited mobility so they can take full advantage of their Apple device.
- What is Switch Control on iPhone and iPad?
- How to set up Switch Control on iPhone and iPad
- How to enable Switch Control on iPhone or iPad
- How to use Switch Control on iPhone and iPad
- How to use iPhone to control another Apple device
What is Switch Control on iPhone and iPad?
Switch Control is part of the tech giant’s accessibility suite that allows users to control their iPhones with switches. iPhone highlights items on the screen in sequence, and you can set switches to tap or select those items. You can even draw on your iPhone’s screen with the switch.
These switches can be external, such as an external adaptive switch that can be connected to or paired with iPhone via Bluetooth.
You can also do full customization and set switches to perform a specific action, making it easier for people with limited mobility to navigate their iPhones with one or more switches.
How to set up Switch Control on iPhone and iPad
Setting up Switch Control is much easier by adding a new switch and assigning some important functions before enabling Switch Control.
Turning it on immediately activates scanning features that you cannot control without setting any switches.
You have the option to use the following as a toggle for your iPhone:
- iphone screen
- Camera
- Click back
- Sounds
- External adaptive switch
If you plan to add an external adaptive switch, the first step is to connect it to your iPhone by following the instructions that came with it. If the Switch connects using Bluetooth, go to Settings → Bluetooth and pair the Switch.
Add new radio button
- To set up the new toggle, go to Settings → Accessibility.
- Then go to Switch Control → Switches.
- Tap Add New Switch, then choose one of the following options:
- External: Allows you to use a Made for iPhone (MFi) switch that plugs into the Lightning connector on your iPhone or an already paired Bluetooth switch.
- Screen: Allows you to tap anywhere on the iPhone screen.
- Camera: Uses your front camera to detect left head movements and right head movements, which you can assign as a switch.
- Back Tap: You can double or triple tap to perform a toggle action.
- Sound: Choose from a variety of voiced and unvoiced sounds such as “La”, “Sh”or tongue click to perform an action.
- Select an action to assign to the switch. Two of the most basic features that you need to set a radio button for are Select Item, which selects the highlighted item, and Move to Next Item, which moves the selection to the next group or item.
Apart from these two, below are other actions you can assign to the scanner:
- Scanner Menu: Opens the scanner menu.
- Stop Scan: This stops the automatic scan, which will continue indefinitely.
- Move to Previous Element: This moves the selection to the previously selected group or element.
- Resume Automatic Scan: This allows iPhone to resume automatic scanning of items on the screen.
You can also assign switches that immediately perform system actions in addition to the main Tap function. This allows a person to perform actions that would normally require certain gestures to be performed. Some of them include app switcher, notification center and control center.
Delete switch
- To remove a switch from Switch management, go to the Switches section.
- Select the radio button you want to delete and swipe left.
- Tap Remove.
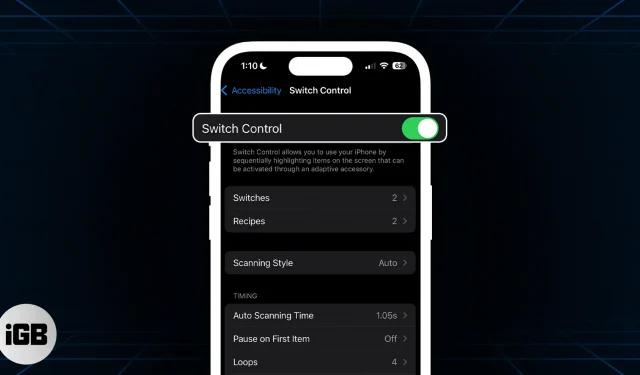
How to enable Switch Control on iPhone or iPad
- Go to Settings → Accessibility.
- Enable switch control.
You can also triple-click the Home button or side button (depending on your iPhone model) at any time to disable Switch Control. You can also manually repeat the process to disable this feature.
How to set up Switch Control on iPhone and iPad
Now that you’re done, you can fully customize Switch Control. Here are the following aspects that you can customize.
Scan style
- Auto Scan: Automatically moves the focus after the specified time has elapsed.
- Manual Scan: To use this you must have a switch that you can use to move focus and a second switch to activate or select focused/selected items.
- One-Toggle Scanning: This also requires that you have a toggle that you must press to move its focus. If you do not perform any action within the specified time, the selected item will be automatically activated.
Timing
In this section, you can configure synchronization and synchronization-related scanning behavior.
- Auto Scan Time: Allows you to set the scan speed.
- Pause on first item: Selecting the first item in a group can be difficult at high scanning speeds. This option pauses scanning of the first item in the group.
- Cycles: Select the number of cycles to scan items on the screen before hiding the cursor. You can choose from 1 to 10.
- Move Repeat: Enable this option to delay before moving to the previous or next item while the switch remains pressed.
- Long press: If this function is enabled, you can pause the scan, which will pause the control of the switch. Choose from 1 to 8 seconds.
- Tap Behavior: Define what happens when the Select action is activated. Select Default to move the scanner menu, Auto Tap to automatically tap the screen after a specified time, or Always Tap to immediately tap the item in focus instead of displaying the scanner menu.
- Focused element after touch: Choose whether the Switch Control will scan the first element or resume scanning the current element after touching the element.
Keyboard
It contains changes to keyboard behavior and includes:
- Scan same key after touch
- Always press keyboard keys
- Extended Predictions
Toggle stabilization
Switch stabilization helps to ensure that the switches do not accidentally operate, taking into account the errors in making the movement to activate the switch, which may occur in people with tremors or other movement disorders. You can set the duration from 1 to 10 seconds.
- Hold Duration: Requires the person to hold the input device for some time before the device recognizes it.
- Ignore Repeat: This treats multiple taps as one input.
Point Scan
- Single: Uses one vertical and one horizontal selection, which is useful for large targets.
- Refined: This adds a second scan to the range of your original selection.
- Accurate: Adds a last low-speed scan for more accurate targeting.
Turn on head tracking if you want to use the iPhone’s camera to track the movement of a person’s head to control the on-screen pointer and certain facial movements, such as raising your eyebrows or opening your mouth, for more actions.
Audio
Toggle Sound Effects to enable sound effects, such as when an item is selected.
Create new recipes
Recipes are special actions that you can use to perform frequently recurring or complex actions in applications. You can create recipes to temporarily assign special actions to switches. It can be game control or page flipping while reading an e-book.
How to use iPhone to control another Apple device
You can also use your iPhone to remotely control another Apple device connected to the same Wi-Fi network.
This allows you to control your Apple TV or Mac using the same switch setting that controls your iPhone.
To start managing another device:
- Make sure both devices are connected to the same Wi-Fi network and iCloud account.
- To control Mac:
- Go to Apple menu → System Preferences → Accessibility.
- On the right side, select Switch Control.
- Check the box next to Allow platform switching to manage the computer.
- Then turn on Switch Control on your iPhone or iPad.
- Then go to Devices → Other Devices.
- Select the device you want to control, then select Connect.
You should now be able to use the switch connected to your iPhone, or the iPhone itself, to control another device.
How to prevent iPhone from controlling another Apple device
Once you’re done controlling another device, simply press and hold the switch for 10 seconds. This will return control of the switch to your iPhone or iPad again.
If you control a Mac, you can also go to the Switch Control menu → choose Device → Stop using device.
Completion…
With Switch Control, you can make your iOS device easier to navigate and more accessible to yourself or a loved one with reduced mobility or other disability.
While the setup process can be tricky and more of a trial and error process based on what works best for your loved one, it’s worth the effort to see them move around their device with greater ease. So don’t be afraid to experiment and be patient as you make technology more accessible. Good luck!
Leave a Reply