How to fix an AirPods case that won’t charge or glow
So you’ve had a busy day and now you want to dive into your AirPods. But you see that there is no juice left. Now you put those AirPods in the case and charge it only to see the AirPods case won’t charge or glow. Well, we’ve all been in this situation and experienced quite a few disappointments.
As a result, those who are currently in this situation need not worry because here we have a guide that will point out exactly why you are facing this issue and how you can fix it. Let’s start.
Content:
- 1 Why won’t my Air Pods case charge or light up?
- 2 How to fix an AirPods case that won’t charge or glow
Why won’t my Air Pods case charge or light up?
If your AirPods case isn’t charging and doesn’t light up at all, the case’s battery is dead. There are many other factors that can play a role in causing this problem. However, here are some of the more common reasons why this happens:
- Dirt: Your connectors are dirty and need a thorough cleaning.
- Faulty cable: Your charging cable may be damaged so you can’t charge your AirPods.
- Software Problem: Even AirPods can sometimes have firmware issues. But this becomes ineffective until the AirPods have at least 5% battery remaining.
- Faulty connector: You may have accidentally dropped your AirPods along with the case and now the connector or tiny wires inside the case have broken.
- Wrong charger: The AirPods case is best charged using a standard 12W adapter. If you happen to use a 20W fast charger, the AirPods case won’t charge and there won’t be any light.
Whatever the cause, here is a detailed step-by-step guide to fixing the problem.
How to fix an AirPods case that won’t charge or glow
Here we have listed 5 possible fixes to help you fix your AirPods charging and no light issue. Make sure you follow the fixes as they are mentioned.
Fix 1: Clean the Lightning Connector
The most obvious fix for an AirPods case not charging or glowing is to check for dirt inside the connector. During the daytime, dirt, grime, and grime can easily get inside the AirPods connector and clog it. As a result, you will not be able to charge them and therefore will not see the light.
You cannot clean the lighting connector with simple tools such as headphones or cotton swabs. There are special tools for this, such as cleaning products for AirPods.
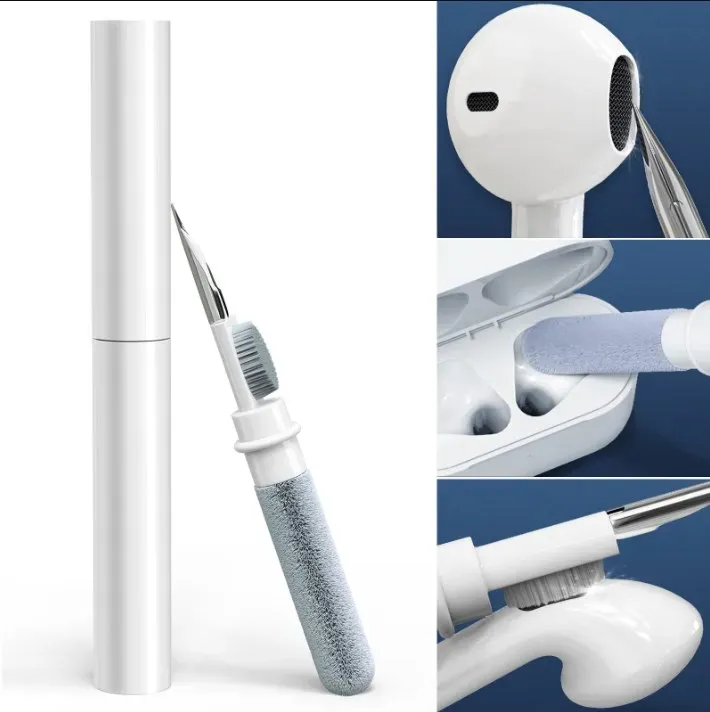
They are readily available on the market for between $2 and $5 and will do the job just fine. Be sure to clean your AirPods case regularly to prevent this from happening.
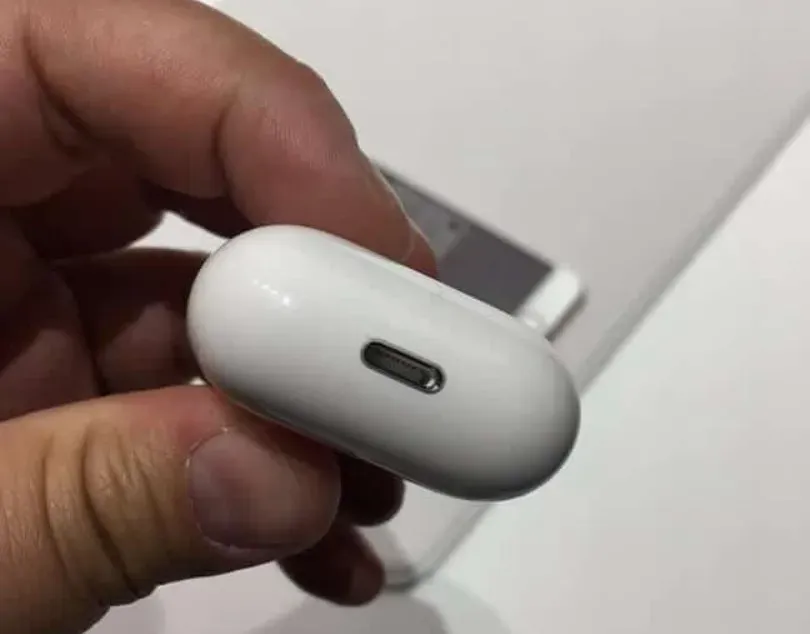
Fix 2: Check and Replace Lightning Cable
The cause of the problem may be a faulty lighting cable. Try changing and checking. You can also use the cable to charge any other Apple device and see if it works properly. If not, you can use a different cable to test.
Also, if you have a QI adapter, try wirelessly charging your case to see if the lights are on. If not, the problem is with the AirPods case itself, not the cable. If it works, the cable is damaged. It may also mean that the connector is faulty, for which you will have to visit a local service center and entrust the diagnosis to specialists.
Fix 3: Check for deep discharge
In our case, we saw that sometimes AirPods run out of power. Therefore, when they are put on charge by connecting the cable, the light does not turn on. However, the light turns on after 15-20 minutes. This is because the battery value has become so low that it is unable to pick up a charge.
Make sure you keep your AirPods connected to the charger for 15-20 minutes and let them charge. It doesn’t matter even if the light is off. Just let it charge and wait. After a while, you will definitely see the charger light turn on and your AirPods will be charging. If that doesn’t help, follow the next fix.
Fix 4: Reset your AirPods
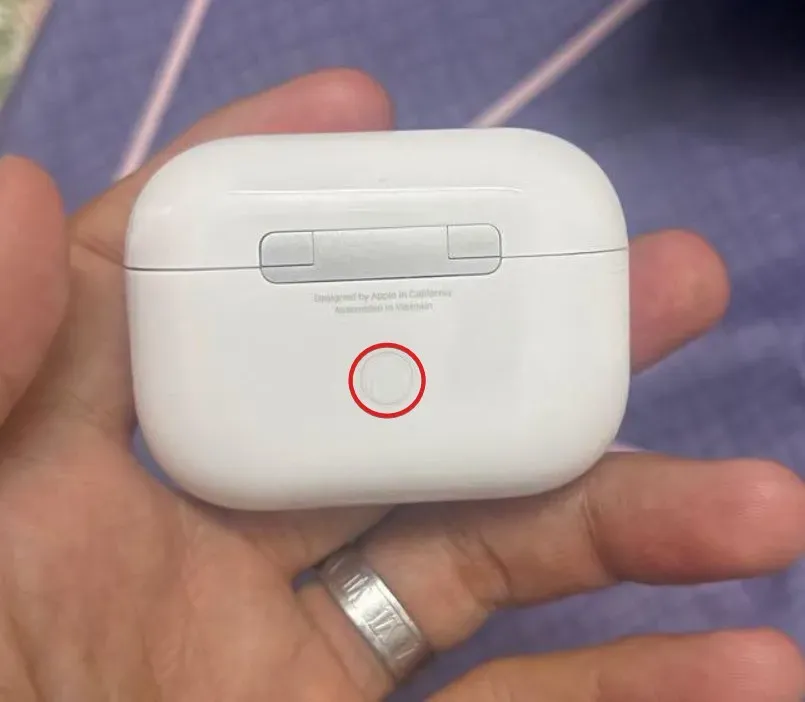
If you’ve tried everything and nothing worked, resetting your AirPods is probably the best way to fix any current issues, including no charging and no light. The reset process is pretty simple.
Put your AirPods back in their case, and then press and hold the round white button. Keep the button pressed for 10-15 seconds until the yellow light starts flashing. Once the lights start flashing, charge your AirPods and see if it charges. Be sure to let it charge for 15 minutes and then check if the light is on.
Your AirPods may now work just fine, or you may not see results. The last fix is the way to go if you don’t see the result.
Fix 5: Contact Apple Support
If none of the above fixes worked, it’s probably time to take your AirPods to an Apple Authorized Service Center and have them checked thoroughly.
Apple experts will diagnose your problem and fix it. With a guarantee, the solution to the problem will not cost a penny. But if the warranty is over, they will give you a fair estimate.
bottom line
Well, that’s all we have on how you can fix AirPods not charging and no lights. We hope this guide has helped you. If not, the guys at the Apple Service Center will do it. To prevent this from happening in the future, it is recommended that you purchase a case for your AirPods that will protect it from future drops and dents.
Leave a Reply