How to Fix Minecraft Launcher Won’t Load
Minecraft is popular among all groups and ages. However, players may encounter issues when launching the game. Sometimes Windows 10 or Windows 11 devices won’t launch the Minecraft launcher, which is a serious problem. So, here’s how to fix it.
Content:
- 1 How to Fix Minecraft Launcher Won’t Load
- 1.1 End all Minecraft background processes
- 1.2 Run Minecraft as administrator
- 1.3 Remove incompatible software
- 1.4 Perform a clean boot
- 1.5 Update driver
- 1.6 Delete launch profiles
- 1.7 Use compatibility mode
- 1.8 Temporarily disable your antivirus
- 1.9 Remove any mods
- 1.10 Reinstall Minecraft – Minecraft launcher won’t load
- 1.11 Final words
How to Fix Minecraft Launcher Won’t Load
A background service can interfere with the Minecraft launcher. Therefore, you will need to check it out. However, it is also possible that the problem is not caused by a background process, but by the launcher itself.
So that we can better understand the problem, let’s take a closer look at the possible causes of its occurrence.
Minecraft launcher profile: It turns out that the launcher profile stored on your system is the most likely reason for your Minecraft launcher not opening. These profiles can become corrupted under certain circumstances.
And as a result, your Minecraft launcher will not start. This can also happen when the authentication database section of the profile contains invalid content.
And in any case, deleting the profiles may solve the problem, because it will allow you to create them again.
Third Party Services. A third party program on your system could also be causing the problem. Third party services or processes sometimes interfere with it in this way.
As a result, it cannot start normally. If so, you should find out what is causing the problem. It could be your antivirus software or something else.
Now we have studied the causes of the problem under consideration. We will now discuss the various solutions that can be implemented to get Minecraft up and running again.
End all Minecraft background processes
Start by closing all Minecraft processes currently running on your computer to fix the Minecraft Launcher launch issue.
You may not be able to access your Minecraft game if it is stuck in the Windows background. However, you don’t have to worry; we have a simple solution that works every time.
If Minecraft does not start due to background processes, follow these steps:
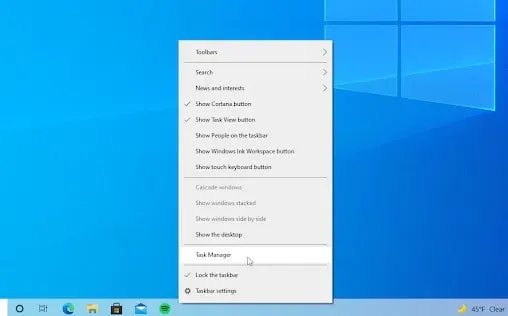
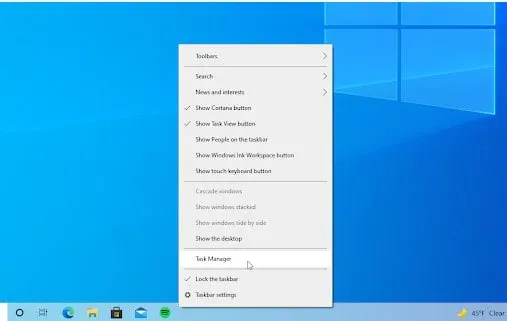
1. Right-click anywhere on the taskbar. Now select “Task Manager”from the context menu.
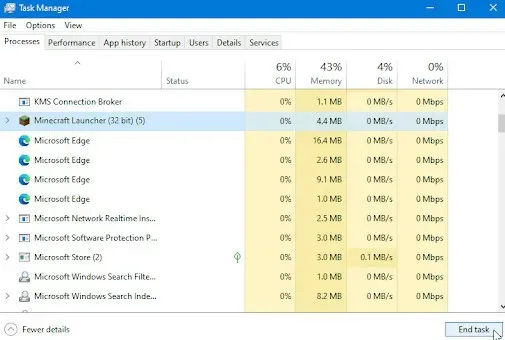
2. Select the Processes tab. And look for any Minecraft processes in the active list. Click once on it to select it.
3. When you have selected Minecraft, click the “End Task”button. The process will be completed. And, if you have multiple Minecraft processes running, repeat these steps.
Now restart the game after closing all Minecraft processes.
Run Minecraft as administrator
You must run the Minecraft launcher as an administrator if it does not launch. So it will try to run as administrator. Therefore, background processes will not interfere with it.
Using the “Run as administrator”option often helps with various problems. The Minecraft launcher can be run as an administrator by right-clicking the shortcut you created.
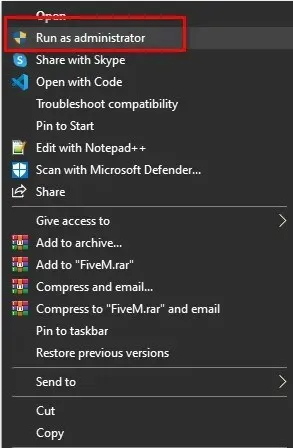
You can also navigate to the location of the launcher. Then click “Run as administrator”from the drop-down menu. Users are prompted to grant or deny permissions. Select Yes. That’s all.
Terminate incompatible software
You must close all background applications before launching Minecraft. The Minecraft Help Center has a list of software known to be incompatible with Minecraft. It is recommended to uninstall these programs.
The list includes Discord, AVG Antivirus, BitDefender, etc. So try disabling your antivirus software and firewall and close Discord. After that, try restarting Minecraft.
If it still doesn’t work correctly, you’d better disable your antivirus software. But remember, as long as your antivirus software and firewalls are disabled, don’t click on suspicious links or websites.
Perform a clean boot
A background service or process may be interfering with the launcher, which in some cases may cause it to fail to open.
In such a case, the real problem is determining what is actually causing it. And once you’ve identified the culprit, you can fix it.
But, since you probably have a lot of applications on your system, it’s hard to pinpoint the culprit.
And third-party antivirus programs are often to blame for such problems. Therefore, it would be a good idea to try disabling any third-party antivirus installed on your system.
The clean boot can ensure that the background service will cause the clean boot problem; only those services that are necessary to run the operating system run in the background.
And as a result, third-party background services are no longer a problem. Obviously, the problem is caused by an application installed on your computer if your launcher starts normally after performing a clean boot.
Following are the instructions for performing a clean boot:
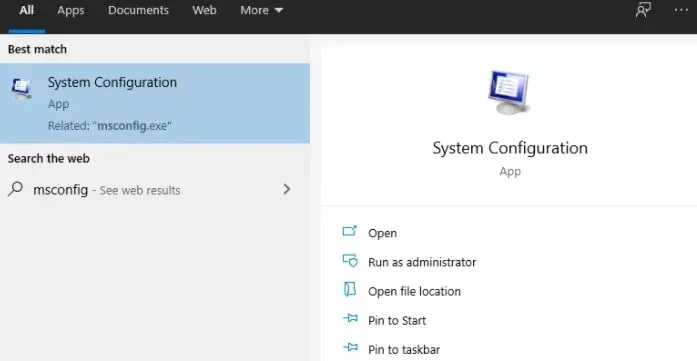
1. First open the start menu. Then type msconfig in the search field. In the results you will see the system configuration. Click on it to open.
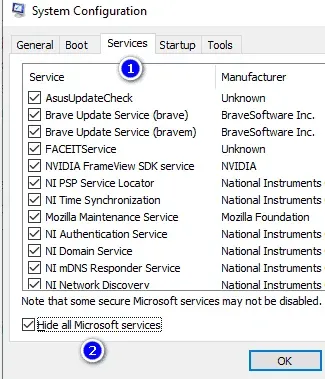
2. Click the Services tab in the System Configuration window.
3. In the lower right corner, you will see a checkbox “Hide all Microsoft services”. If you check this box, all core Microsoft services will be hidden.
4. You can then disable all third-party background services by clicking the Disable All button.
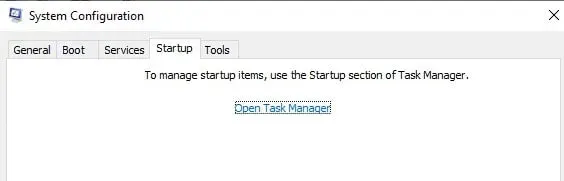
5. After that, go to the “Startup”tab. Select “Open Task Manager”.
6. The Task Manager will appear. Select an application. Select Disable and then OK. Repeat for all applications in the list.
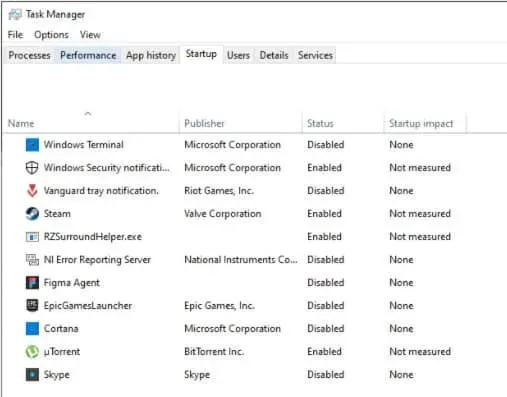
7. Close the Task Manager window after disabling all applications. Then click OK to set up the system.
Restart your computer now. Launch Minecraft again once your system boots up and see if it works.
Update Driver
In order for your hardware to work, you need drivers. But your applications may malfunction if your drivers are not up to date. For example, Minecraft may not open if your drivers are not up to date.
You can update your graphics card drivers as follows:
Option 1: Manually update your video adapter driver.
You can update the graphics card manually. But first you need to check your graphics card configuration:
Just press the Windows key and R at the same time. Type “dxdiag”into the search field. Click OK to continue.
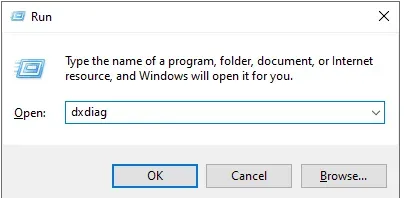
Now go to the Display tab. Make a note of the model and manufacturer of your video card in the “Device”section.
Now do the following:
1. Go to the manufacturer’s website. Click on the download link.
2. You can use the search tools provided to find your graphics card model. Download the latest driver for it.
3. Double-click the downloaded file and follow the on-screen instructions to download and install the latest driver. You may need to restart your device after installation.
You should always download and install the correct driver for your graphics card. If you’re not sure, do a Google search or contact your manufacturer’s customer service department.
Option 2: Automatically update video adapter drivers
You can also update drivers automatically. Here’s how:
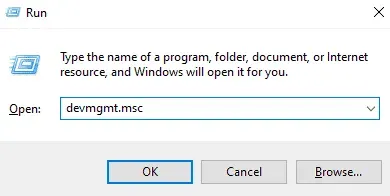
1. Press Windows + R at the same time. Then type “devmgmt.msc”without quotes. Click OK to continue. The Device Manager window will appear.
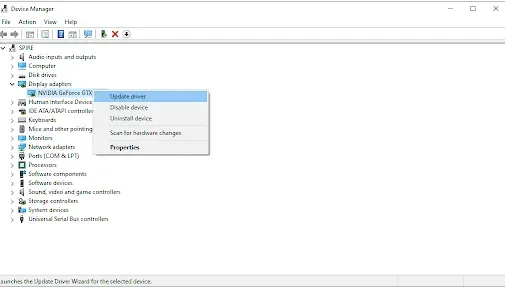
2. By clicking the arrow icon on the left, you can expand the Display Adapters section. Right click the current driver. Then click Update Driver.
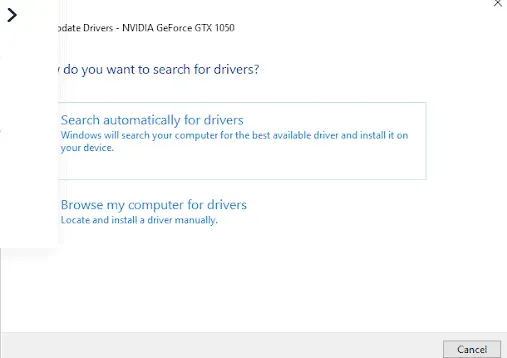
3. Allow Windows 10 to update your driver automatically by clicking Search automatically for updated driver software. You can now exit Device Manager. Click the Reload button.
Delete launch profiles
When you start Minecraft, the launcher loads the profiles you have saved on your computer.
But the launcher may not start at all if this profile file is corrupted. As a result, in this case, you must delete the launcher profile.
These files are generated automatically, so it’s perfectly safe to do so. However, this will cause the launcher settings to be lost. Remember this.
Follow these instructions to remove a launch profile:
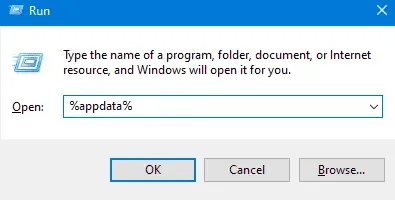
1. To get started, press Windows + R to open the Run dialog box.
2. Then enter %AppData% in the Run dialog box. Press Enter.
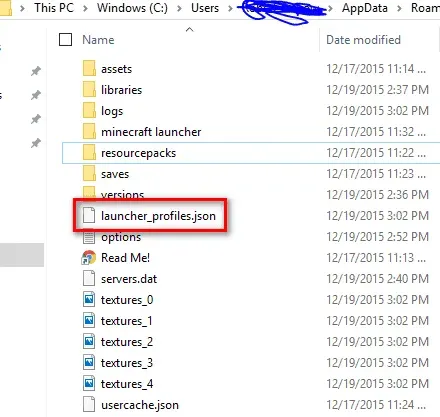
3. An Explorer window will open. Navigate to the folder. minecraft. Open the folder.
4. Remove the profiles.json startup file from the folder. minecraft. But if you don’t want to delete the directory, you can also move it to a different location instead.
After that, try opening the launcher again.
Use compatibility mode
The latest version of Windows 10 will work with previous versions of Windows. However, some of them may not start correctly or work poorly.
When using compatibility mode, you can use Windows settings from an earlier version of the operating system. This may help you fix the Minecraft launch issue.
To do this, follow these steps:
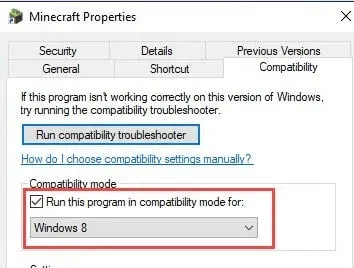
1. Open Minecraft by right clicking it. Then select Properties.
2. Select the Run this program in compatibility mode check box on the Compatibility tab.
3. Select an operating system from the drop-down menu.
4. Click the Apply button. Then click OK.
Launch Minecraft. Make sure it works correctly.
Temporarily disable your antivirus
Other applications may be detected by your antivirus program as false positives. A false positive means that malware is erroneously identified as innocent software.
In this case, your antivirus program should be temporarily disabled. After that, launch Minecraft.
1. Select an empty space on the taskbar by right-clicking the mouse. And use the context menu to select Task Manager.
2. Using the header menu at the top, select the Start tab. Find your antivirus application in the list. Click once to select it.
3. In the lower right corner of the window, click the Disable button. Your device will no longer run the app.
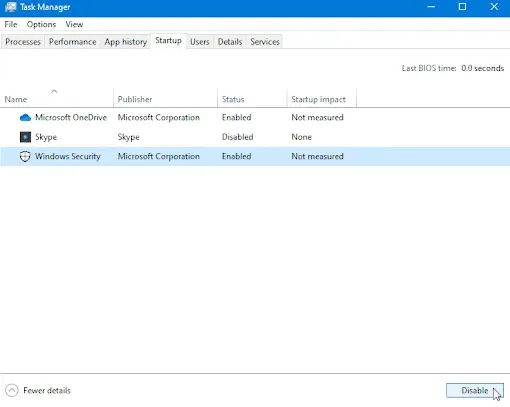
4. You will be able to play Minecraft after restarting your computer. But don’t forget to re-enable your anti-virus program afterwards.
Remove any mods
It is possible that mods are interfering with the opening of the game if you are using them with Minecraft. Many mods directly modify the Minecraft code.
In addition, they are error prone, especially if they have not been updated for a long time. So, you can remove them by doing the following:
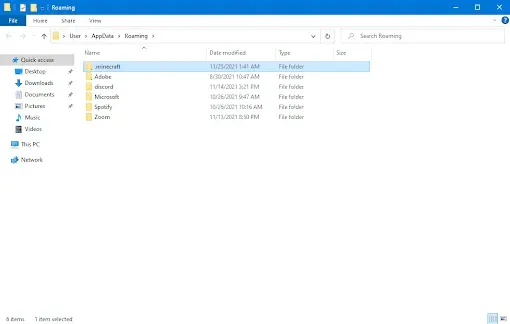
1. Press Windows and R at the same time. Enter “%appdata%”without quotes. Then click OK. The AppData folder will appear in the Explorer window.

2. Open a folder. minecraft by double clicking on it. This folder contains most of your Minecraft game files, such as saved worlds, player data, and mods.
3. If you can find a folder named “mods”in the file list, right click it. Select Delete from the context menu.
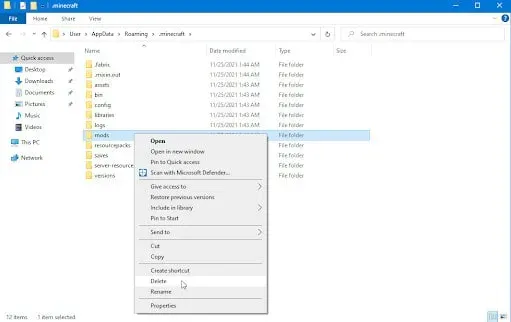
4. Open the Minecraft launcher after deleting the mods folder. The latest version of Minecraft should be selected, so be sure to select the unmodified version.
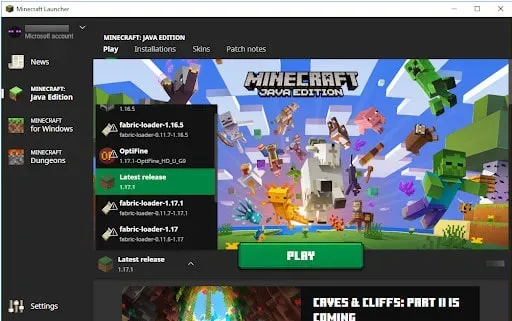
Now try to open the game. Now the game should work fine. However, if that doesn’t work, try the next tip.
Reinstall Minecraft – Minecraft launcher won’t load
You might be having a problem with corrupted Minecraft installation files if none of the above solutions worked for you.
As a result, you will need to completely uninstall Minecraft. Once you do that, you can reinstall Minecraft.
Here are the steps:
1. The first thing you need to do is open the control panel. Just type “Control Panel”into the start menu.
2. Once you have the Control Panel open, select “Uninstall a Program”under the “Programs”section.
3. Double click Minecraft Launcher in the list of installed applications.
4. You can also select an application from the list. Click “Delete”to remove it.
5. Press the Win + R key to open the Run dialog box.
6. Then enter %AppData% in the Run dialog box. Press Enter to continue.
7. Explorer will open. Now go to the folder. minecraft. And delete it.
8. After completing this step, download Minecraft again. Then install it.
Now run it and make sure everything is working properly.
Final words
That’s all about how to fix Minecraft Launcher launch issues. You can try all of the above methods and see which one works for you.
Leave a Reply