How to Fix Ethernet Not Working in Windows 11
Many people prefer to use Ethernet to connect to a wired network. People find Ethernet much more stable and faster than wireless Internet. However, many users have reported that Windows 11 Ethernet not working issue. This is a common problem with Windows PCs that you may encounter due to driver issues. If you are facing this problem, this article will help you solve it.
Fixing Ethernet Not Working in Windows 11
We have discussed some troubleshooting methods to help you fix Ethernet not working in Windows 11.
Restart your computer
You may encounter this issue due to temporary errors on your system, which can be resolved by rebooting your system. If you encounter this problem, try restarting your computer.
After restarting your computer, check if Ethernet is working normally. If Ethernet still doesn’t work in Windows 11, continue with the following troubleshooting methods.
Try changing the ethernet port
In many cases, the problem can be related to a faulty Ethernet port on the router. You should try changing the port on your router and then check if you are still experiencing the problem or not. You can even try replacing the ethernet cable and then check if you are still facing this error or not.
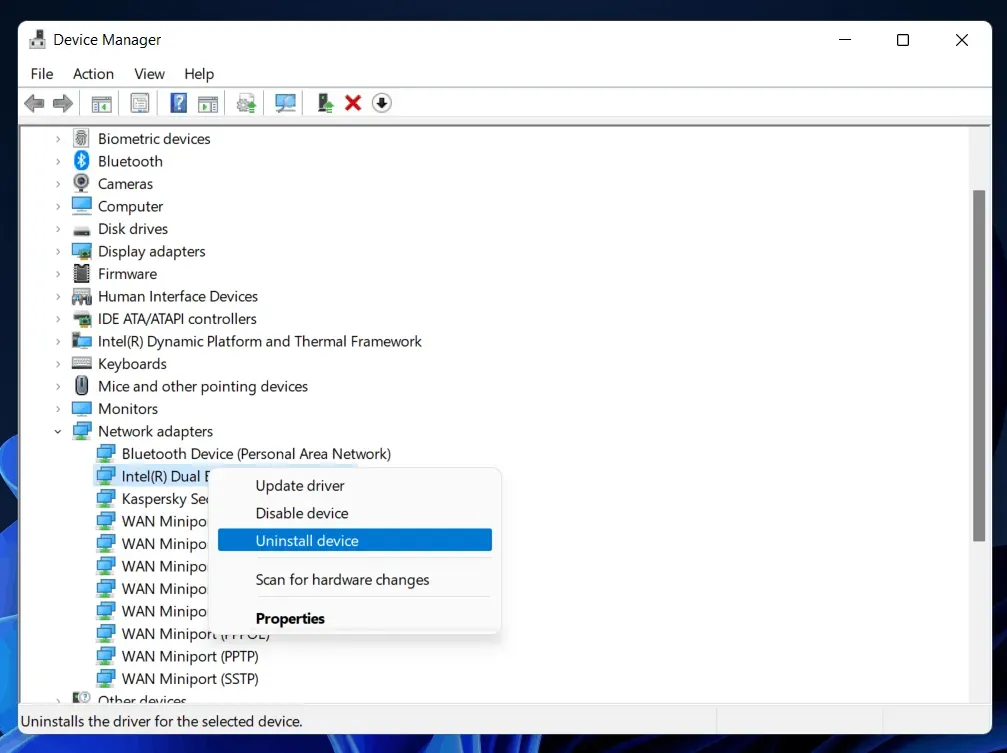
Reinstall Ethernet drivers
You may encounter this issue due to faulty internet drivers. You can try reinstalling your Ethernet drivers and then check if you are still experiencing this issue or not. To reinstall Ethernet drivers, follow the steps given below:
- In the Start menu, find “Device Manager” and open it.
- In Device Manager , expand Network Adapters by double-clicking them.
- Now select the driver, right click on it and choose Uninstall device. After that, restart your computer and the driver will be reinstalled on your computer.
- You can check if the driver is reinstalled or not from the network adapters section in Device Manager .
- If there is no driver, go to the Action tab in Device Manager and click Scan for hardware changes. This will install the driver on your computer.
Run the network troubleshooter
If you are still facing the issue, try running the network troubleshooter. The Network Troubleshooter identifies a problem with your network adapter and the Internet and fixes it. Follow the instructions below to run the network troubleshooter.
- Navigate to the Settings app on your PC by pressing the Windows + I key combination on your keyboard. You can find and open “Settings” in the Start Menu.
- By default, you will be taken to the “System” section in the settings. If you’re not in the System section , click on System on the left sidebar in Settings.
- Now, under the System section , find Troubleshoot and click on it. In the troubleshooting section , click another troubleshooter.
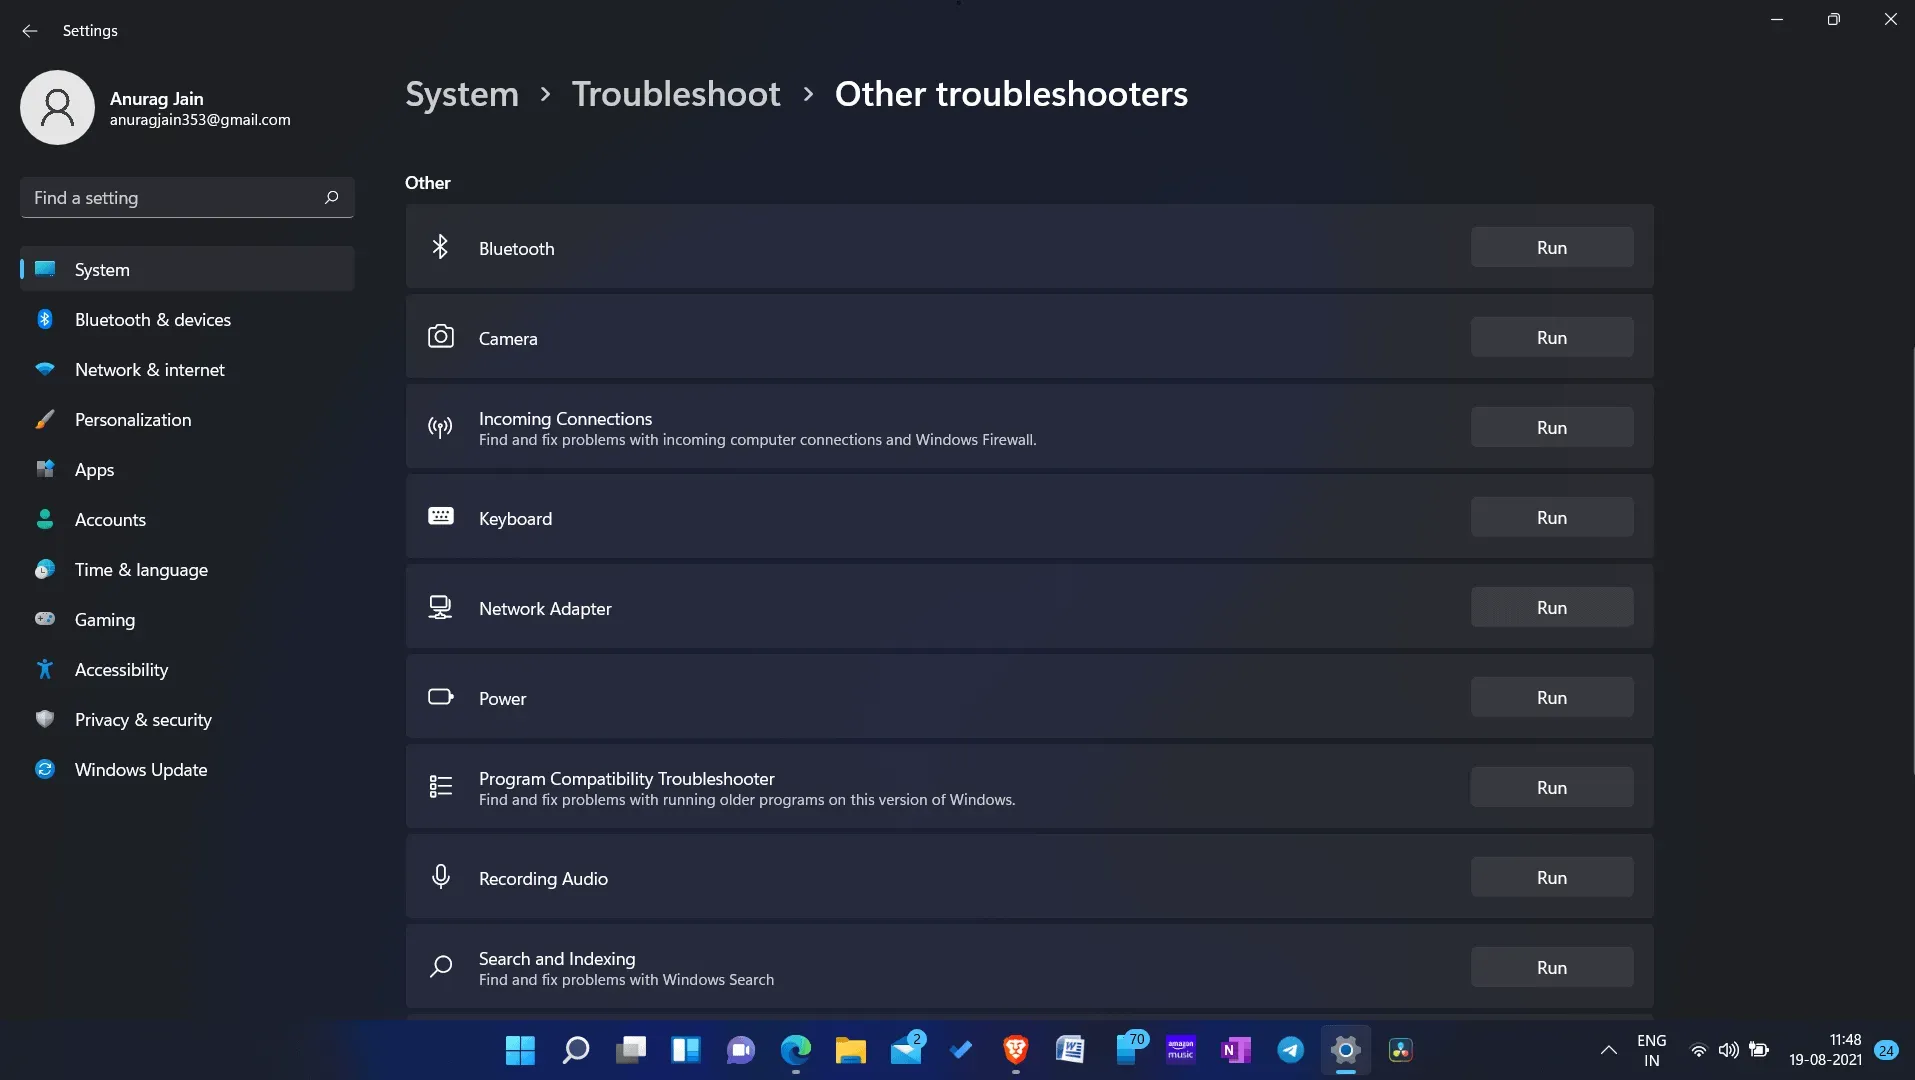
- Here, click on the launch option next to the network adapter.
- Now follow the instructions on the screen to run the troubleshooter and fix the problem.
This will fix the problem with Windows 11 Ethernet not working on your PC. If this also did not solve the problem for you, then you should move on to the next step.
Try resetting your network settings
Many times, resetting network settings can fix the problem for you. This will remove all current network settings and return them to their default settings. To reset your network settings, follow the steps given below:
- Press the key combination Windows + I to open the Settings app on your PC.
- Go to Network & Internet on the left sidebar in Settings.
- Here tap on advanced network settings and then tap on reset network.
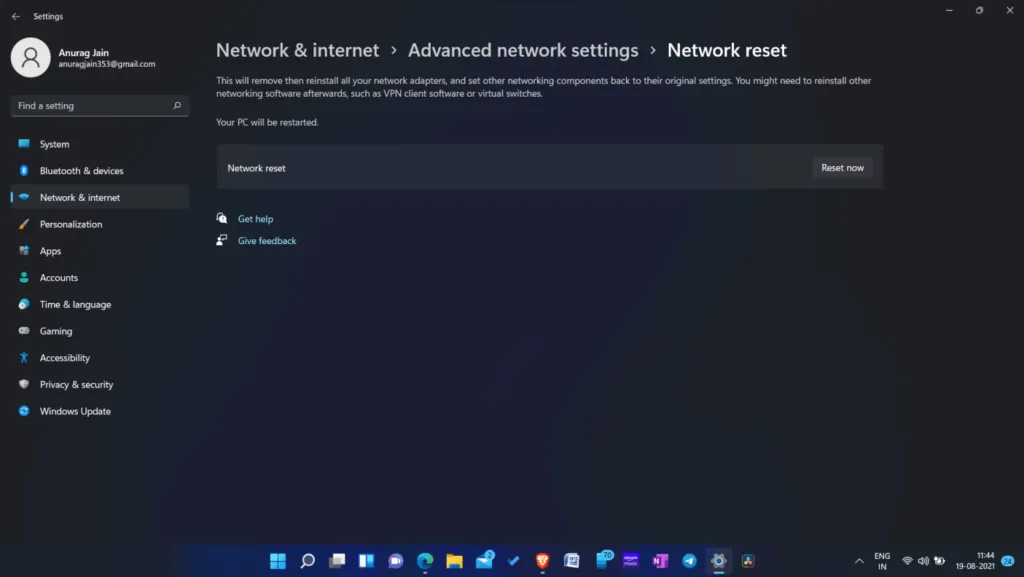
- Click Reset Now , then follow the on-screen instructions to reset your network settings.
Update driver
If Ethernet still doesn’t work on Windows 11, try updating your network driver. To update the network driver, follow these steps:
- From the Start menu, find Device Manager and open it.
- In Device Manager, double-click the Network adapters option to open it.
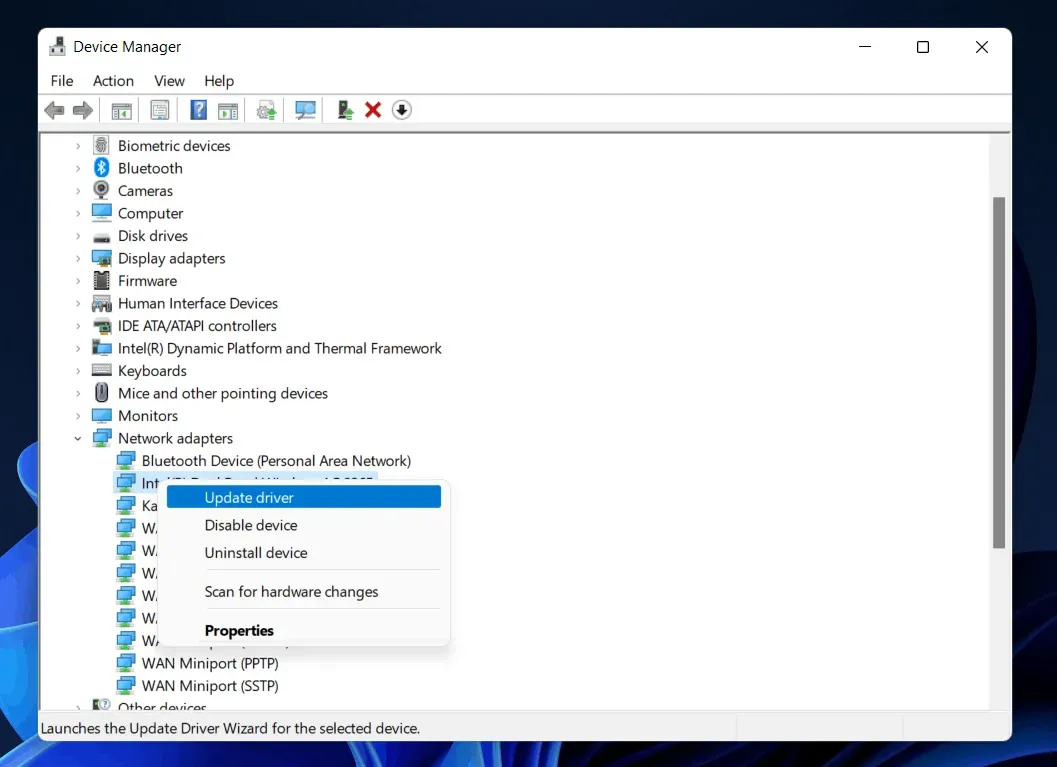
- Now select the network driver, right-click it and choose Update Driver. This will update the network driver.
If you don’t want to use Device Manager to update the driver, you can use third party applications to update the driver. You can use third party applications such as Driver Booster or DriverPack Solution to update the driver.
Performing a Netsh Winsock Reset
This method can help resolve some network issues you may be experiencing. This method is not directly related to Ethernet not working on Windows 11, but many users have reported that their issue was fixed after following this step. To reset Netsh Winsock, follow these steps:
- In the start menu, find CMD and open it. This will open a command prompt on your PC.
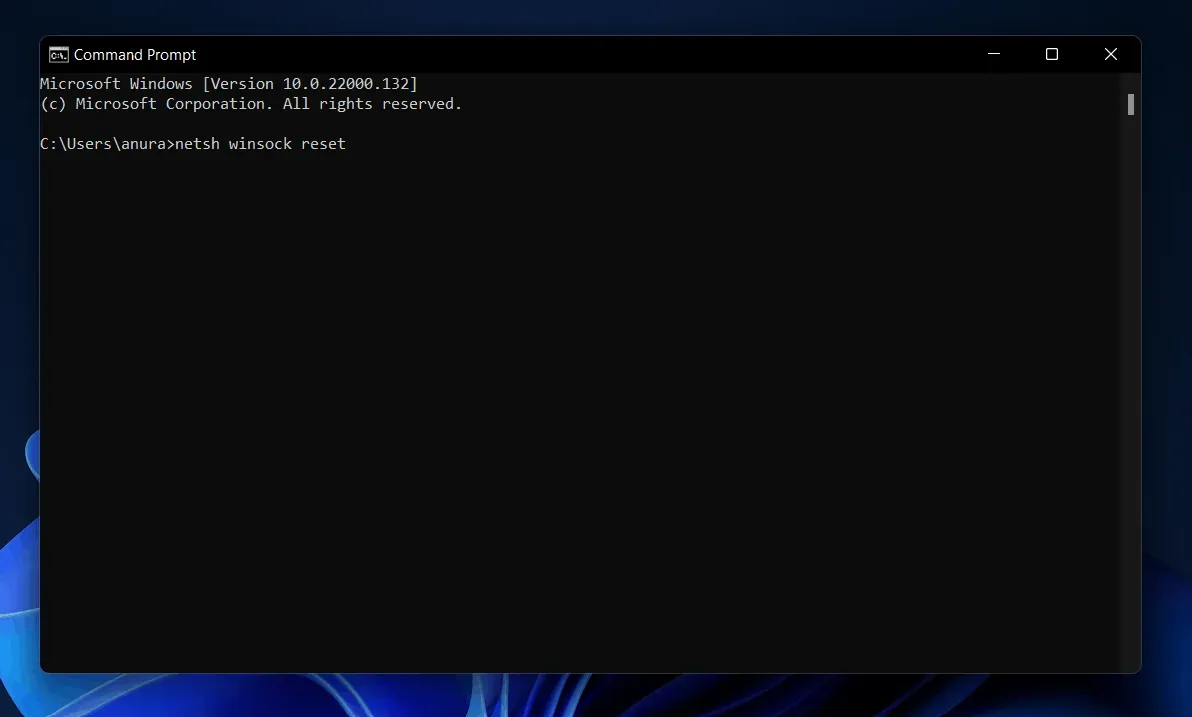
- At the command prompt , type netsh winsock reset and press Enter to execute the command.
This should most likely fix the issue for you.
Final words
If Ethernet is not working in Windows 11, follow the steps in this article. We have discussed some effective troubleshooting steps to help fix Windows 11 Ethernet not working. By following the steps above, you should be able to resolve the issue you are experiencing. We hope this article helps resolve the Ethernet issue you’re experiencing.
Leave a Reply