How to Fix NVIDIA Control Panel Not Showing in Windows 11
Almost every Nvidia GPU user has experienced the lack of control panel, myself included. Most PC users won’t need the control panel because the default configuration is more than enough for optimal machine performance. However, I’m a gamer and I need access to the toolbar in order to adjust settings for maximum performance.
Why is the Nvidia Control Panel not showing up in Windows 11?
I installed fresh graphics drivers downloaded from the official site and still the Windows PC couldn’t find the control panel. Several users reported that Nvidia was not opening when the icon was shown in search results.
- It’s an Nvidia package bug or glitch that’s causing this.
- PC threats.
- Something must have gone wrong during installation.
- Latest build of Windows
However, I have to say that it’s not your fault if the control panel doesn’t show up after it’s installed correctly. I was able to solve this problem several times by completely reinstalling the entire package.
Download manual driver package
The final solution is to manually reinstall Nvidia GPU drivers. You need to uninstall the Display Driver Uninstaller (DDU), which will remove all leftovers from the PC. Let me show you how to completely uninstall GPU drivers from PC and I have done it several times in the past.
Download drivers:
- Open a browser.
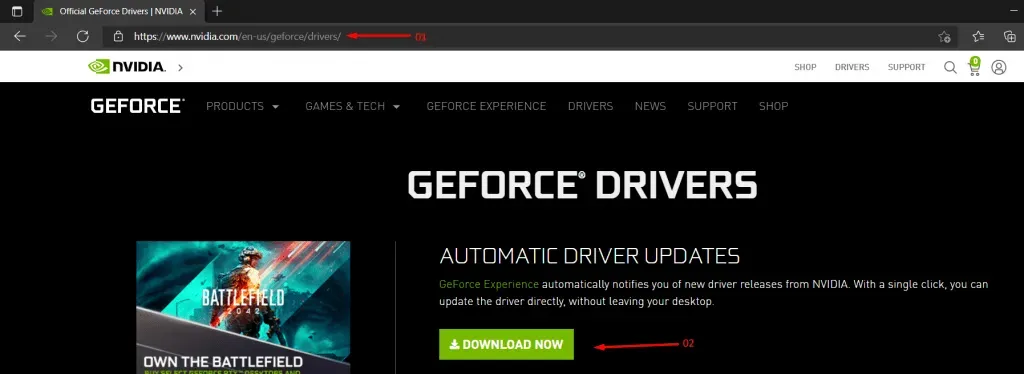
- Go to the official Nvidia website and download the package locally.
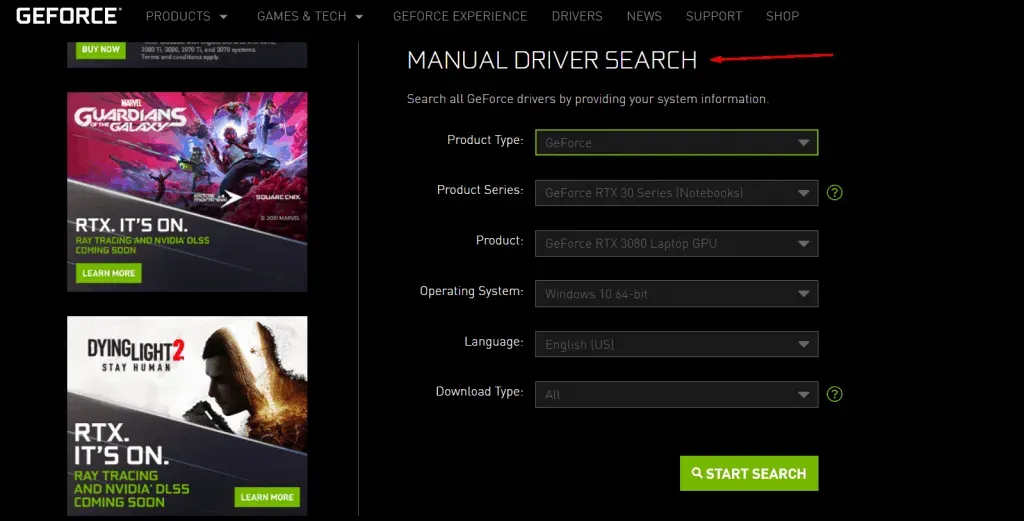
- Extract the files to a local folder.
You are halfway to reinstalling your GPU drivers.
Uninstall GPU drivers:
- Open a browser.
- Go to the DDU website and download it.
A. Extract the ZIP folder.
B. Go into Windows Safe Mode and you can watch YouTube for visual instructions.
C. Run DDU as administrator.
- Select GPU and Nvidia in settings.
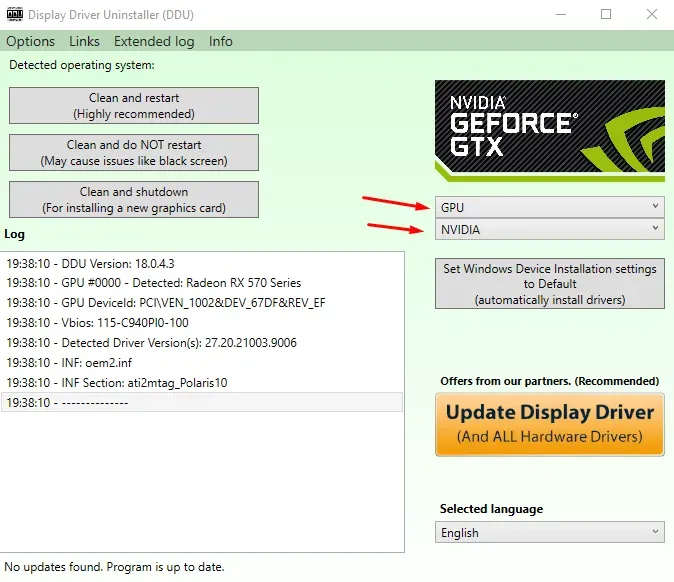
- Click Clean and Restart to complete the process.
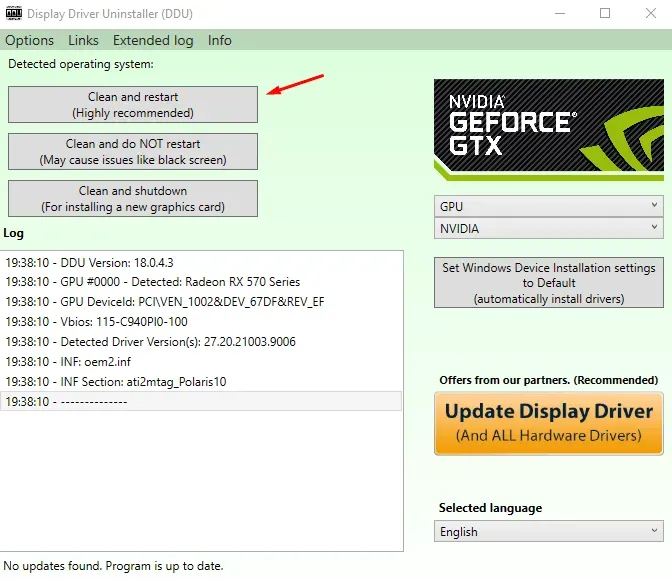
Your computer will restart and the Nvidia GPU drivers will be removed from the computer.
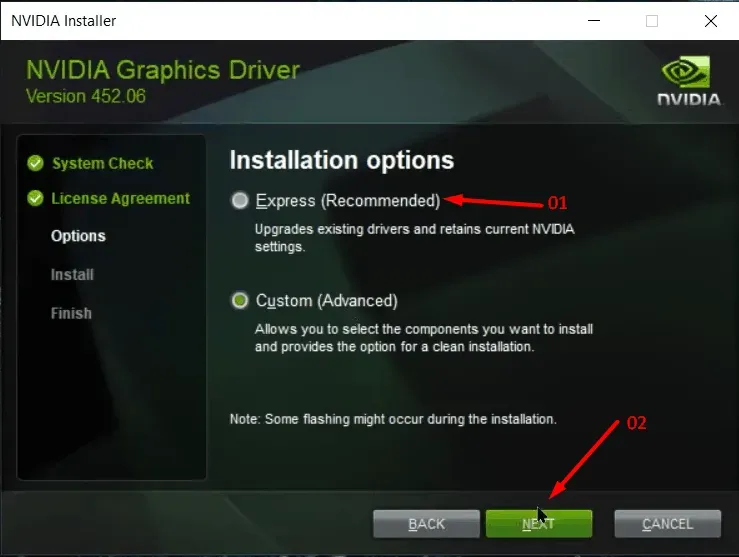
Now install the GPU drivers as usual and no further instructions are required. Display Driver Uninstaller is my GPU and Audio uninstaller because it won’t leave a single residue and fixes the shortcomings of the Nvidia package manager.
Automatic update of video adapter drivers
Old drivers cause a lot of problems in the new build version of Windows. Microsoft makes users update the software frequently and it includes the build version. I installed a Windows 2004 build version and to be honest it was a disaster.
I ran into a number of issues with the FiveM app and other stability issues. The American GPU manufacturer releases new software updates when it deems it necessary to fix known issues. Use Windows Update and update your system video drivers.
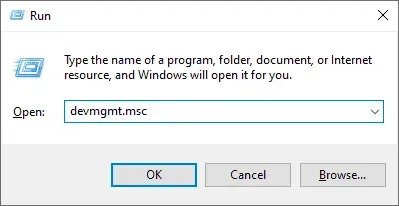
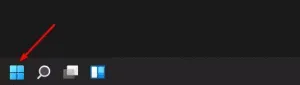
- Click on the “Windows”icon.
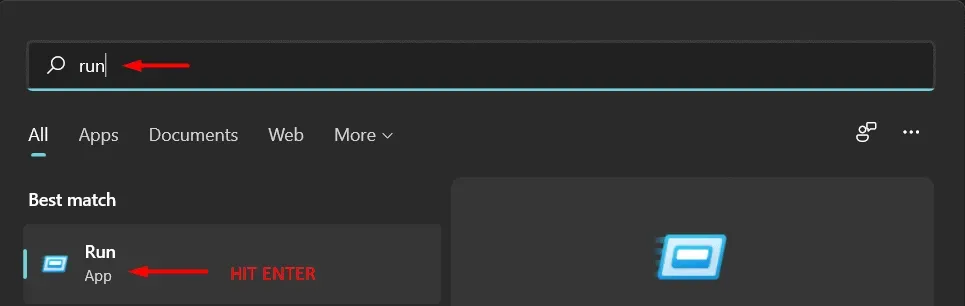
- Type “Run”and press the “Enter”key to open the application.

- Enter “devmgmt.msc”in the startup option, then click OK.
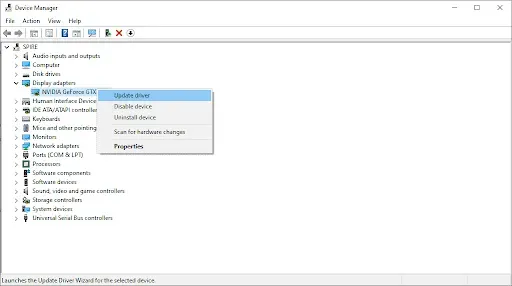
- Locate and right-click Display Adapters, then select Update Driver.
- A window will appear on the screen and select “Search for Drivers Automatically”.
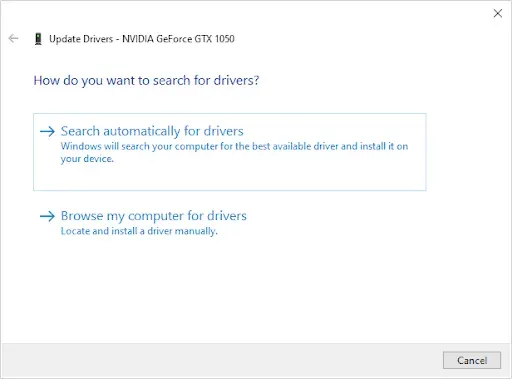
- Let Windows look for suitable drivers.
The scanning and installation process takes a few minutes, so be patient and don’t close the window. Restart your Windows 11 PC after installing updated graphics drivers.
Restart NVIDIA services.
Windows software is not perfect and has flaws that we have to put up with. However, you can force restart Nvidia services and that might fix the GUI issue.
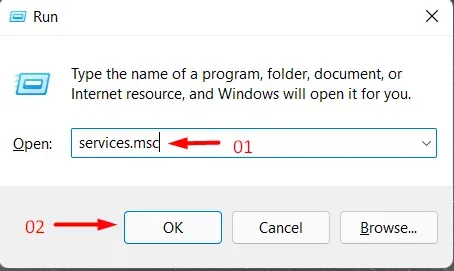
- Click on the “Windows”icon.
- Type “Run”and click to open the app.
- Enter “services.msc”in the startup option, then click “OK”.
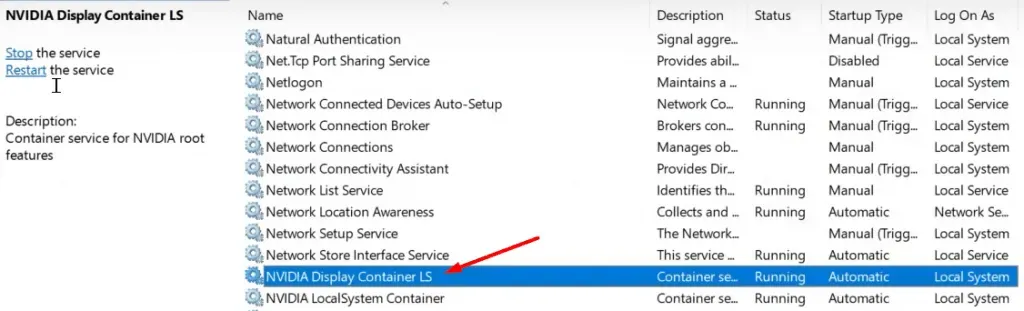
- Locate “NVIDIA Display Container LS”and right-click to view advanced options and then select “Properties”.
- You must complete three steps.
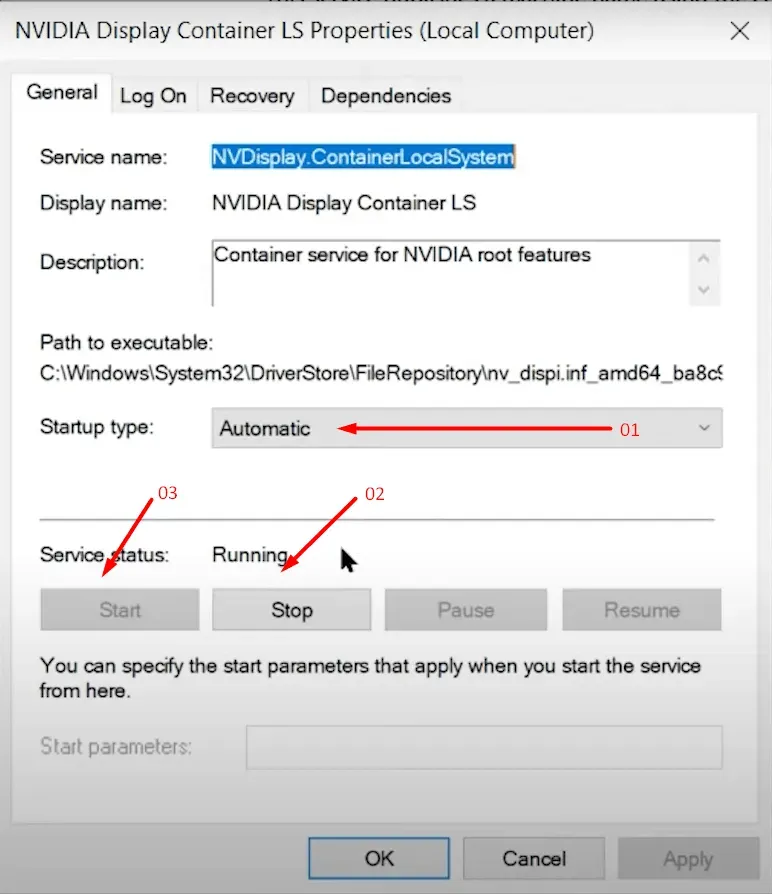
- A. Change the startup type to Automatic.
- B. Click Stop, then click Start.
Click “OK”to save your changes.
Restart your Windows PC to force restart all services again and the new changes will take effect at PC boot time.
Add desktop context menu
How to access the Refresh button in Windows? Yes, that’s what the context menu means.
- Click on the “Windows”icon.
- Find “Control Panel”and click “Open”.
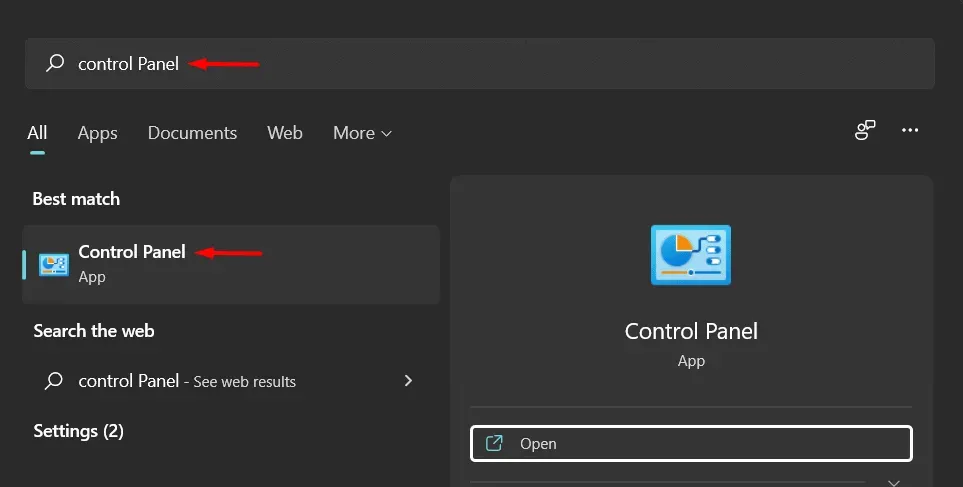
- Change “Category View”to “Large Icons”.

- Click on the Nvidia Control Panel.
- Click “Desktop”located in the top menu and then select “Add Desktop Context Menu”.

Now close the Control Panel and restart your computer to end your session. Turn on the computer and check if the Nvidia Control Panel is displayed in the context menu.
Conclusion
I fixed the missing Nvidia control panel by uninstalling the GPU drivers with DDU and manually reinstalling it. The Display Driver Uninstaller solved the problem several times, and it has worked for several others who have contacted me with similar situations. Let us know which solution helped resolve your Control Panel issue in the comments section below.
Leave a Reply