How to Fix Samsung TV Can’t Find or Connect to Internet Wi-Fi
The advantage of smart TVs is that you can use Wi-Fi directly without plugging in portable storage devices. For many users, Samsung is a familiar brand. Many users prefer to always choose Samsung when buying mobile devices, wearables or smart TVs. However, some customers are reporting that their Samsung TVs cannot find or connect to Wi-Fi on the Internet. This prevents them from watching their favorite TV shows and movies online.
If you are facing a similar issue where your Samsung Smart TV is constantly losing internet connection or you are getting errors like error numbers 012, 102, etc., you have come to the right place. Let’s take a look at how to solve the problem of Samsung TV not finding or connecting to the Internet via WiFi.
There are several reasons why your Samsung smart TV cannot connect to WiFi. Your network connection may have some problems. Your modem or router may be the source of the problem. The problem may be with your network provider.
Content:
- 1 Why won’t my Samsung TV connect to WiFi?
- 2 Fix Samsung TV not connecting to WiFi
- 2.1 1. Restart your Samsung TV.
- 2.2 2. Try unplugging the TV
- 2.3 3. Reboot the modem
- 2.4 4. Check Wi-Fi Password
- 2.5 5. Limit the number of devices connected to WiFi
- 2.6 6. Use the IP settings on your phone.
- 2.7 7. Change DNS and IP settings
- 2.8 8. Reset network settings.
- 2.9 9. Reset Smart Hub
- 2.10 10. Reset your TV
- 2.11 Conclusion
Why won’t my Samsung TV connect to WiFi?
Our research shows that a wide range of factors can prevent your Samsung TV from establishing a WiFi connection. The following are some of the most typical:
Outdated Firmware
Your TV’s firmware is probably out of date if it hasn’t been updated in months. In this case, it will not work properly. Also, your TV settings may not be accurate. Also, a device with outdated firmware may be more vulnerable to malicious system issues.
General error
When turning off the TV with the remote control for more than 10-15 minutes, there were reports that Samsung network settings were lost. Other technical factors can also make your device vulnerable to common bugs.
Mac address blocking
Samsung TVs use special addresses to ensure a stable connection, just like other devices that connect to a WiFi router. The address may be prohibited from connecting to the router by the ISP or the user. Your Samsung TV will not find or connect to Wi-Fi internet if this happens.
DNS settings
When trying to connect to Wi-Fi, a conflict may occur between your router and TV if the DNS settings are not configured correctly. Users may accidentally change the settings manually which will cause this issue.
Problem with router or modem
If your Wi-Fi router is broken, your Smart TV may not connect to Wi-Fi at any time.
Wrong password
Many people often make the mistake of entering the wrong password. This happens frequently because the TV’s on-screen keyboard can be difficult to use.
Fix Samsung TV not connecting to WiFi
Luckily, there are solutions to help you fix the Wi-Fi issue on your Samsung TV. If the issue still occurs, try each of the solutions listed below.
1. Restart your Samsung TV.
Restarting your Samsung smart TV is the first thing you need to do if it won’t connect to Wi-Fi. There are two options for further action.
Here is the first option:
- Make sure your Samsung TV is turned on.
- Press the power button on the supplied Samsung remote.
- Keep pressing this button until the Samsung logo appears on the screen.
- The red LED on the TV will start flashing faster after the restart process is complete.
- Try to connect to the Wi-Fi network again as soon as the TV turns on.
You can try the second option if the TV still cannot connect to WiFi. The steps for selecting two are as follows:
- Turn on your Samsung TV.
- Leave the TV on for five to ten minutes, then unplug the power cable (do not use the remote control to turn off the TV first).
- Restart your TV after about 30 minutes.
- Continue to the next step if the connection issue persists.
2. Try turning off the TV.
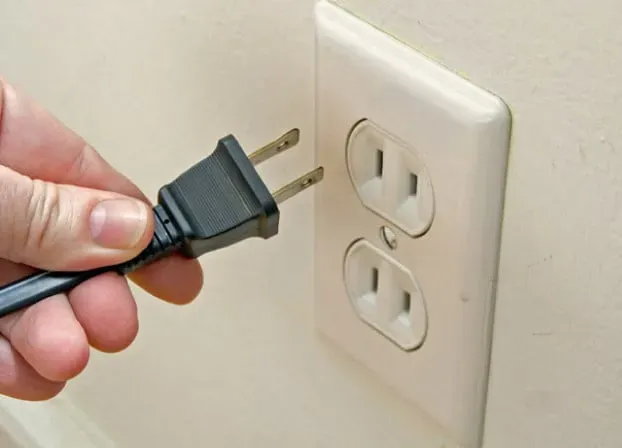
This is a really simple yet effective method that many people find useful. Simply unplug your TV, wait a minute for it to cool down, then plug it back in. After that, use the remote control to turn on the TV as usual. Your TV will be reset and hopefully the WiFi issue will be resolved.
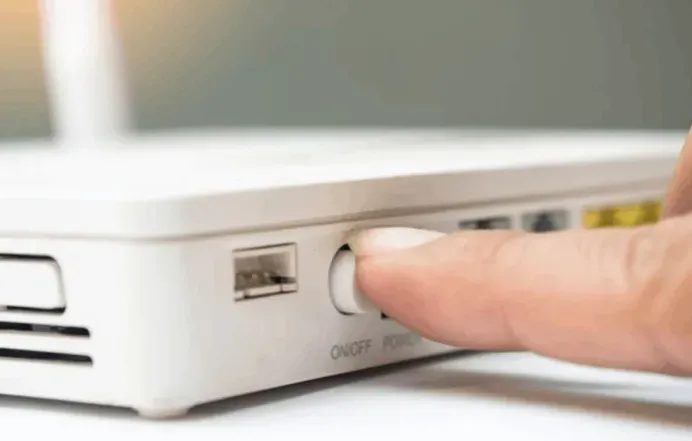
3. Reboot the modem.
4. Check Wi-Fi Password
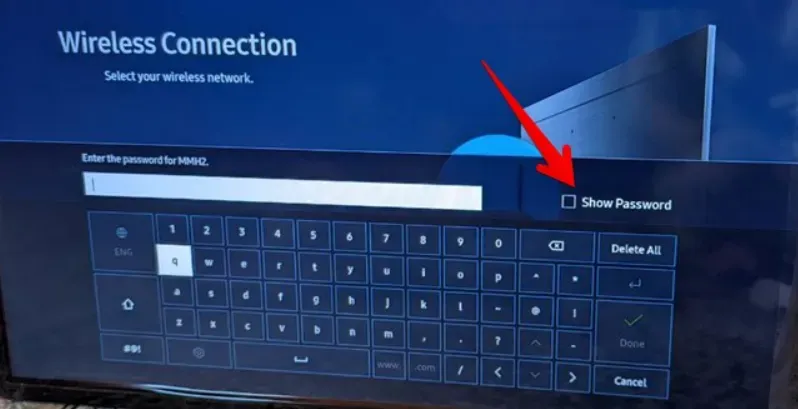
If this is your first time connecting to a Wi-Fi network on a Samsung Smart TV, check that the password is correct. Therefore, check the box next to “Show password”when the on-screen keyboard appears. This way you can be sure that you are entering the correct password.
5. Limit the number of devices connected to WiFi
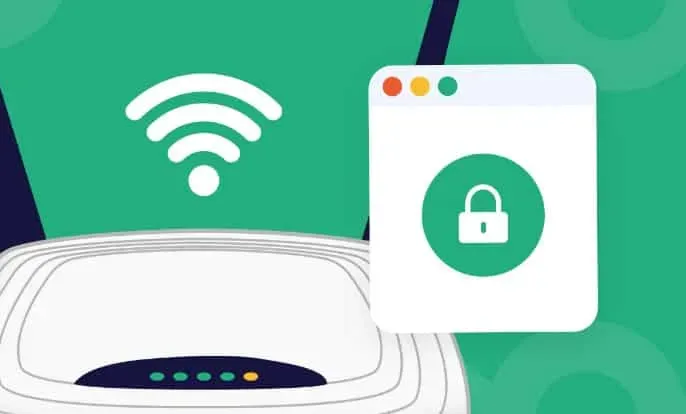
The number of devices that can be connected to most Wi-Fi modems is limited. Wi-Fi signal strength decreases as more devices connect to it. Therefore, you should remove some other devices from your Wi-Fi network if your Samsung TV is having problems connecting to the Internet.
6. Use the IP settings on your phone.
To do this, follow these steps:
- Turn on the TV.
- Enter your password and select your Wi-Fi network from the Internet Settings menu.
- If you do not change the network/IP settings, the TV will not connect.
- Select “Manual IP and DNS Configuration”under “IP Settings”.
- Enter the same information as on your smartphone, which must be connected to the same wireless network.
- To get this data on your phone: Go to WiFi Settings, select Active Network, Manage Network Settings, Show Advanced Options, IP Settings and change to
- Take a screenshot of all displayed network data.
- Enter the information from your phone into the network settings on the TV.
- Click OK.
7. Change your DNS and IP settings
Changing the IP address or DNS server number on your TV can sometimes fix Wi-Fi issues or certain app issues on your Samsung TV.
Follow these steps:
- Select Settings > General > Network.
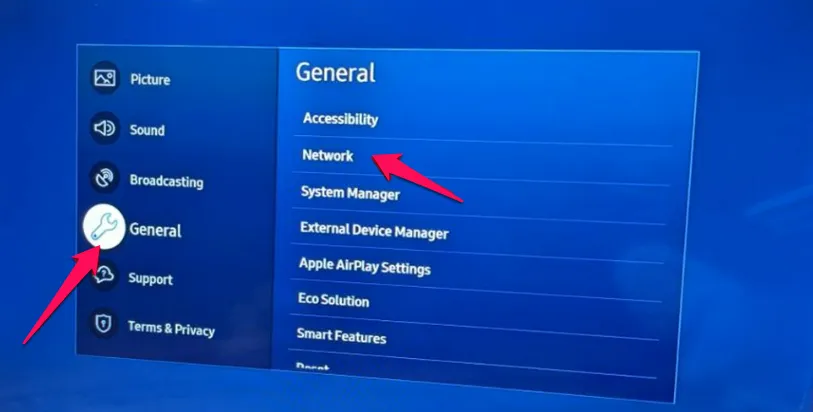
- Go to network status.
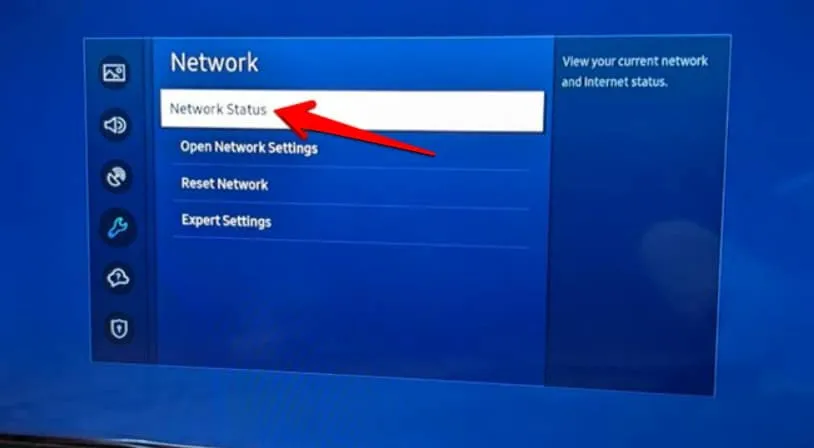
- Cancel network check.
- Select IP settings.
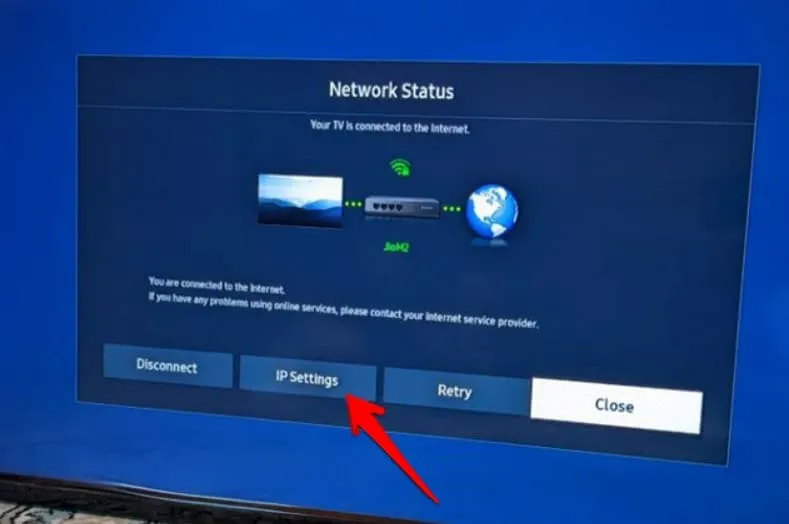
- Samsung TV won’t find or connect to Wi-Fi internet
- In the DNS Settings section, select Log on automatically.
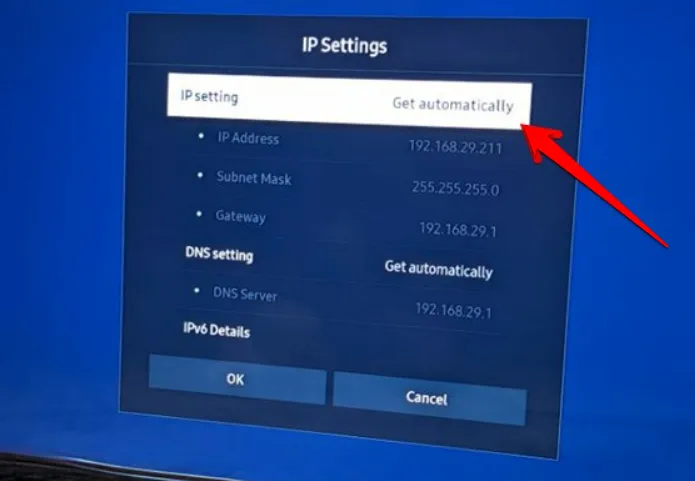
- Enter 8.8.8.8 and click Finish.
208.67.222.222 is a public DNS address that you can enter manually to see if it works for you.
8. Reset network settings.
You should reset your TV network settings if nothing seems to be working to fix Wi-Fi not working on Samsung TV. This will return the network settings to their original conditions. You will need to reconnect to the Wi-Fi network.
The methods listed below should be used to reset the network settings on your TV.
- Press the Home button on the remote.
- Select Settings > General > Network.
- Click Reset Network.
- Select Yes.
- To change network settings, restart your TV.
9. Reset smart hub
Any software issues causing Wi-Fi issues on your Samsung TV can be fixed by restarting Smart Hub. Reset it by following these simple steps:
- “Press the home button on the remote control.
- Go to Settings > Support > Device Care > Self Diagnosis.
- Choose to reset smart hub.
- Enter the TV PIN (default PIN is 0000).
- Follow the instructions displayed on the screen.
10. Reset your TV
Finally, you may have to go through the horrifying process of formatting your Samsung TV. If you do this, the TV will return to its default settings. It will need to be set up again, including adding Wi-Fi, installing apps, customizing the home screen, and other tasks.
- Select Settings > General > Reset.
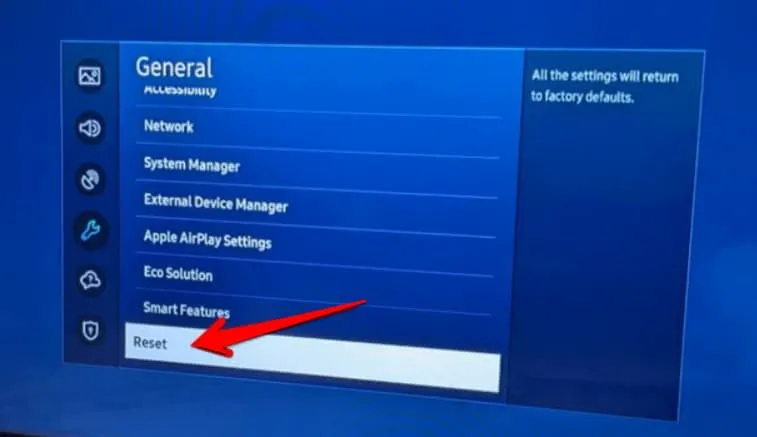
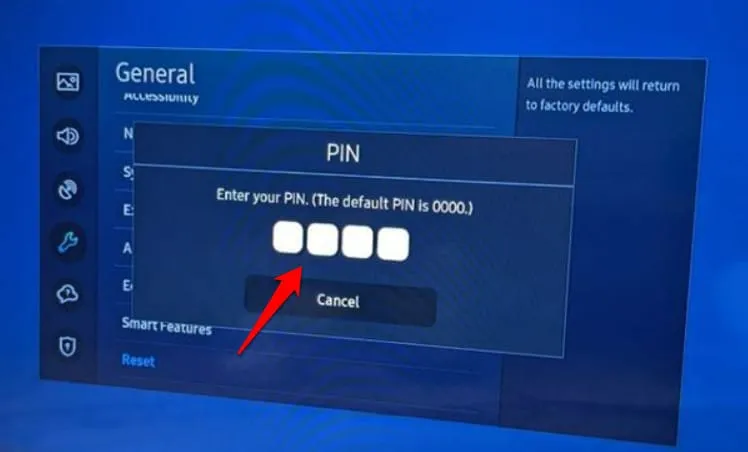
- You will see a confirmation popup. To confirm, enter the PIN code (0000)
If none of these instructions have yet been able to help you fix this problem, we advise you to contact professionals.
The only thing left to do after exhausting all other options is to try and contact your local electrician or Samsung support directly to see if they can come up with a workable solution that will work for you.
Conclusion
No matter how advanced your Samsung TV is, it won’t be able to connect to the internet without the right Wi-Fi signal. There are several factors that can affect these signals, but there is nothing to worry about because in this article, we have provided you with the information you need to troubleshoot this issue.
Leave a Reply