How to fix Windows 11 File Explorer crash
File Explorer crash is a common problem that Windows 11 users face after first booting the operating system. This issue is not unique to Windows 11 as many people have experienced it on Windows 10. If File Explorer in Windows 11 keeps crashing or doesn’t work properly, you’ve come to the right place. This article explains how to fix File Explorer in Windows 11 if it keeps crashing.
Fix File Explorer Crash in Windows 11
Have you upgraded to Windows 11 but are still seeing File Explorer Errors? Here are some of the most effective ways to fix it.
Restart Windows Explorer: Explorer is missing
The very first thing you can try to do to fix this problem is to restart Windows Explorer. You can easily restart Windows Explorer using Task Manager. To do this, follow the steps given below:
- Press the key combination CTRL + ALT + DEL together, and then on the screen that opens, click “Task Manager”.
- On the Processes tab, find Windows Explorer and select it.
- Now click on the restart option , which you will find in the lower right corner of the Task Manager window.
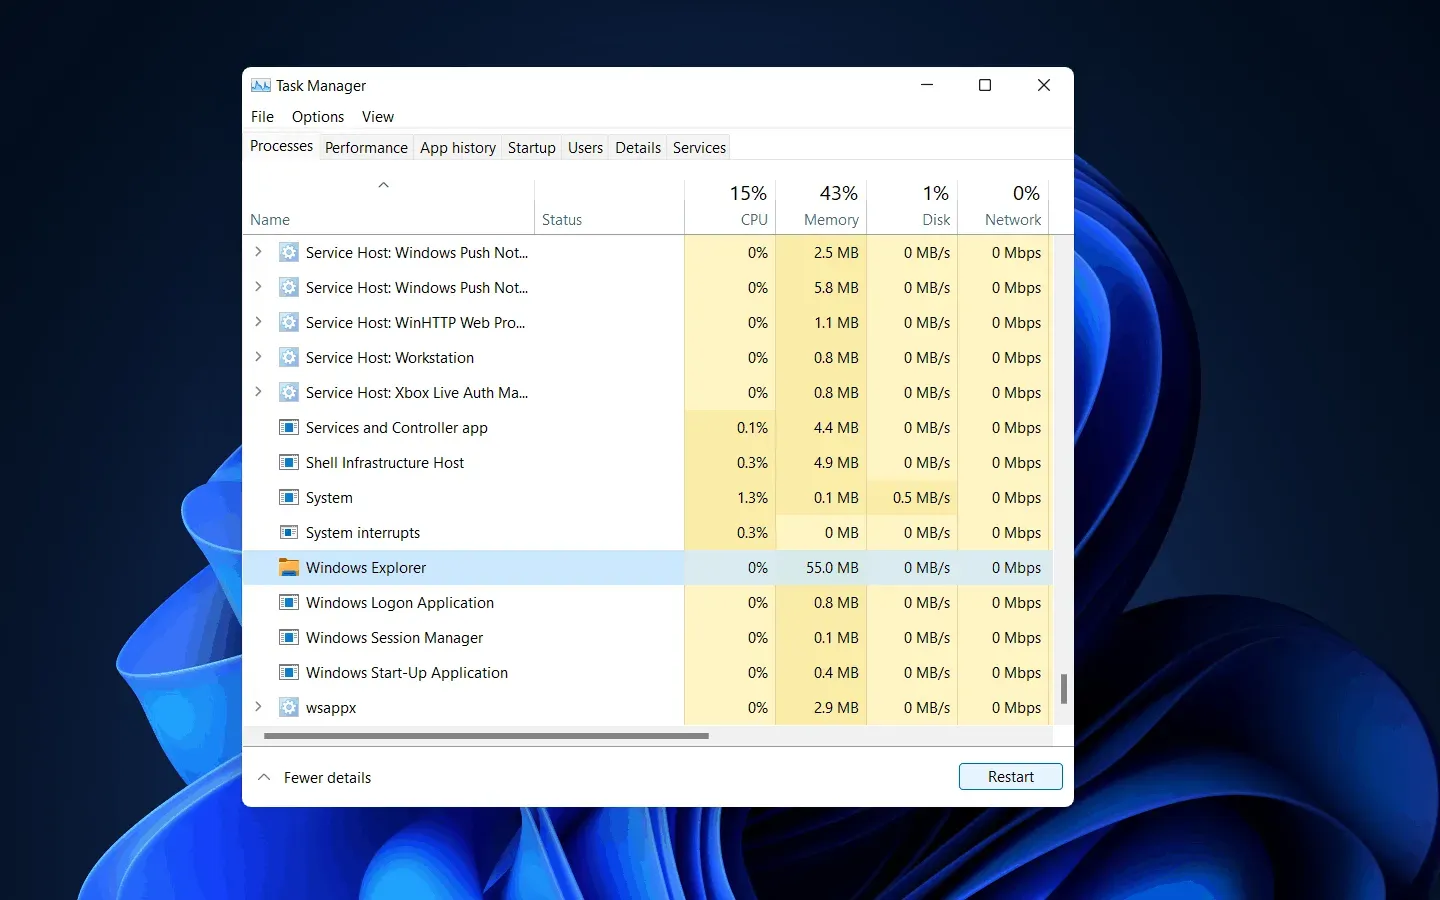
This will restart File Explorer and most likely fix the File Explorer crash issue.
Remove Antivirus: Suspend Mode Explorer.exe
If your File Explorer keeps crashing in Windows 11, it might be due to the antivirus or antivirus programs installed on your PC. Many times, an antivirus can mess up your file manager, causing it to crash.
Therefore, you can try disabling your antivirus or uninstalling it. If uninstalling the antivirus solved the problem, then you are probably facing the problem due to the antivirus. If the problem is still not solved, then the antivirus has nothing to do with it.
Change explorer options
The next thing you can try is to change your File Explorer options. Changing your File Explorer options can most likely fix the problem for you.
- Click the Start icon to open the Start menu , and then search for Control Panel and open it.
- Now go to the search bar in the control panel and look for “Explorer Options”.
- Open File Explorer Options. By default, you will be on the General tab in File Explorer Options.
- You’ll find a drop-down menu next to the “Open File Explorer in:” option . Select This PC from the drop-down menu.
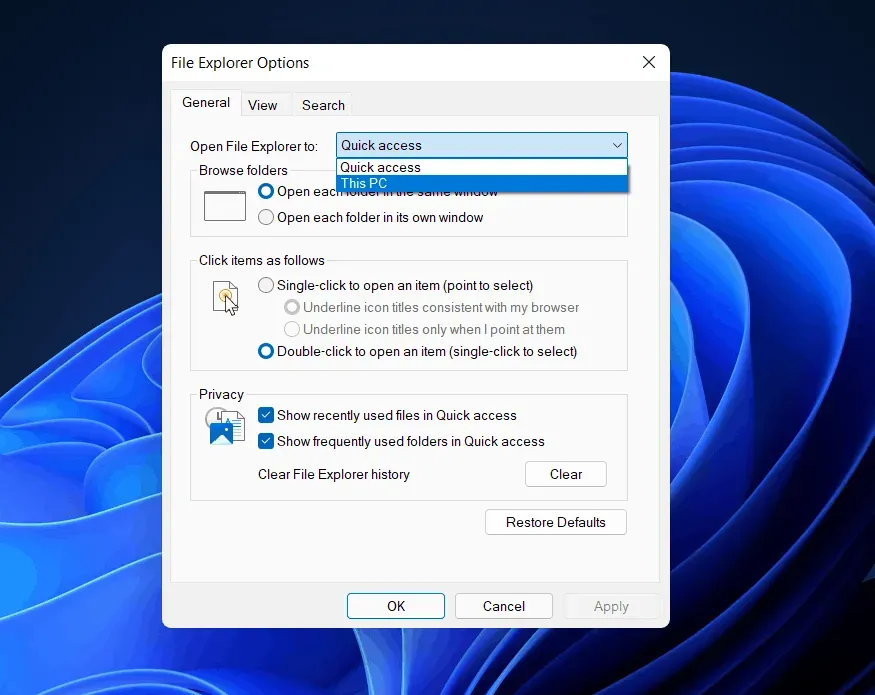
- Click Apply and then close the window and Control Panel and your issue will be resolved.
Clear explorer cache
Many times the cache accumulated by the file manager can also cause it to crash. Old cached data may contain corrupted files that need to be cleaned up. To clear the File Explorer cache, follow these steps:
- Open the Control Panel and search for File Explorer Options in the search bar in the Control Panel.
- Open “Explorer Options”.
- On the General tab , you will find the Clear option under the Privacy section . Click “Clear” to clear the cache and then click “OK”.
- Close the control panel and your explorer will no longer crash.
Run SFC Scan
SFC scans for any problem with your system and fixes it. This will look for any problems with your file, such as corrupted files that may be causing File Explorer to crash, and then fix them. If your File Explorer keeps crashing on Windows 11, then the next option for you might be to run an SFC scan.
- In the Start menu, find “Command Prompt”. Right-click Command Prompt and select “Run as administrator”. This will launch a command prompt as an administrator.
- At the command prompt, type sfc /scannow and press Enter.
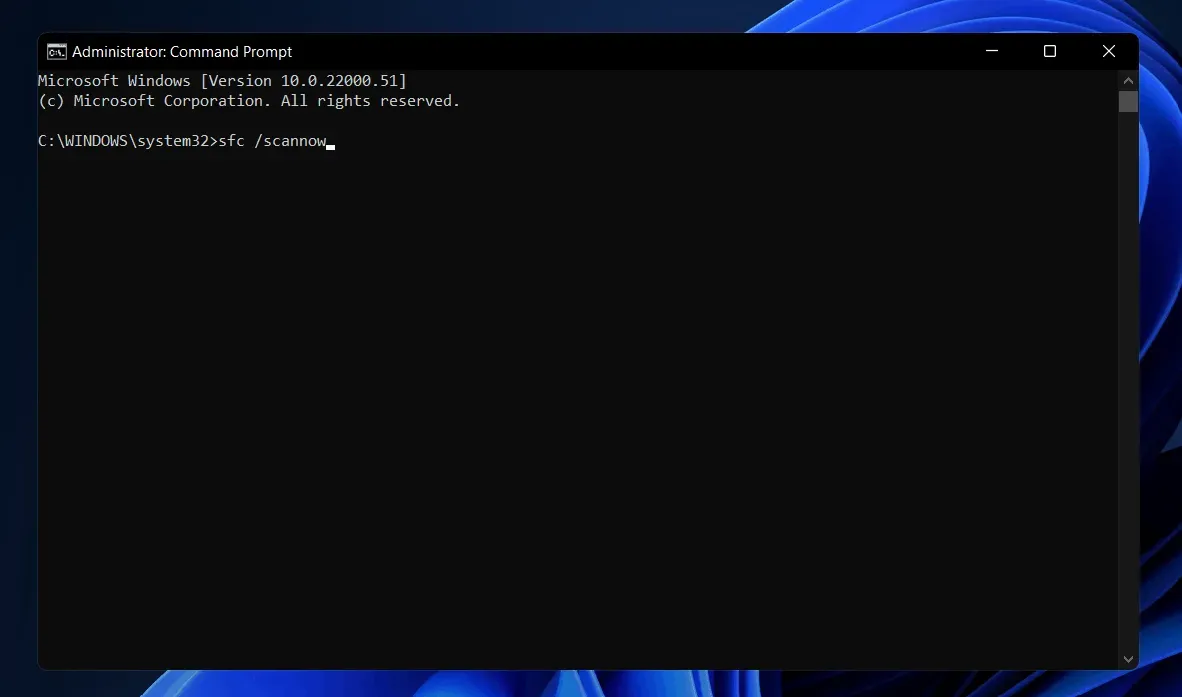
- The process will start. Wait for it to complete and then restart your computer.
This should most likely fix the issue for you.
Use Windows PowerShell
If the above method didn’t work for you, try using Windows PowerShell to resolve the issue. Follow the instructions below to use PowerShell to fix the issue.
- Right-click the Start icon , and then select Windows Terminal (Admin). This will launch Windows PowerShell as an administrator.
- In PowerShell, enter the Repair-WindowsImage -Online –RestoreHealth command and run it.
- Wait for the process to complete and then restart your computer. This will solve the problem.
- How to easily restore Windows 11
- How to disable automatic updates in Windows 11
Final words
These were some of the possible fixes you can try if your File Explorer keeps crashing on Windows 11. We hope these methods work for you and fix the issue you are experiencing.
Leave a Reply