How to Fix High CPU Usage by Killer Network Service
Killer Network Service or KNS runs in the background of your PC and is most commonly found on gaming laptops. This is not a Windows application and has several performance issues. This reduces the speed of the PC and also reduces the overall performance. Killer Network Service makes the gaming experience better. However, sometimes you may encounter issues with the Killer Network CPU service that can cause high CPU usage issues.
If you are experiencing high CPU usage due to Killer Network Service, you may experience issues such as PC lagging, constant frame rate drops while playing games, and the like. In this article, we will discuss how you can fix high CPU usage due to Killer network service.
Content:
Is Killer Network Service a virus?
As you know, Killer Network Service is a background service, not a virus. But many times the malware pretended to be KNS and accessed the location or path of every service on the computer, but the malware didn’t have the same location. If you want to check if the KNS service on your PC is malware or not, follow these steps:
- Open File Explorer on your PC by pressing the key combination Windows + E.
- Here follow the following path:
C:\programfiles\killernetworking\killercontrolcenter .
Note . The specified path will not work for users who do not have the Killer network service.
- Now right-click on the given executable for KNS and select Properties.
- Here, check if the path for Killer Network Service is the same as above or not.
- If it’s the same, then KNS is not a virus. However, if it is different, then it is malware.
Fix Killer Network Service High CPU Usage
So, below are the methods by which you can fix Killer Network Service high CPU usage issue.
Stop Killer Network Service
KNS handles many processes; these processes can sometimes be incompatible and can cause high CPU errors. Now, if you want to prevent KNS from using your CPU, follow these steps:
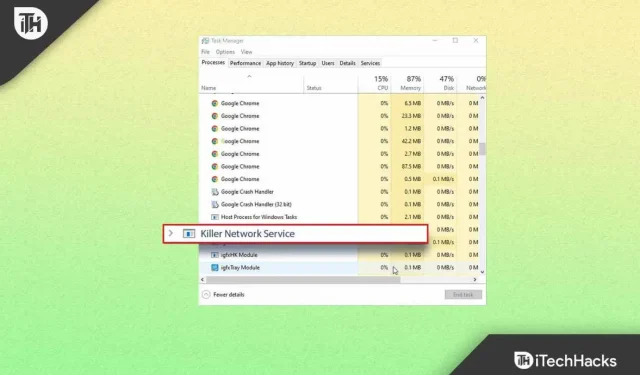
- Open the Start menu , search for Tools and press Enter.
- Scroll and find Killer Network Service there .
- Double-click KNS, and then click the Stop button to stop the service.
Run DISM
If you encounter this issue, try running DISM. To do this, follow the steps given below:
- Press the key combination Windows + S and search for CMD. Right-click Command Prompt and select Run as administrator from the pop-up menu.
- At the command prompt, type DISM.exe /Online/clean-image/Restorehealth and press Enter to start the operation.
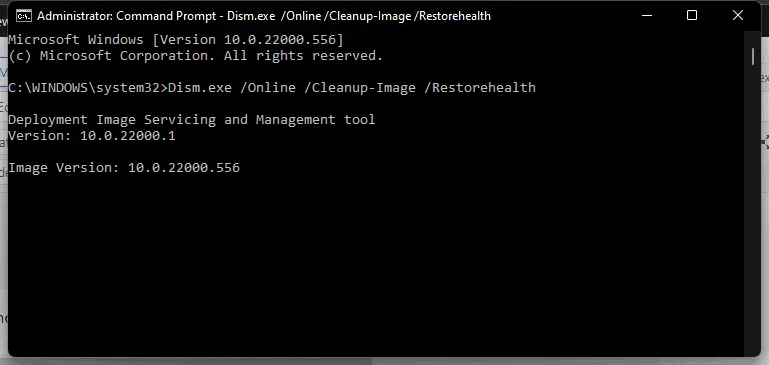
This command will restore your system automatically and you won’t lose important data during the process. So, here is how you can fix the high CPU usage issue in Killer Network Service. If that doesn’t work, you can try other methods.
Using Resource Monitor
The main function of the Resource Monitor command is to detect system problems. By using this command, you can fix various issues, even high CPU usage caused by KNS. To do this, follow the steps given below:
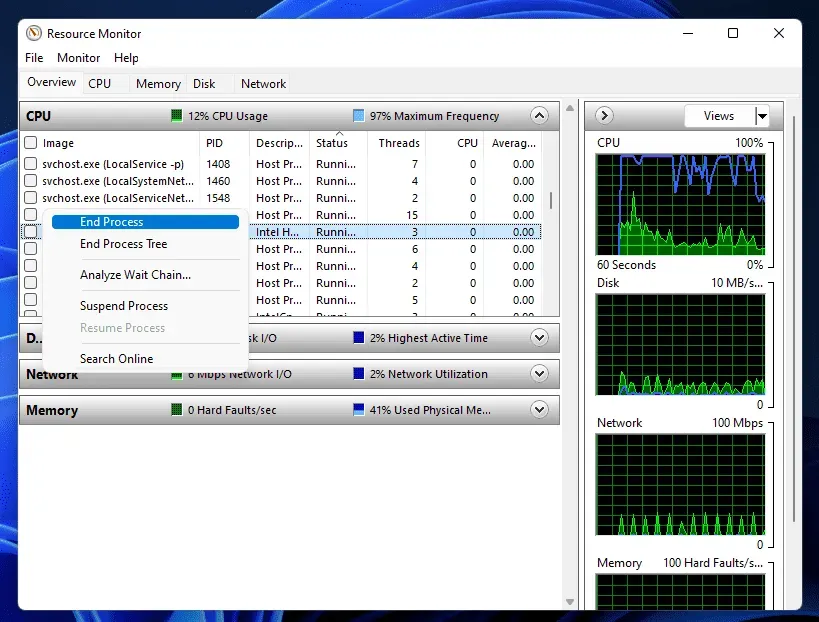
- Press the key combination Windows + R to open the Run dialog box .
- Now type resmon and click OK.

- In the Resource Monitor window , find Killer Network Service. Right-click it and choose End Process.
By uninstalling the Killer network service
Removing KNS is another way to fix high CPU usage. Since this service is not a Windows service, it has little to no effect on your processes. Follow the given steps to uninstall this service.
- Press the Windows key , find Control Panel and click the first option to open Control Panel.
- Now click Uninstall a Program under the Programs section .
- Click Killer Network Manager Suite and then click Uninstall. Follow the instructions on the screen to uninstall the program.
- Remove the Killer wireless network drivers in the same way .
Switch to high performance
Changing the power service can also help resolve the high CPU usage issue. Follow these steps to change the power settings.
- Open Control Panel on your PC.
- Now find” Power Options “here and click on it.
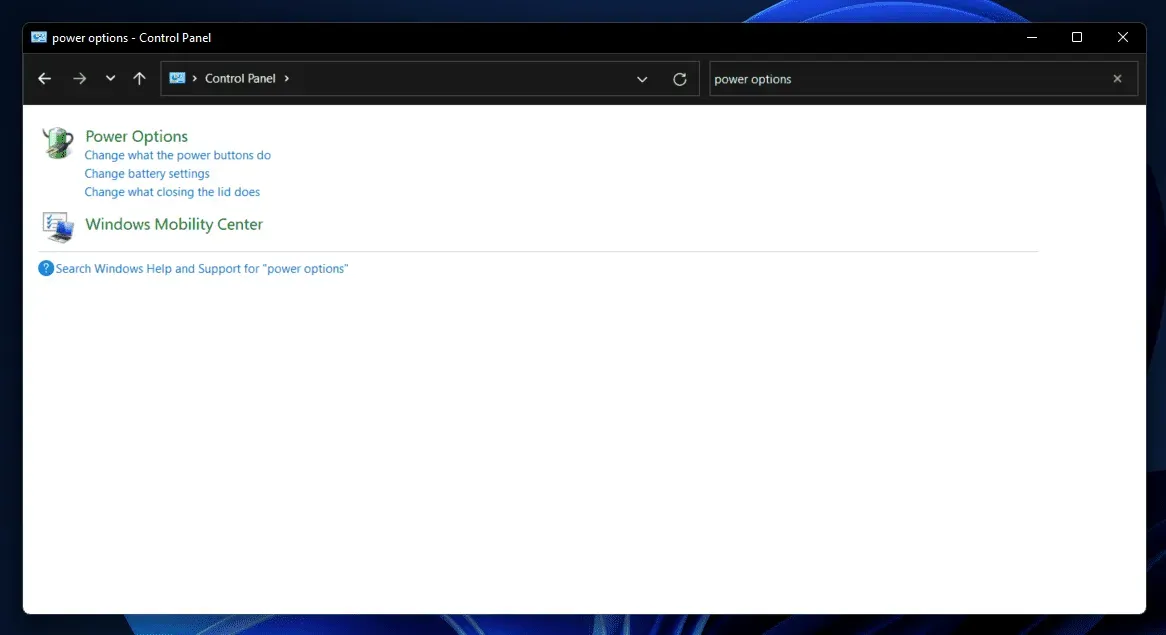
- Here, select High performance.
- This should most likely fix the issue you’re experiencing.
Reset/Reinstall Windows
If you are still facing the problem, you can try resetting Windows settings. Resetting your Windows PC will clear all settings and you shouldn’t face any issue once the process is complete. You can follow our guide to restart your Windows PC. You can either reinstall Windows or reset it.
Conclusion
In this article, we discussed the Killer Network Service and provided steps to troubleshoot high CPU usage. Chances are these troubleshooting steps should resolve the issue. If none of these work, resetting Windows 11 to factory settings will surely help.
Leave a Reply