How to change the virtual memory size of Windows 11
Virtual memory is a critical component that allows you to remove and save less frequently used modified pages from RAM to your hard drive. Your computer will prioritize RAM for the processes you use most when this feature is enabled. This will help your computer run faster. If you use this option, your system will run out of memory. Resizing virtual memory in Windows 11 is easy and you can do it quickly. This article will help you change the virtual memory size in Windows 11.
Content:
- 1 What is virtual memory in Windows 11?
- 2. Change the virtual size using the system properties.
- 3 Change the virtual size using advanced system settings.
- 4 Change the virtual size in the “About”section
- 5 Change virtual memory size in Windows 11
- 6 Virtual RAM Windows 11
- 7 final words
What is virtual memory in Windows 11?
Currently, Android smartphones have a new feature called “Memory expansion”up to 2 GB. Windows is a modern operating system and over the years they have been tweaking the software to reduce the pressure on resources. Windows uses RAM to load program files, explorer files, and other temporary data.
In most cases, you don’t need to tamper with the setup because Windows manages it by default, mindful of the hardware. The software will calculate the raw power of RAM, storage and CPU in order to remove excess files in virtual memory.
This feature is called “Page Feeding”which Windows uses to move program files to the hard drive to take the load off the RAM. You can increase virtual memory from 4GB to 8GB, and it’s worth it if Windows can’t handle this feature efficiently.
Keep in mind that Windows puts stress on the hard drive, and if your machine has a slower mechanical drive, I don’t recommend increasing the virtual memory size. Consider upgrading the RAM and switching to SDD because these two components will unlock the true potential of the machine’s hardware. Yes, an SSD and physical RAM will make your machine run smoother than before, so consider upgrading your internals.
Let’s discuss how you can change the virtual memory size in Windows 11.
Change virtual size using system properties
Microsoft did not abandon the traditional interface, this is how we are going to set the size of virtual memory. You need administrator rights to make changes to the system, so switch to an administrator account.
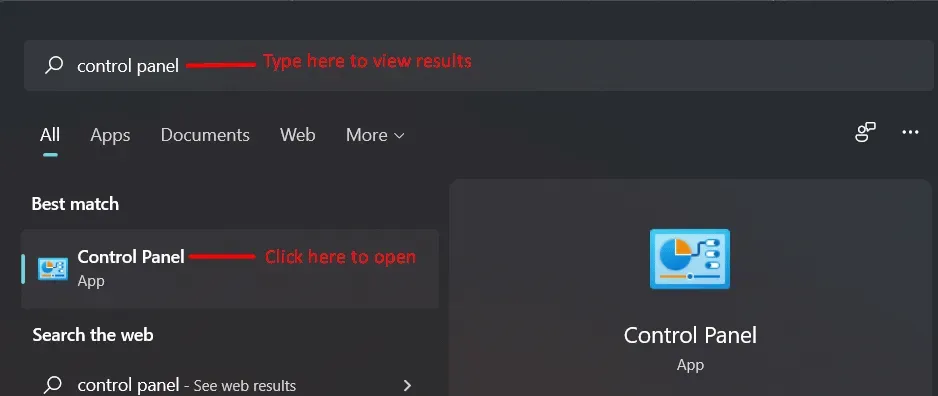
- Click on the Windows icon to get started.

- Type “Control Panel”in the search bar and then press “Enter”on your keyboard.
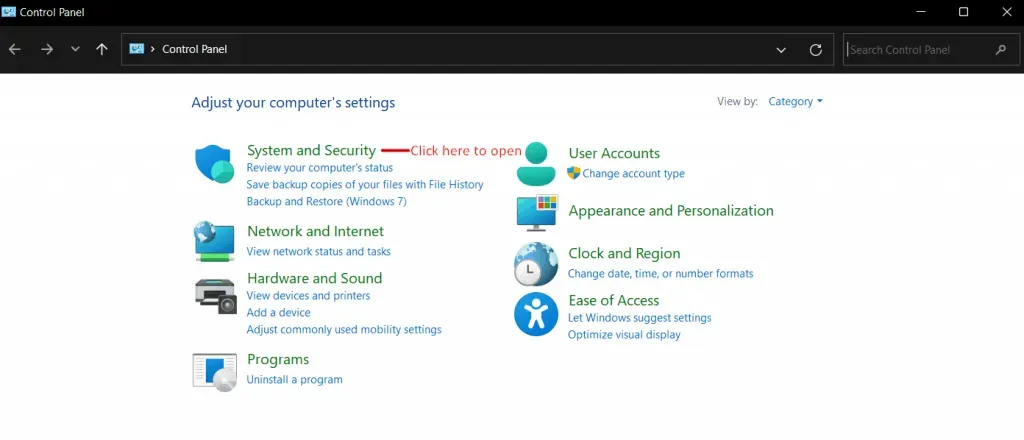
- Click “System and Security”to view the new interface.
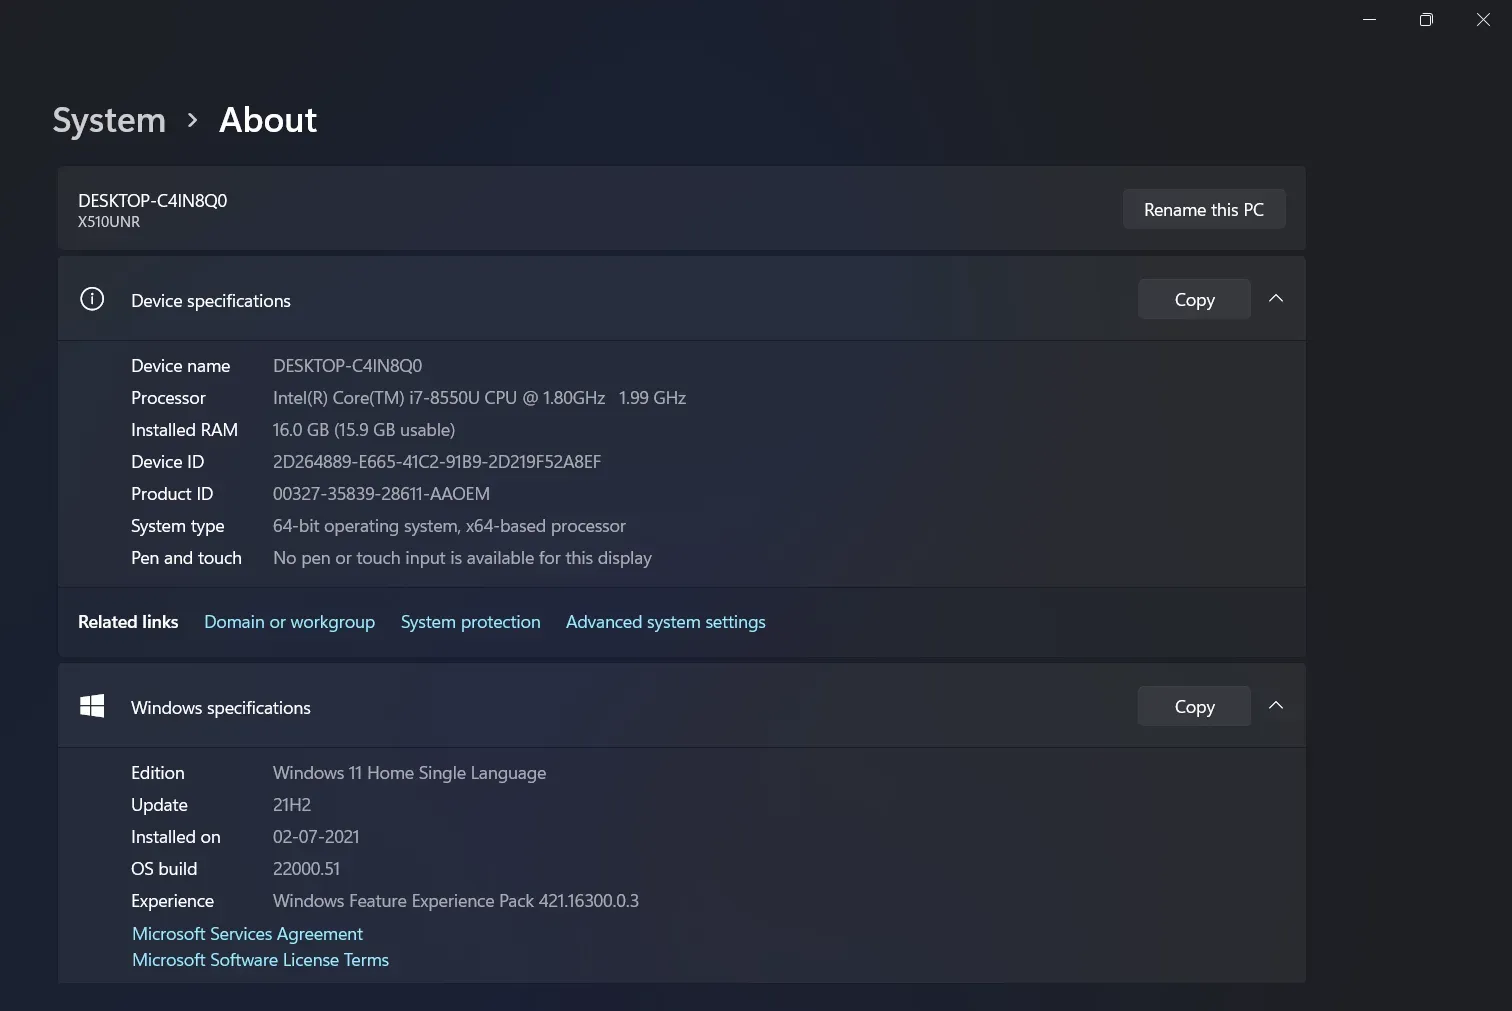
- Click “View RAM and Processor Speed”available under the “System”option.
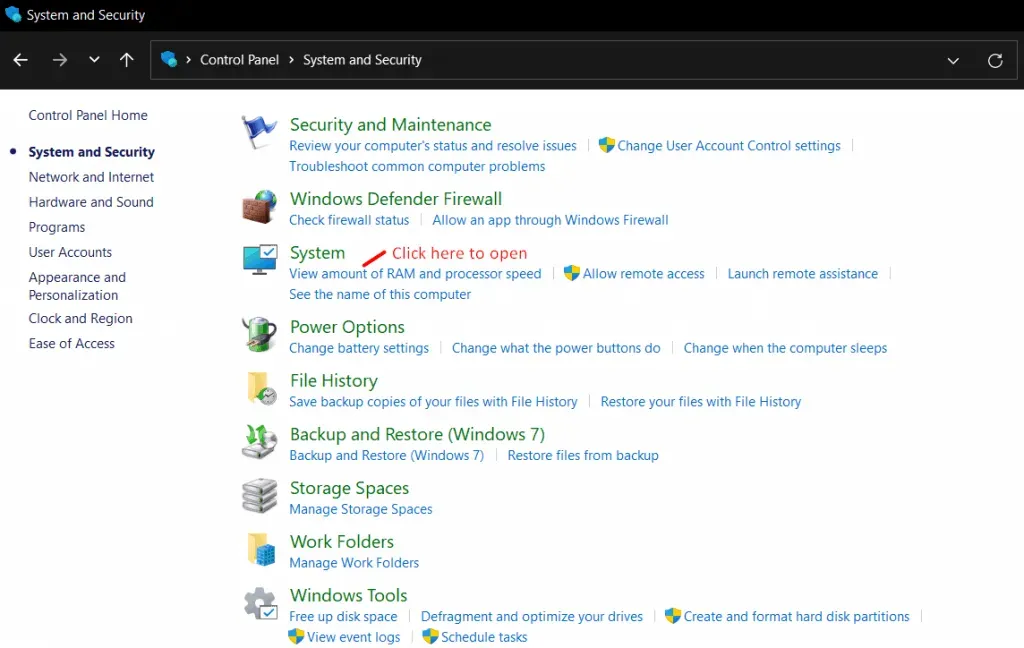
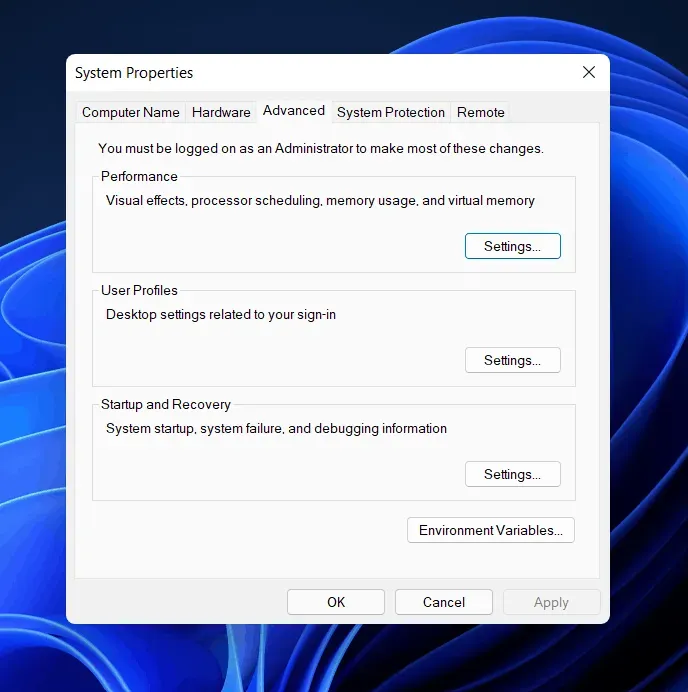
- Click “Advanced system settings”available under “Related Links”.

- Click on the “Settings”option available under the “Advanced”section.
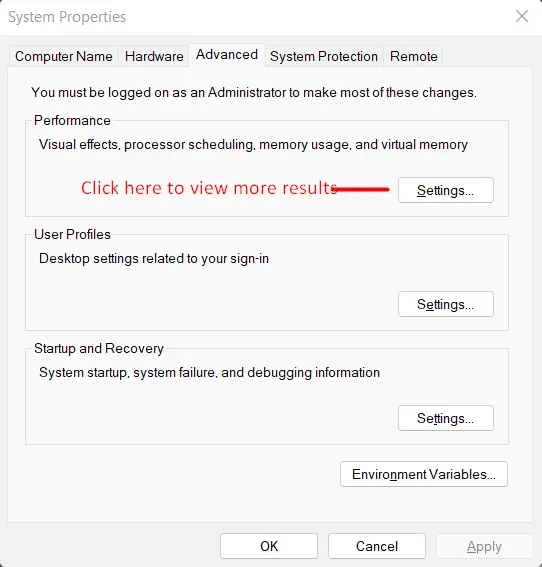
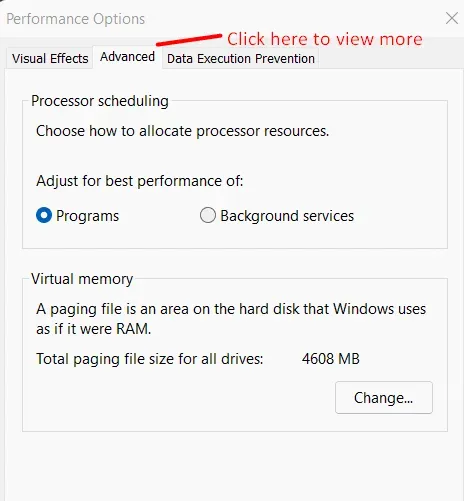
- Click on the “More”option to view more.

- Click Edit.
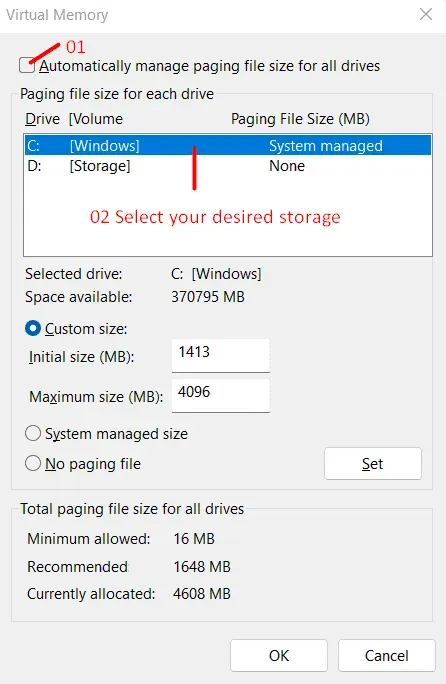
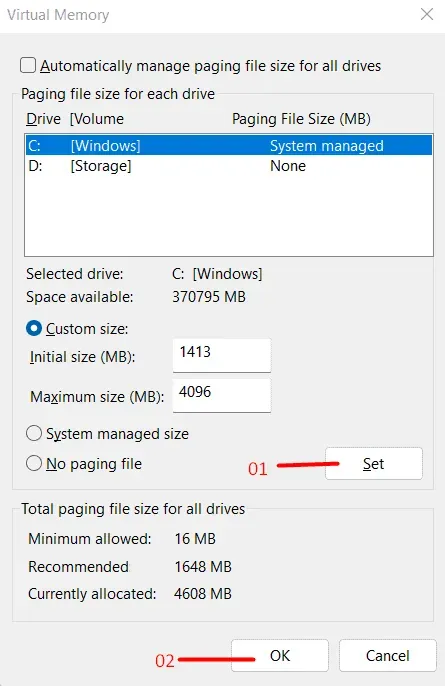
- Uncheck “Automatically manage paging file size for all devices”, then select the drive or partition.
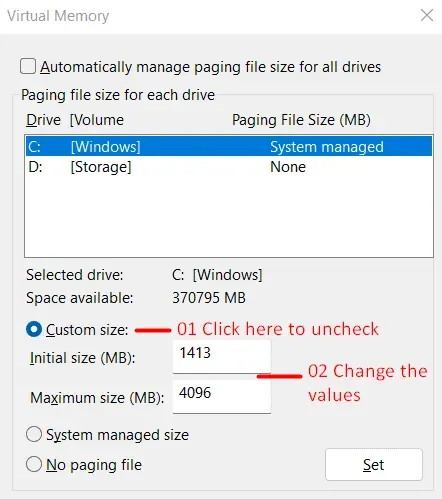
- Select “custom size”, then change the values as required.
- Press “SET”, then press “OK”.

Restart your computer to apply the changes.
Let me show you the calculation so you can figure out the ideal amount of memory for storing pages.
- 1 GB = 1024 MB
- 2 GB = 2048 MB
- 3 GB = 3072 MB
- 4 GB = 4096 MB
Change the maximum size to whatever you want, like 4096MB, but don’t forget to consider upgrading your SSD and RAM.
Change the virtual size using advanced system options
Let me show you another way to increase the virtual size more easily.
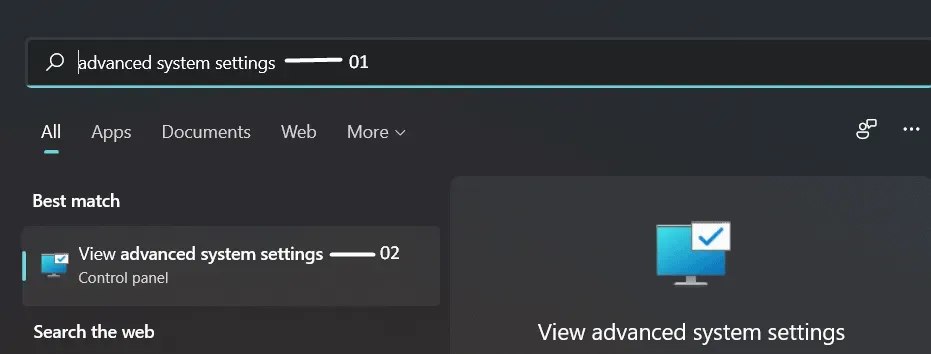
- Click on the Windows icon to get started.

- Type “Advanced system settings”in the search bar, then press the “Enter”key.
- Click on the “Settings”option under the “Advanced”section.

- Select the “More”option to see more.

- Click Edit.

- Uncheck “Automatically manage paging file size for all devices”, then select the drive or partition.

- Click Custom Size, then change the values as required.

- Press “SET”, then press “OK”.
Restart your computer to apply the changes.
Change the virtual size in the “About”section
New Windows users may have trouble accessing the Control Panel and Search options. Microsoft is moving the main tools to Settings, and you may no longer find this option in the Control Panel. Let me show you how you can access advanced options in the settings window.
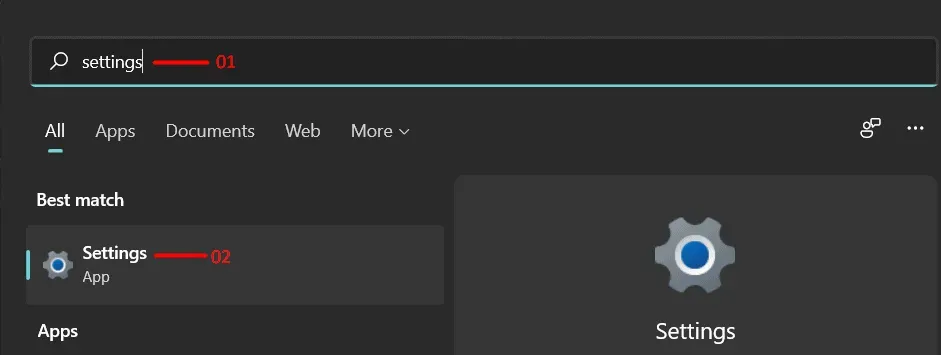
- Click on the Windows icon to get started.

- Type “Settings”in the search bar, then press “Enter”on your keyboard.
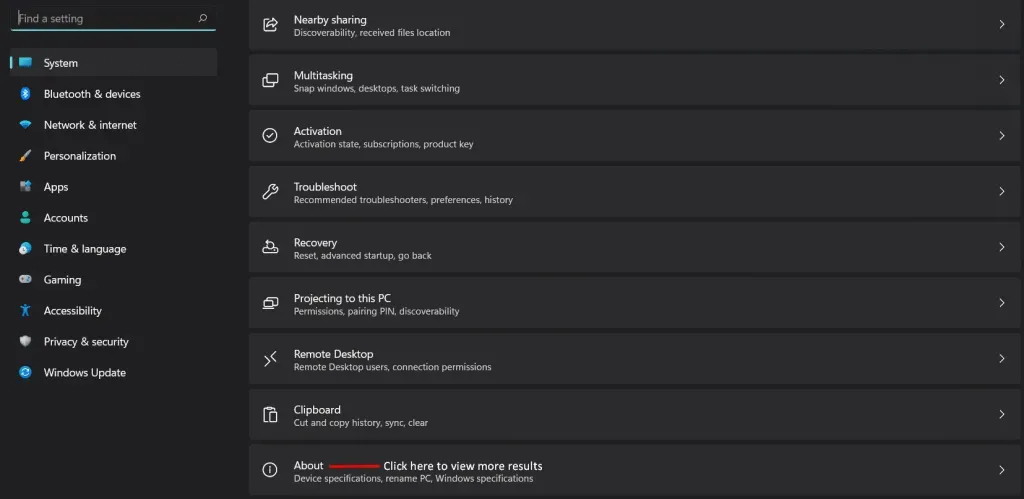
- Scroll down and click on the “About”option available under the “Section”section.
- Click “Advanced system settings”available under “Related Links”.

- Click on the “Settings”option available under the “Advanced”section.

- Click on the “Extras”option to view more
- Click Edit.

- Uncheck “Automatically manage paging file size for all devices”, then select the desired storage.

- Click Custom Size, then change the values as required.

- Press “SET”, then press “OK”.

Restart your computer to apply the changes.
Change virtual memory size in Windows 11
Since we’ve already discussed how important virtual memory can be, let’s discuss how you can resize it. Following are the steps to help you change virtual memory size in Windows 11.
- Open your PC settings . You can do this by searching for Settings in the Start Menu , and then opening it, or you can press the Windows + I combination to open Settings.
- Make sure you are in the system settings section. Open the system partition on the left sidebar if you’re not already there.
- Now under the System section, click on About and then click on Advanced system settings. This will take you to the advanced tab in system properties.
- Click on settings under performance. This will open performance options.
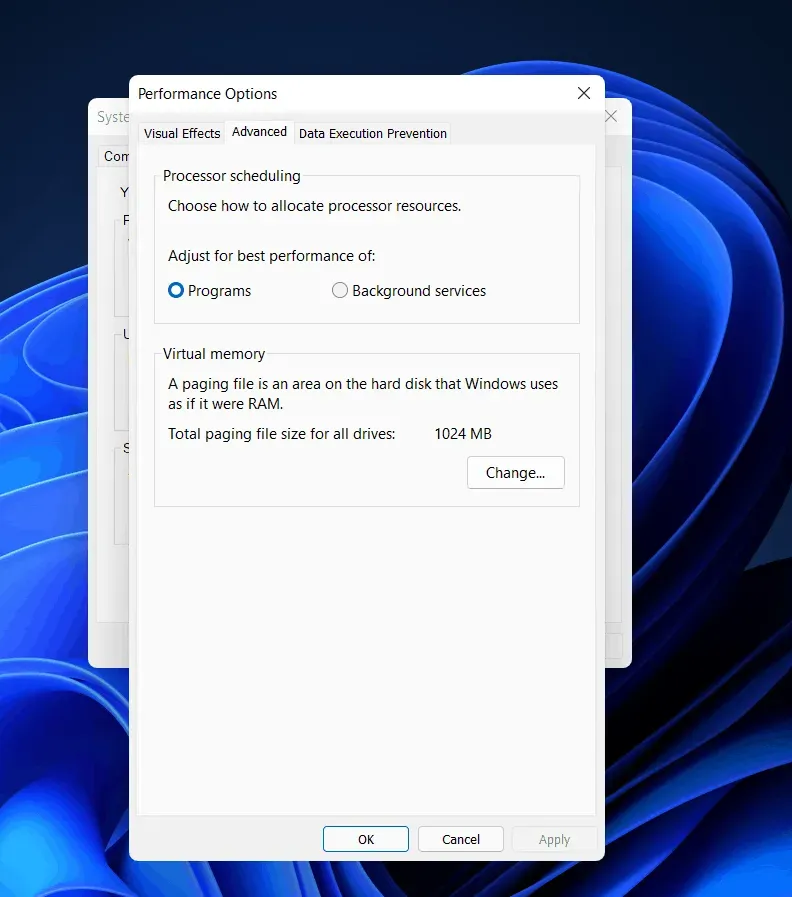
- Now go to the “Advanced”tab in the performance options .
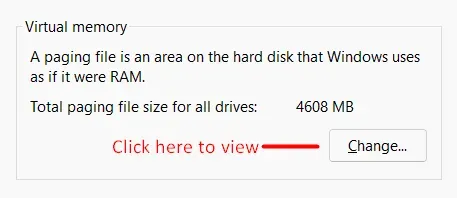
- This is where the virtual memory section resides. In the Virtual Memory section, select the Change option.
- By default, the “Automatically manage paging file size for all drives”option will be selected. Clear the checkbox.
- Now select the partition and then select the custom size option .
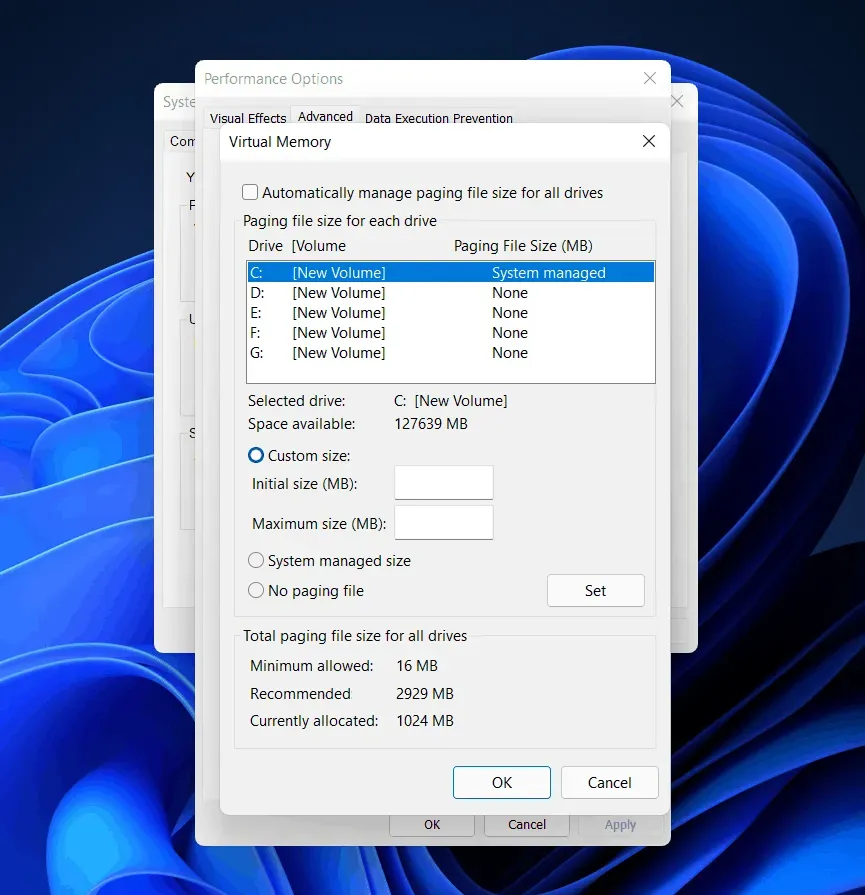
- Now specify the initial size as well as the maximum size in MB. After that, click Install. Click OK to close the window.
- After that, reboot your system for the changes to take effect.
The virtual memory size is unique across devices and cannot be generalized. You need to use one and a half times the total memory available for the initial size. Whereas, for the maximum size , you need to use three times the amount of memory available to it.
After that, the performance of your PC will increase. This will allow the RAM to store the apps you work on frequently, while keeping the less used apps in virtual memory.
Virtual RAM Windows 11
What’s more, you can undo the changes anytime you want. All you have to do is follow the above steps again and “tick”to automatically manage the swap file size for all drives you didn’t previously install, then reboot your device.
Even if you have a lot of system memory, it is not recommended to disable virtual memory in Windows 11. When you disable the swap file, some applications may stop working, some system functions may not work properly, and you may see strange behavior.
Final words
This completes the method of increasing the size of virtual memory in Windows 11. If your PC performance is slow, you can change the virtual memory size in Windows 11. This will surely help improve your PC performance.
Leave a Reply