How to change system language settings in Windows 11
Users can change the system language in Windows 11. You are allowed to add multiple language keyboards, language packs, and regional layouts to the system. However, there are a few things you need to know about this and it is related to your product key. Don’t skip a single detail of the guide, and I’ve only touched on the important points.
Content:
What is the language change shortcut in Windows?
Microsoft designed the user interface for beginners so you don’t have to rack your brains during setup. I showed you how to change the system language in Windows 11 Pro and Windows 11 Home Single Language.
Users can set the language permanently in their Microsoft account and you can manage the settings. The latest version of Windows 11 requires an MS account and is now part of the ecosystem. Follow the instructions and be sure to read each step to the end.
Change system language in Windows 11
You don’t need an activated copy of Windows, and the free version works flawlessly. My desktop is running the free version and I haven’t tried to register a product key. Follow my example to change the system language in the latest Microsoft operating system.
OS: Windows 11 Pro
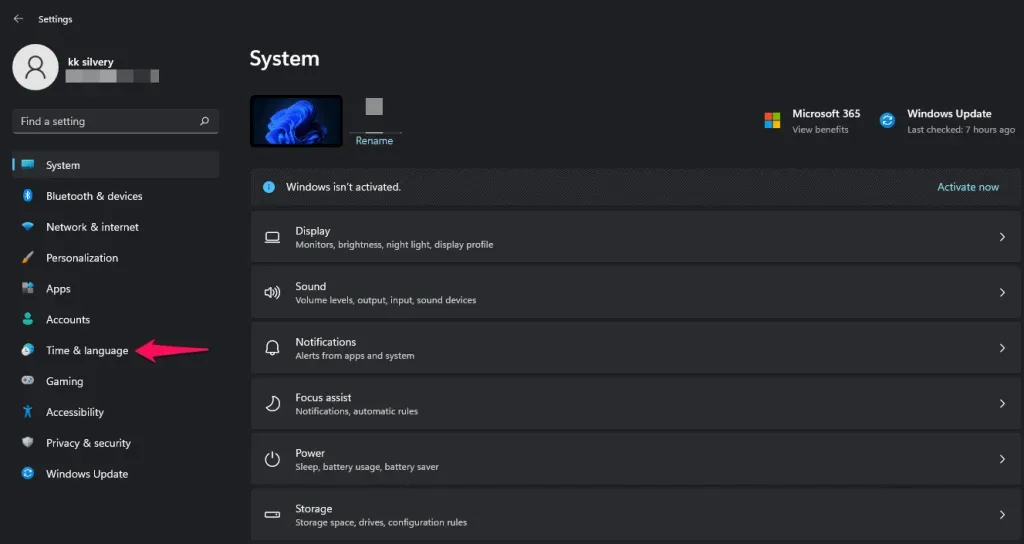
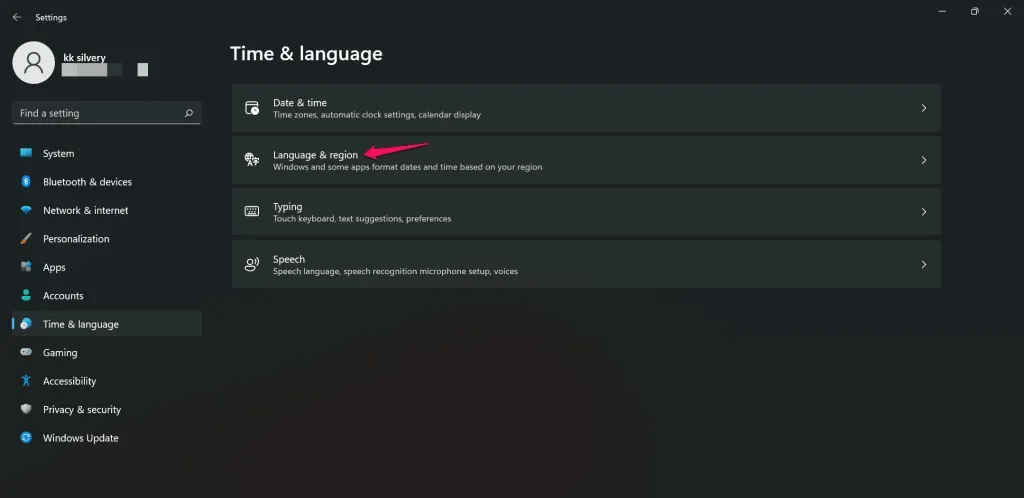
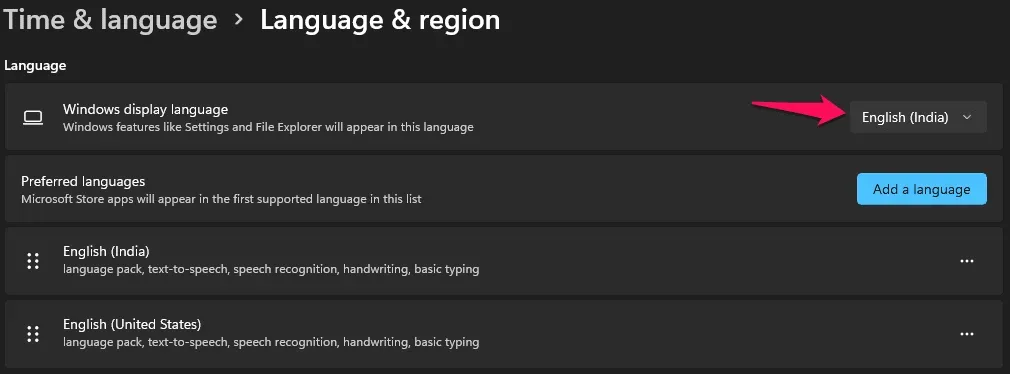
Step 1: Press the Windows key and I to open the Settings app.
Step 2: Click “Time & Language”on the main menu.
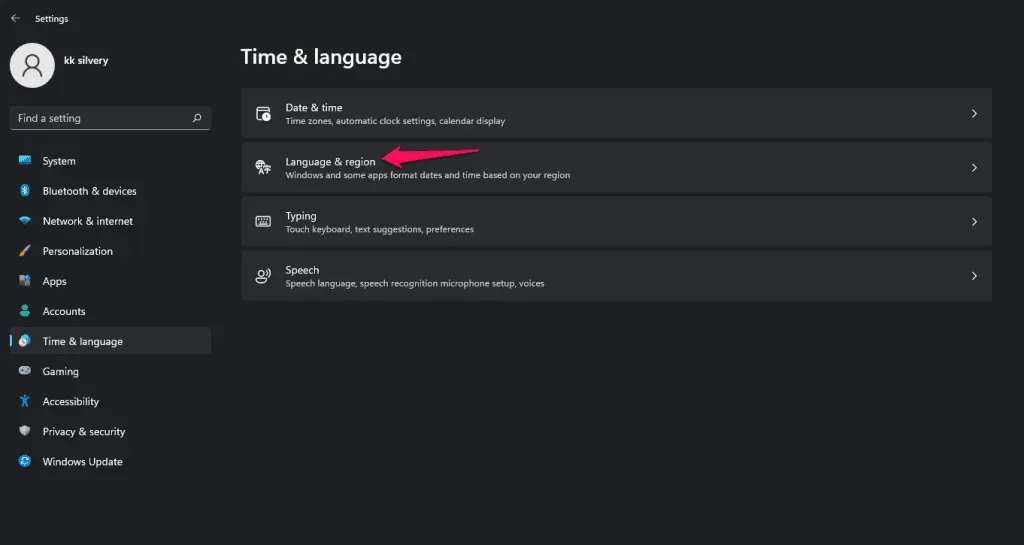
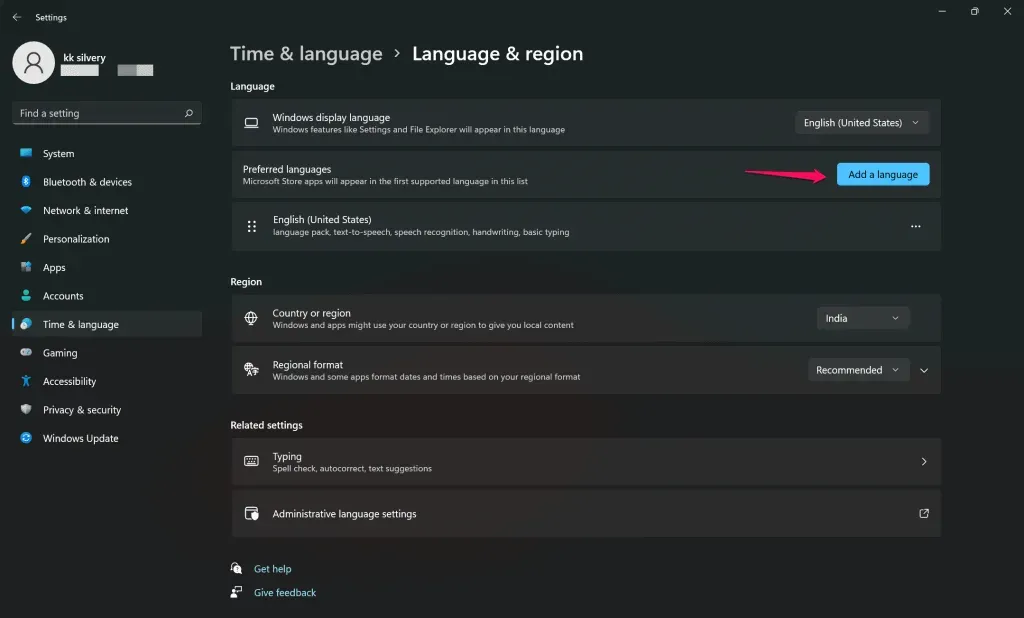
Step 3: Select “Language and Region”to open more options.
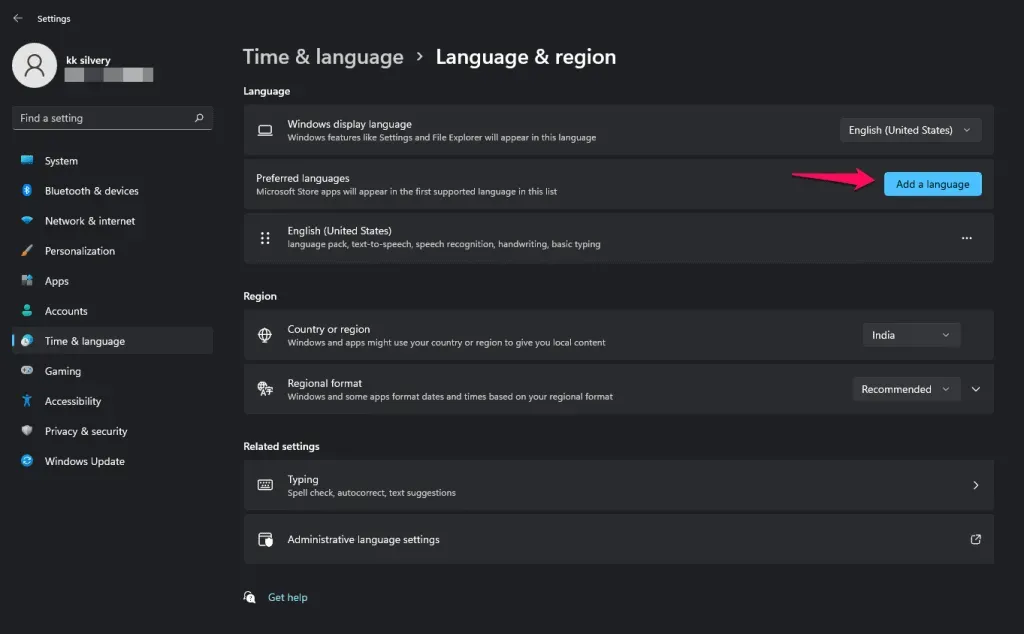
Step 4: Click Add Language.
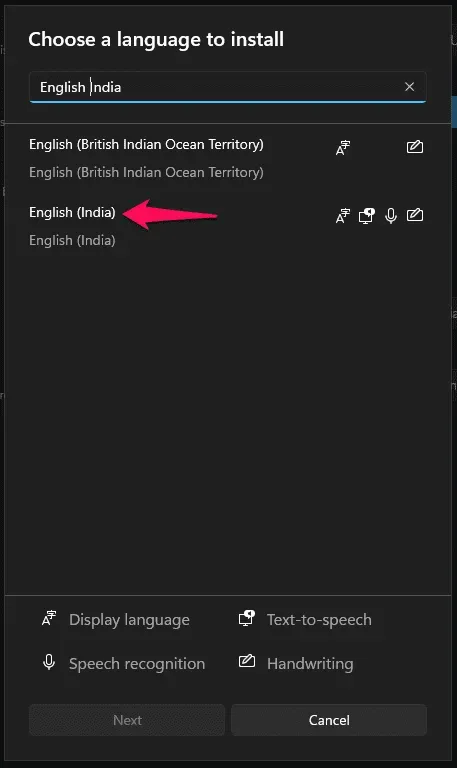
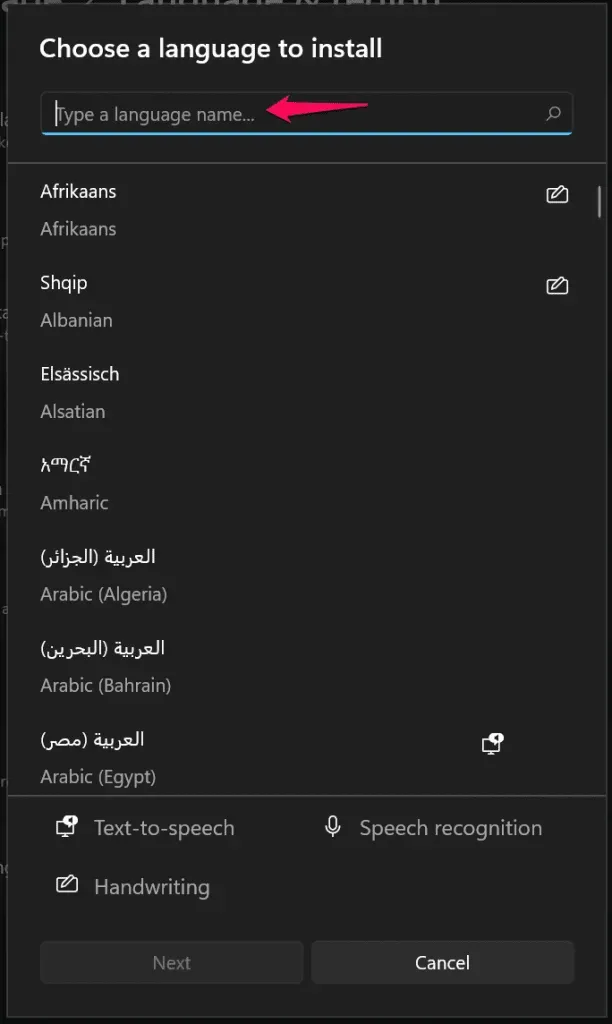
Step 5: Search for the desired language in the search bar.
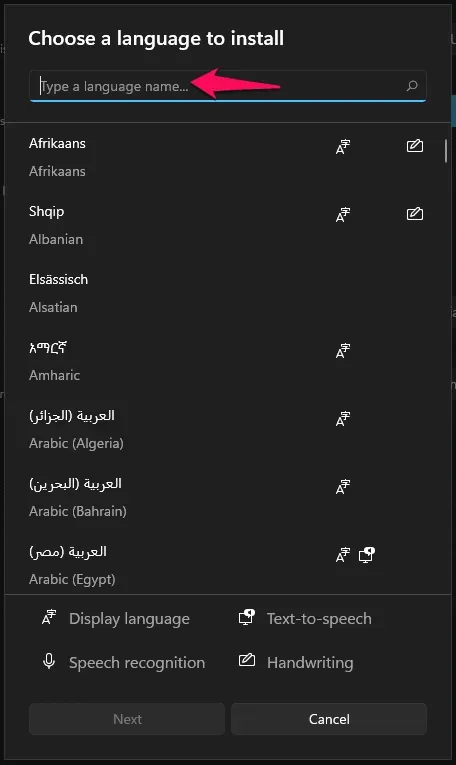
Step 6: I was looking for English (India).
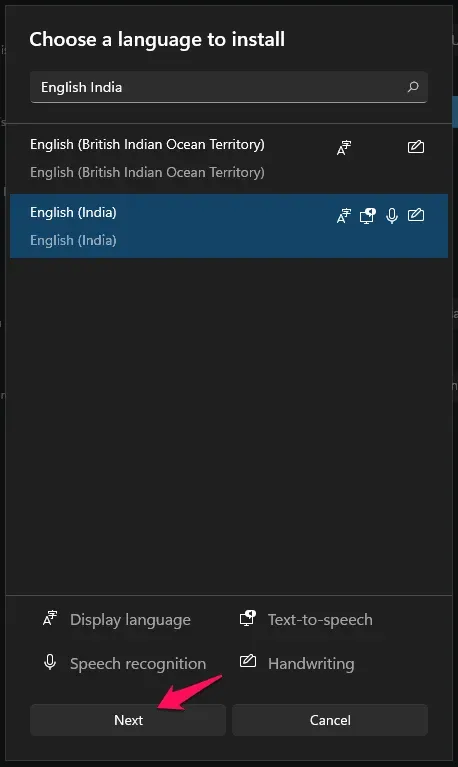
Step 7: Click to select a package, then click “Next”to continue.
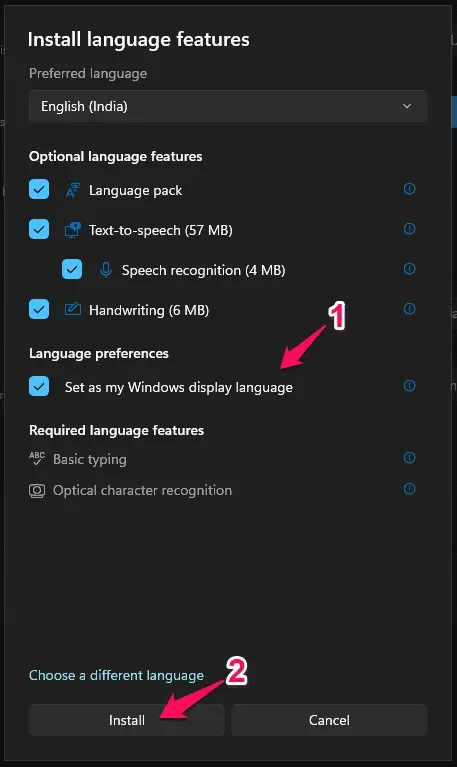
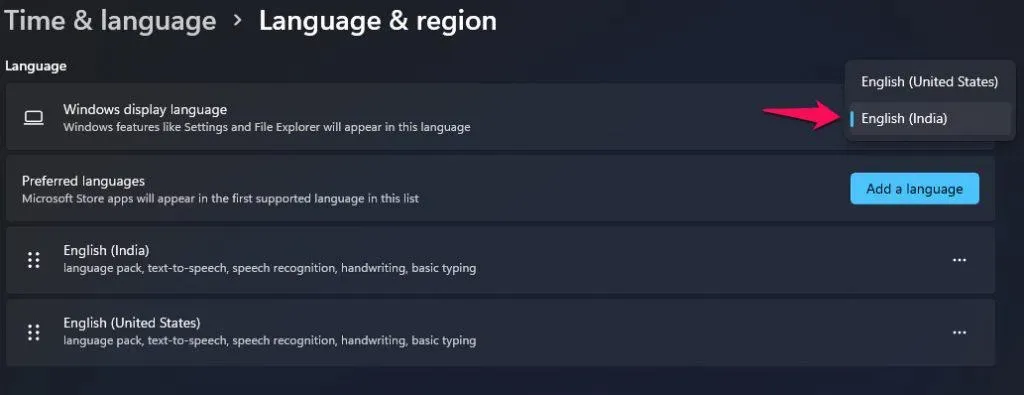
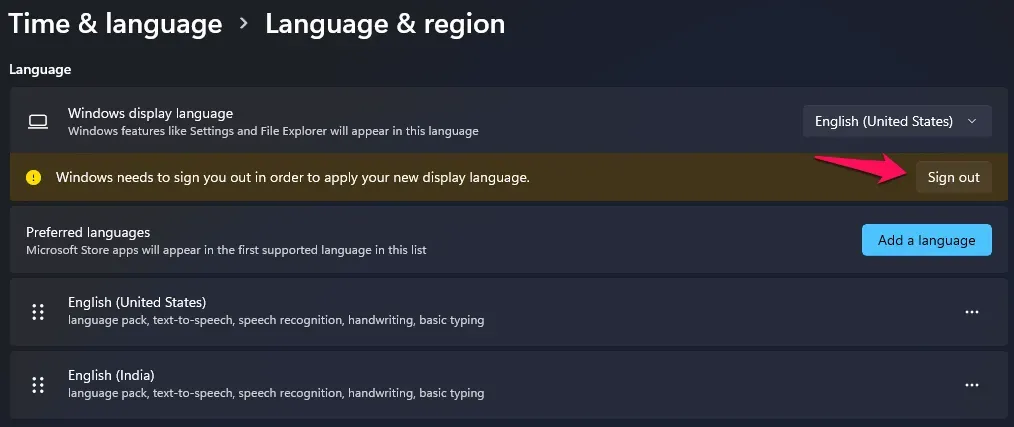
Step 8: Select the “Set as Windows display language”option.
Step 9: The software starts downloading the package from the Microsoft servers.
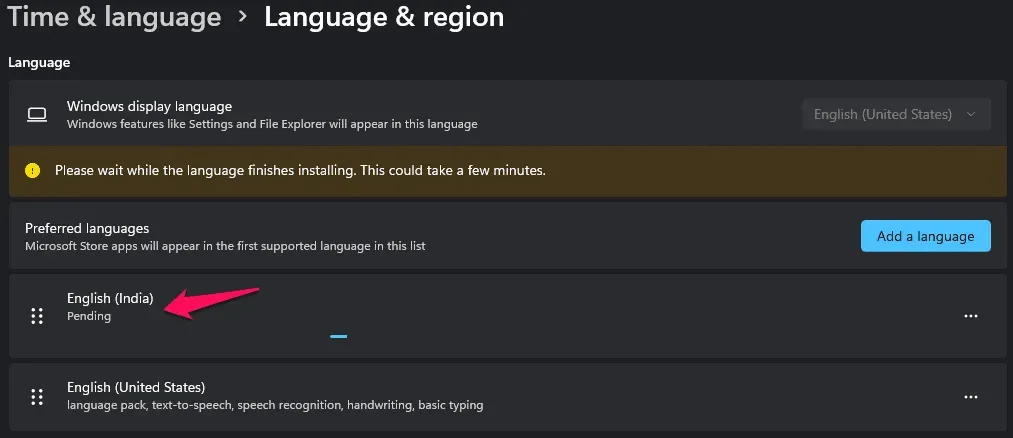
You have to wait patiently and internet download speed matters here.
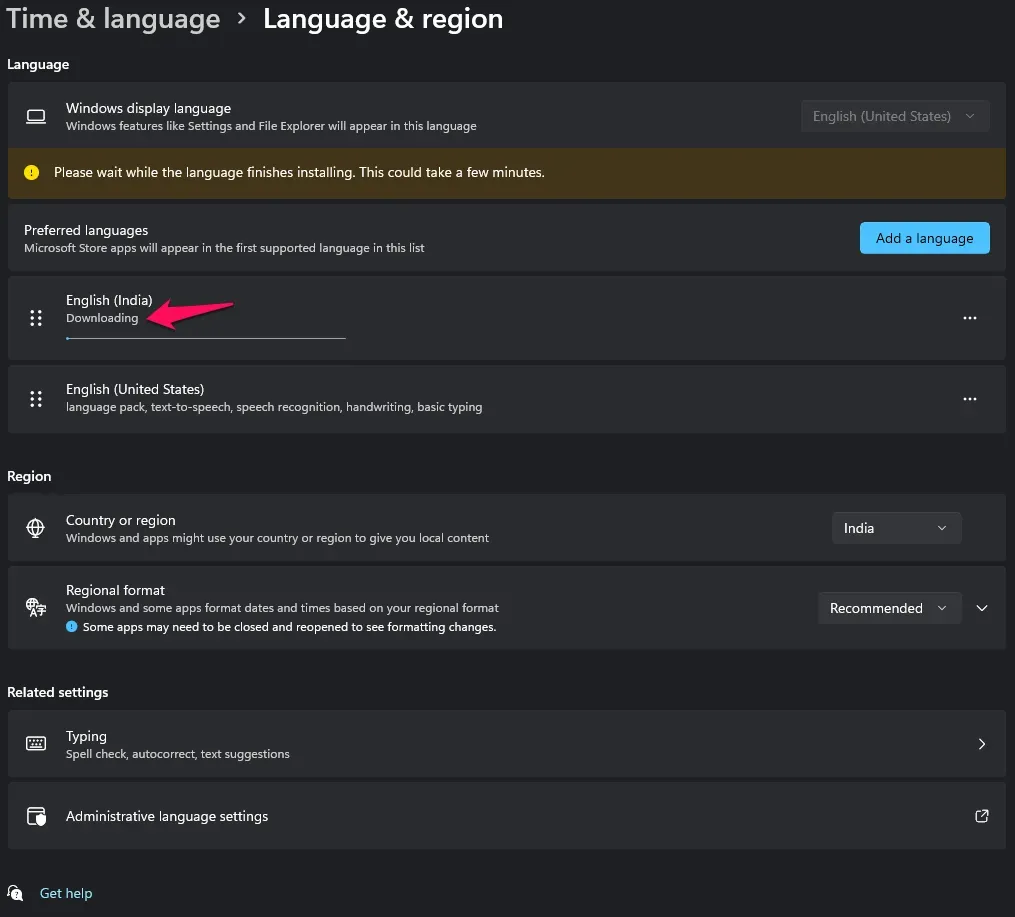
Step 10: The system has started downloading the language pack.
Step 11: Click “Exit”when the package is saved on the machine.
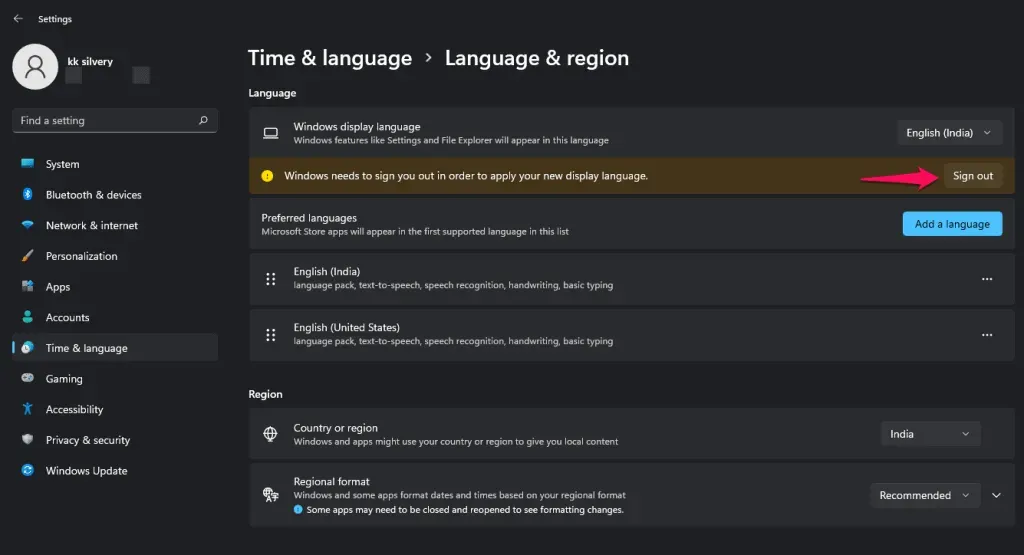
Step 12: Log in and go back to the settings I showed above.
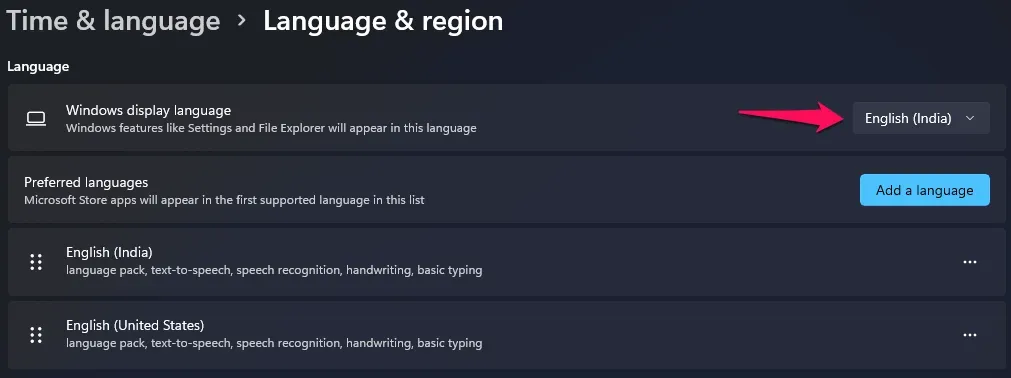
Step 13: Changed the Windows interface language to English (India).
The whole process takes a couple of minutes and part of downloading the package depends on your internet speed. You have no restrictions in the language department and can install any package available in the library. Of course, I have Windows Pro (non-activated version) and I showed you how to install a language pack on a single language (OEM) machine.
Change system language in Windows 11 Home Single Language?
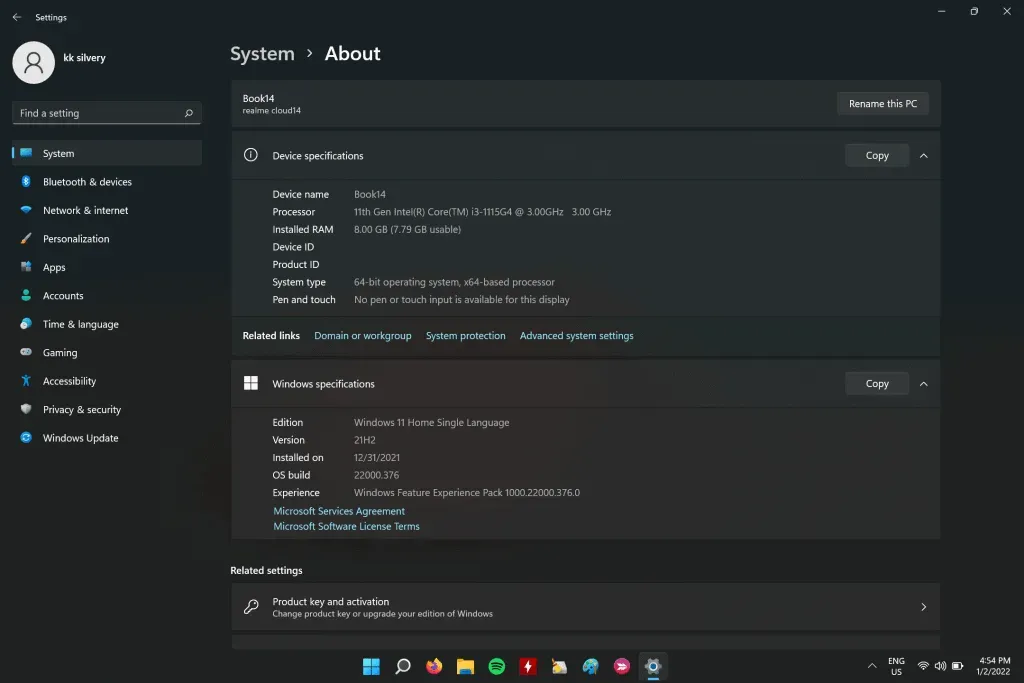
My Windows 11 laptop has a home version and it is a single language version. It’s scary to have an operating system that falls under the category and we don’t know what limitations it has in software. This is an OEM product key that was activated immediately after purchase, so I’m sure you’re in the same boat.
OS: Software upgraded from Windows 10 Home Single Language to Windows 11 Home Single Language.
- Press the Windows key and I to open the Settings app.
- Tap “Time & Language”from the main menu.
- Select “Language and Region”to open more options.
- Click on the “Add Language”option.
- Find your desired language in the search bar.
- This time I was looking for my native language Hindi.
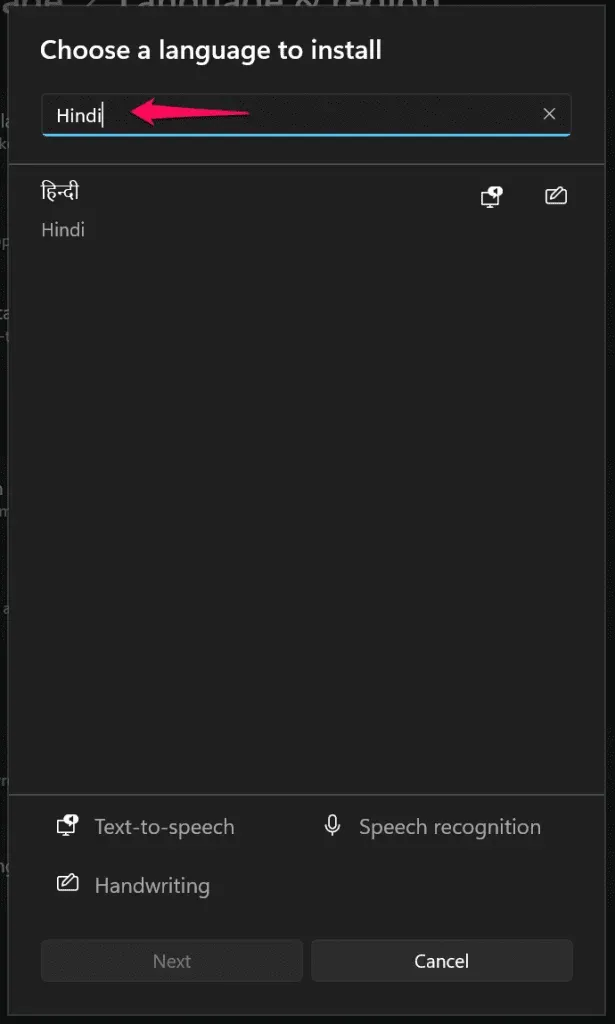
- Select a language and click the “Next”button to continue.
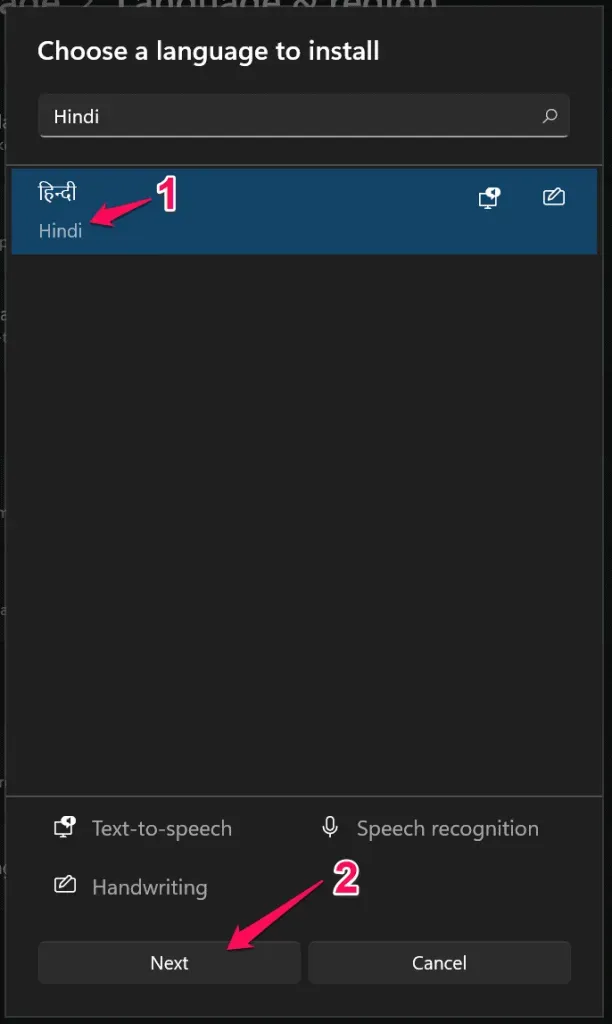
- Select the “Set as my Windows display language”option.
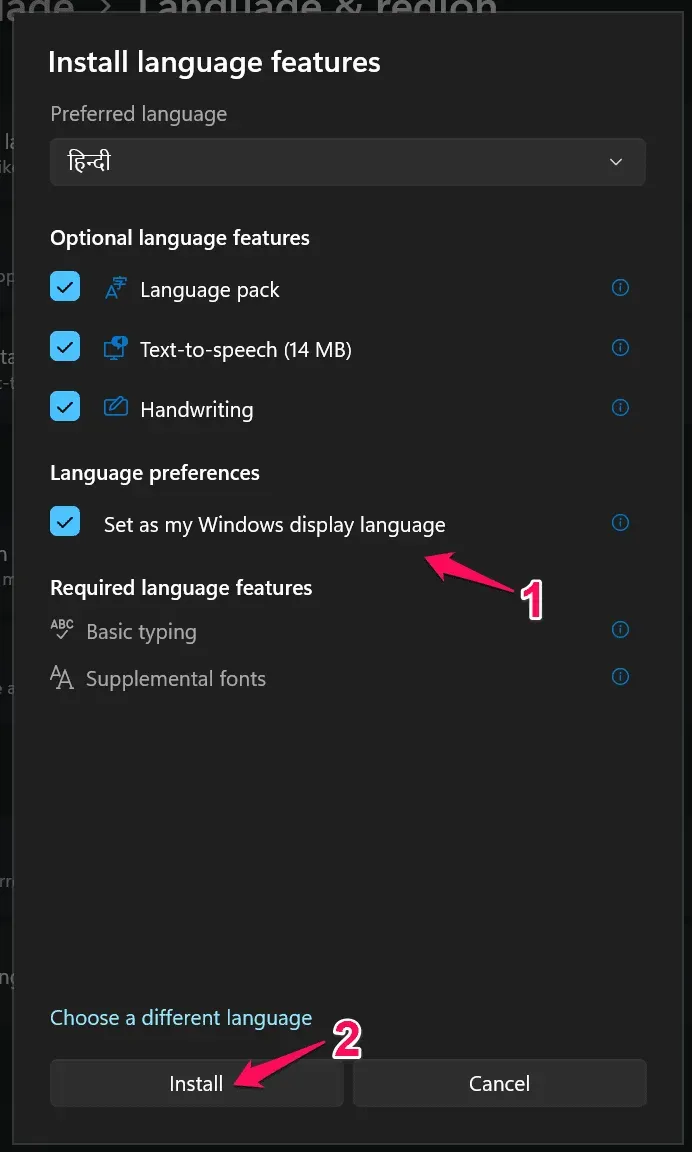
The operating system did not load the package because the language was stored in the laptop from the start.
- Regional languages are stored in the software so you do not need to download them over the Internet.
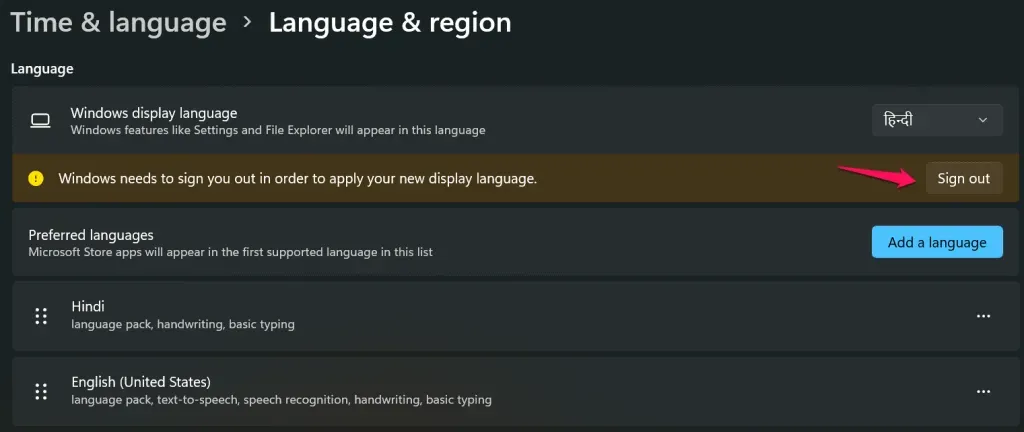
- Click on the Sign Out option.
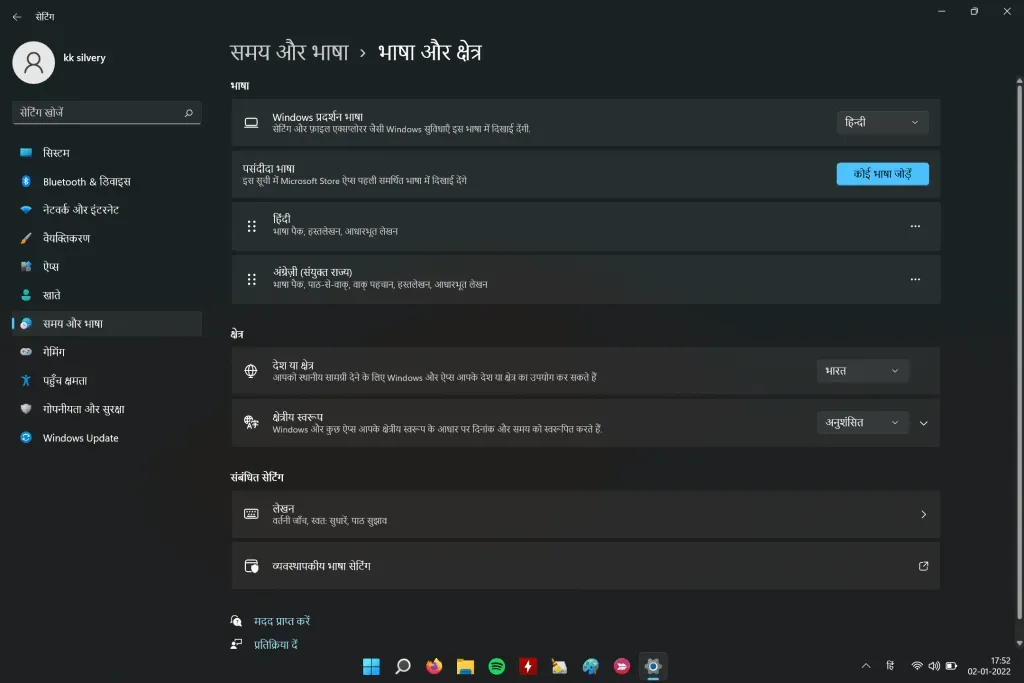
- Windows has switched to Hindi regional language.
Luckily, you don’t have to worry about the limitations of the home version, and you can keep multiple languages on the system.
How do I change my computer settings back to English?
Many users experiment with the machine and end up choosing a language they don’t feel is right for the ecosystem. Let me show you how to change the settings back to English and remove them permanently. Follow my lead and don’t skip any step because you don’t want to make mistakes.
- Press the Windows key and I to open the Settings app.
- Tap “Time & Language”from the main menu.
- Select “Language and Region”to open more options.
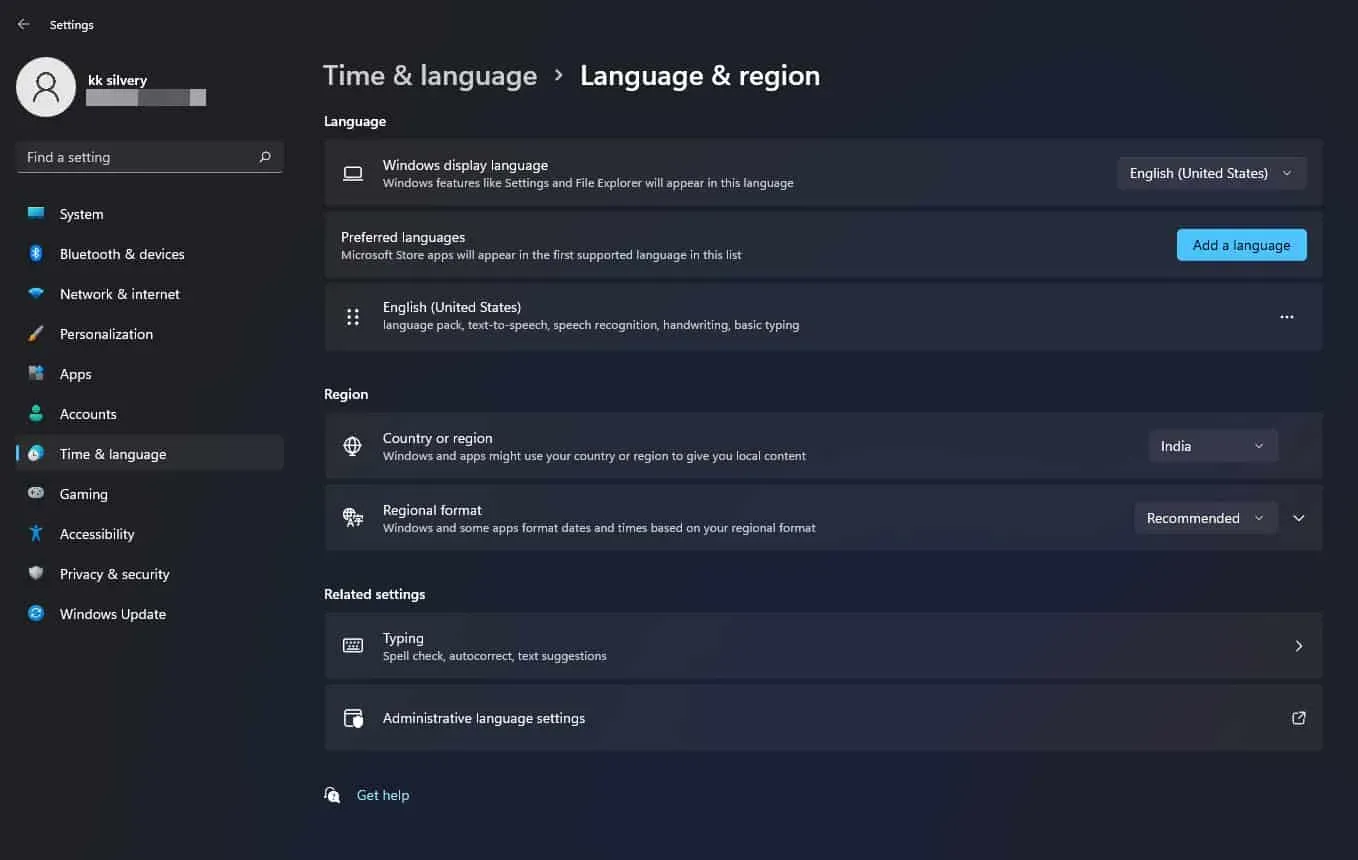
- Click on the “Windows display language”option.
- Select English (United States), then click the Sign Out button.
The system will go to the lock screen and return to the system language section.
- Click on the three dot settings you want to remove.
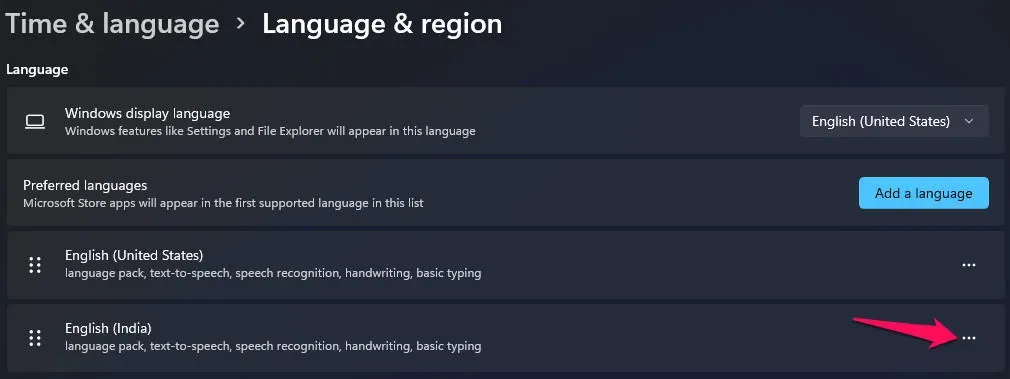
- Click “Remove”to remove it from the system.
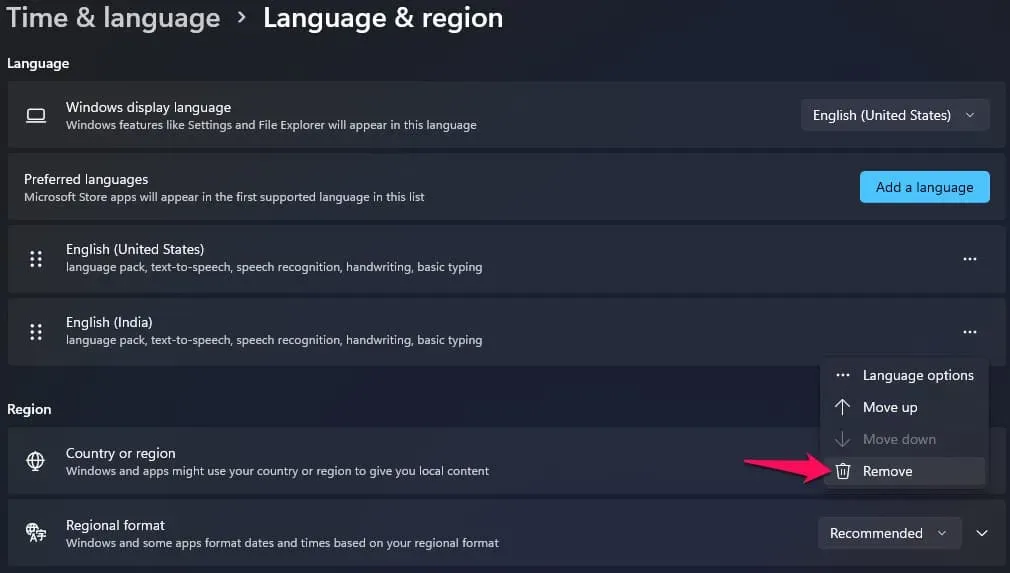
- The language pack has been removed from the selection.
You have full control over what you want to add to the system and what you want to remove, so don’t worry about playing around with language packs.
Choose the language settings in your Microsoft account.
The Microsoft account is part of the products, and here they replicate the Apple ecosystem. The MS account has an option to choose a default language and you can set your regional or preferred language in it. I was unable to remove my preferred language from my account, so you should consider this a permanent change.
- Press the Windows key and me to open the Settings app.
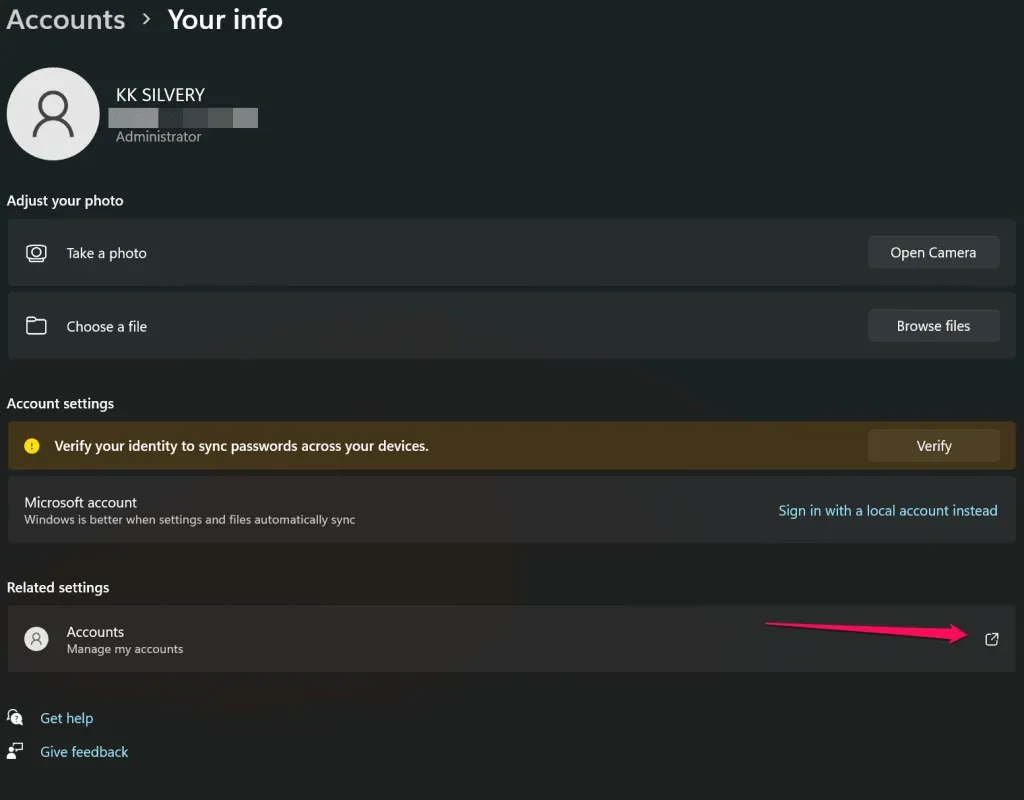
- Select “Accounts”, then click “Your Information”to open more options.
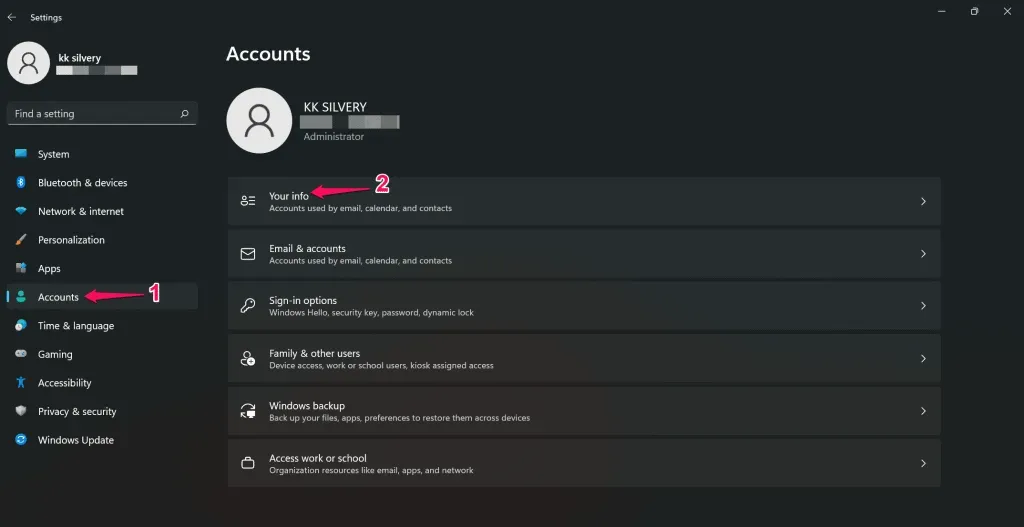
- Scroll down and click “Accounts”to manage them.
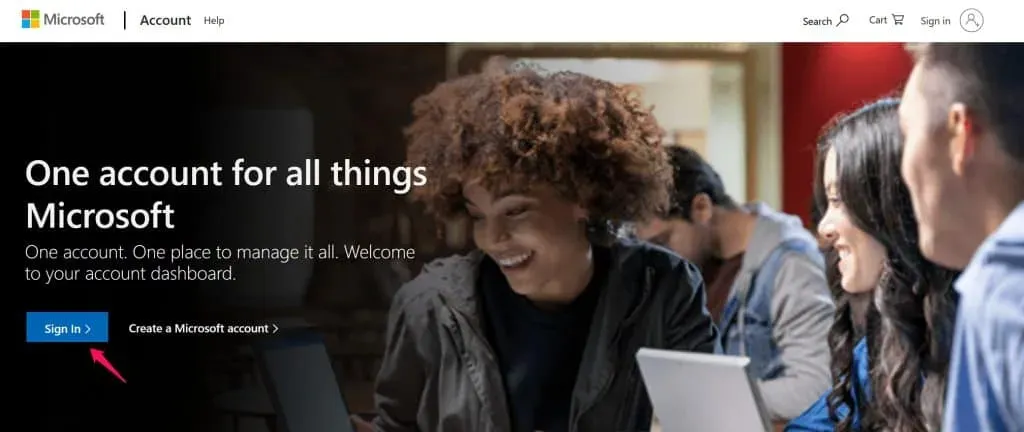
- By default, the screen with the Microsoft website is displayed and the “Sign in”button is pressed.
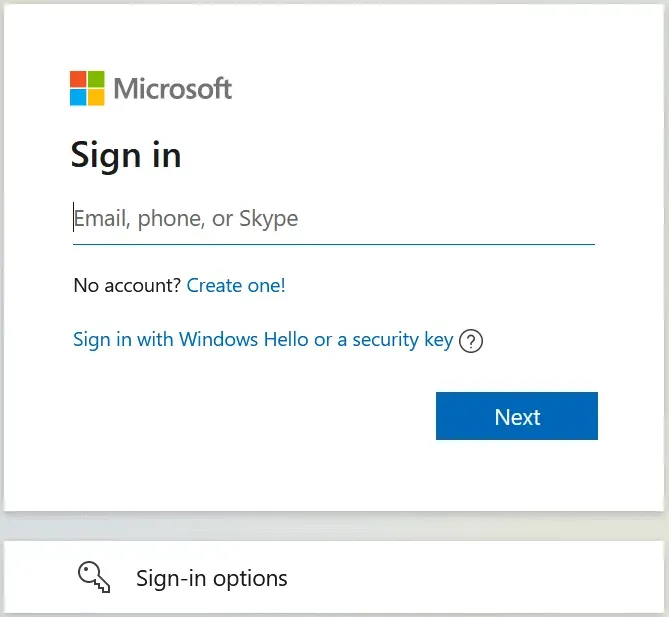
- Enter your email address, then click Next.
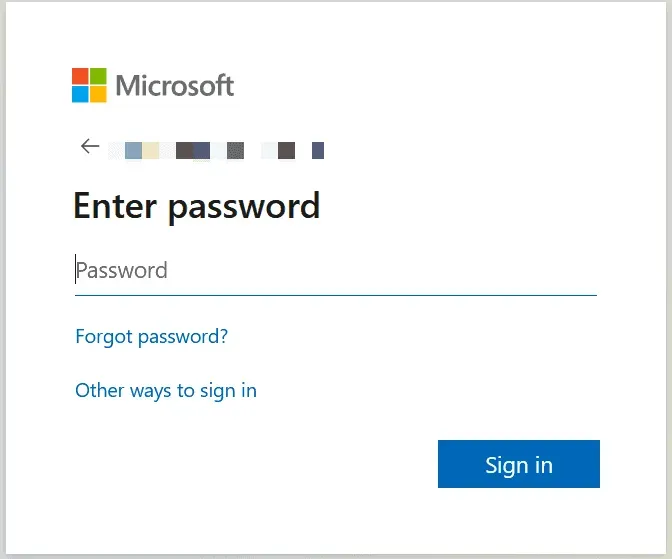
- Enter your password, then click on the “Login”button.
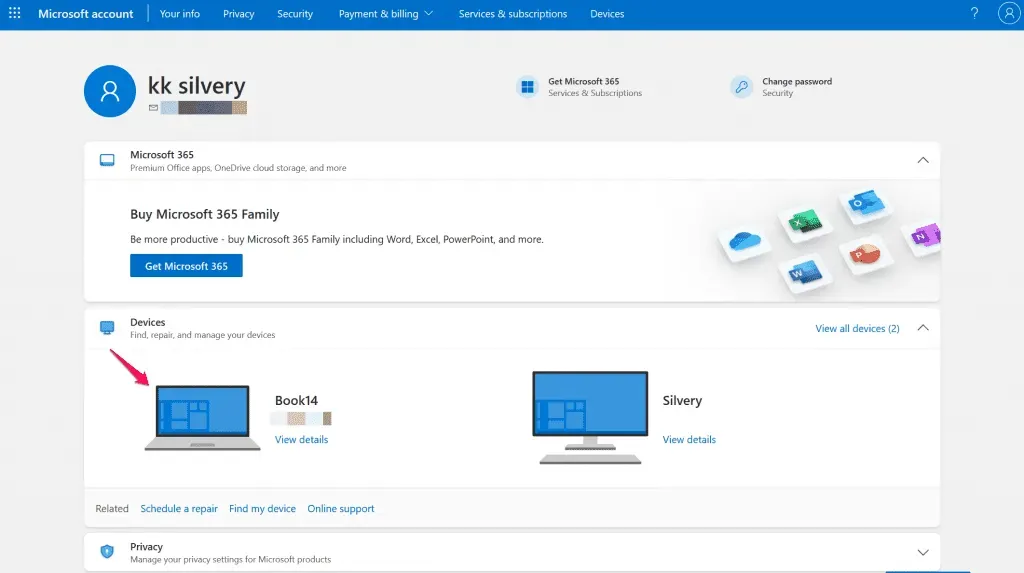
- Make sure the connected devices are in the list.
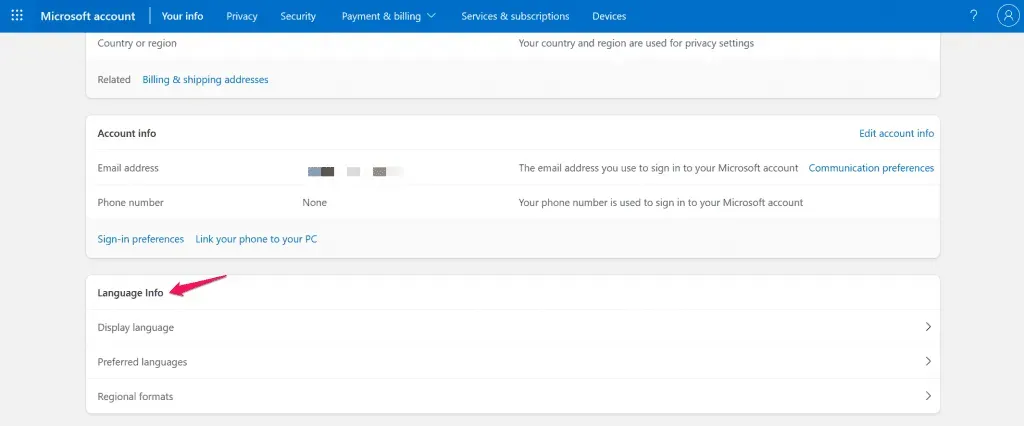
- Click on “Your Information”located in the top menu.
- Scroll down and find the “Language Information”section.
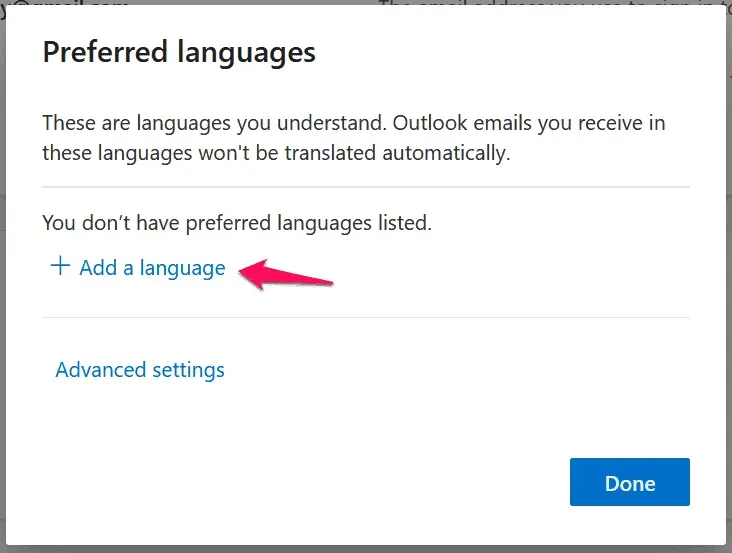
- Select “Preferred Language”, then click the “Add Language”button.
- Enter the name of the language or the name of your country in the search bar.
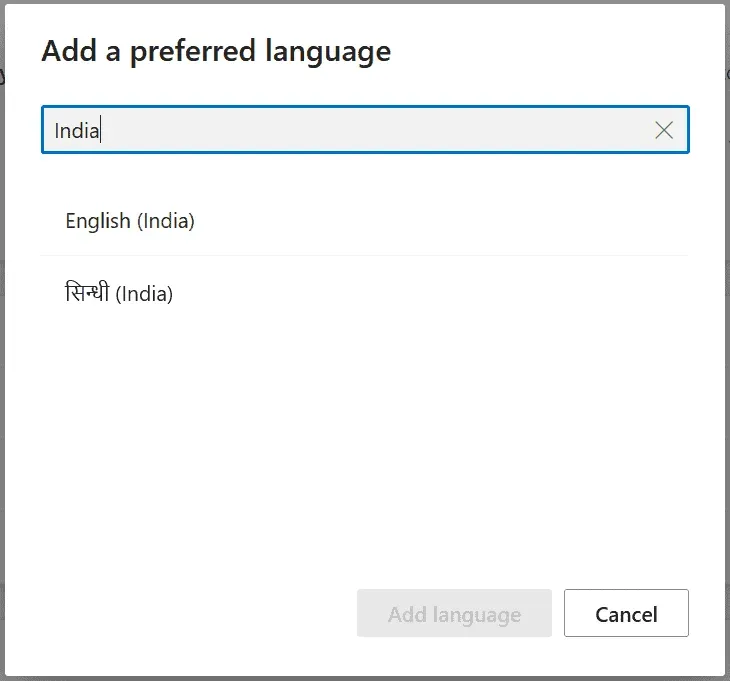
- I selected English (India), then click on Add Language.
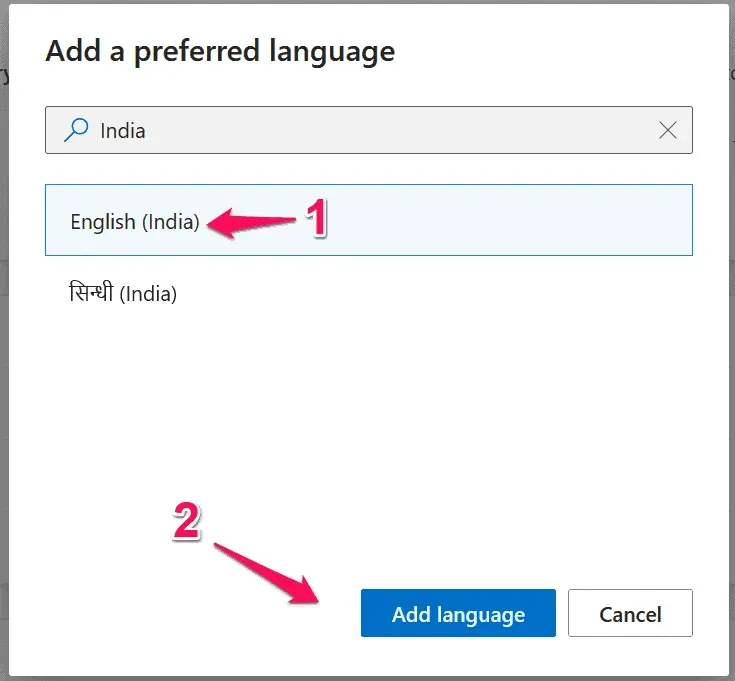
- My account has English (India) set as the default language.
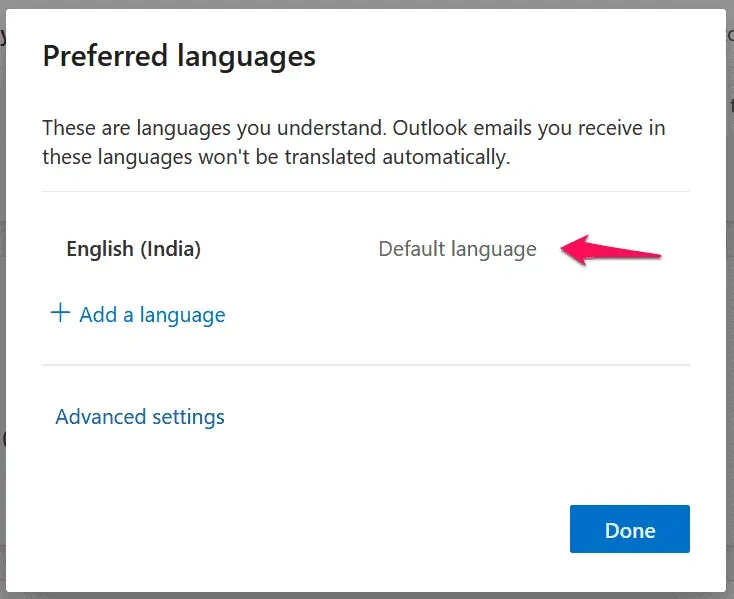
- Click Finish to complete the task.
MS account users can add multiple languages to the language section and there are no restrictions here. Your Windows PC will set the default language the next time you install the operating system.
Conclusion
Users can change the system language in Windows 11 and this is possible in all editions. You have full control over the language settings in the software, so don’t worry about getting confused about the language. You can switch between multiple languages on the system and this will also be available in the keyboard layout. Let us know what you think of the Windows 11 language system in the comment section below.
Leave a Reply