How to make email secure on iPhone
Privacy is a growing concern in the tech industry, but Apple is lagging behind many of its competitors when it comes to email security. Luckily, iOS 15 changes that. Your email address is the key to a huge amount of personal information, not to mention navigating to your other online accounts, so it’s great to see new features for iPhone that protect email accounts and their content.
Many of us, intentionally or not, store sensitive data in our email accounts, including drafts, passwords, photos, addresses, personal secrets, and even social security numbers. Gaining access to an email address can be the gateway to banks, photo backups, credit card numbers, online accounts, and even calendar events. This is why phishers, hackers and spammers are so persistent in attacking email.
For some peace of mind, it’s important to turn on and start using iOS 15’s email-focused privacy features right away. Not only can your iPhone block email tracking pixels that track how you interact with incoming messages, but it can also generate new and random email addresses for use with other apps and services, obfuscate your web traffic (including when using email on your phone), and more.
In addition to the latest features, there are already several ways to protect your privacy when sending email from your iPhone, some of which you may not be aware of. The iOS 15 tips below can help prevent security breaches and unwanted outside access, and show you why you should switch to (or keep using) an iPhone if you care about email security.
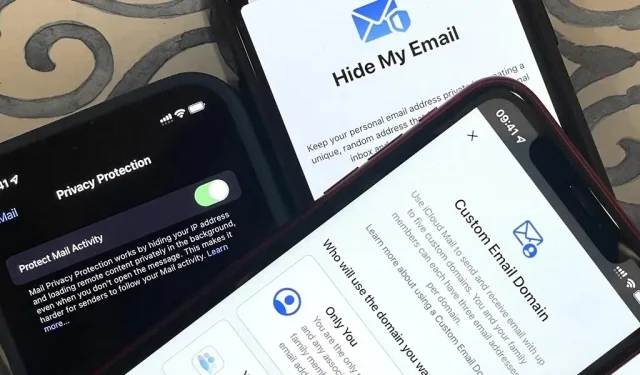
Use custom email domains with iCloud Mail
Your iCloud email address is not a secret. It’s easy for hackers to find or guess email addresses to start cracking passwords and gaining access to accounts, especially when most iCloud email addresses end in @icloud.com and many people use a variant of their name.
Luckily, if you’re on iOS 15, have two-factor authentication enabled for your Apple ID, own your primary iCloud mail address, subscribe to iCloud+, and own a domain, you can use your own email domain with iCloud Mail.
Security considerations aside, a custom email domain will allow you to quickly move between email hosts when needed, can make your business more legitimate if you have one, can give each of your family members individual addresses, and stop tech companies from rummaging through the web.. your emails for promotional purposes.


You can specify up to five custom domains for Apple mail servers. Once set up correctly, you and your family can have up to three email addresses per domain. Unique email domains can make it much harder to coordinate phishing attacks and make your data more secure.
A few downsides include using poor quality Apple spam filtering and consolidating all mail from all domains to your primary iCloud email address.
Use iCloud aliases
With an iCloud email account, you can create email aliases and stop giving your primary email address to anyone and everyone, isolating unwanted messages and spam from important messages. With an @icloud.com email address, you get up to three aliases, which gives you some flexibility.
Once you set up an alias, you can use it to send and receive email through iCloud.com, Mail, or a third-party email client. If necessary, you can change the full name of the alias and add a label, such as Shopping, Work, etc. To create or change aliases, open iCloud Mail in a web browser, tap the settings gear on the All mailboxes screen, select Settings, and select Accounts.
Once you’ve created aliases, you can select them in the From field in the Mail app. If you don’t actually send emails with them and only use them to receive, you can hide them in the “From”selector.


If you used Apple’s mail system before it became iCloud Mail, you may already have up to five aliases, each with its own @me.com and @icloud.com variations. You have more aliases, but if you remove them, you will have a maximum of three aliases, just like everyone else. So it’s in your best interest to keep them if you want more aliases.
Use mail privacy protection
New to iPhone in iOS 15, Mail Privacy Shield helps protect your data by preventing marketers (or hackers) from getting specific information about you. First, it hides your IP address, which helps advertisers avoid creating profiles on you. Second, it blocks tracking pixels by prefetching the content of the deleted message to a proxy server before sending it to your inbox.
The Protect Mail Activity routes all remote content uploaded by Mail through two separate relays managed by different entities. The former knows your IP address, but does not know the contents of the remote mail you receive. The second knows the content of the remote mail you receive, but not your IP address, instead providing a general identification to the recipient. Thus, no entity has information to identify both you and the remote mail content you receive. Senders cannot use your IP address as a unique identifier to link your activity on websites or apps to create a profile about you.
The prompt to activate Mail privacy protection should appear the first time you open the Mail app after setting up iOS 15 on your iPhone. To enable it, simply select the Protect Mail Activity option. If you missed or skipped the prompt, you can go to Settings -> Mail -> Privacy Protection and then turn it on.
If you disable Mail Activity Protection, its two main components will appear as separate toggles in case you want to use one and not the other. Only “Hide IP Address”will hide your location but tell senders if you’ve opened their emails. Only “Block all remote content”will preload the remote content, preventing pixel tracking, but giving away your location.


Encrypt emails with S/MIME
Unlike Android, iOS has a built-in ability to encrypt email using the Secure/Multipurpose Internet Mail Extensions (S/MIME) protocol. It’s been around since iOS 5, but it’s a little-known feature that many people still don’t know about. Email encryption with S/MIME adds another layer of security and protects against man-in-the-middle attacks and header spoofing.
To enable this feature on iOS, you need to obtain an S/MIME certificate. Most email certificates require a paid annual subscription, such as GlobalSign, and only cover one email address. However, there are a few free ones for personal use. Actalis is one of the CAs that provides a free S/MIME certificate that is valid for a year, and you can continue to receive free certificates after a year.
You first need to install your certificate as a profile on your iPhone and then activate it for the email address to be used in the Mail app. You then share your public key with the people you want to use end-to-end encryption with, and they will have to share their key with you. The recipient’s public key is needed to encrypt messages, and the associated private key will decrypt them.


Once you have successfully enabled S/MIME, you will be able to see the status of its encryption by looking for the blue padlock in the “To”field of your message whenever you compose, reply or forward a message. You can also disable encryption by clicking on the blue padlock. If your iPhone doesn’t have the recipient’s public key, you’ll see a red padlock instead, indicating you can’t get E2E protection.
Track app privacy report
Starting with iOS 15.2, your iPhone has an App Privacy Reporting feature that tracks how often apps use features that could potentially violate user privacy. The App Privacy Report provides information about how often apps and websites collect location data, access storage, activate the microphone, and use the camera. It even tells where they are sending the data.
To find it, go to Settings -> Privacy -> App Privacy Report. The report makes it much easier to monitor in detail what applications are doing, including the Mail app and third-party email clients. The more you know about how apps use your data, the safer everything on your iPhone, including emails, will be safer.


In iOS 15.0-15.1.1, this feature was called Recording App Activity and it didn’t give you a pretty interface with tons of data at your fingertips. Instead, you had to export the data as a JSON file and then read it in a separate application. Reading directly in the new user interface is a much more convenient method because you don’t have to leave the screen.
Take the opportunity to hide my email
Sometimes you want to subscribe to an app or service but don’t want to provide your actual email address. Otherwise, the app or service may annoy you with too many emails or sell your contact information to third parties. Luckily, there is Hide My Email.
Hide My Email creates a dummy email address that redirects back to your real one. If you want to stop receiving emails from the people you send them to, just remove the blank and they won’t be able to contact you.
Apple included the Hide My Email feature as part of the Sign in with Apple service that came with iOS 13, and you could only use it when creating new accounts from apps and browsers using Sign in with Apple.
You can do so much more with Hide My Email thanks to iOS 15.2. Now you can use it to generate random disposable email addresses that you can use for anything, not just when creating accounts. The proxy email will forward emails to your actual mailbox and you can remove the proxy at any time. The only requirement is a paid iCloud+ plan.
To create fake emails, go to Settings -> [Your Apple ID] -> iCloud -> Hide My Email, then click + Create New Address. You can tag each proxy address to make it easier to remember why you are using them. At the bottom of the Hide My Email screen, you can even change the email address that proxy servers forward emails to.


Change the Default iOS Email Client
Even with S/MIME encryption, you may feel more comfortable using a more secure email client or service like ProtonMail. Whichever email application you prefer, you can probably make it your default email application so that every time you open mailto: links, your preferred application opens instead of your default email application.
ProtonMail has an iOS app and uses PGP (Pretty Good Privacy) encryption options with advanced security features, support for third-party clients, messaging options, and ironclad anonymity. Services like Tutanota or Hushmail are also viable alternatives, although Tutanota is still trying to add support for becoming the default email app and Hushmail isn’t free.
To change your default email program, download the email app of your choice, then open its settings in the stock Settings app. Select “Default Mail Application”, then mark the desired application and exit the settings. The next time you click on a link that would normally open in Mail, it will load into your email application of choice. This feature is available for iPhone with iOS 14.


Use Siri to compose emails
You can use Siri to compose emails, but in the past, the voice assistant had to send audio to Apple’s servers for processing. Unfortunately, this added an additional route through which your data could be compromised. Fortunately, starting with iOS 15, Siri requests are handled on the device.
You don’t have to do anything to enable Siri requests on your device, which work even when you’re offline. However, this feature is only available on iPhones and iPads with an A12 chip or later. This means that the oldest phones with this capability are the iPhone XS and iPhone X R lines.
Some of the commands that Siri can handle offline include making phone calls, replying to messages, setting preferences, setting timers and alarms, and more. And let’s certainly not forget about composing and reading emails.


Leave a Reply