How To: Update your screenshots by framing them with the body of your iPhone or iPad—no third-party apps required
Have you ever seen an image on social media, someone’s blog, or a news website that shows a screenshot of an iPhone or iPad with a real model of the iPhone or iPad framed around it? You can do that too, and it’s really easy to do it with a third-party app, but you can do the same with a label that won’t stop you from paying or subscribing.
Problem with screenshot apps
There are many tools in the App Store that can add iPhone and iPad frames to your screenshots. However, most of them have expensive in-app subscriptions like Screenshots Pro, which charge $1.49/month or $14.99/year to unlock screenshot frames, although you can also pay $29.99 once instead of a subscription.
Other apps like iFrame and FrameWork are cheaper at just $0.99 a time, but you’ll miss the iPad models. And you’ll also find a lot of legacy apps like Screen Frame Maker that don’t support newer device frames.
Screenshot Maker Pro has everything you need when it comes to device shots—all iPhone and iPad models, all color variations, angles, shadows, and more—but it’s one screenshot at a time. Also, there are ads and it limits you to two saves per day unless you spend $9.99 to remove ads and save limit.
Best Solution: Apple Frames Label
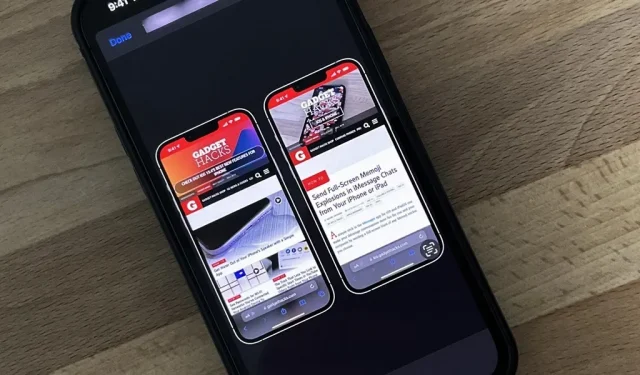
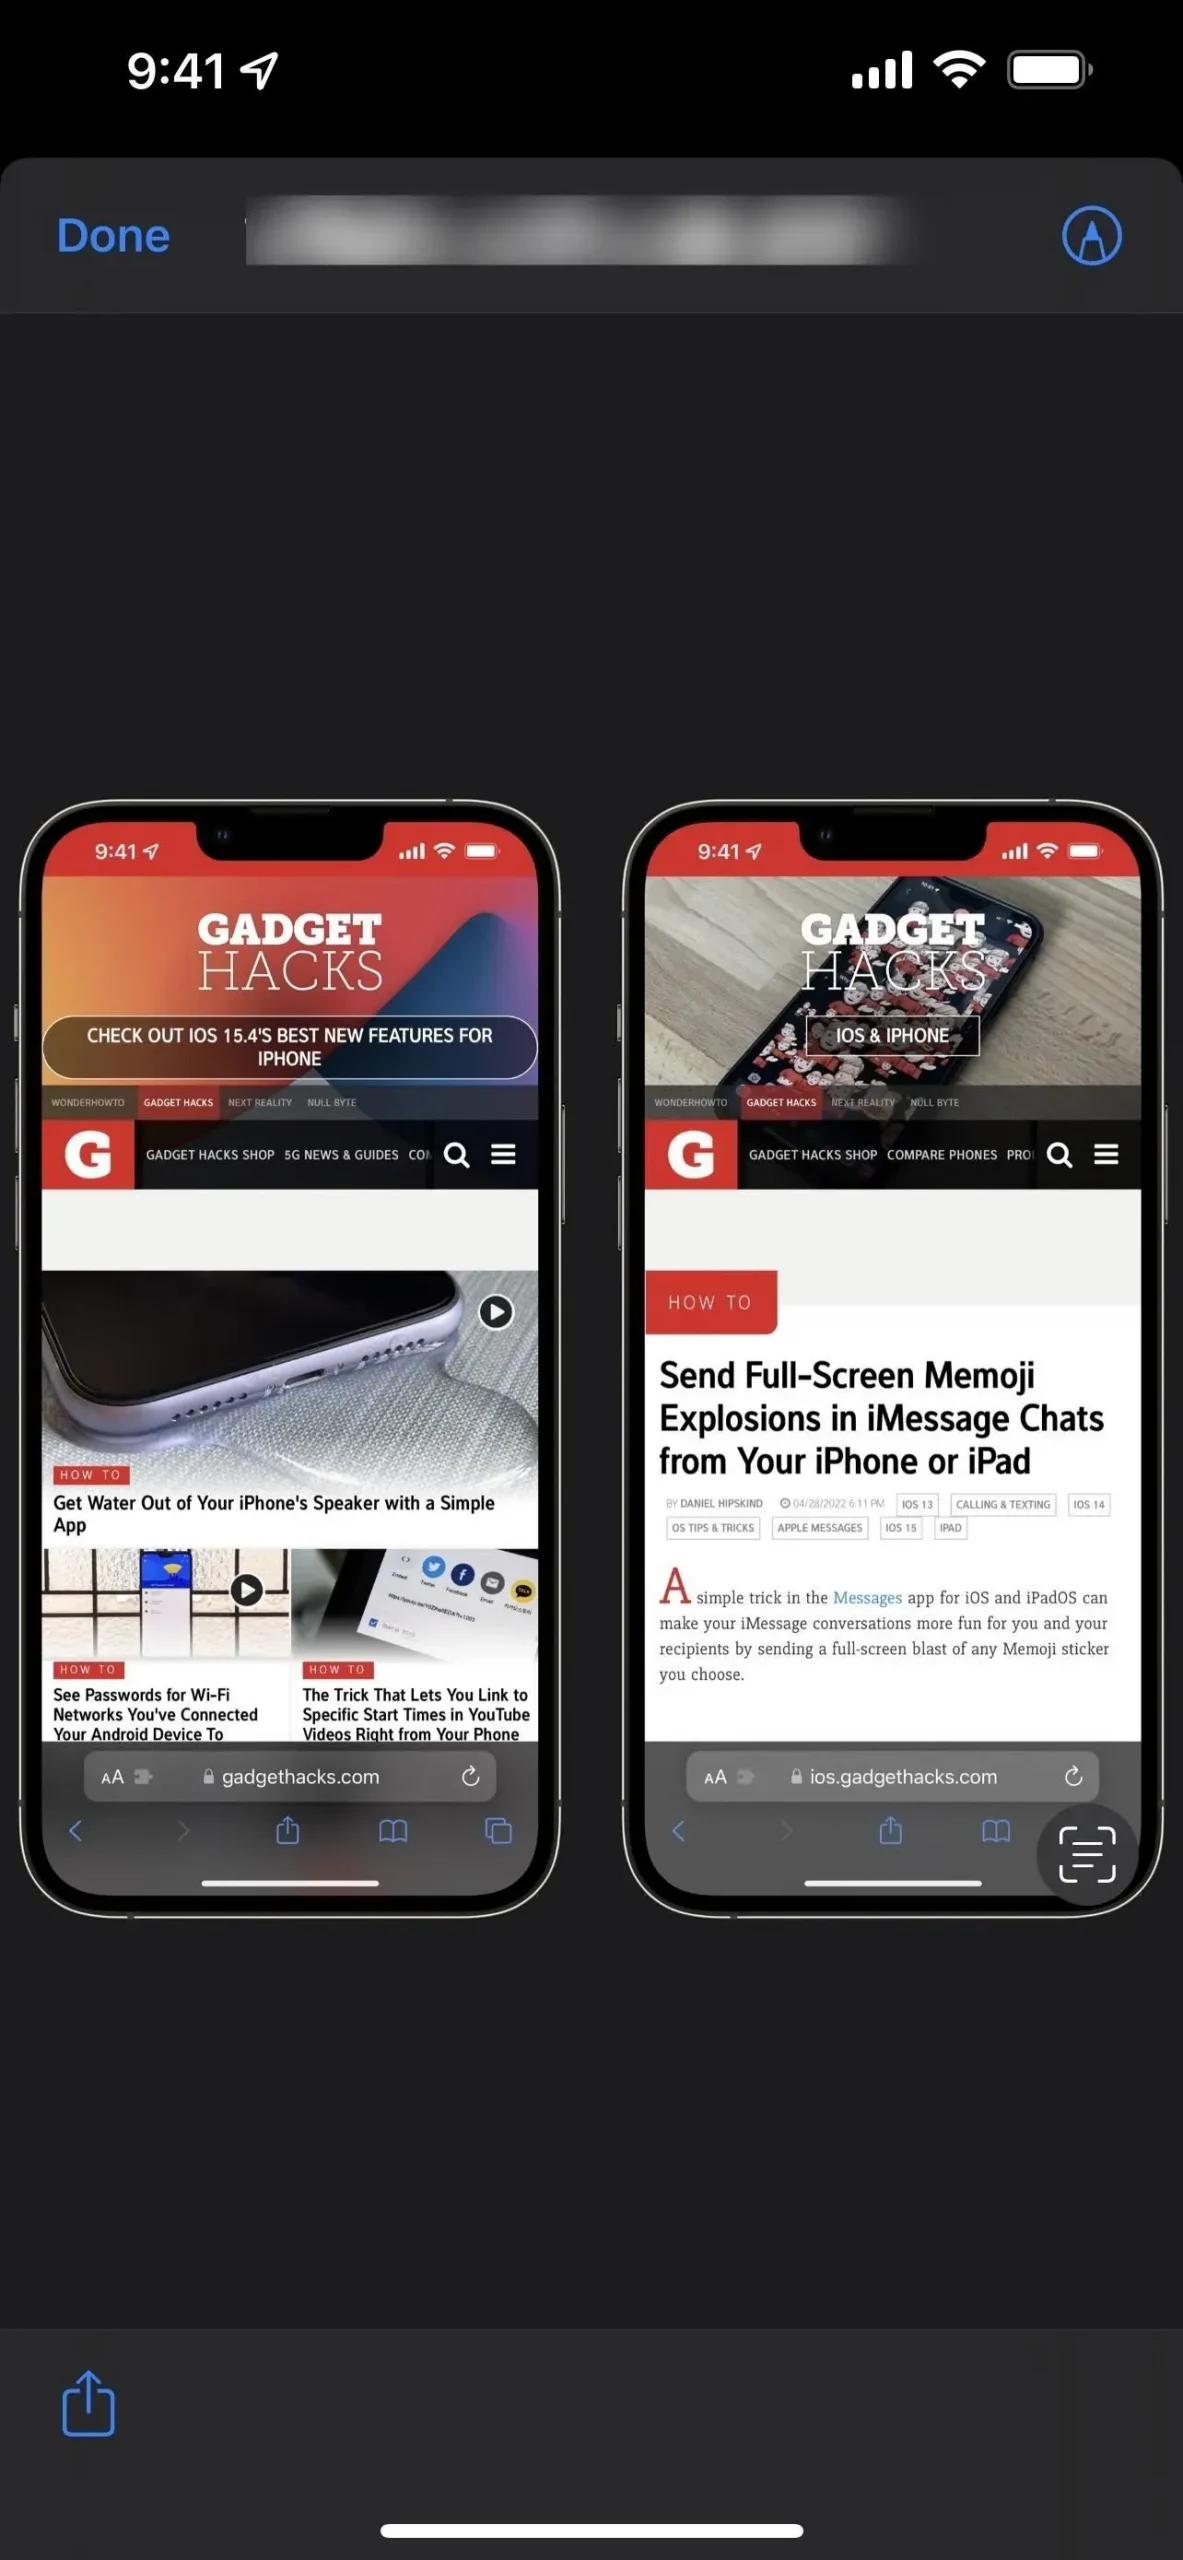
If you don’t need anything fancy or expensive, try the Apple Frames shortcut, which makes it very easy to frame screenshots in full screen mode. You select a screenshot or screenshots, and then the shortcut analyzes their resolution to find the appropriate device type. It then adds device frames and places screenshots side by side if you select more than one screenshot. It’s free and supports most new Apple devices, including:
- iPhone 13 Series (Standard, Mini, Pro, and Pro Max sizes)
- iPhone 12 Series (Standard, Mini, Pro, and Pro Max sizes)
- iPhone 11 Series (Standard Size, Pro and Pro Max Sizes)
- iPhone 8 Series (Standard and Plus)
- iPhone SE (1st, 2nd and 3rd generation)
- iPad (9th generation)
- iPad Pro 11-inch (3rd generation)
- iPad Pro 12.9-inch (3rd, 4th and 5th generation)
- iPad Air 10.9″(4th generation)
- iPad mini (6th generation)
- Apple Watch Series 4-6 (40mm and 44mm models)
- Apple Watch Series 7 (45mm model only)
- iMac 2021 (24-inch model)
- Macbook Air 2020
- MacBook Pro 2021 (all models)
Step 1: Install the Apple Frames Shortcut
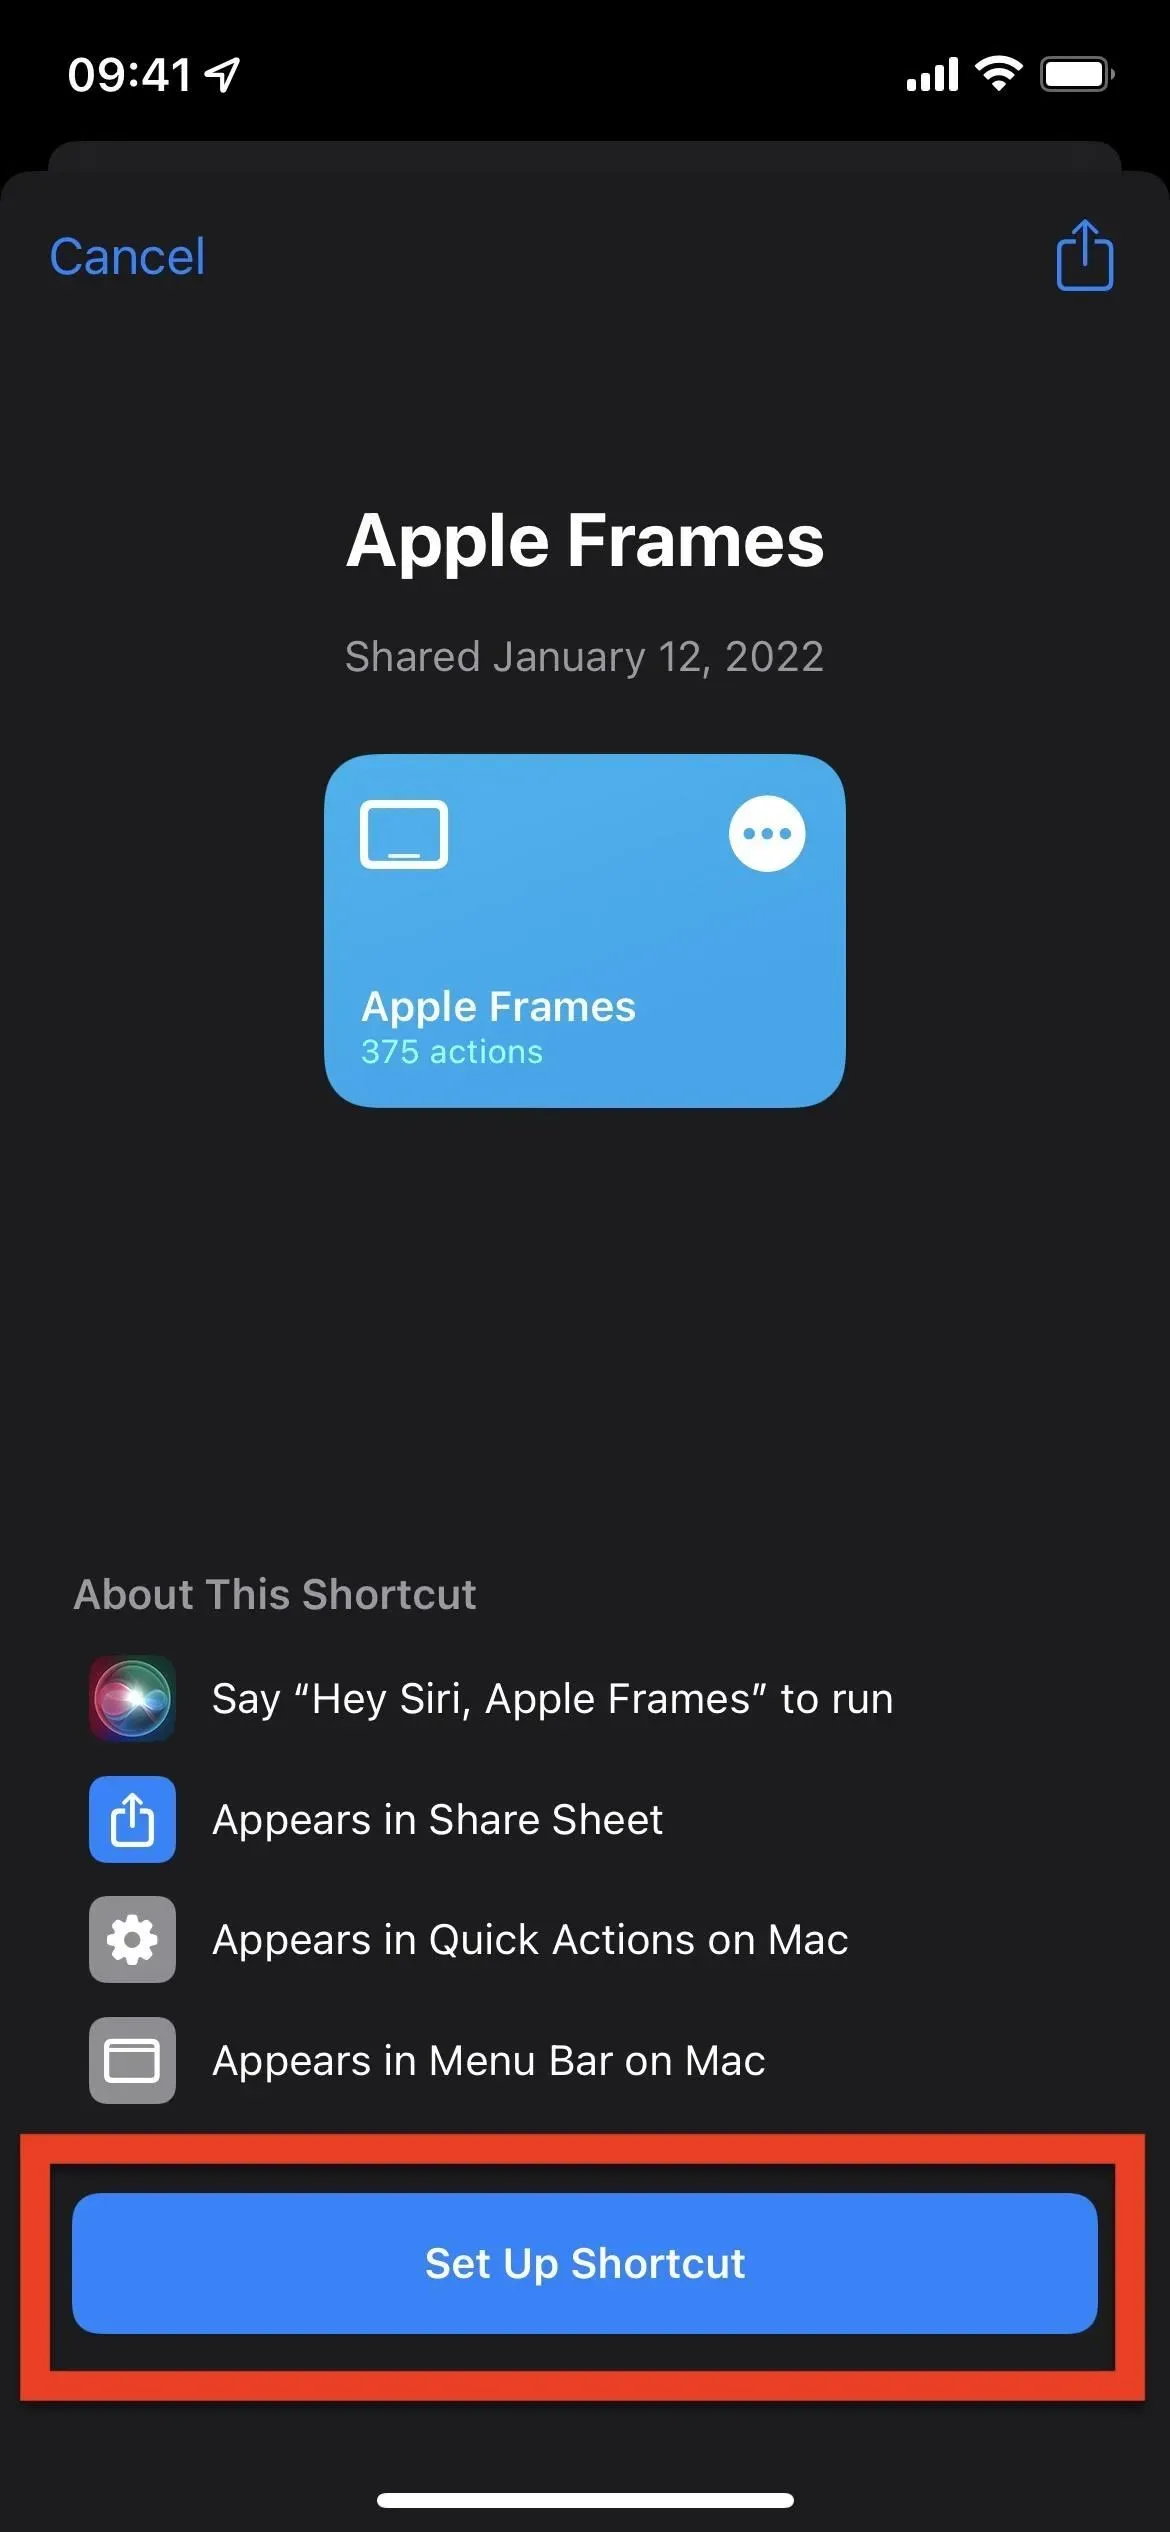
The label is called Apple Frames and was created by Federico Viticci, founder and editor-in-chief of MacStories. It’s easy to use and has workflow comments if you’re interested in learning how to create more detailed shortcuts, or you’re just curious about how a shortcut works.
- iCloud Shortcuts Download Link: Apple Frames (January 2022 Version)
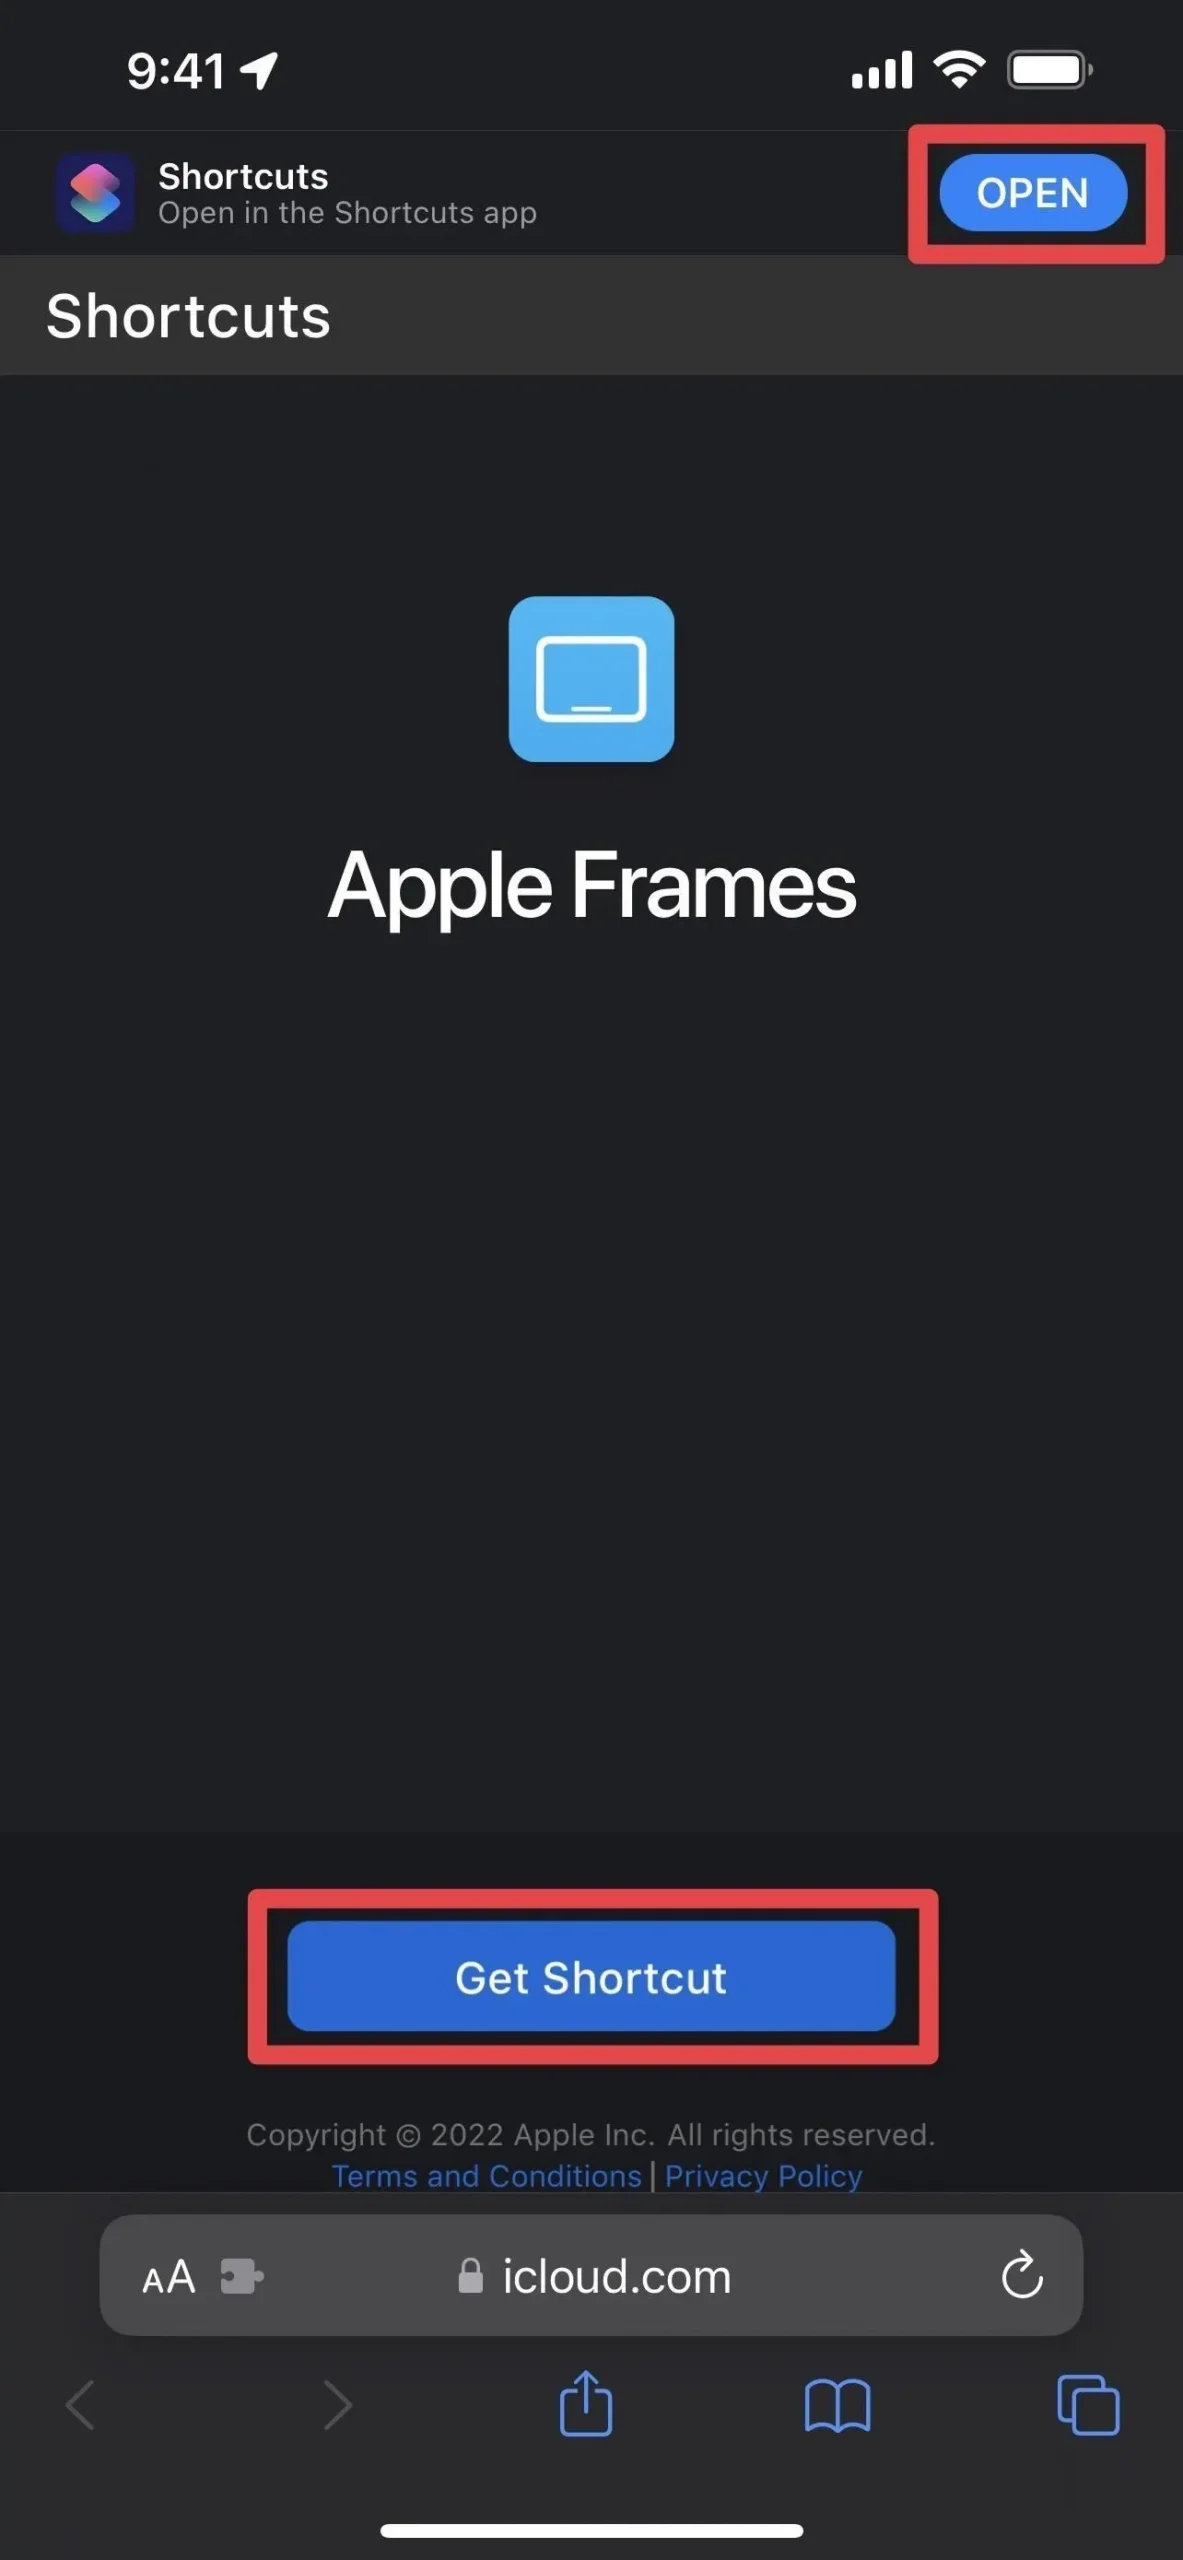
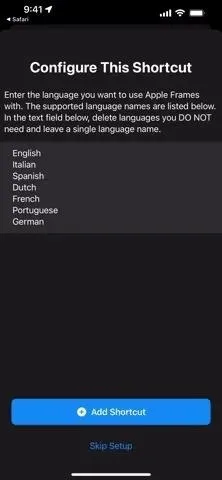
Open the shortcut download link in Shortcuts. If it doesn’t automatically take you there, click Open or Get Shortcut. It will then ask you what language you want the shortcut to be in. Nine language options are available: English, Italian, Spanish, Dutch, French, Portuguese, German, Chinese and Czech. Delete everything but your preferred language and click “Add Shortcut”to add it to the shortcut library.
Step 2: Take screenshots (skip if you already have them)
Take the screenshot or screenshots you need. The label can combine several screenshots side by side into one image. So if you want to make one image with multiple framed screenshots, just make sure you have all the screenshots ready.
- iPhone with Face ID: Press the side buttons and volume up buttons at the same time.
- iPhone with Touch ID: Press the side or top button and the Home button at the same time.
- iPad: Press the top button and any volume button at the same time.
Do not crop screenshots using the screenshot editor or the Photos app, because the shortcut will not be able to determine the device model.
- Complete Guide: 8 Ways to Take a Screenshot on iPhone 13, 13 Mini, 13 Pro or 13 Pro Max


Step 3: Run the shortcut
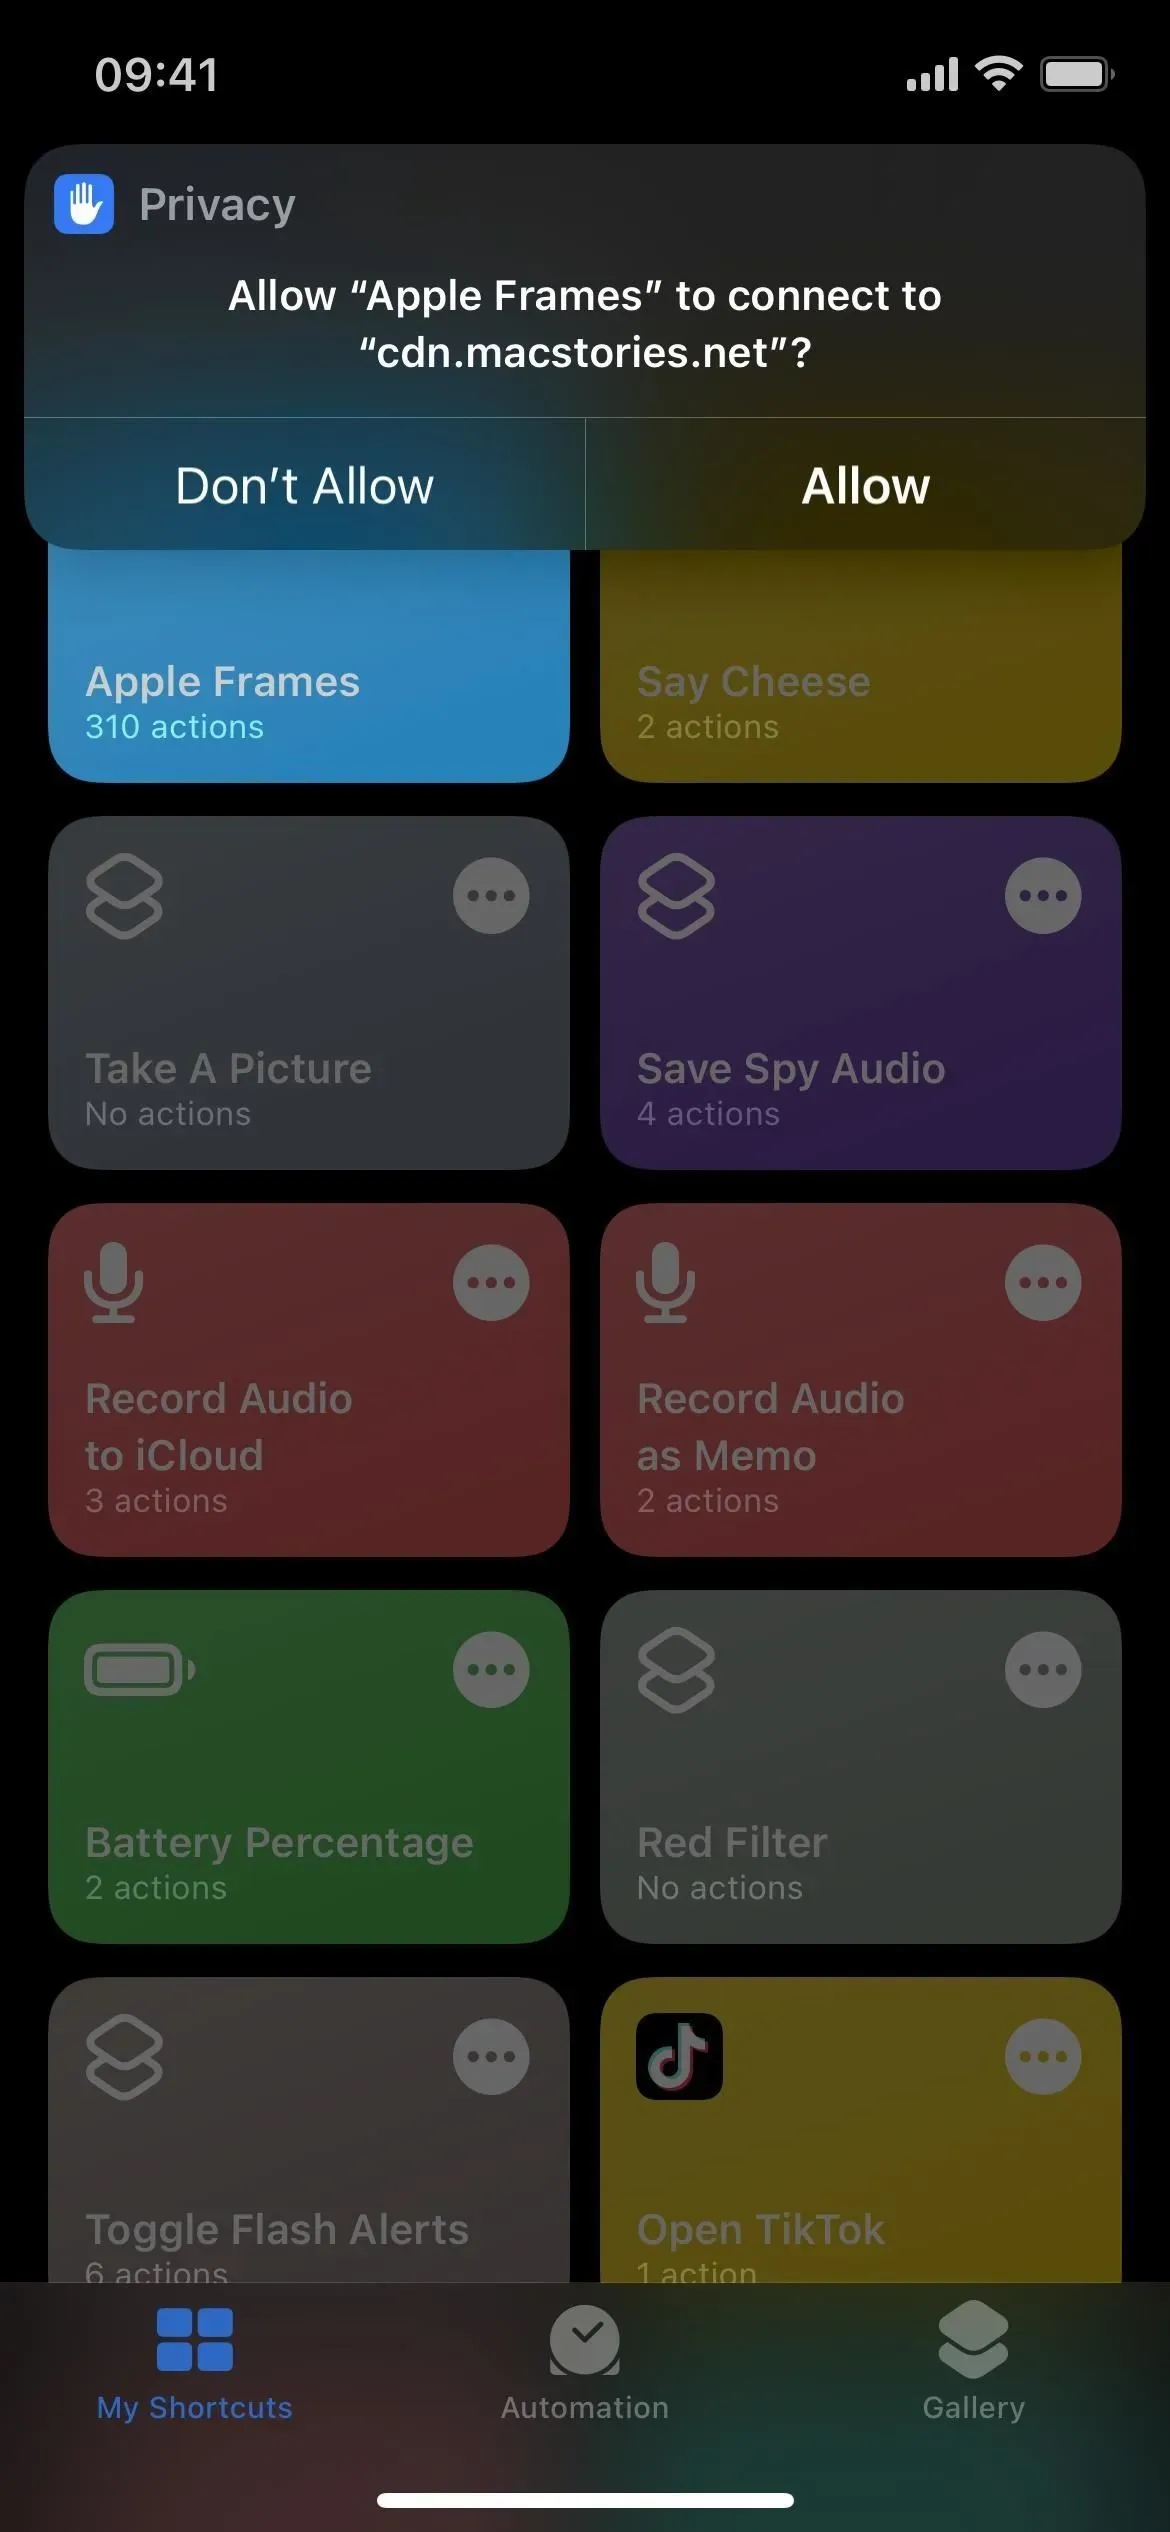
When your screenshots are ready to go, click on the “Apple Frames”shortcut in your “My Shortcuts”library. If it’s the first time it’s running, you’ll be prompted to upload the Frames.json file to iCloud. Click “OK”and “Allow”, otherwise the shortcut will not work.

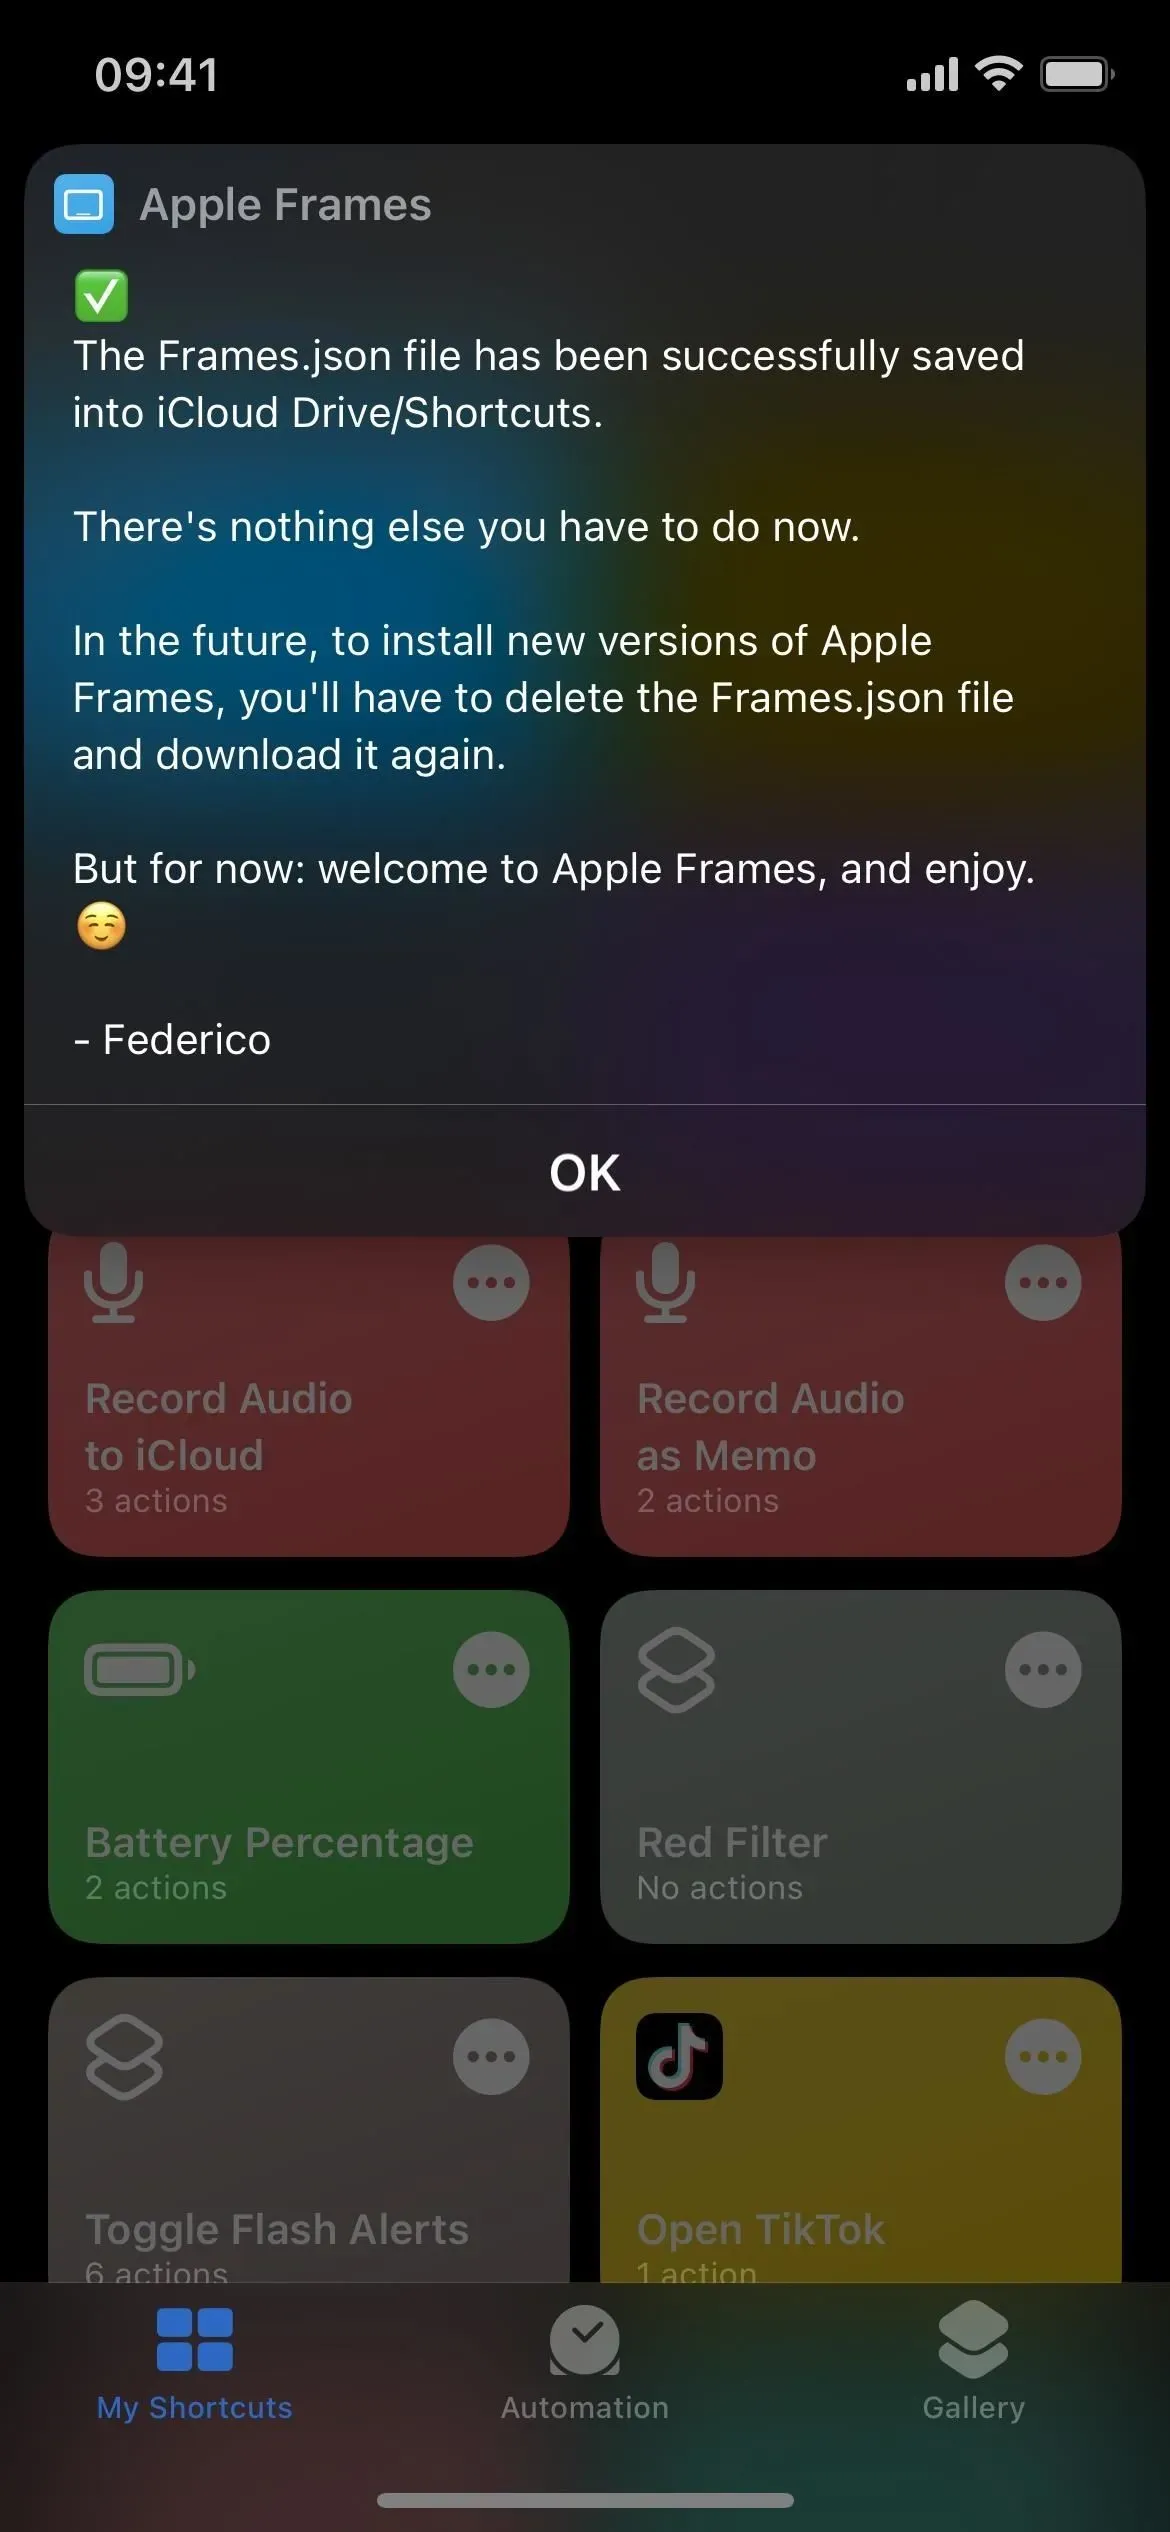
With the Frames.json file installed, tap the shortcut again if it doesn’t continue automatically. Keep in mind that it may take some time to start up as there are a lot of steps.
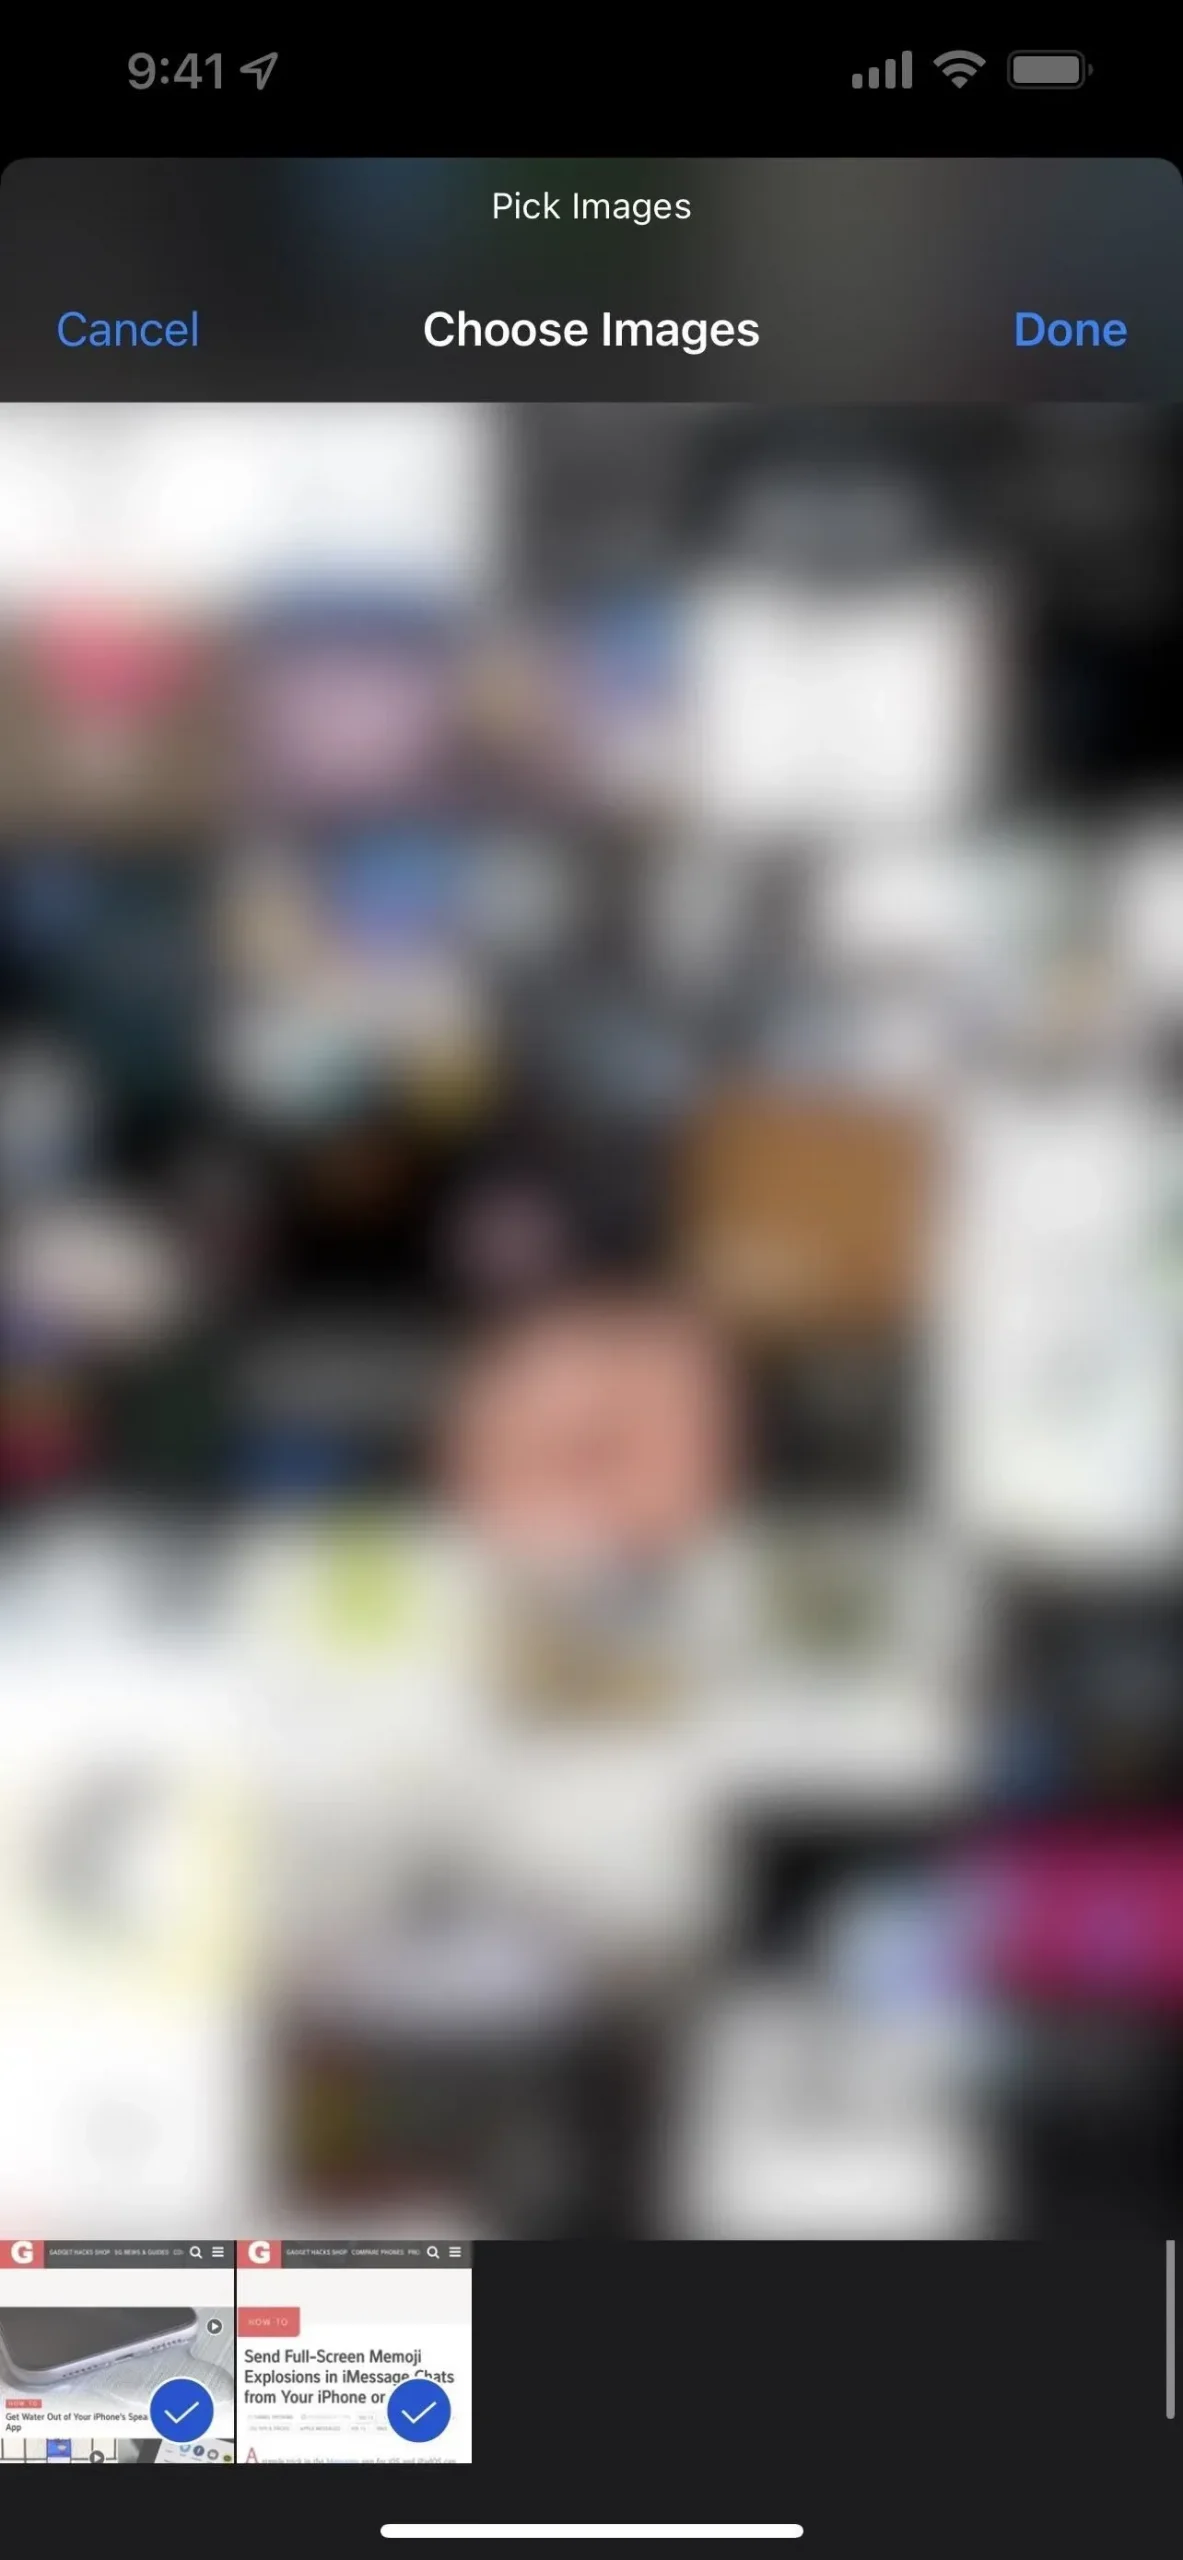
An image picker will open and you can select one or more screenshots to crop. If you want to take multiple screenshots, the first image you click will be on the left, moving from left to right. The newest screenshots will be at the bottom of the page, but you can change the sorting later (see the section at the bottom of this article).
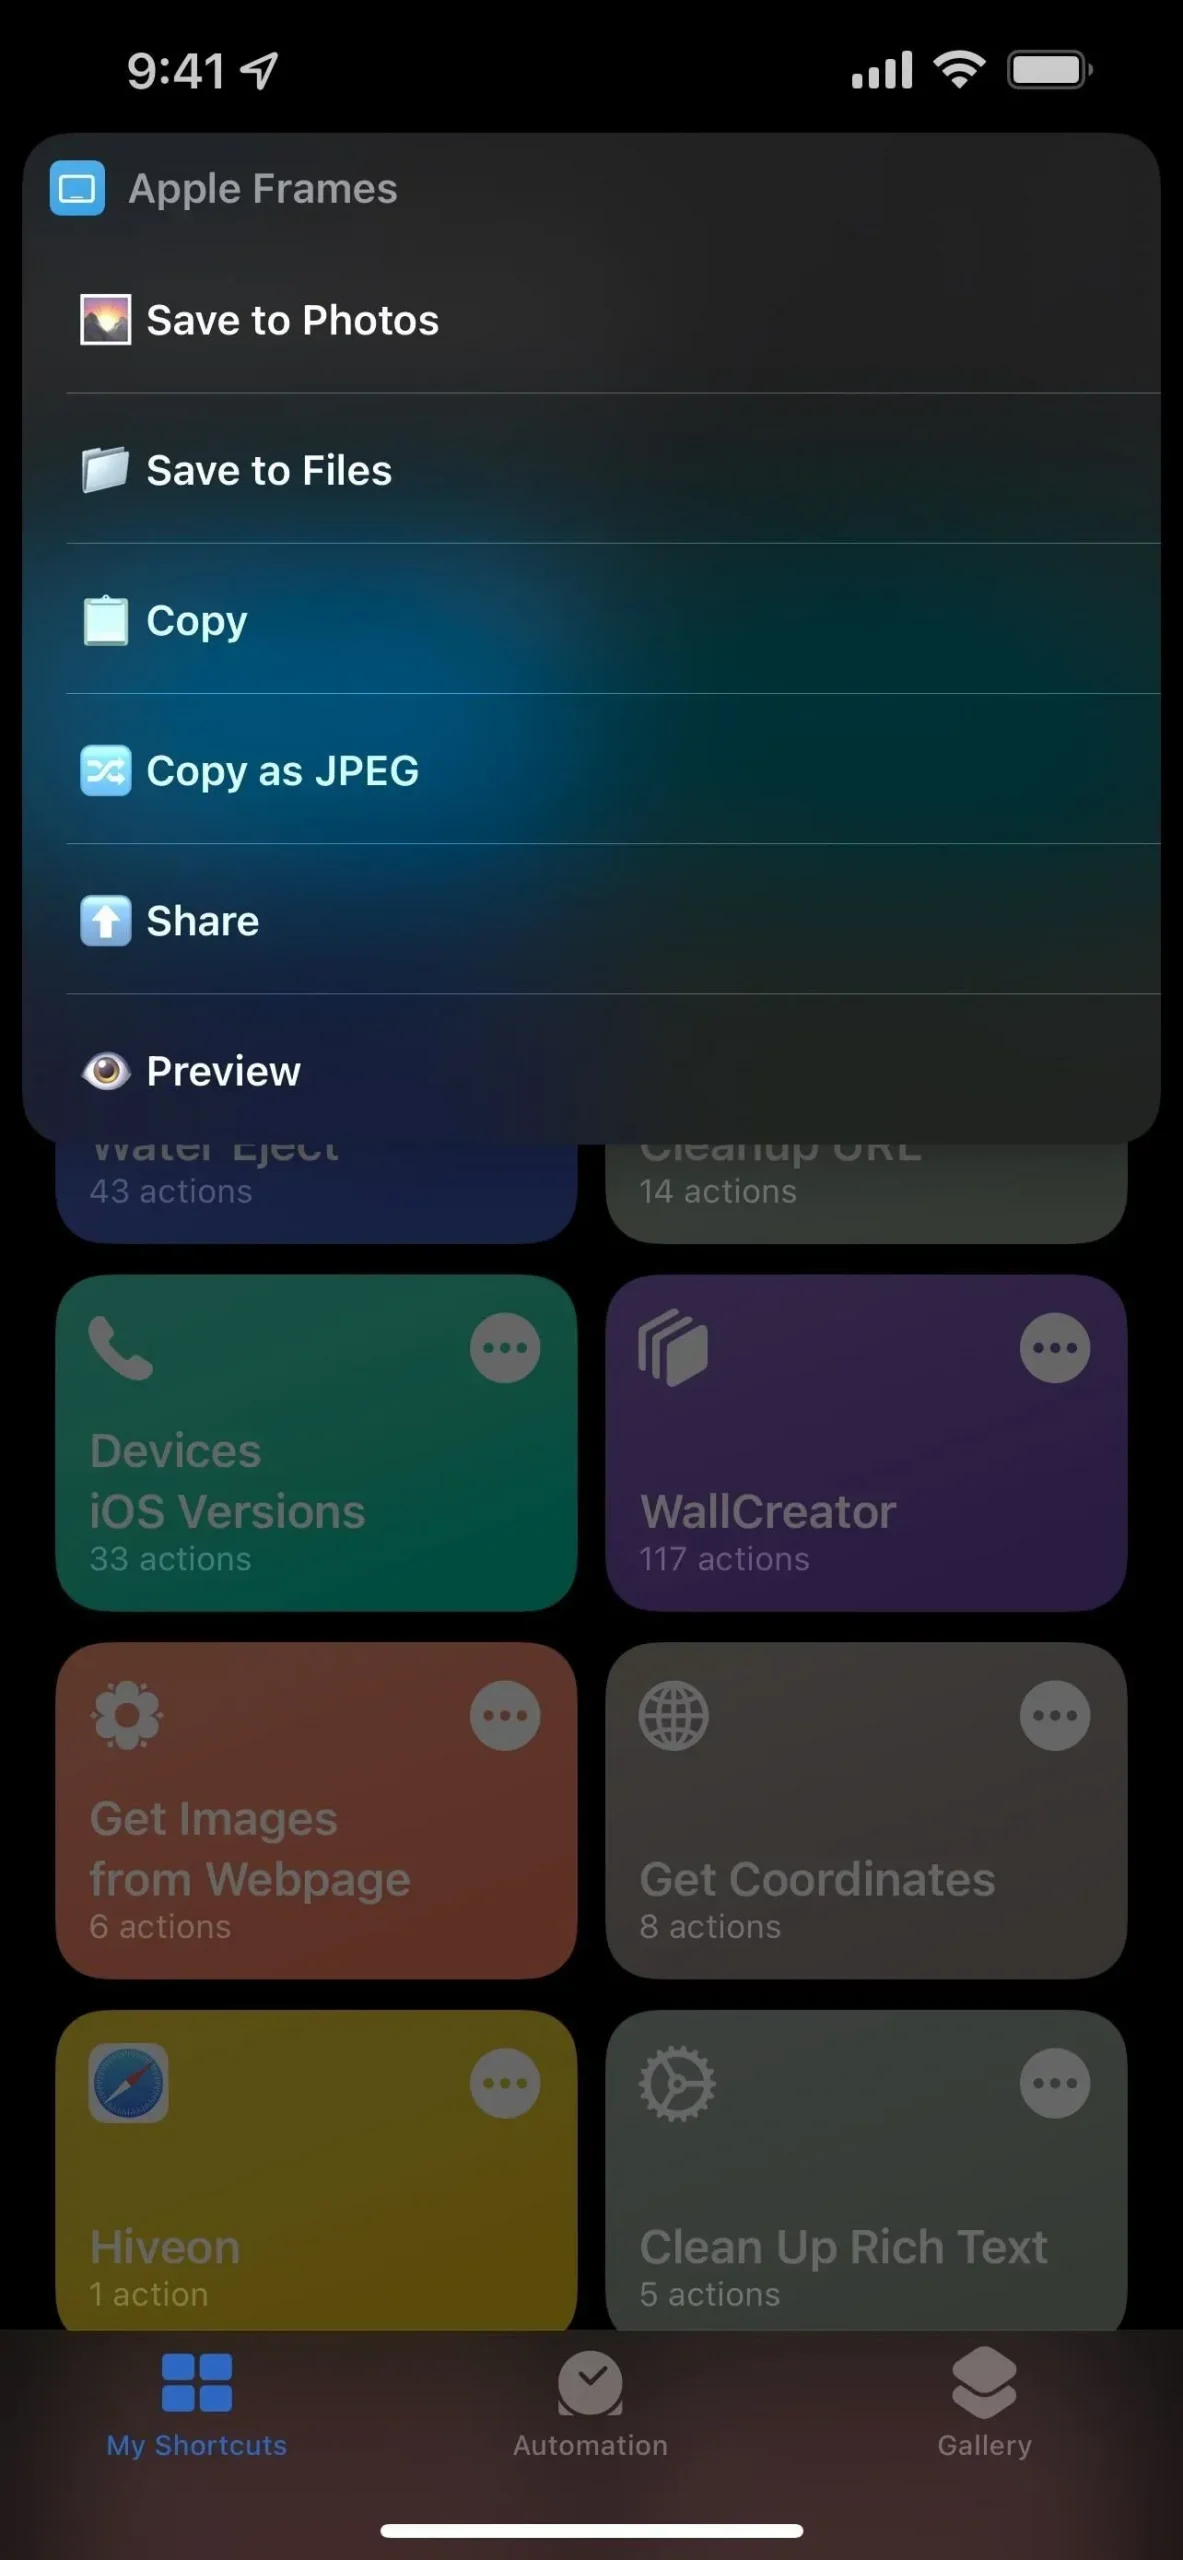
When all images are selected, click Done. It will ask you where you want to put the screenshots in the frame. If you get any requests to access your photo albums, files, clipboard, or other areas of your device during the process, I recommend clicking “Always allow”so you don’t have to worry about permissions later.
- Save to Photos: Saves a PNG copy of the image with a transparent background in the Photos app.
- Save to Files: Saves a PNG copy of the image with a transparent background to a folder on iCloud Drive or on my iPhone in the Files app. You must give it a custom name before you can select a directory.
- Copy: Copies a PNG image with a transparent background to the clipboard so you can paste it wherever you want.
- Copy as JPEG: Copies a JPEG image with a background to the clipboard so you can paste it wherever you want.
- Share: Opens a copy of the PNG image with a transparent background on a share sheet, where you can upload it or share it with a person, device, app, or activity.
- Preview: Opens a copy of the PNG image with a transparent background in a preview window where you can use the markup and call up a shared sheet to download or share it.
Customize Shortcut
The only thing that bothers me about the shortcut is that it shows the newest images last in the image picker. If this also seems outdated to you, you can toggle it.
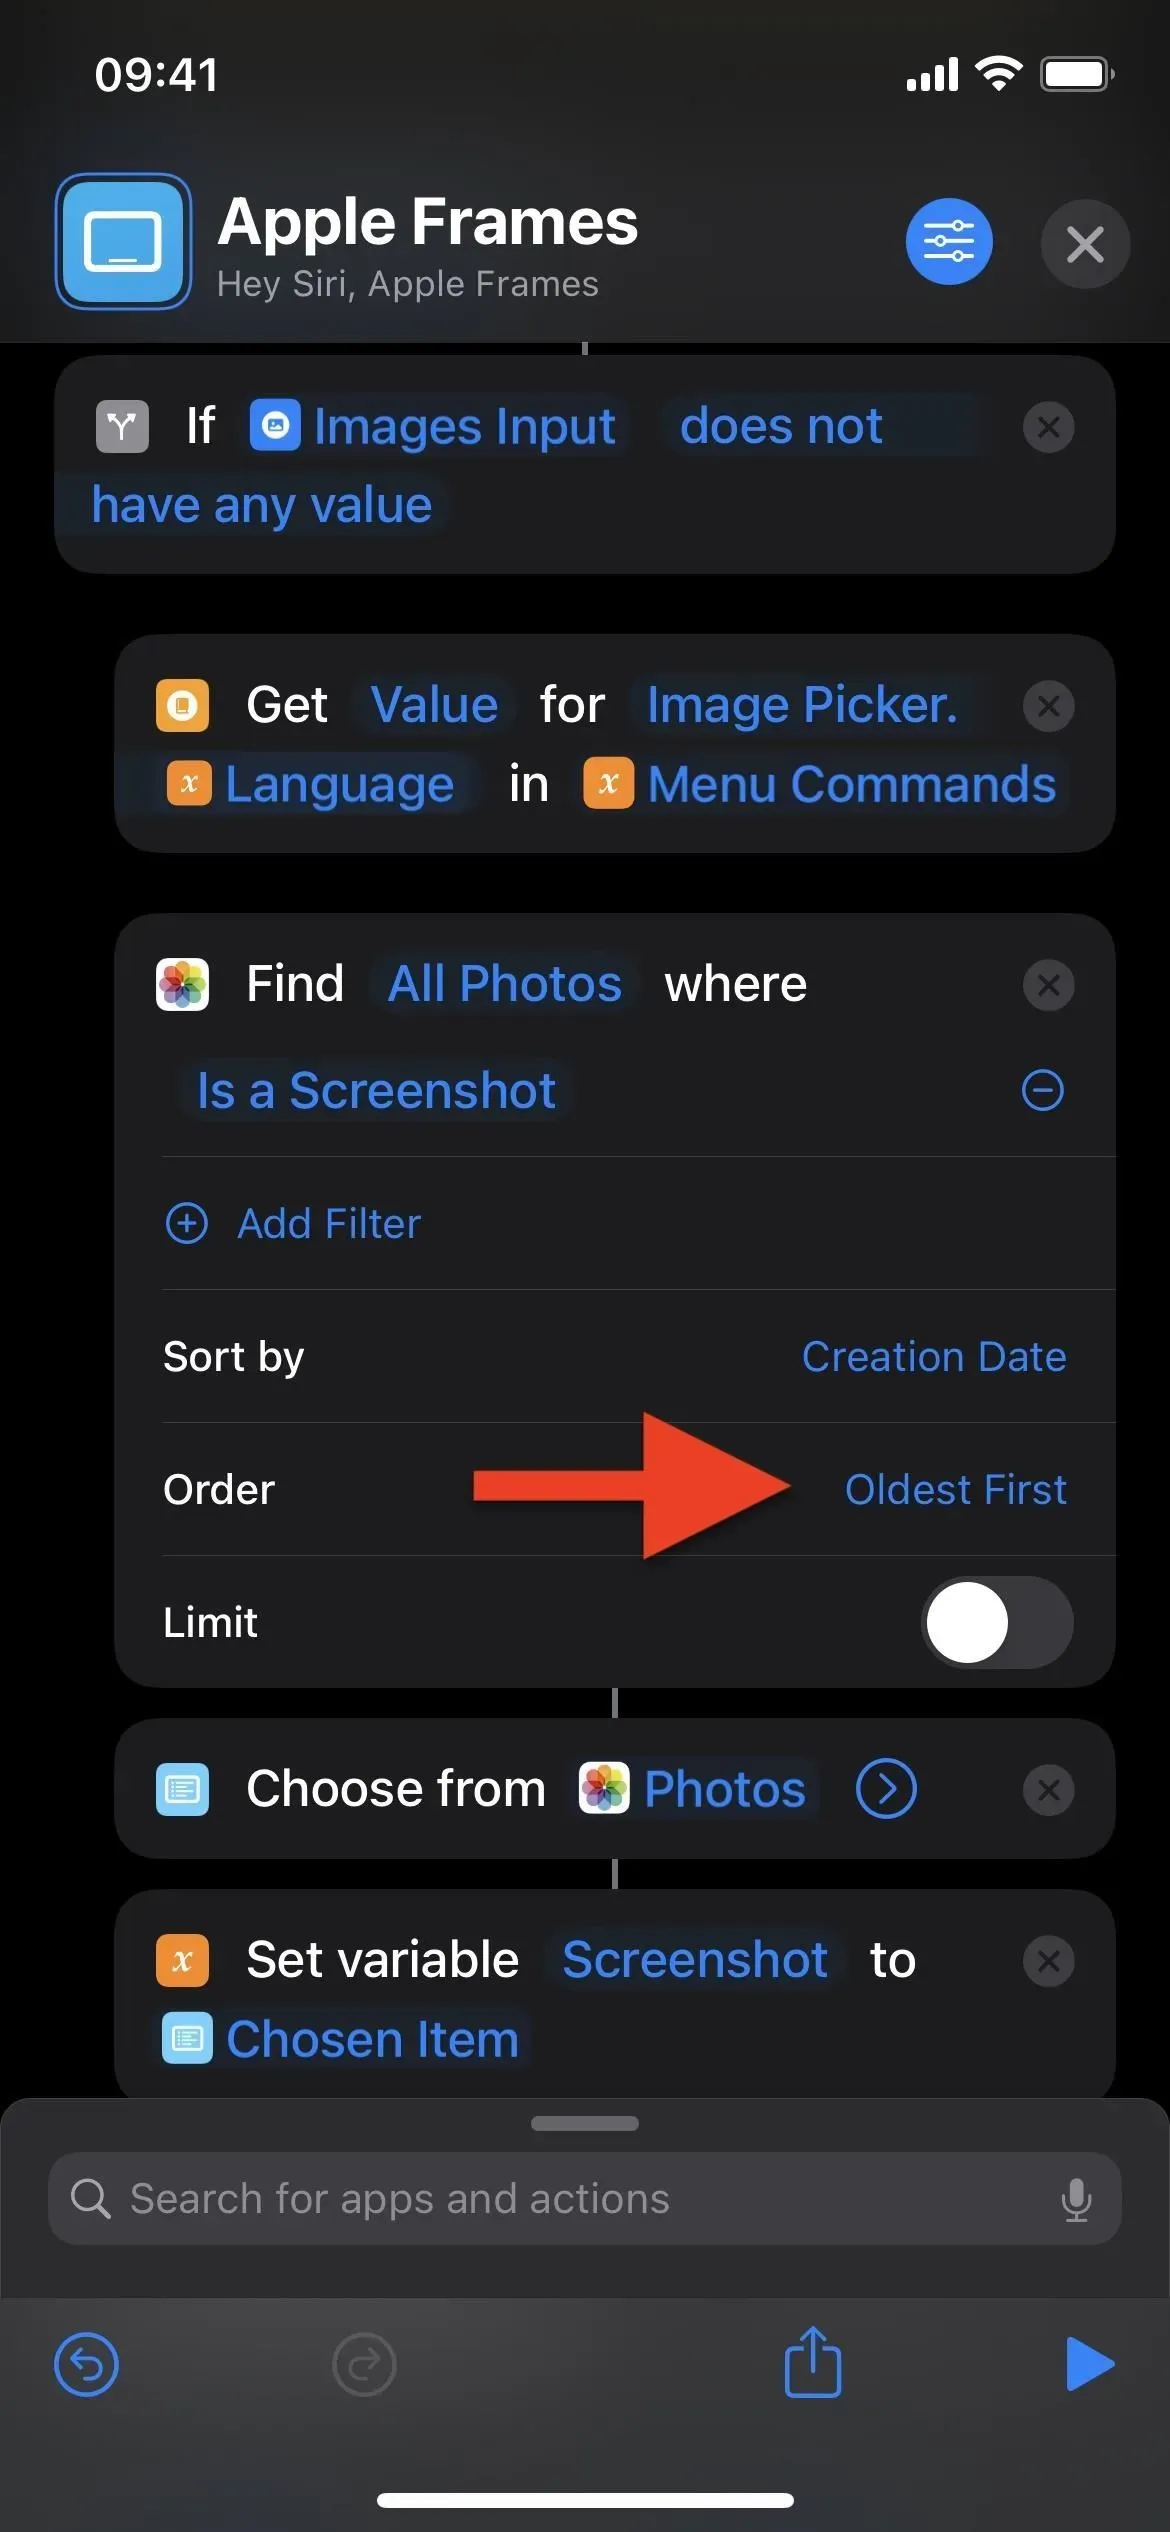
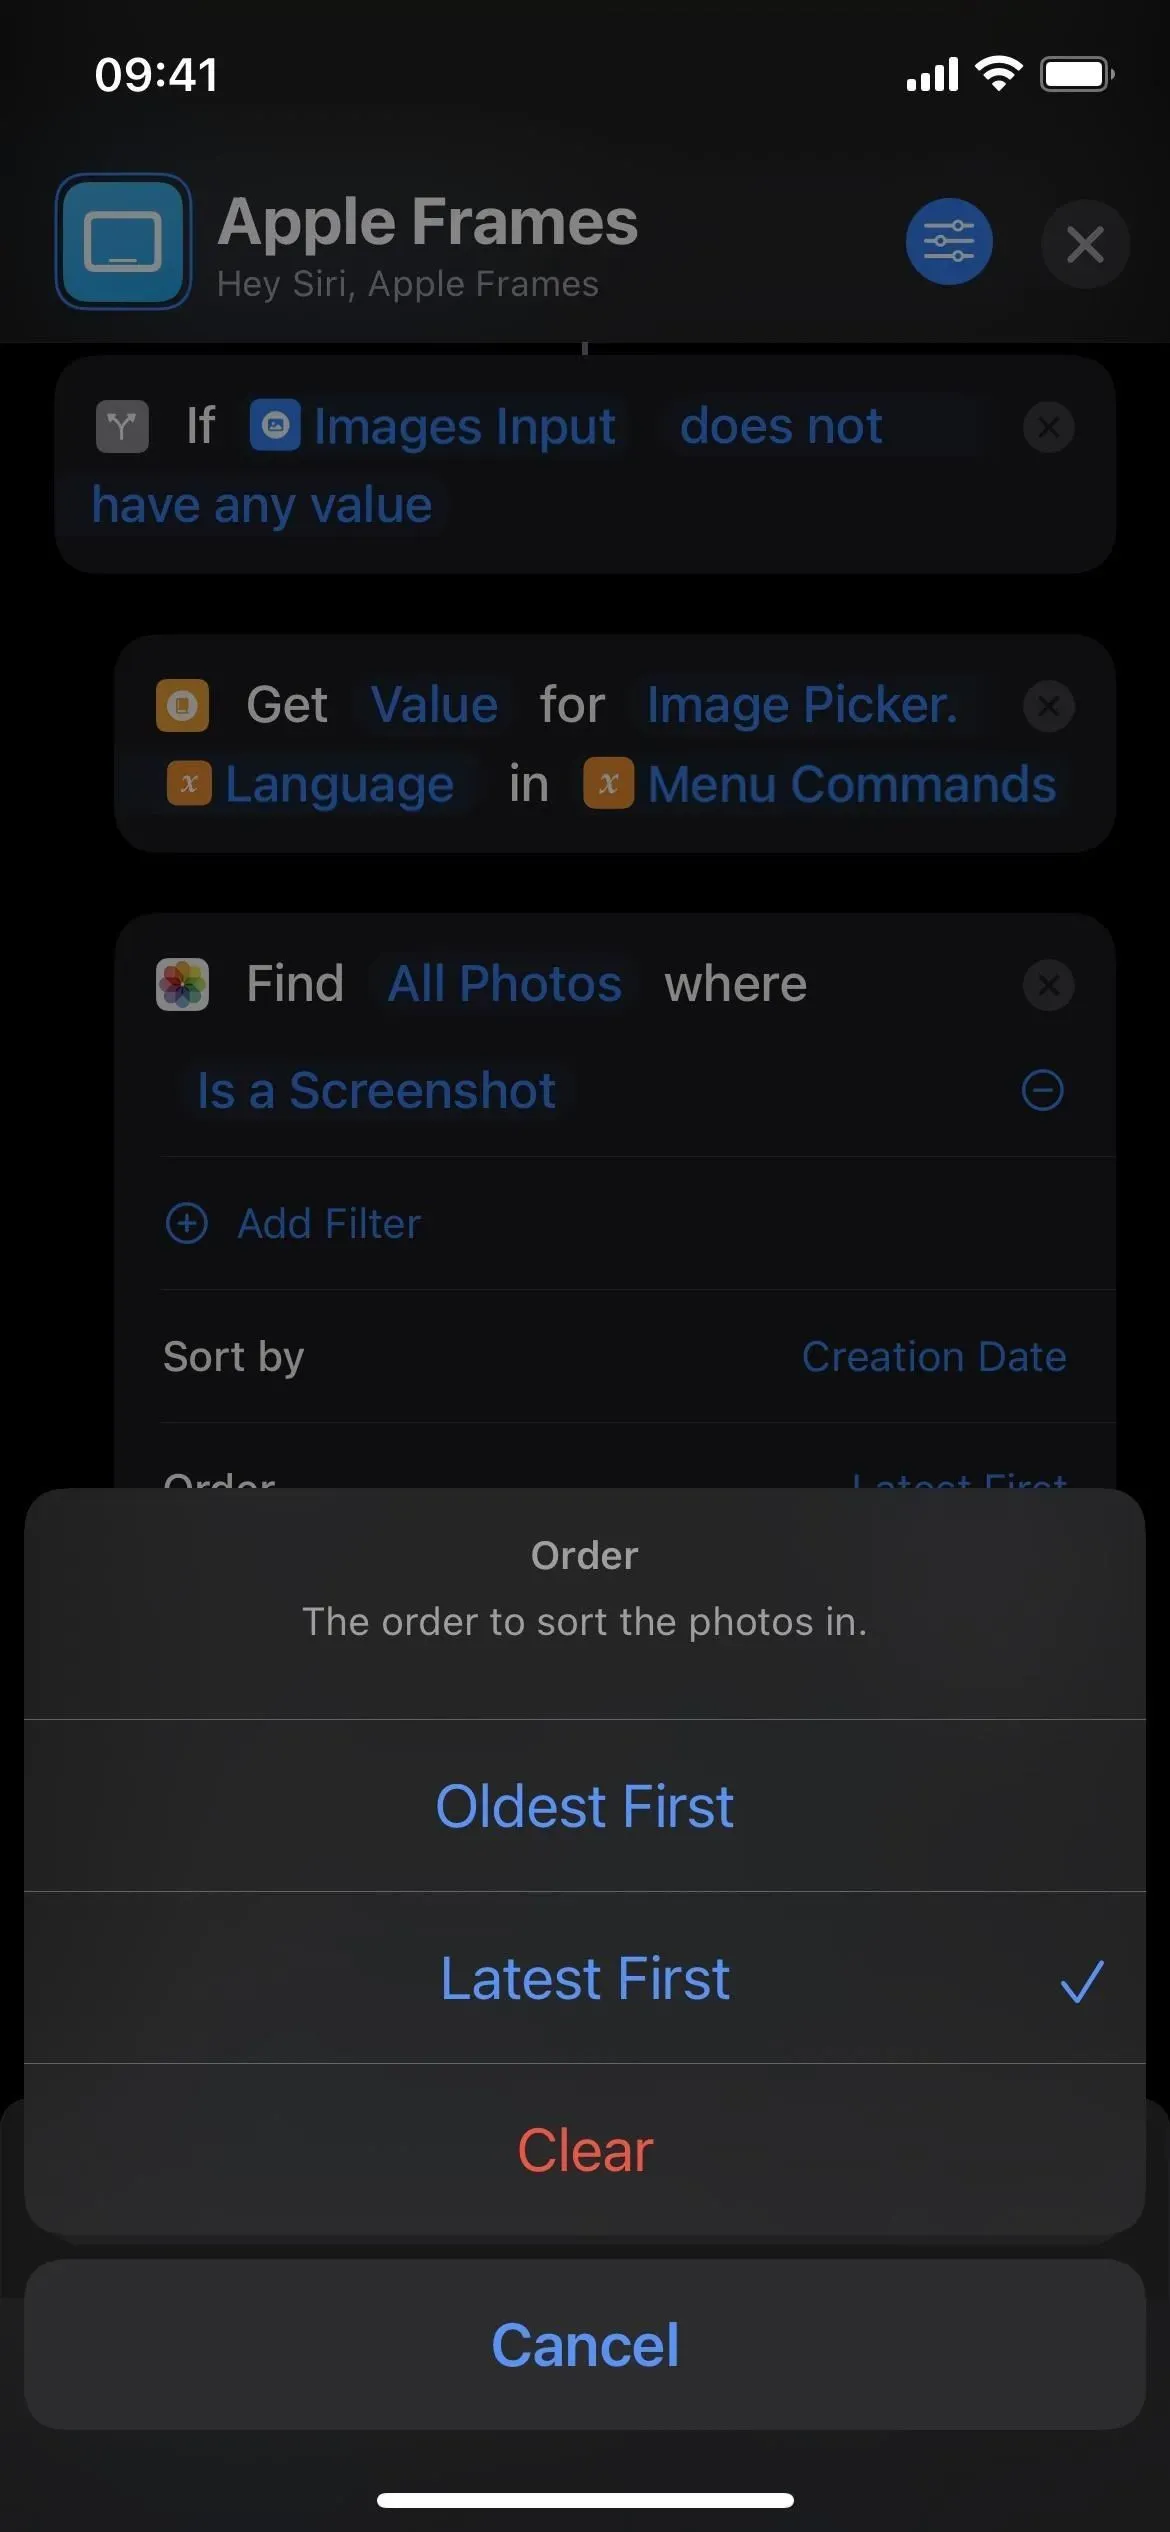
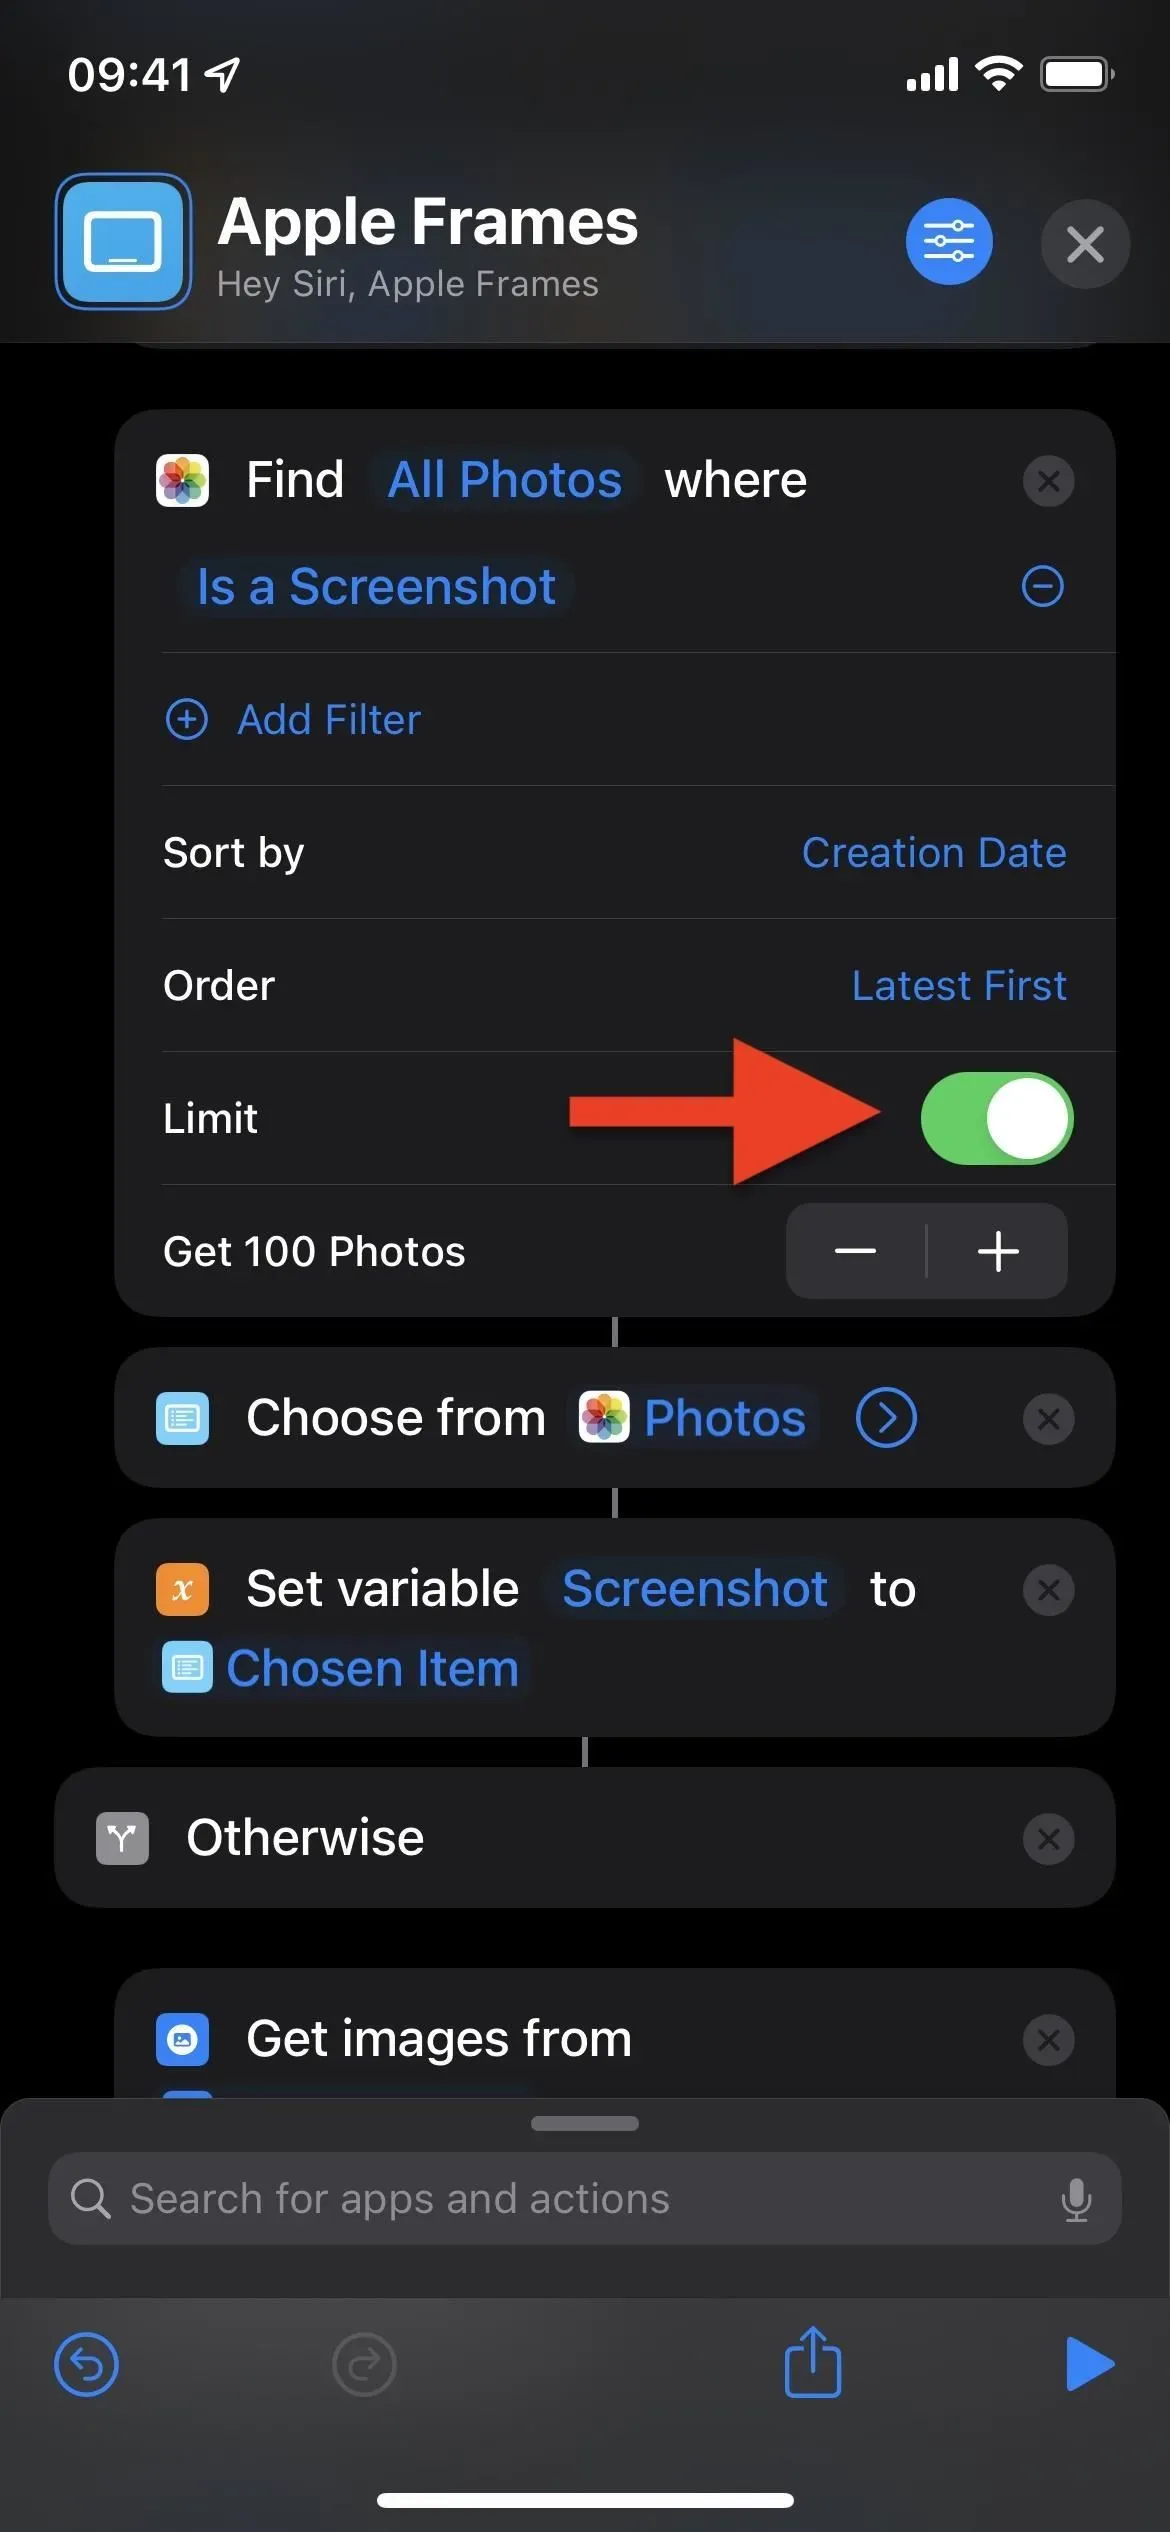
Open the editor for the shortcut (tap •••), find the action Find all photos with a screenshot, and then change the order from Oldest first to Newest first. You can also enable the “Limit”switch and select the number of images you want to see, such as the last 10 or the last 100. Click the (X) button to save.
Leave a Reply