How to batch edit photos on iPhone with the same filters and effects
The Photos app in iOS 16 lets you copy changes made to an image and paste them into another image or multiple images. This handy tool lets you apply custom filters, fixes, and effects to many images with just a few taps.
Let’s go ahead and show you how to copy and paste changes to the Photos app for iPhone and iPad.
Editing photos in iOS
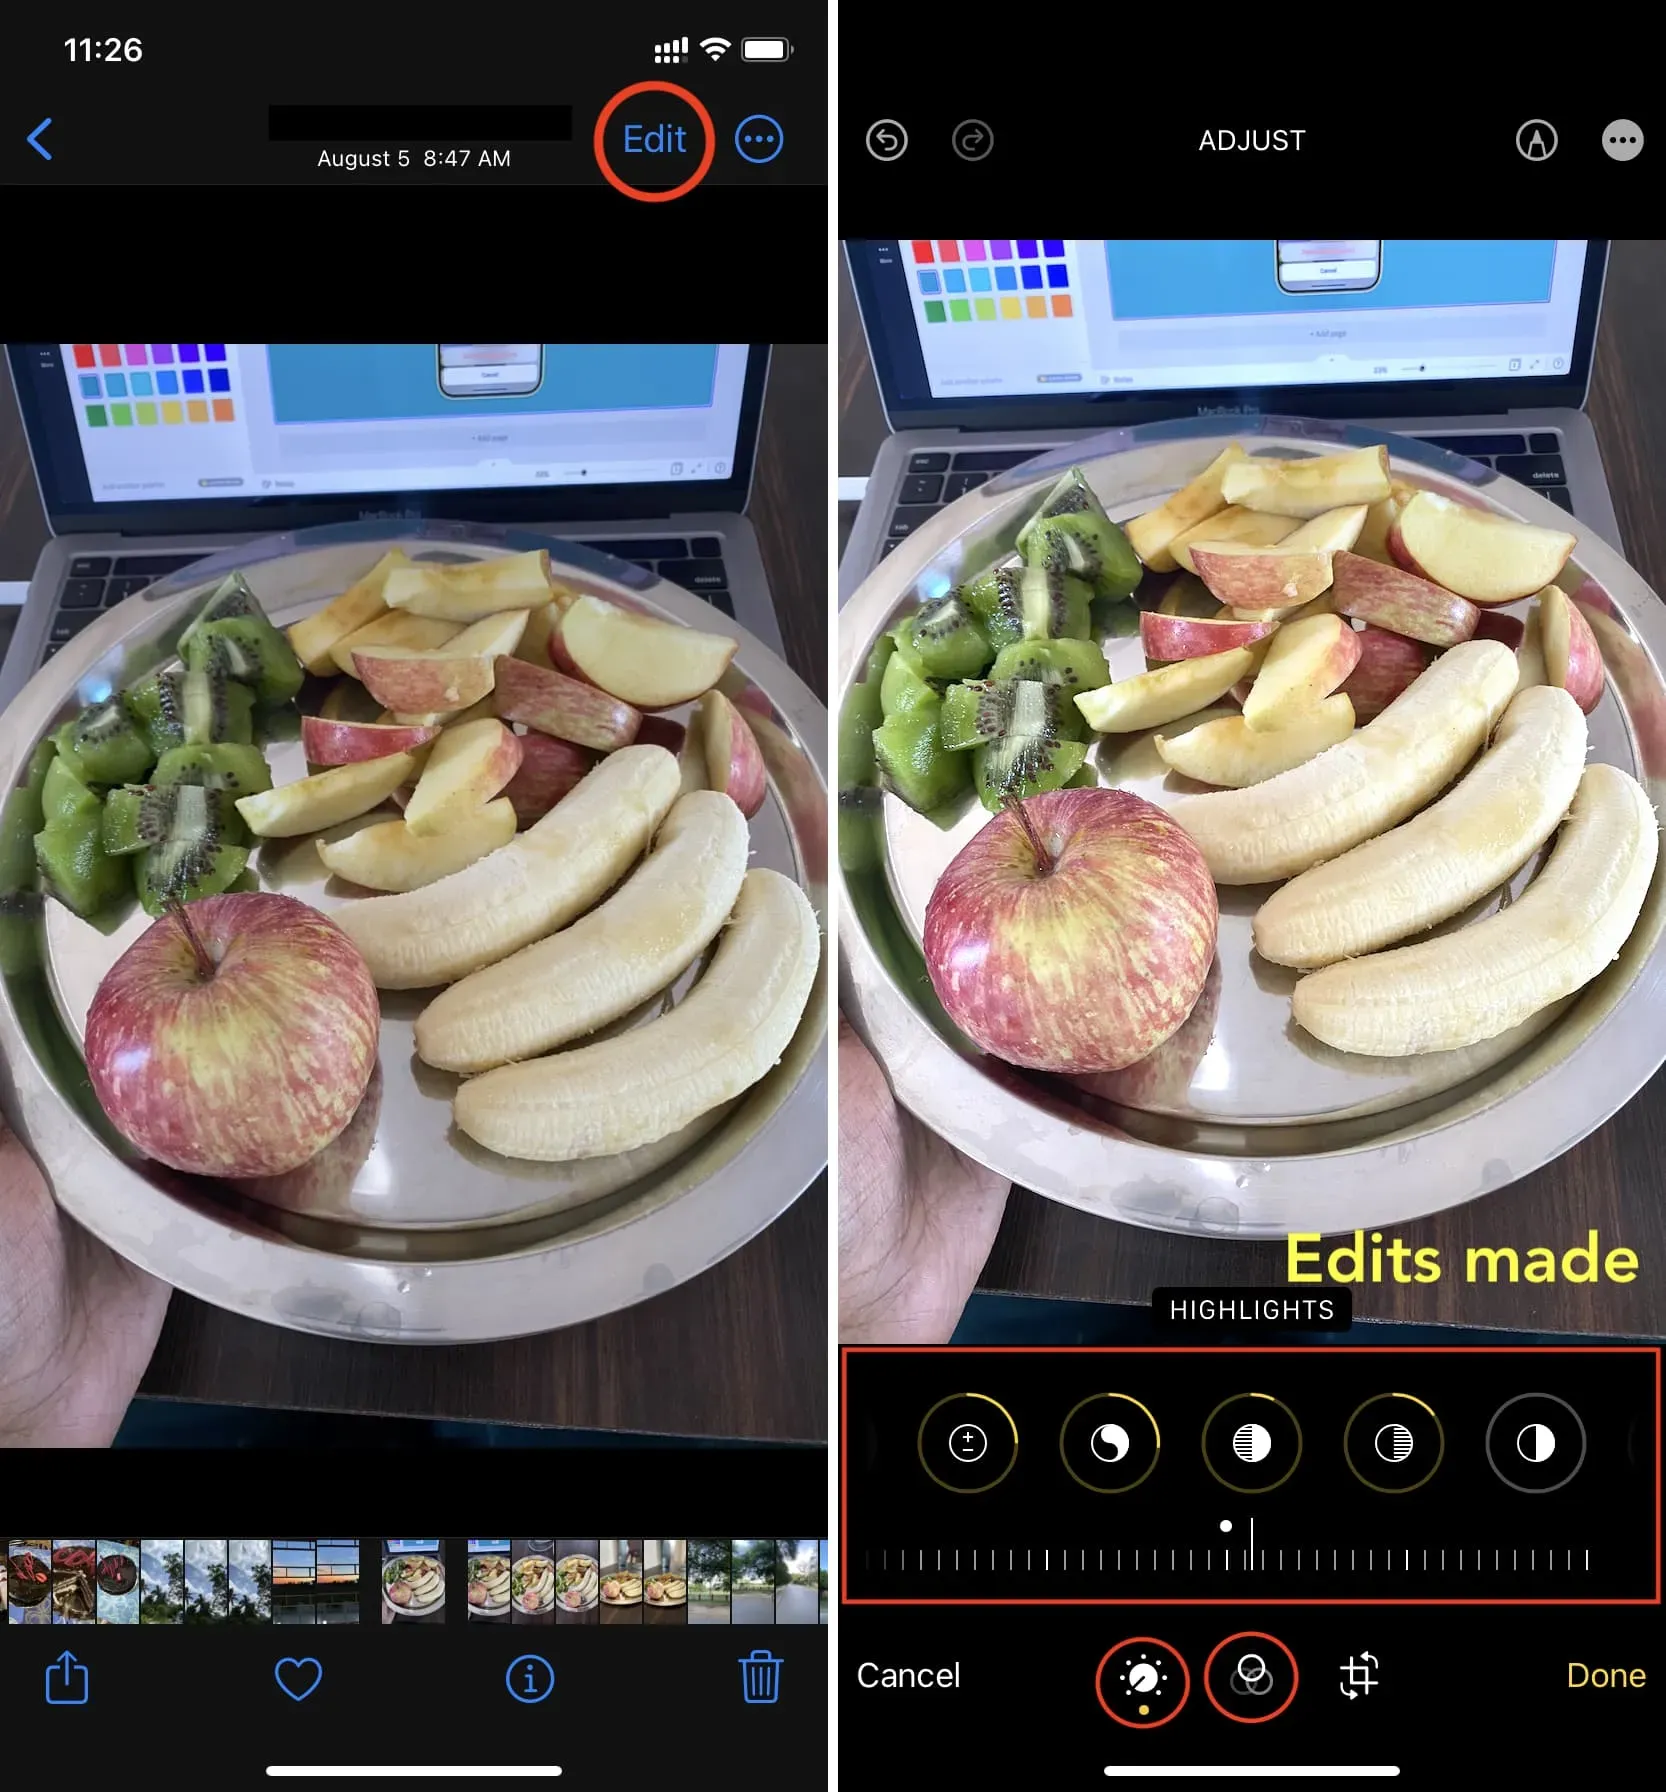
When you open an image in the Photos app on iPhone and click Edit, you are taken to the editing screen.
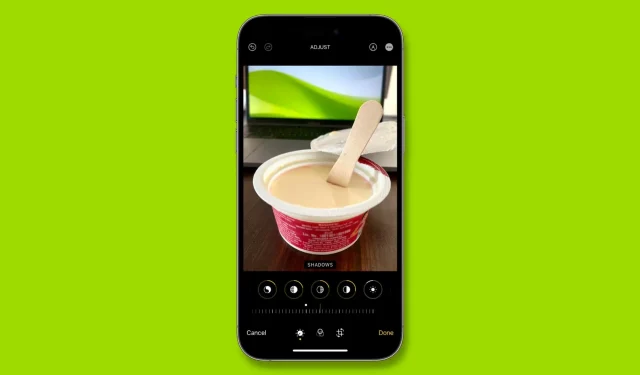
In addition to automatic enhancement, there are tools for changing exposure, brightness, highlights, shadows, contrast, brightness, black point, saturation, vibrancy, warmth, hue, sharpness, clarity, noise reduction, and vignette effect. These tools have an adjustment range of -100 to 100 or 0 to 100 and you can tweak them accordingly to get the look you want.

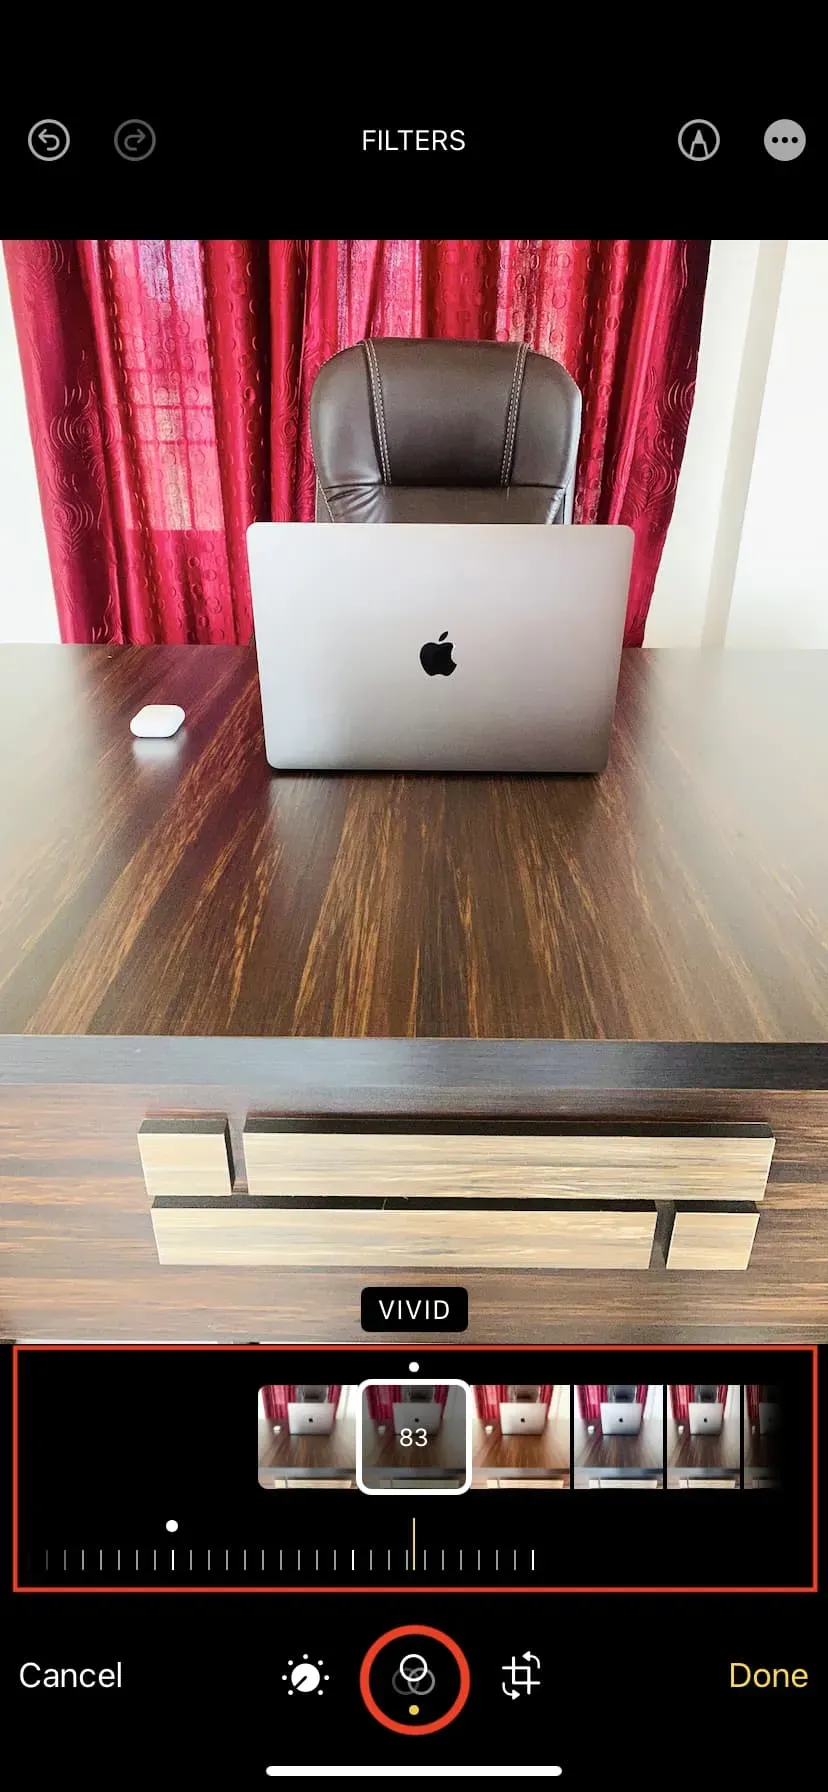
In addition to these manual controls, you can also use pre-made filters such as Vivid, Vivid Warm, Vivid Cool, Dramatic, Dramatic Warm, Dramatic Cool, Mono, Silvertone, and Noir. These filters also have a finer tuning range that can be set from 0 to 100.
When people edit an image in the iOS Photos app, they use the tools mentioned above and customize them according to their preferences.
In iOS 16, when you’re about to edit a photo, you can copy the edits you’ve made and then paste them into another image or multiple images. As a result, precise changes will be instantly applied to all selected images.
Use cases for batch photo editing
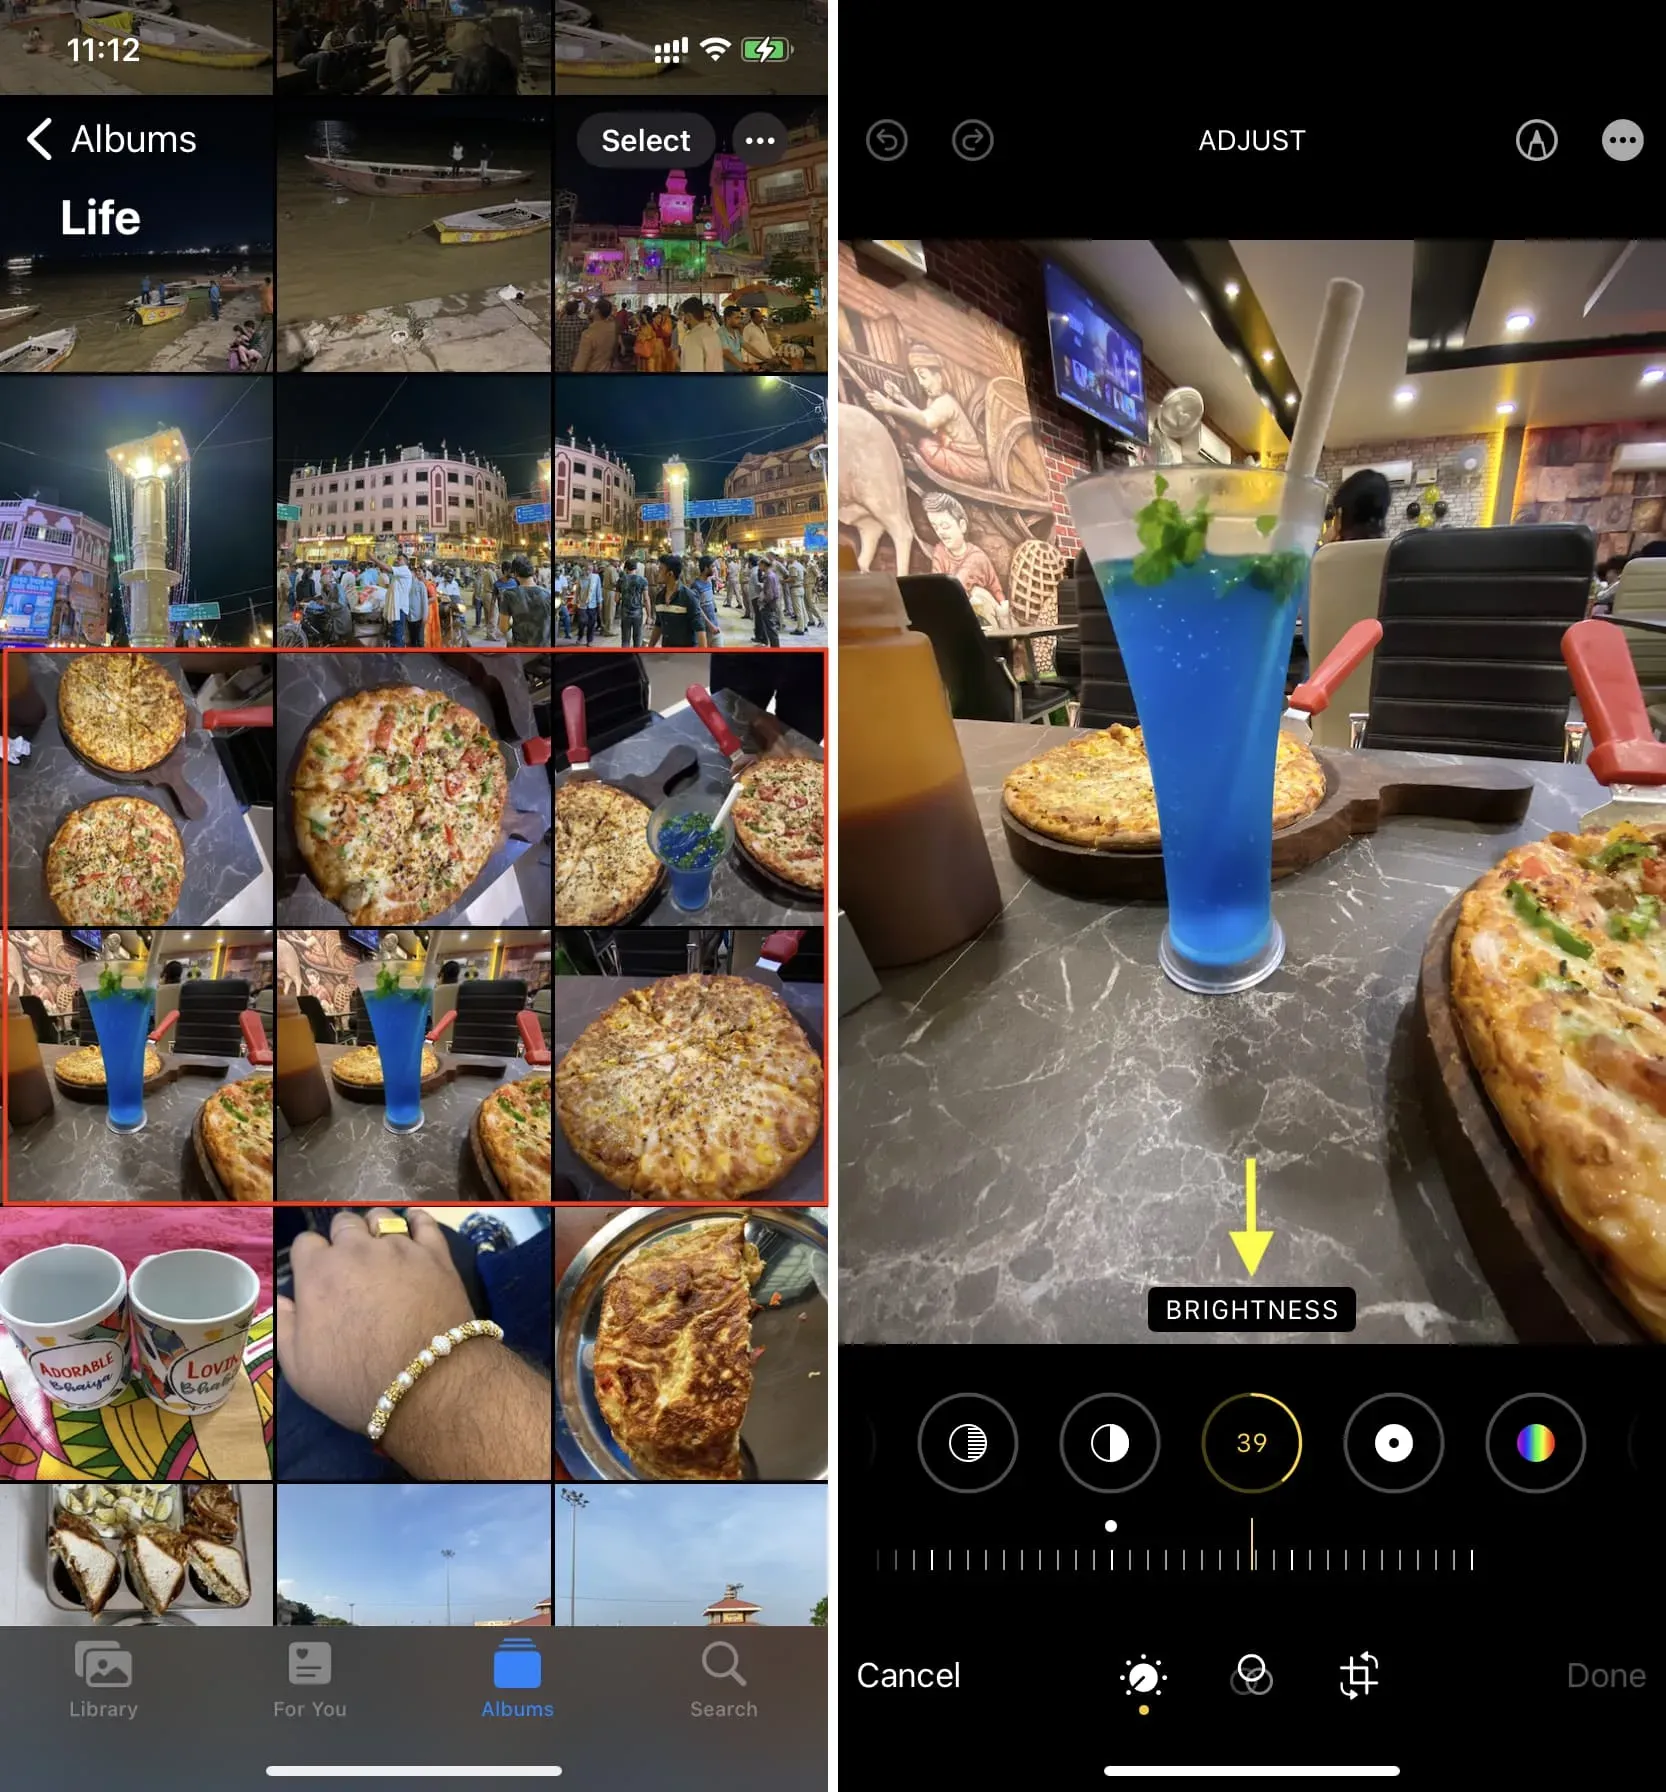
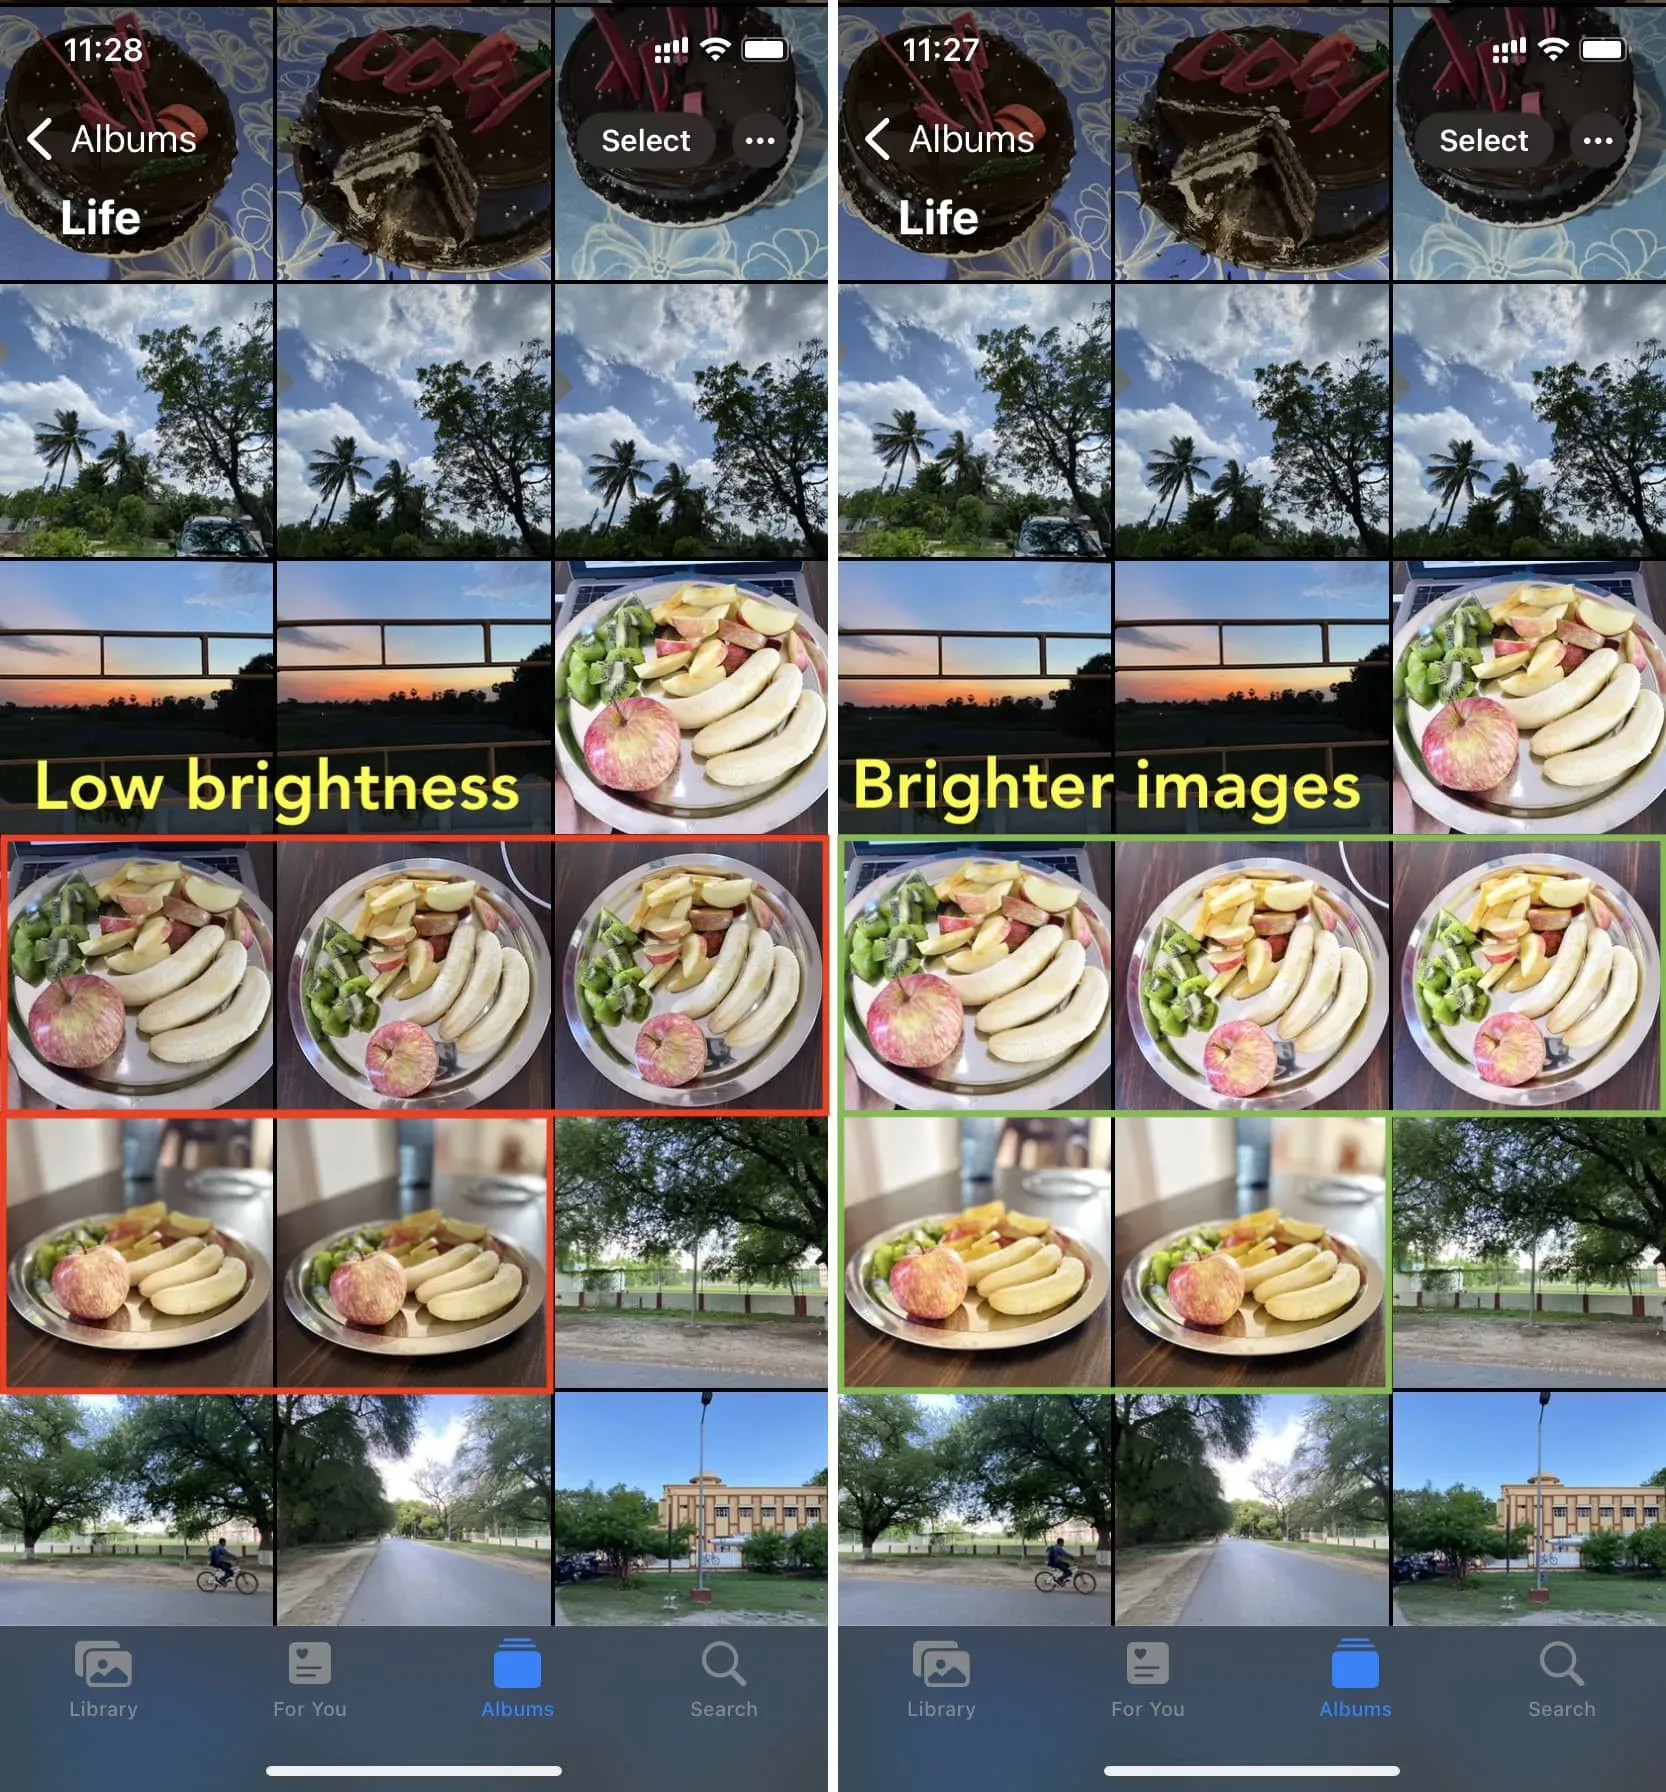
I went out for dinner and took some photos. They were all shot under the same lighting conditions, which seems a bit dark to me. So, I want to increase the brightness on all photos.
I used to have to edit all the photos one by one, which was time consuming. But with iOS 16, I can edit one of my dinner photos, setting the brightness level (and other options) to my liking.
Let’s say I set the brightness to 39. Then I have the option to copy those changes. And finally, I can select all my dinner images and paste the changes into them. In an instant, all my selected photos will be edited and become brighter. All of them will have a brightness level of 39!
You can use this to quickly add the same filter to many images at once, or change their brightness, color, noise level, etc. There are no limits, and you can paste the copied changes into any image you want. But we recommend using the same edits on photos taken for a specific occasion, event, lighting conditions, etc.
How to Edit Multiple Selected Photos at Once on iPhone and iPad
1) Go to the Photos app and open the image in full screen mode.
2) Click “Edit”.
3) Now make the necessary changes. You can choose “Auto”or one of the options next to it. You can also click the filters button and use it.
4) After editing, click the “More”button and select “Copy Changes”.
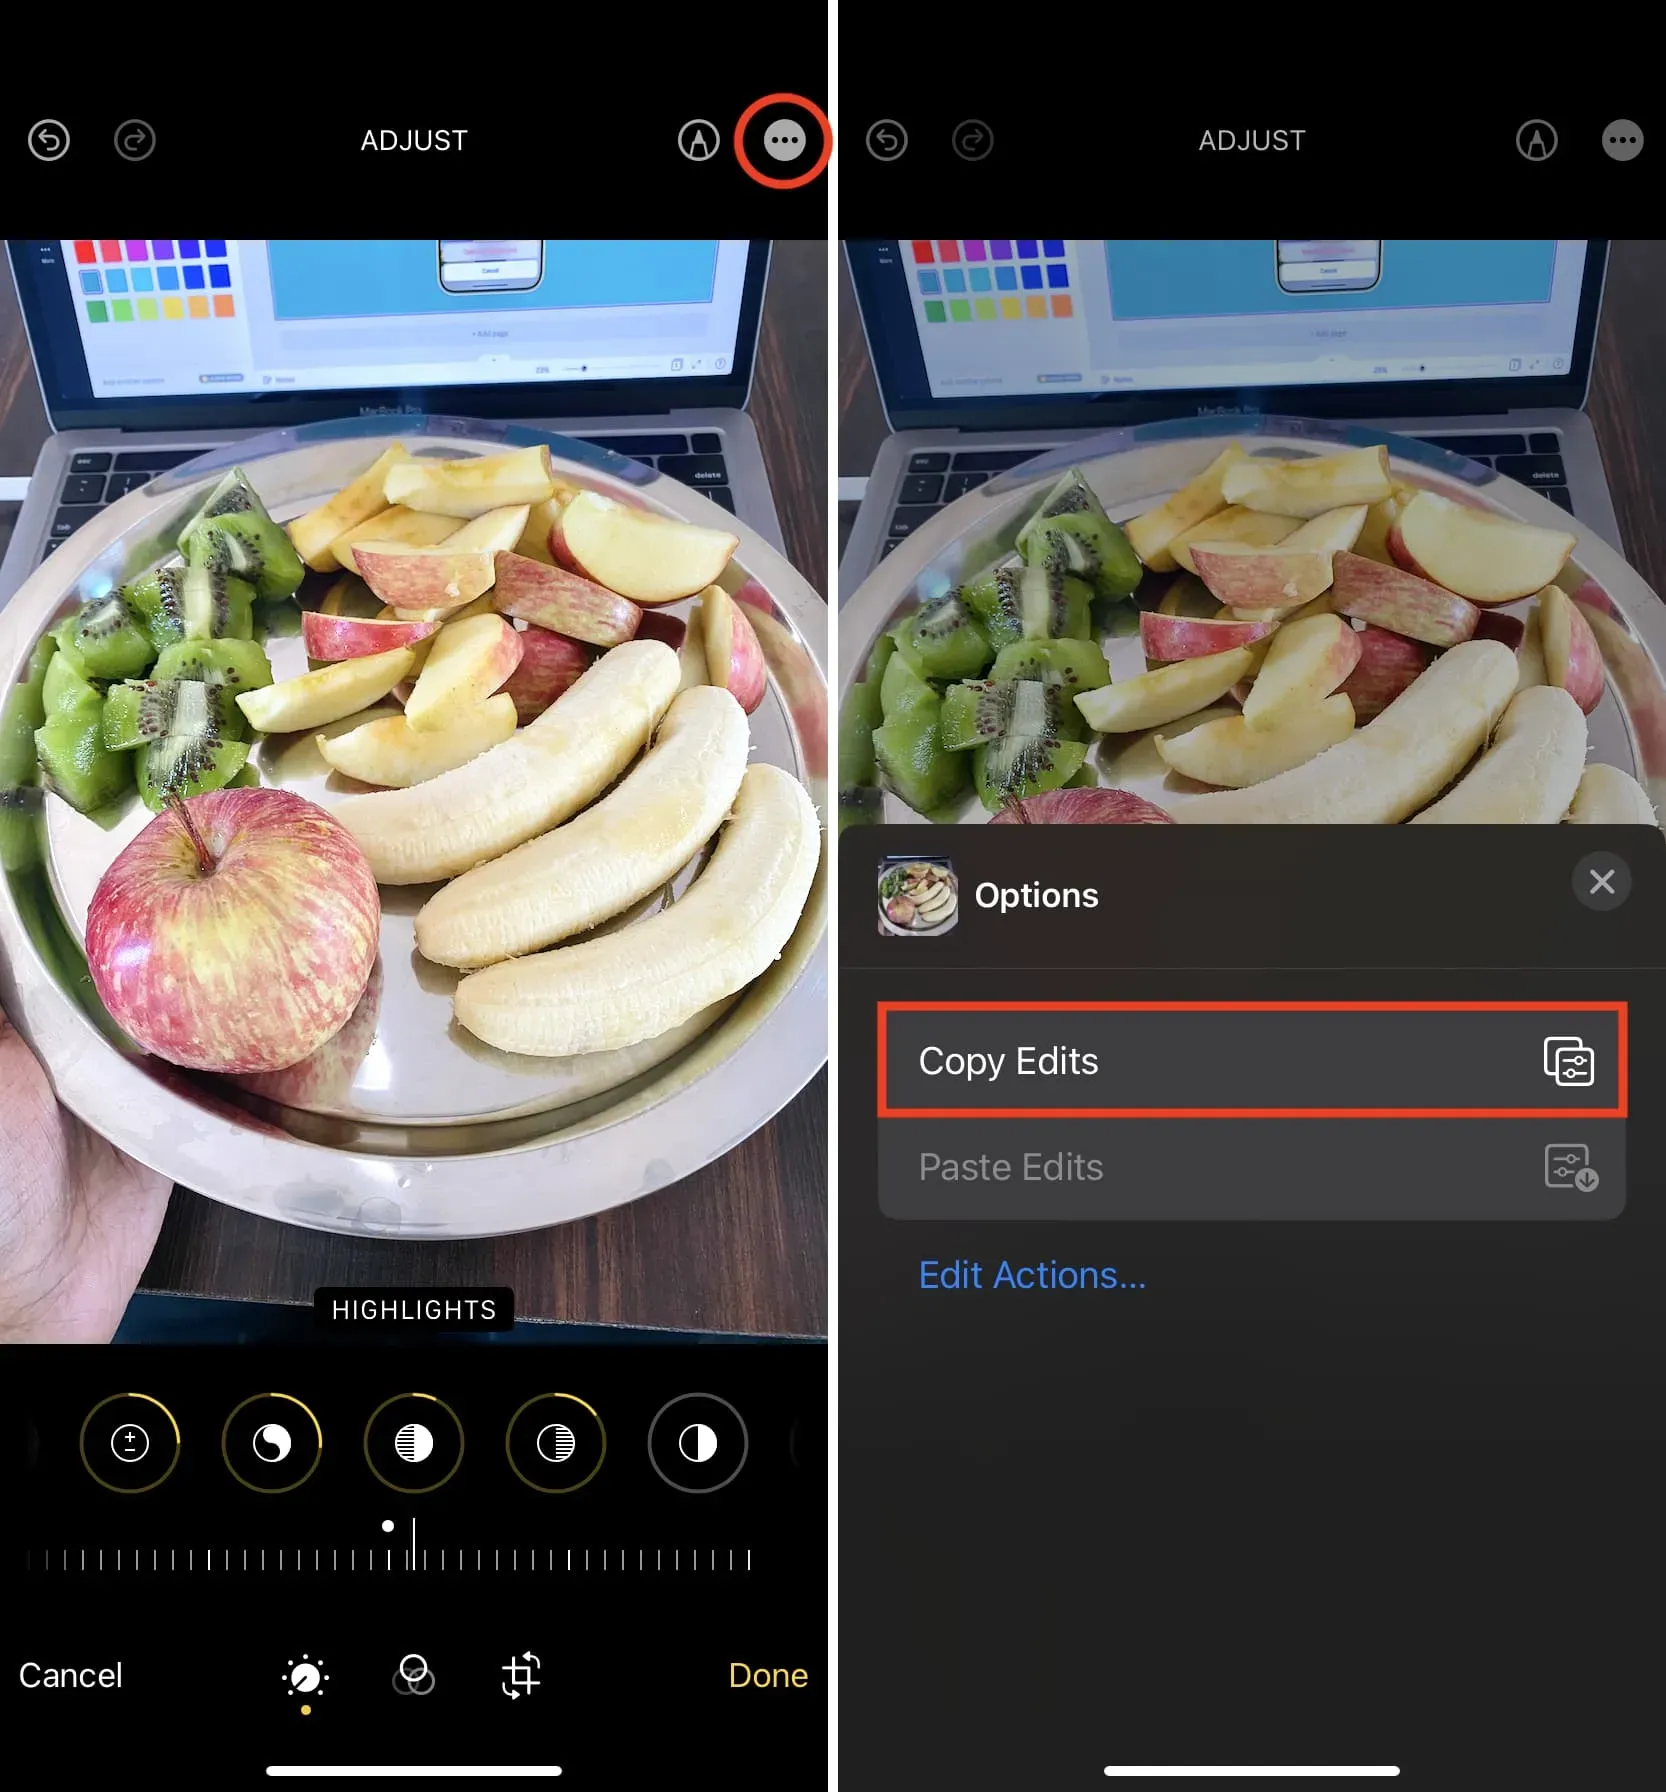
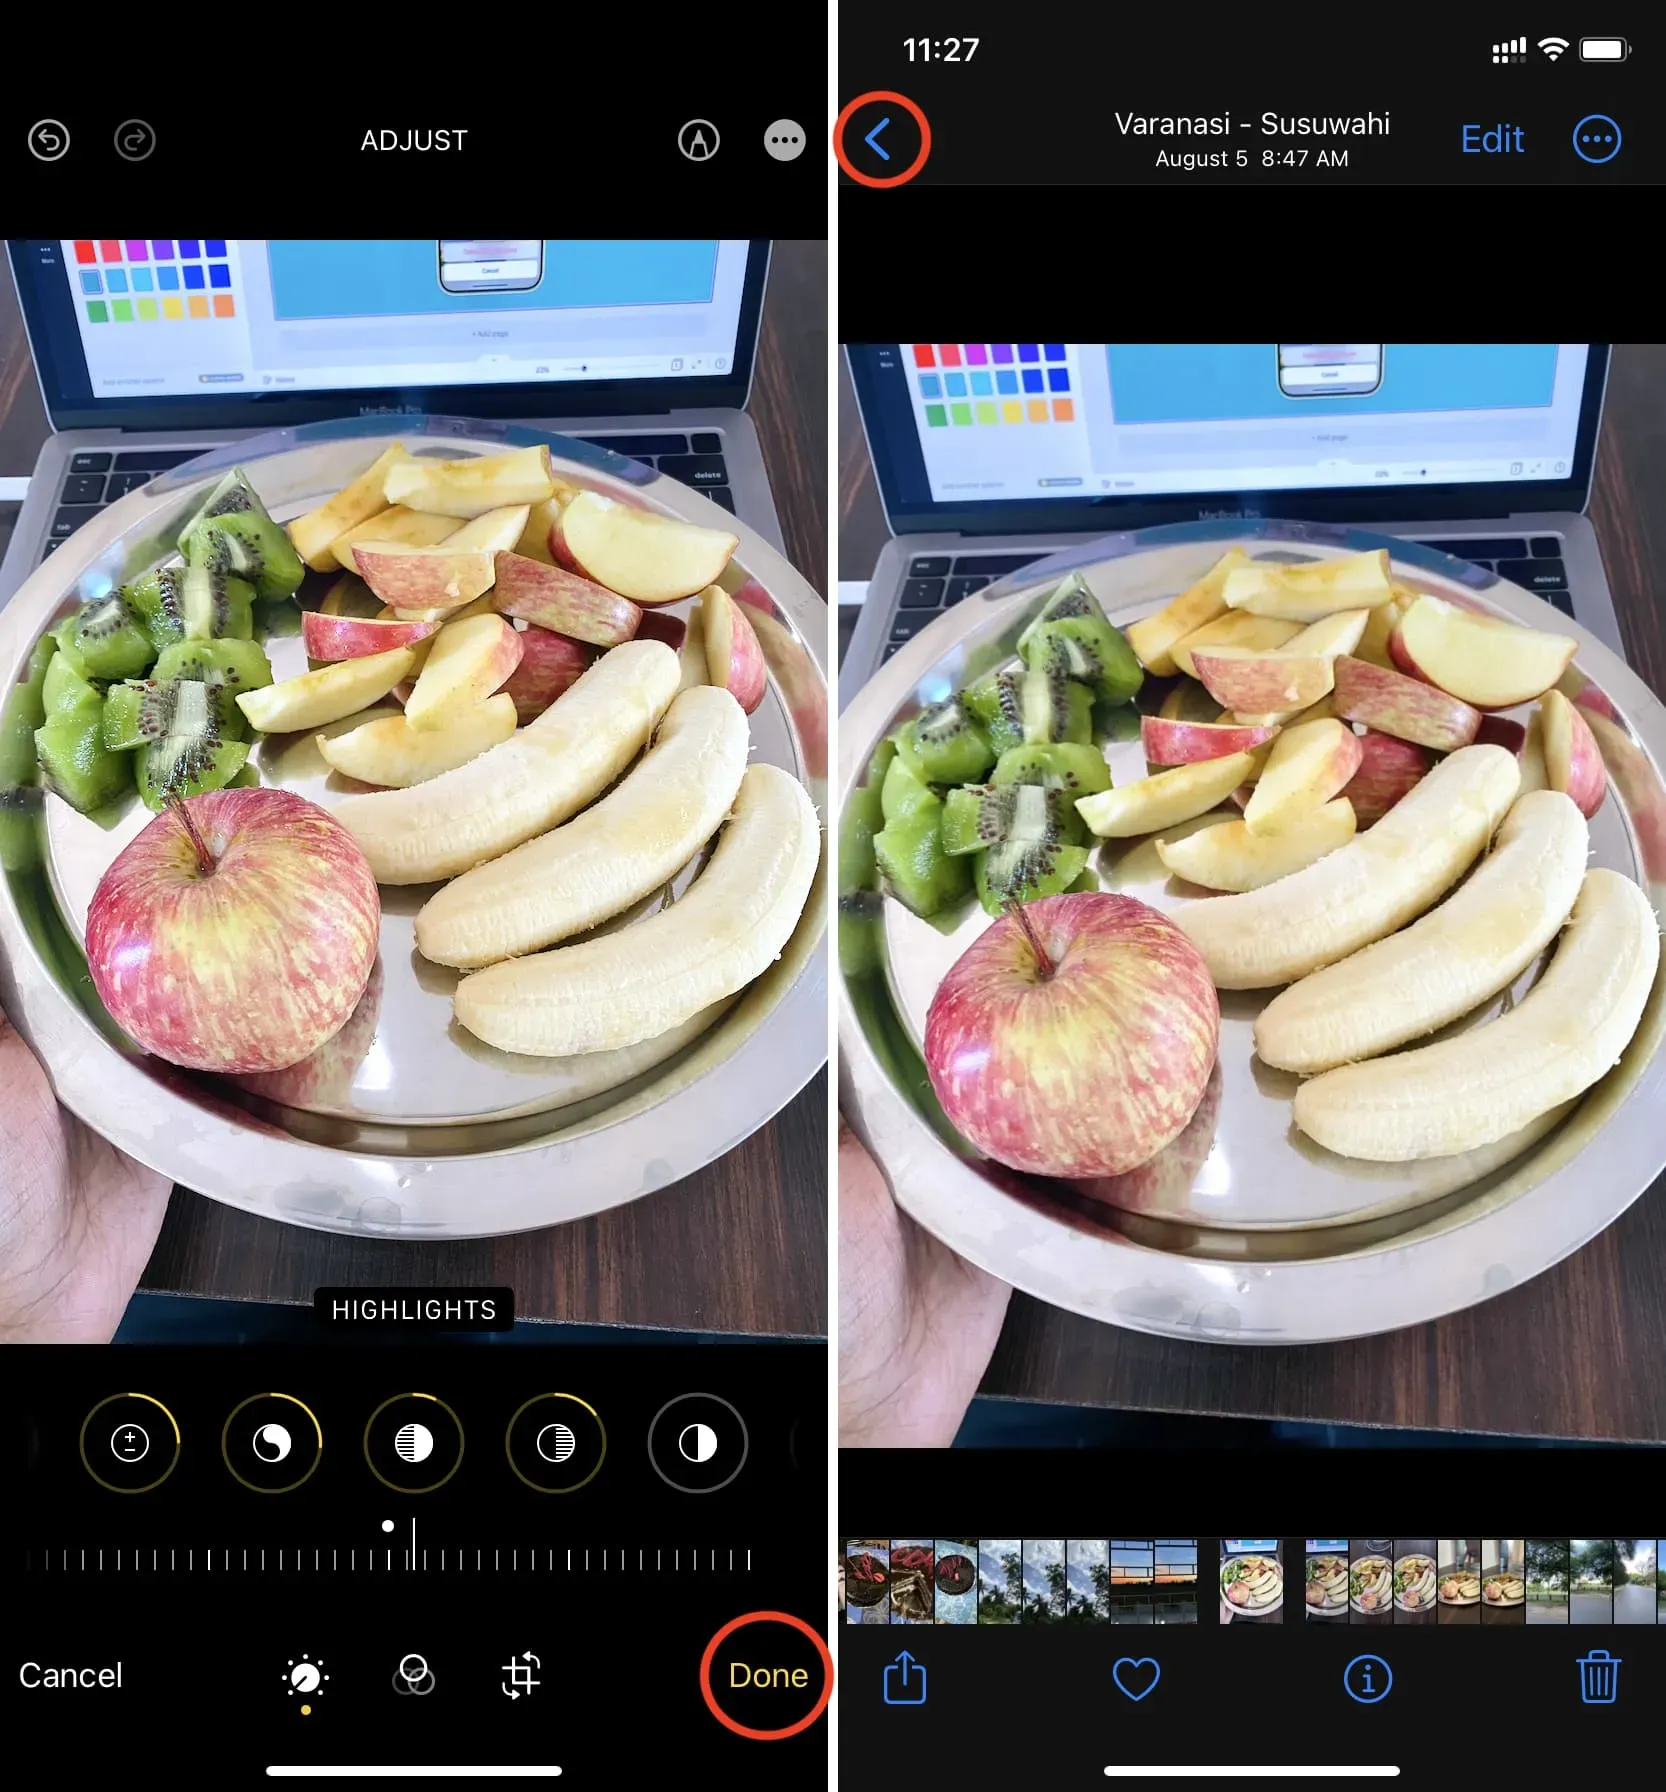
5) Click Done to exit the editing screen.
6) When you exit the edit screen, press the back button to see all your images as smaller tiles/thumbnails.
7) Click “Select”and select images.
8) Click the “Advanced”button and click “Paste Changes”.
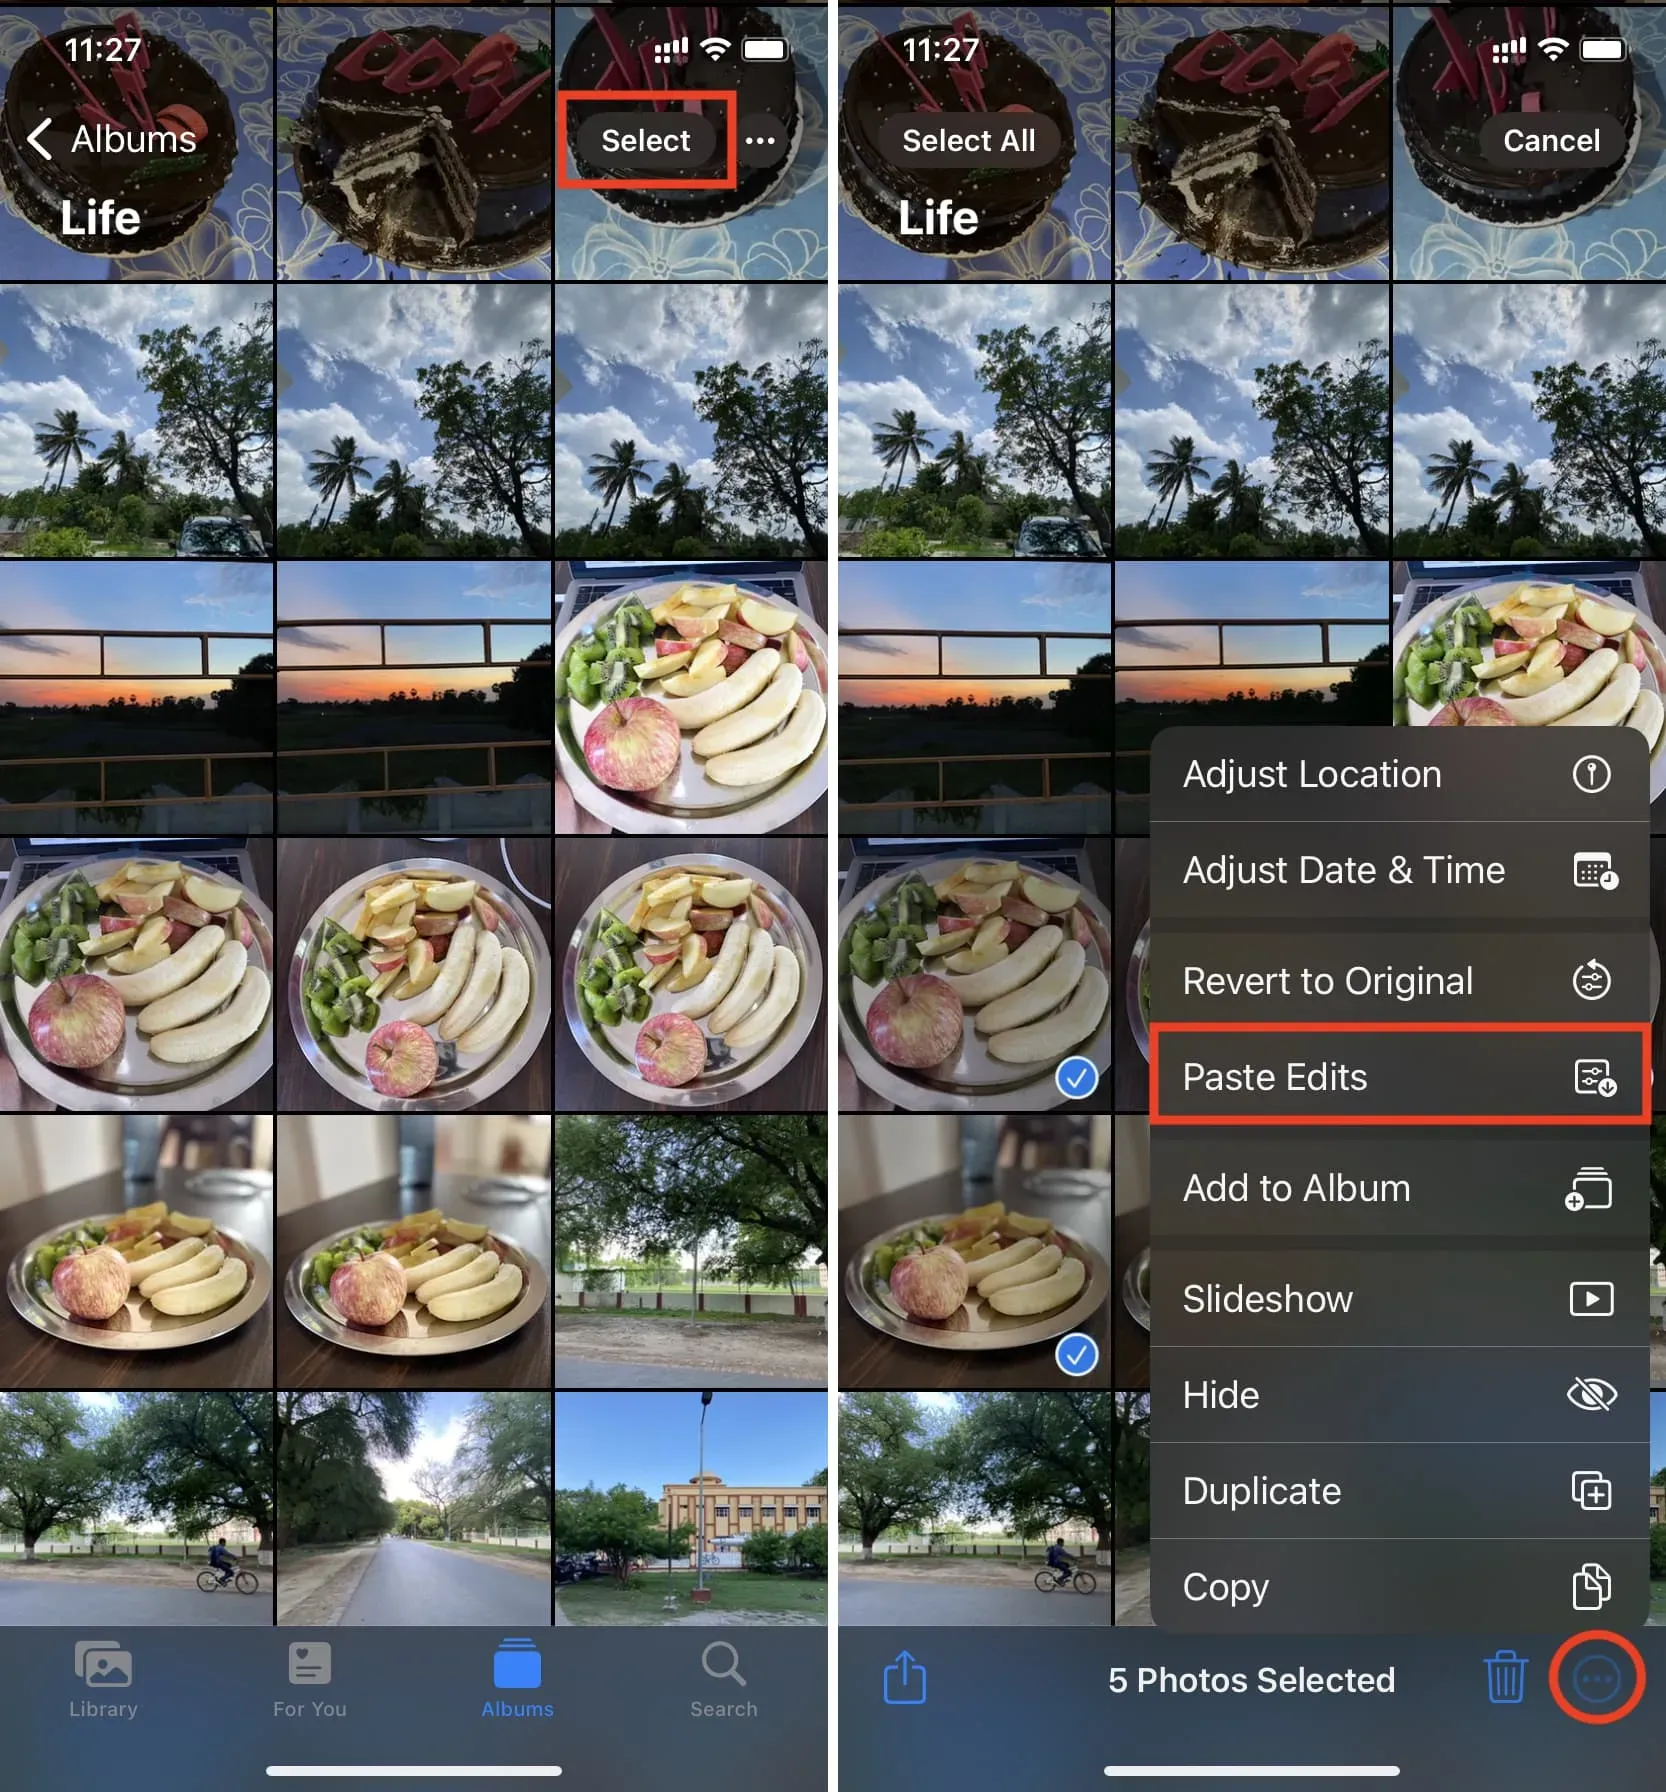
All selected images will be edited in the same way as the first image you edited in steps 1 to 5.
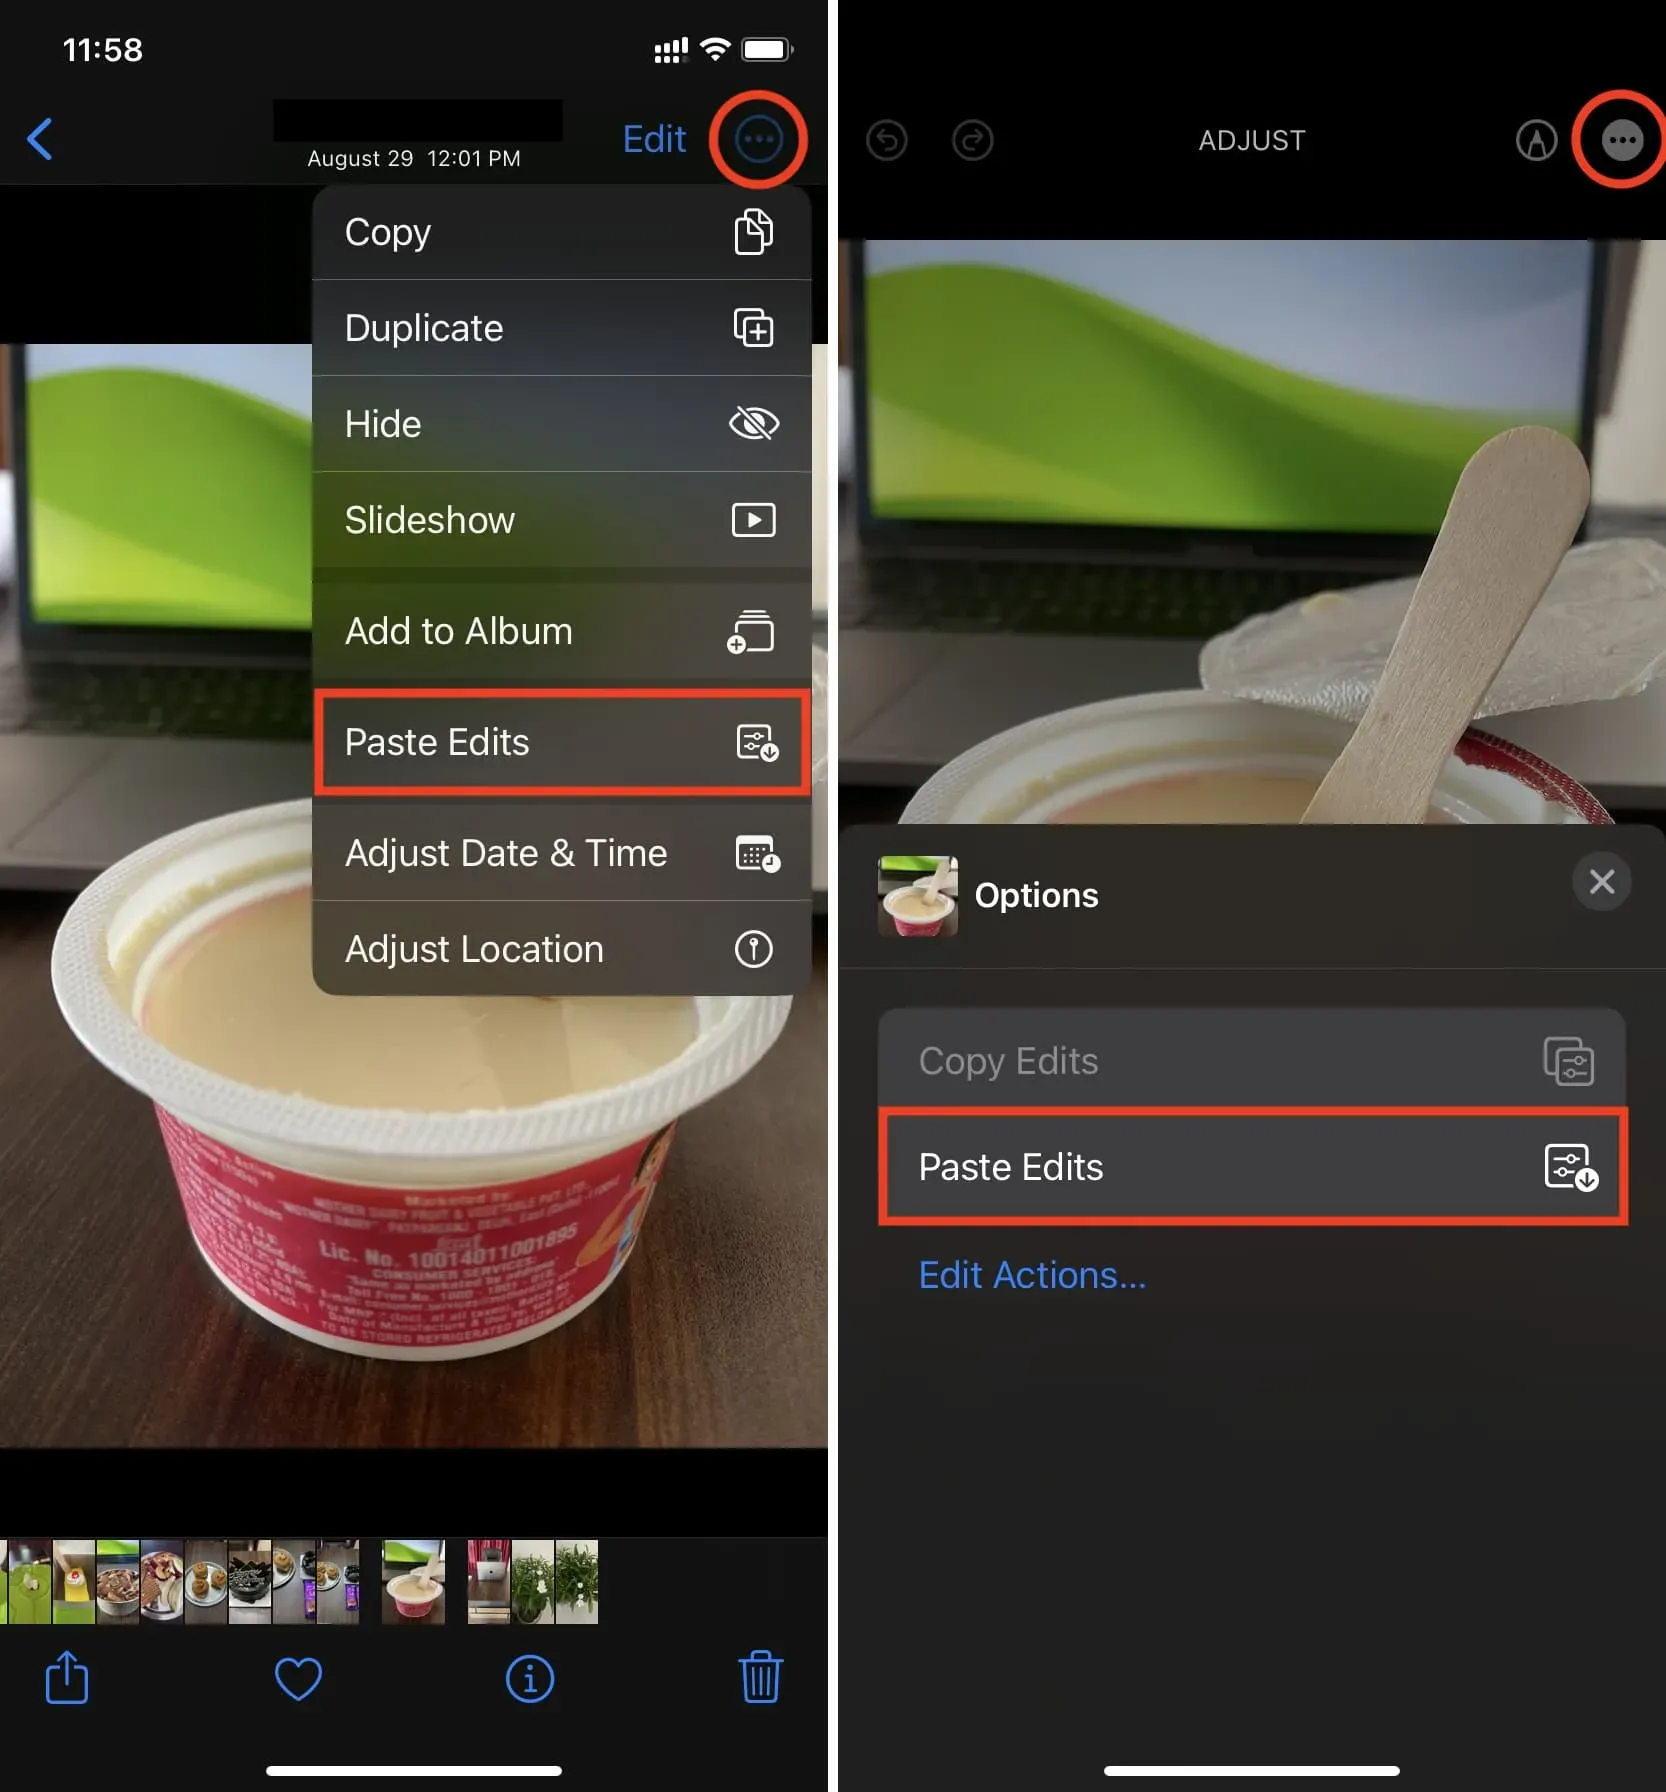
Paste changes to only one photo
To paste changes into a single image, open it in full screen mode and click the More button and then Paste Changes (left image). You can even paste the copied changes while editing the image (right image).
Make additional adjustments or undo changes
Even after you’ve edited multiple photos in a batch, you have the option to edit an individual photo by tapping it and clicking Edit. You can make further edits to an image that has already been edited, or click Revert to undo editing that image.
Remove pasted edits from all images
Don’t like the edits you’ve made to multiple images at once? You can remove edits one by one from the desired photos. Or you can remove changes from all images at once, and they will return to their previous unedited look. Here’s how:
1) Click “Select”and select the image you’ve made changes to.
2) Click the “More”button and select “Revert to original”.
3) Confirm by clicking Return.
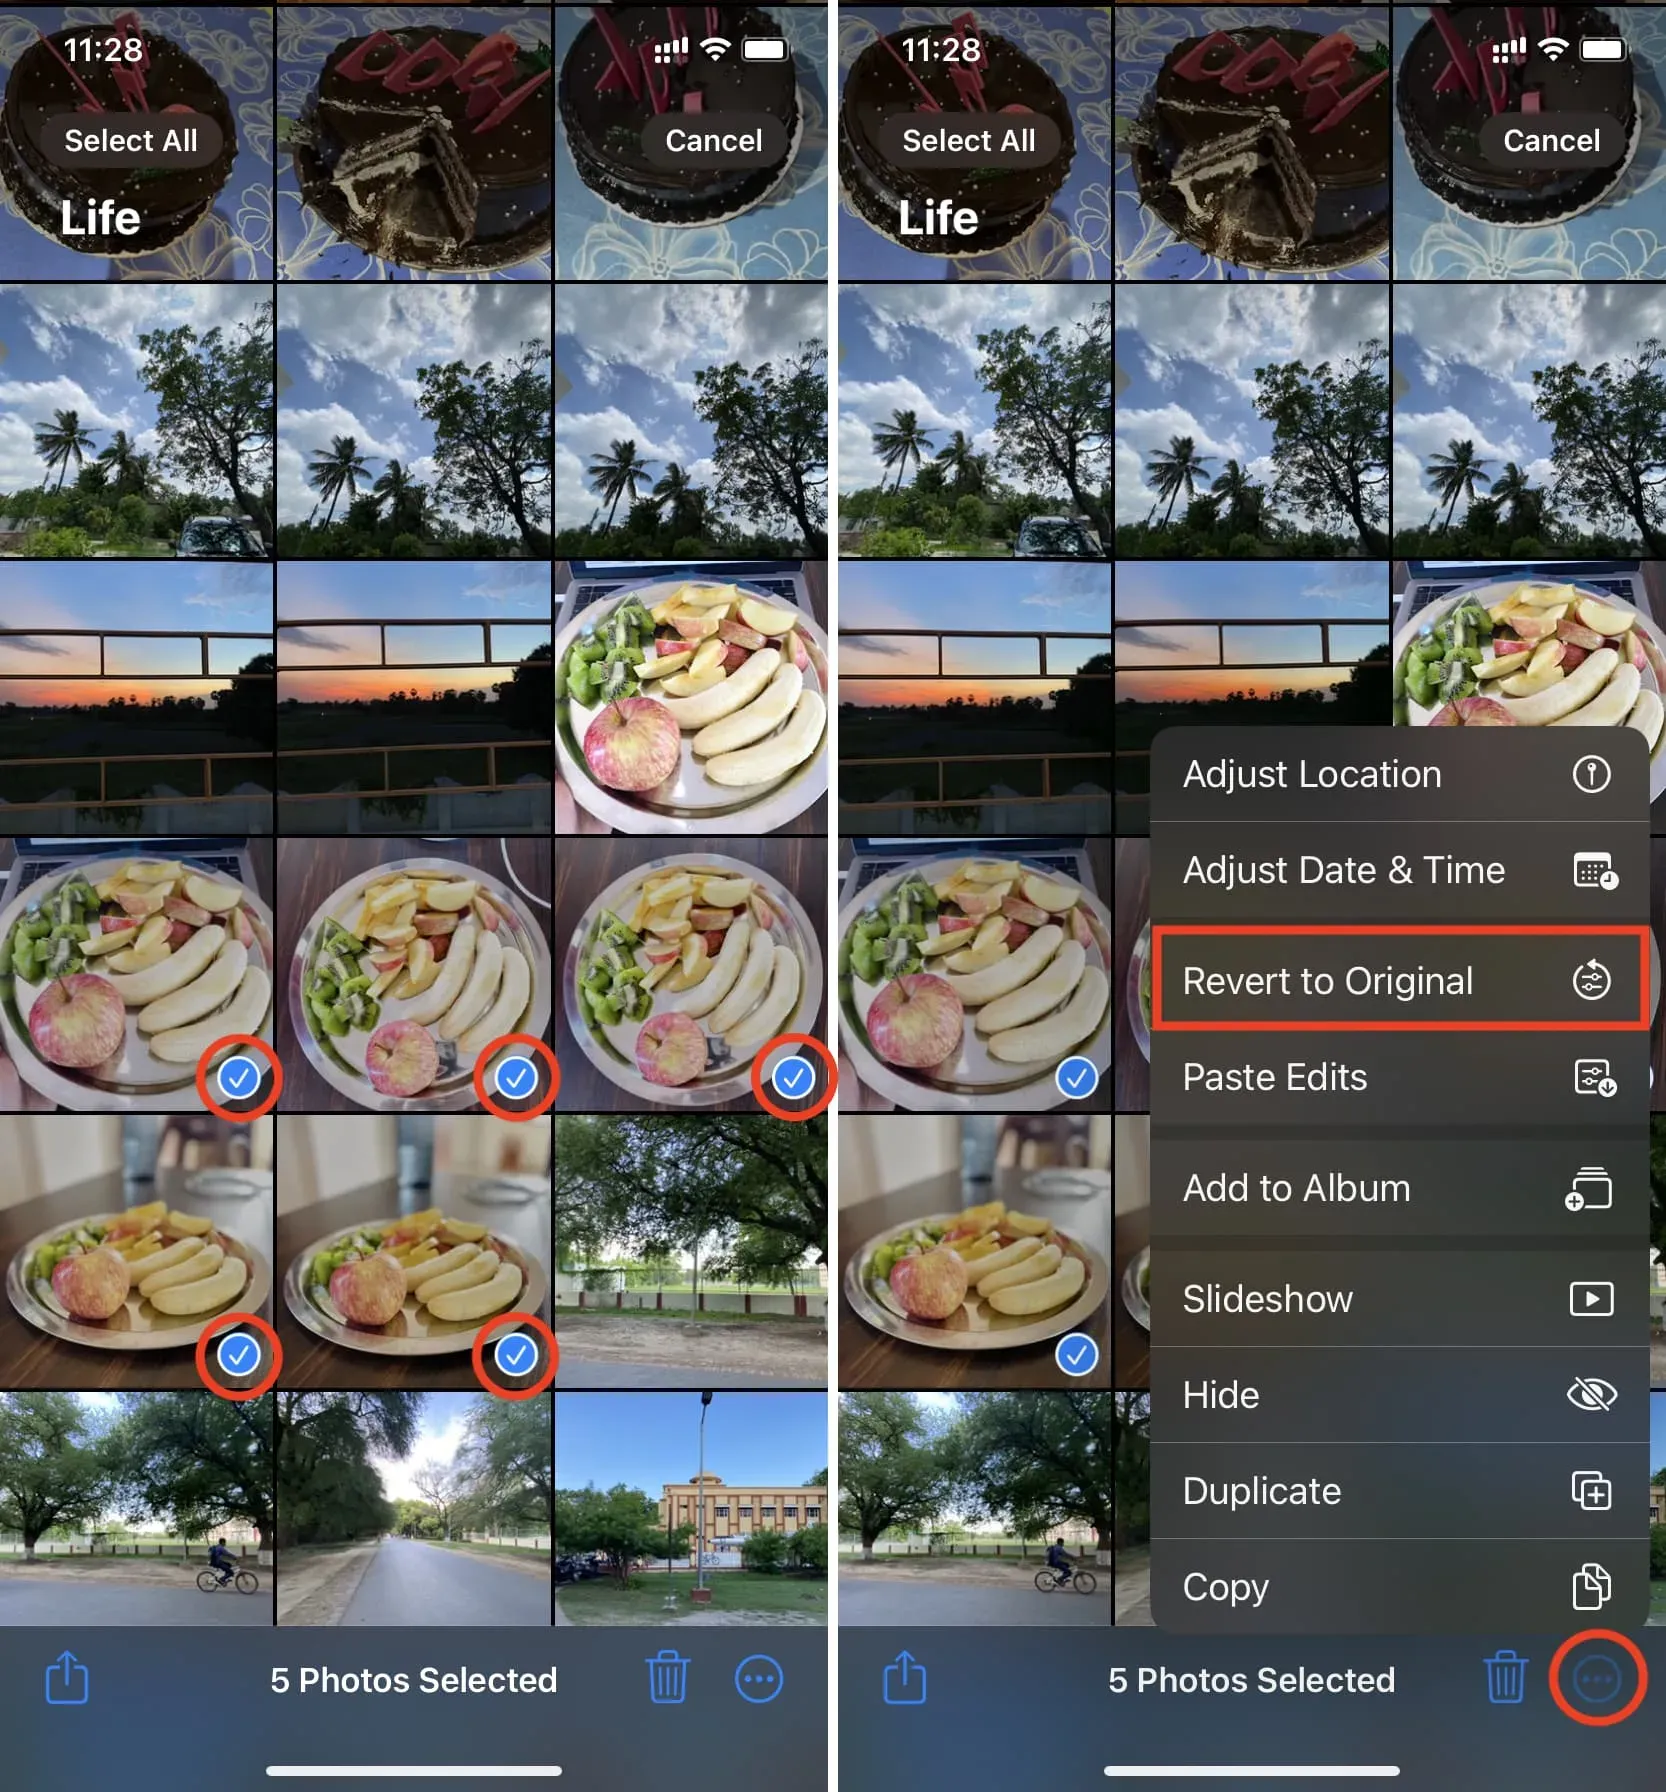
Editing of the selected images will be cancelled. This action cannot be undone. However, you can always select the images again and paste the copied changes.
Don’t see the option to copy changes?
In the editing section of the Photos app, you have several tools. However, you can only copy filters, auto enhancement settings, and adjustments made with the tools next to the AUTO button.
You cannot copy the following changes and paste them into other images:
- crop
- Image Rotation
- Image Flip
- markup
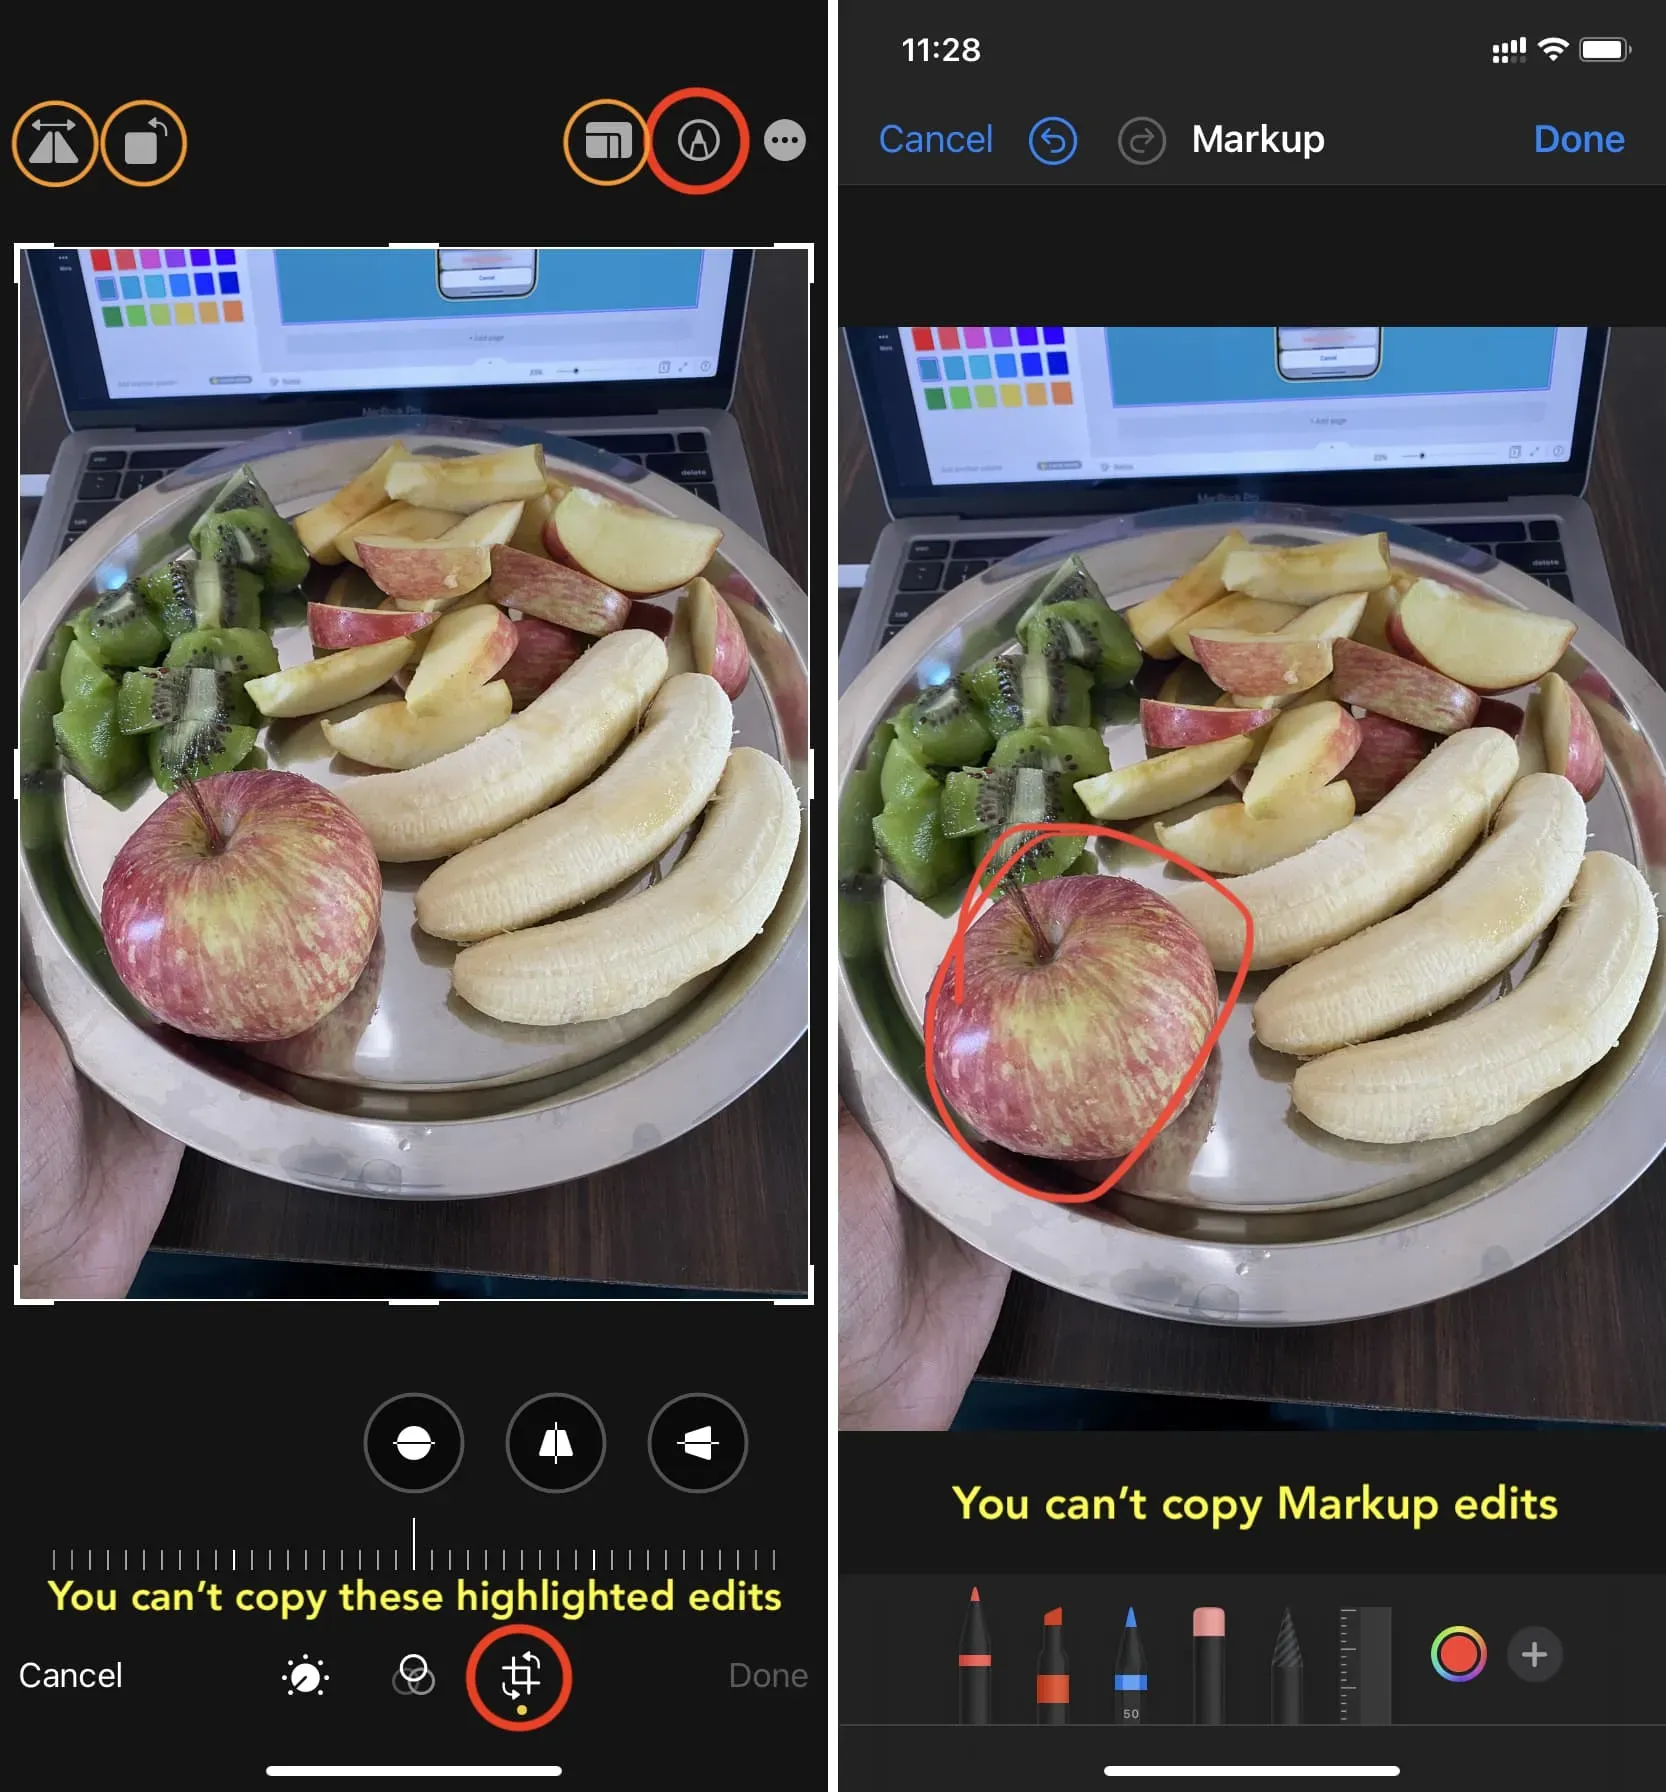
If you’ve cropped the image, flipped it, or used markup (say, added a caption) and then clicked the “Advanced”button, you’ll see that the Copy Changes option is greyed out. It will only turn blue if you are using the filter, auto-enhancement tools, or manual adjustments.
Don’t see the option to paste changes?
If you haven’t copied the changes, you obviously won’t see the option to paste them.
Also, after copying an edit, if you copy something else to the iPhone’s clipboard, such as text, an image, etc., it will delete the copied image changes. Thus, when you click the “Advanced”button, you will not see the “Insert Changes”option.
To fix this, simply open the edited image, click the “More”button, and copy the changes again. You will now see the option to paste these changes into another image or multiple selected images.
Leave a Reply