How to Completely Disable Your MacBook Pro Touch Bar and Make It Unresponsive to Touch
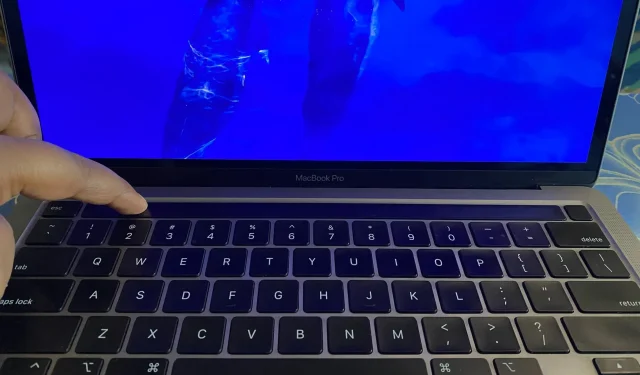
There is no terminal option or command on macOS to disable the touchpad. However, with some simple tweaks, you can turn off the touchpad functionality to turn it off and have it appear as a blank, unlit black bar.
In this guide, we’ll show you how to disable your MacBook’s Touch Bar and make it unresponsive to touch.
Why You Might Want to Disable the Touch Bar
Turn off the lights at night: By design, the touchpad screen should turn off after a moment of inactivity. So, as soon as you start watching a video, it disappears. However, sometimes when I watch a movie at night on my MacBook, the icon lights on the Touch Bar stay on, which is annoying.
Changing options is confusing: some people don’t like the touchpad because its controls change depending on the app you’re in and extra taps are required to access the most useful controls. To solve this problem, you can make the touchpad display the same set of buttons all the time.
You are using an external keyboard: If you are using an external keyboard with your MacBook, then the Touch Bar is useless, as you may not want to extend your hand each time to use it.
Touchpad disable options
If your main concern is constantly changing buttons on the touchpad, you can set it up to always show either function keys or media controls. After that, the touchpad will not show options depending on the application you are in.
But if you really don’t like the touchpad and want to disable it, you can do so by following these steps.
Disable the touchpad completely so it doesn’t display anything
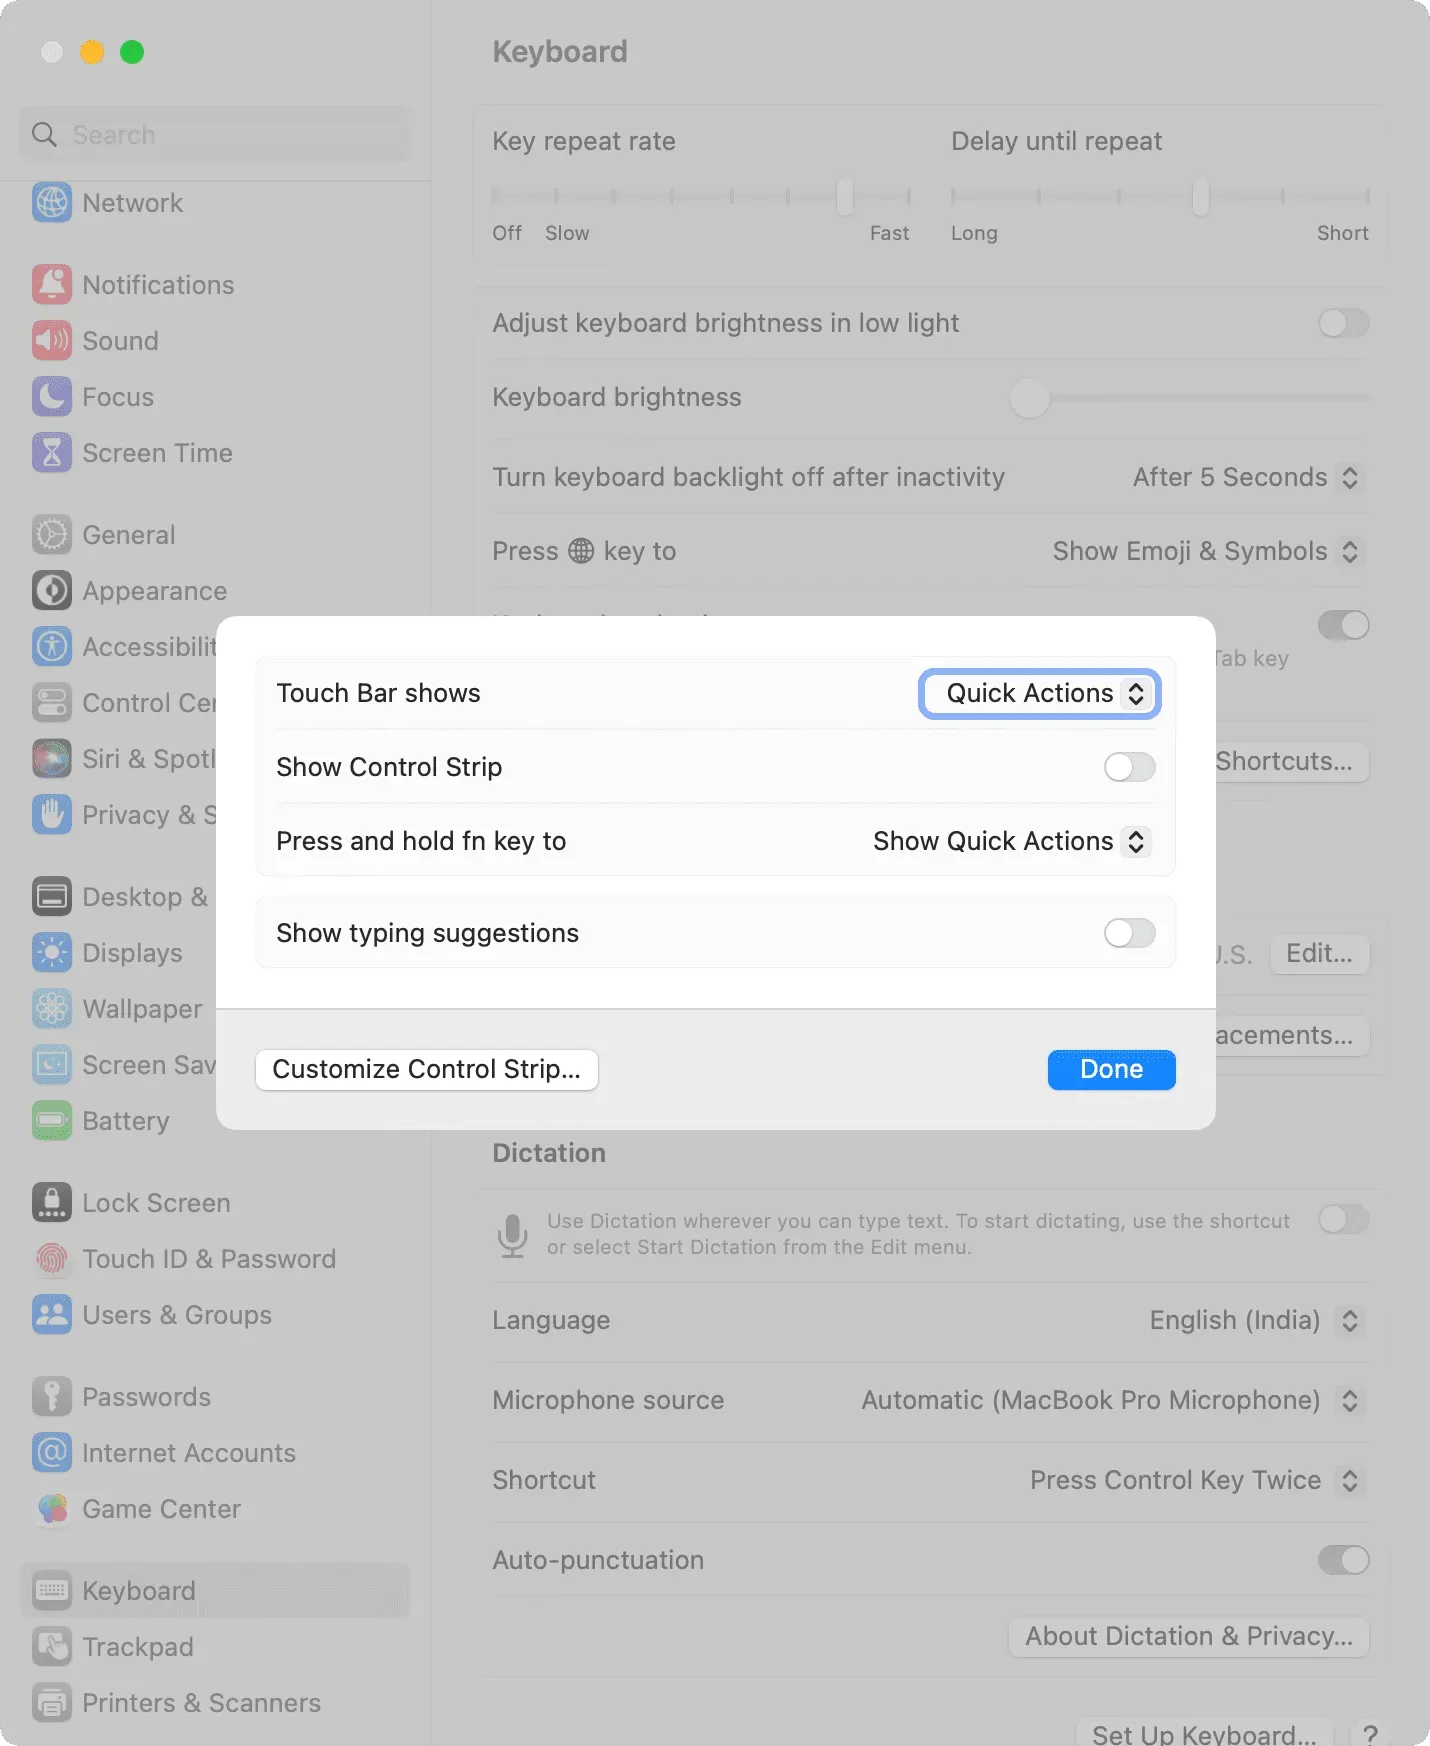
- Open System Preferences on your MacBook.
- Scroll down the left sidebar and click Keyboard.
- Click Touchpad Settings.
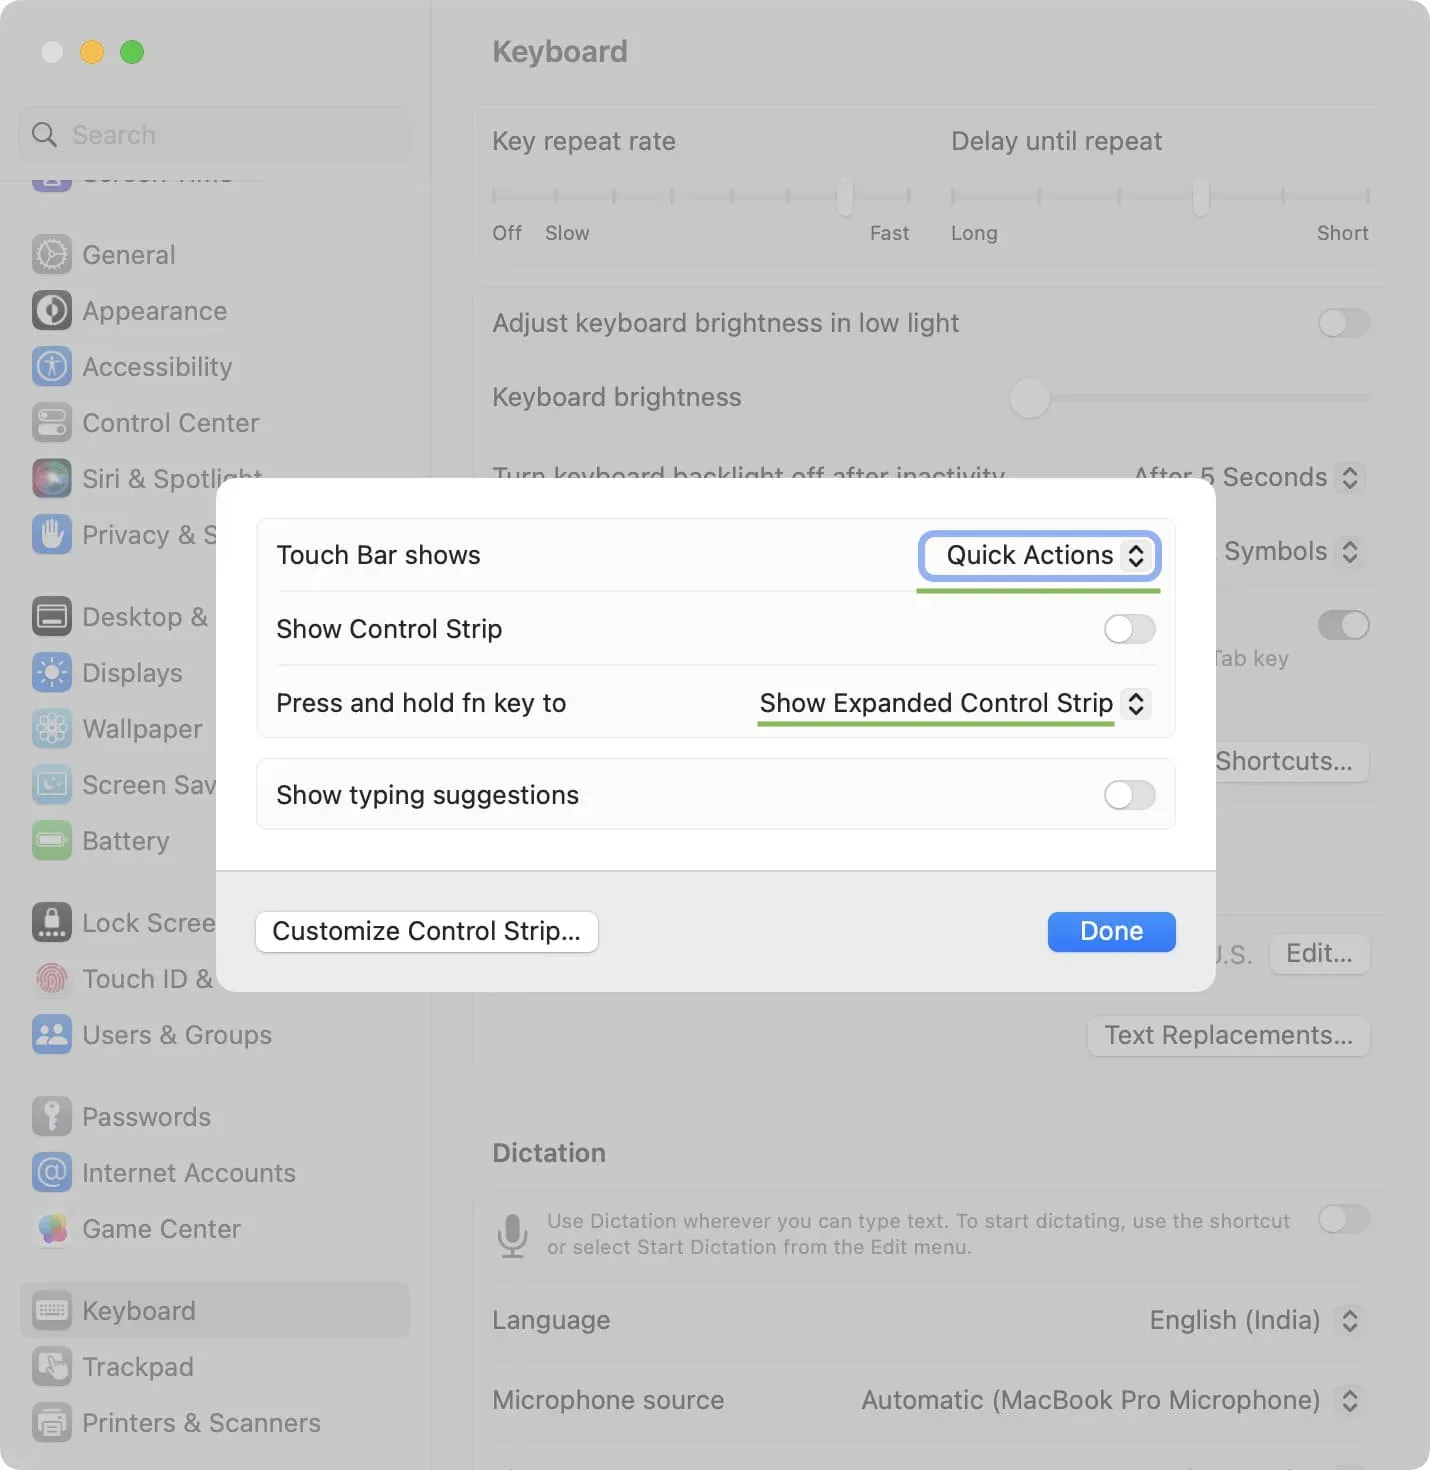
- Click the dropdown menu next to the touchpad and select Quick Actions.
- Then turn off the “Show Control Strip”toggle.
- Set Press and hold the fn key to show quick actions, and turn off the “Show input options”toggle.
- Finally, click Done.
You will see your Mac’s Touch Bar become blank with no buttons, keys, controls, sliders, or anything else. It will appear as a black bar above your keyboard and nothing will happen even if you touch it! Also, pressing and holding the function key will not display anything on the touchpad.
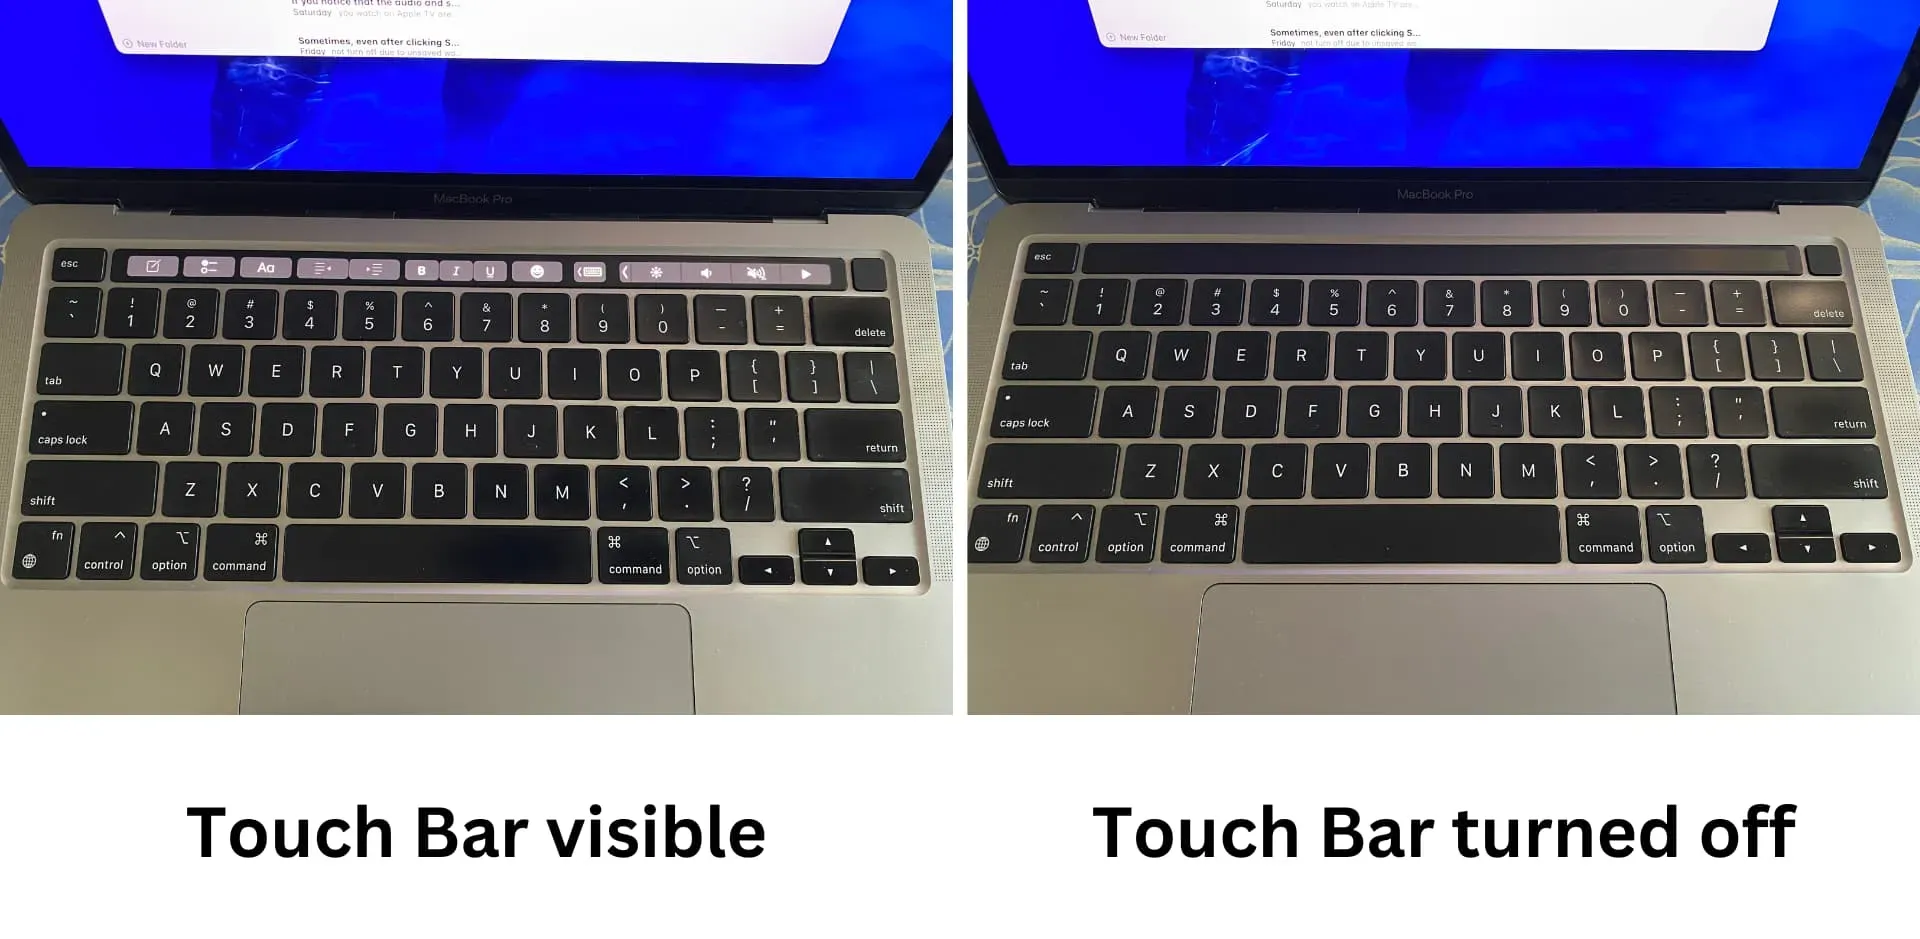
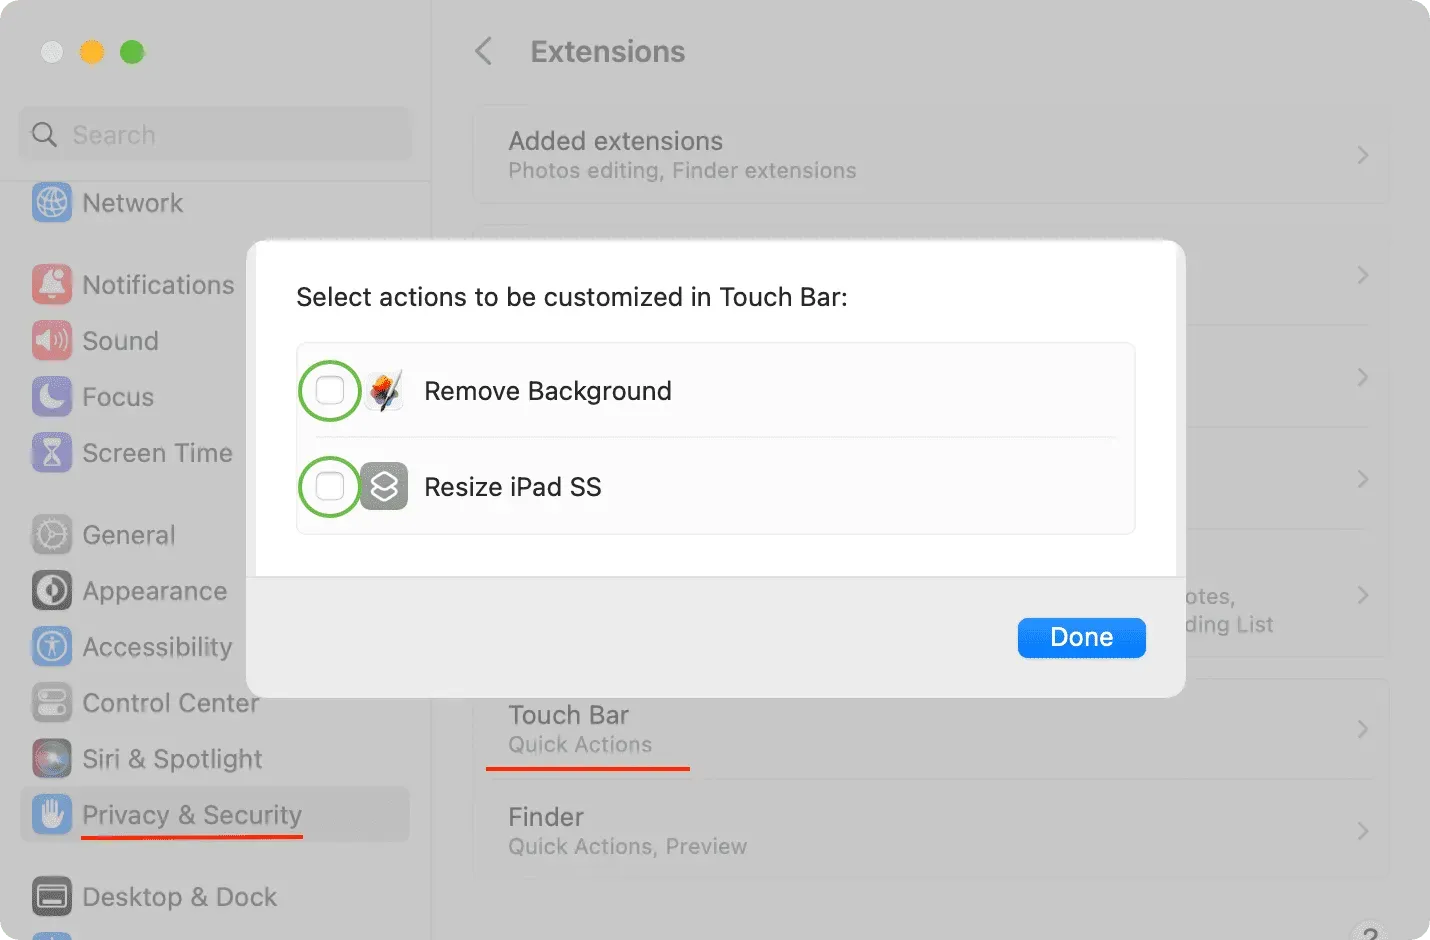
However, if you still see some options (quick actions) on the touchpad, here’s what to do to get rid of them:
- Go to the first System Preferences screen and click on Privacy & Security.
- Click Extensions at the bottom.
- Enter the touchpad quick action bar.
- Uncheck everything you see here and click done.
Your touchpad should now be completely disabled, with no buttons on it.
3 tips after you disable your touchpad
After disabling the touchpad, you will obviously lose media, brightness, volume, and other quick buttons. But there are simple alternatives:
1. Use the macOS Control Center
Click the Control Center button at the top right of the menu bar to change brightness, volume, and more.
2. Put a few things on the top menu bar.
Open the Control Center and drag the button from the Control Center to the top menu bar. To remove it from the menu bar, hold down the Command key and drag the icon down to the desktop.
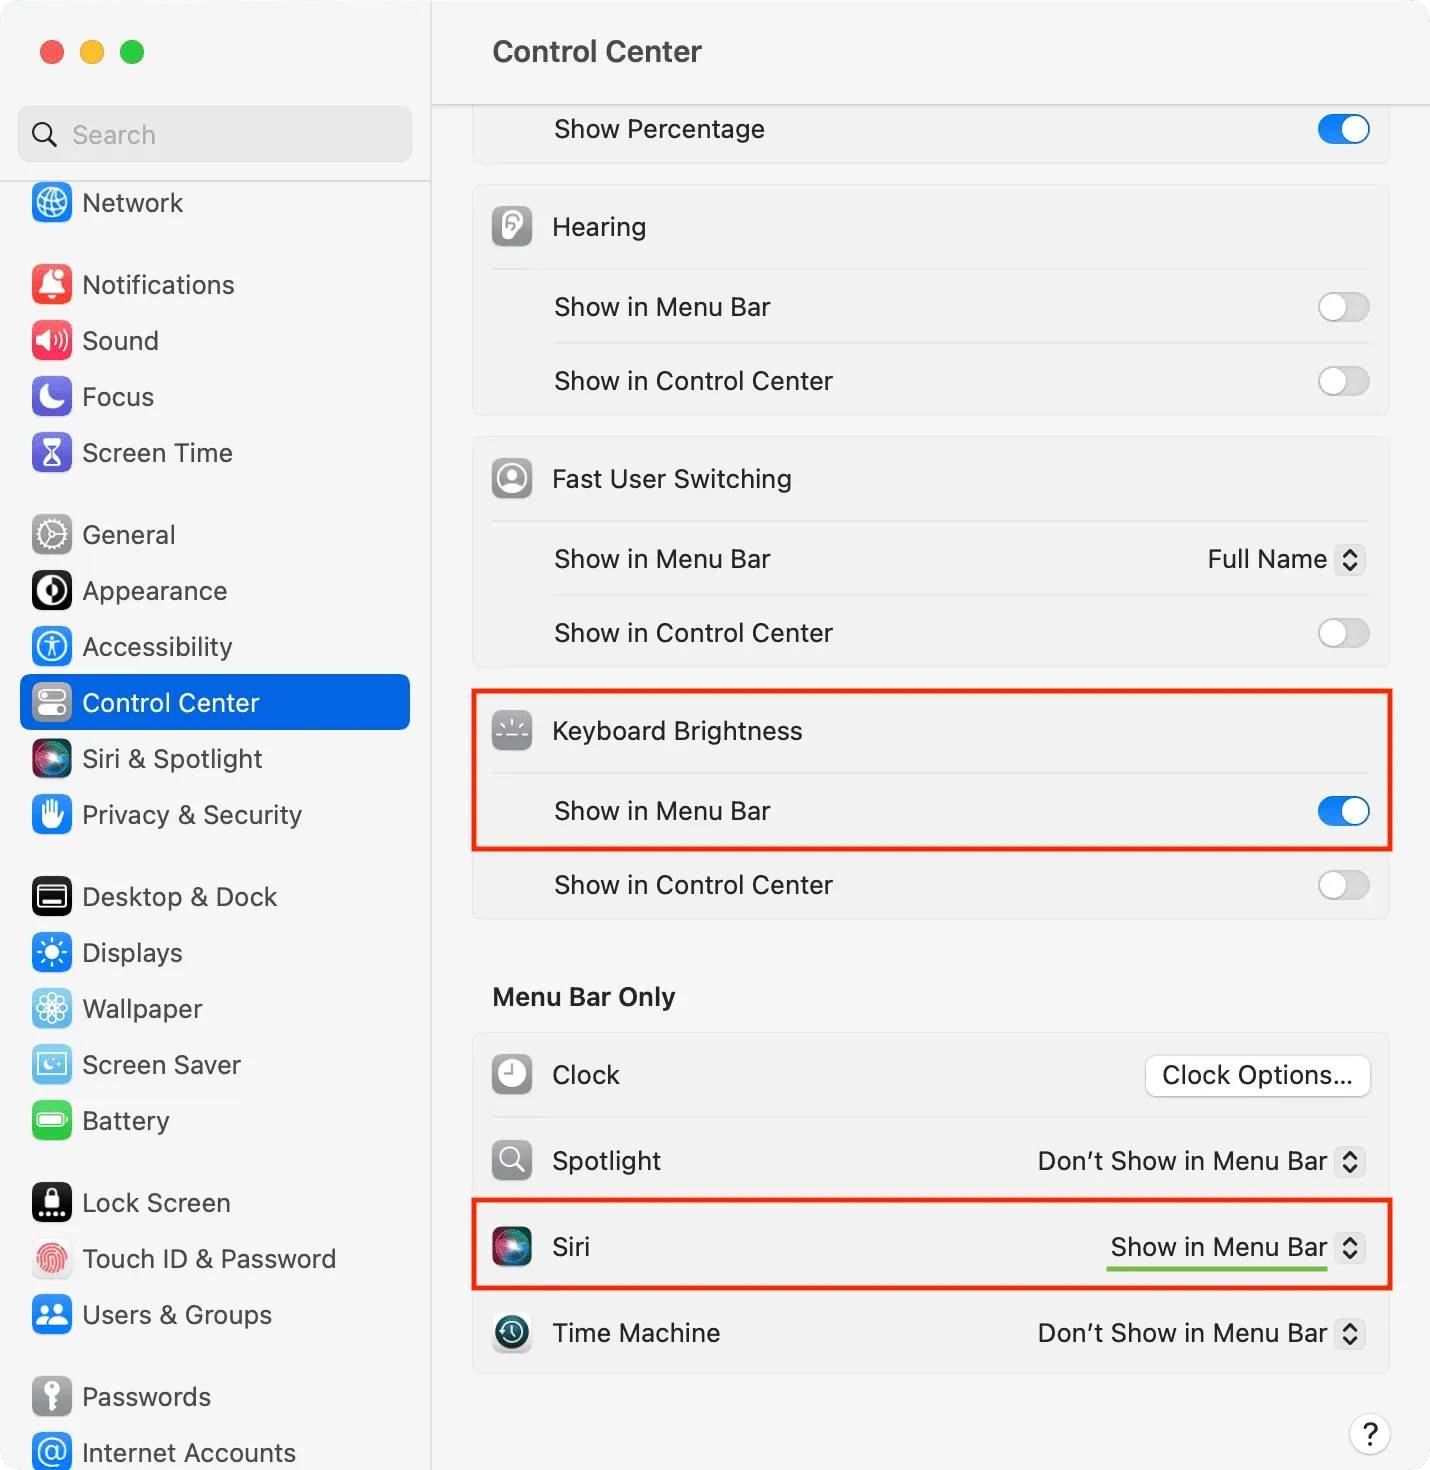
Alternatively, you can go to System Preferences > Control Center and display handy options like keyboard brightness and Siri in the menu bar.
3. Don’t damage the touchpad completely
Follow the steps above and set the Touch Bar Impressions to Quick Actions. Also, prevent it from showing the control strip. However, set Press and hold the fn key to display application controls, extended control bar, function keys, or anything else other than quick actions. Once this is done, your touchpad will remain disabled. However, when you hold down the fn key, the controls or option you selected are displayed and you can use them.
Enable touchpad again
You can restore Touch Bar functionality by going to MacBook System Preferences > Keyboard > Touch Bar Preferences. From there, set the touchpad to display to “Application Controls”or “Advanced Control Strip”or any option other than “Quick Actions”.
Leave a Reply