How To: The Reminders app on your iPhone just got a whole lot more useful
Apple just updated its Reminders app for iPhone with some powerful new task management tools and improvements that will make you wonder how you ever lived without them.
You’ll notice some of the new reminder features that are coming with iOS 16 as soon as you get the update. However, there are hidden features that are easy to miss if you don’t know where to look. Together, all the new changes make reminder lists and reminders themselves even more useful and customizable.
Keep reading to see everything the revamped Reminders app includes.
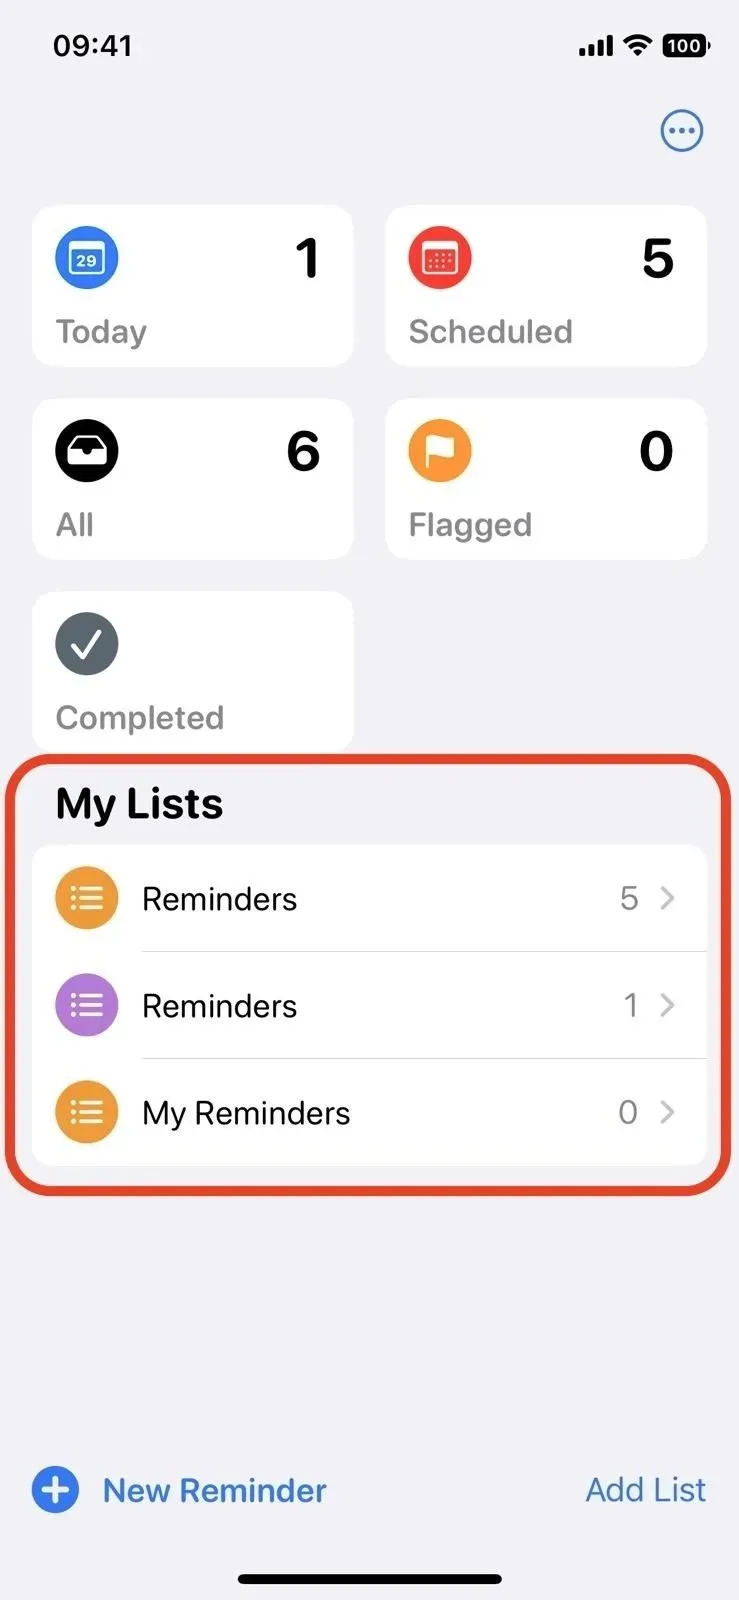
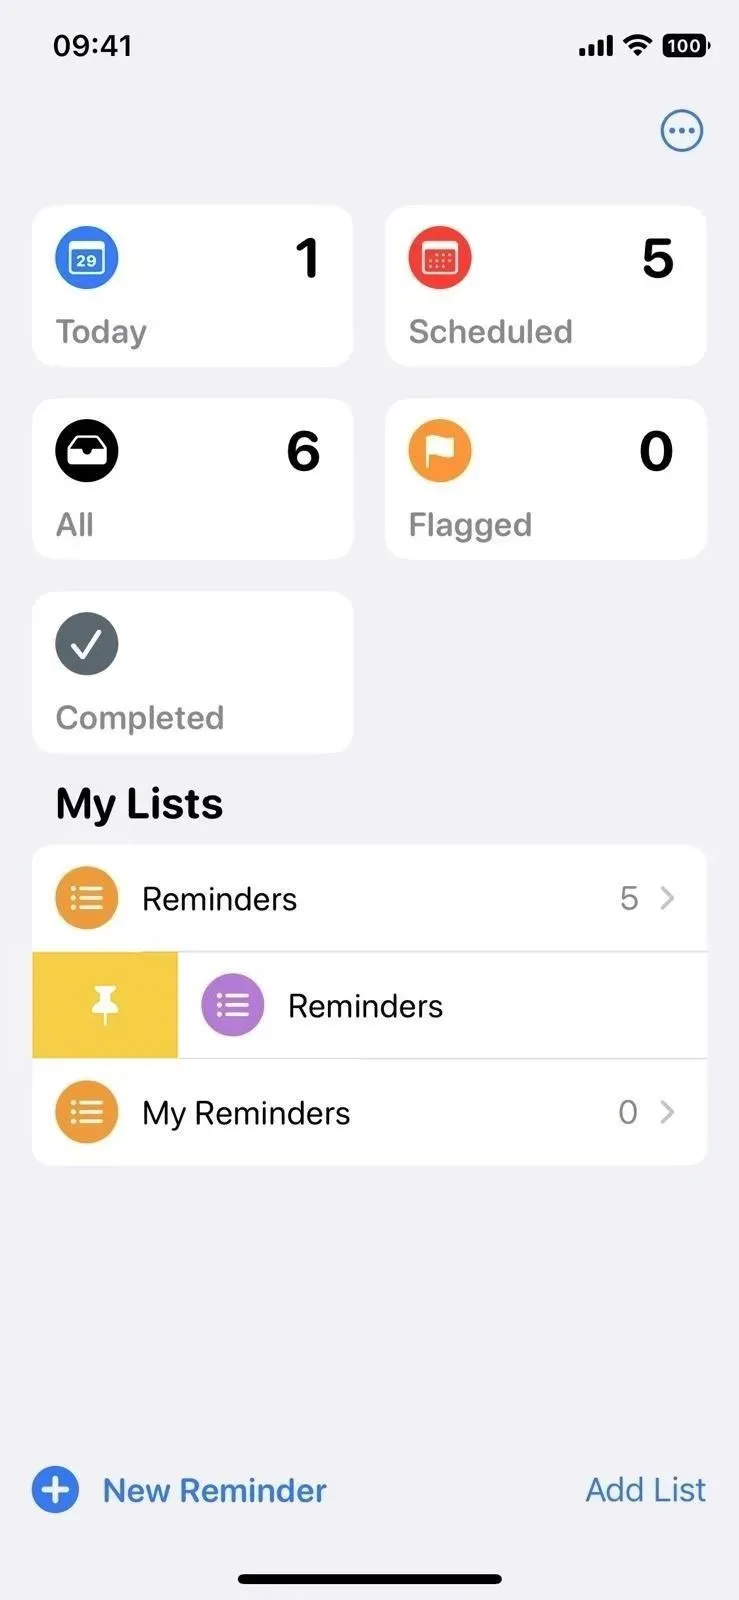
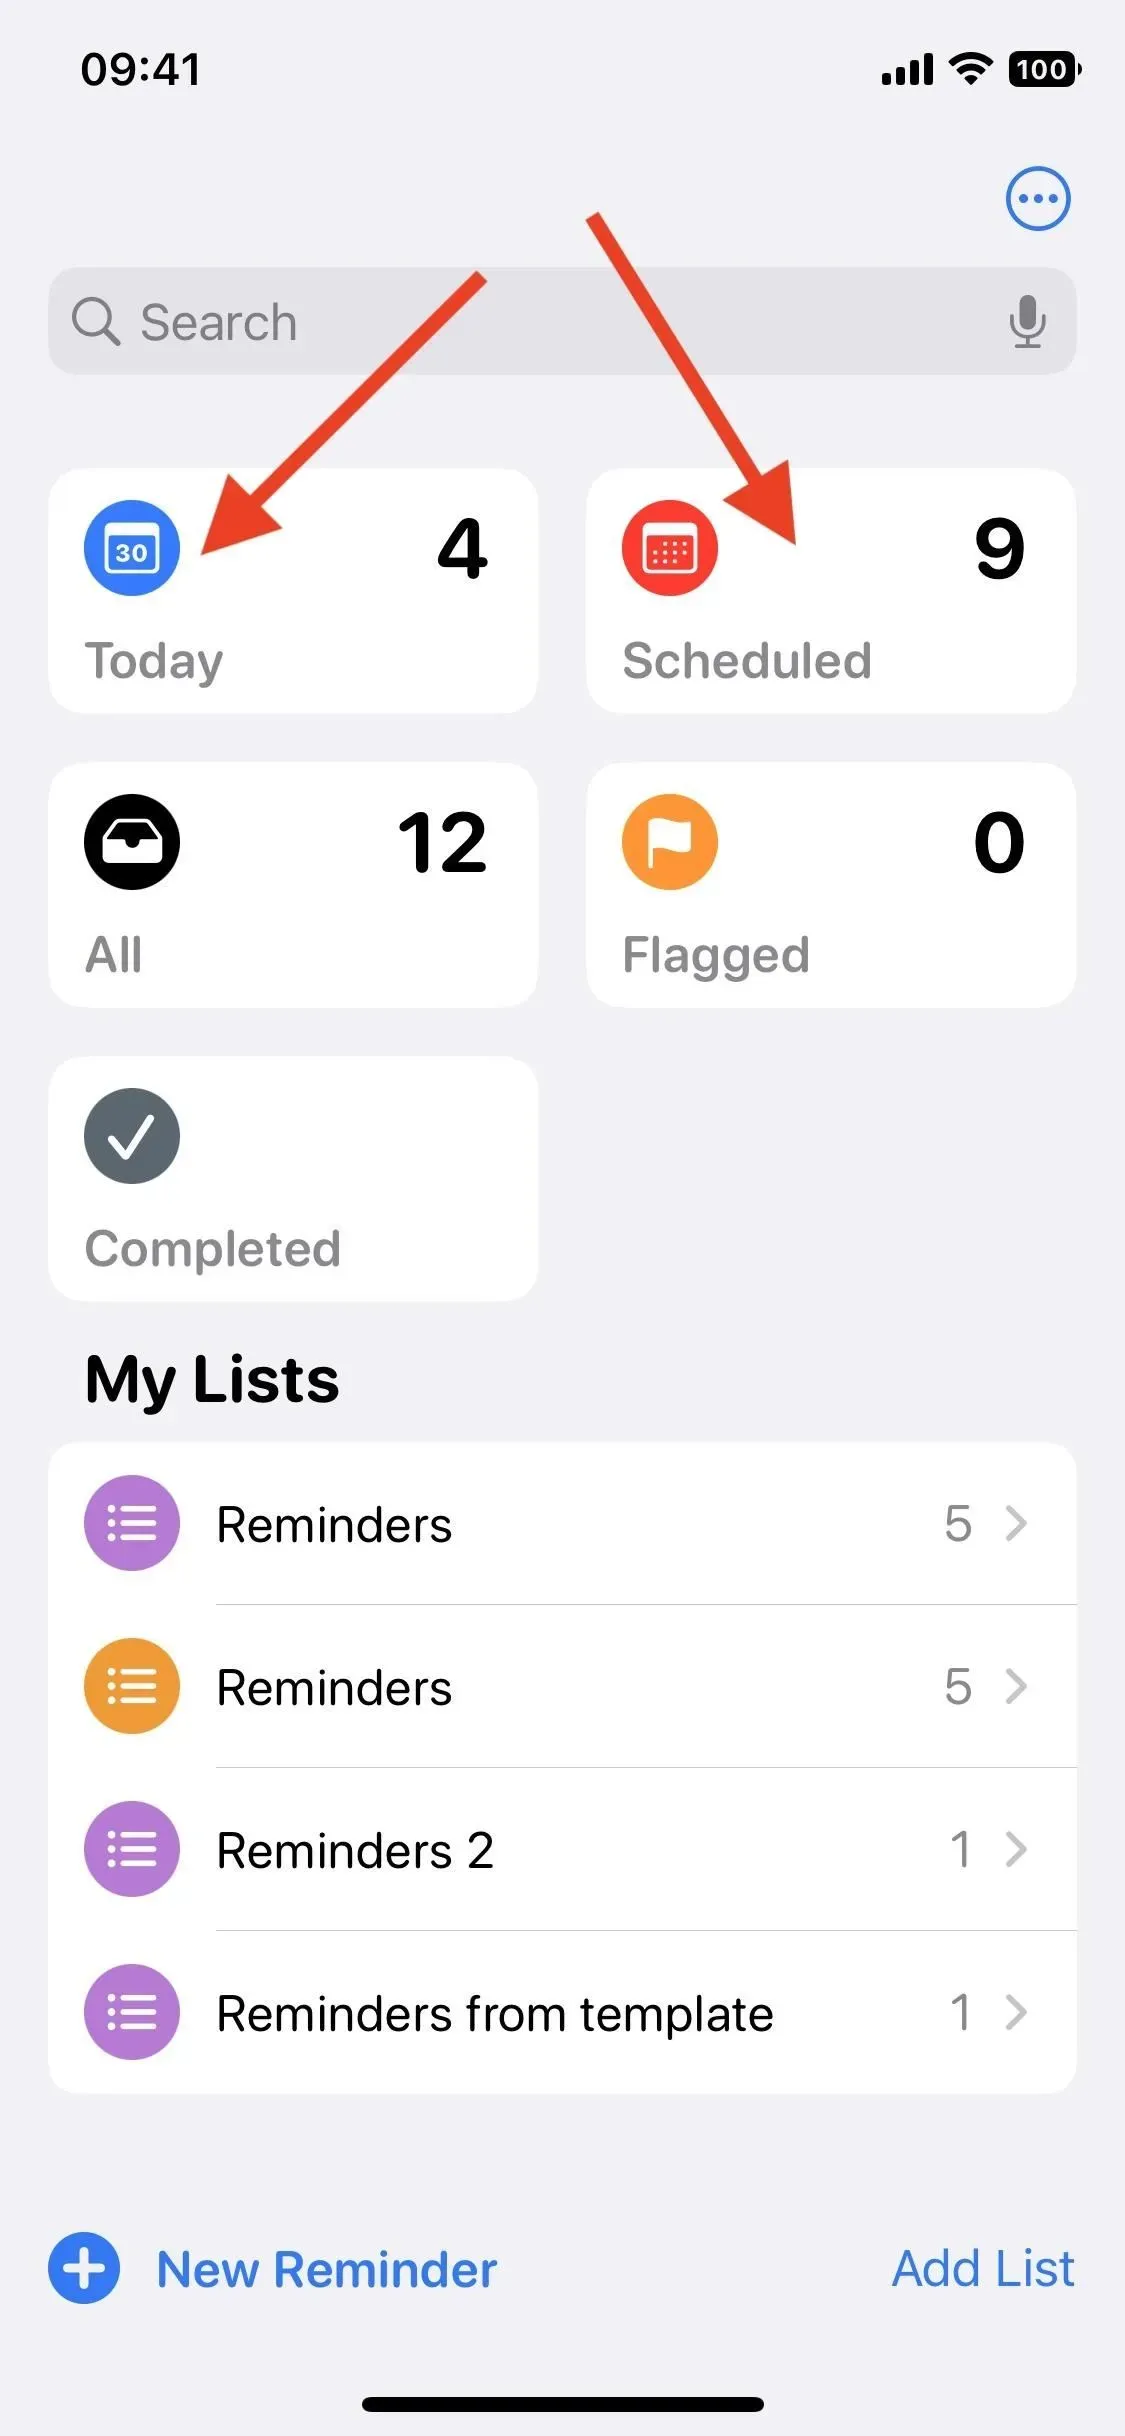
1. You Can Finally Pin Lists
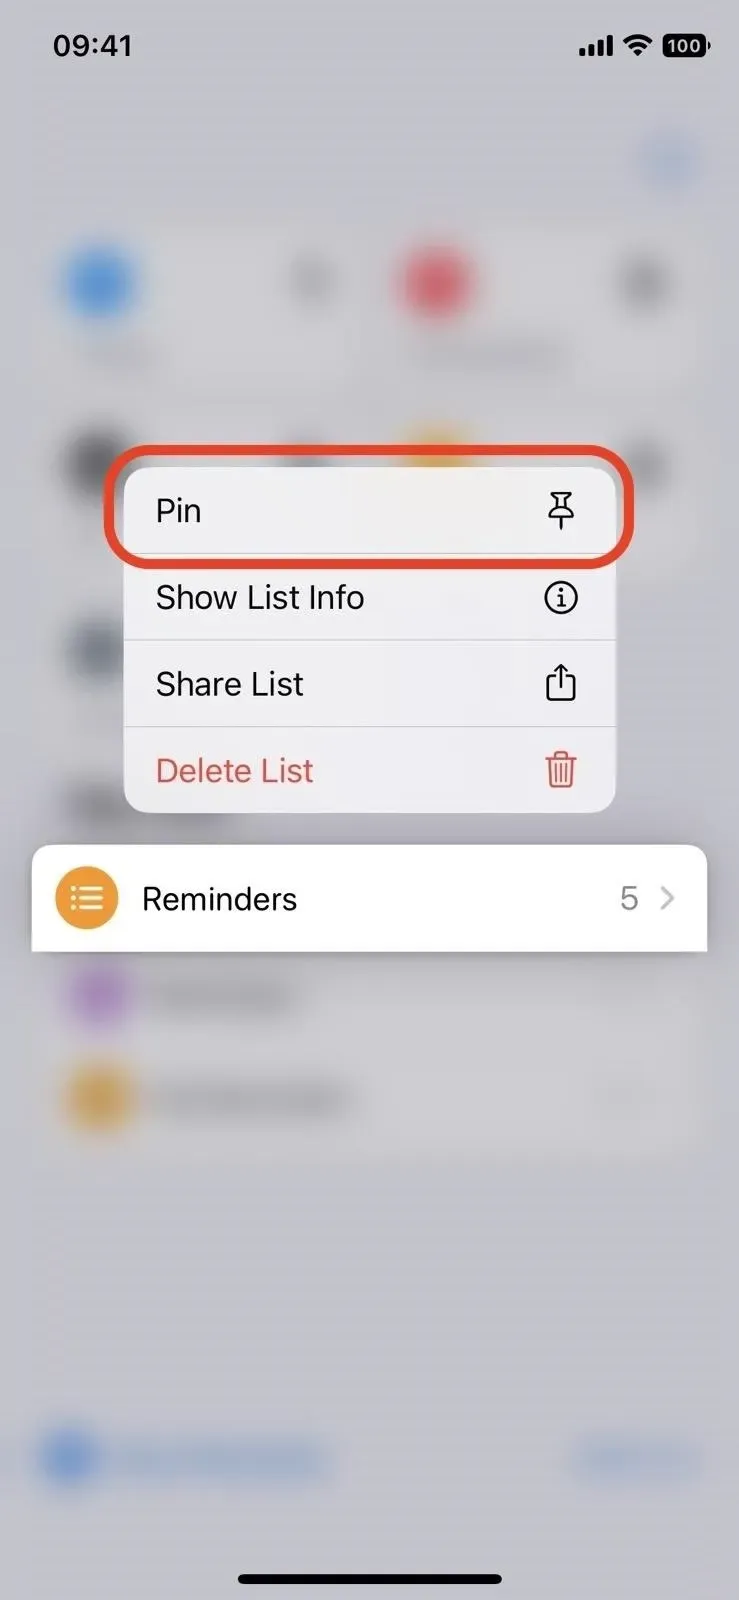
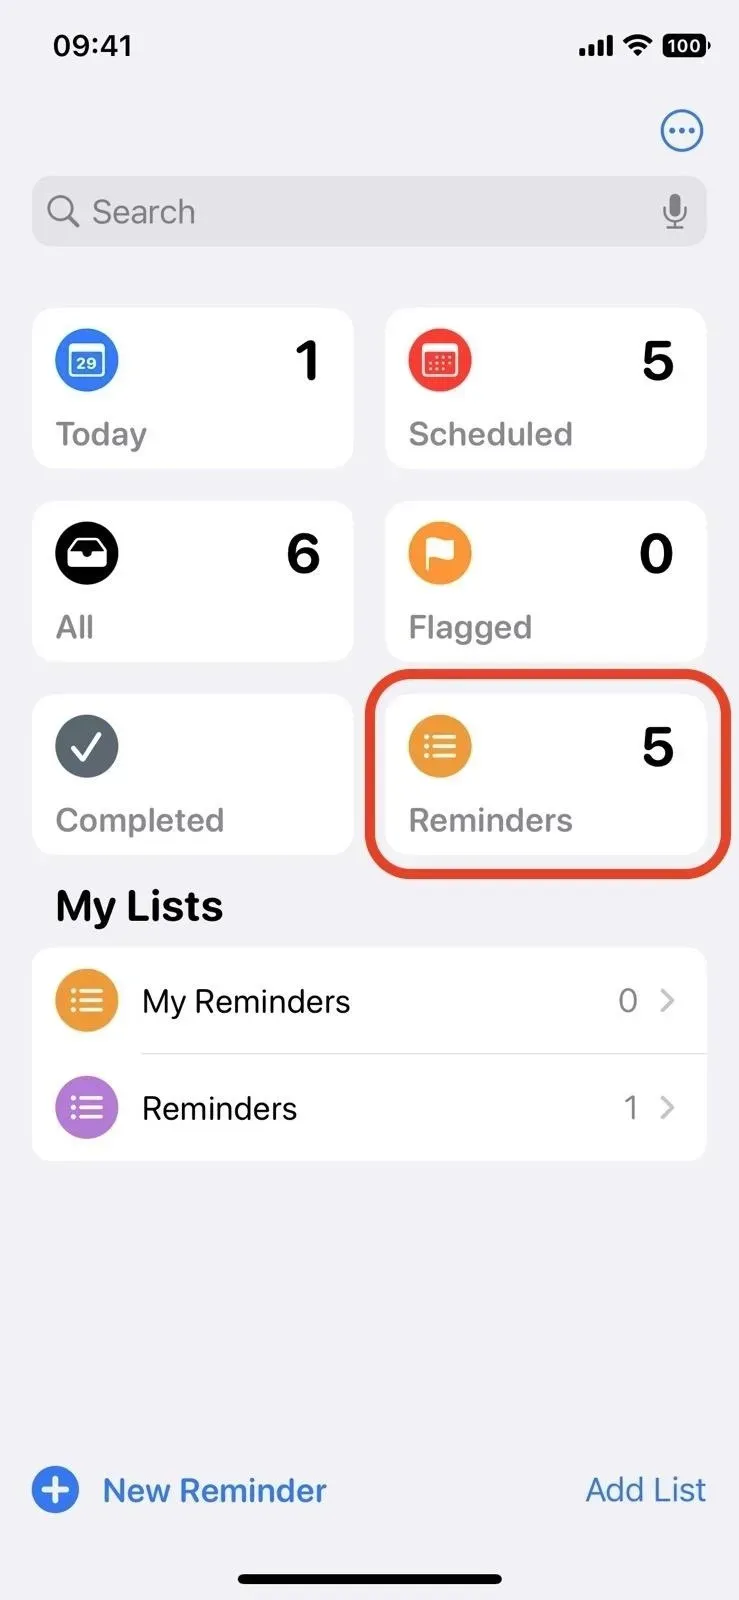
Like Notes and Messages, Reminders now has a pin feature. With it, you can pin important and frequently used lists to the top for quick access, but only for your iCloud account, so it won’t work for Exchange, Outlook, Yahoo, and others.
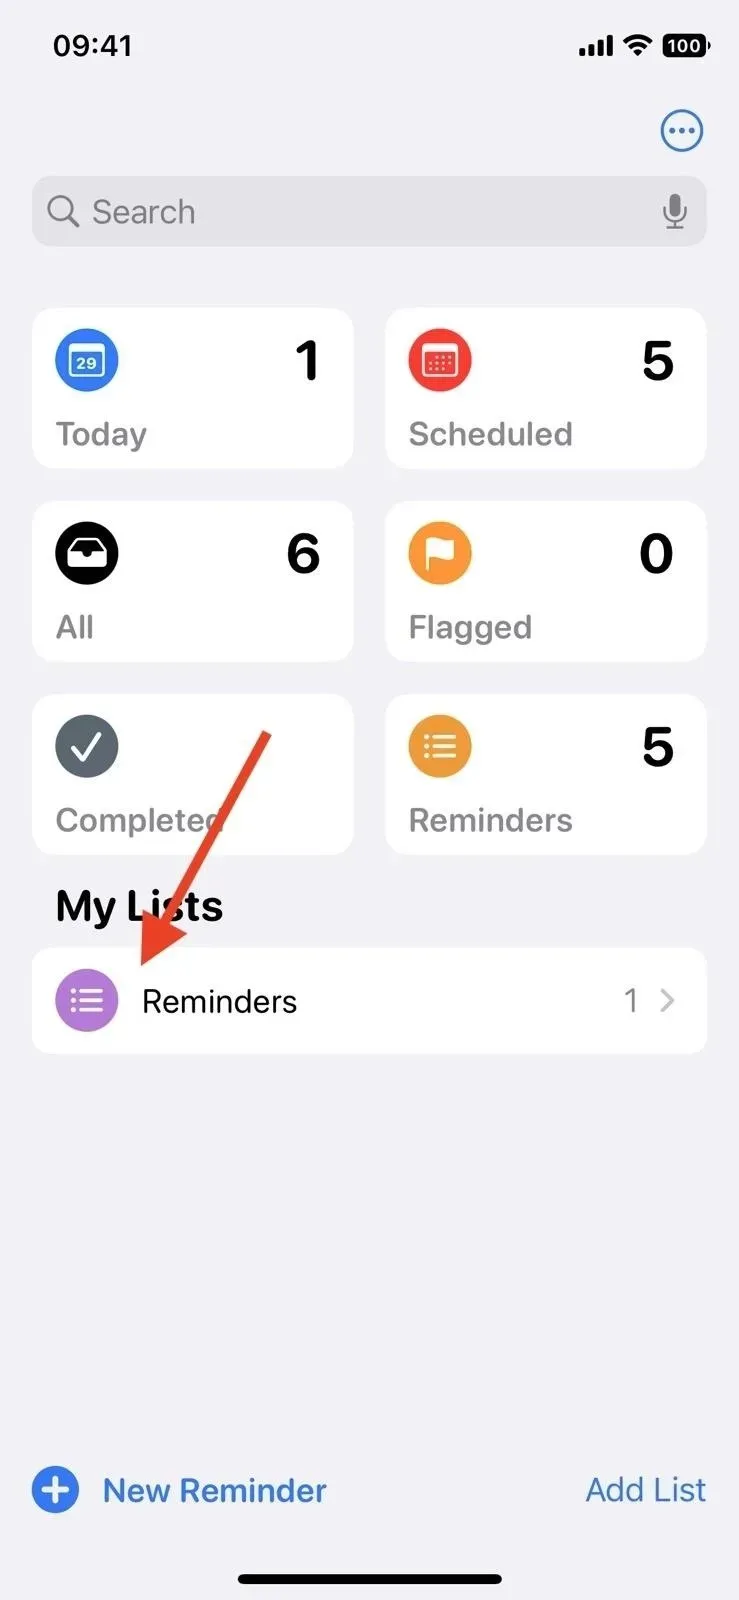
In the iCloud or My Lists section of the Lists page, press and hold the desired list or smart list until the quick actions menu appears, and select Pin. It will then move to the top where the smart lists are “Today”, “Scheduled”, “All”, “Started”, “Done”and “Assigned to me”.
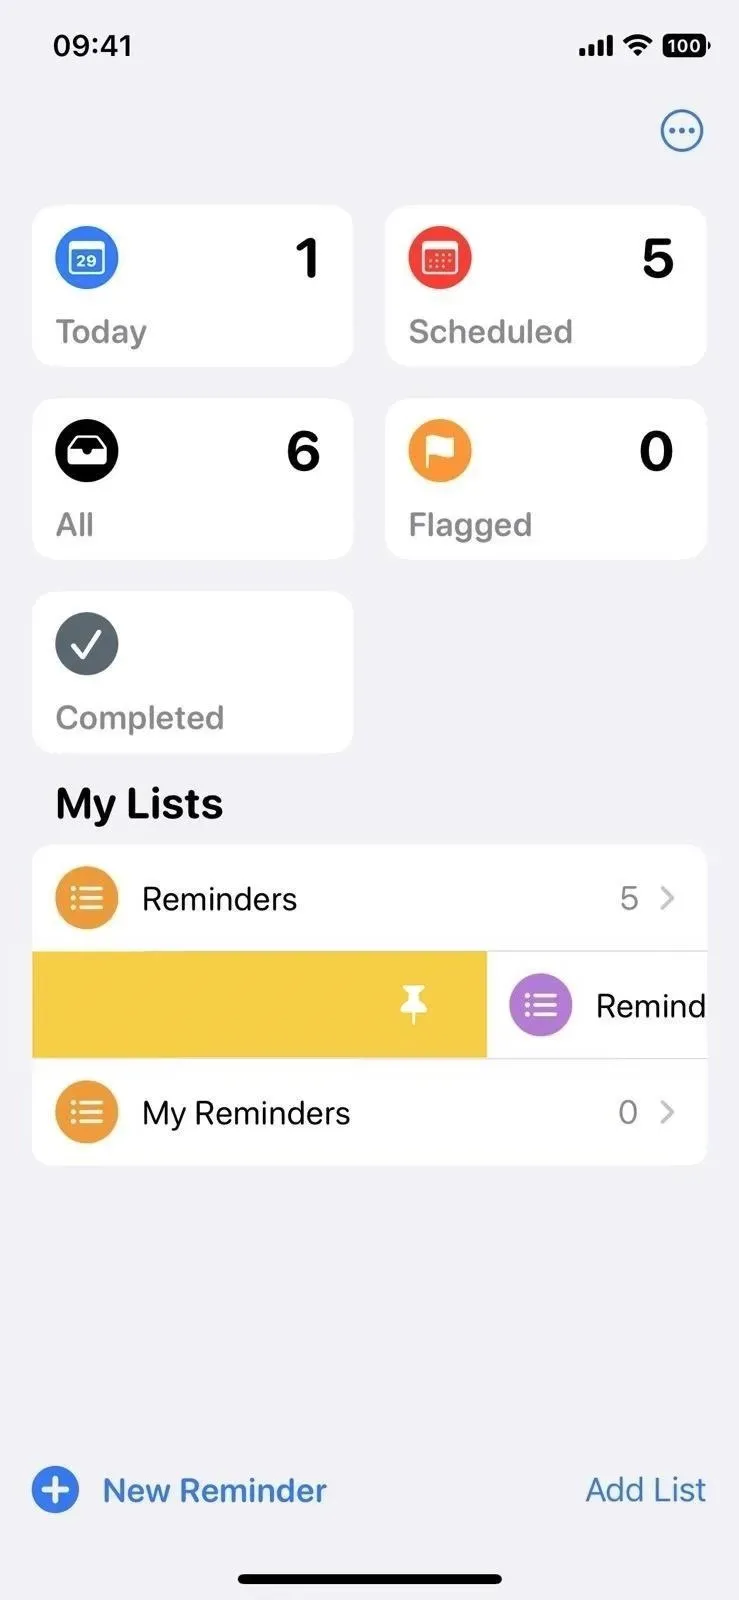
You can also pin lists and smart lists using the swipe options. To do this, swipe right on the list and tap the pin icon, or swipe right until the list disappears from the screen. You can even click the ellipsis button (•••) and then Edit Lists and drag the list or smart list to the top.
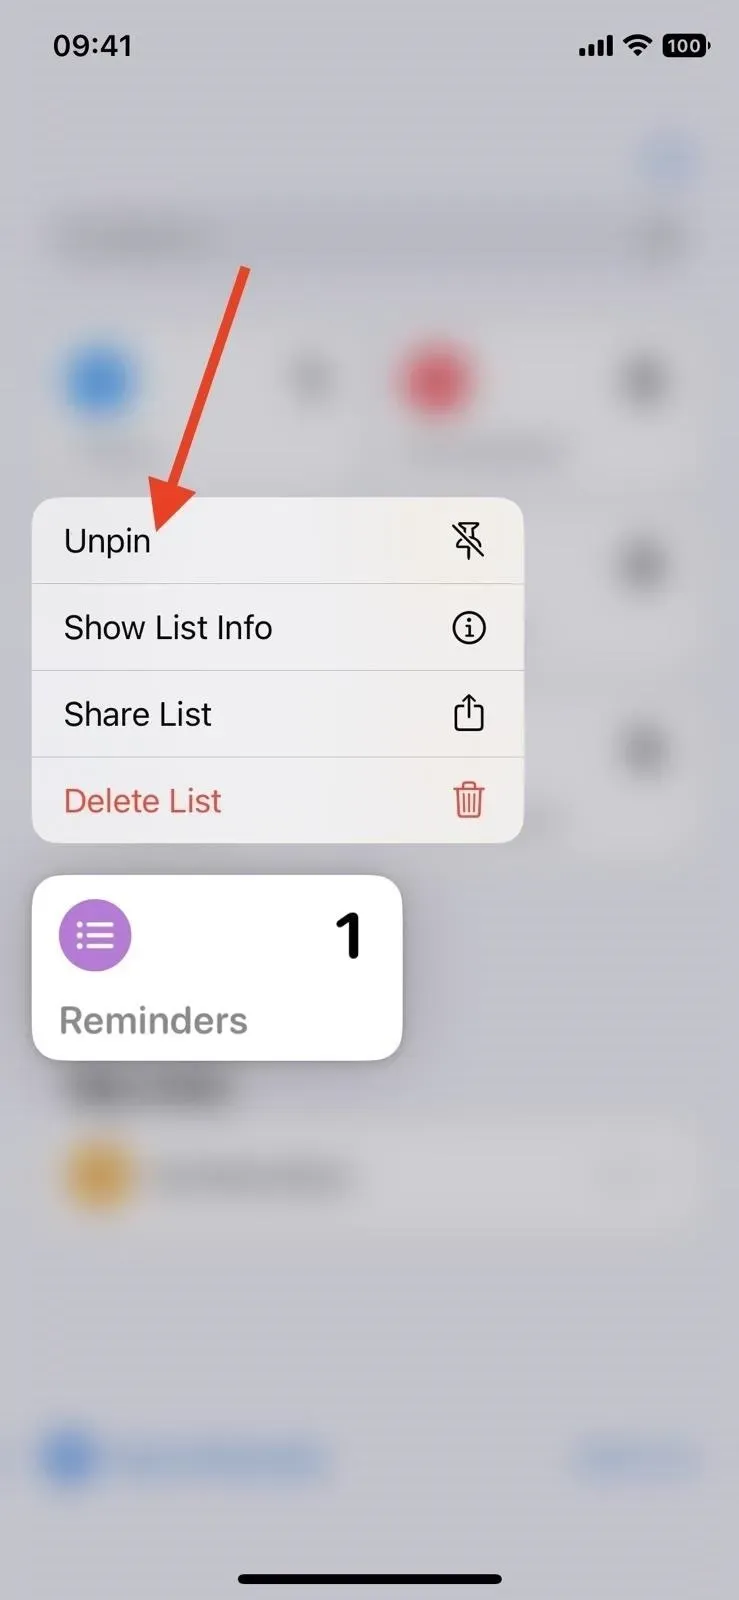
To unpin a list, press and hold until quick actions appear, then tap Unpin. You can also click the ellipsis (•••) button, then Edit Lists, and drag the pinned list back to iCloud or My Lists.
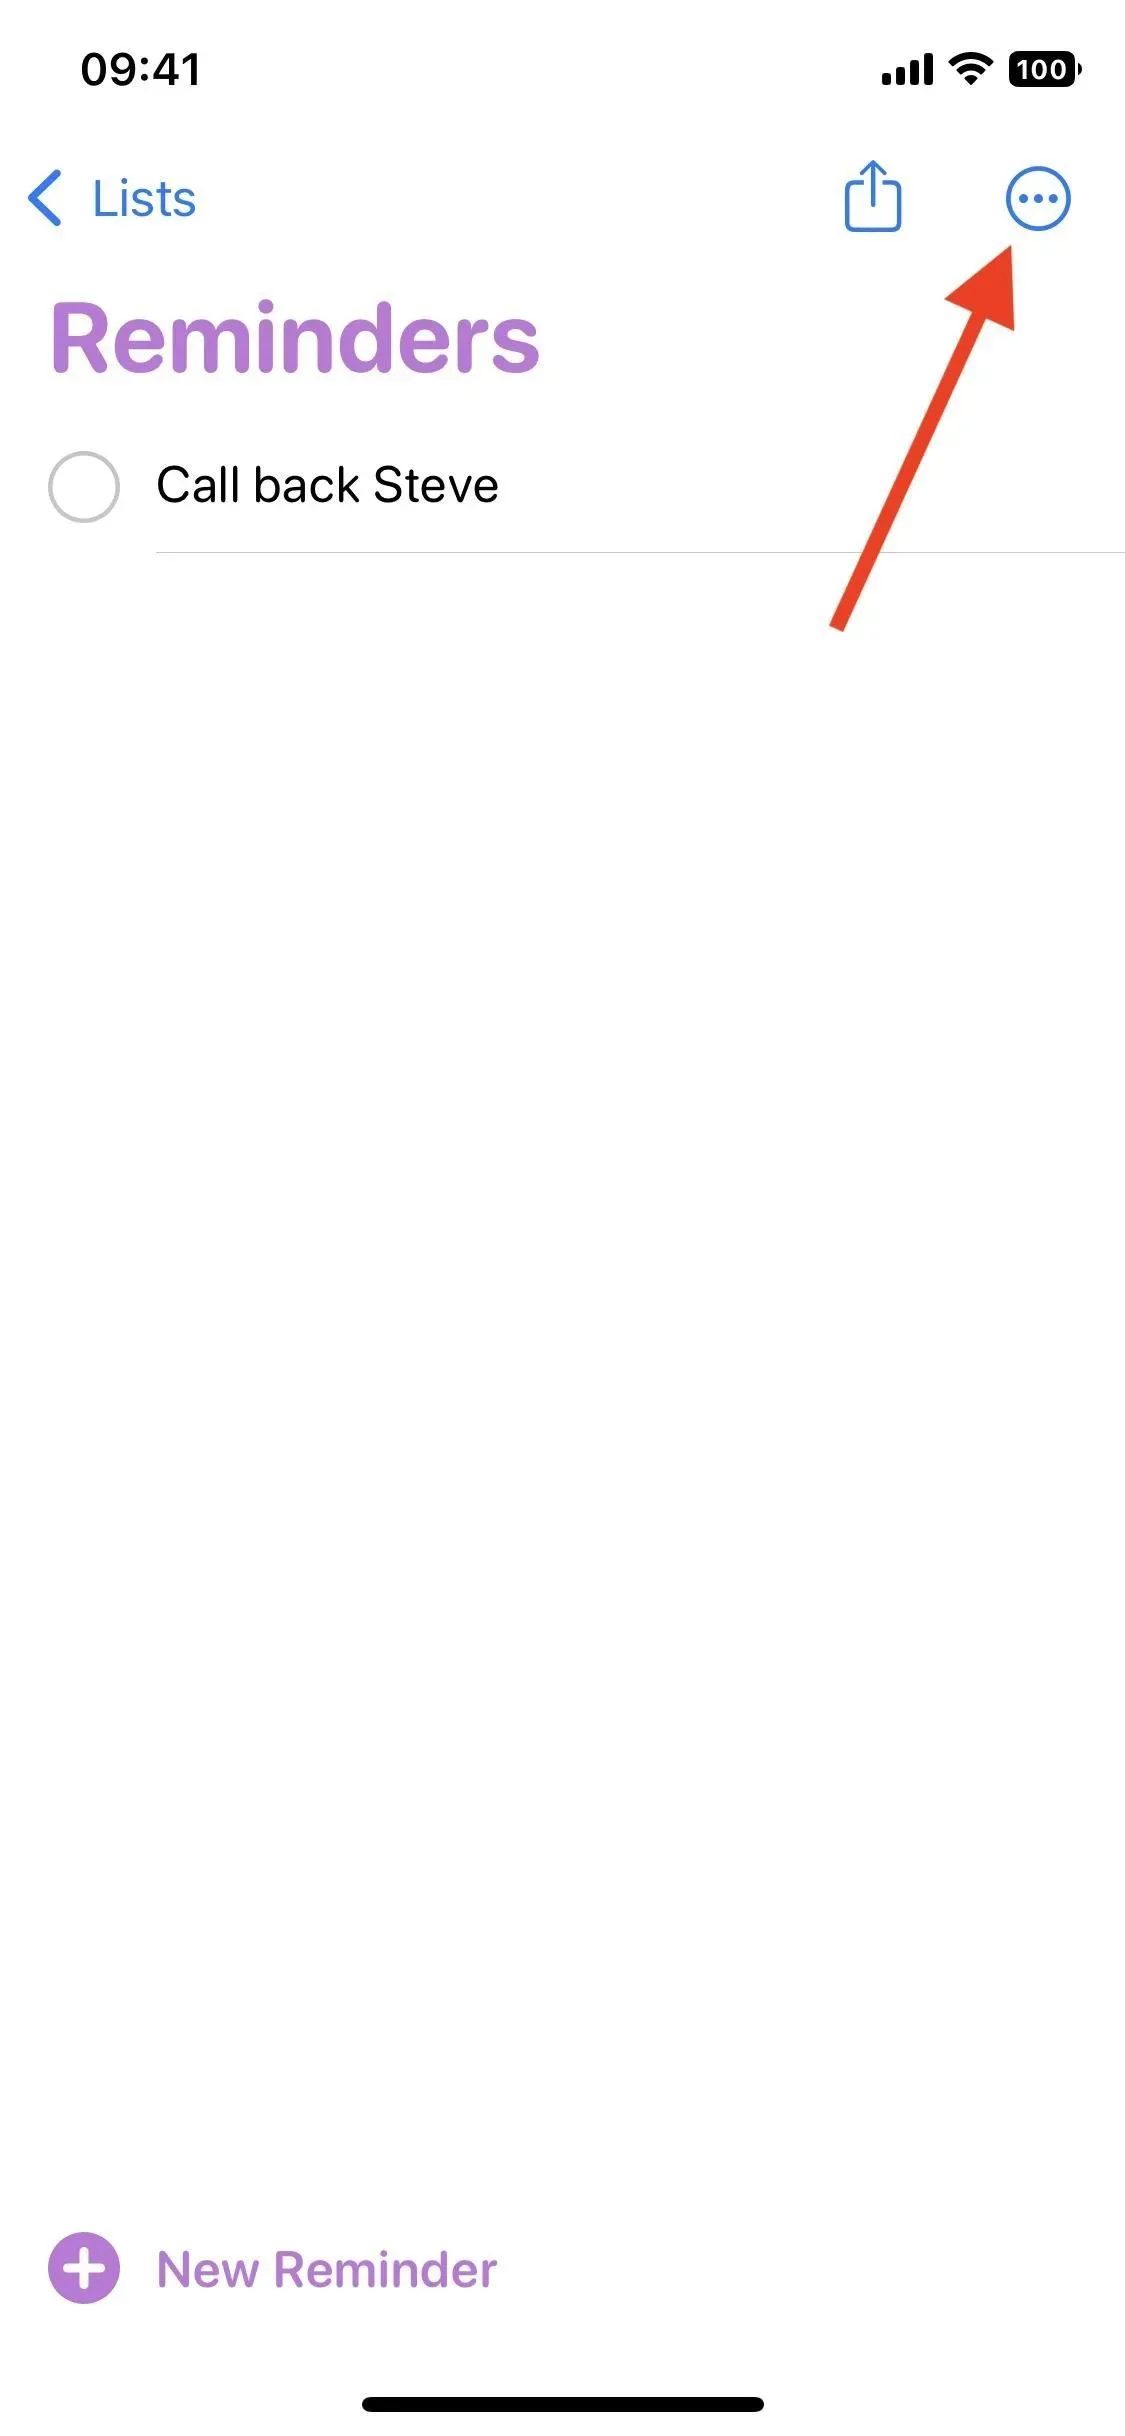
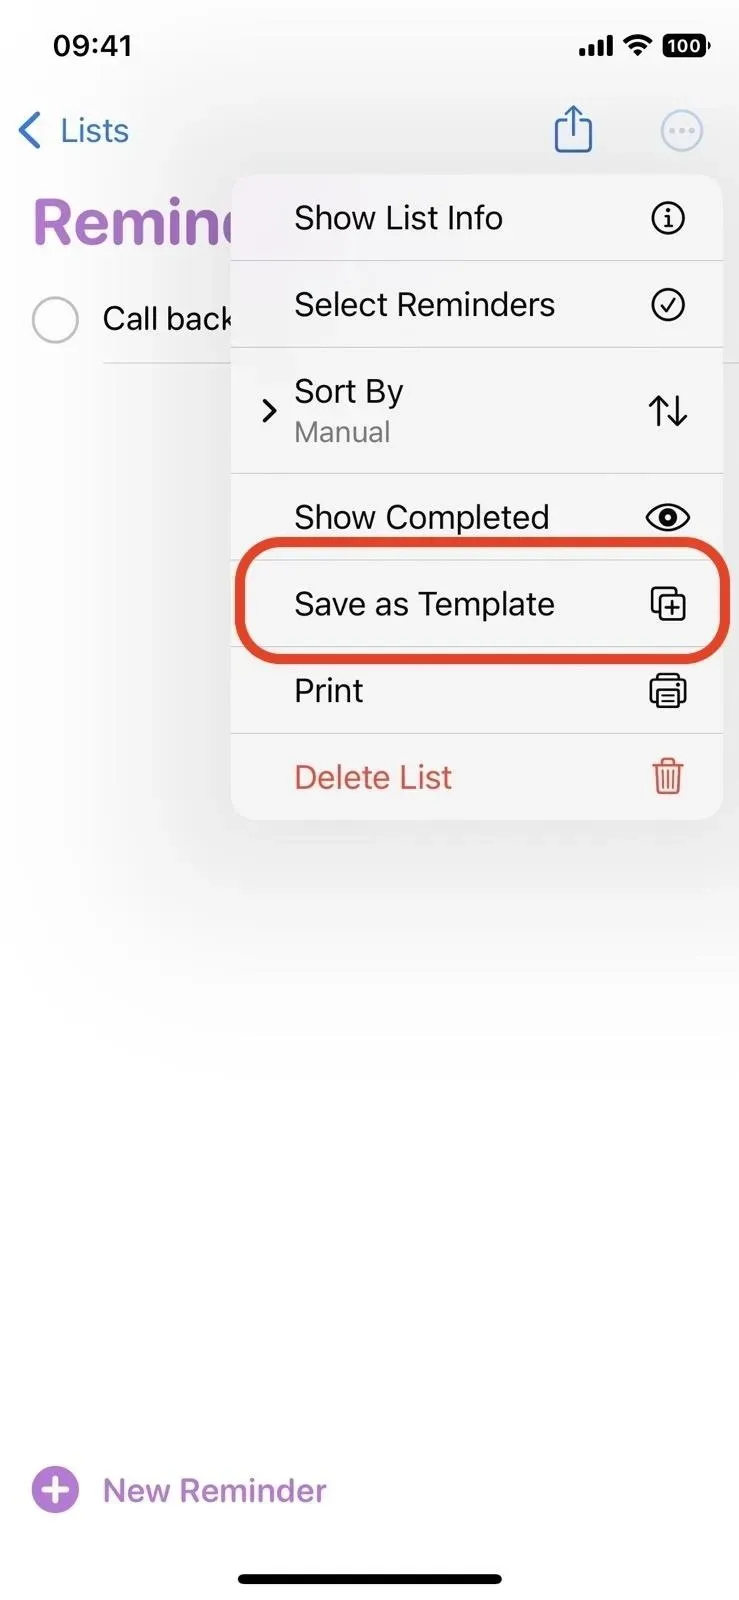
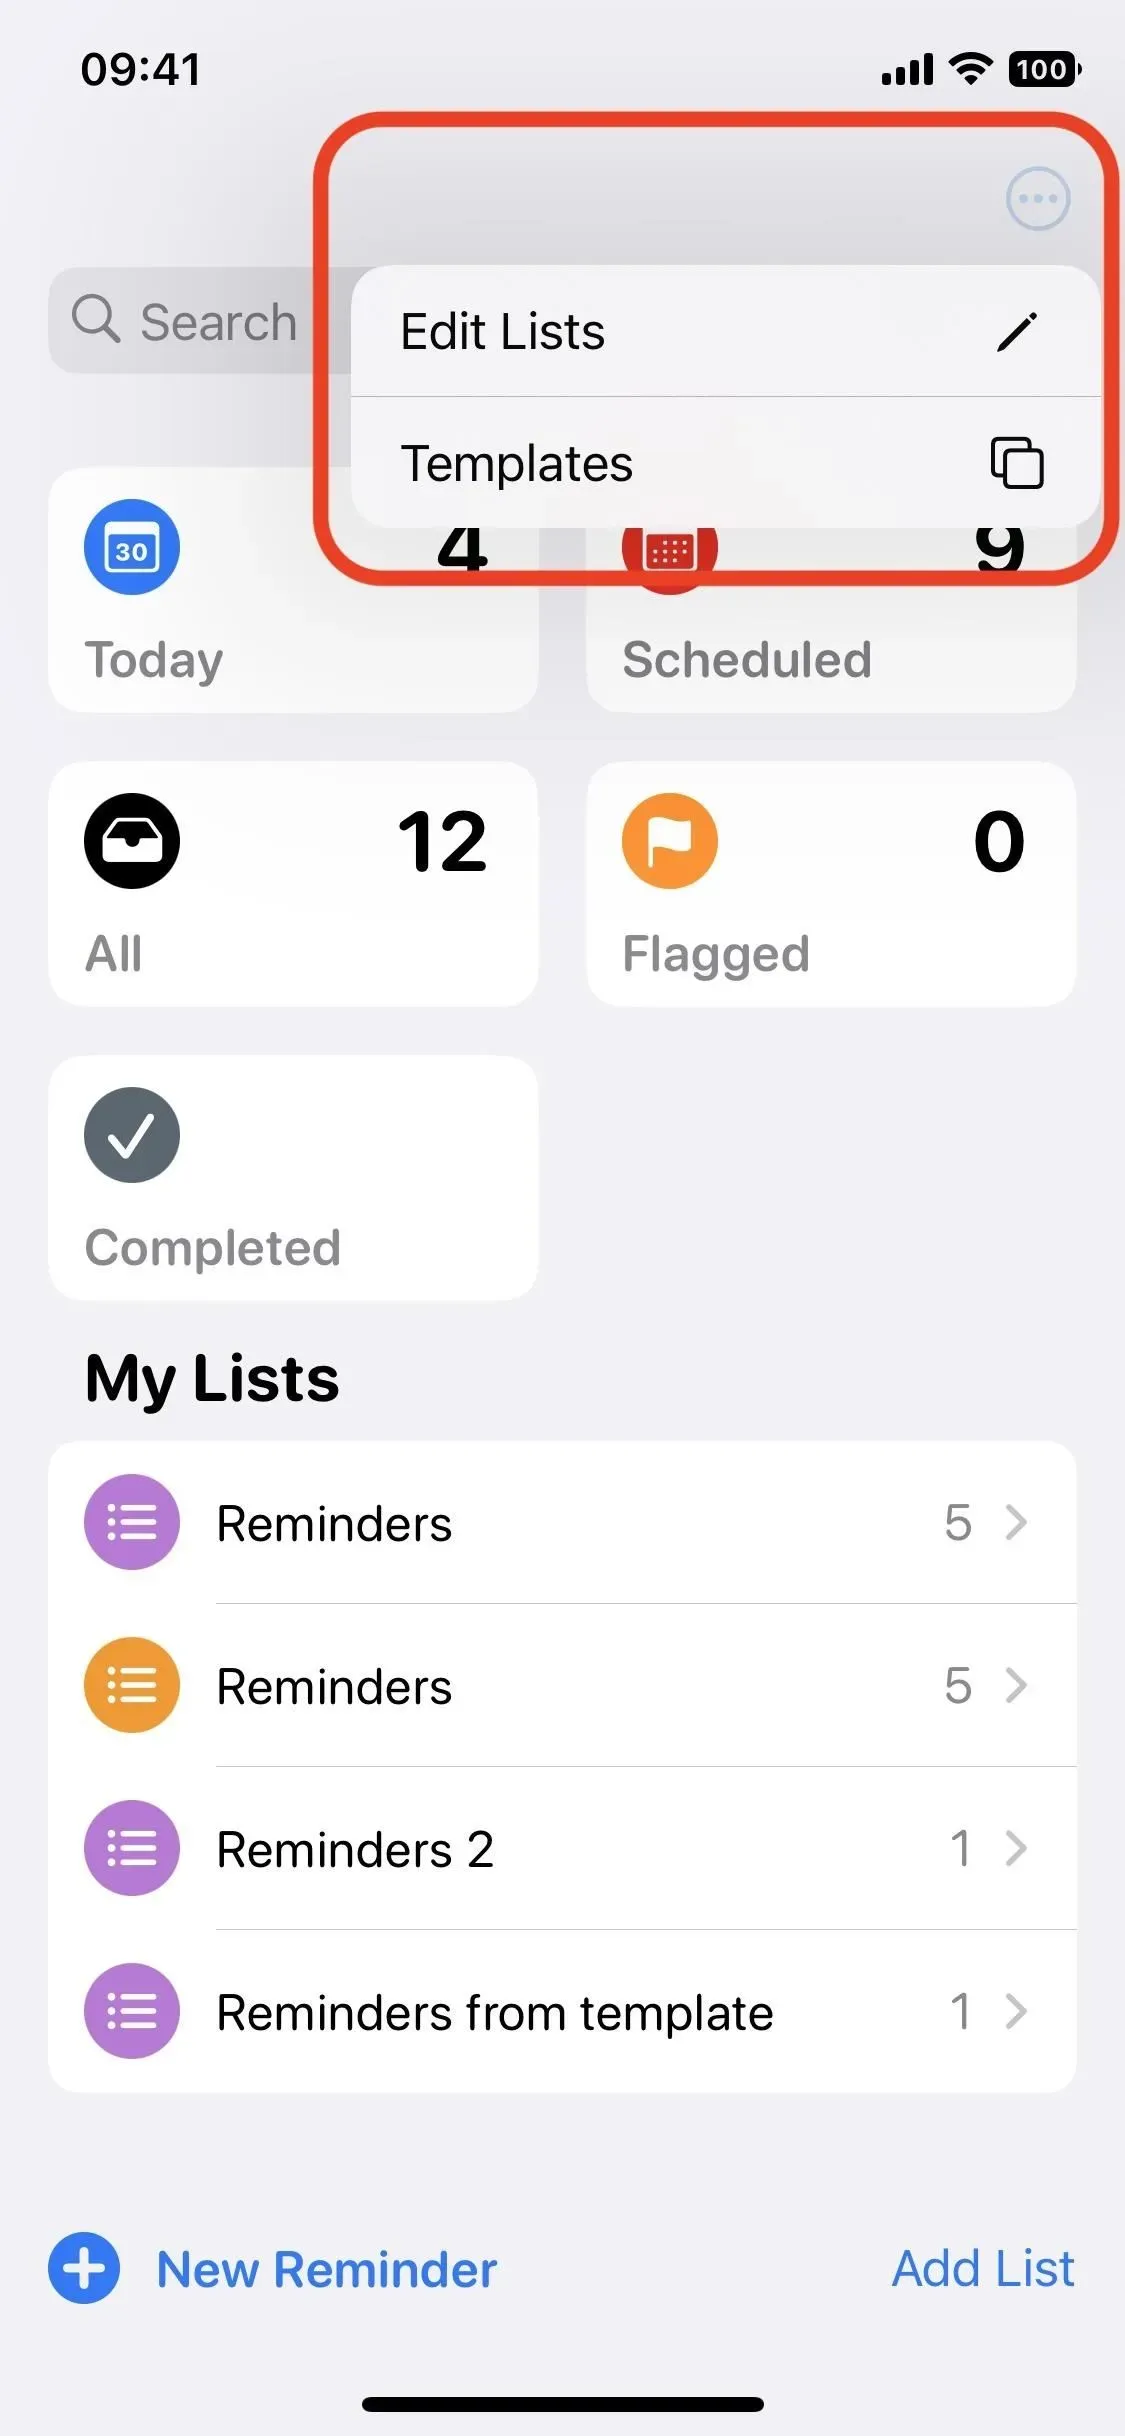
2. You can create and use list templates
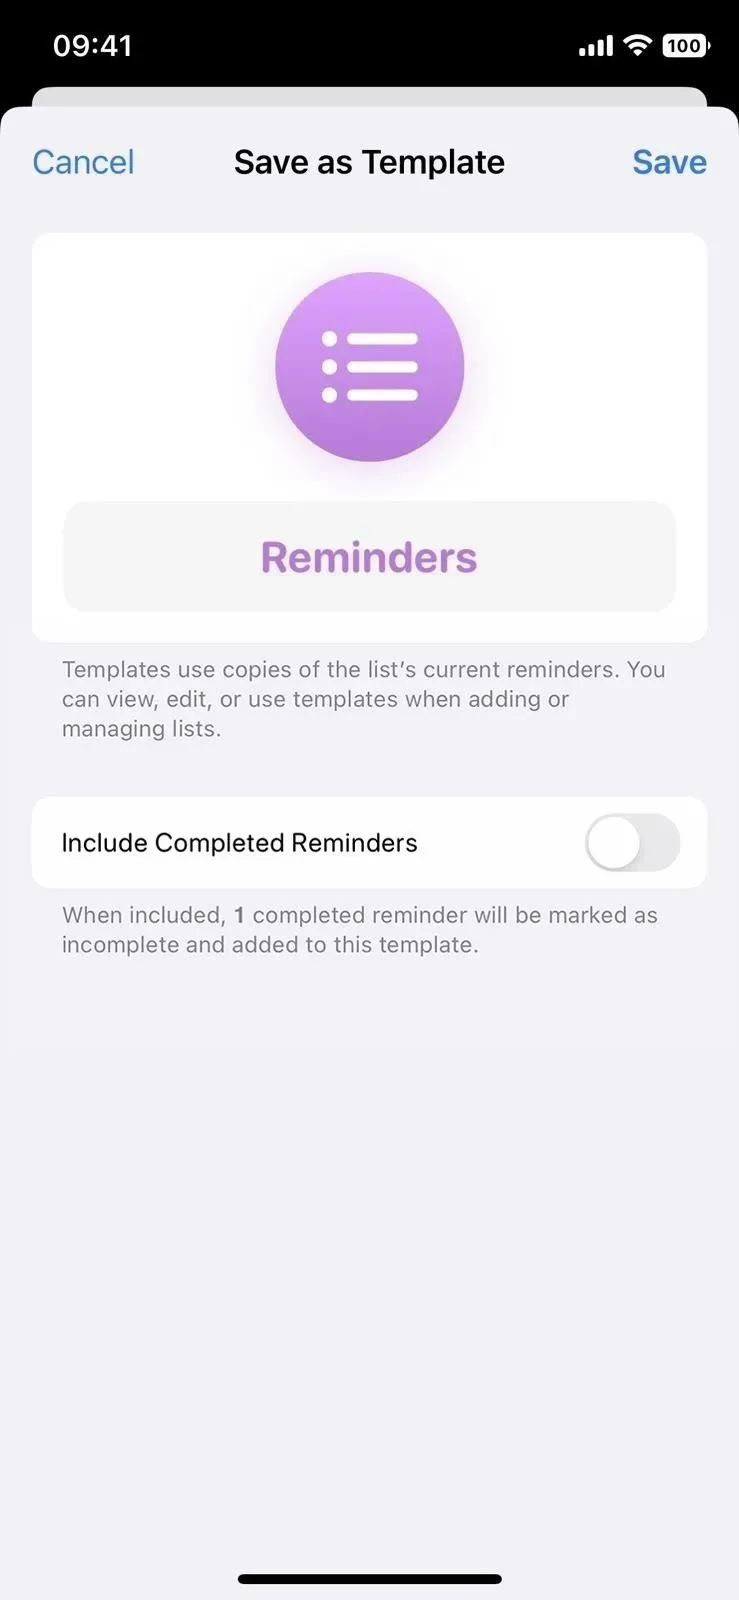
You can turn any list you make into a template to reuse over and over again. Open an existing list, tap the ellipsis button (•••), select Save as Template, and rename it if you like. If there are completed reminders in the list that you want to save with the template, select the Include Completed Reminders radio button. When you’re done, click Save.
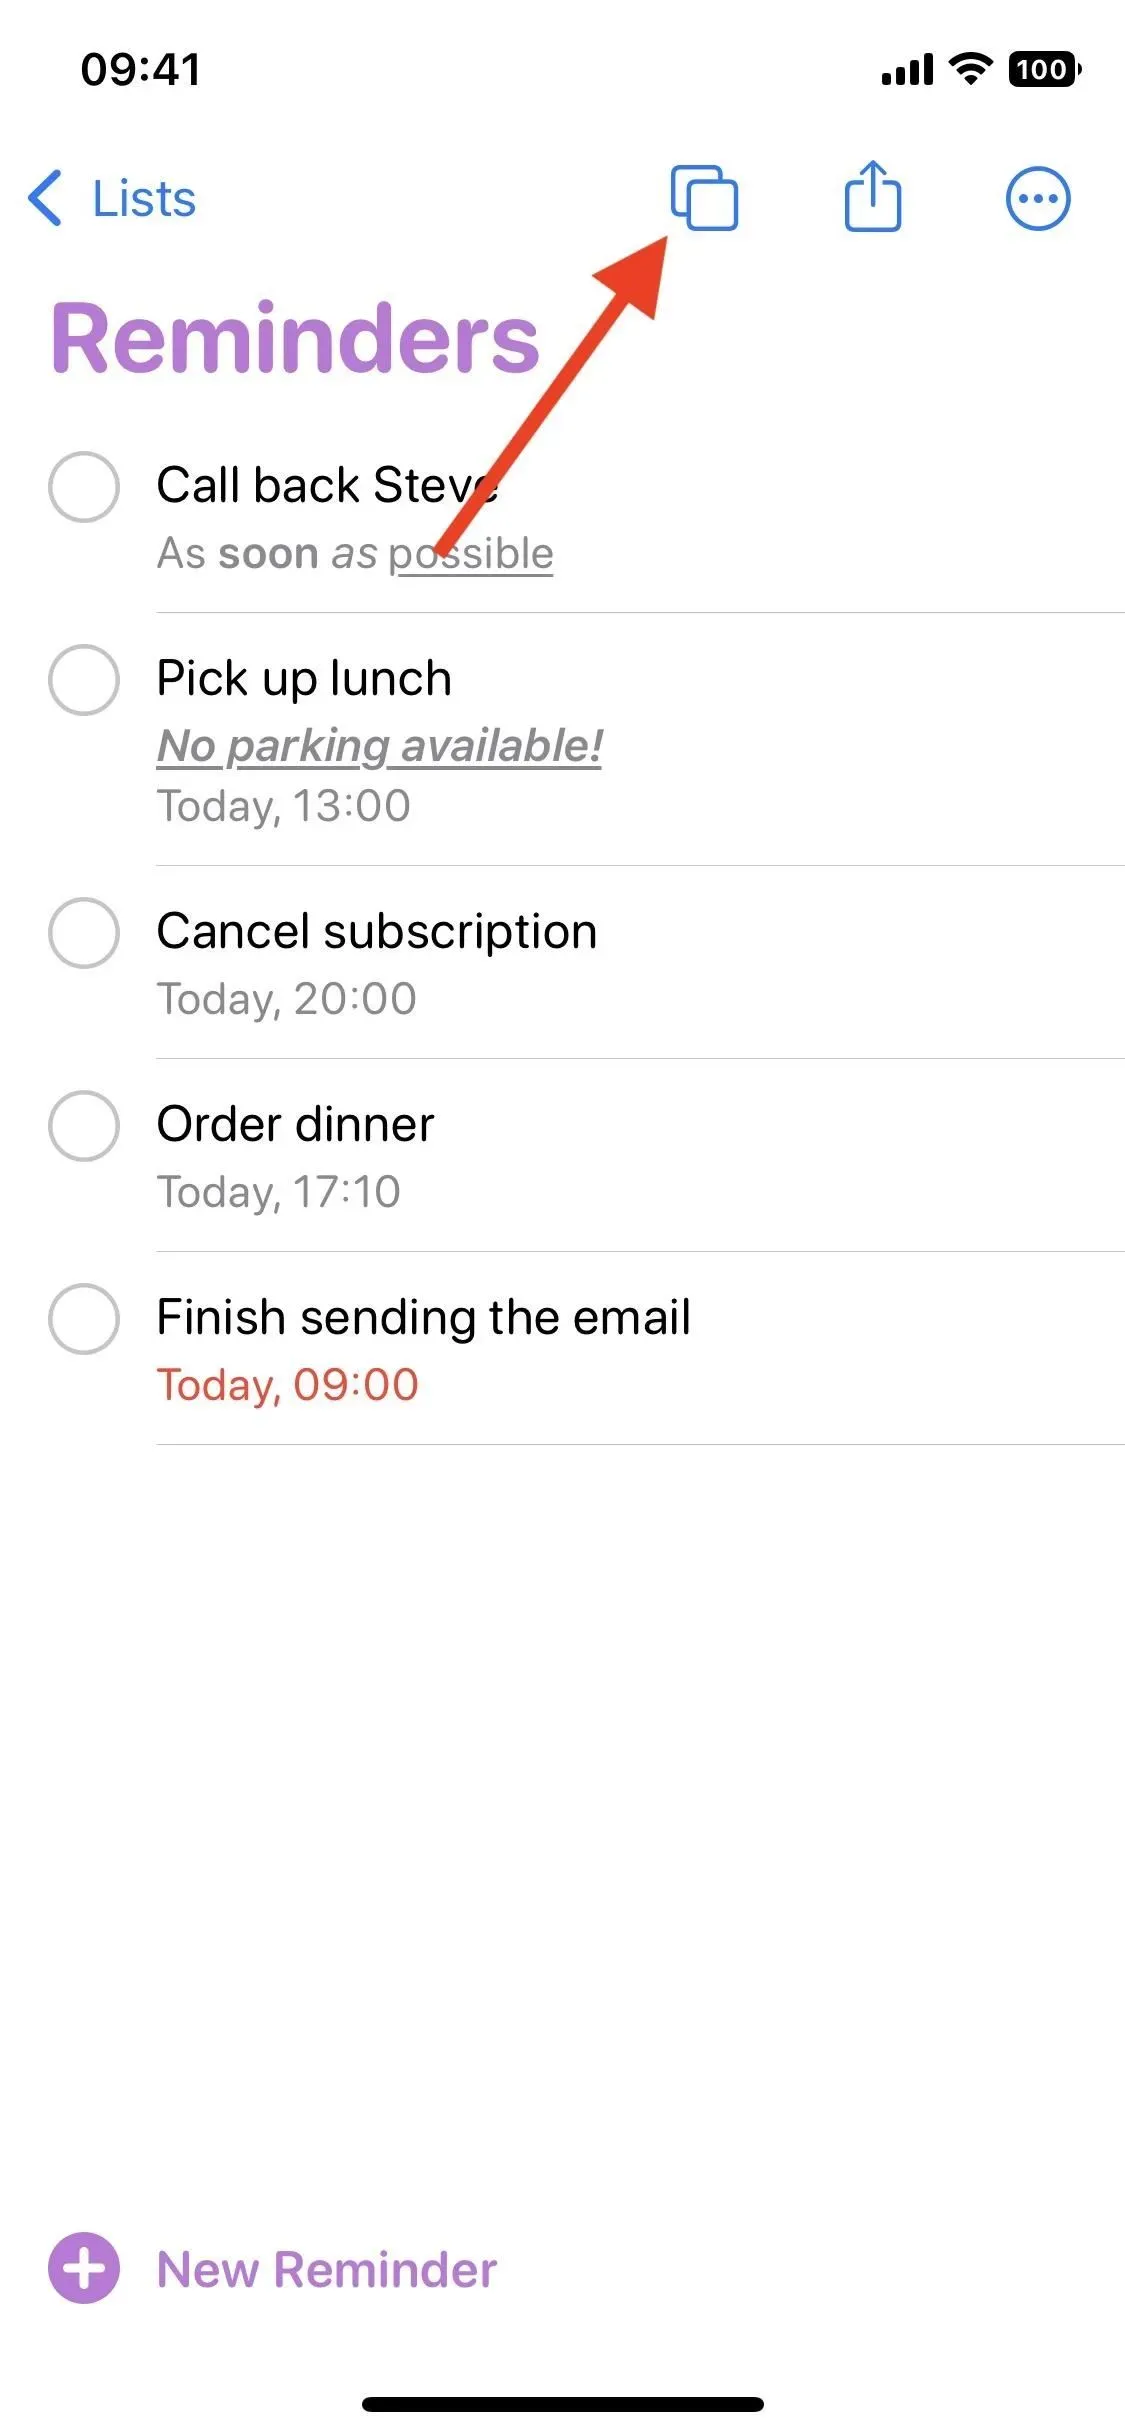
When you open a list you’ve saved as a template, you’ll see a new icon next to the share button that allows you to use the template to create a new list. Tap it, select the desired template, rename the new list, and click Create. You’ll see it appear in iCloud or My Lists.
You can also access all your templates from the list view. To do this, touch the button with the ellipsis (•••), then “Templates”. If you click the info button (i) next to each template, you can edit it, share it, or delete it. You can also swipe left on a template to delete it, or swipe right to share it.
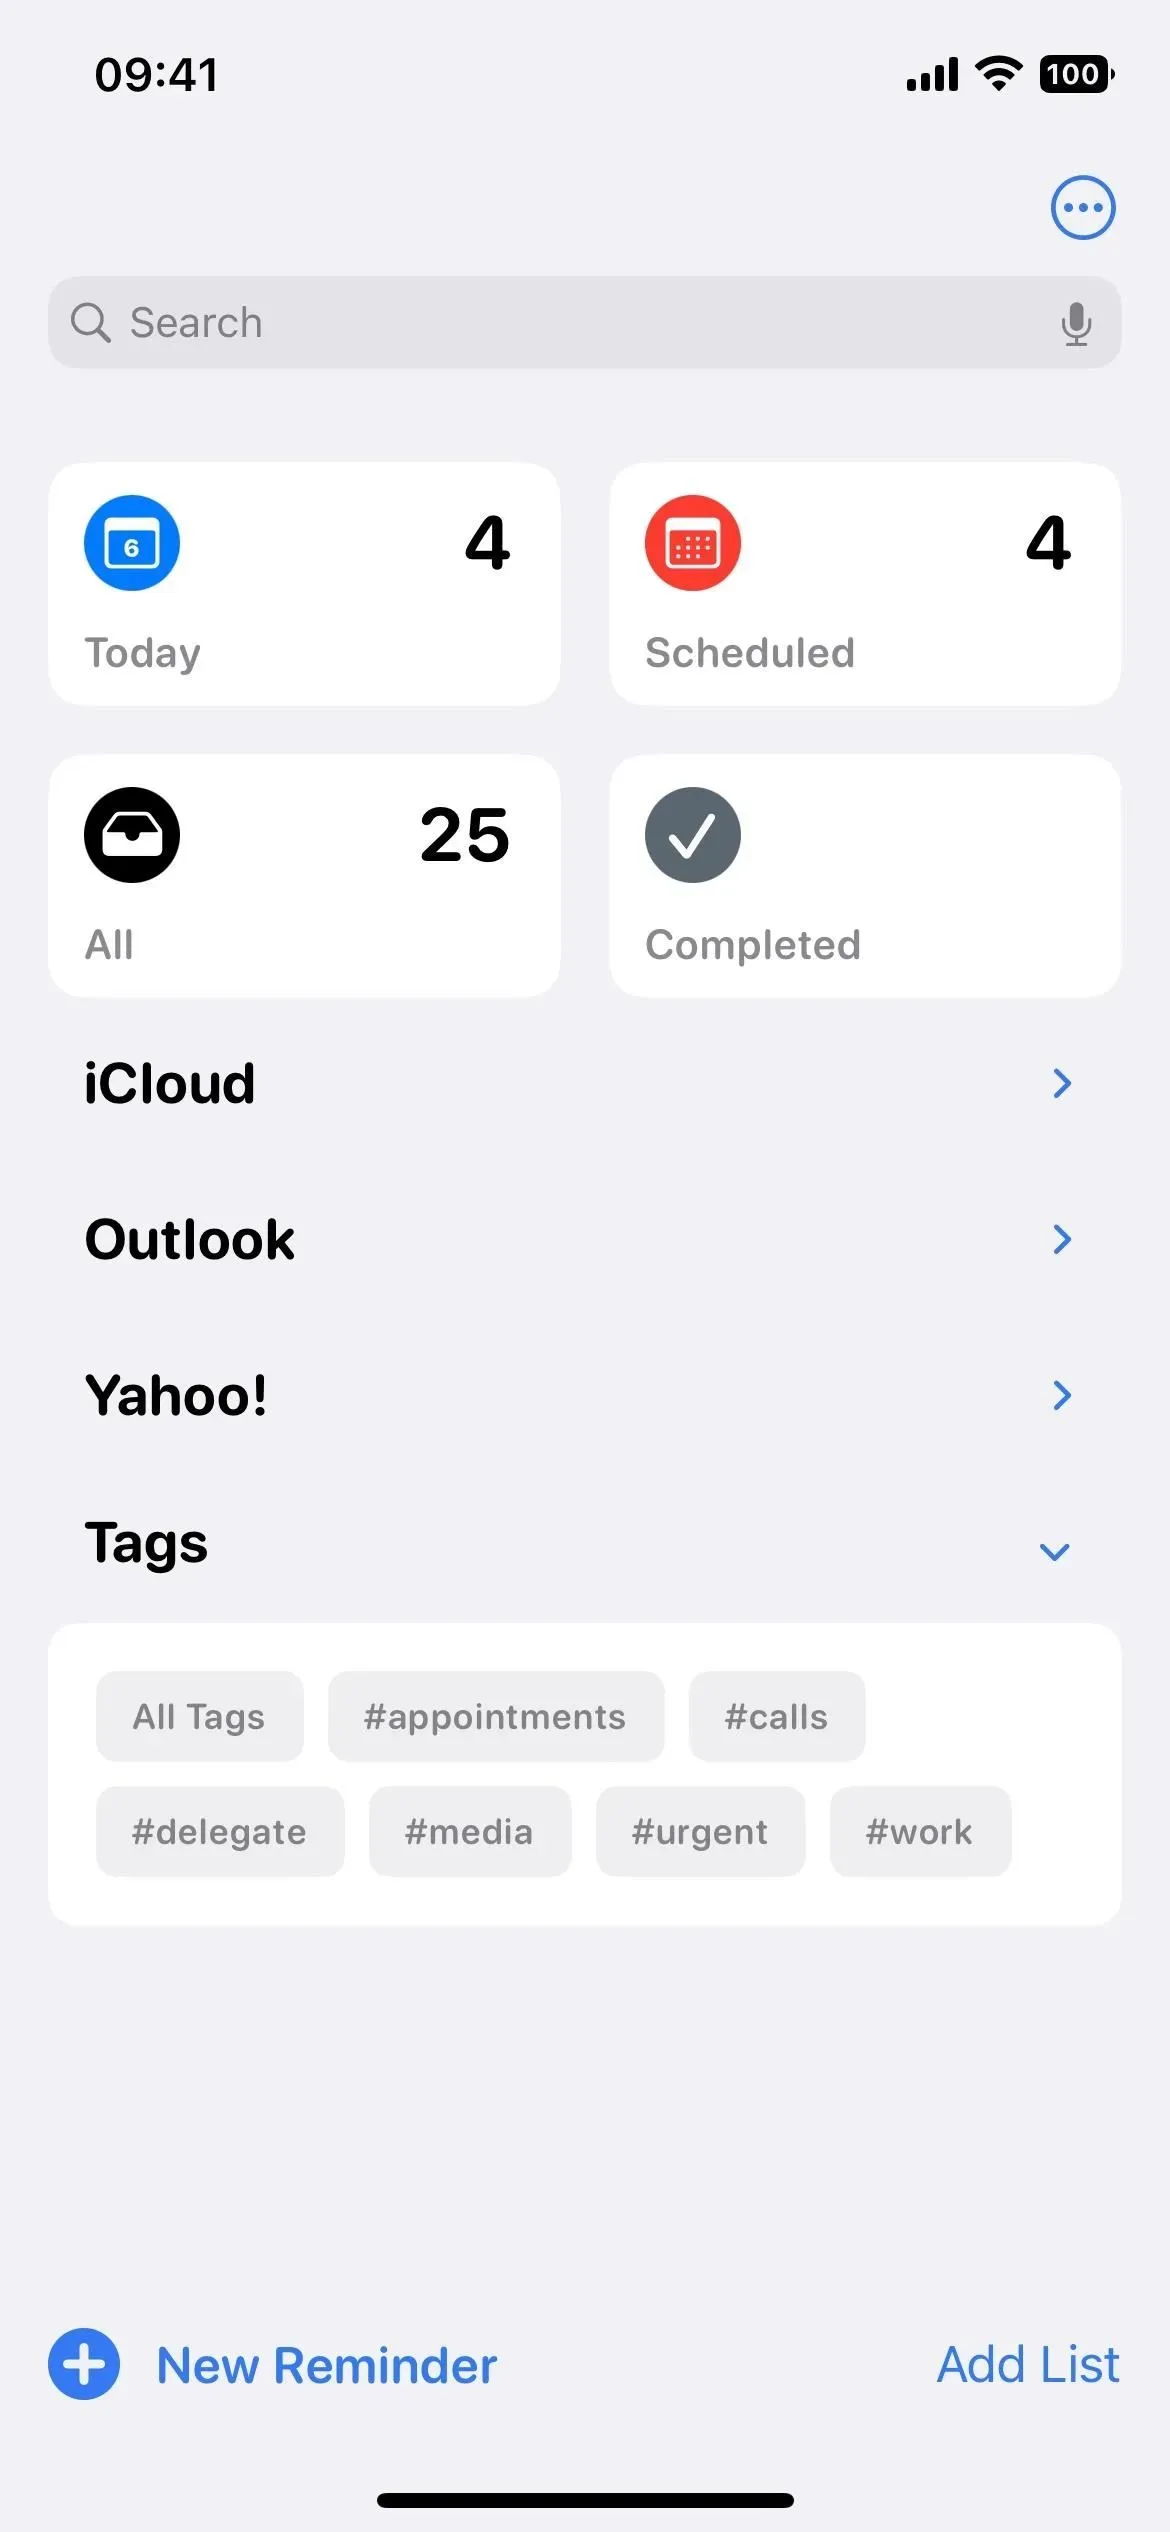
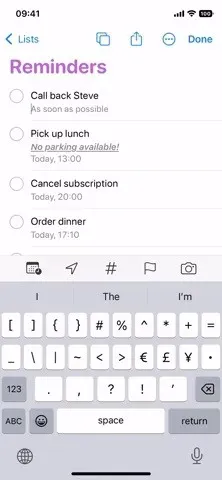
3. There is a new section for all completed reminders.
Among the pinned lists, you will see a new smart list called Completed. It contains all the reminders (combined from all lists) that you have marked as done, in case you want to come back to them later. Completed reminders are sorted by date, so you’ll see sections like Today, Previous 7 days, Previous 30 days, and older completed reminders sorted by month.


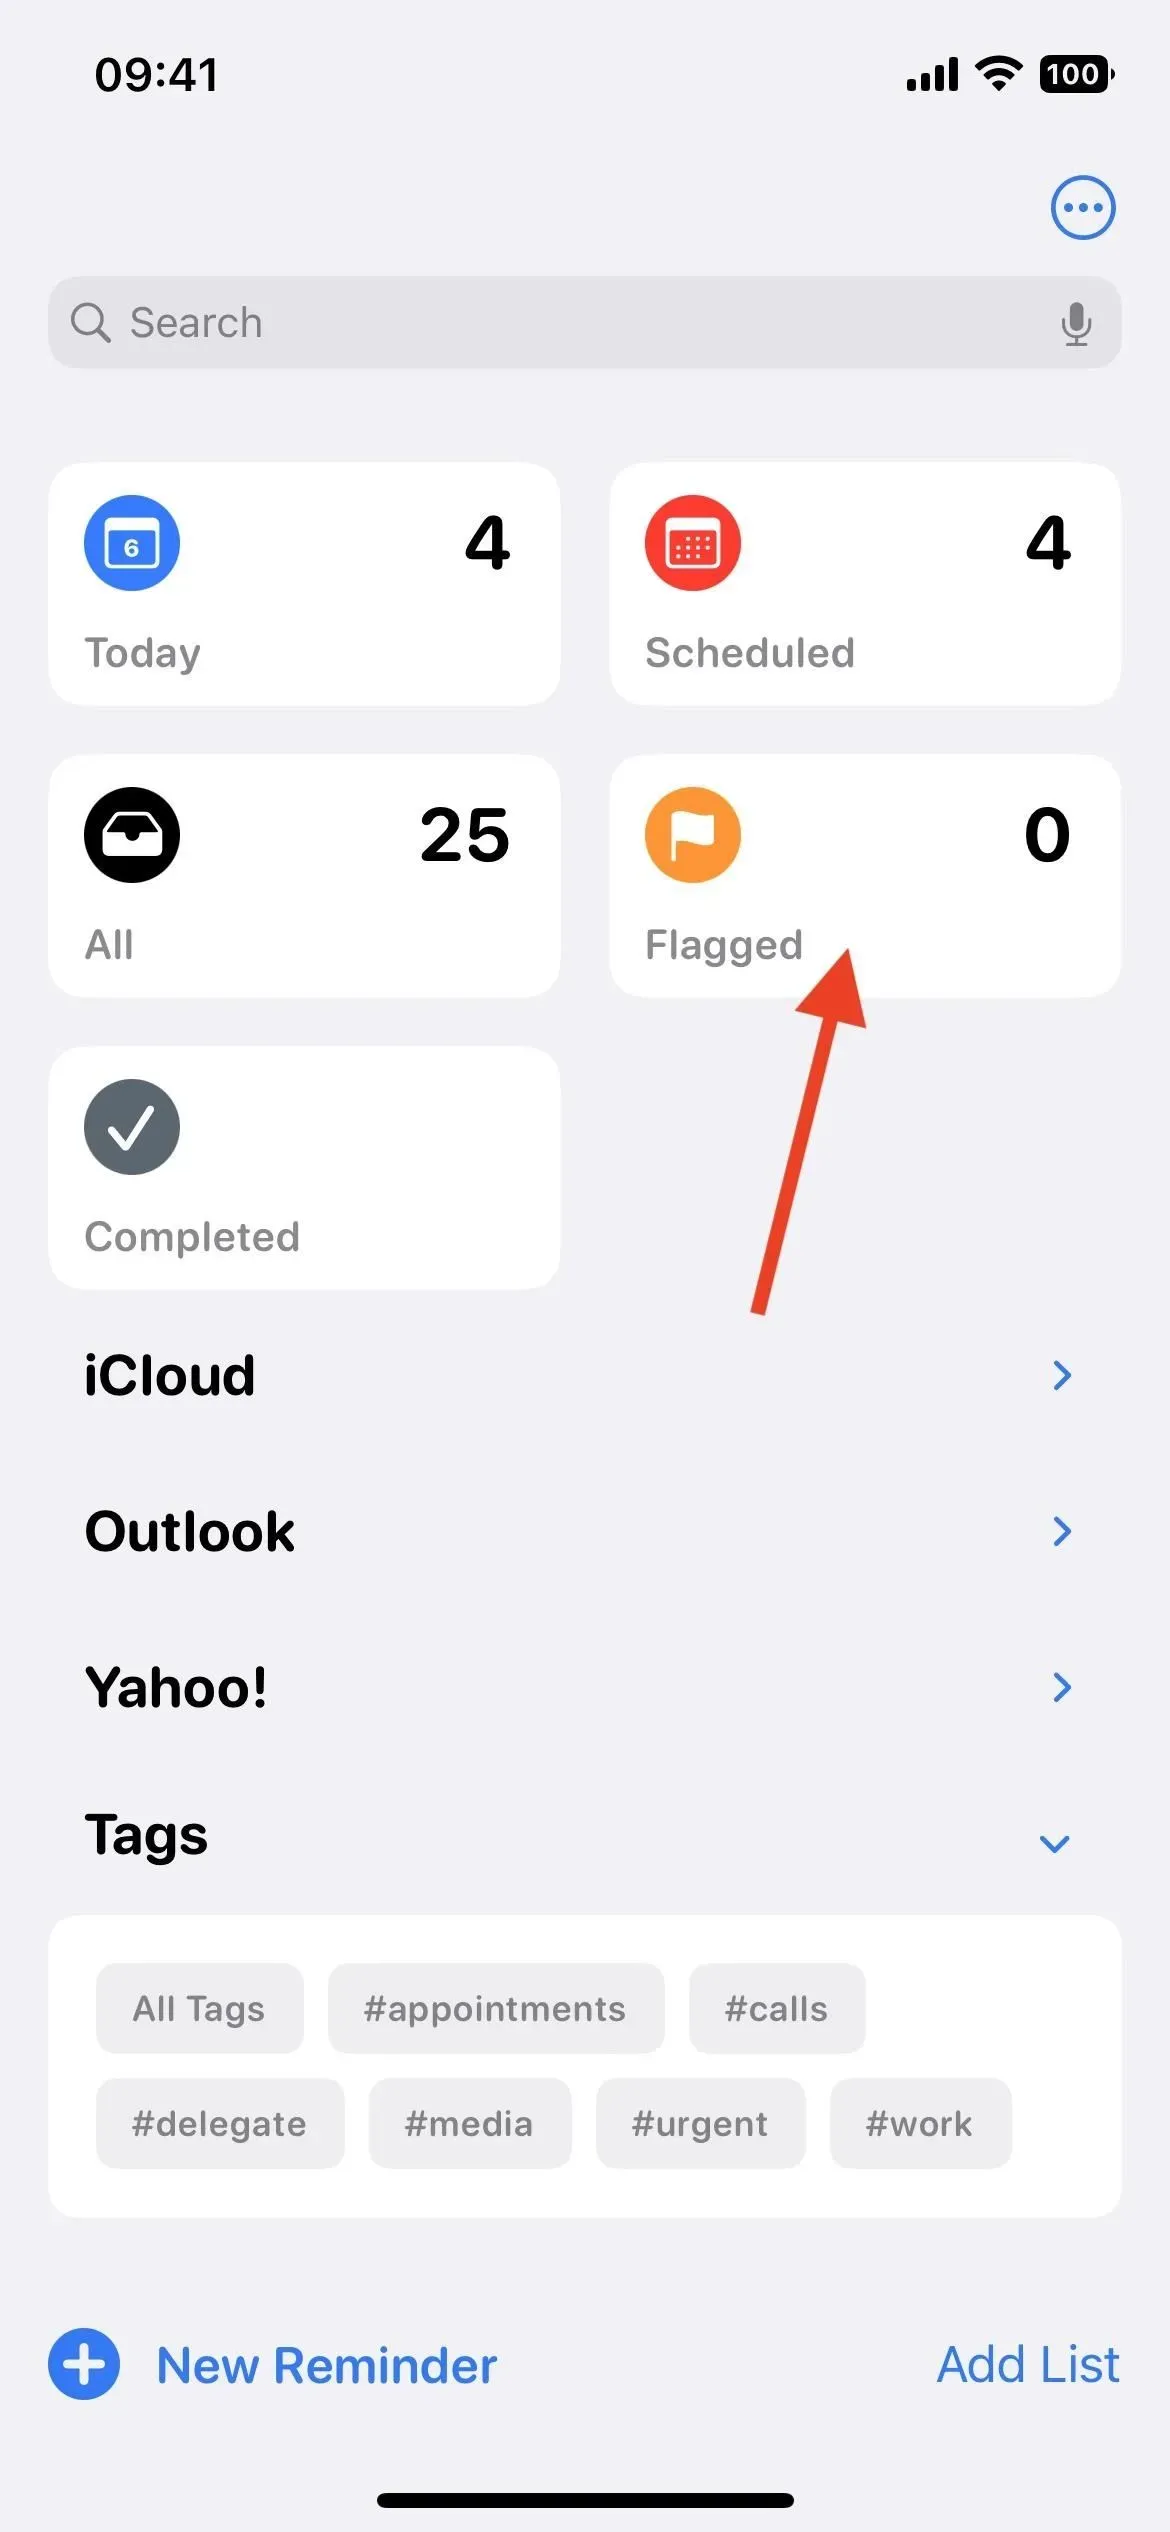
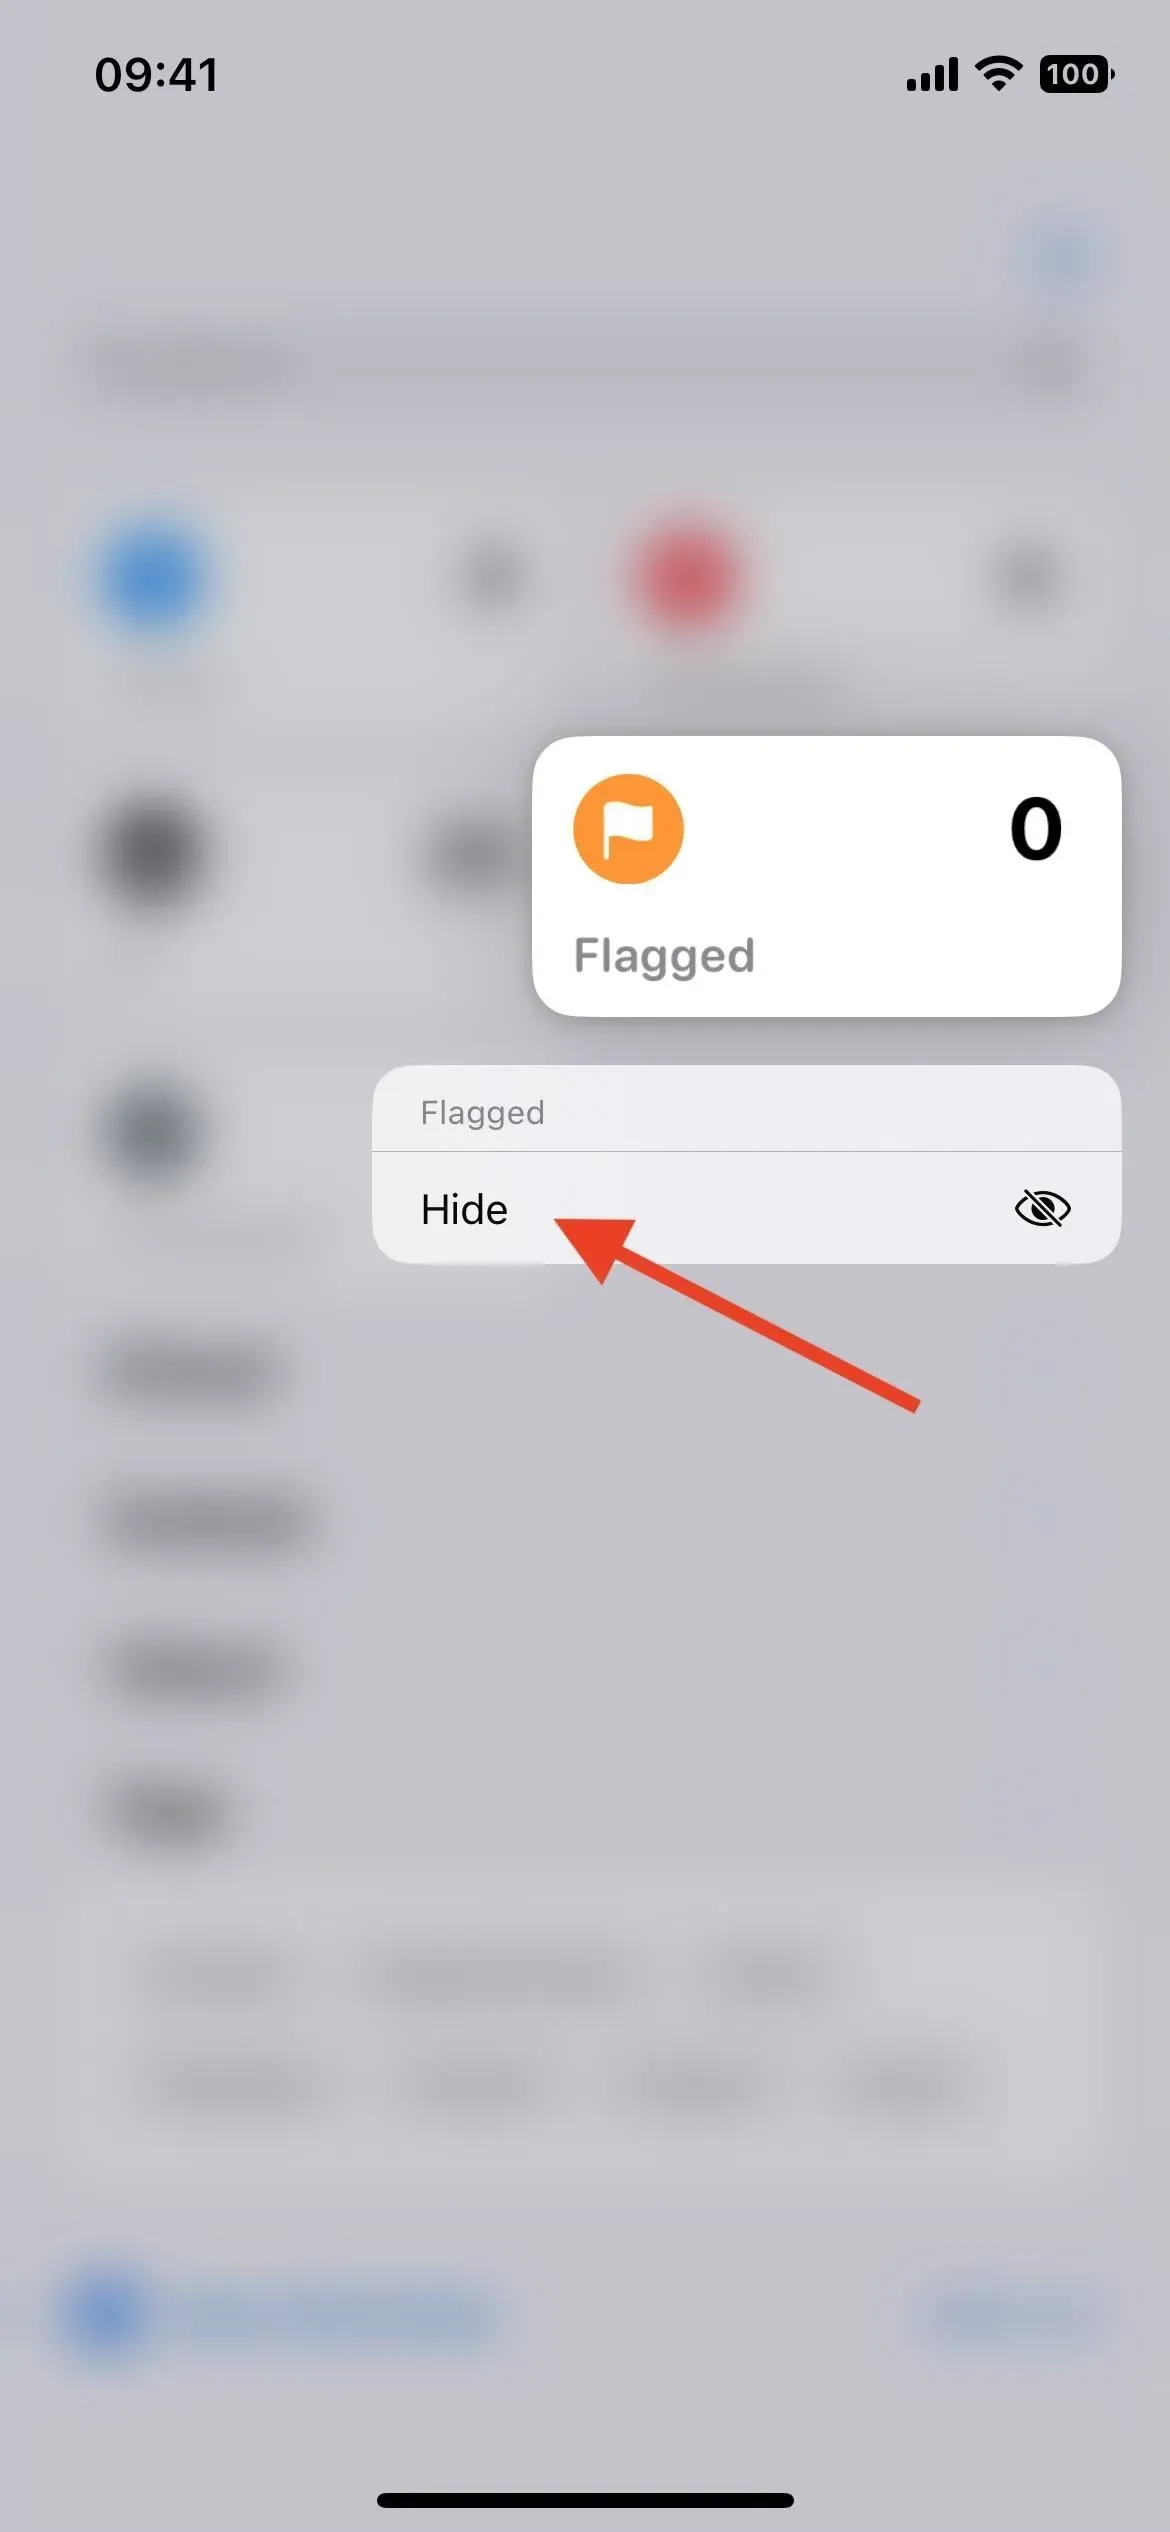
4. Easier to Hide Smart Lists by Default
Previously, you had to click “Edit”in the list view and then uncheck “Today”, “Scheduled”, “All”, “Noted”or “Assigned to Me”if you don’t want to see them all the time. You can still do this, although you’ll hit the ellipsis (•••) and then “Edit Lists”to go there now. However, you can hide some of them without doing so. Instead, press and hold the card and select “Hide”from the quick actions menu.
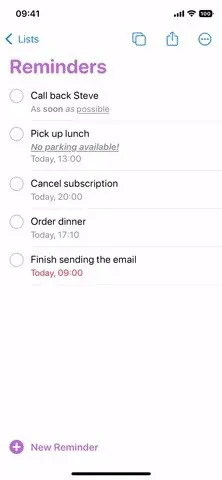
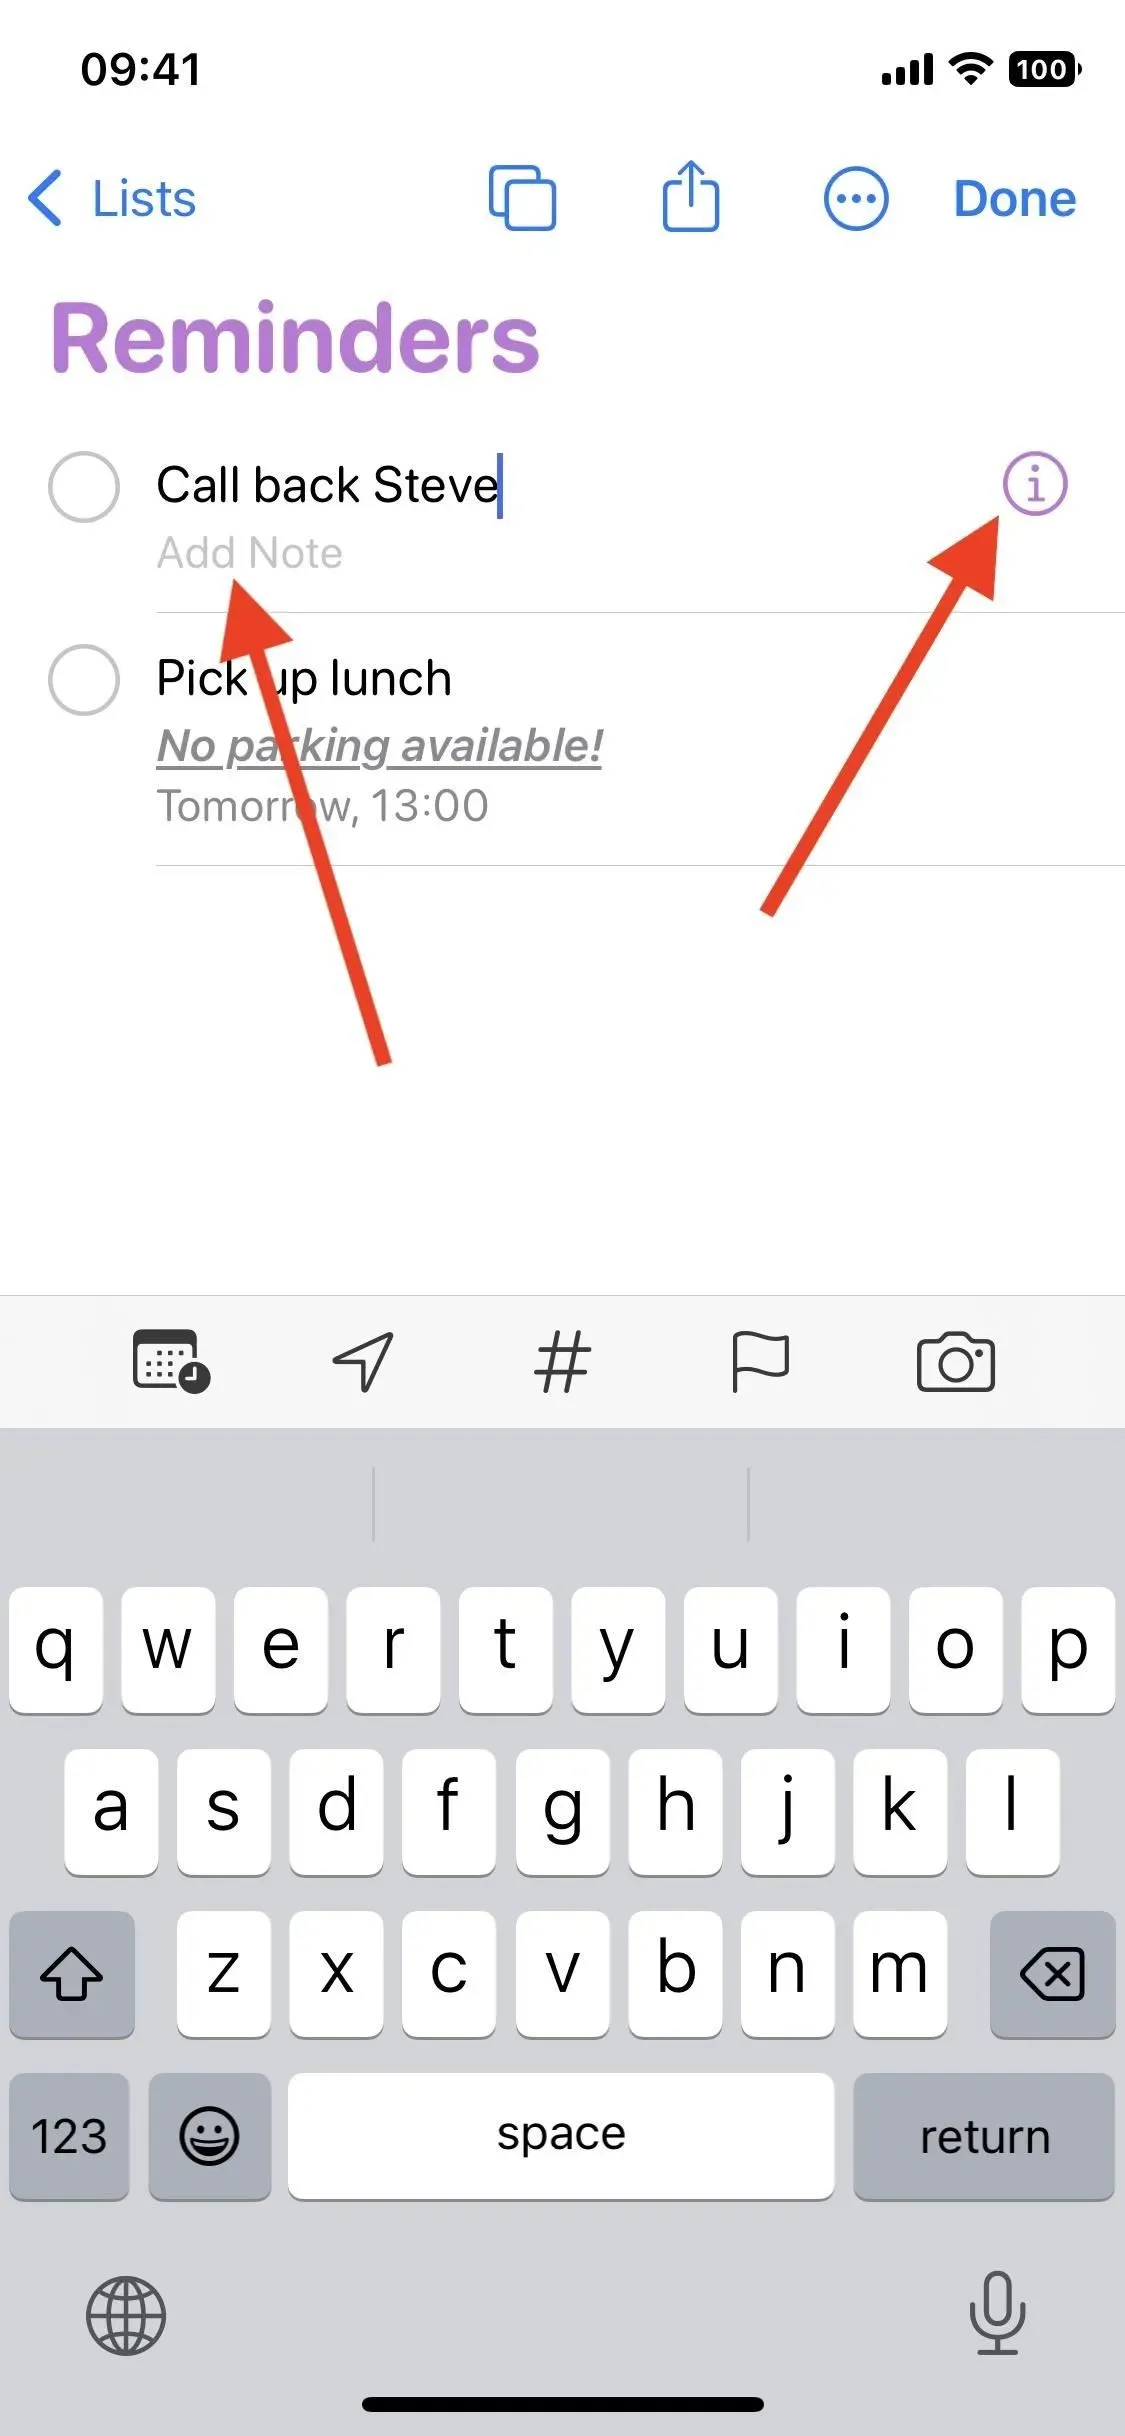
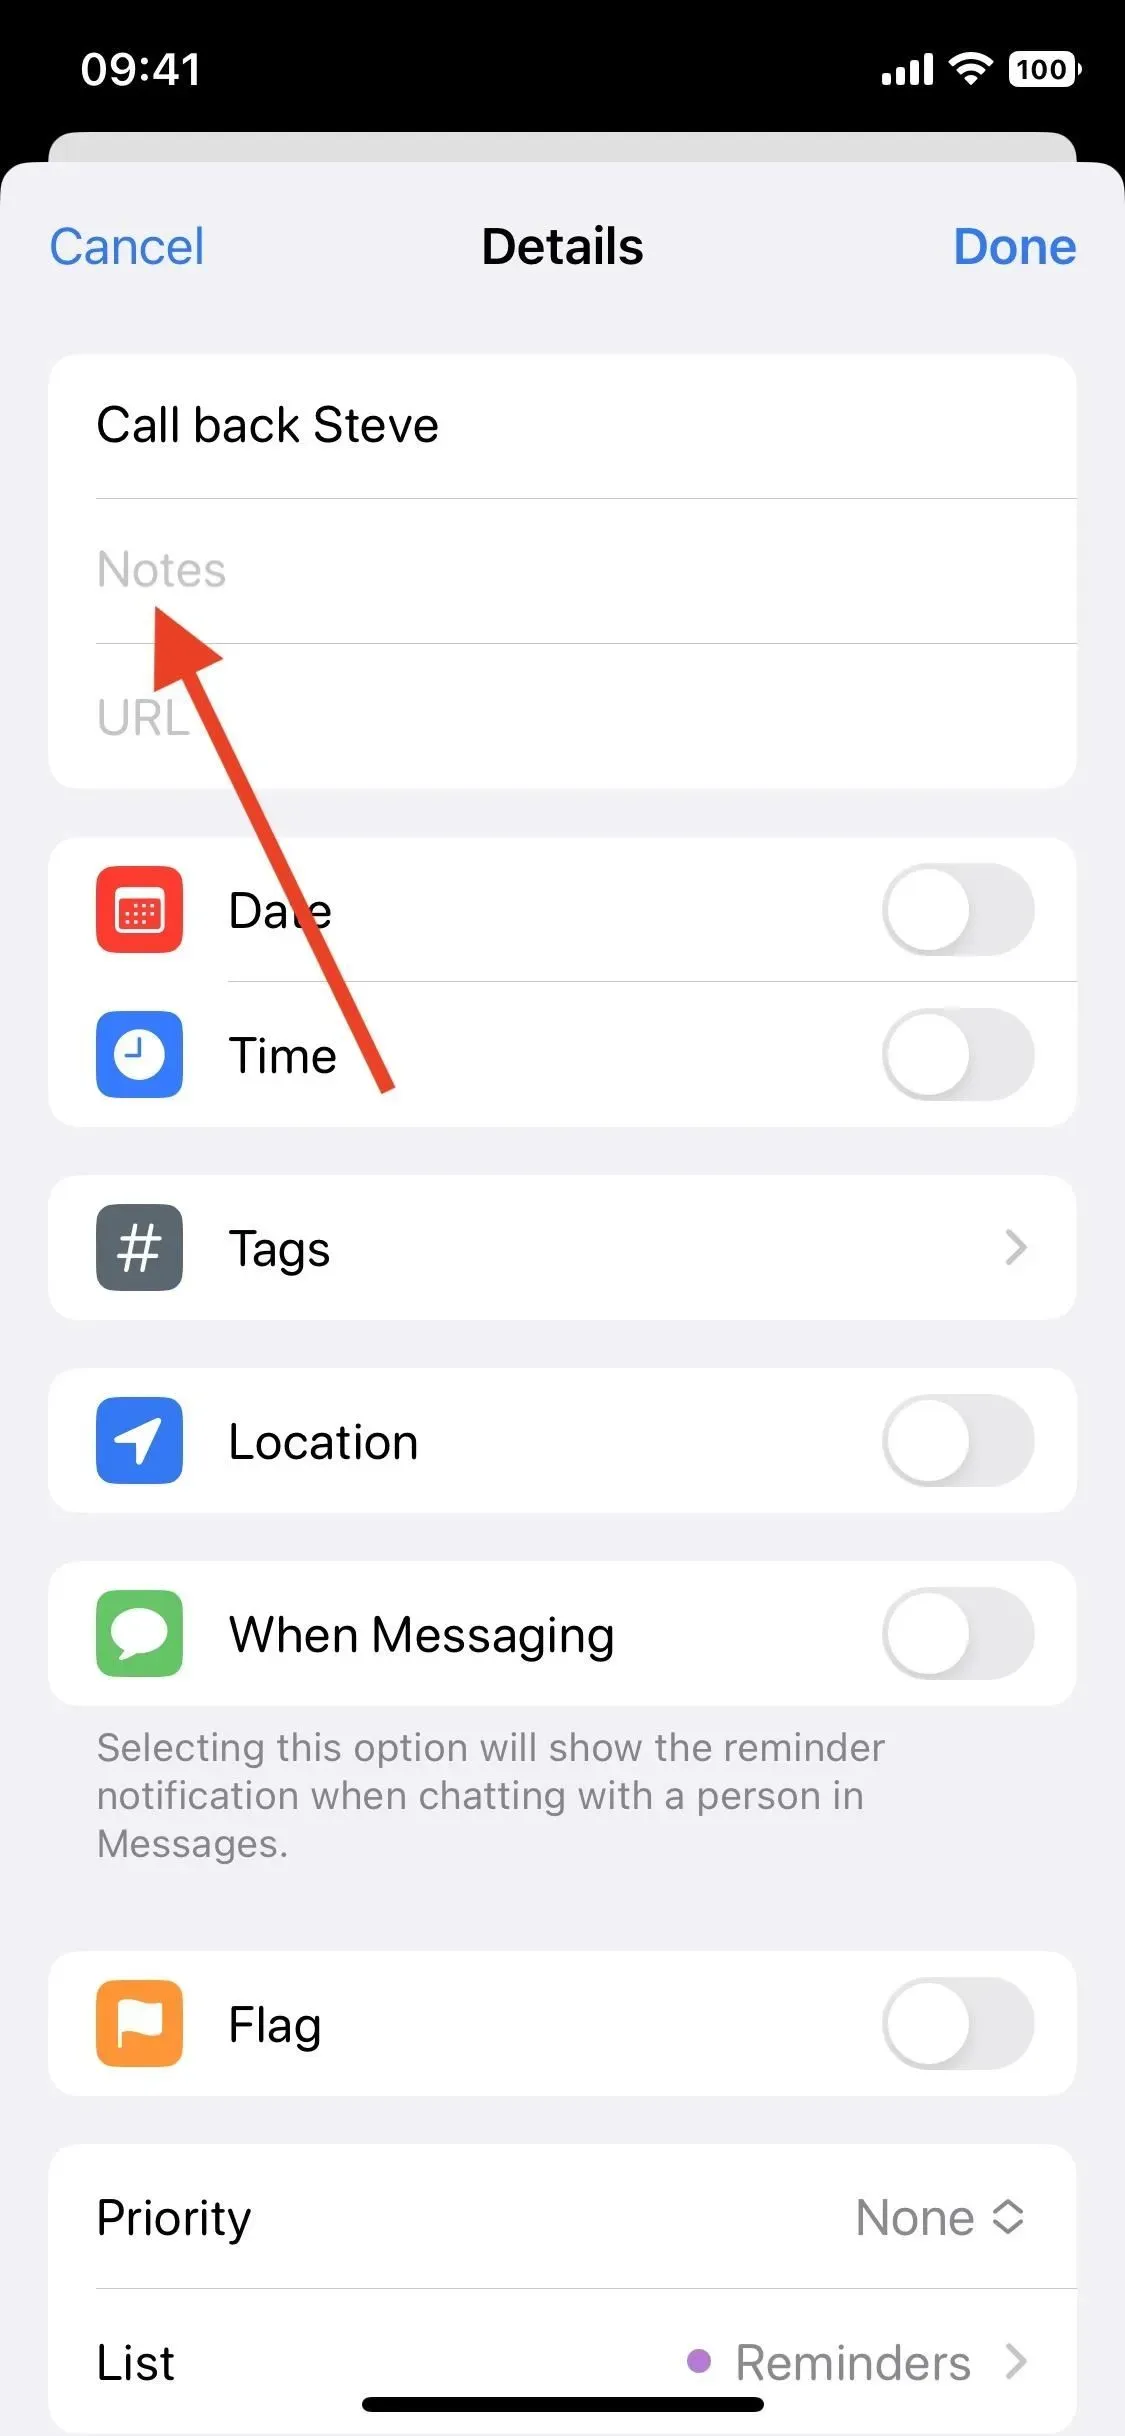
5. You can format text in notes
Adding a note for each individual reminder is not a new feature, but formatting the text in a note is. Formatting options include bold, italic, underline, bulleted list, dotted list, and numbered list. This can be applied to any single word or whole note. To add notes, you can:
- Tap the reminder, then tap the “Add note”box below the title (this is a new feature).
- Tap the reminder, tap the info button (i) on the right, and select the Notes field.
- Swipe left on a reminder, tap More, and select the Notes field.
You can format a note as you type it or after you add it. To format as you type, tap the cursor, choose Format from the menu, and choose a formatting option. For example, if you select Bold, whatever you type will appear in bold until you turn it off, use AutoCorrect, or tap a suggestion. You can even combine formatting options.
Select a word, phrase, sentence, or entire note to format the content after the fact. If the menu does not appear, tap the selection. Then select “Format”and select any formatting option.
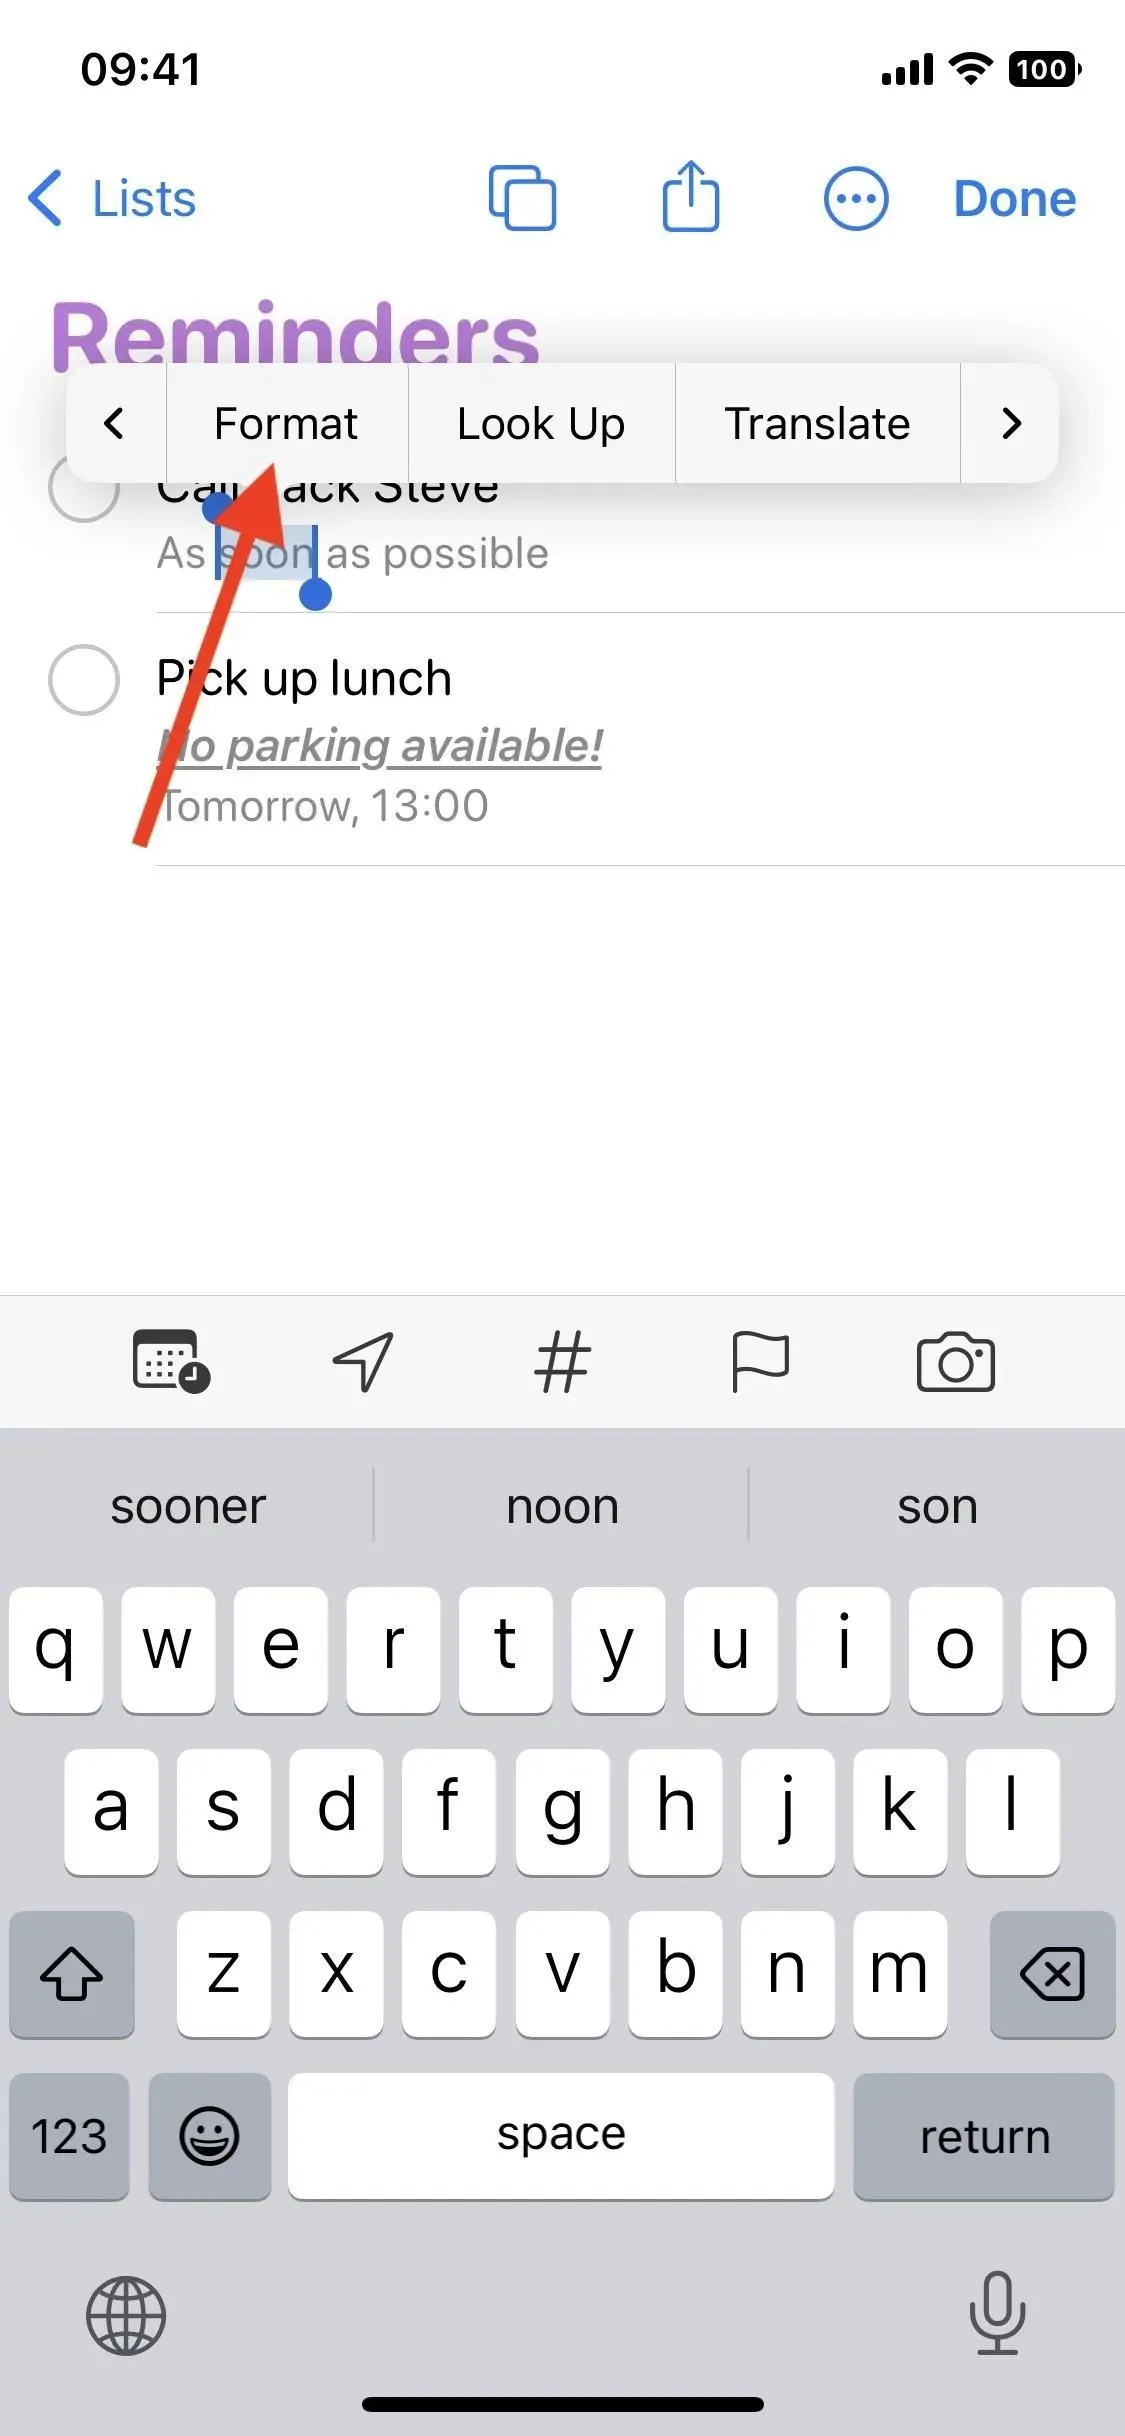
While there is no quick bold, italic, and/or underline option, you can create lists in a note without opening the context menu. Use an asterisk (*) to start a bulleted list, a dash (-) for a dotted list, and 1. for a numbered list.
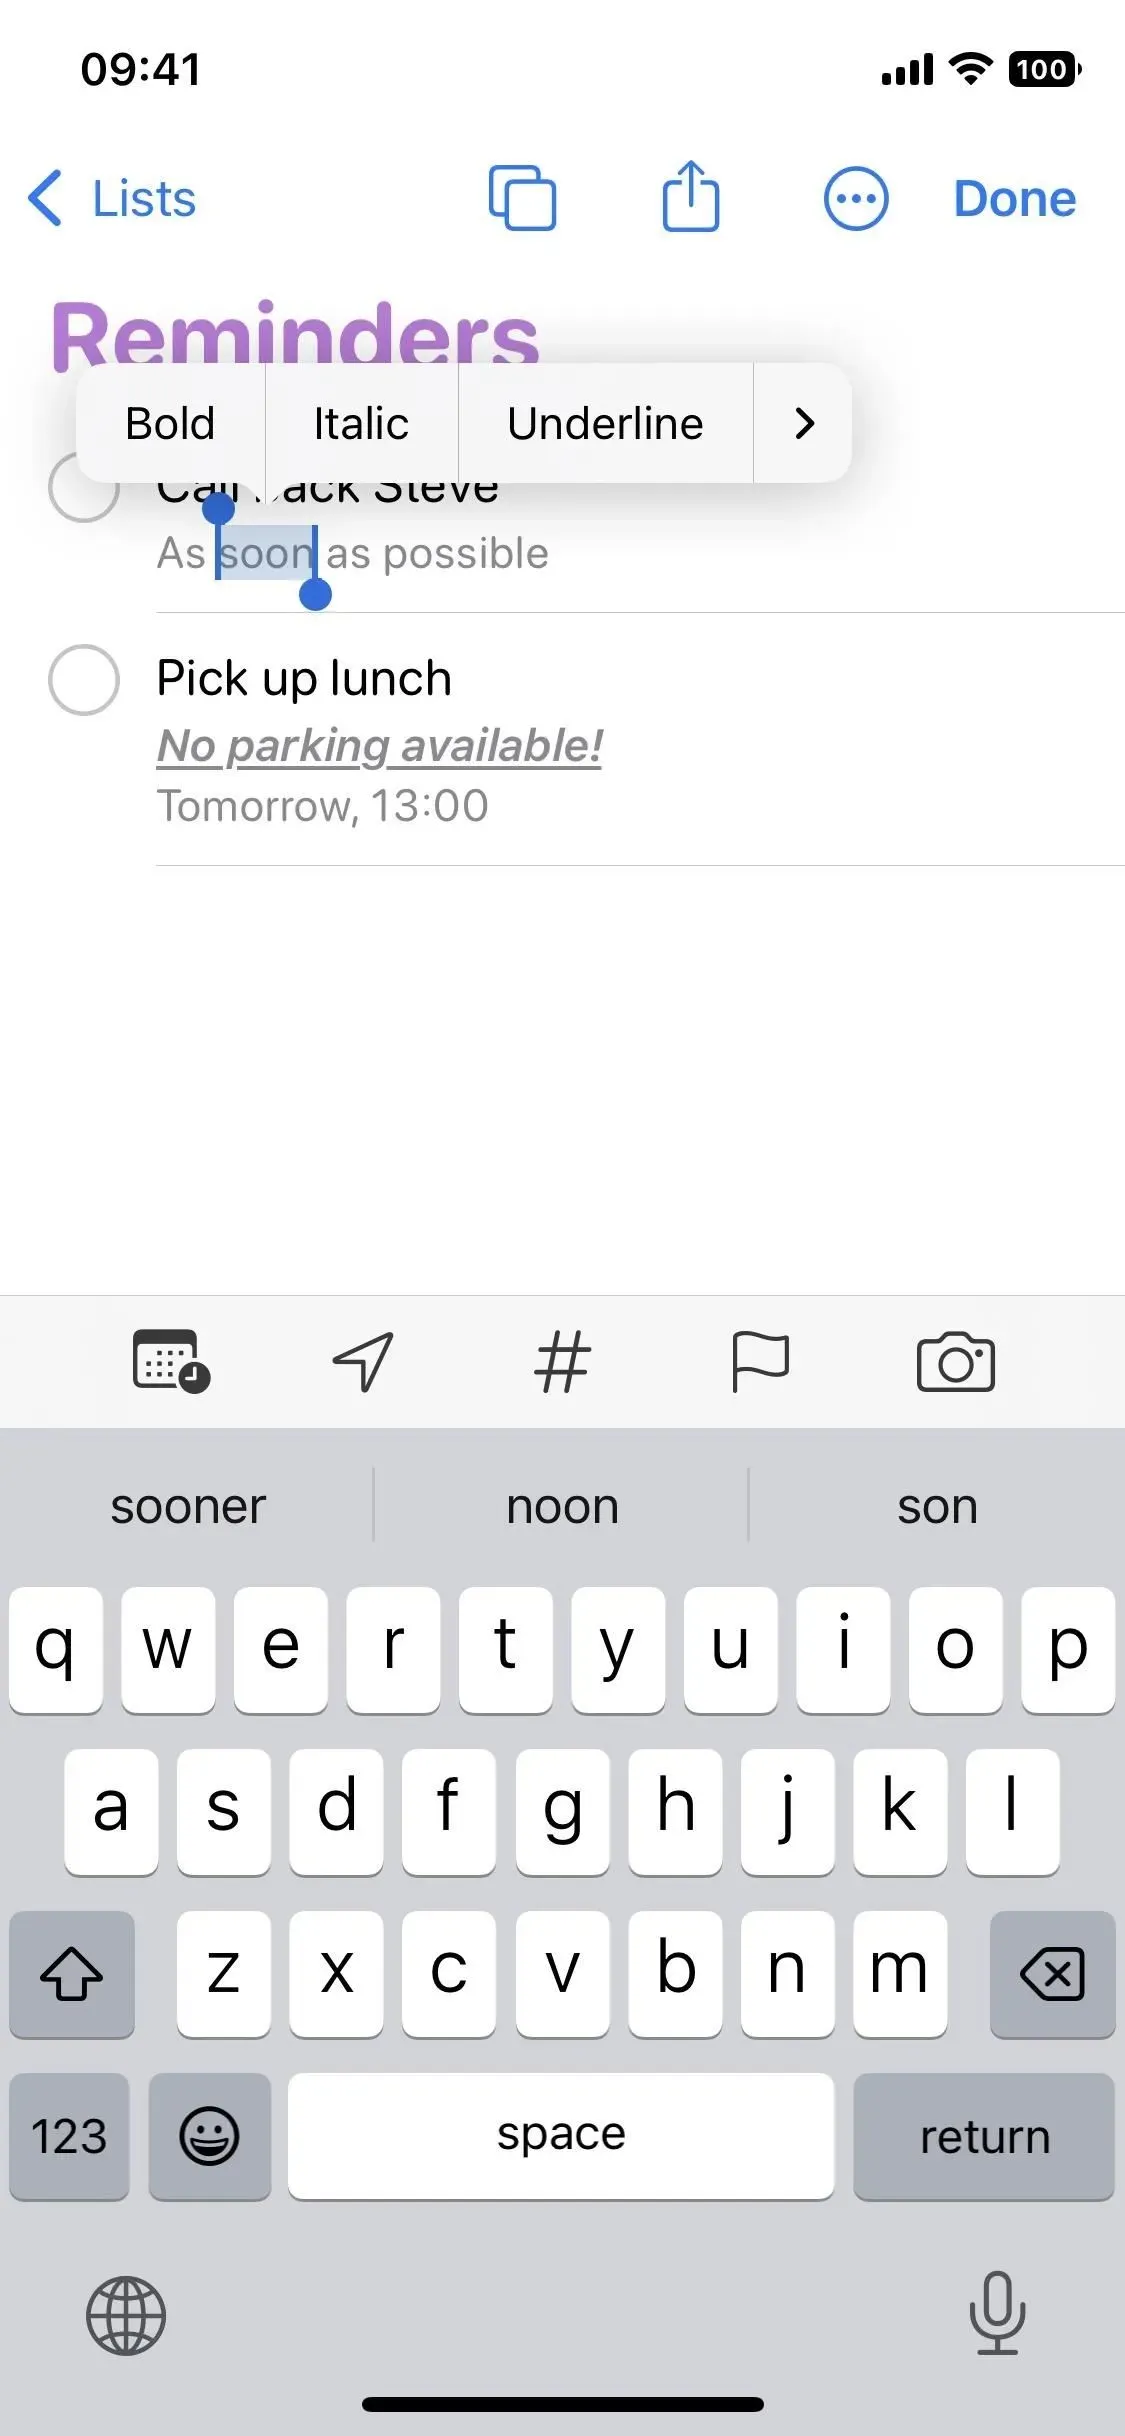
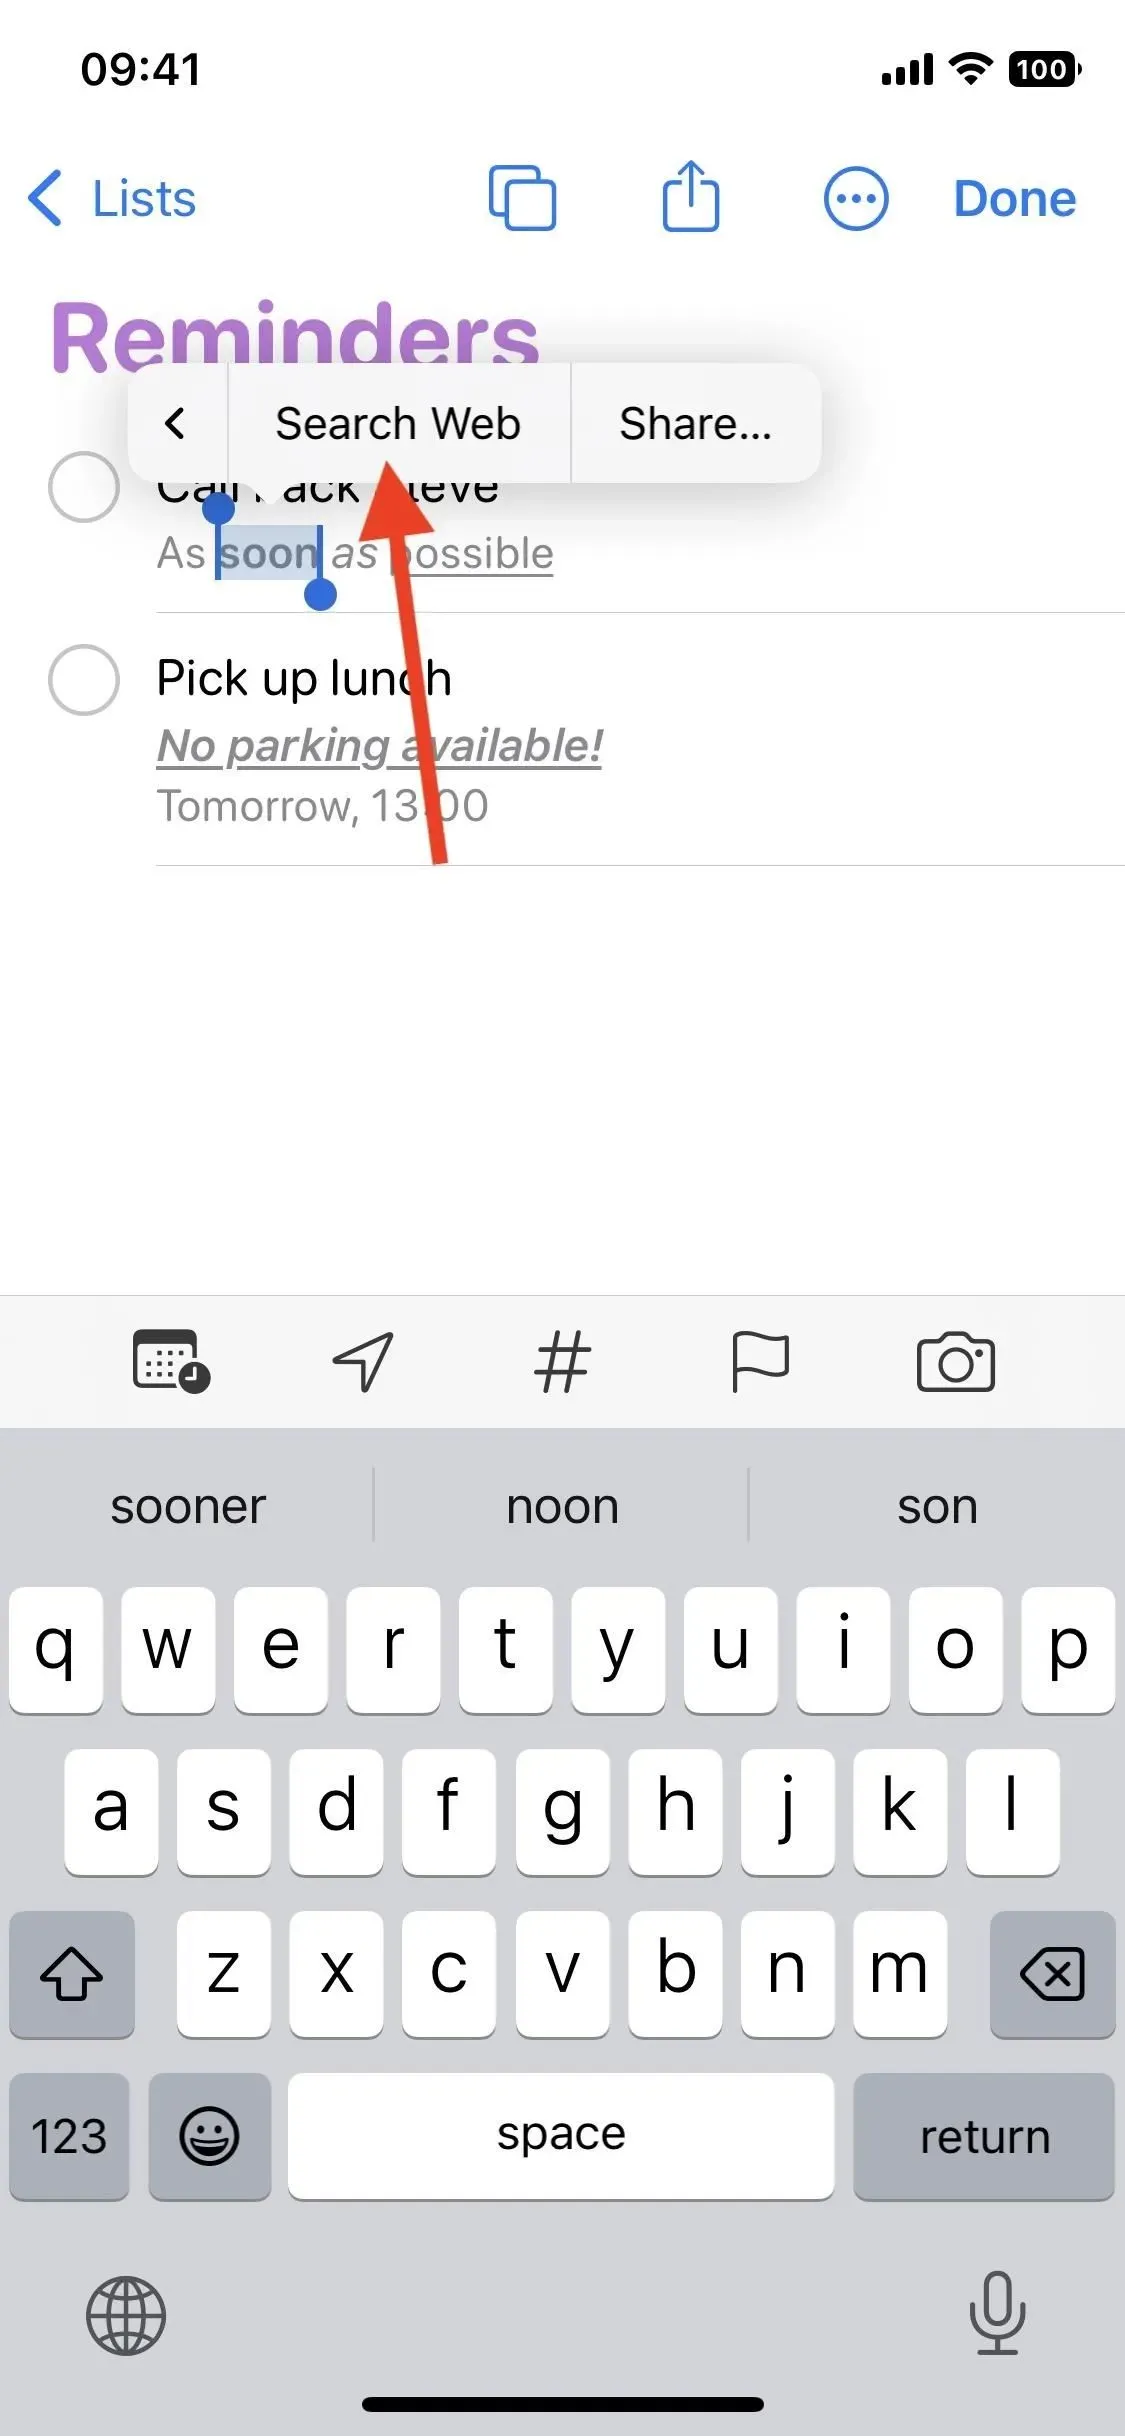
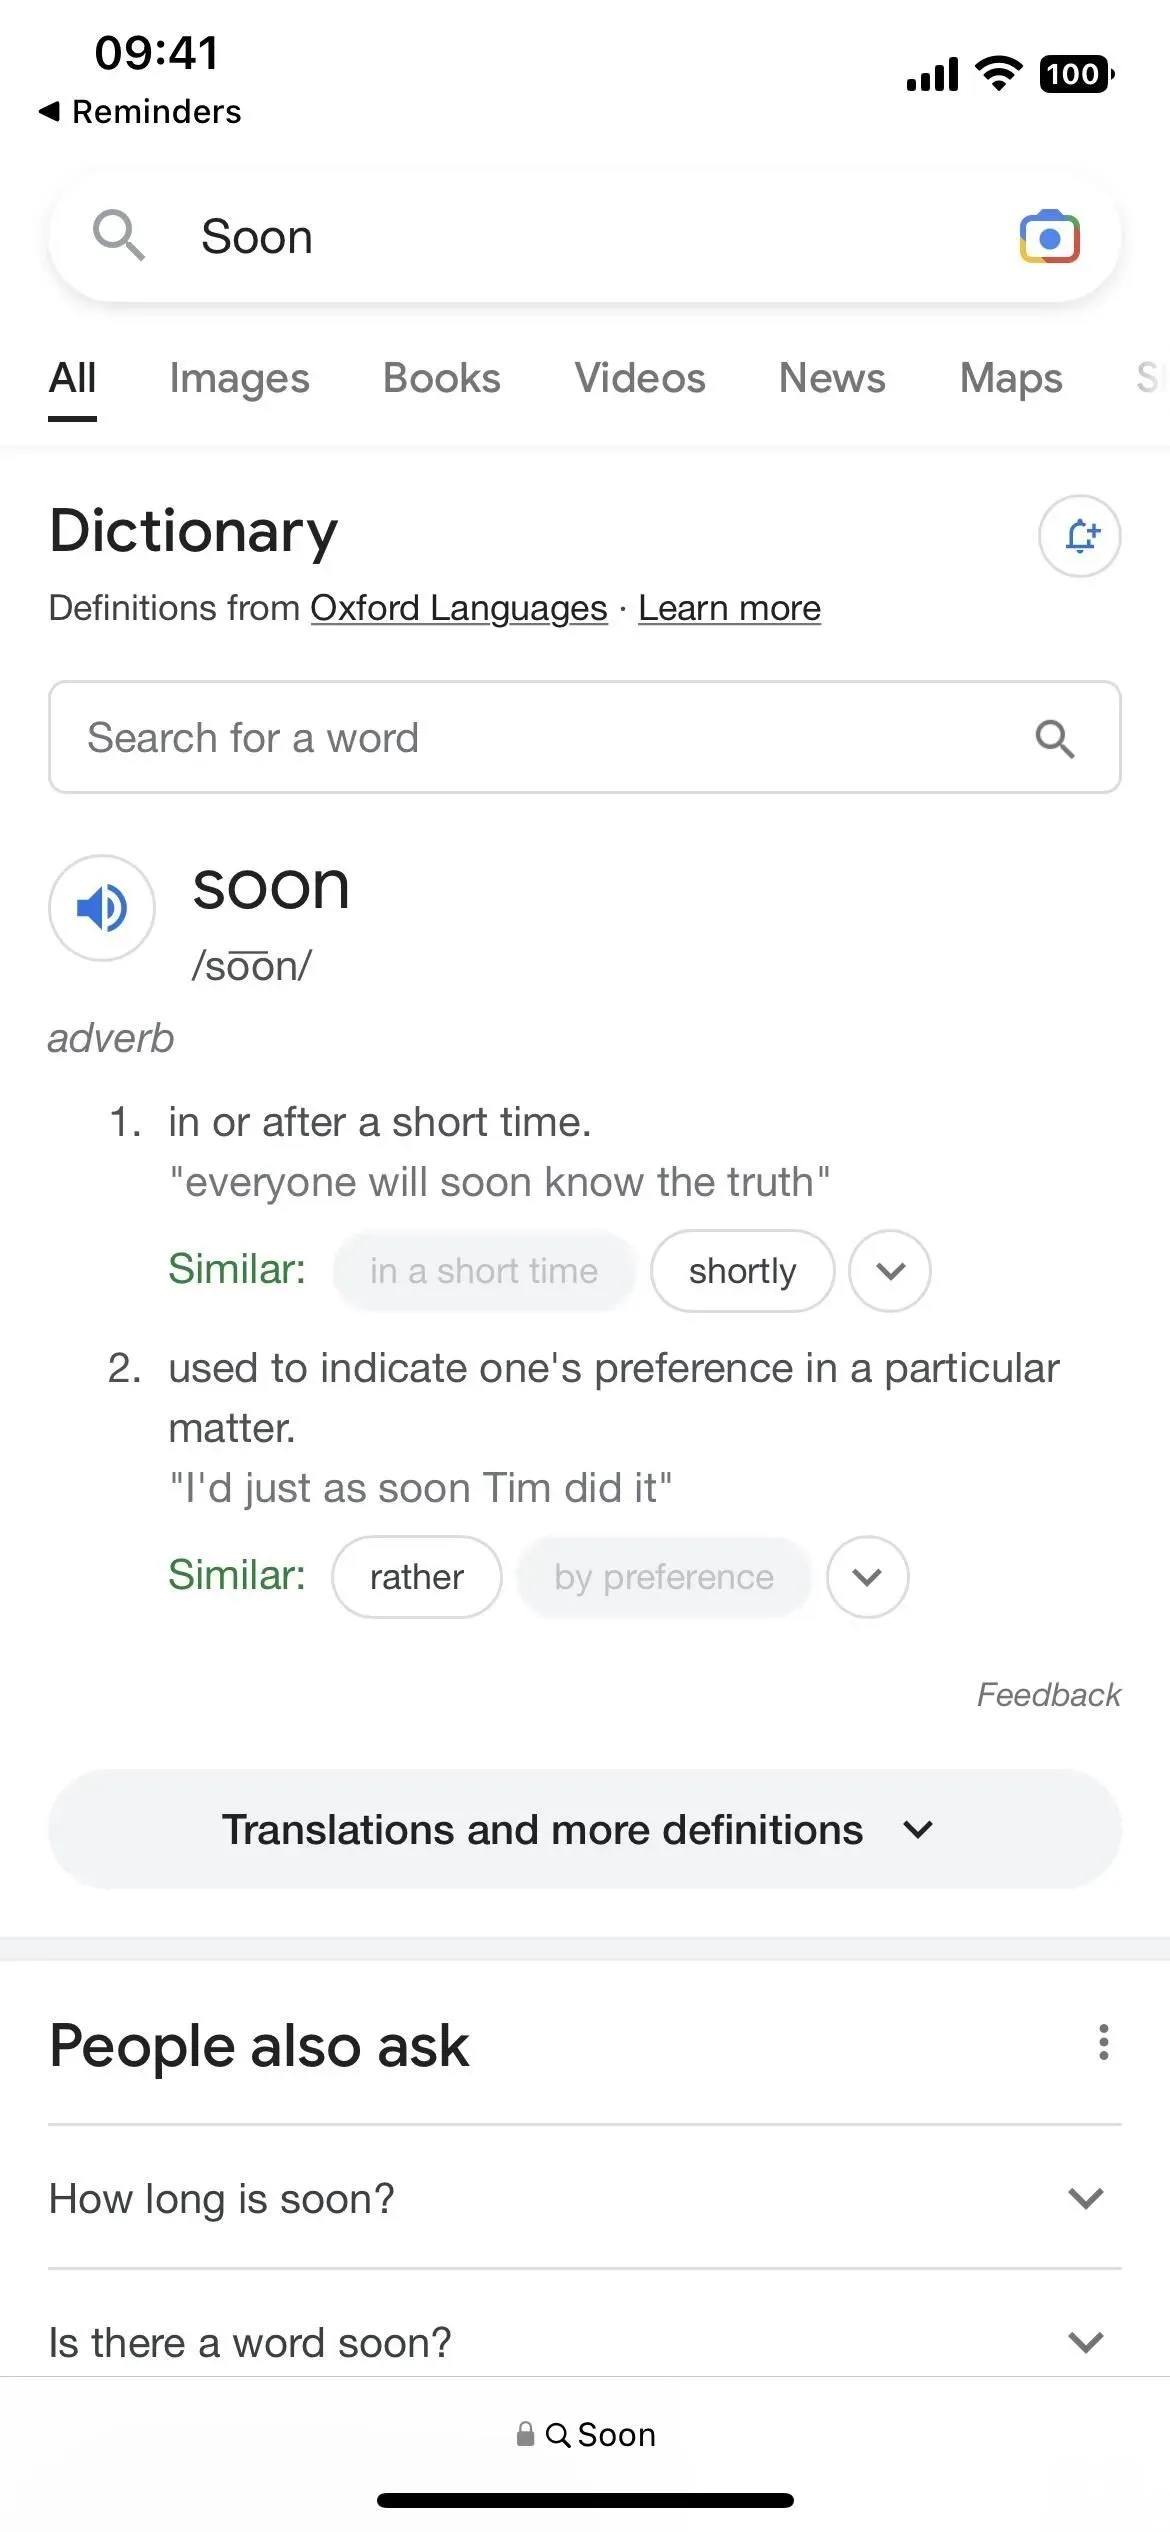
6. You can search the web for any selected text
When you select content in the title, note, URL, or reminder tags, a new “Search Web”option appears in the context menu. Clicking on it will open a new search in Safari using Google or whatever search engine you have installed.
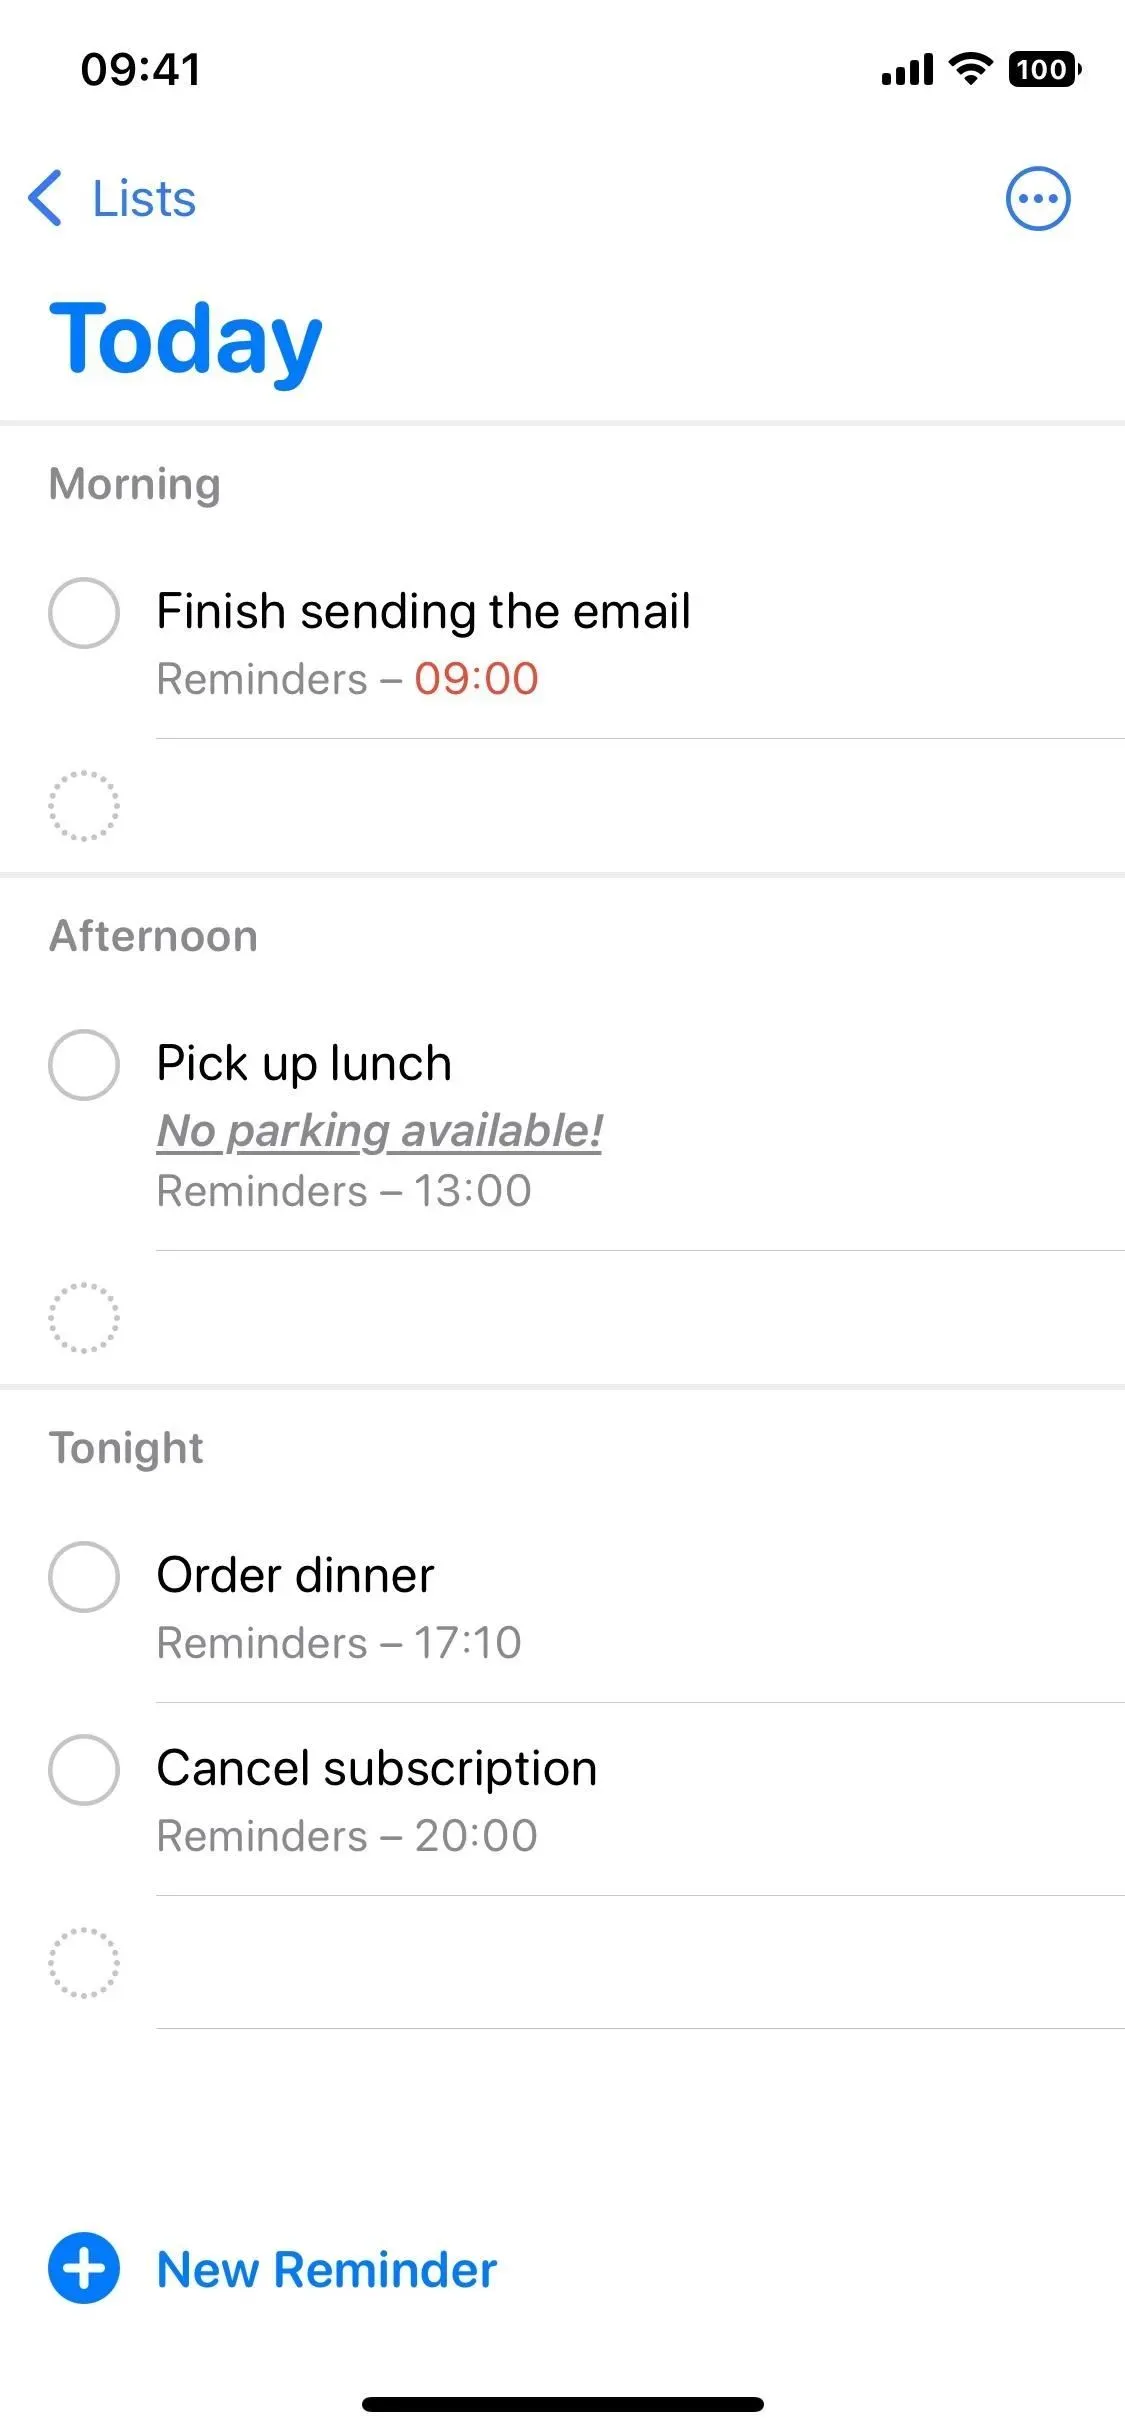
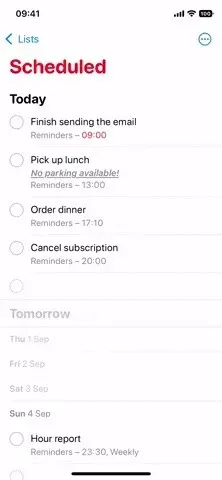
7. Smart lists “Today”and “Scheduled”organized
When you open the Today smart list, the reminders will be divided into sections. The top section is for all-day reminders, while Morning, Afternoon, and Tonight are for specific time reminders. Everything used to be in the same group. Now when you use sort options, they are applied per section.
As for the “Scheduled”smart list, they are now divided into categories such as “Overdue”, “Today”, “Tomorrow”, “Other [Current Month]”and each month after that. It used to be just one big list.
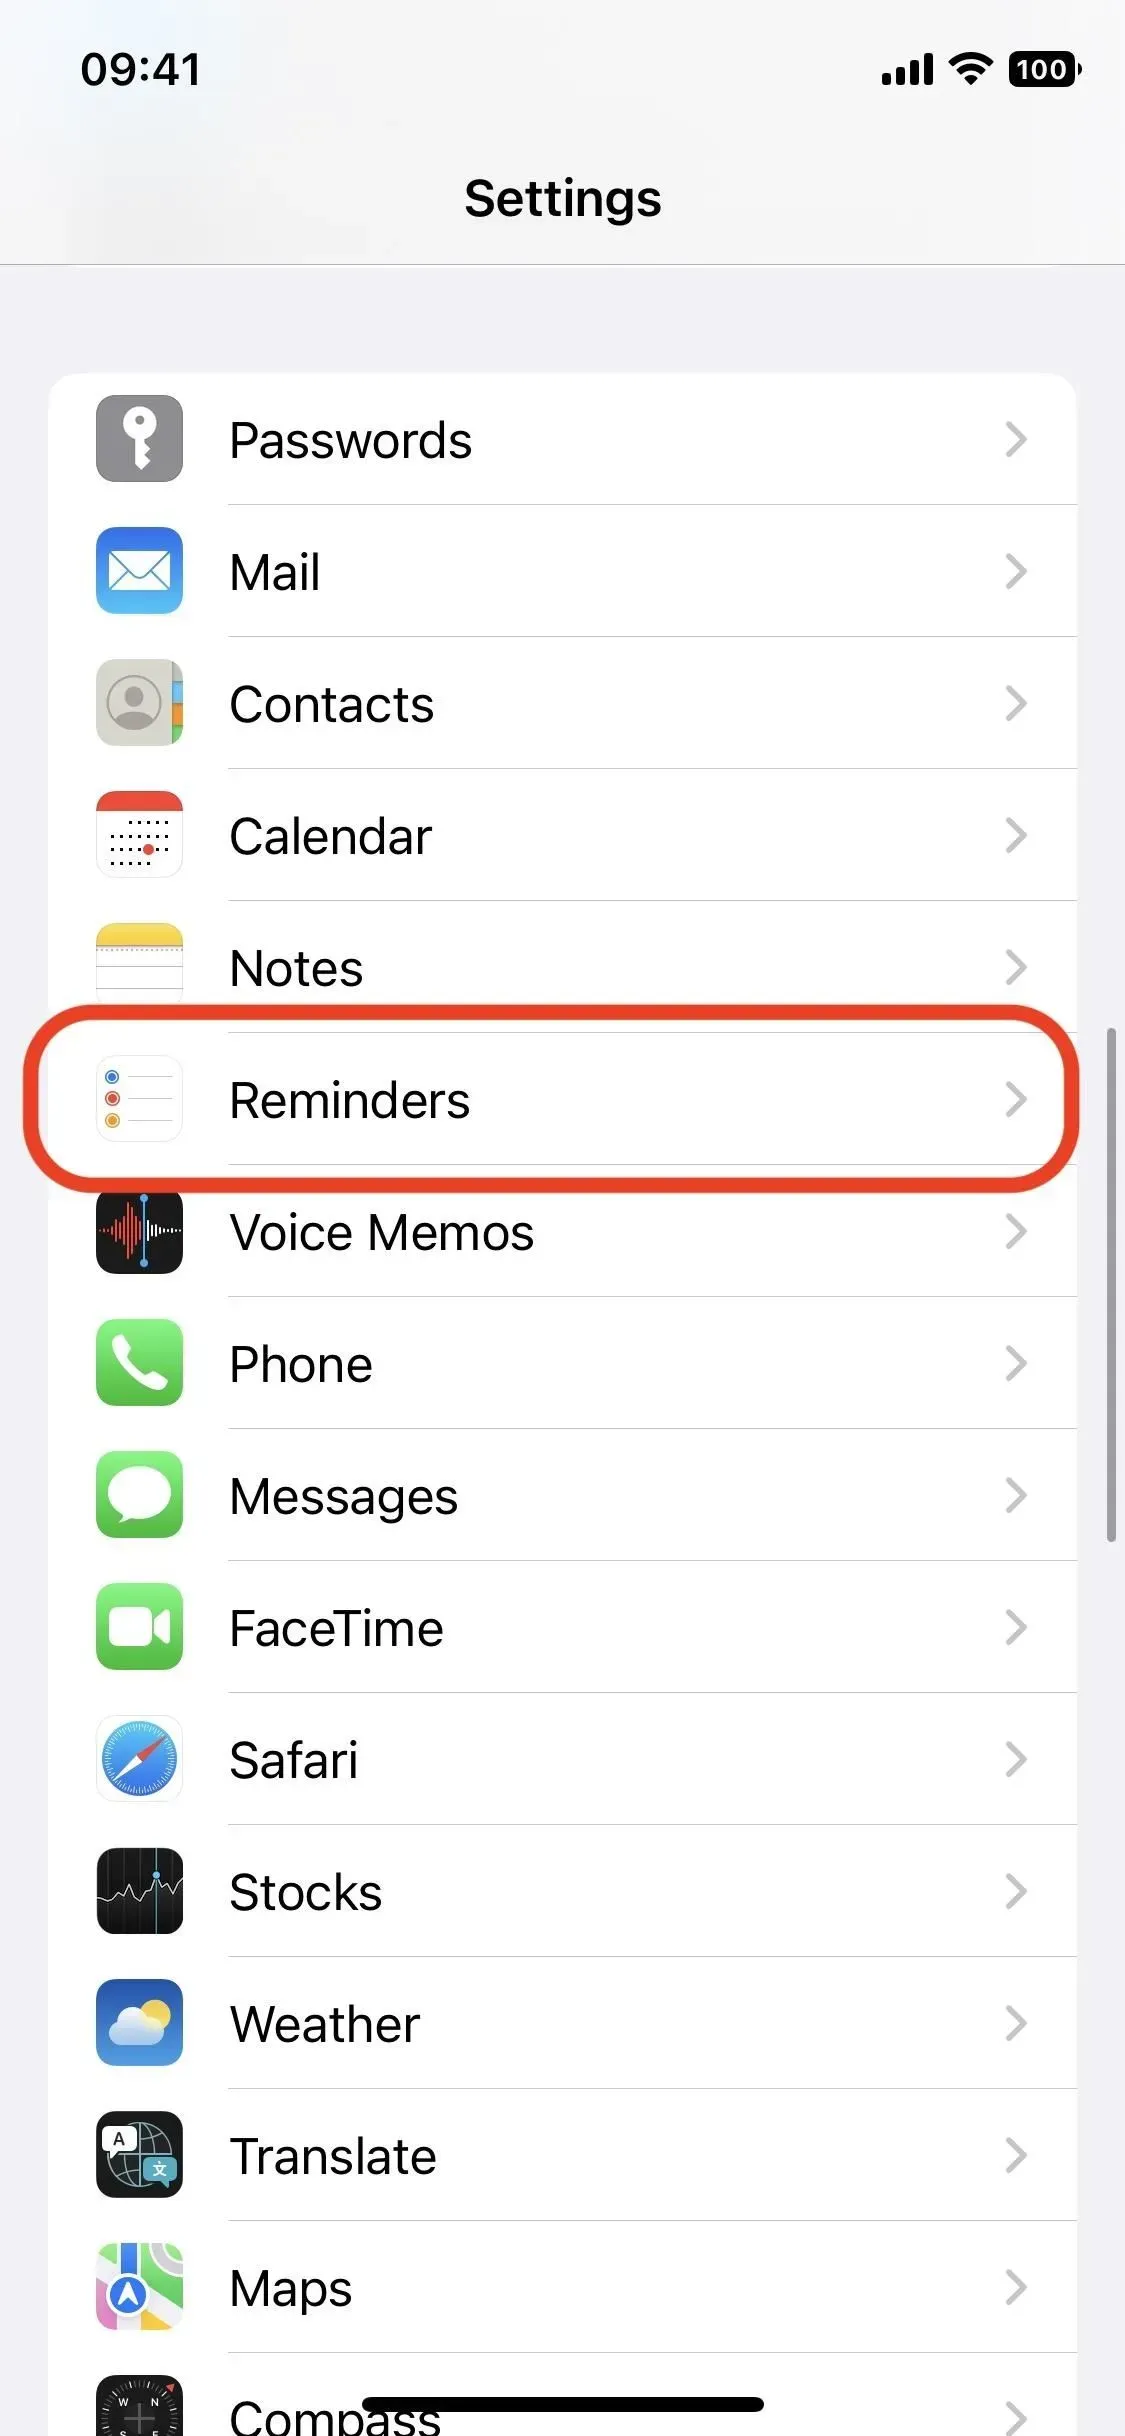
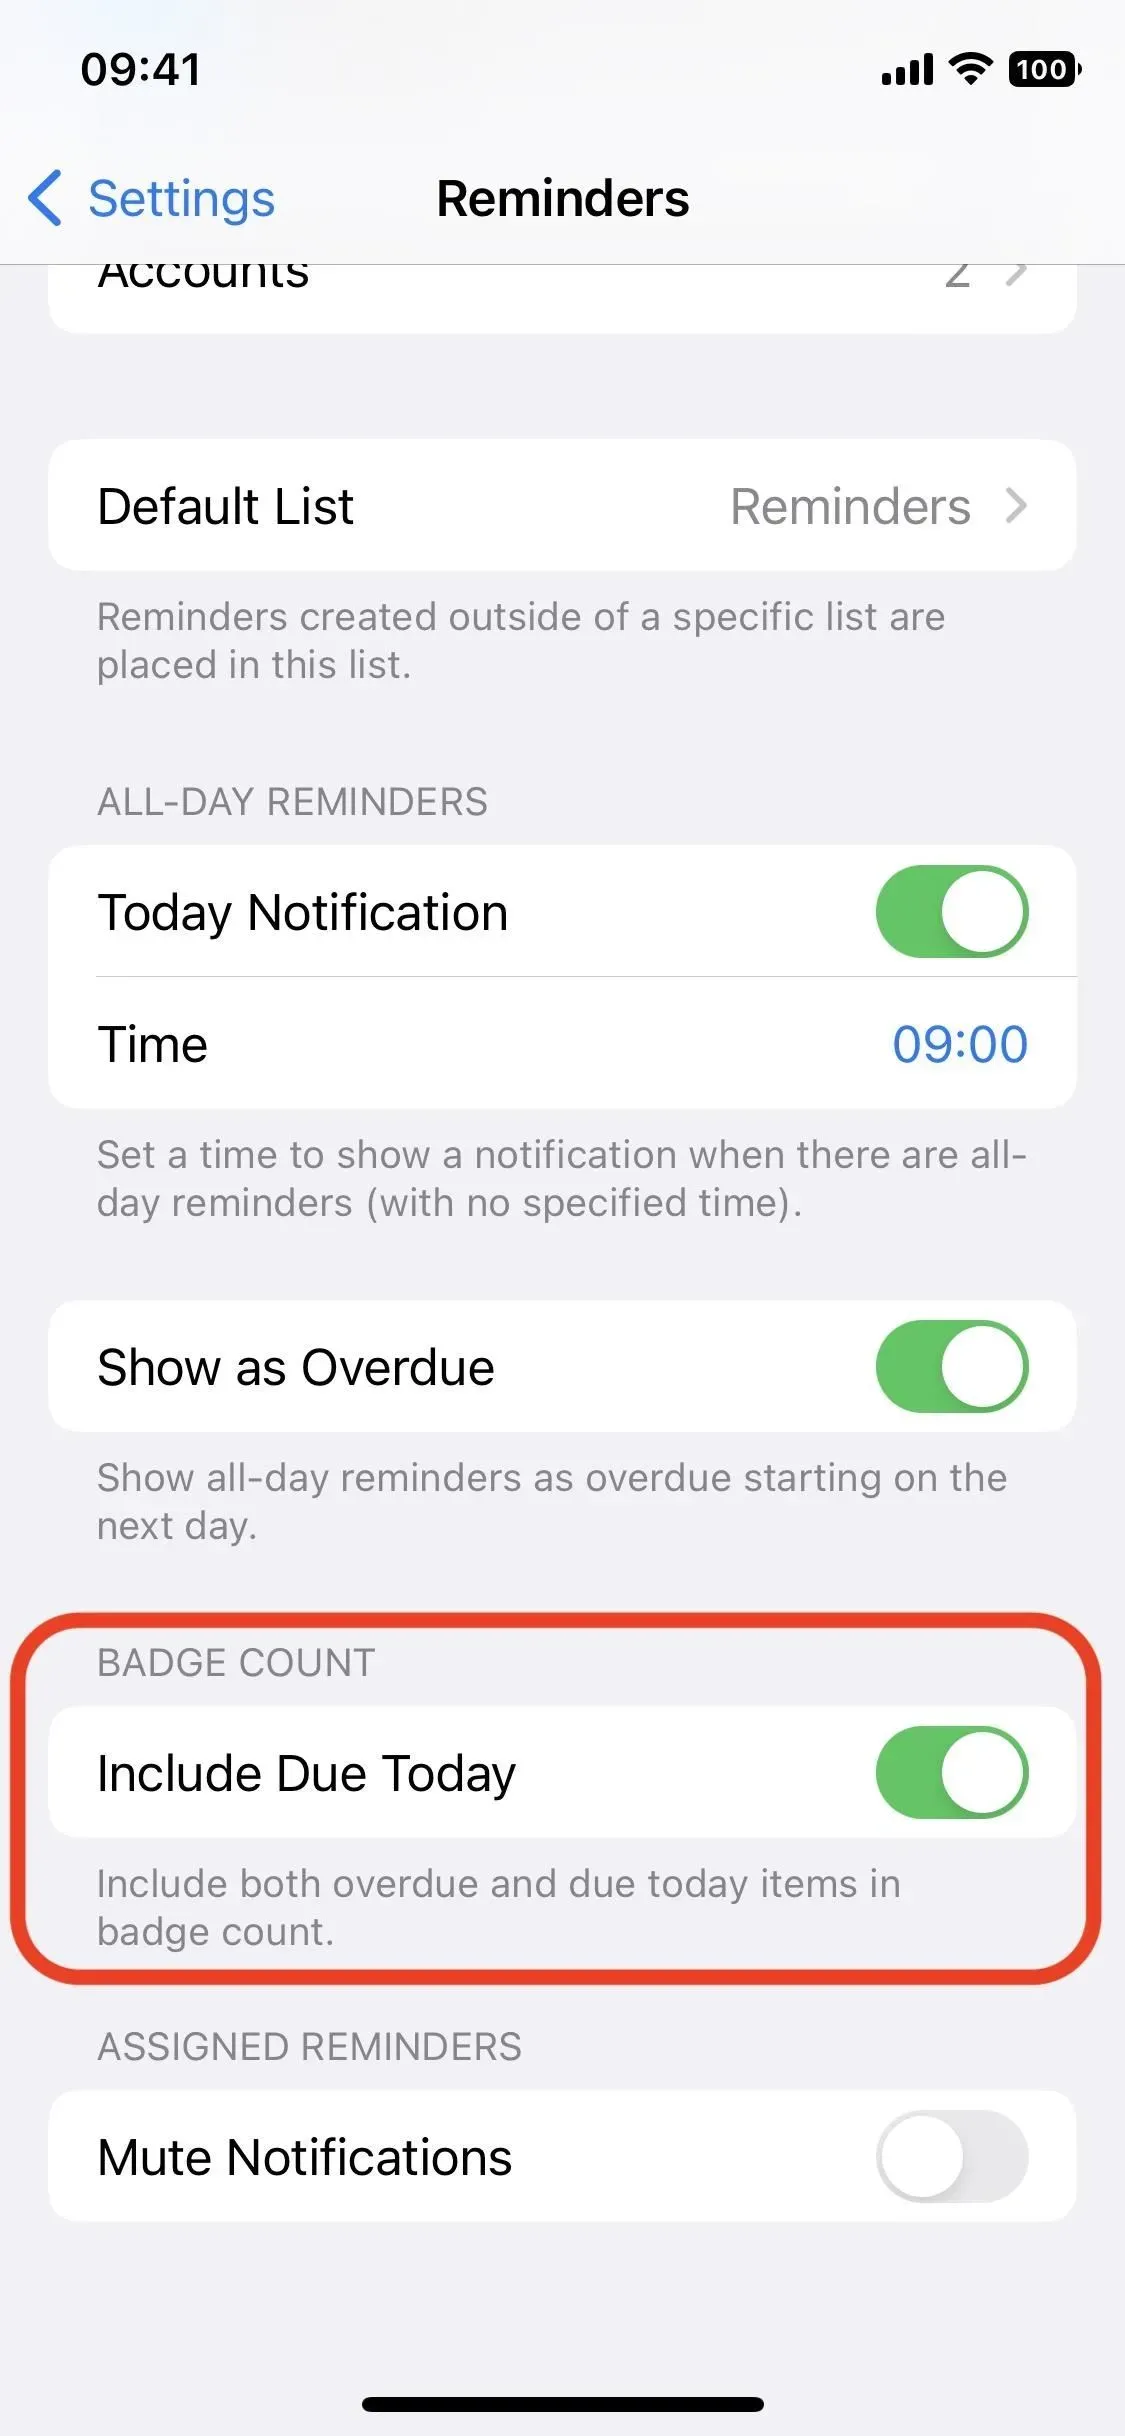
8. You can add today’s items to the badge counter
On iOS 15 and earlier, the reminder icon counter on the home screen only shows expired reminders. This is still the case in iOS 16, but you can also add items that need to be completed today to the count. To turn them on, go to Settings -> Reminders and turn on “Enable for payment today”.
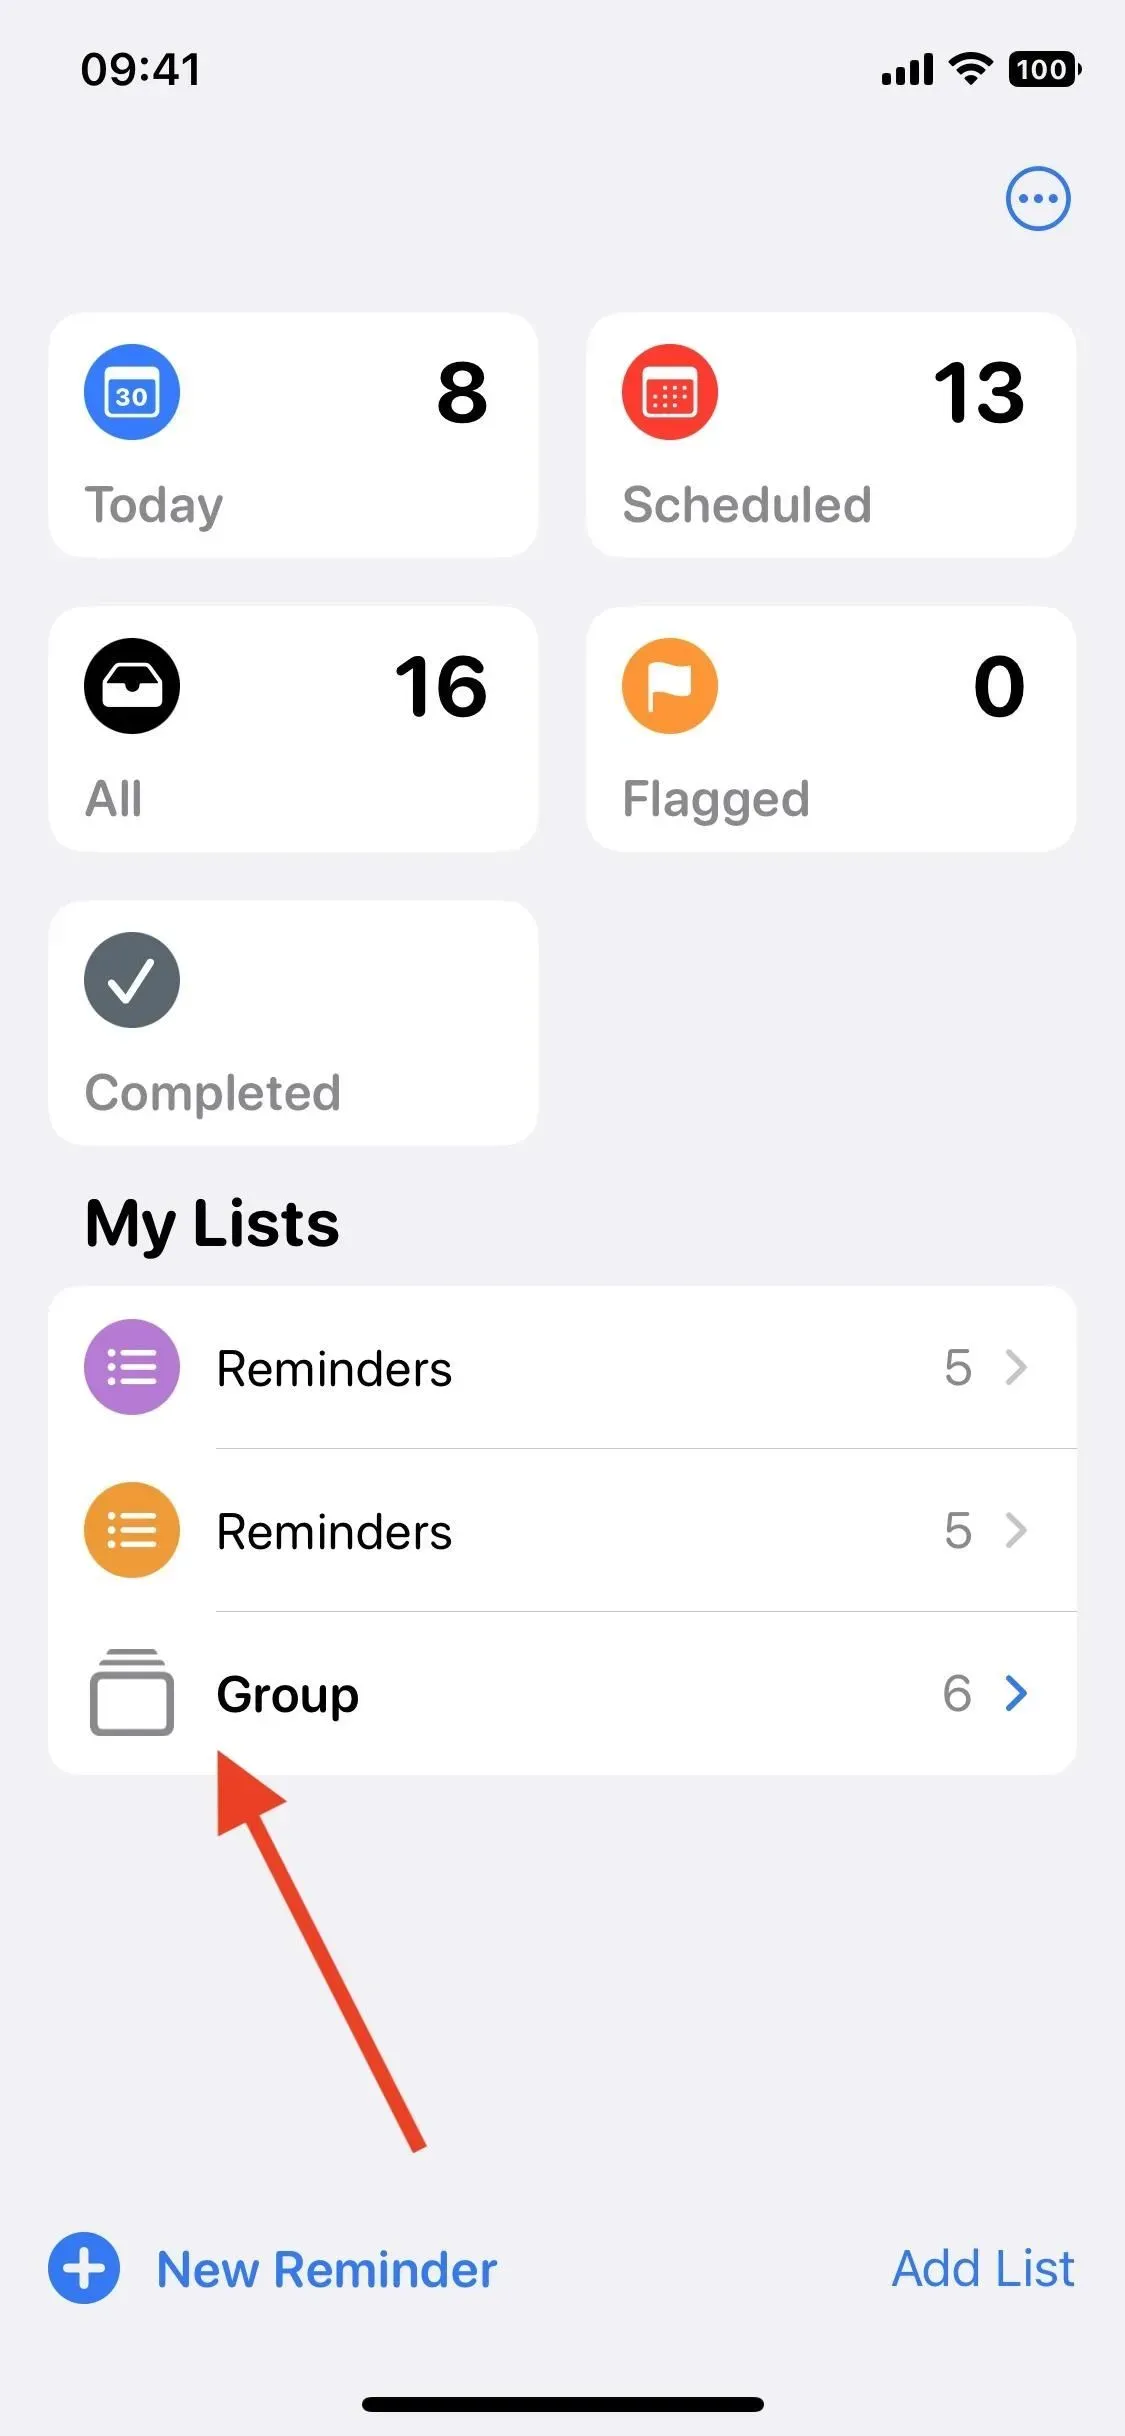
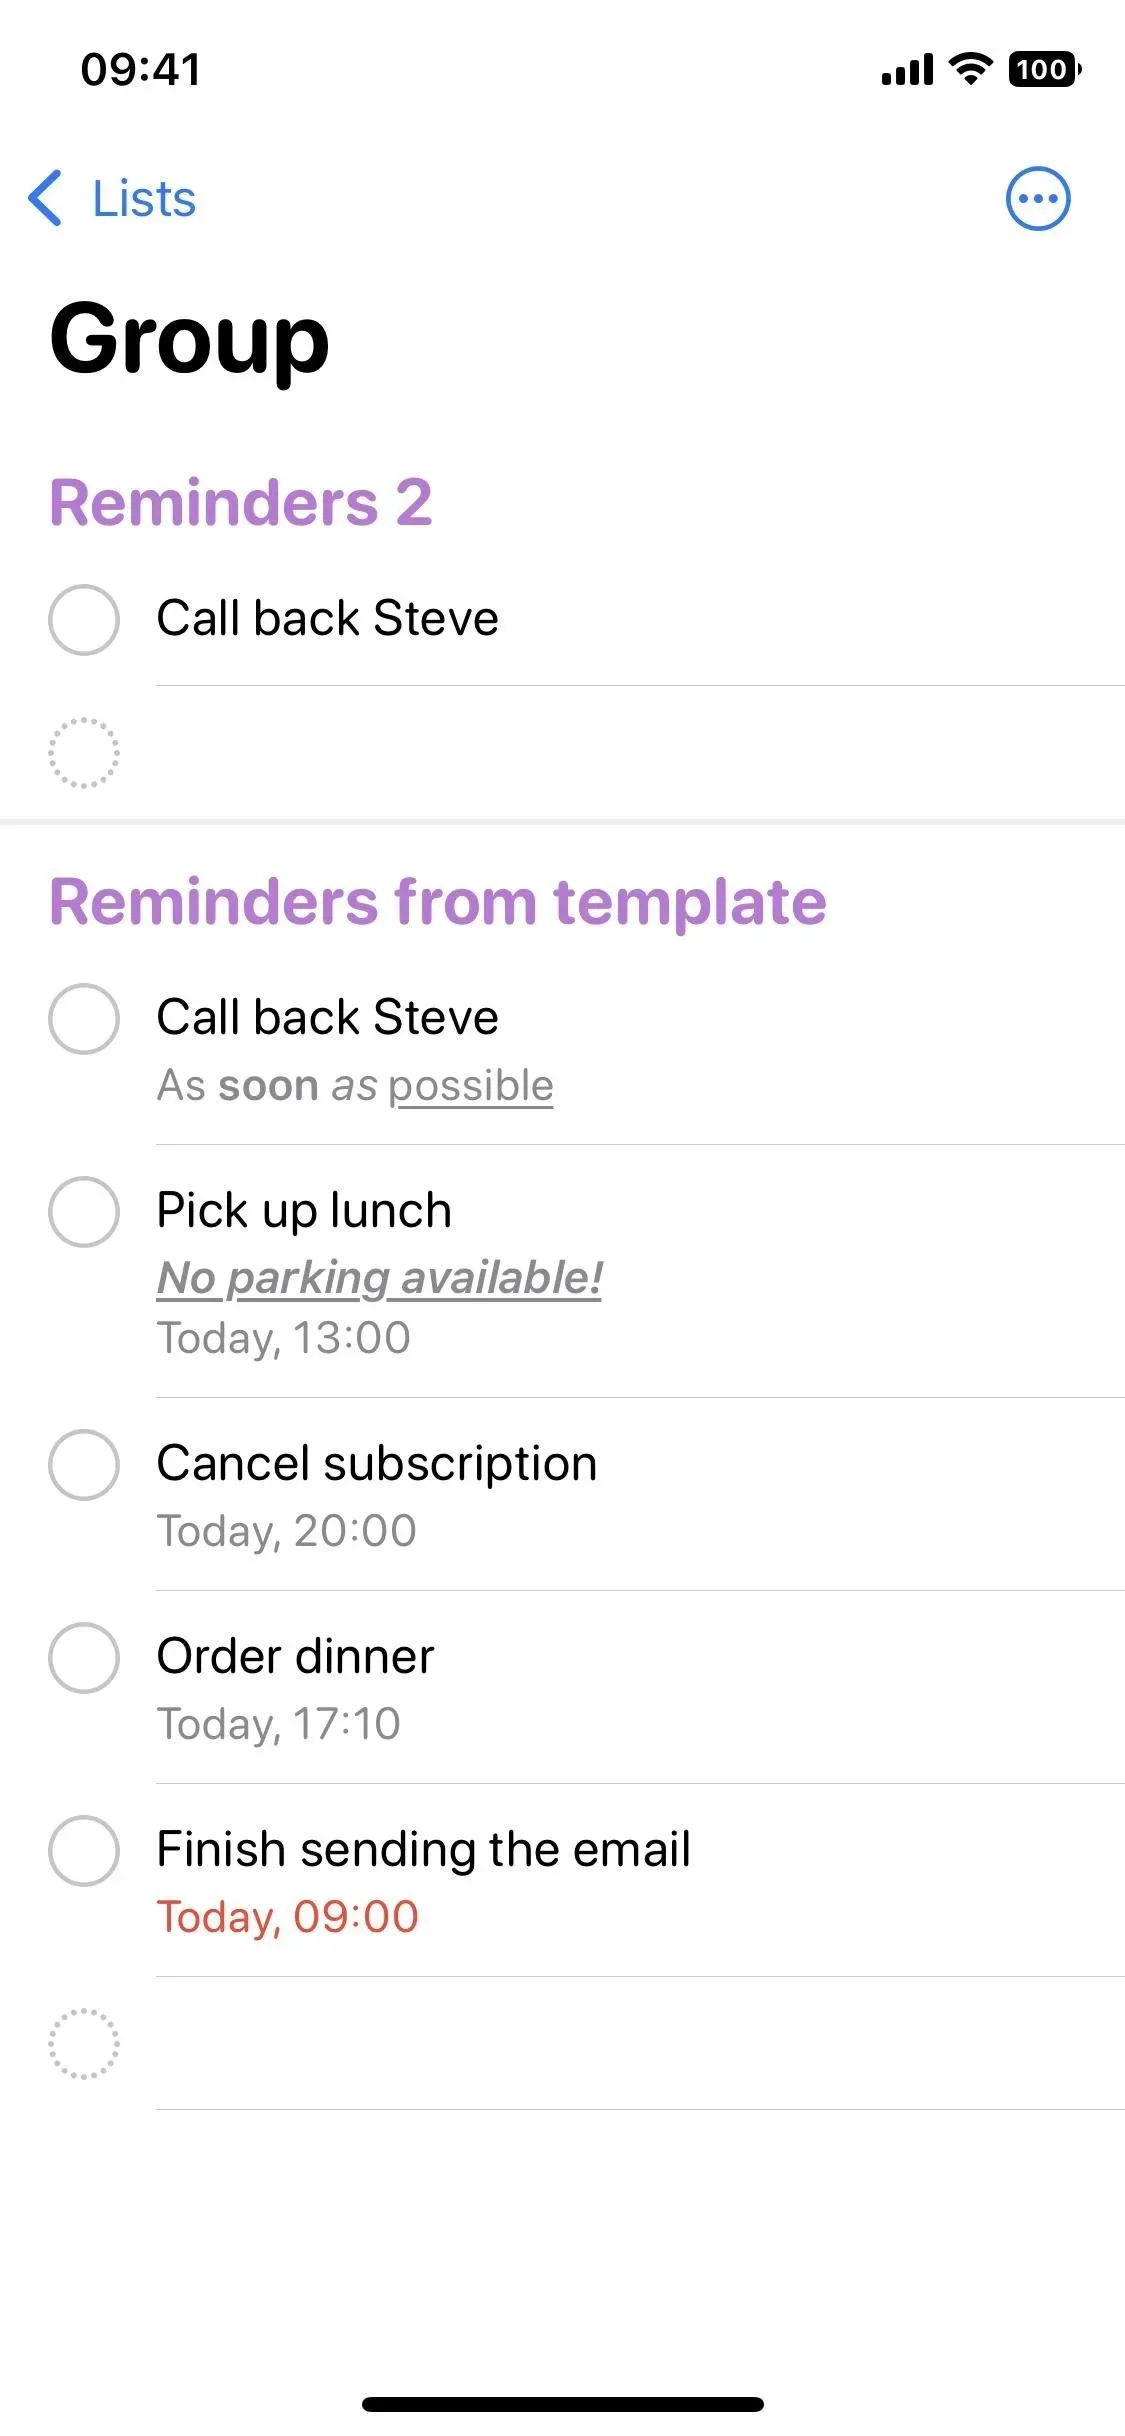
9. List groups have a new look
Groups let you group multiple lists together to stay organized, and there’s a new feature available for them. First, if you don’t have groups, it’s easy to create them. In list view, tap the ellipsis (•••), then Edit Lists, then Add Group, give it a name, choose which lists you want to include, and tap New.
Now, when you tap the group you just created, you’ll get a combined view of the lists it contains and the reminders from those lists. On iOS 15 and earlier, tapping on a group will only display its lists.
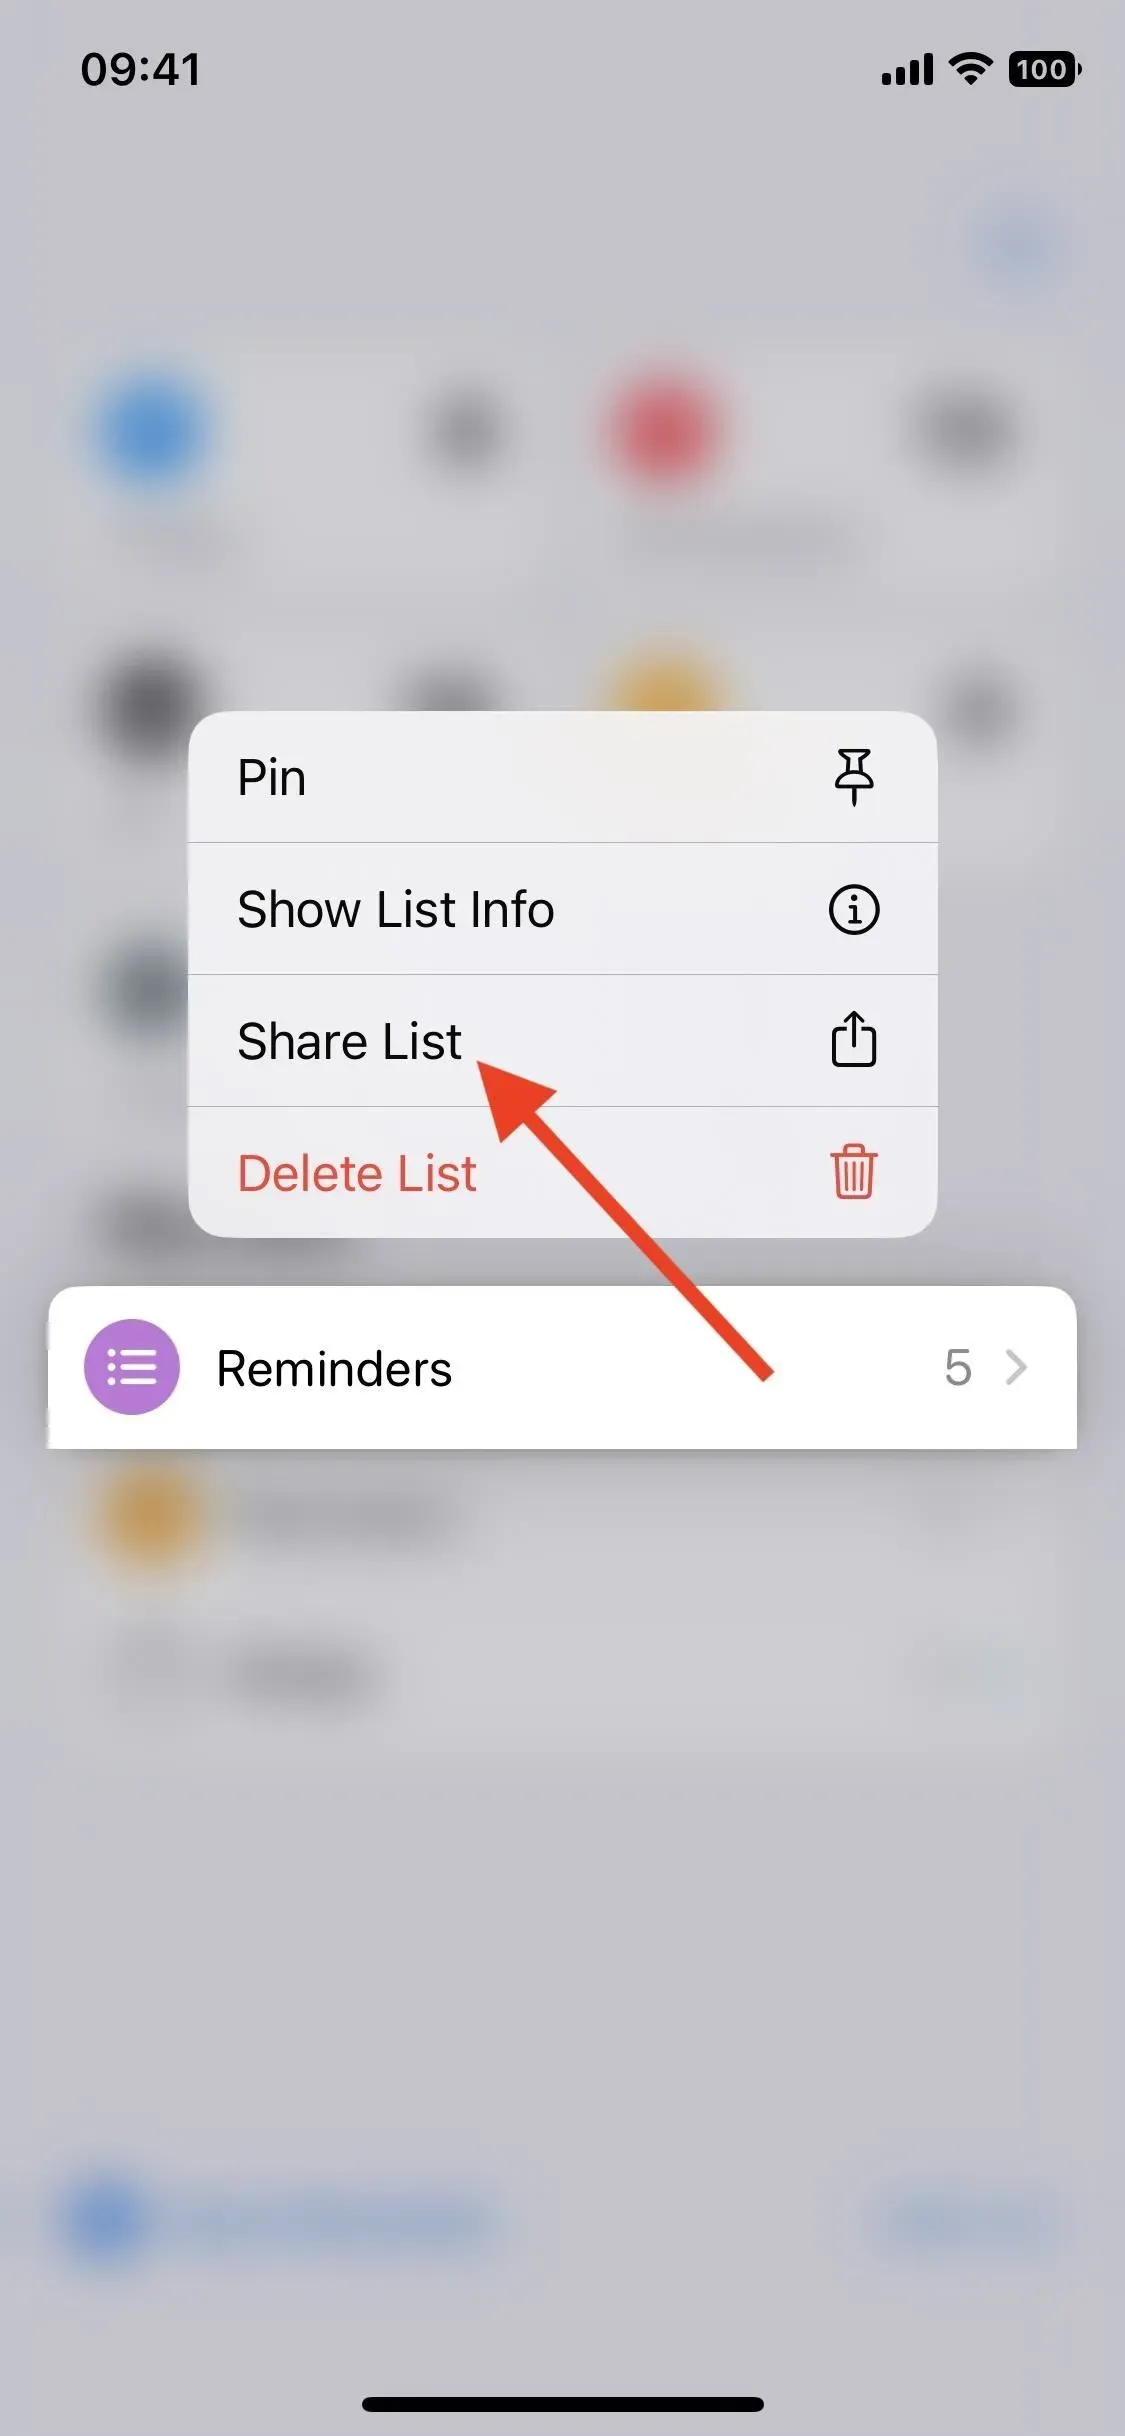
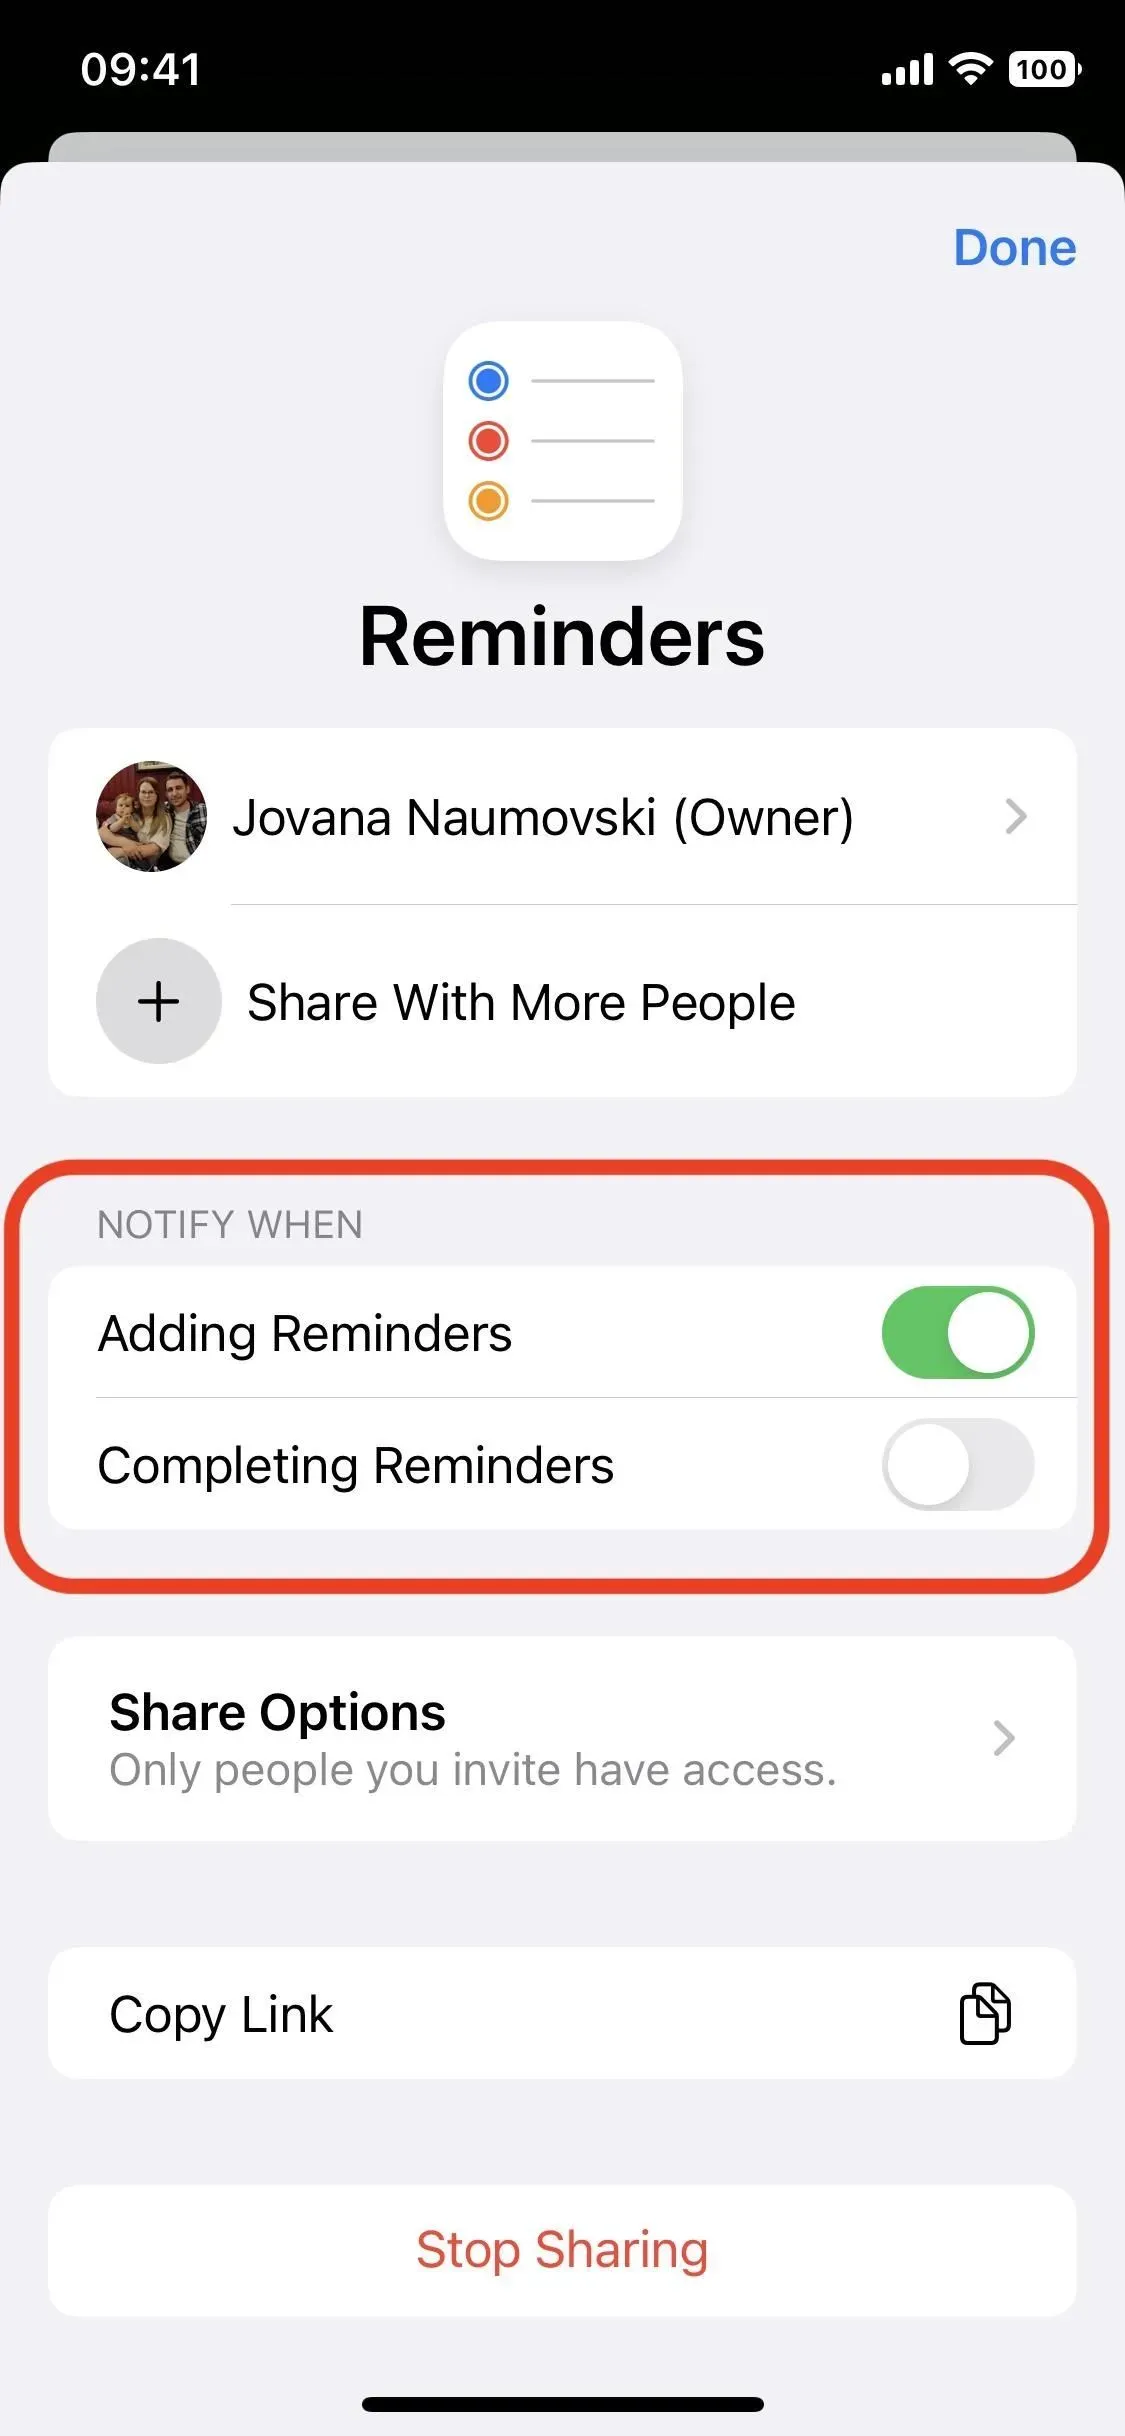
10. You can get notifications for shared lists
Now you can receive notifications about new added or completed tasks in the general list. For a list shared with you or shared with others:
- Tap and hold on a shared list in the lists view and tap Manage Shared List.
- Tap the user profile icon in the public list and select Manage Public List.
Then turn notifications on or off when someone adds or completes a reminder.

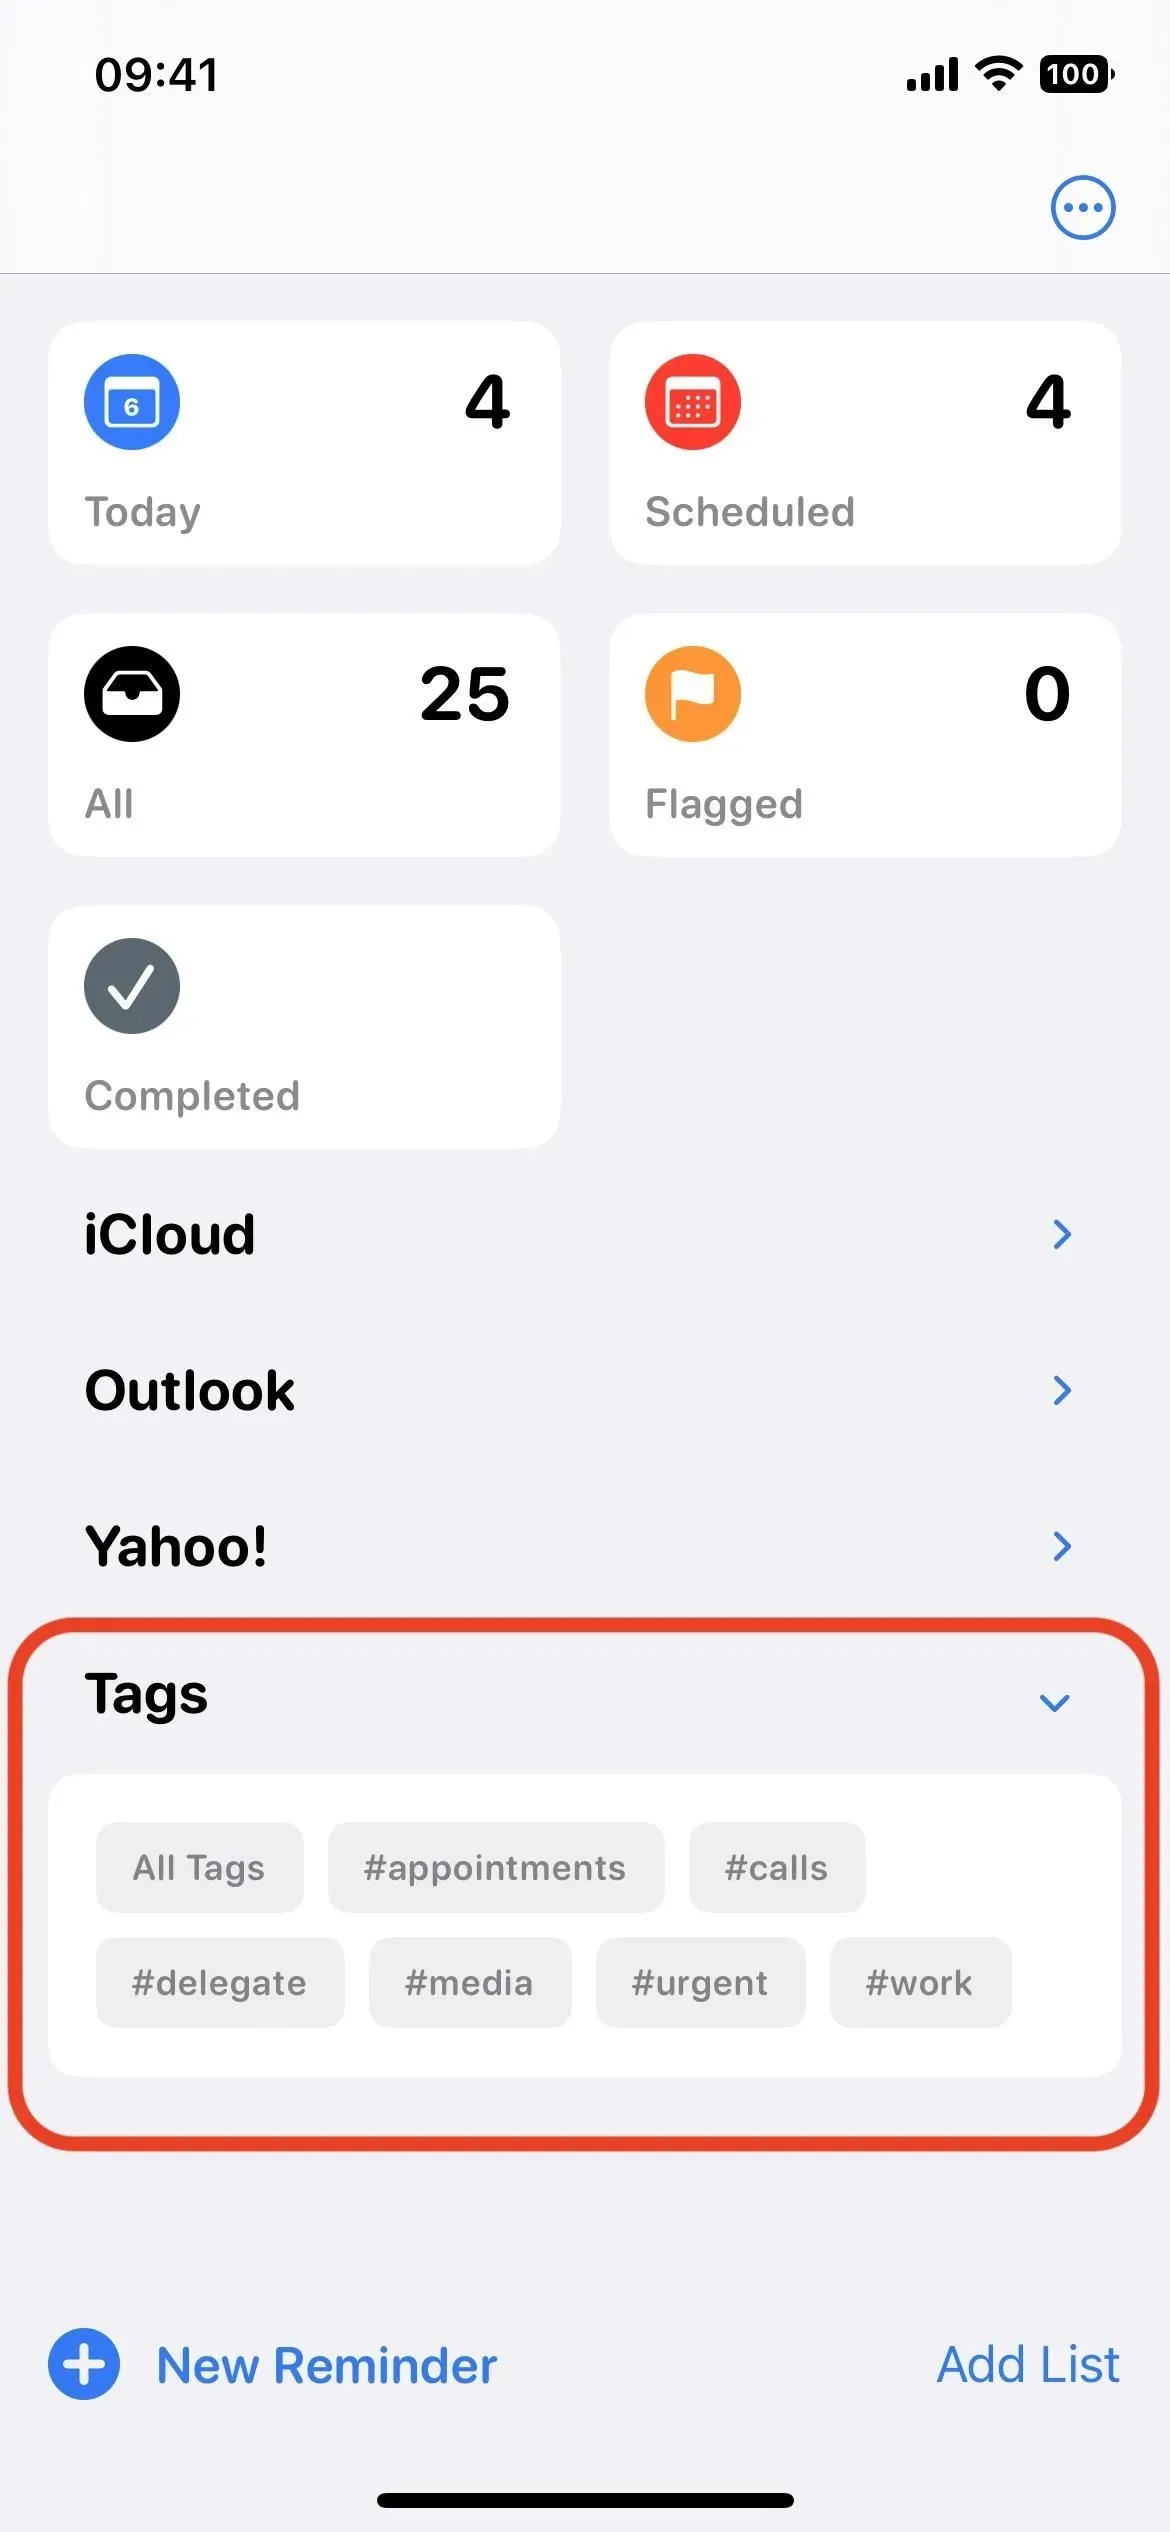
11. You filter reminders by any tag, not just all
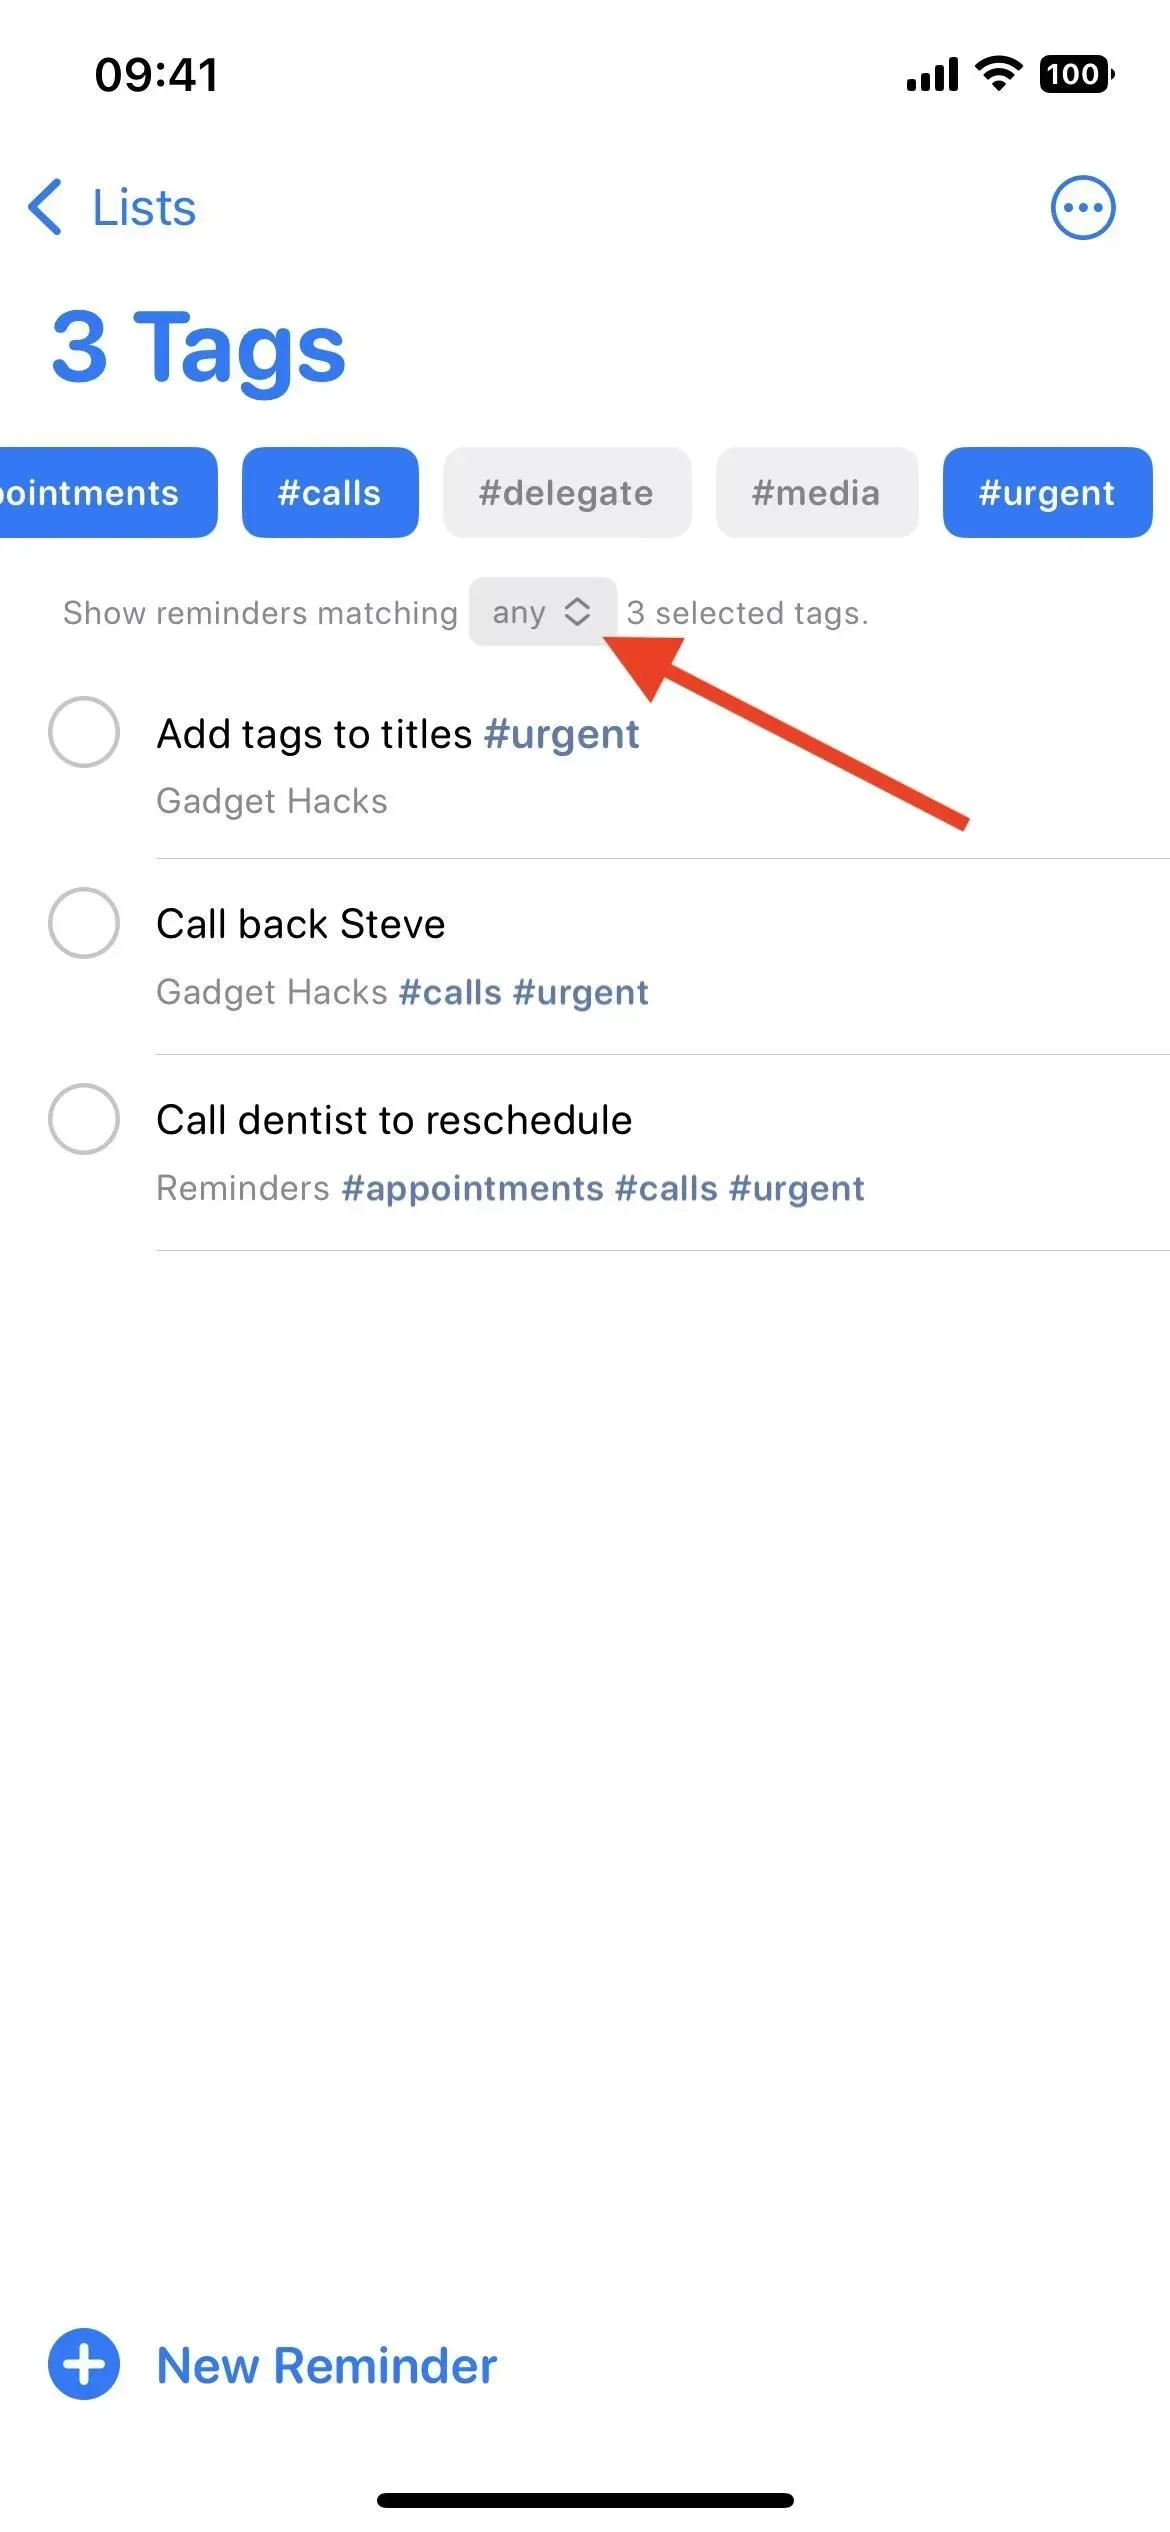
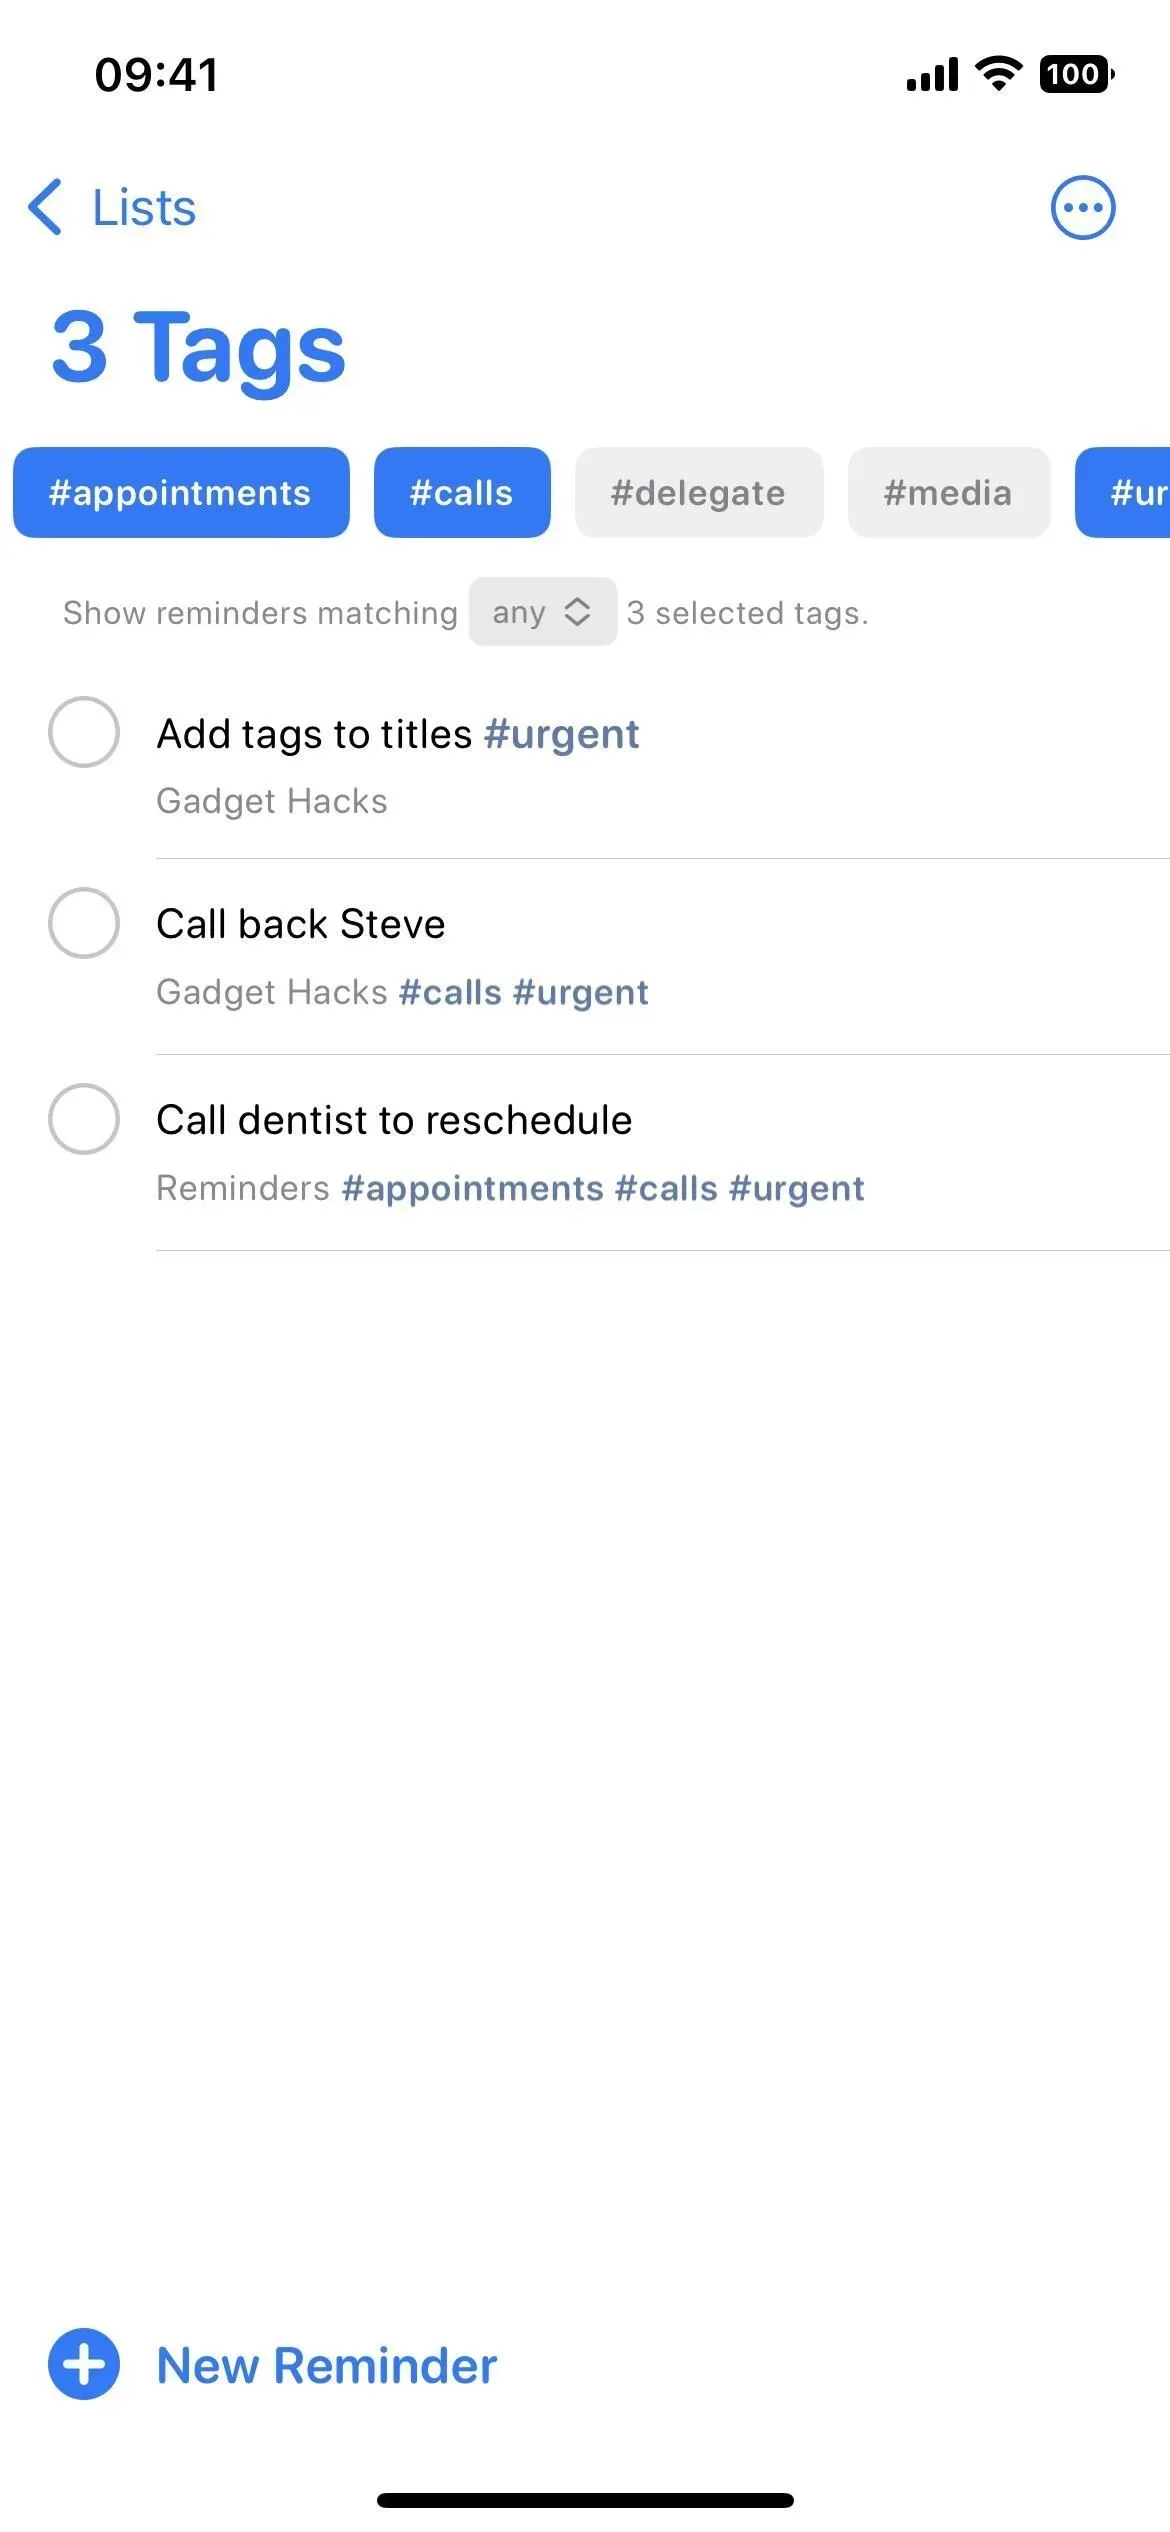
In iOS 15, you can add tags to reminders and use the Tag Browser to filter reminders so that only those containing the tag or group of tags you select appear. Now, instead of just showing reminders with all the tags you choose to filter by, you can show any reminder with at least one of the tags.
In the tag browser at the bottom of the list, tap a tag or All Tags to filter reminders, then select any other tags you want. In the drop-down list below the selected tags, change “all”to “any”to see reminders with one or more selected tags, not just all.
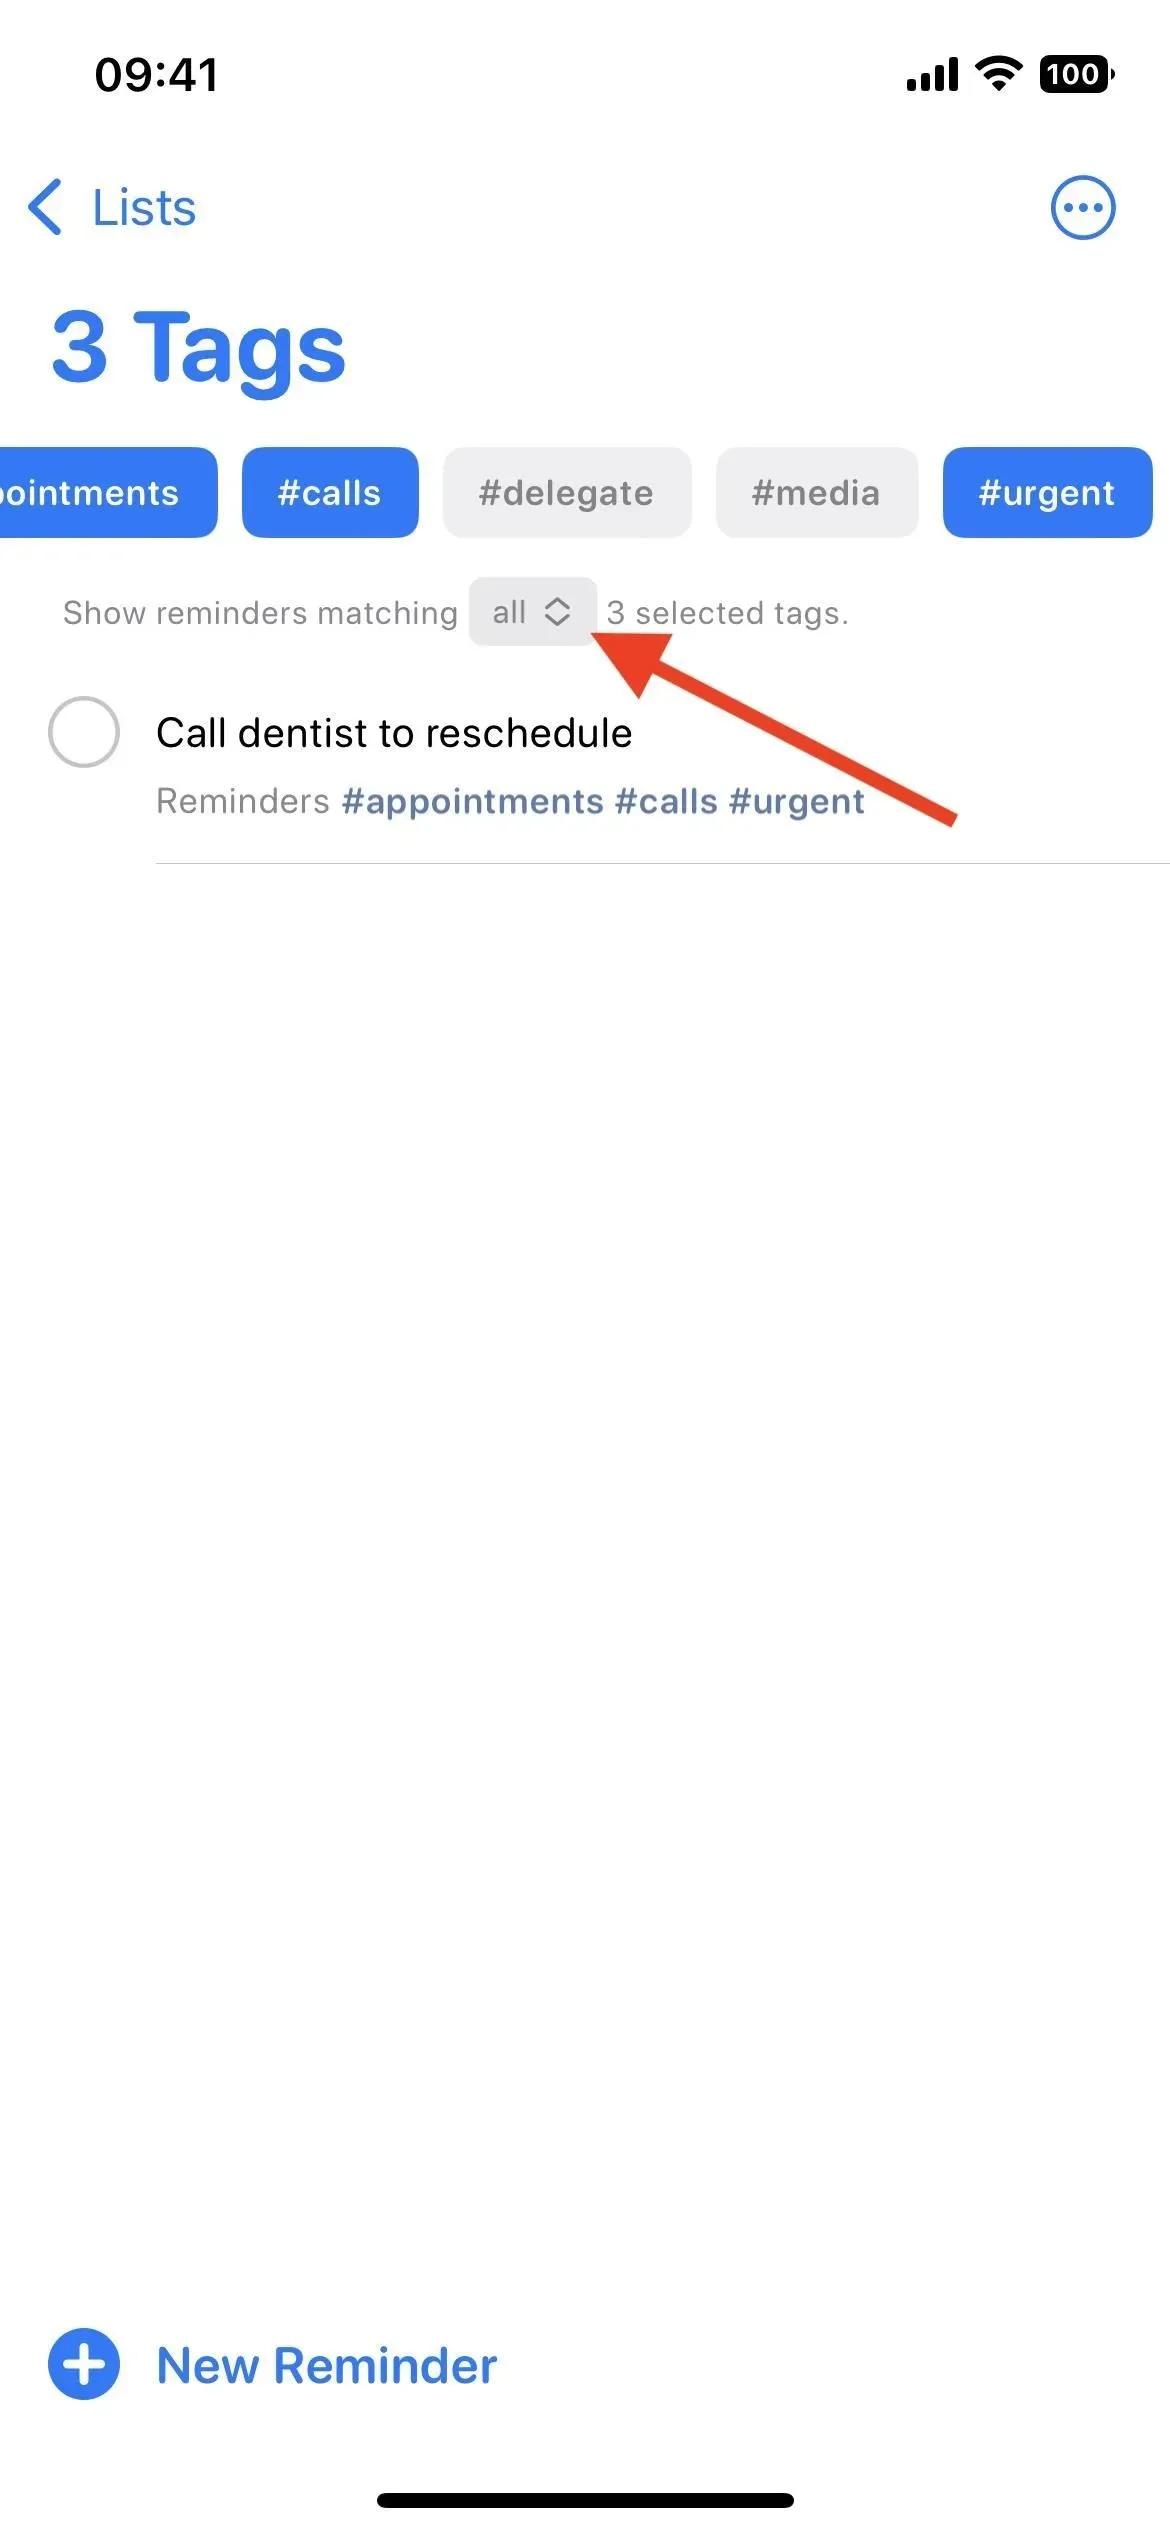
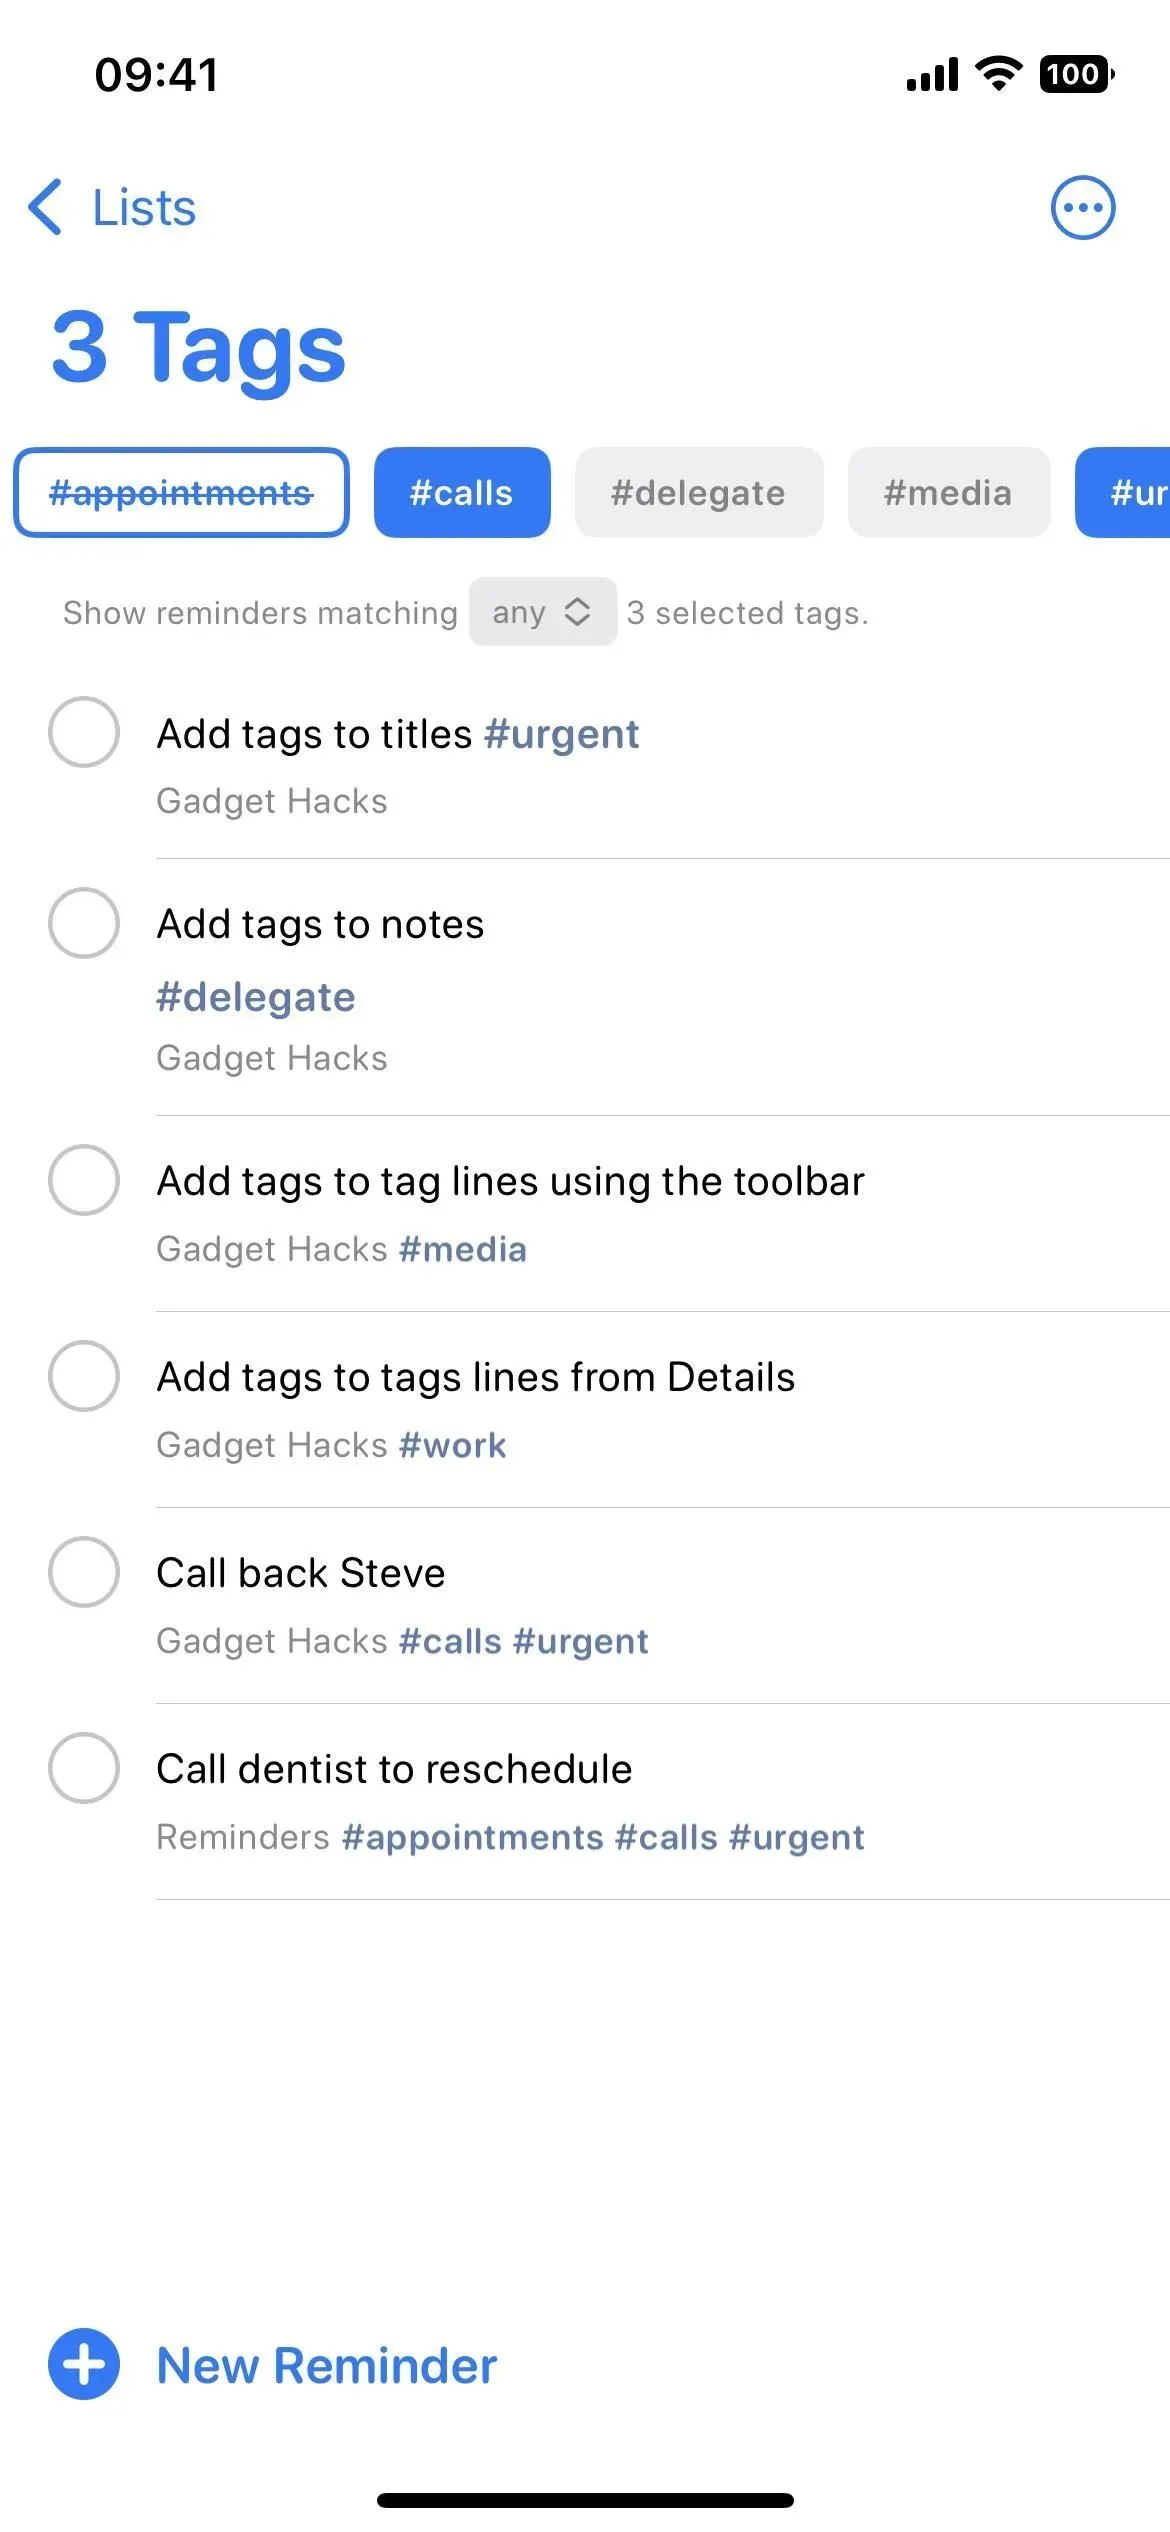
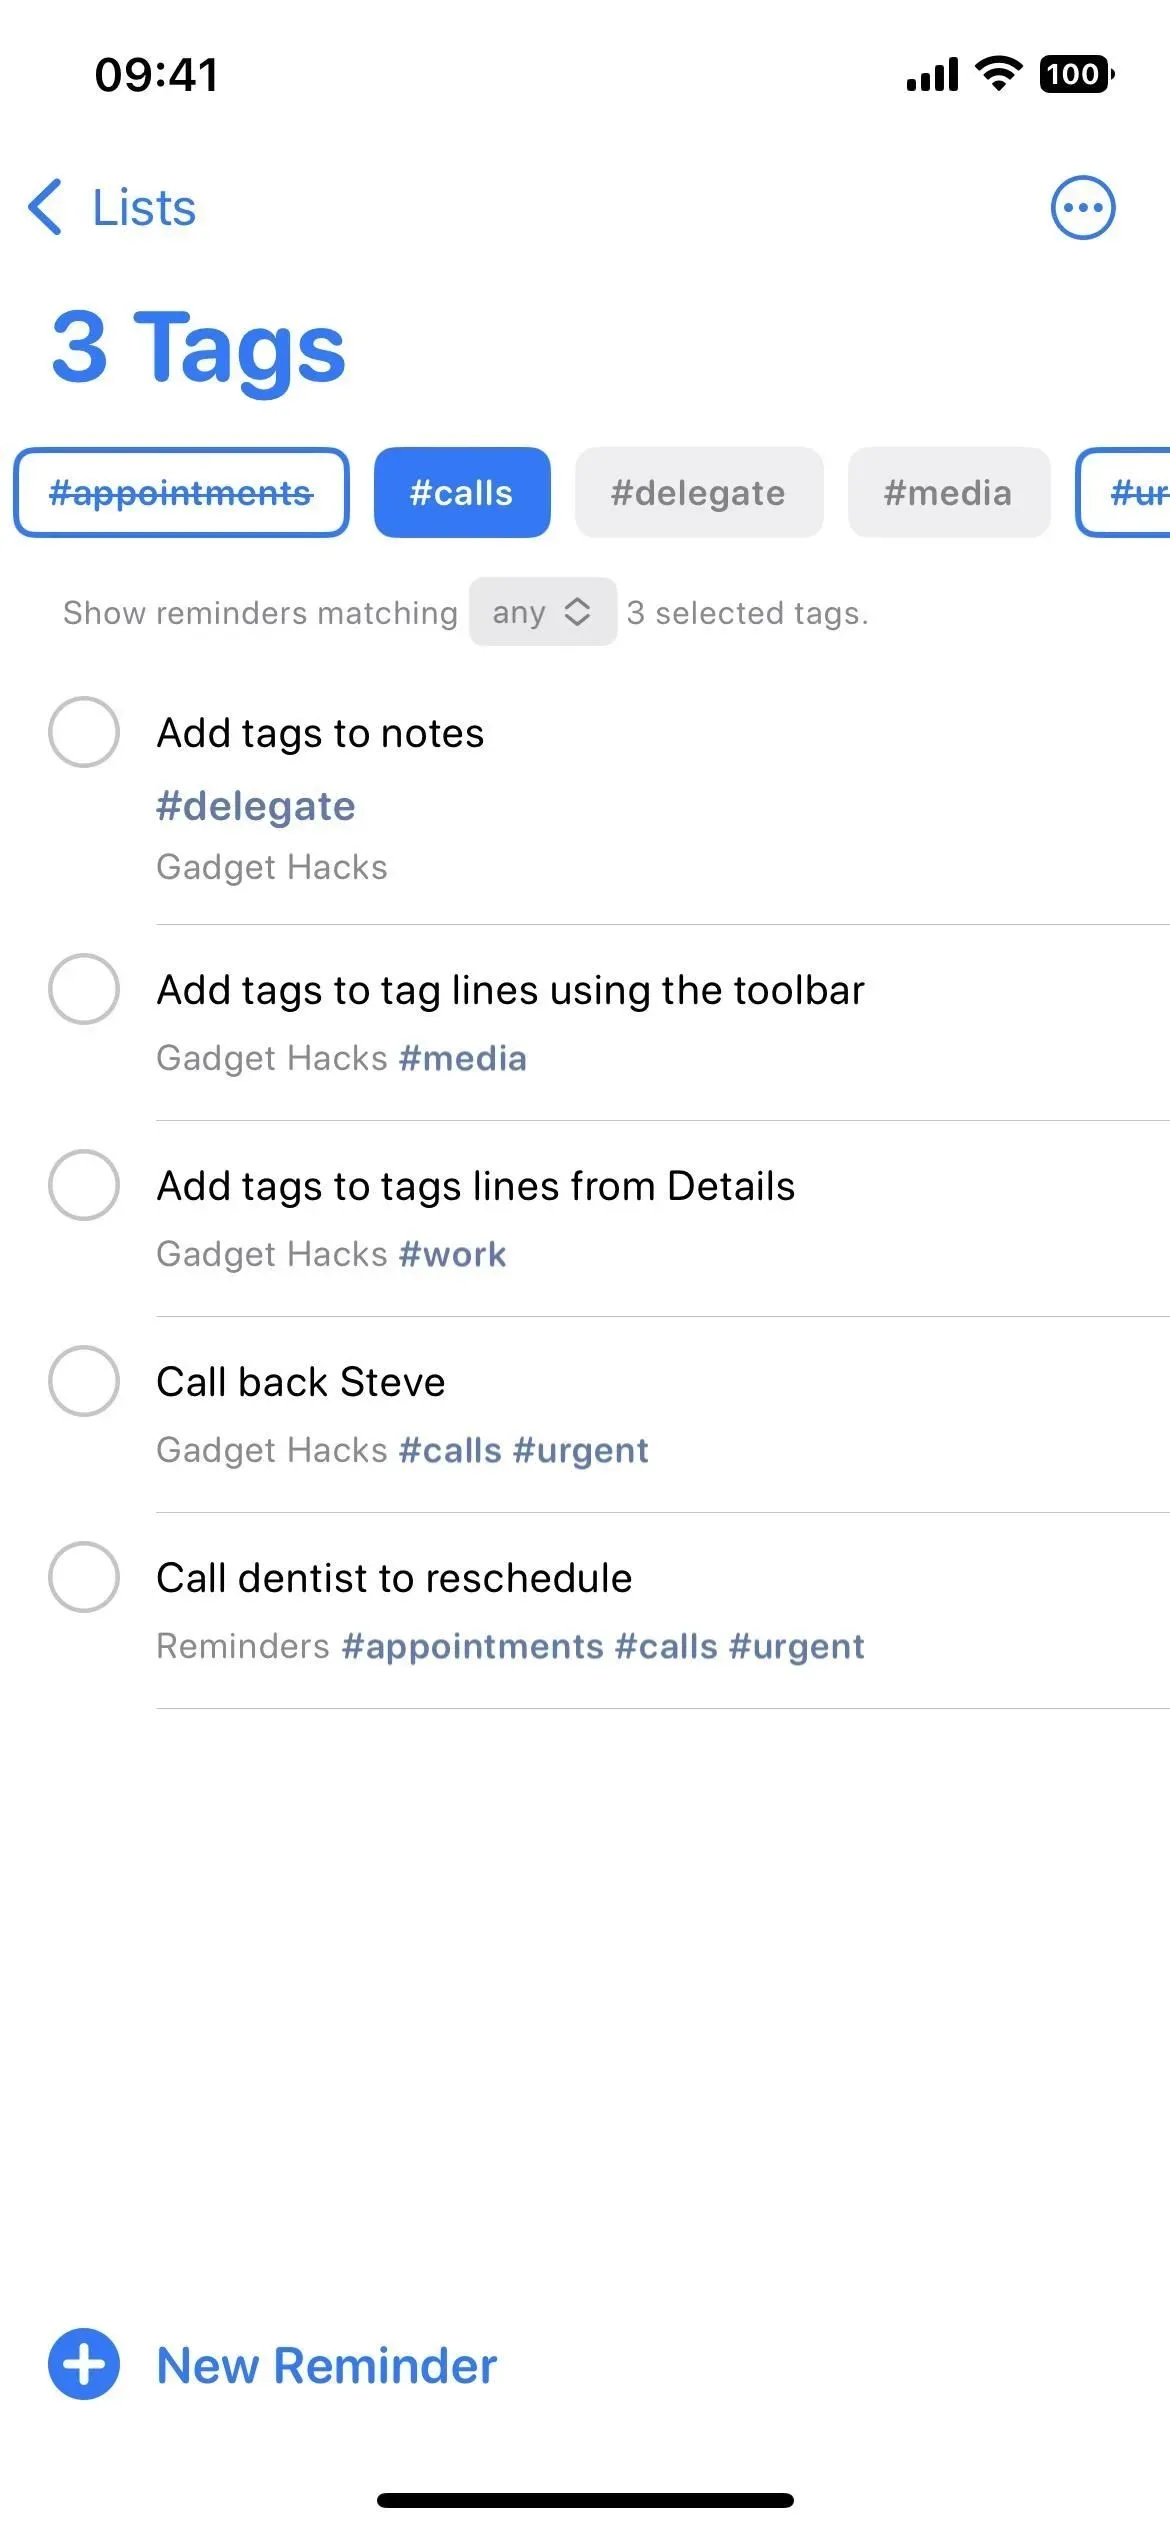
12. You can filter reminders with specific tags
Also new to the Tag Browser is the ability to select the tags you want to exclude from your search. When you click on a tag from the list, it highlights it. But when you click on the highlighted tag, it gets crossed out, indicating that the filtered reminders shouldn’t have that tag, even if they have another highlighted tag.
Leave a Reply