How to back up photos and videos on Mac

Given your Mac’s large internal drive, you might be tempted to store all your photos and videos locally on it. But storing meaningful memories in just one place is never ideal, as you can lose them due to drive failure, theft, or unforeseen circumstances. Therefore, it is highly recommended to back up your most valuable images and videos in at least two different places, and in this guide, we will help you with that.
Cloud backup
Online cloud storage services allow you to access your media from anywhere in the world as long as you have an internet connection. When it comes to backing up your online photos and videos on Mac, you can use Apple iCloud Photos or third party options like Google Photos. Let’s get to know both.
Photo iCloud
Apple allows you to securely store photos and videos in iCloud Photos. But you only get 5GB in the free tier, which is also shared with other iCloud services. Your files are likely to exceed this limit, in which case you’ll have to upgrade to a paid iCloud+ plan, which can expand your iCloud online storage up to 2TB (4TB with Apple One and Family Sharing). You can use the same iCloud account (i.e. your Apple ID) on all your iPhones, iPads, Macs, and Windows PCs to upload and store photos and videos.
Follow these steps to set up and back up pictures and videos from your Mac to iCloud Photos:
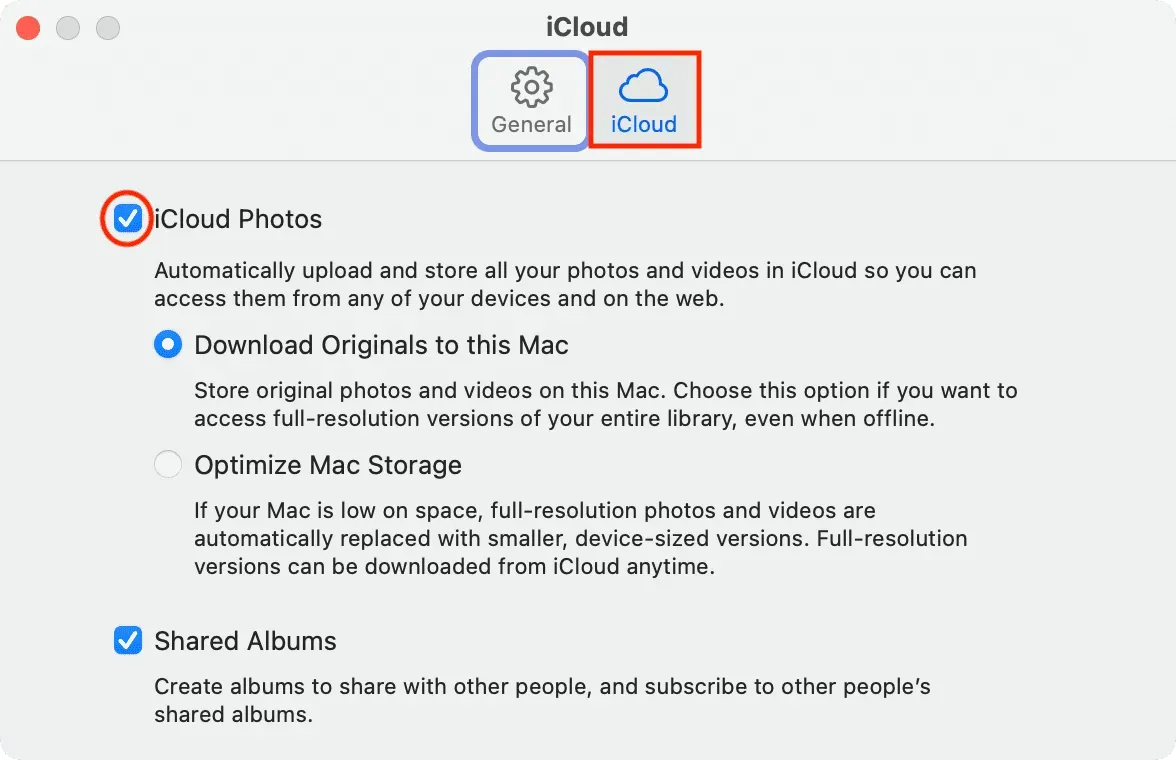
- Open the Photos app on your Mac.
- Click Photos > Preferences on the top menu bar.
- Click the iCloud tab.
- Check the box for iCloud Photos.
- If you have limited free space on your Mac, check the “Optimize Mac Storage”box. This will replace full-resolution images and videos with smaller versions optimized for the size of the device, and the full-length versions of these files will be stored in iCloud, from where you can download them at any time via Wi-Fi.
- Alternatively, if you have enough free local space on your Mac, you can choose “Download Originals to This Mac”which will store full quality photos and videos on this computer (as well as iCloud) so you can view them offline mode.
You have successfully set up iCloud Photos on your Mac. It will now automatically upload everything inside the Photos app to iCloud. These images will also appear in the Photos app on your iPhone and iPad, and vice versa.
Use iCloud for the web
iCloud Photos only downloads and saves the photos that are in the Photos app on your device. But what about images you have in your Finder folders that you want to keep in iCloud Photos but don’t want to add to the Photos app on Mac? Sign in to iCloud Photos on the web. Here’s how to use it:
- Visit iCloud.com and sign in with your Apple ID.
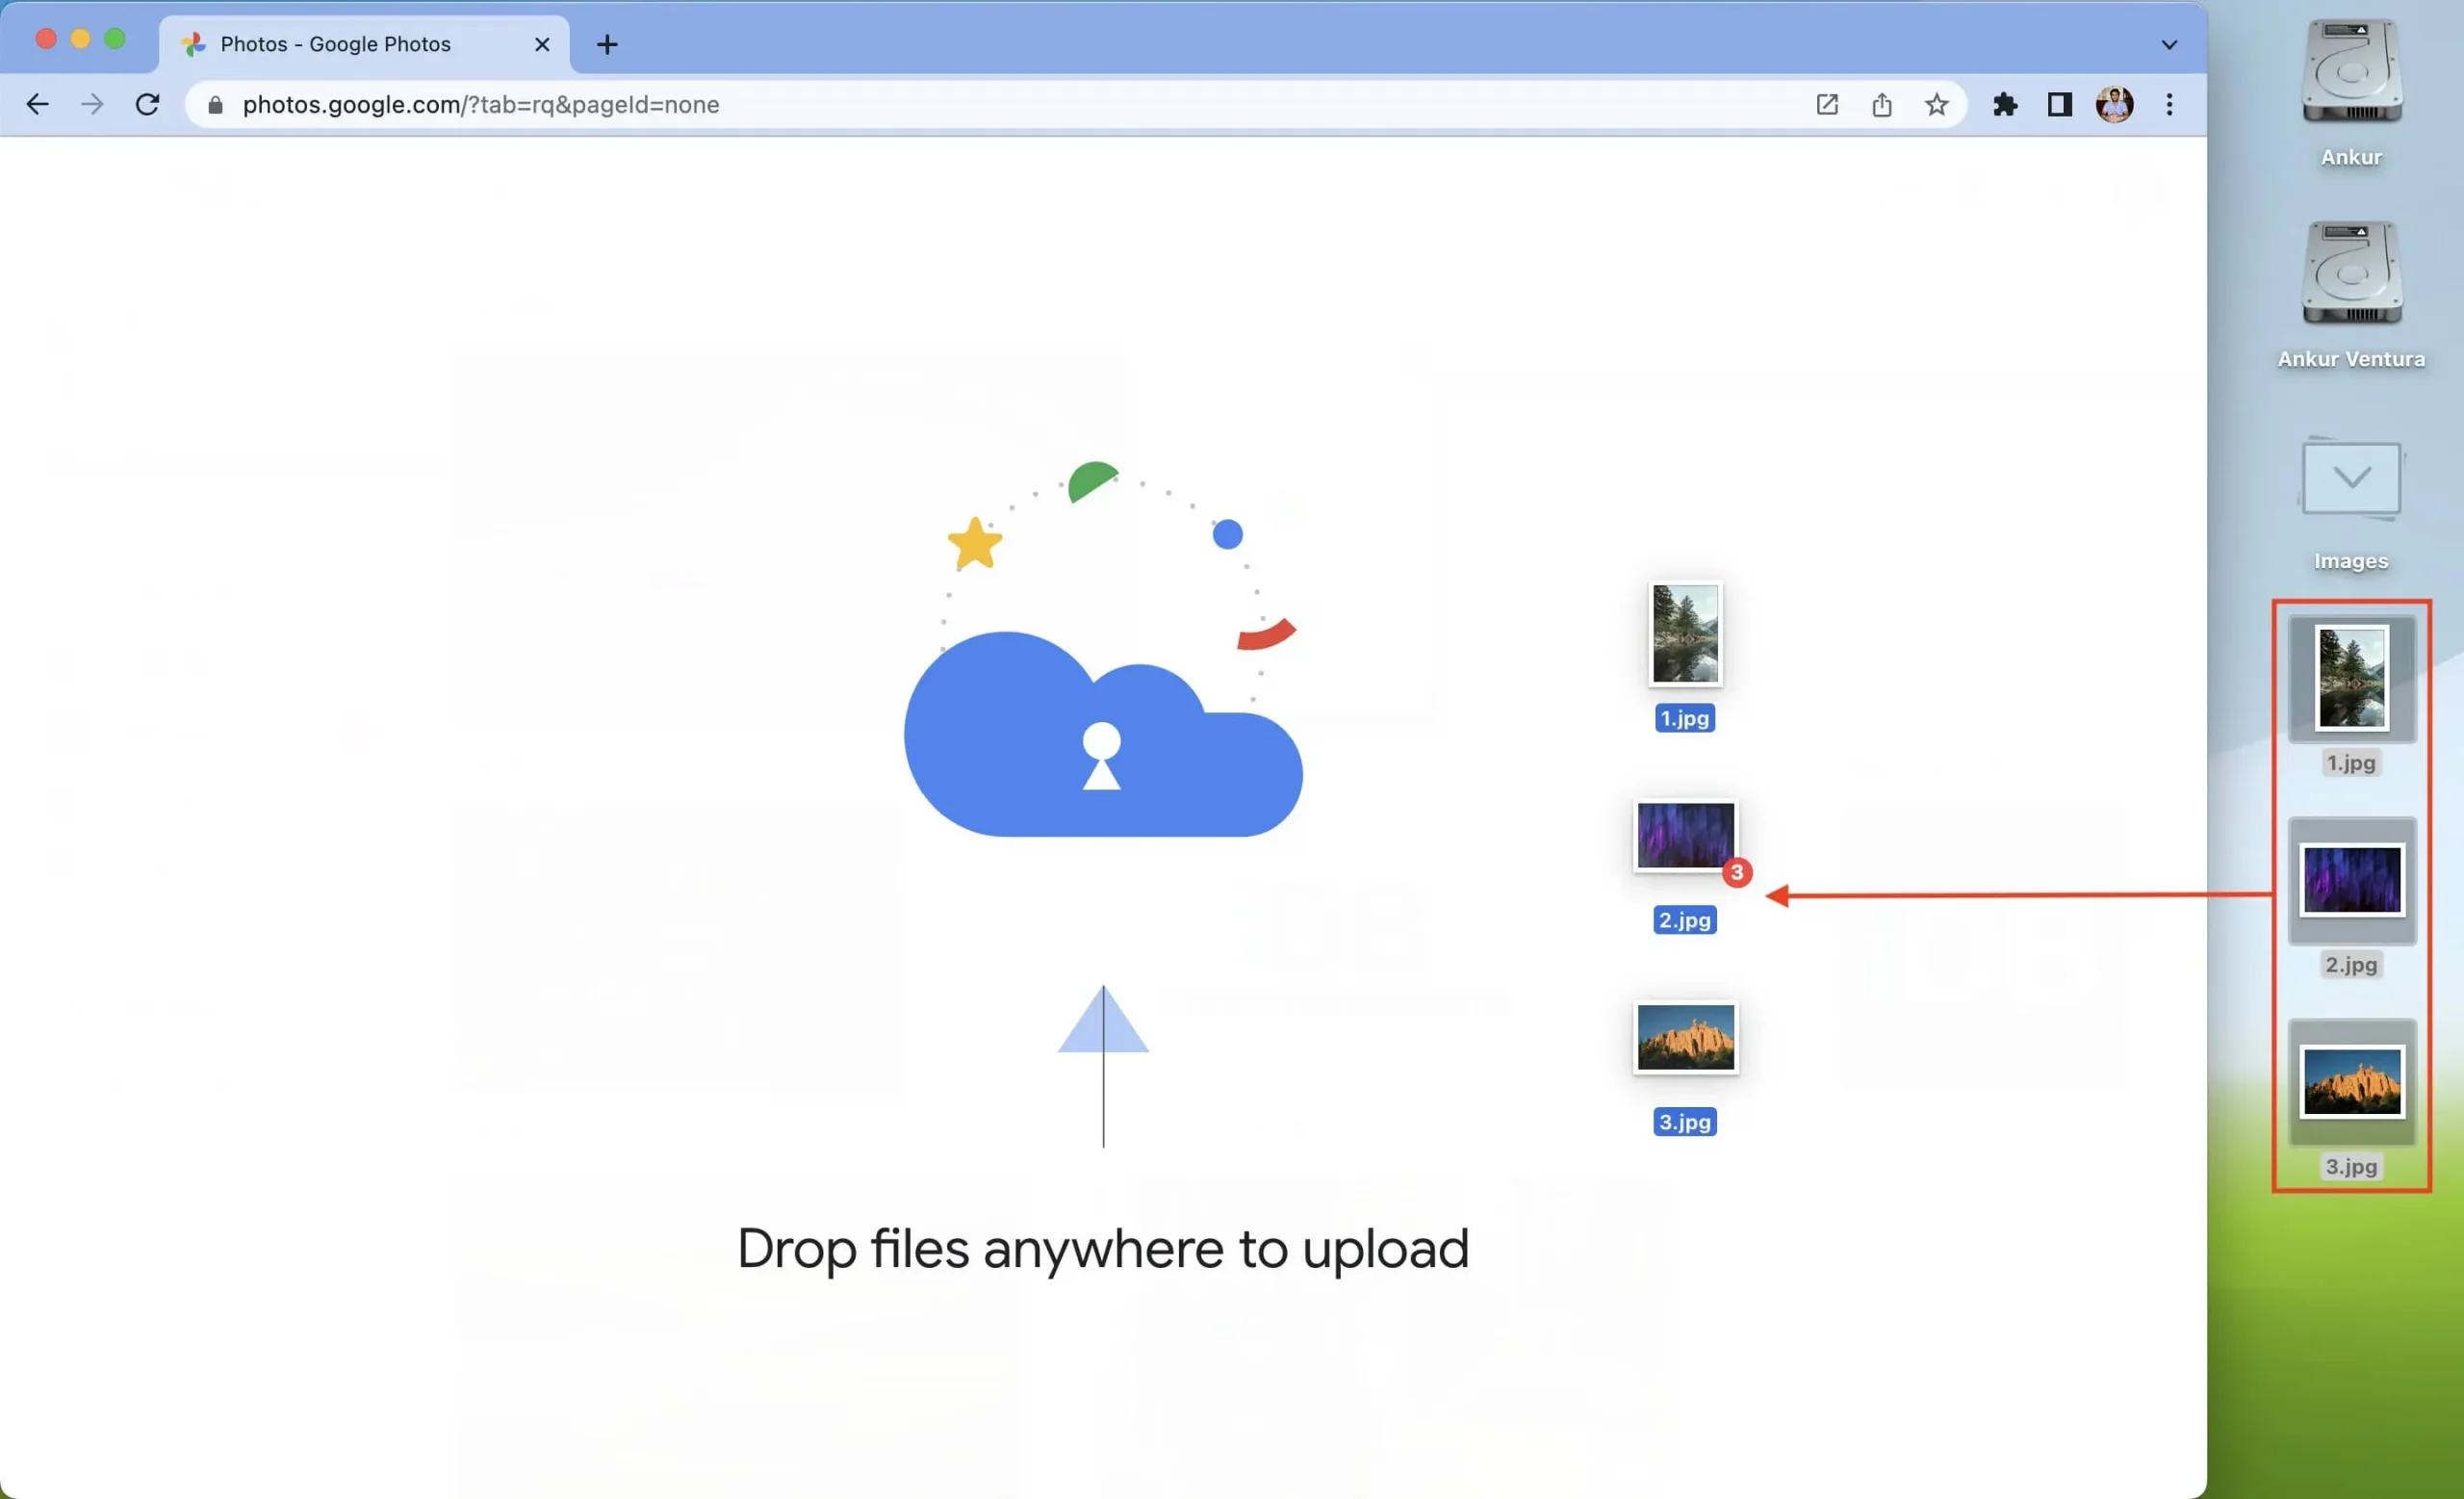
- Select Photos.
- Drag and drop images and videos to the iCloud Photos browser tab. You can also click the up arrow icon, select images, and click Upload.

Third Party Services
Instead of or in addition to Apple’s offerings, you can explore great third-party cloud storage options like Google Photos, Google Drive, Dropbox, One Drive, Box, Mega, and Backblaze to back up your important files.
The basics for uploading to any third party cloud storage like Google Drive, One Drive, Dropbox, Google Photos, Box, etc. are the same:
- Start by visiting the cloud storage website in a browser.
- Create a folder or album for better organization.
- Drag and drop photos and videos from your Mac’s Finder into this browser window, or use the upload button.
Several services such as Dropbox and Google Drive also offer Mac apps for easy syncing. Plus, you can even set your Mac to automatically upload photos and videos to services like Google Photos.
Backup to local storage
On-premises physical solutions have some advantages over cloud solutions. First, they work offline and do not require an internet connection to upload or download images. You can simply connect them to another computer, Smart TV and other similar devices to view your memories.
Also, a high capacity HDD or SSD may be cheaper in the long run than a cloud solution. This is because you only need to purchase the drive once, and you can keep using it for as long as it lasts. On the contrary, all cloud services have a subscription model that needs to be renewed every month or year, and costs, especially in terms of a higher level, can increase significantly.
Here are some of the best offline solutions for backing up your photos and videos on Mac.
Use a time machine
Just like you can back up your entire iPhone and iPad to iCloud or a computer, you can back up your Mac to Time Machine.
Time Machine is an easy-to-use tool from Apple that backs up your Mac data securely to an external drive and restores it when needed.
So, in addition to your photos and videos on your Mac’s internal drive, get a massive 2TB, 4TB, or 8TB hard drive and use it for Time Machine backups.
Check out 8TB hard drives on Amazon
Hard disk, SSD, flash drive, etc.
External hard drives, SSDs, flash drives, DVDs, and CDs are timeless methods for backing up your media. It may not be convenient to plug in an external drive and transfer photos and videos every day these days, but these tools make a difference when it comes to preserving precious memories.
For example, the total size of photos and videos of my wedding is about 300 GB. Storing them in iCloud or Google Photos will mean paying a significant amount per month. So what I did was transfer all 300 GB of memories to an external hard drive that I keep at home.
So, if you have a huge library of photos from special events like weddings, birthdays, Christmas and other memorable events, consider moving them all to an external drive. You can even put them on two discs that should be kept in different physical locations, such as different rooms or one in your house and the other in a bank vault. This ensures that the other one remains safe even if one copy is accidentally destroyed.
Check Out External SSDs at Amazon
iPad, iPhone or Android phone
Currently, high memory limits are available not only for your computer. You can buy smartphones and tablets with 512 GB, 1 TB, or even 2 TB of internal storage.
If you have an iPad or iPhone with plenty of free space, you can AirDrop photos and videos from your Mac to their Photos app. This way you will have two copies of the media – one on your Mac and the other on your tablet or phone.
If you have an Android smartphone, download Google’s Android File Transfer app for Mac to move photos and videos between your Mac and Android devices.
Leave a Reply