How to uninstall and install WMIC in Windows 11

The WMIC or Windows Management Instrumentation command line utility in Windows 11 provides a command line interface. It is compatible with shell and utility commands on your Windows PC. Microsoft has made WMIC available in Windows 11 Build 22572. It is available as an optional feature that can be manually enabled from Windows 11. If you want to uninstall and reinstall WMIC in Windows 11 (22572), this article will help you. In this article, we will discuss how you can easily uninstall and reinstall WMIC on Windows 11.
Content:
- 1 Uninstall and reinstall WMIC in Windows 11 using Settings
- 2 Uninstall and reinstall WMIC on Windows 11 (22572) using Command Prompt/Windows PowerShell
- 3 final words
Uninstalling and Reinstalling WMIC in Windows 11 Using Settings
The first way to uninstall and reinstall WMIC on Windows 11 is to use the Settings app. To use the Settings app to uninstall and reinstall WMIC on Windows 11, follow these steps:
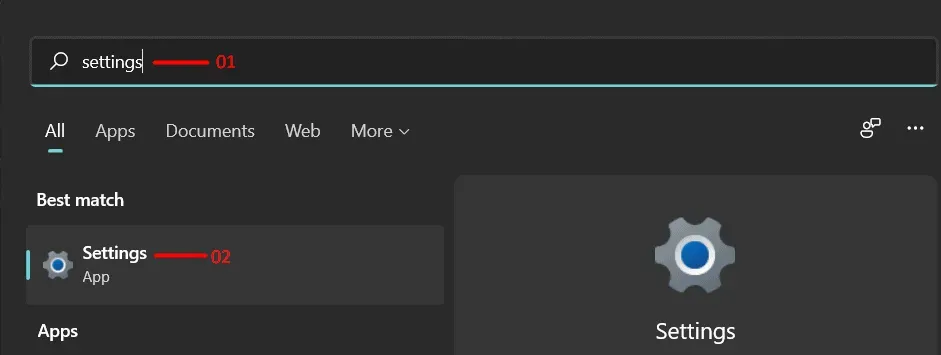
- Open the Settings app on your Windows 11 PC by pressing the key combination Windows + I.
- Navigate to the Apps section on the left sidebar in the Settings app.
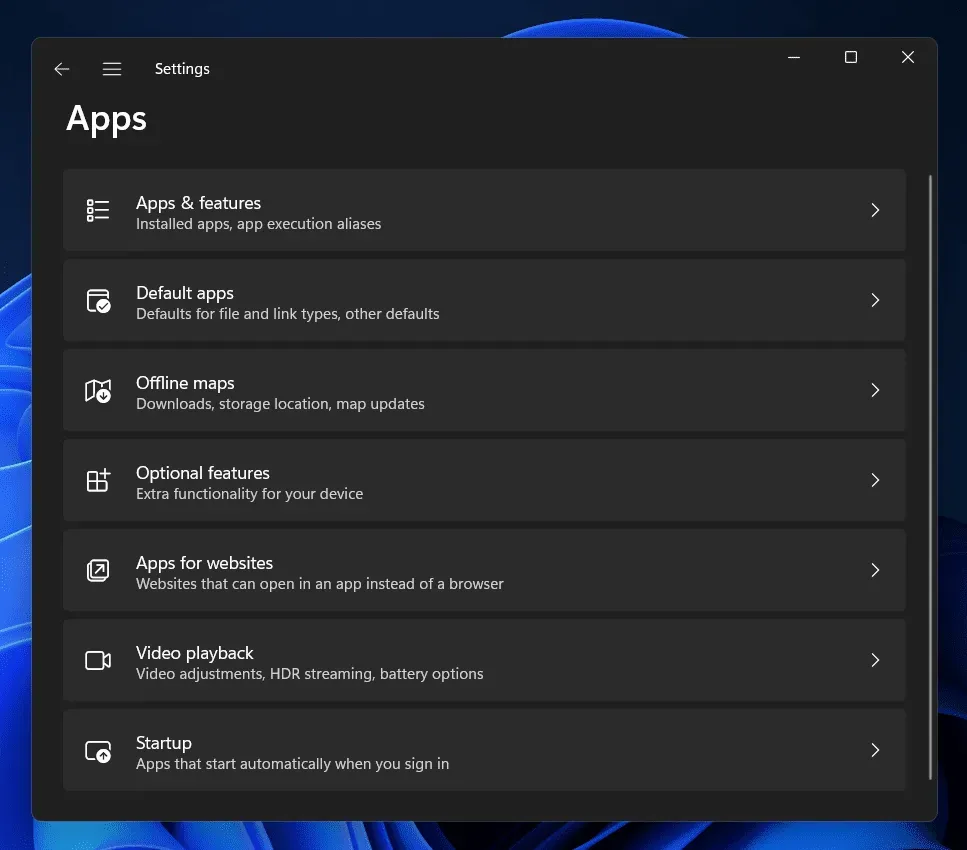
- Now, on the right side of the Applications section, click on Additional Features.
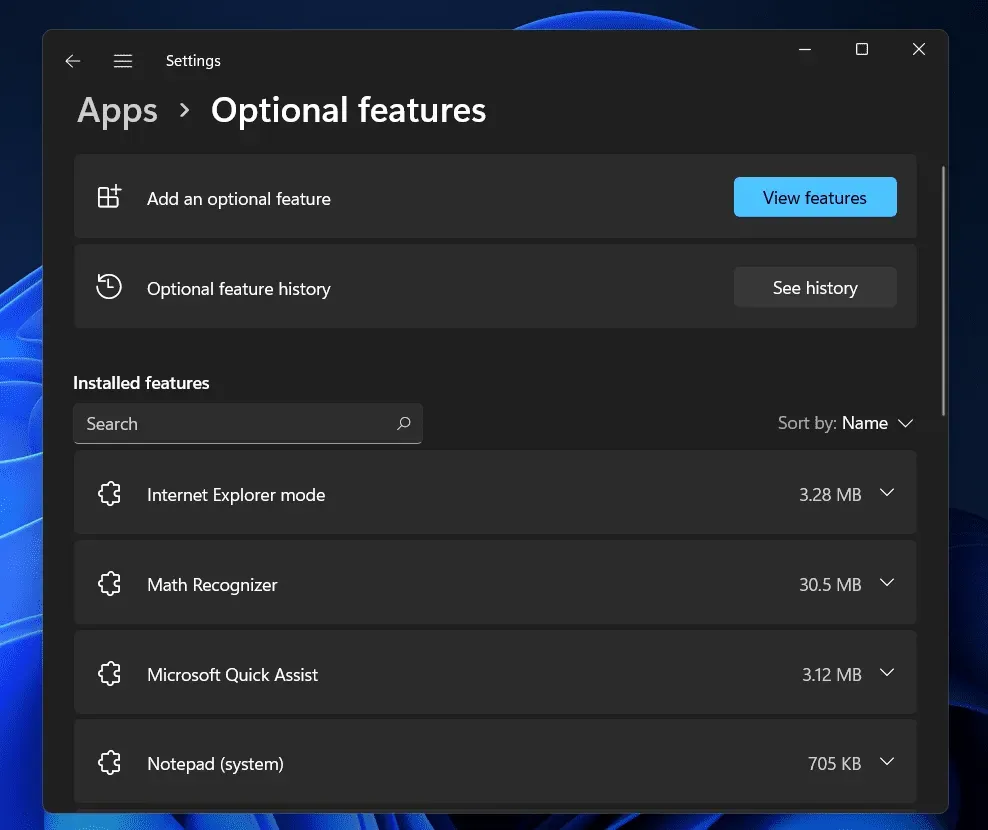
- Here, locate the WMIC option under Installed Features and then expand the section by clicking on the down arrow you see next to it.
- Then click the Uninstall button to remove WMIC from your PC.
This will uninstall WMIC on your Windows 11 PC. Now, to reinstall WMIC, follow the steps given below:
- Press the Windows + I key combination on your keyboard to open the Settings app.
- Click on the “Apps”section, which you will find on the left sidebar of the “Settings”application.
- On the right side, click “More Features”and click the “View Features”button.
- Now search for WMIC and check the box next to WMIC.
- After that, click “Next”and then click “Install”to reinstall WMIC on your PC.
Uninstalling and reinstalling WMIC on Windows 11 (22572) using Command Prompt/Windows PowerShell
Another way to uninstall and reinstall WMIC on Windows 11 (22572) is to use Command Prompt or Windows PowerShell. You will run Command Prompt or Windows PowerShell as an administrator on your Windows 11 PC and then run the add or remove command for WMIC to uninstall and reinstall WMIC on Windows 11. Following are the steps to uninstall and reinstall WMIC. Install WMIC on Windows 11 (22572) using Command Prompt or Windows PowerShell.
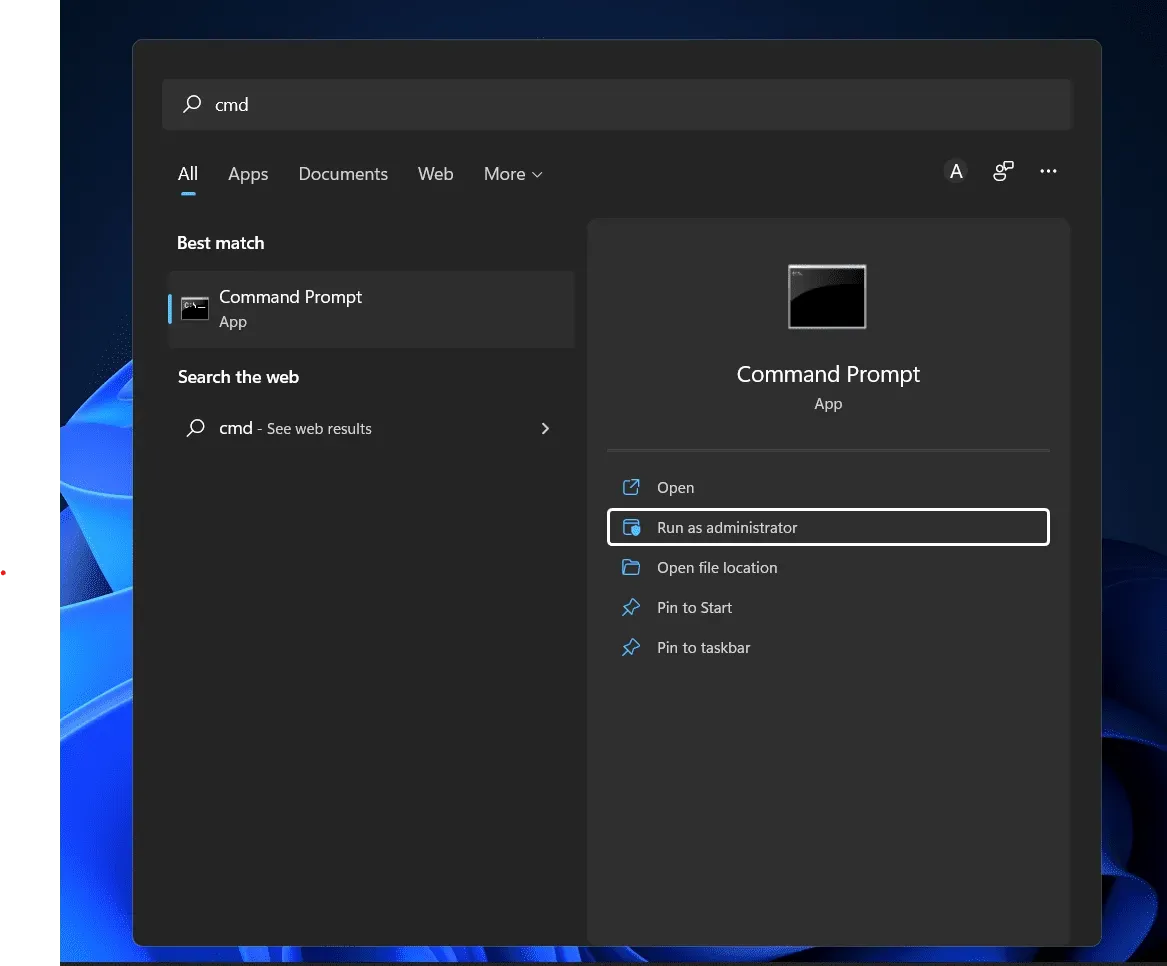
- Open the Start Menu in Windows 11 by pressing the Windows key.
- In the start menu, find CMD. Right-click Command Prompt in the search results and select “Run as administrator”. You can run Windows PowerShell as an administrator.
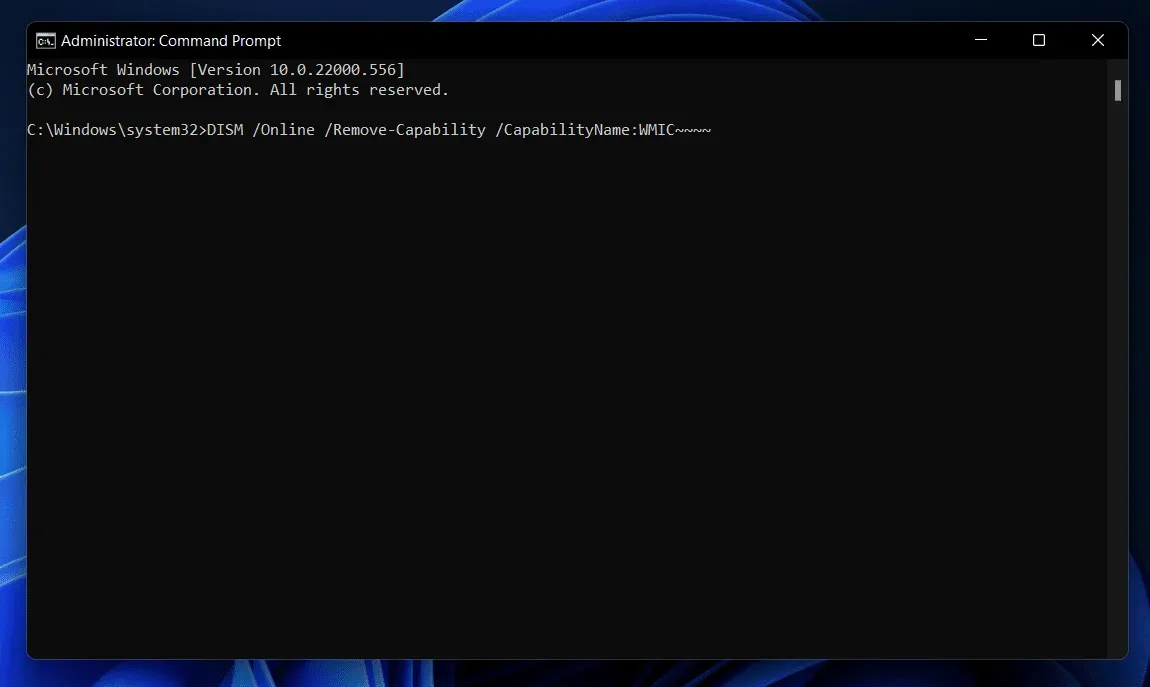
- Now, to remove WMIC in Windows 11, type DISM /Online/Remove-Capability/CapabilityName:WMIC~~~~ and press Enter. This will uninstall WMIC on Windows 11.
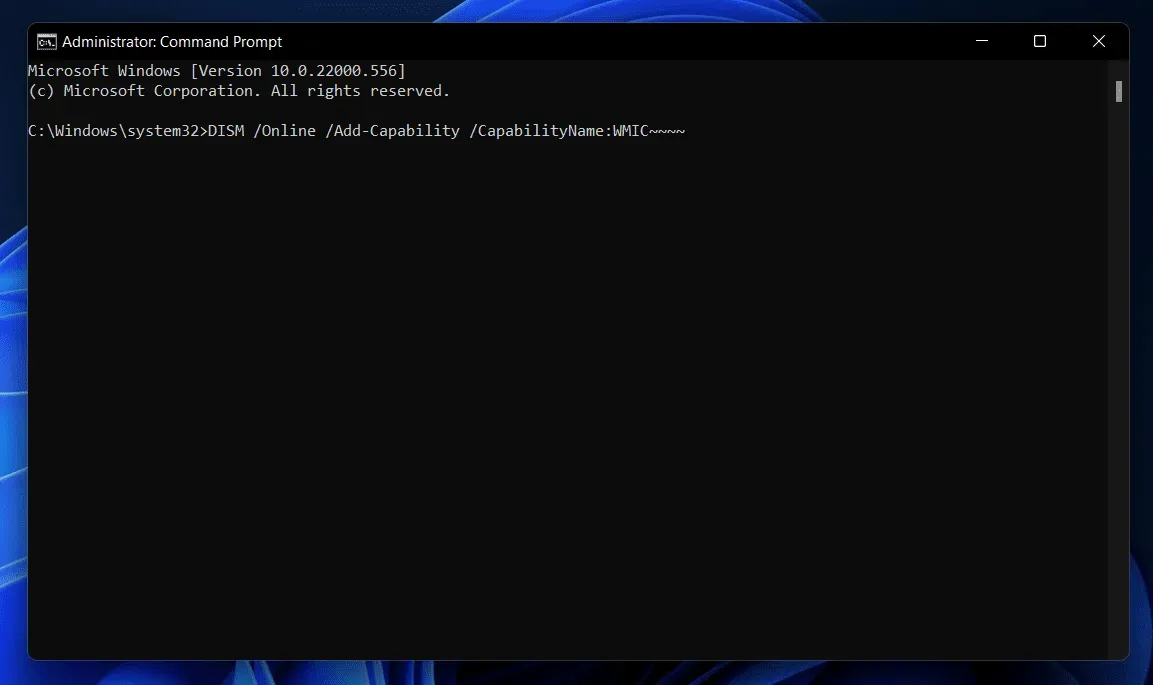
- If you want to reinstall WMIC on Windows 11, type DISM /Online /Add-Capability /CapabilityName:WMIC~~~~ and press Enter to install WMIC on Windows 11.
Final words
These were the two ways to uninstall and reinstall WMIC on Windows 11 (22572). If you’re running Windows 11 build 22572 and want to add or remove WMIC on your Windows 11 PC, follow the steps in this article. Following the steps above will allow you to install and uninstall WMIC on your Windows 11 PC.
Leave a Reply