How to delete or clean junk files on Windows 11 PC
Junk files may not seem like a problem, but they can take up a lot of space on your computer and also slow down your system. Junk files can be files created by applications, junk internet files, update logs, cache, software leftovers, and others. These are temporary files that your computer creates when you use different programs. When using the program, these temporary files can help speed up the process. However, if left uncleaned for a very long time, these junk files can cause a problem.
Clean Junk Files on Windows 11 PC
In this article, we will discuss how you can clean junk files on Windows 11 PC.
Empty trash
The very first thing you should try to do is empty the trash. When you delete files, they are moved to the trash, and to permanently delete the files, try emptying the trash. To empty your trash, follow these steps:
- From the Start menu , find Trash and press Enter to open Trash. In the Trash application window , click the Empty Trash button , and then click Yes to confirm the deletion of files.
Delete temporary files
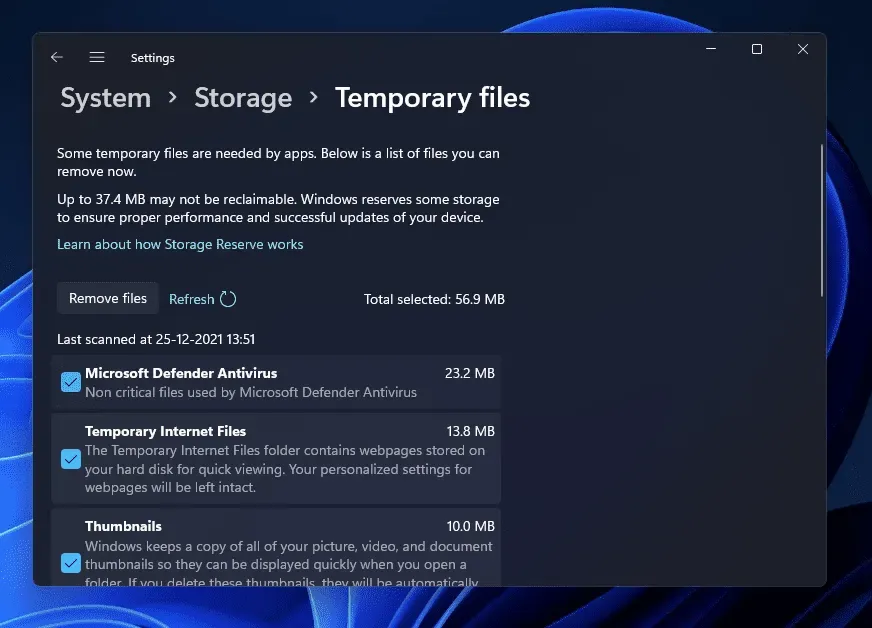
Temporary files are also the main part of junk files. You should try deleting temporary files and you should be able to clean junk files on your Windows 11 PC. To delete temporary files, follow these steps:
- Open the Settings app by pressing the key combination Windows + I.

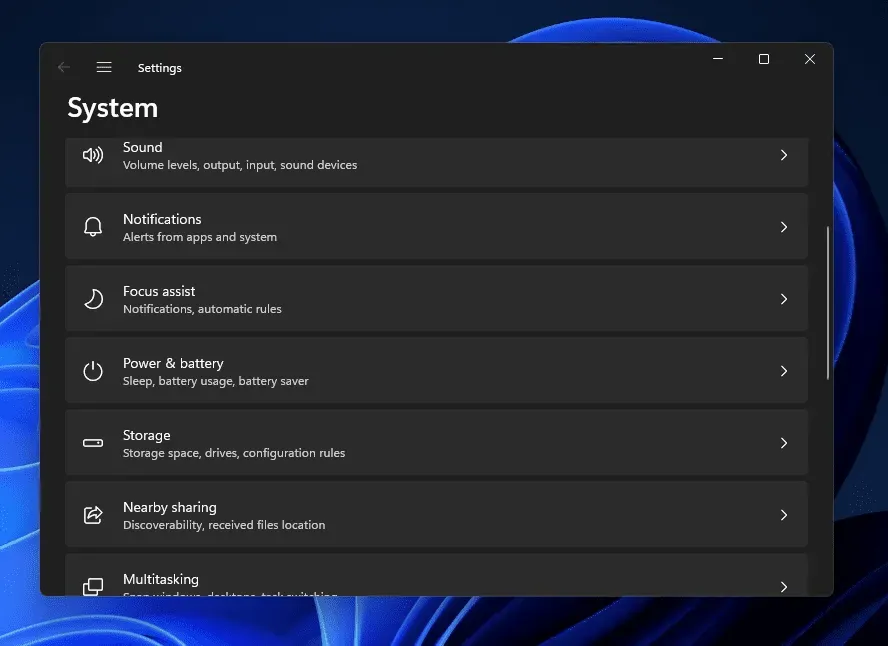
- On the right side of the Settings app , click on Storage .
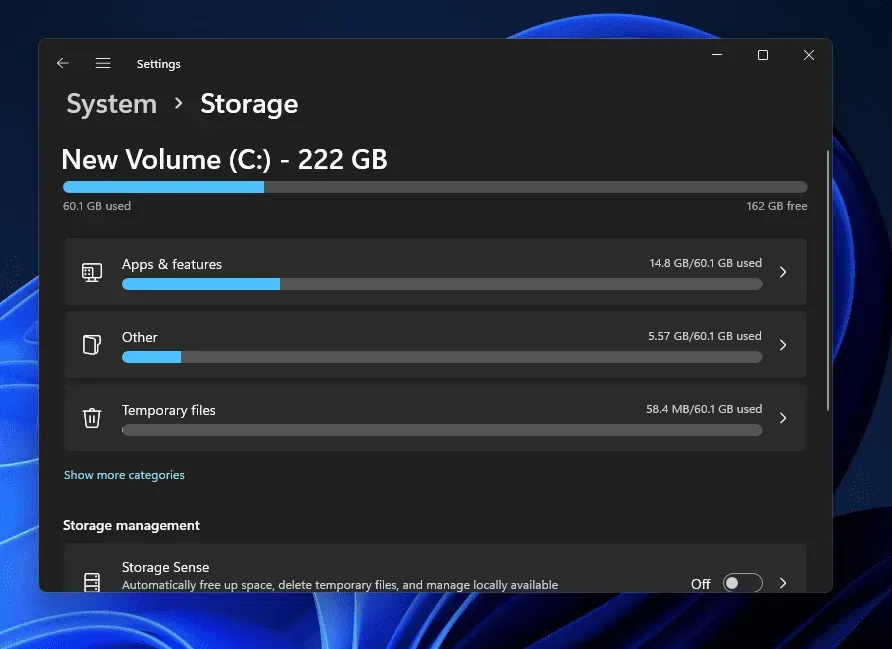
- Then select the Temporary Files option .
- In the next window, click the” Delete Files “button and then click “Continue”to continue the process.
- Go back to the “Storage”page in Settings and turn on the” Storage Sense”toggle.
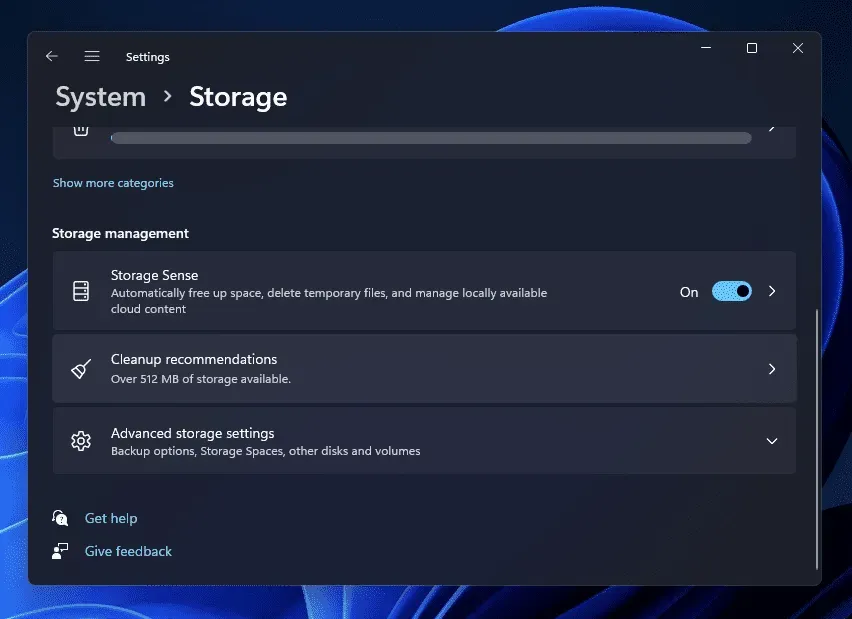
- Click on the Storage Sense option to set it up.
- Here, check the box Keep Windows running smoothly . Also, turn on the toggle to automatically clean up user-generated content.
- You can then set up the cleaning schedule as you see fit. After that, click on Run Memory Monitor now to start Memory Monitor. Storage Sense will remove temporary files from your PC.
Run Disk Cleanup
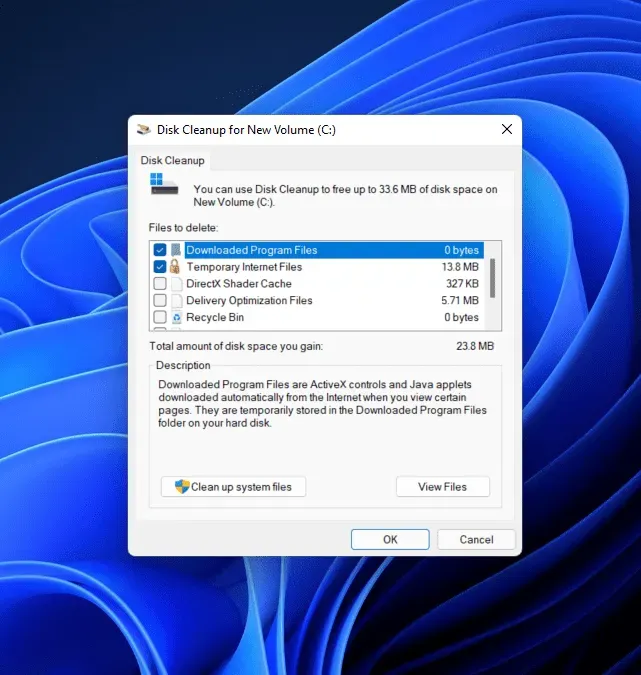
Another thing you can do is run Disk Cleanup. Disk Cleanup is a Windows utility with which you can clean up junk files including program files, cache, temporary internet files, and various other types of files. To run Disk Cleanup, follow these steps:
- Click the Start icon on the taskbar to open the Start menu. From the Start menu , search for Disk Cleanup.
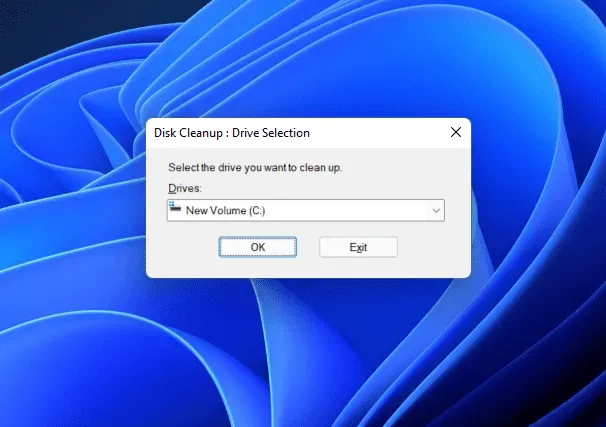
- You will be prompted to select a drive to clean up in the next window. Once done, click OK.
- Then check the boxes for the files you want to delete. After that, click “OK” and then click “Delete Files”.
Clean junk files using cleaning recommendations
The last thing you can try is to clean junk files using the cleanup recommendations. You can get cleanup recommendations that tell you which files to clean up, including temporary files, files from apps you don’t use, files synced to the clouds, and more. To clean junk files with cleanup recommendations, follow these steps:
- Press the key combination Windows + I to open the Settings app on your Windows 11 PC.
- Make sure you are in the System section in Settings. If not, then click on the System tab on the left sidebar.
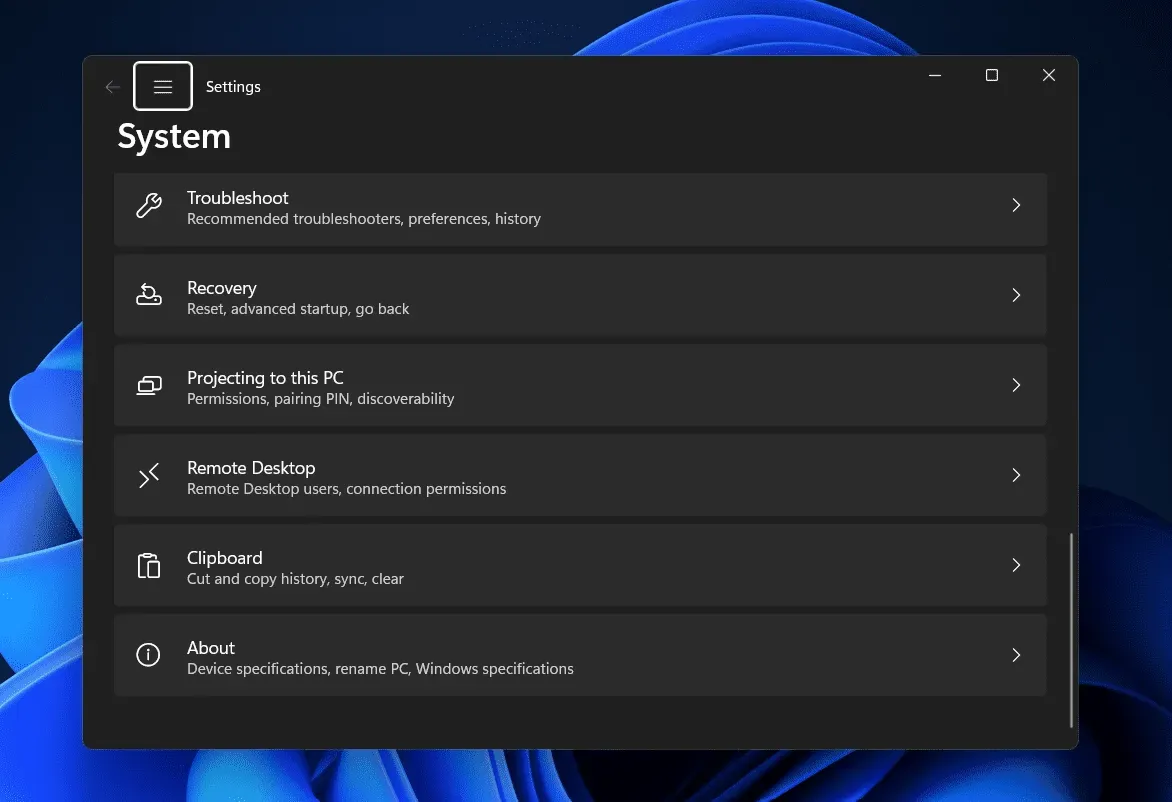
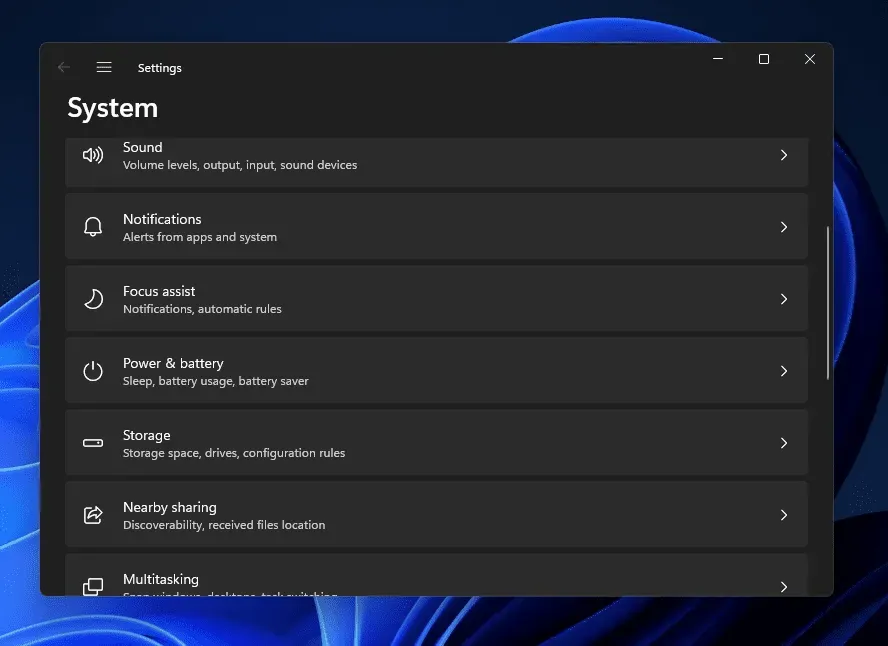
- Now on the right side of the System tab in the Settings app , click on Storage .
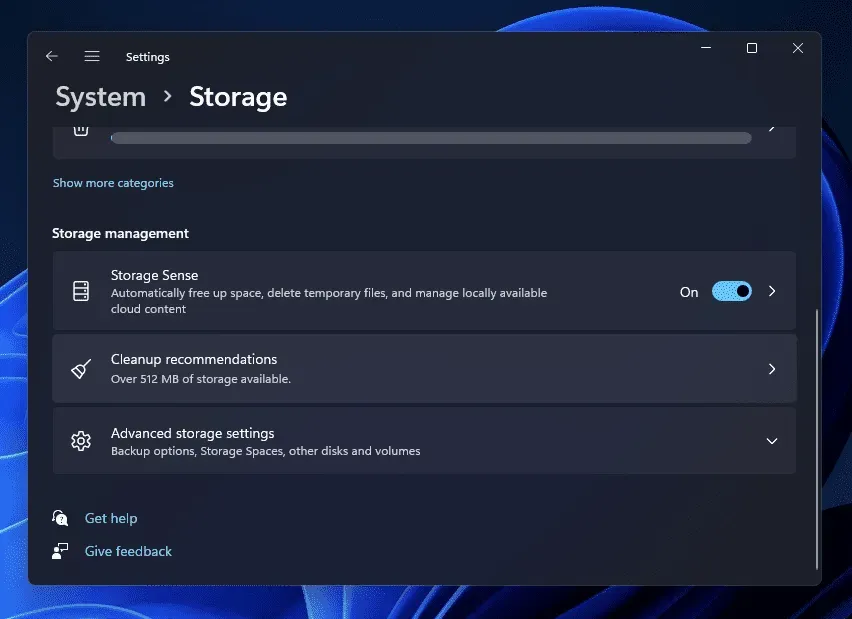
- Then click on Cleanup Recommendations . This will now scan for all temporary files and junk files that you can clean up.
- After that, click on the Clear button at the bottom of the window.
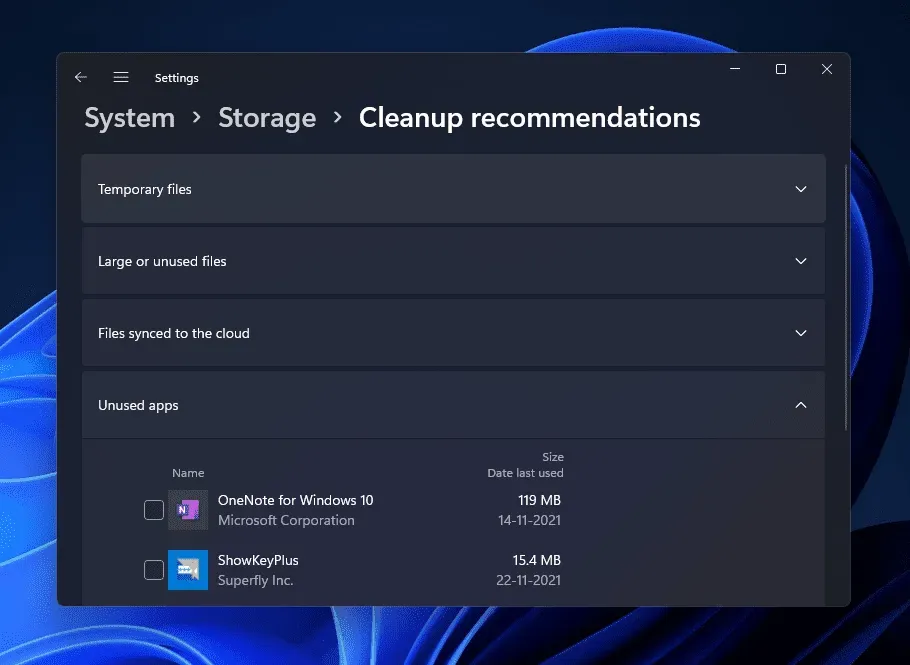
This will check all junk files and remove them to free up space on your computer.
Final words
If your system has accumulated junk files that are consuming a lot of your PC’s memory and causing it to slow down, you should probably try cleaning junk files. We have discussed all working ways to clean junk files on Windows 11 PC. By following the above steps, you will be able to clean up junk files on Windows 11 PC.
Leave a Reply