How to remove user accounts from your Mac

Whether you want to free up space on your device or simply organize your accounts, this guide will walk you through the steps to delete user accounts on your Mac, including administrator accounts.
When you have multiple people using the same Mac, having more than one user account can be very helpful in separating everyone’s files and apps and adding a layer of privacy and security between users. However, when you no longer need an additional user account for your Mac, it only takes a few clicks to remove that account.
Before you start
- To delete a user account, you need to be logged into an administrator account.
- Before you click the permanently delete account button, you will be asked if you want to keep the existing details of the user account you are deleting. At that time, you have options: keep all your data, or keep nothing. So, if you want to keep certain data from the user account you are about to delete, first log into that account and move the files to an external drive for safe keeping.
How to remove user accounts from Mac
1) Open System Preferences in macOS Ventura or later and click on Users & Groups.
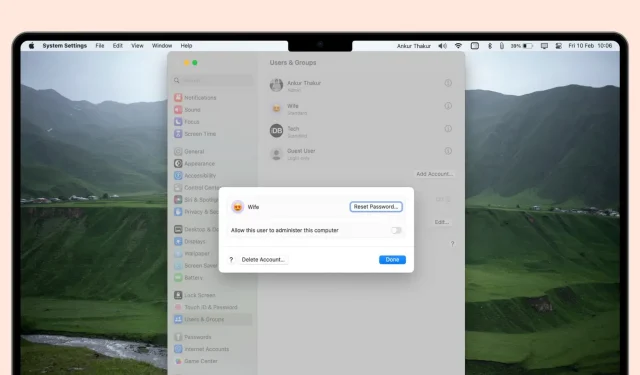
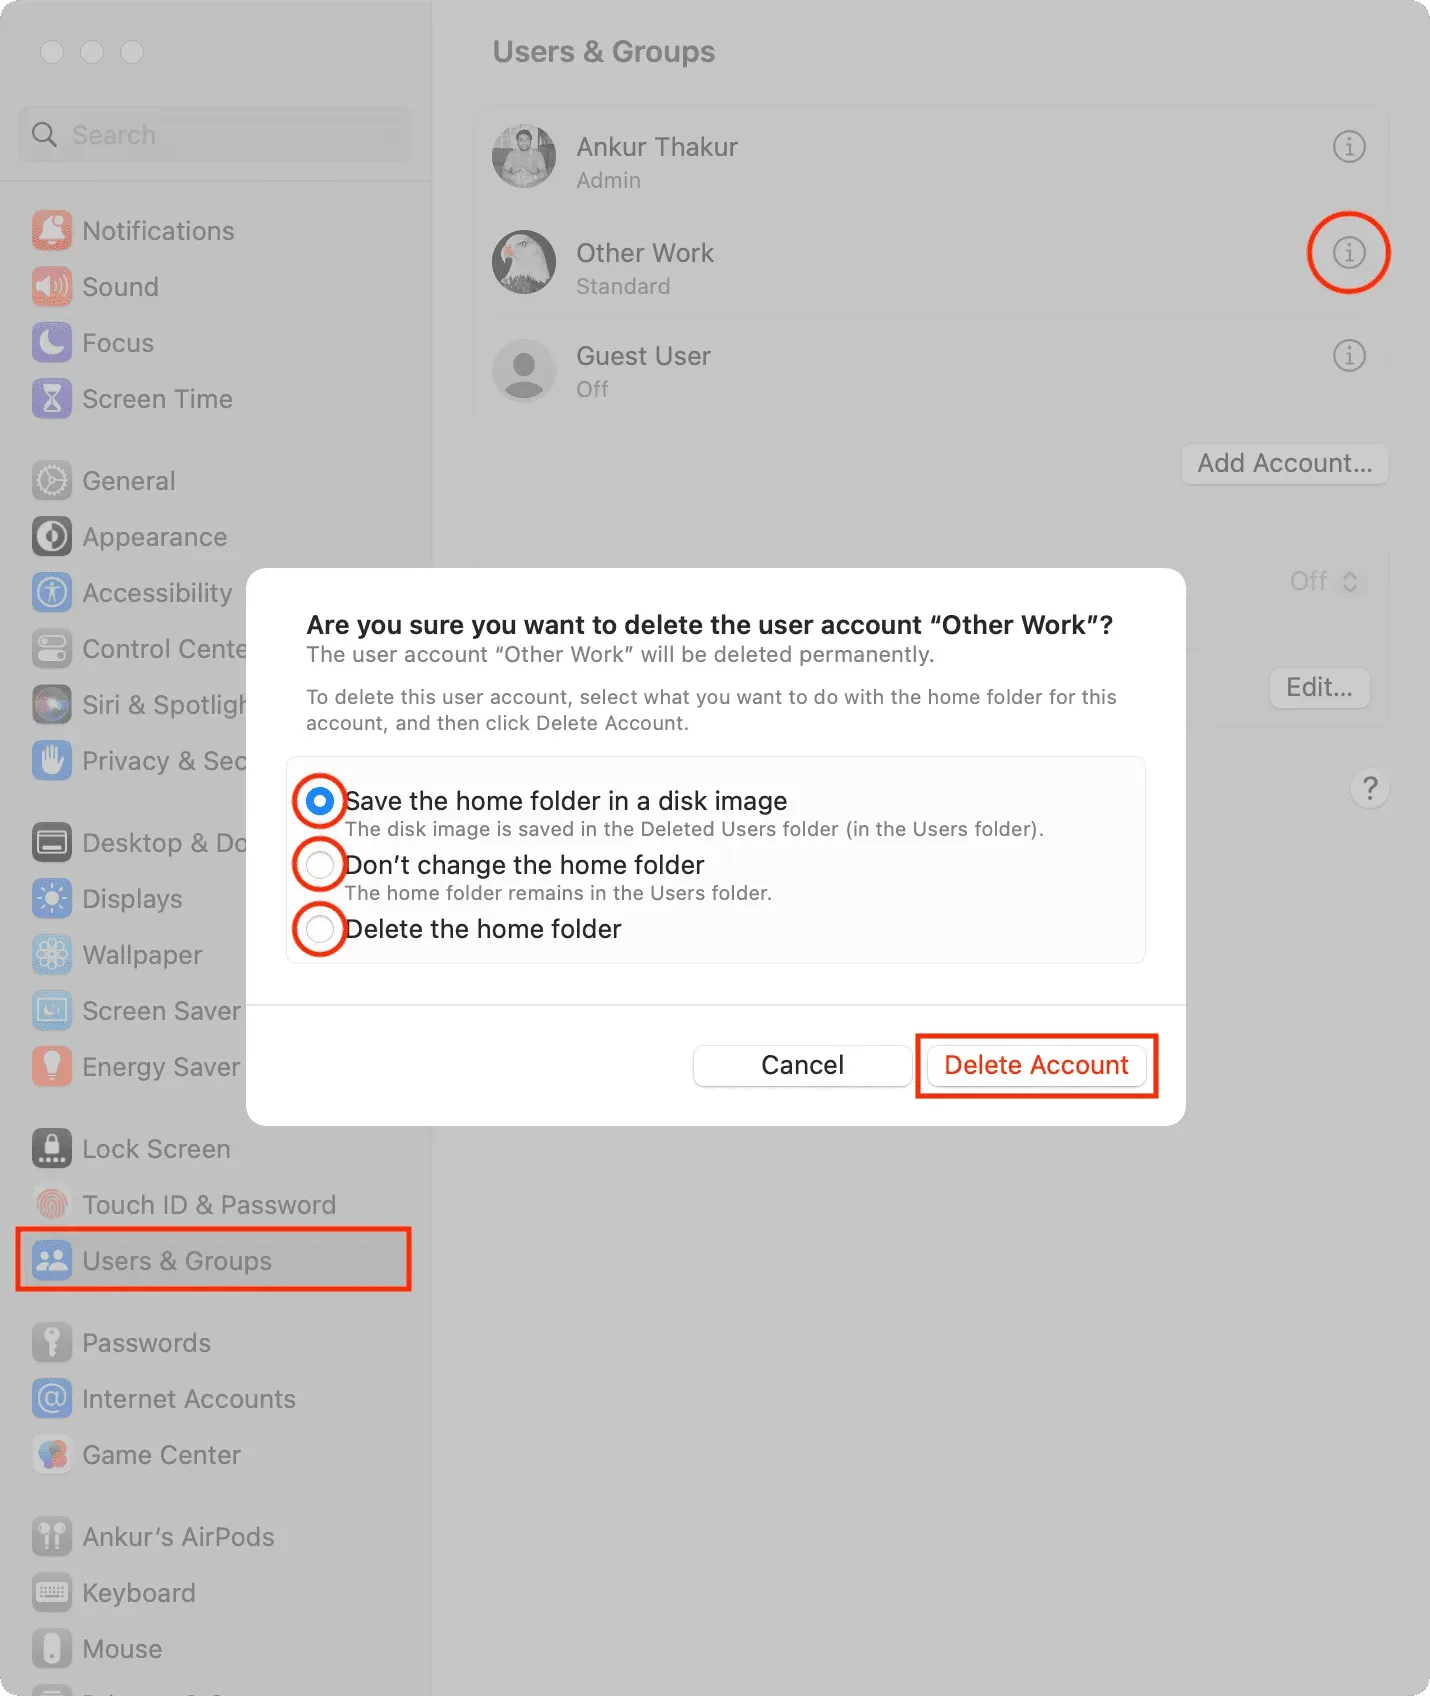
2) Click the information button ⓘ next to the user account you want to delete.
3) Click “Delete Account”and enter the administrator password for authentication.
4) Now decide what you want to do with user files:
- Save your home folder in a disk image: If you choose this, all of that user account’s data will be archived to a file. dmg and saved to a folder in
/Users/Deleted Usersplace. You can use it to restore a user with all files later. - Don’t change the home folder: this keeps all the user’s files in the main
Usersfolder. It doesn’t create a compressed dmg file, it just adds the word (deleted) next to the user’s home folder name. If you plan on restoring the user in the future, I recommend using this option instead of the first one, as restoring it is a bit easier. - Delete Home Folder: Deletes the user’s home folder and all their files, thereby freeing up space on your Mac’s internal drive. Obviously, if you choose this, you won’t be able to restore the user’s files later.
Click “Delete Account”when you’re ready.

You have successfully deleted a user account and prevented that person from accessing your Mac.
If you ever need to give that person access to your Mac again, you’ll need to create a new user account.
On older versions of macOS
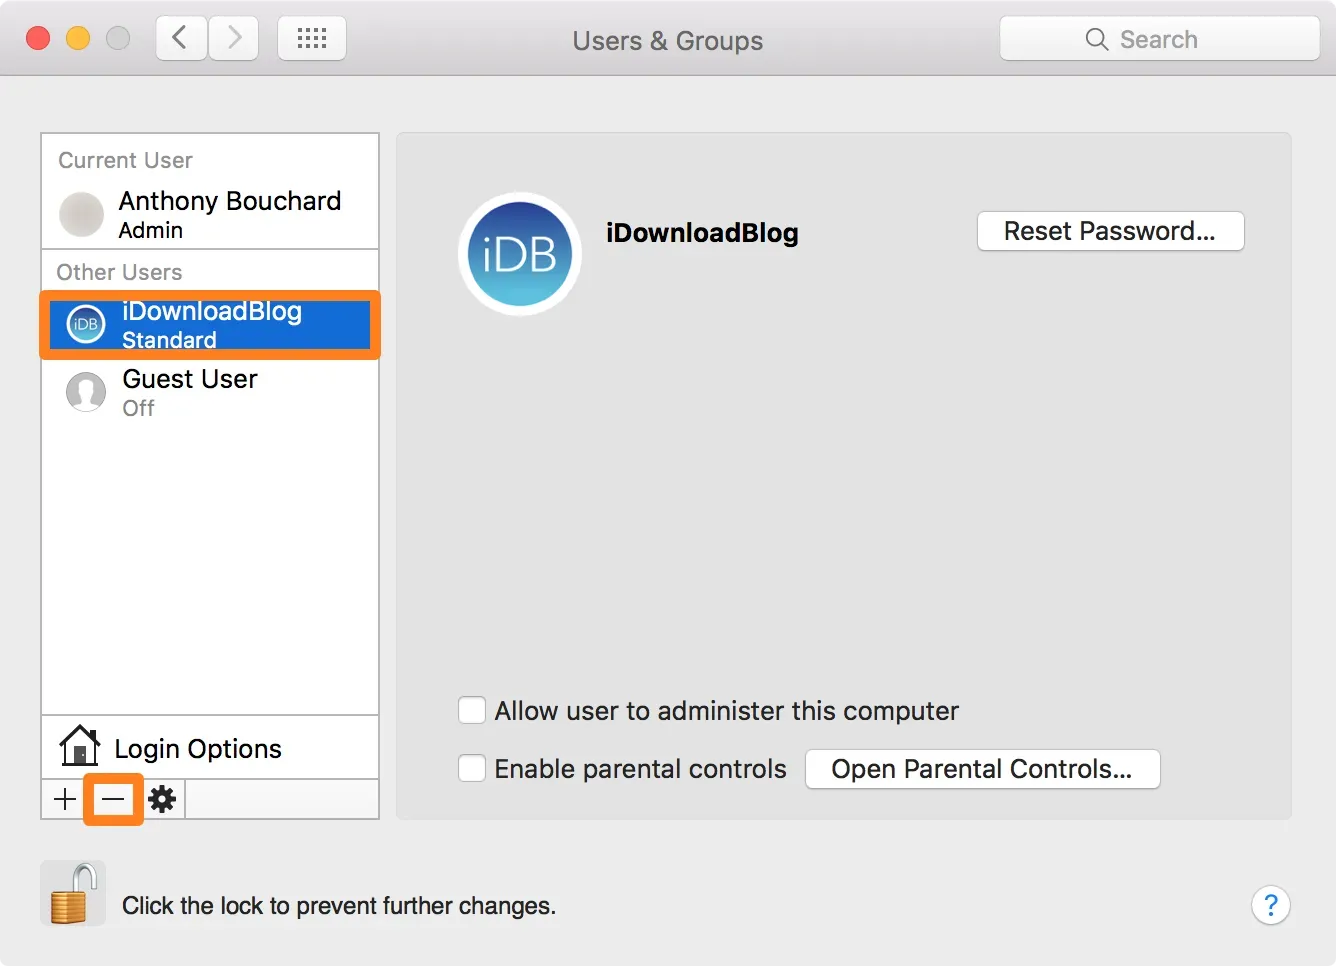
1) Open System Preferences in macOS Monterey or earlier and navigate to the Users & Groups preference pane.
2) Then click the lock button at the bottom of the Users & Groups preference pane to unlock it.
3) When prompted, enter your administrator password, then click the blue Unlock button.
4) When you are logged in, select the user account from the list on the left side of the window that you want to delete. In this case, we are removing the default iDownloadBlog user. Then click the minus (-) button at the bottom of the account selection list.

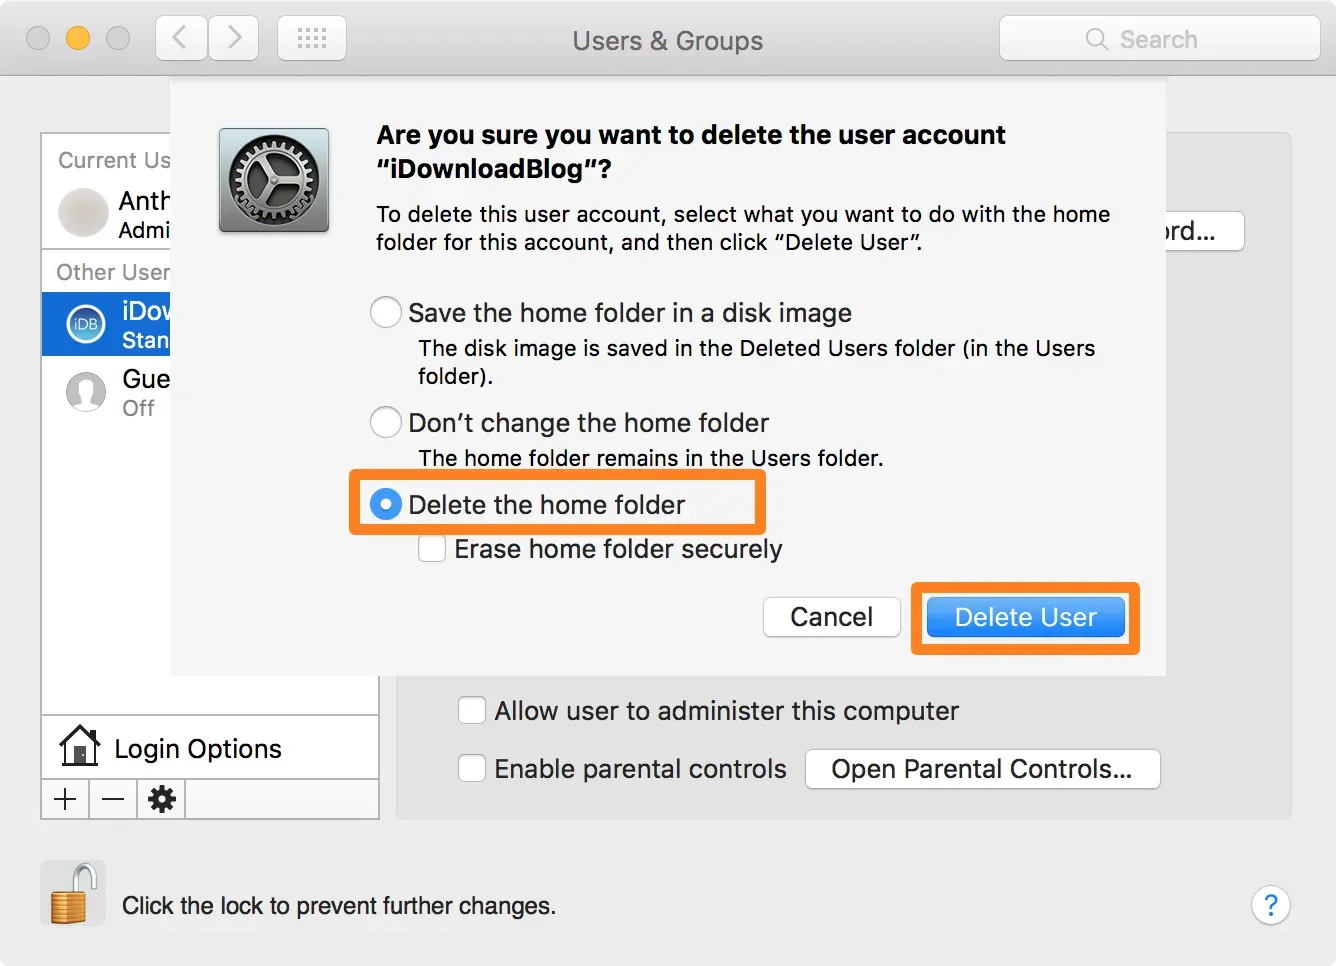
5) Confirm that you want to delete the home folder of the account being deleted by selecting the last option in the prompt that appears, then click the “Delete User”button.

6) After deleting, click the “Lock”button again to lock and save the changes.
Leave a Reply