How to Reduce Image File Size on iPhone and iPad
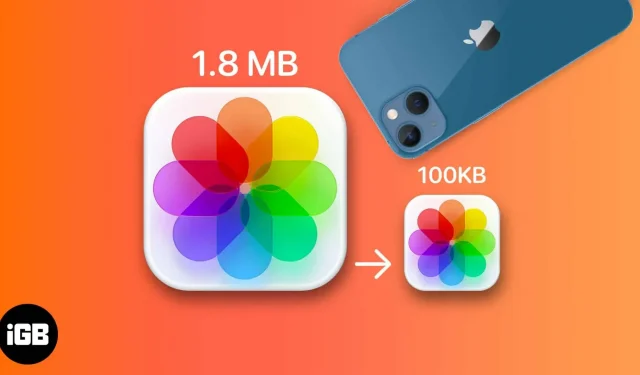
Over the years, we’ve seen iPhone cameras evolve and improve. With big and powerful cameras come great photos and, unfortunately, larger image sizes. One image can take up from 1.5 to 5 MB of space or even more.
There is no easy way to resize images on an Apple device. Luckily, a few workarounds can help you reduce the file size of photos on your iPhone or iPad. I’ll list them all for you below.
- Crop an image in the Photos app
- Change File Format in iPhone Camera Settings
- Use the Shortcuts App to Compress Images on iPhone
- Use Apple Mail to Reduce Image Size
- Use instant messaging apps
- Third Party Apps to Reduce Image File Size
Reasons to change the file size of a photo
- By resizing photos, you can save a lot of space on your device. This is especially useful since the iPhone and iPad don’t have expandable storage.
- Reducing the size of images also helps when you need to email them or share them with others via messaging apps.
- Reducing the image file size may also be necessary when uploading to certain sites.
Crop image in Photos app to reduce file size
Open the Photos app → tap the desired image → Edit → the crop/rotate icon at the bottom of the screen.
Slightly cropping an image can help reduce image resolution. The Photos app lets you crop your image to multiple aspect ratios, but you can crop them manually as well.
Change File Format in iPhone Camera Settings
The best way to avoid all the hassle of compressing or reducing the file size of iPhone and iPad photos is to take pictures with small file sizes.
Devices running iOS 11 and later automatically use High Efficiency Image Format (HEIF) instead of JPEG. The first file size is smaller than JPEG but provides the same quality. Your iPhone or iPad takes images in this file size, but if you’ve unknowingly changed it, here’s how you can turn it back on:
- Open “Settings”→ go to “Camera”.
- Click Formats → select High Efficiency.
The downside is that HEIF/HEIC is not as universally compatible as JPEG. Therefore, you may need to convert your photos to another image format.
Use the Shortcuts App to Compress Images on iPhone
The Shortcuts app is a goldmine for a ton of valuable automation. You have the option to create your own shortcut or upload one instead. I’ll cover both below.
Download ready label
If you don’t want to create your own shortcut (the method mentioned below), downloading a pre-made shortcut is smarter and much easier. Begin:
- Download Change image quality and share label.
- Click “Add Shortcut”and wait while it is added to the shortcuts in your application.
- Open shortcuts → tap on the “Change image quality and share”shortcut. You may be asked to grant the app access to your photos. Just click Allow access.
- Select the photo you want to resize → click Add.
- Select your preferred image quality.
- Prompt asking you to allow the shortcut to share images that you have resized. Select “Allow once”or “Always allow”.
- The Share tab will appear → click Save Image.
Create your own photo resizing shortcut
Creating your own shortcut allows you to reduce the image file size on your iPhone or iPad according to your preference; plus promises to be a safer and more private method:
- Open Shortcuts → click the Add (+) button.
- Assign a name to the shortcut → click Add Action.
- Select the Categories tab → click Media.
- Scroll down and select “Get images from input”under “Images”.
- Press the blue button at the top → enable “Show in Shared Sheet”→ select “Done”.
- Drag the Media selection up and select Resize Image under Image Editing.
- You can change the following:
- Click “Size”and change the options by which you want to resize. You can select “Ask every time”to manually enter it each time the shortcut is launched.
- 640 is the default width set by the label. You can change it to your desired width. You can change it to 1080, which is the standard value for Instagram posts.
- Do not change Auto Height so that your device can find the correct height to maintain balanced proportions. This ensures that the resized images you create with the shortcut don’t look stretched or strangely compressed.
- Click “Done”in the menu above the keyboard.
- Drag the Media selection again and select Convert Image under Images. If you want to change the file format of the resized image, tap JPEG and select your preferred format.
- Drag the media up one last time, then click “Save to Photo Album”in the “Photos”section. By default, the resized image will be saved to Recent. You can change the destination folder by tapping “Recent”and selecting a different album.
- Press the Exit button (x).
To launch the shortcut, select an image from your photo library. Tap the Share icon at the bottom of the screen. Scroll all the way down and select Resize Images. A hint will tell you that your image has been resized successfully.
Use Apple Mail to Reduce Image Size
Another option is to reduce photos without cropping them. You can quickly reduce the file size of images by sending them using Apple Mail. Here’s how:
- Go to Photos and select the image or images you want to resize.
- Tap the Share icon → select Mail from the sharing options.
- Enter your email address → click Submit.
- A pop-up window will appear with information about the size of the image and the option to reduce the size to Small, Medium, Large, or keep the actual size. Mail will send your photo as soon as you select one of the options.
- Open Mail and upload the resized image.
Use instant messaging apps to compress the image
Perhaps you have already noticed or at least been frustrated by how most messaging apps drastically reduce the resolution and quality of the photos you upload? You can do the same with photos that need to be resized.
Just send the photos to yourself on any instant messaging app like WhatsApp, Telegram or Facebook Messenger. You can also use the same method to reduce the size of your videos.
Third Party iOS Apps to Reduce Image File Size
There are also plenty of third party apps you can try out. Below I will talk about the most reliable options.
1. Image size
- Price: Free (offers in-app purchases)
- Ratings: 4.7/5 (24.6k ratings)
- Compatible Devices: iPhone, iPad, Mac and iPod Touch.
An app like Image Size makes it easy to resize a photo on your iPad or iPhone to any size you want.
- Download the Image Size app .
- Tap the Photo icon to import the image you want to resize. Click “Allow Access”to allow the app to access your photo library.
- Select your photos → click Select.
- Select pixels, millimeters, centimeters or inches for your image resizing options. Enter values in the Width and Height sections.
- Move, reposition or scale the image as you wish. You will also see the difference in the size of the original and compressed image below the photo.
- Tap the Load/Save icon in the lower left corner of the screen.
2. Compress photos and images
- Price: Free (offers in-app purchases)
- Ratings: 4.7/5 (15.6k ratings)
- Compatible Devices: iPhone, iPad, Mac and iPod Touch.
Compress Photos & Pictures is another app that will help you quickly resize images. What’s great about this app is that it compresses your iPhone and iPad photos without an internet connection.
- Download Compress photos and images.
- Give the app access to your photo library. Select the photos you want to resize → click Next.
- Move the photo quality and photo size sliders. When everything is satisfied, click Compress.
- After that, the application will show the original file size and the file size of the compressed image.
- Click Delete Original if you don’t want to keep the original photo. Otherwise, select Keep original.
Video: Resize or Reduce the File Size of a Photo on iPhone and iPad
FAQ
There are several ways to reduce the size of files on your iPhone. You can compress files and folders in Files. For images, you can use the Shortcuts app to resize the images. You can crop photos, email them, or use a third party app.
To check the file size of your photo, simply view the photo in the Photos app and click the Info (i) button. You can also swipe on an image to reveal camera information, including the file size of the photo.
You can crop the image or send it to your mail or messaging app like Whatsapp and Telegram. You can also use the shortcut to automatically resize the image.
I hope I was able to help you with this guide – let me know if you find any other way to compress photos on your iPhone or iPad. Save space on your device or increase the file size and print your memories – now it’s up to you.
Completion…
You may need to downsize photos on your iPhone or iPad to free up space on your device. It can also help you transfer images from one device to another or share them with people and friends.
Whatever your reason, you can try one or more of the tips above so that you no longer have to worry about large file sizes and enjoy saving more memories on your device.
Leave a Reply