How to install and set up Cortana on Windows 11
Cortana is the virtual assistant that you get with Windows. It first appeared in Windows 10 and worked as an assistant for Windows users to help them complete their basic tasks. However, in Windows 11 it is disabled by default. Unlike Windows 10, you don’t get Cortana by default on Windows 11. To use it, you’ll have to re-enable it or install it on your Windows 11 device. If you’re looking for how to install Cortana on Windows 11, you’ve come to the right place.
Setting up Cortana in Windows 11
In this article, we will discuss how to install Cortana on Windows 11.
Installing Cortana on Windows 11
Cortana is not excluded from Windows 11, but it is disabled by default. Therefore, you will have to re-enable it to be able to use it on your system.
- Press the Windows key on your keyboard and then from the Start menu, search for Cortana.
- You will see the Cortana app in the search results. Open it.
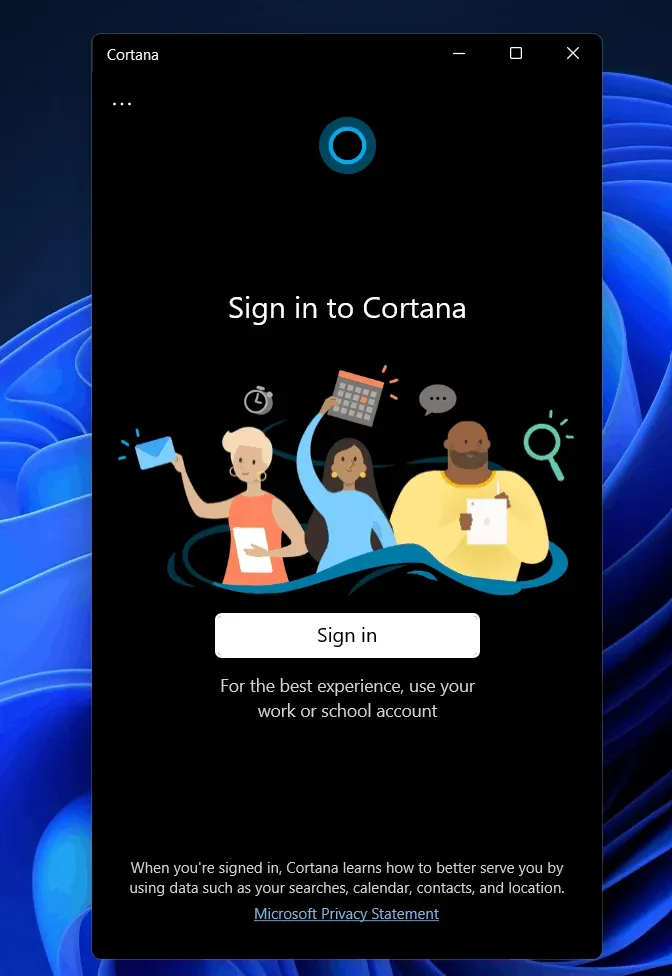
- You will now be prompted to sign in to Cortana. Click Sign In and sign in with your Microsoft account.
- Cortana will then ask you for app permission. Click on accept and continue.
- This will set up Cortana and you will be able to use it on Windows 11.
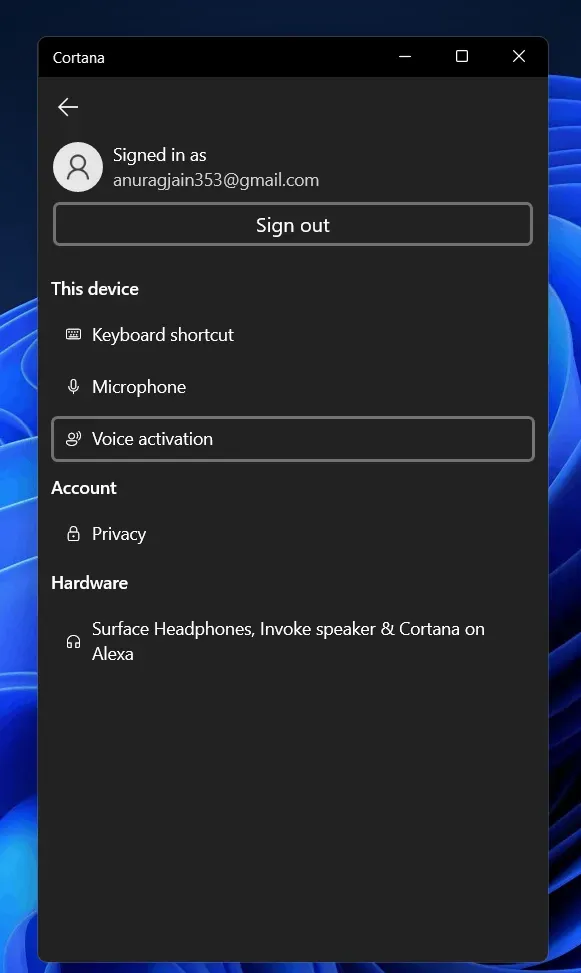
- If you want to control it with your voice, you will have to enable voice activation.
- Click on the three ellipses in the top left corner of the Cortana window and then click on Voice Activation.
- It will ask you to give voice permissions. Click on voice activation privacy settings.
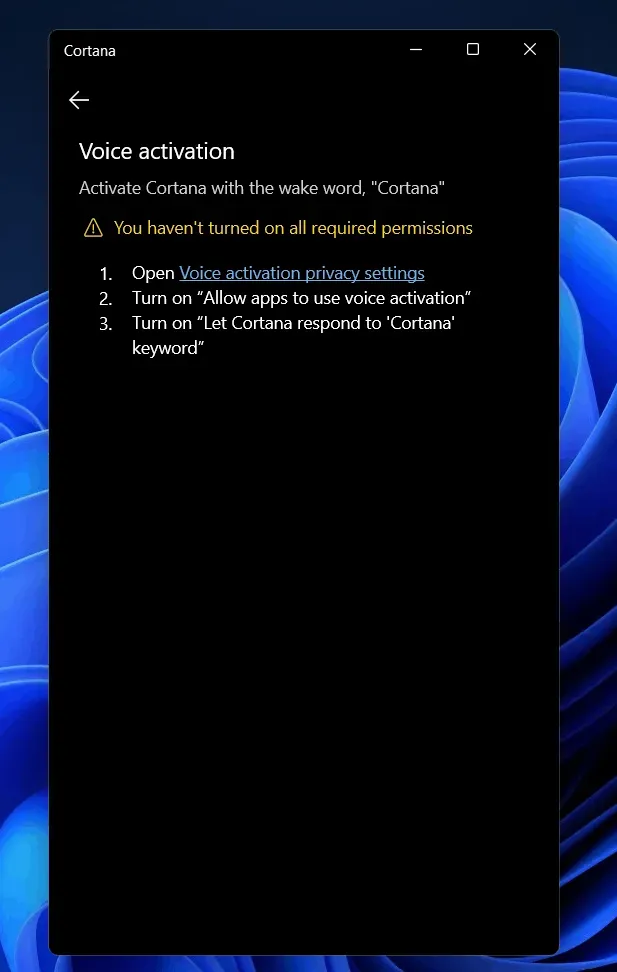
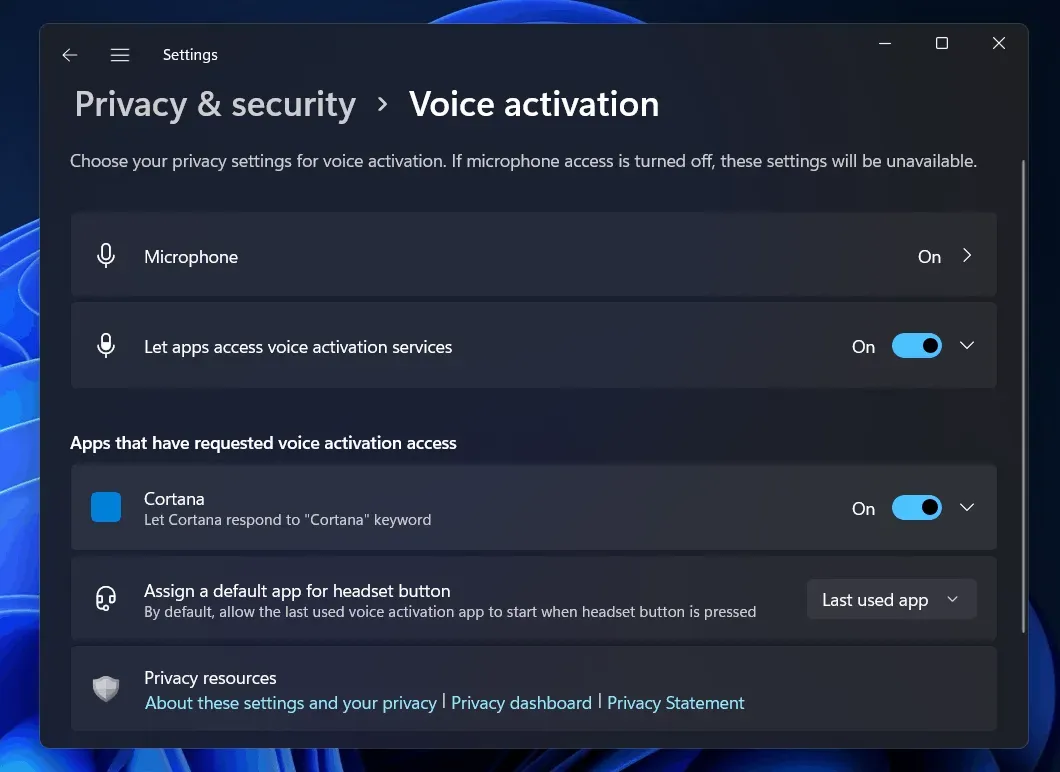
- You will be taken to the voice activation section in the settings app. Scroll down here to find Cortana.
- Now turn on Allow Cortana to respond to the “Cortana”keyword toggle. After turning on this switch, you can access the voice assistant with a voice command.
How to use Cortana in Windows 11
If you didn’t find the Cortana app in the search results as mentioned in the second step, follow the steps given below:
- From the Start menu, find the Microsoft Store and open it.
- Search the Microsoft Store for Cortana. Click on the very first option that appears.
- Now click “get/install”. This will download and install Cortana on your computer.
- After installing Cortana, close the Microsoft Store.
- From the Start menu, search for Cortana and open it. Now you will need to set it up. Follow the steps above to set up Cortana and access it anytime.
Final words
Cortana hasn’t disappeared from Windows 11, but it’s disabled by default. If you want to use it, you must first activate it. You can do this by following the methods described in this article. If Cortana is not available on your PC or if it has been uninstalled, we have already covered how to reinstall it. Let us know if you get stuck at any stage.
Leave a Reply