How to block junk emails in iCloud: iPhone/iPad 2022
Most people associate email with Gmail as it is one of the most widely used email services. However, Apple provides its users with iCloud, which is its own email service. As with Gmail, iCloud accounts can also be targeted by spam. If you receive too much spam and junk emails, you may be missing an important iCloud email.
To avoid such situations, you can identify some of the most common email IDs that you receive spam from and block them in iCloud.
How to block unwanted emails in iCloud
In this method, we will provide you with the steps by which you can redirect all emails from a specific email ID to Trash in iCloud. This will help you protect your mailbox from spam and unwanted emails.
Step 1. On your PC, launch a web browser and go to the iCloud official website.
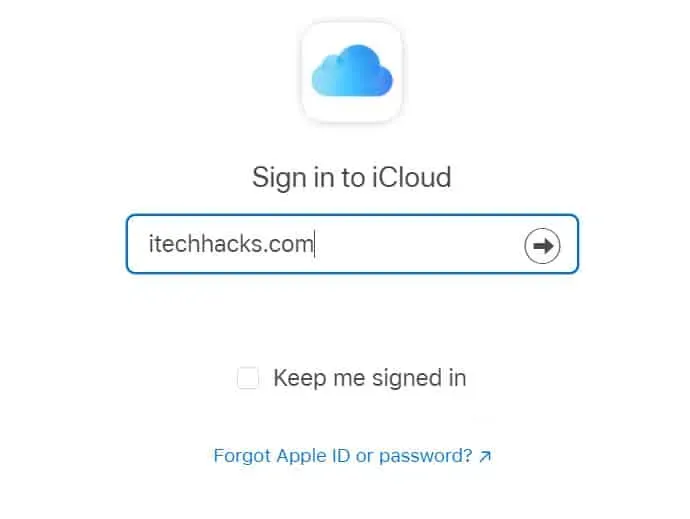
Step 2. Now sign in to your iCloud account by entering your Apple ID and password.
Step 3. Once you are signed in to your iCloud, click the “Settings”icon located at the bottom left corner of the window.
Step 4. Select “Rules”from the list of options that appear on your screen.
Step 5. You will see a new window on your screen. Go to the “Rules”tab in this window and click on the “Add Rule”option highlighted in blue ink.

Step 6: Now click on the first dropdown box and select the “from”option. Then enter the email ID you want to permanently block iCloud. From the next drop-down list, select the Move to Trash option and click Done.
Step 7 You will notice that a new entry has been made in the Rules section of the Settings window. Finally, click “Done”to permanently block emails from a specific email ID in iCloud.
If you want to permanently block emails with more than one iCloud email ID, repeat all of the above for the next email ID.
Now all emails from the email IDs you added in the rules will be sent directly to the trash, keeping your inbox clean.
Also, if you want to edit or delete a rule, you can go to Settings >> Rules. Here, click the “i”icon located next to the rule to manage it.
Conclusion:
Here’s how you can permanently block emails in iCloud. Blocked emails will be immediately sent to the trash. You can also manage existing rules. If you know of any better way to permanently block email in iCloud, please let us know in the comment section below.
Leave a Reply