How to make the screen stay on longer for Windows, Android, iOS
By default, the Windows screen timeout is very low, and sometimes it can be annoying when you study on your smartphone, laptop, or PC. This happens when Windows thinks we are inactive and not using the system. If you’re online or running on battery power, Windows 11 will automatically shut down after five minutes.
However, while these power-saving features are helpful, waking up the screen whenever you’re reading on the screen of your smartphone or PC is annoying. So, is there a way to make your screen stay on longer ?
Well, that’s all this guide is about. Here you will learn how to extend screen time . So, without further ado, let’s move on to the guide.
Content:
- 1 How to change screen timeout using different methods on Windows PC?
- 2 Change screen timeout using different methods on android device
- 3 How to change screen timeout in different ways on iPhone?
How to change screen timeout using different methods on Windows PC?
Luckily, our team has put together some information on how to make your screen stay on longer , which will surely help you increase your screen timeout. So, if you are looking for such methods, be sure to read this guide and apply the steps we have mentioned further in this guide. So let’s get started:
Method 1: Use Windows Settings
Changing the screen timeout is not a big deal because there is a special option for that in Windows settings. So follow these instructions and adjust Windows screen timeout with ease. So, let’s go over the necessary steps to set screen timeout on Windows PC:
- Open Windows Settings.
- Click on the System tab and select Power and Battery.
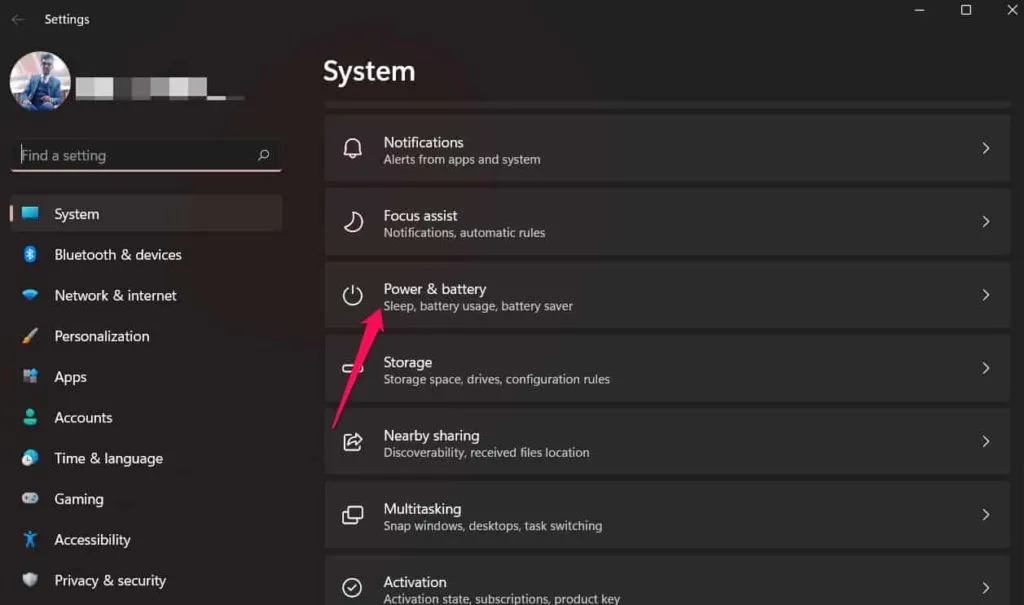
- Now find and expand the Screen and Sleep section.
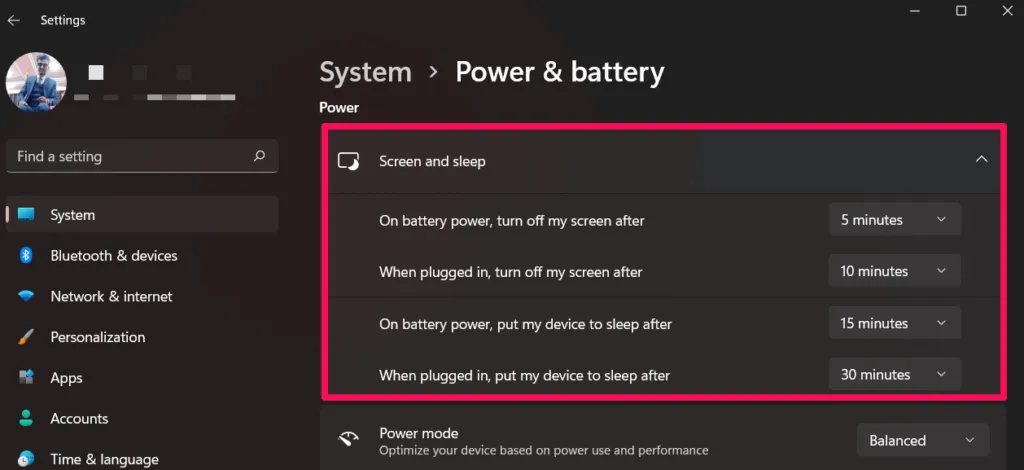
- Finally, you can prevent the screen from turning off by setting the options shown in the figure below to Never.
That’s all. You have now disabled the screen timeout feature on your Windows PC. So now you can enjoy your content without the annoying screen timeout.
Method 2: Use Control Panel Power Options
There is also a way to prevent screen timeout in Control Panel. There is no difference between this and the method mentioned above, but it may be easier to use for those who are used to it. So, if you want to try another method that can give you the same functionality, you can use this method by following the steps given below:
- Open the control panel using the Windows search menu.
- After that, in the Control Panel, find Power Options. Then click on it.
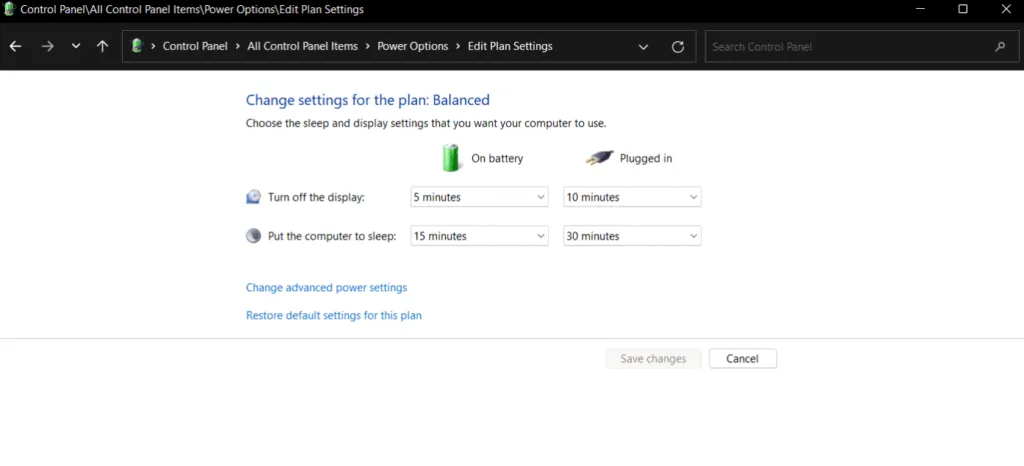
- Now find and click on “Choose when to turn off display”.
- That’s all. Now you should change the screen timeout setting as you wish and click the Save Changes button. We suggest you set it to “Never”.
Method 3: Use advanced power plan settings
There is another option in the Windows system control panel with which you can change the screen time of your screen i.e. e. Advance Power Plan . So, if you want to learn how to make your screen last longer with Advanced Power Plan, be sure to follow these steps:
- First, open the control panel using the Windows search bar.
- Then find Power Options and click on it.
- Now find and click on “Change plan settings”. This option will be located next to your active power plan.
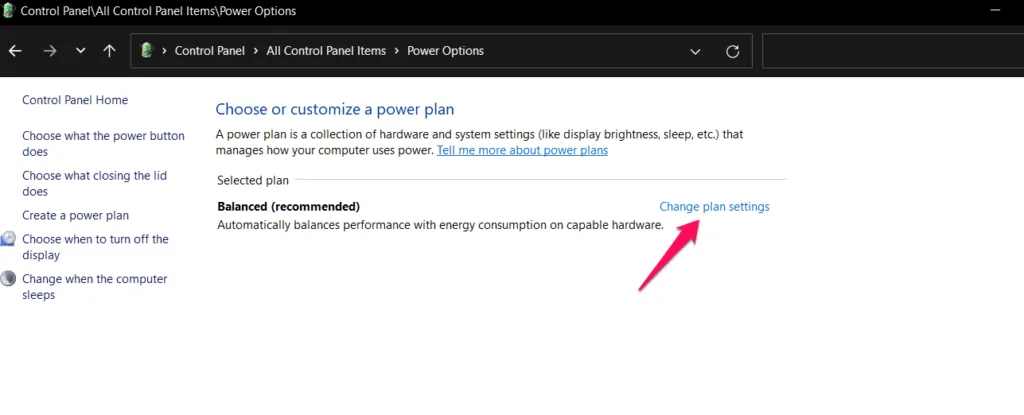
- After that, click on the link “Change advanced power settings”.
- Now just expand the Display tab and then Turn off display after.
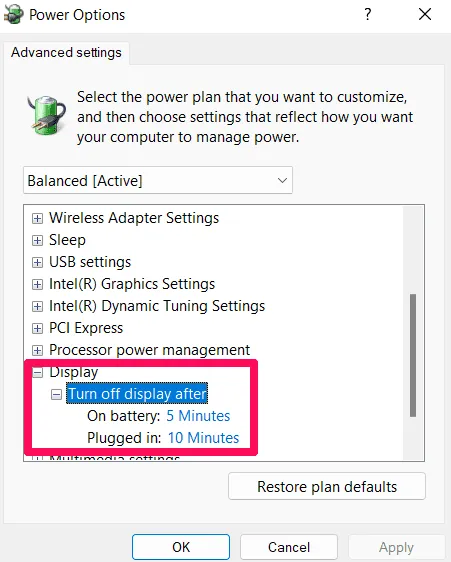
- Then adjust the value to change the screen timeout settings. We advise you to set it to 0 as this will disable screen timeout on your Windows PC.
Method 4: use the command line
Did you know before that you can even use the command line on your device to change your power plan settings? Well yes, we can easily change or disable screen timeout settings using CMD. So, if you want to learn how to extend screen time using the command line, follow these steps:
- First, open a command prompt, giving it administrator rights.
- After that, run this command to change the battery timeout settings (replace X with a value):
powercfg-change-монитор-тайм-аут-DC х
- If you want to disable the timeout setting, run this command when connecting (replace X with 0)
powercfg - изменить -monitor-timeout-ac x
Change Screen Timeout with Various Methods on Android Device
So, as we have already described all the necessary methods through which you can change the screen timeout on Windows PC. So it’s time for Android smartphone users to learn how to make their screen stay on longer on Android devices. So let’s get down to the steps:
- Open the Settings app.
- After that, click on Display.
- Now scroll down and select Lock screen.
- Then find and click Sleep.
- That’s all. Now set the screen timeout period of your choice. We suggest you set it to Never.
How to keep the Android screen on while charging?
While the device is charging, you can keep the screen on by using the screen saver setting. However, although many users are already aware of this feature. But there are a number of users who are still not aware of this feature on Android devices. So don’t worry! Here are the necessary steps to keep the Android screen on while charging:
- Open the Settings app .
- Now go to the Screen tab .
- After that, click on the “ Screen saver” option.
- Finally, select an option, such as Photos or Colors.
- That’s all. Now every time you connect your phone to charge, it starts showing the picture or color that you set up.
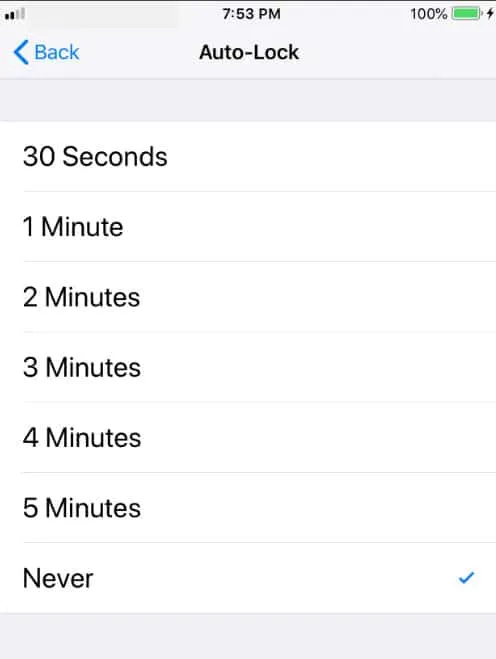
How to change screen timeout using different methods on iPhone?
You can easily check screen timeout on your iPhone. But, let me remind you that in this case, the battery of your iPhone can quickly run out. However, if even after that you want to know how to make the screen stay on longer on your iPhone, follow these steps:
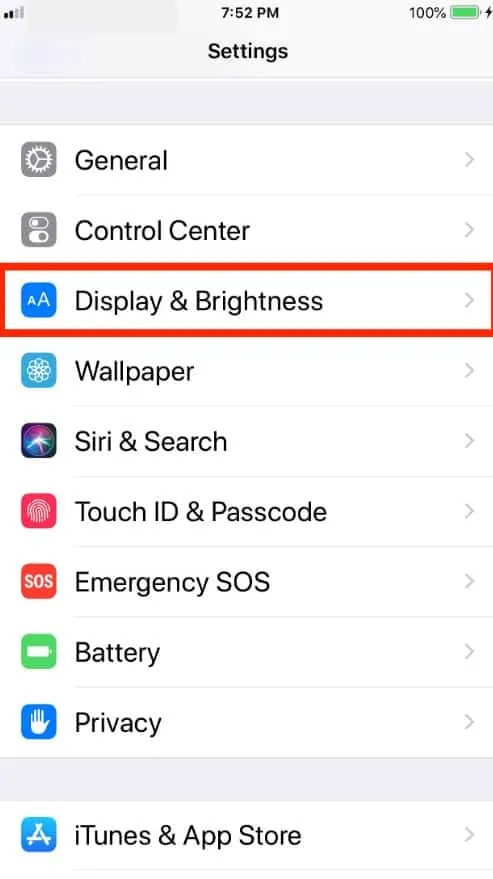
- Open the iPhone Settings app.
- After that, tap on Display and Brightness.
- Now find and click Auto-Lock.
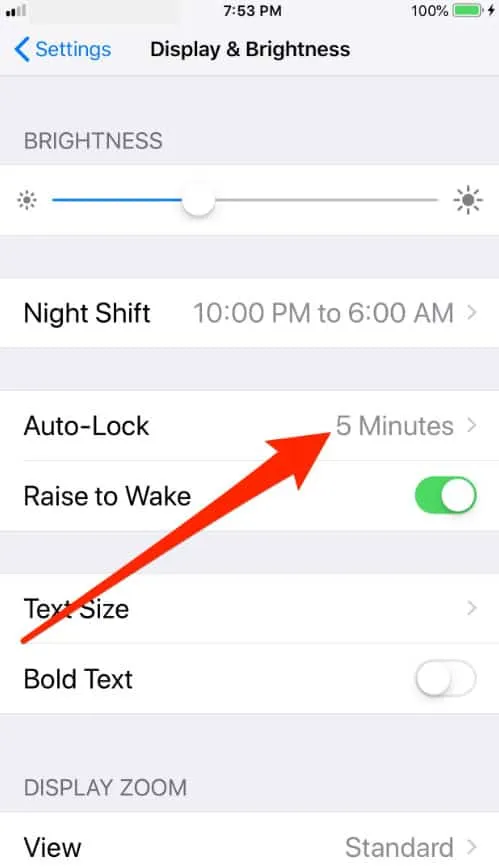
- That’s all. Now install it according to your needs. However, we recommend setting it to Never.
From the author’s table
So, here’s how to make the screen stay on longer on Windows, Android, and iOS devices. Thank you for reading this article. We hope you find it useful. Also, comment below and let us know if you have any doubts.
Leave a Reply