The Complete Guide to Planning Multi-Stop Trips in Apple Maps on Your iPhone
What Apple Maps has always lacked is the ability to add stops along a route when planning a trip. Navigation will help you travel from your starting location to your final destination, and the only places you can add in between will be pit stops like banks and ATMs, cafes, convenience stores, eateries, fast food, gas stations, and car parks. All this has changed in the latest Apple Maps update.
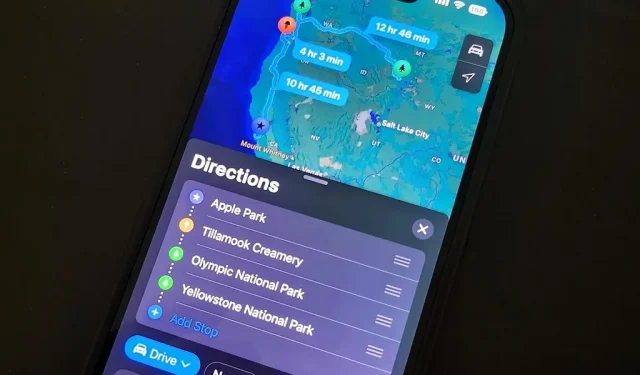
With iOS 16, you finally have multi-stop trip planning tools, so you can create multiple stops along a route when planning a trip – and they can be anywhere, not just pit stops. This is much more efficient than receiving separate sets of destinations for each leg of the trip. It’s now even easier to make changes to routes while navigating.
Step 1. Find out how to get to your first location
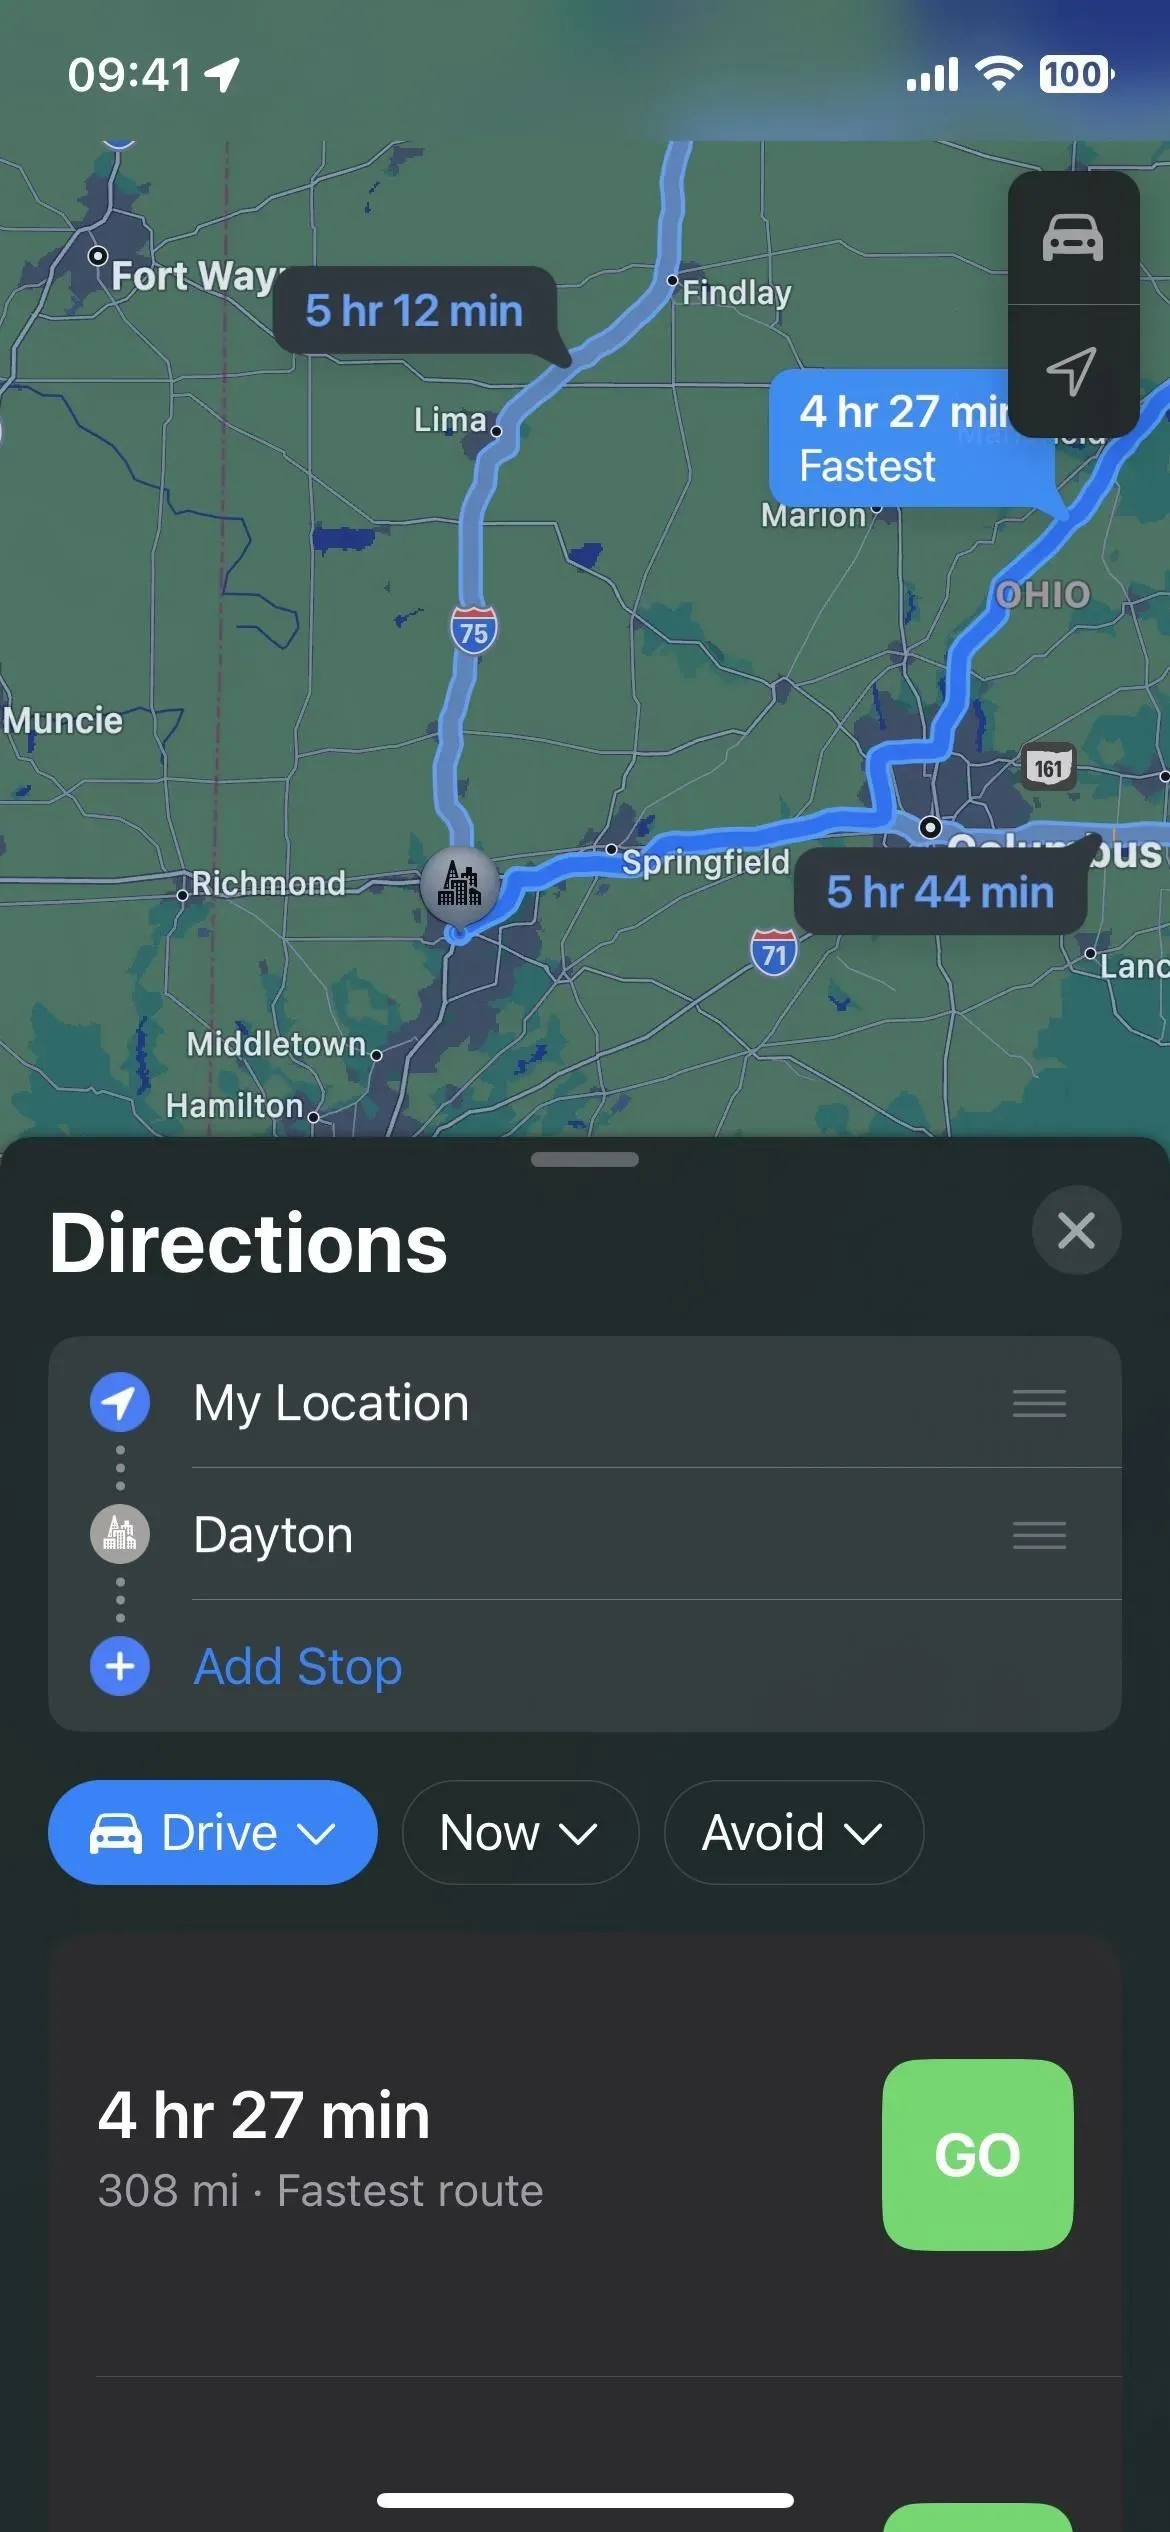
Find the first stop on the route you plan to take, then ask how to get to it, just like in iOS 15 and earlier. It’s easier to add the first scheduled stop first, since Maps will make it the second stop after the starting point.
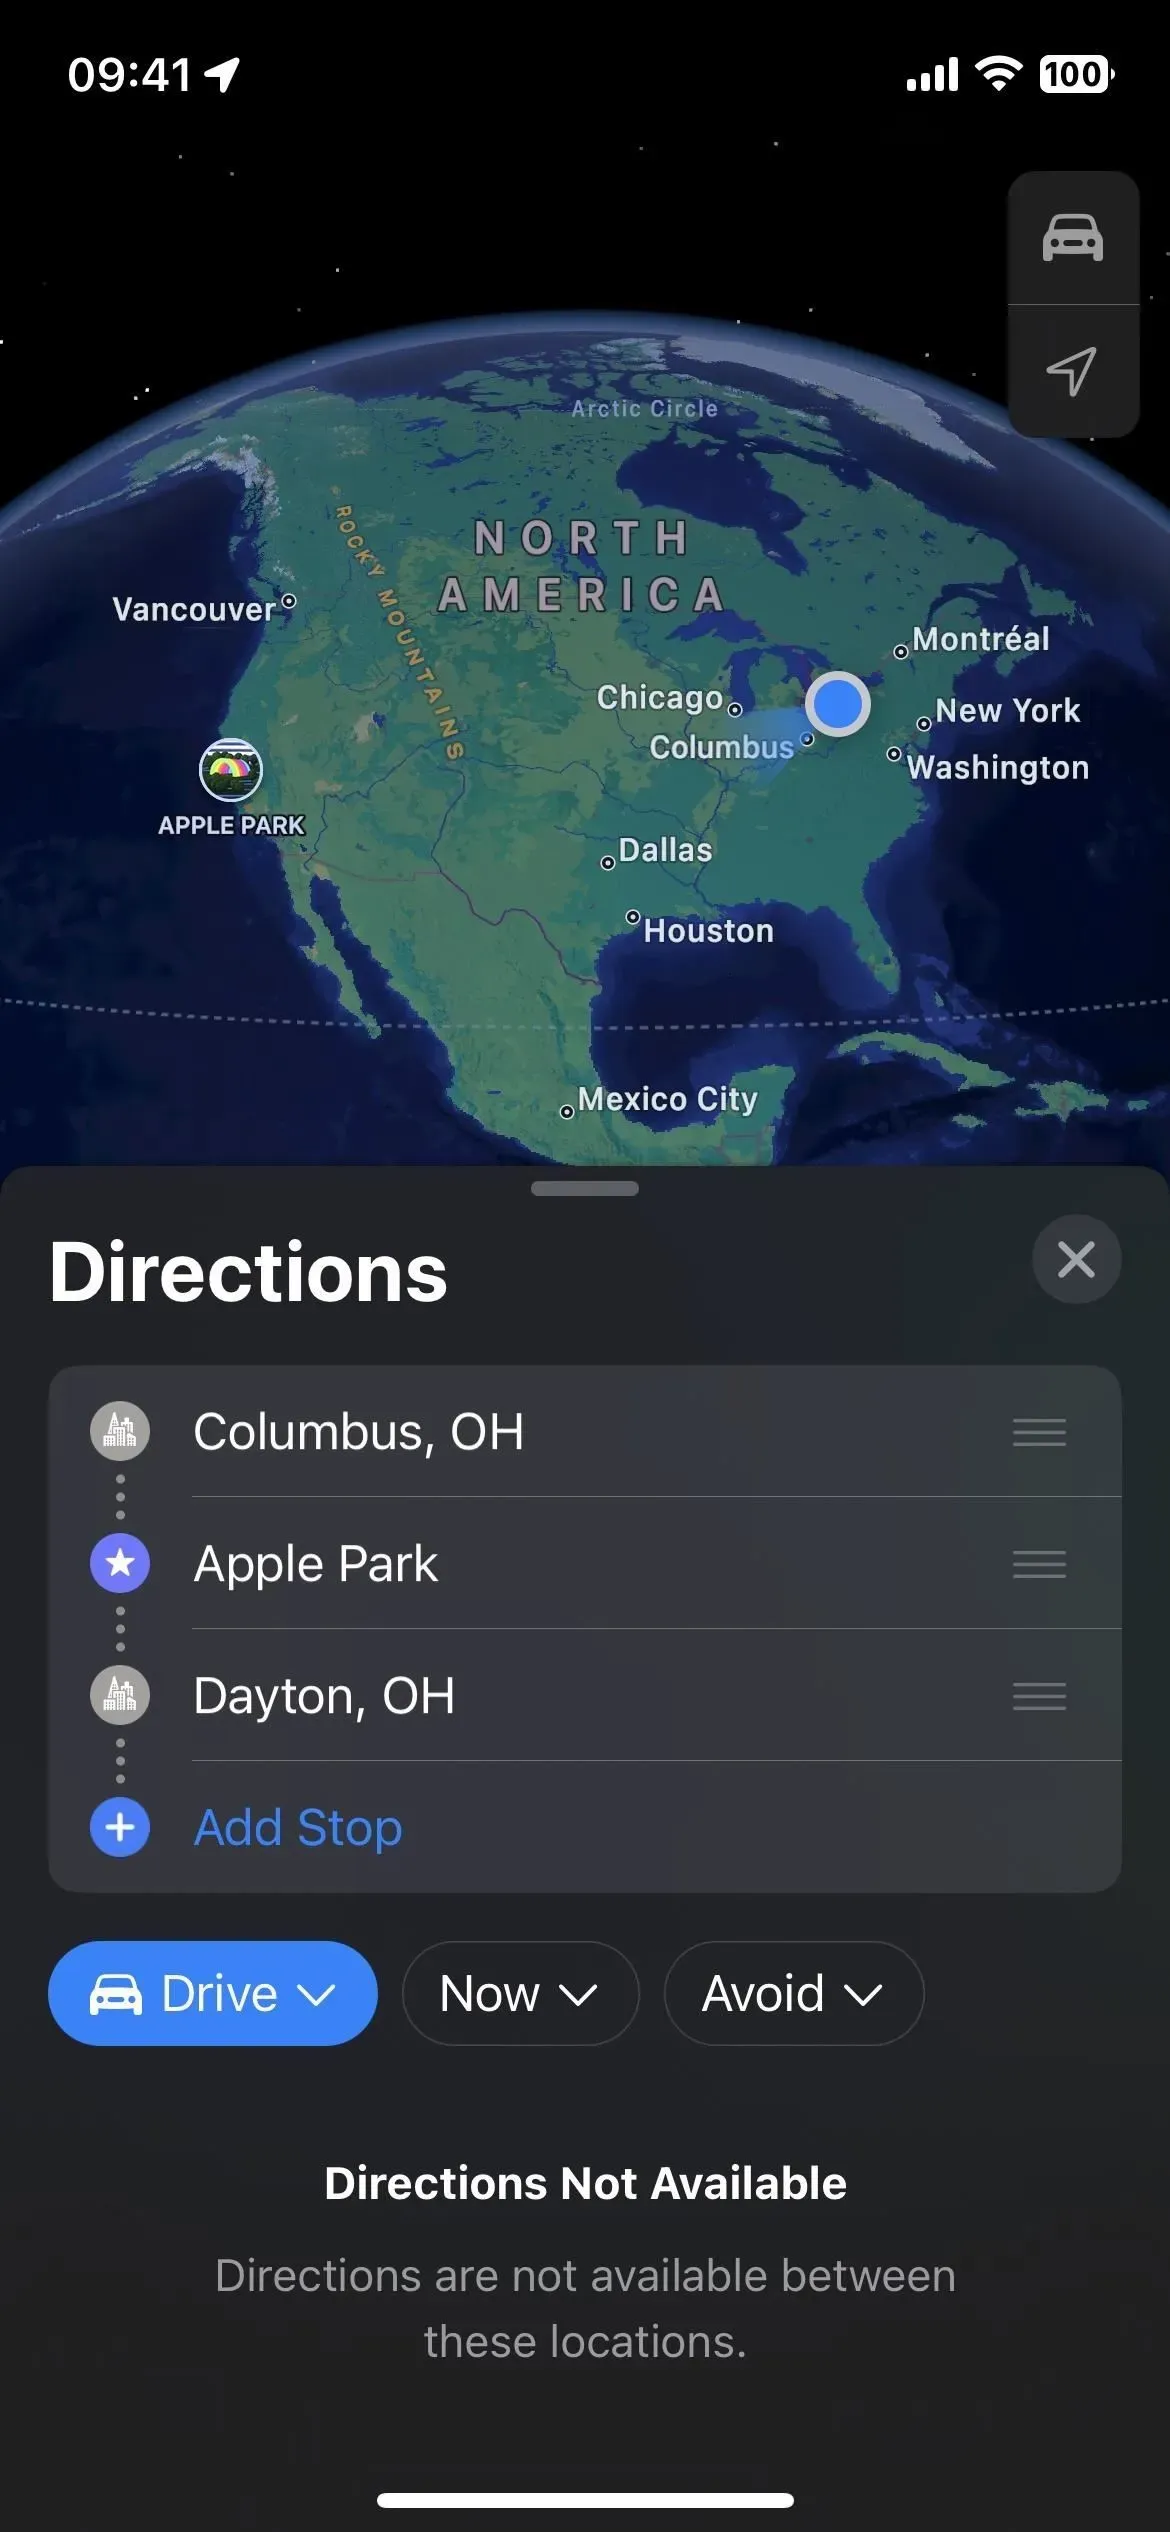
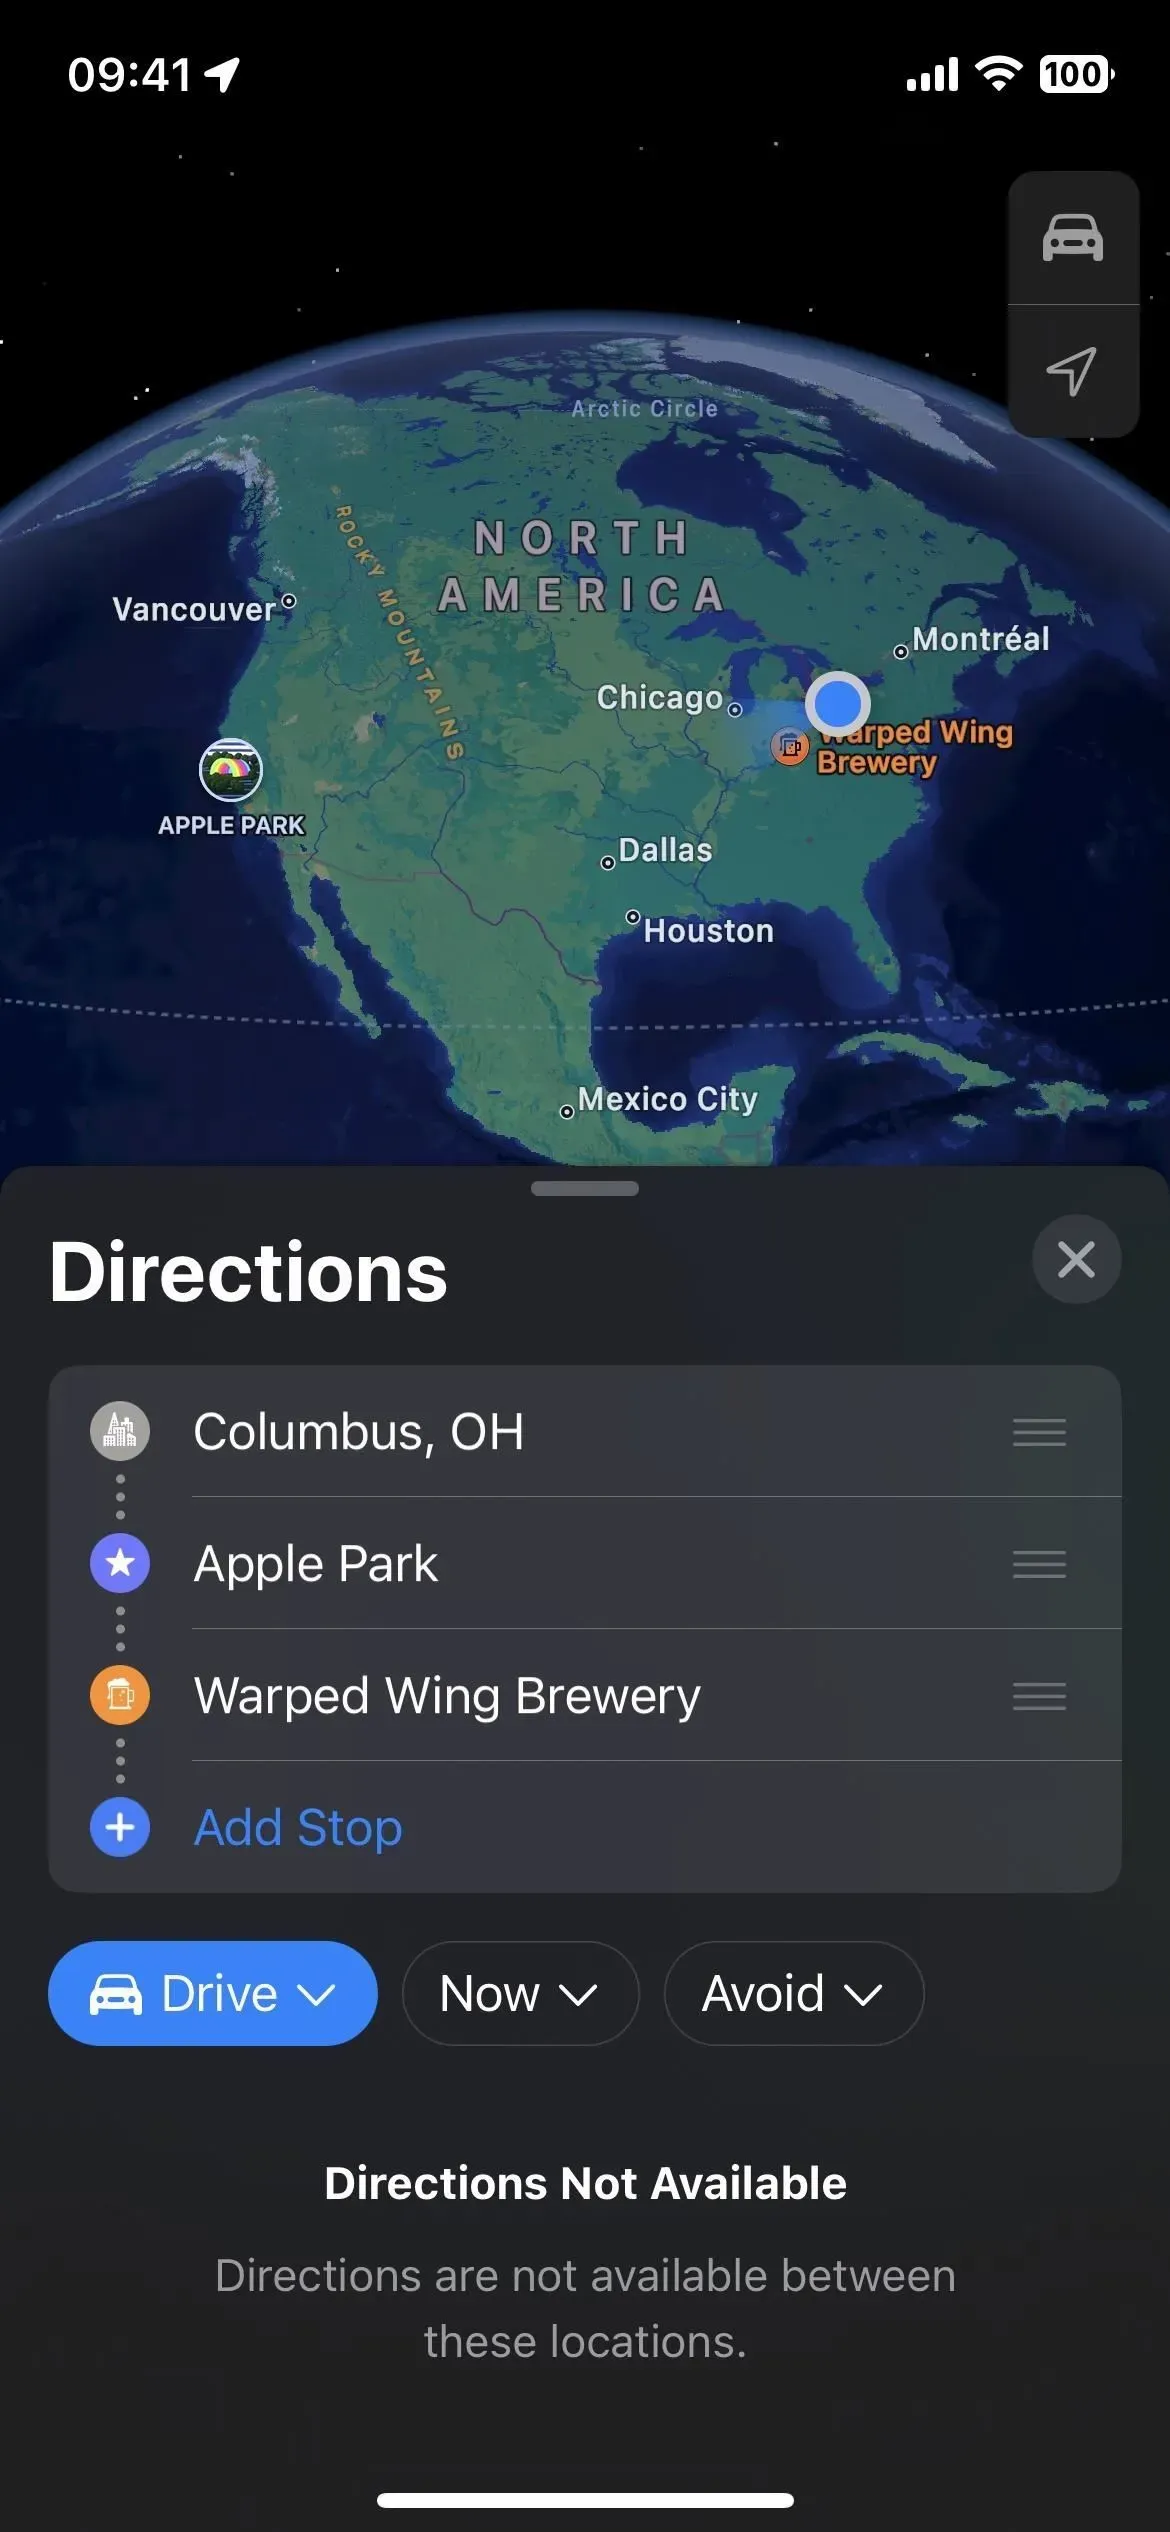
You can choose your final destination or any other place you want to add to your trip, but after adding a third place, you may need to reorder the itinerary (see step 4 below). Otherwise, Maps may not show directions.
For example, if your final destination is 1,500 miles away, and then you add a stop that is close to your current location, Maps will likely tell you that routes between all the selected areas are not available. In this case, changing the order of the trip can help.
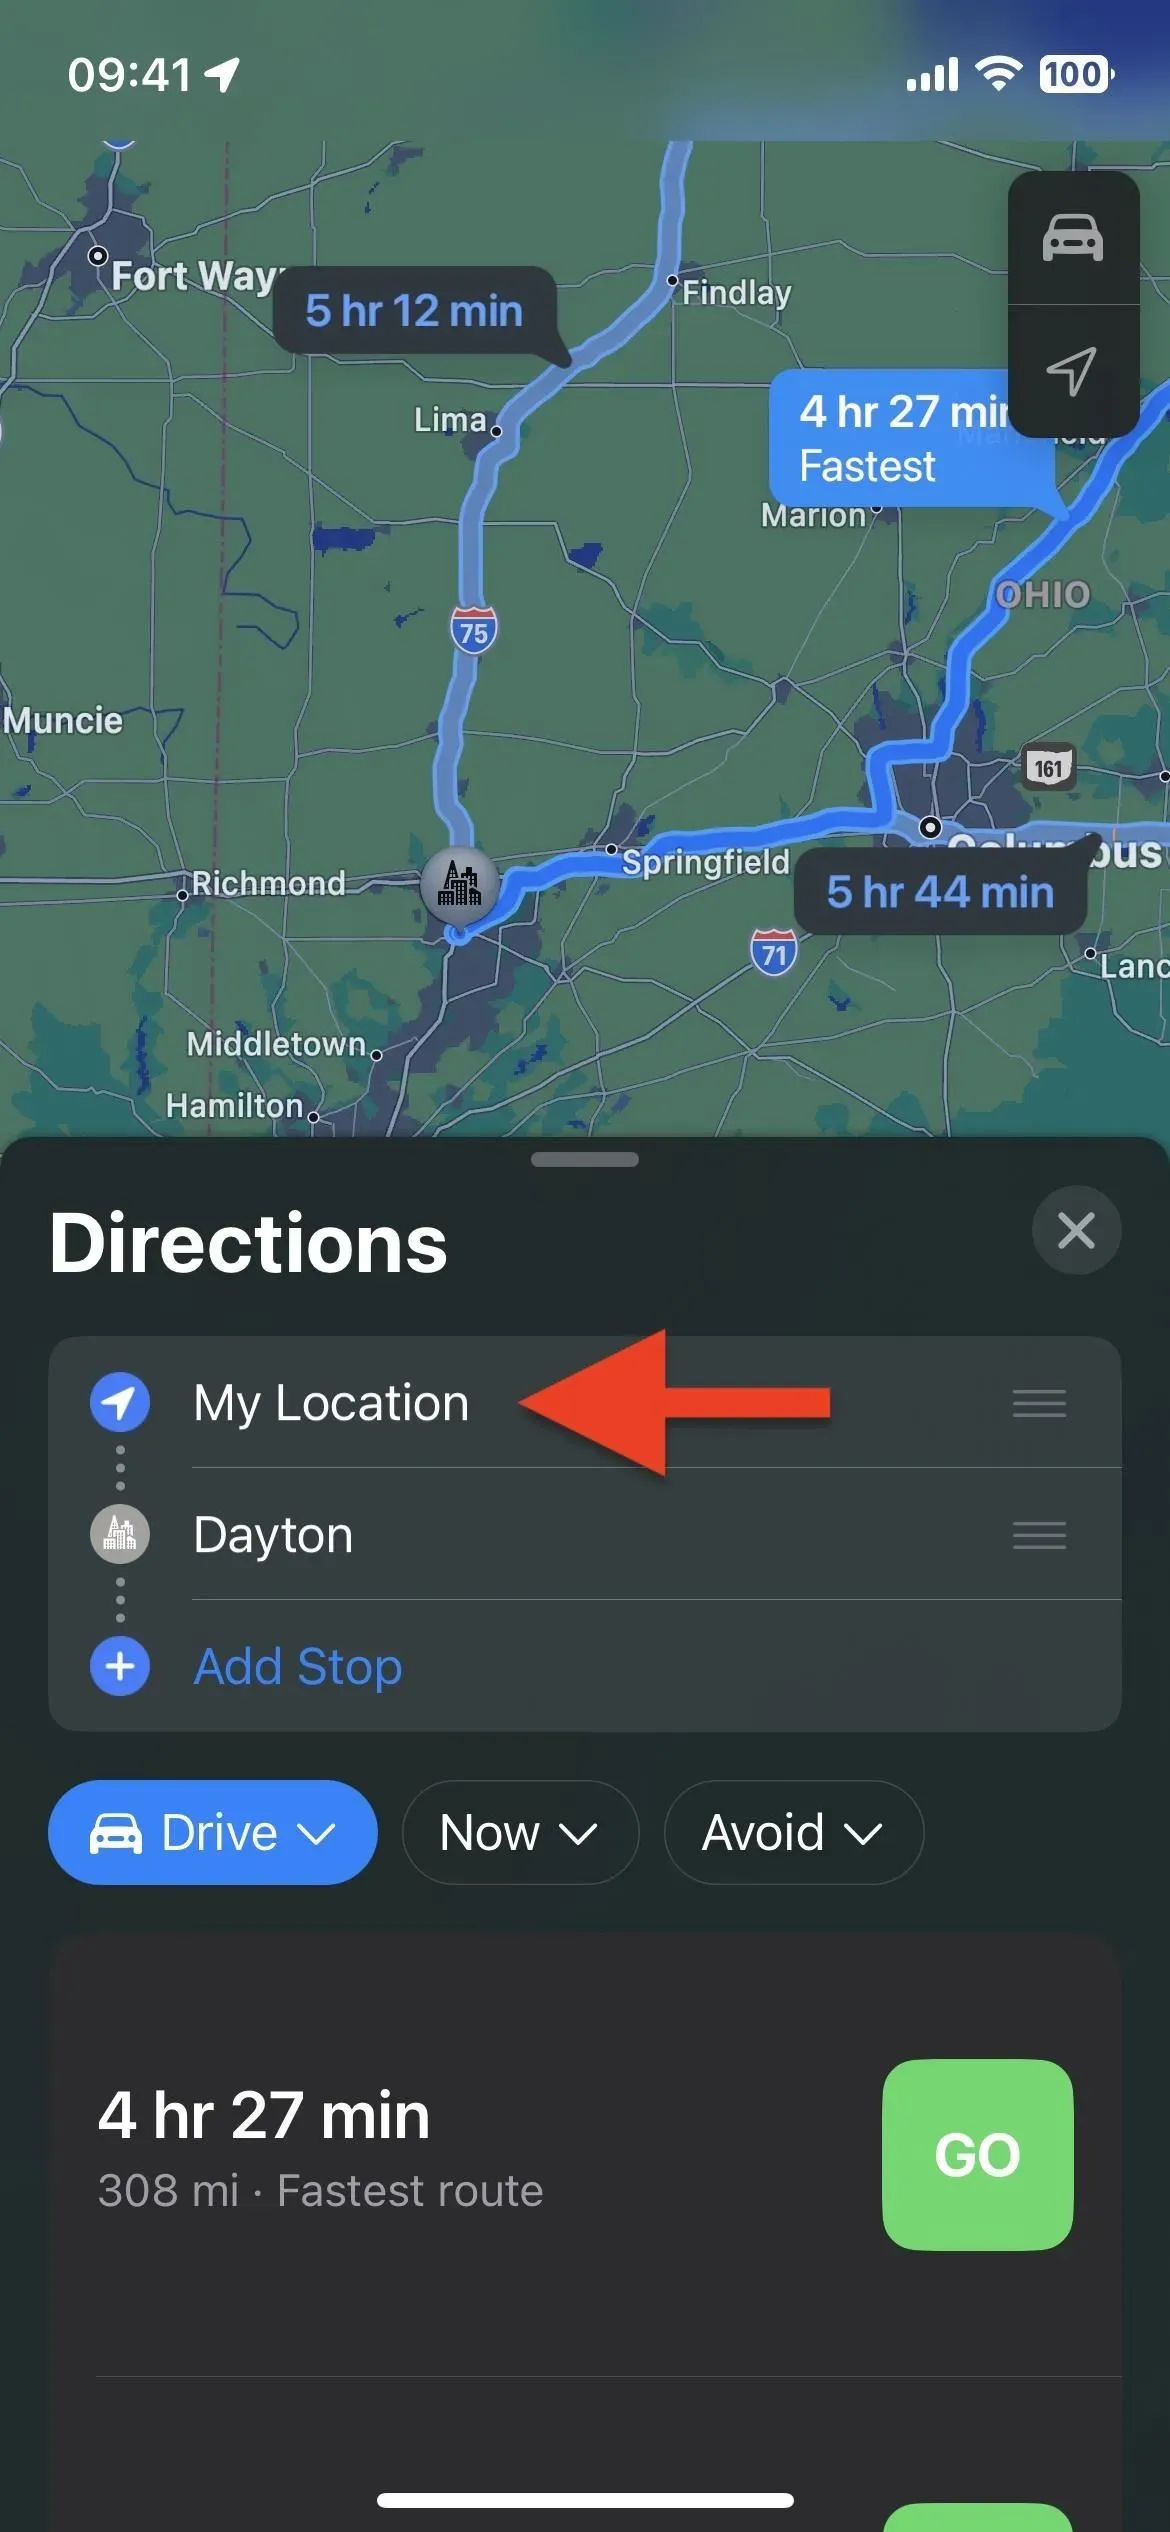
Step 2: Change the starting point if necessary
The default starting point will be your current location, but you can click My Location to find and select a different starting point. You can also add another stop as a starting point, remove My Location, and then move the actual starting point to the top of the list – more on that in a moment.

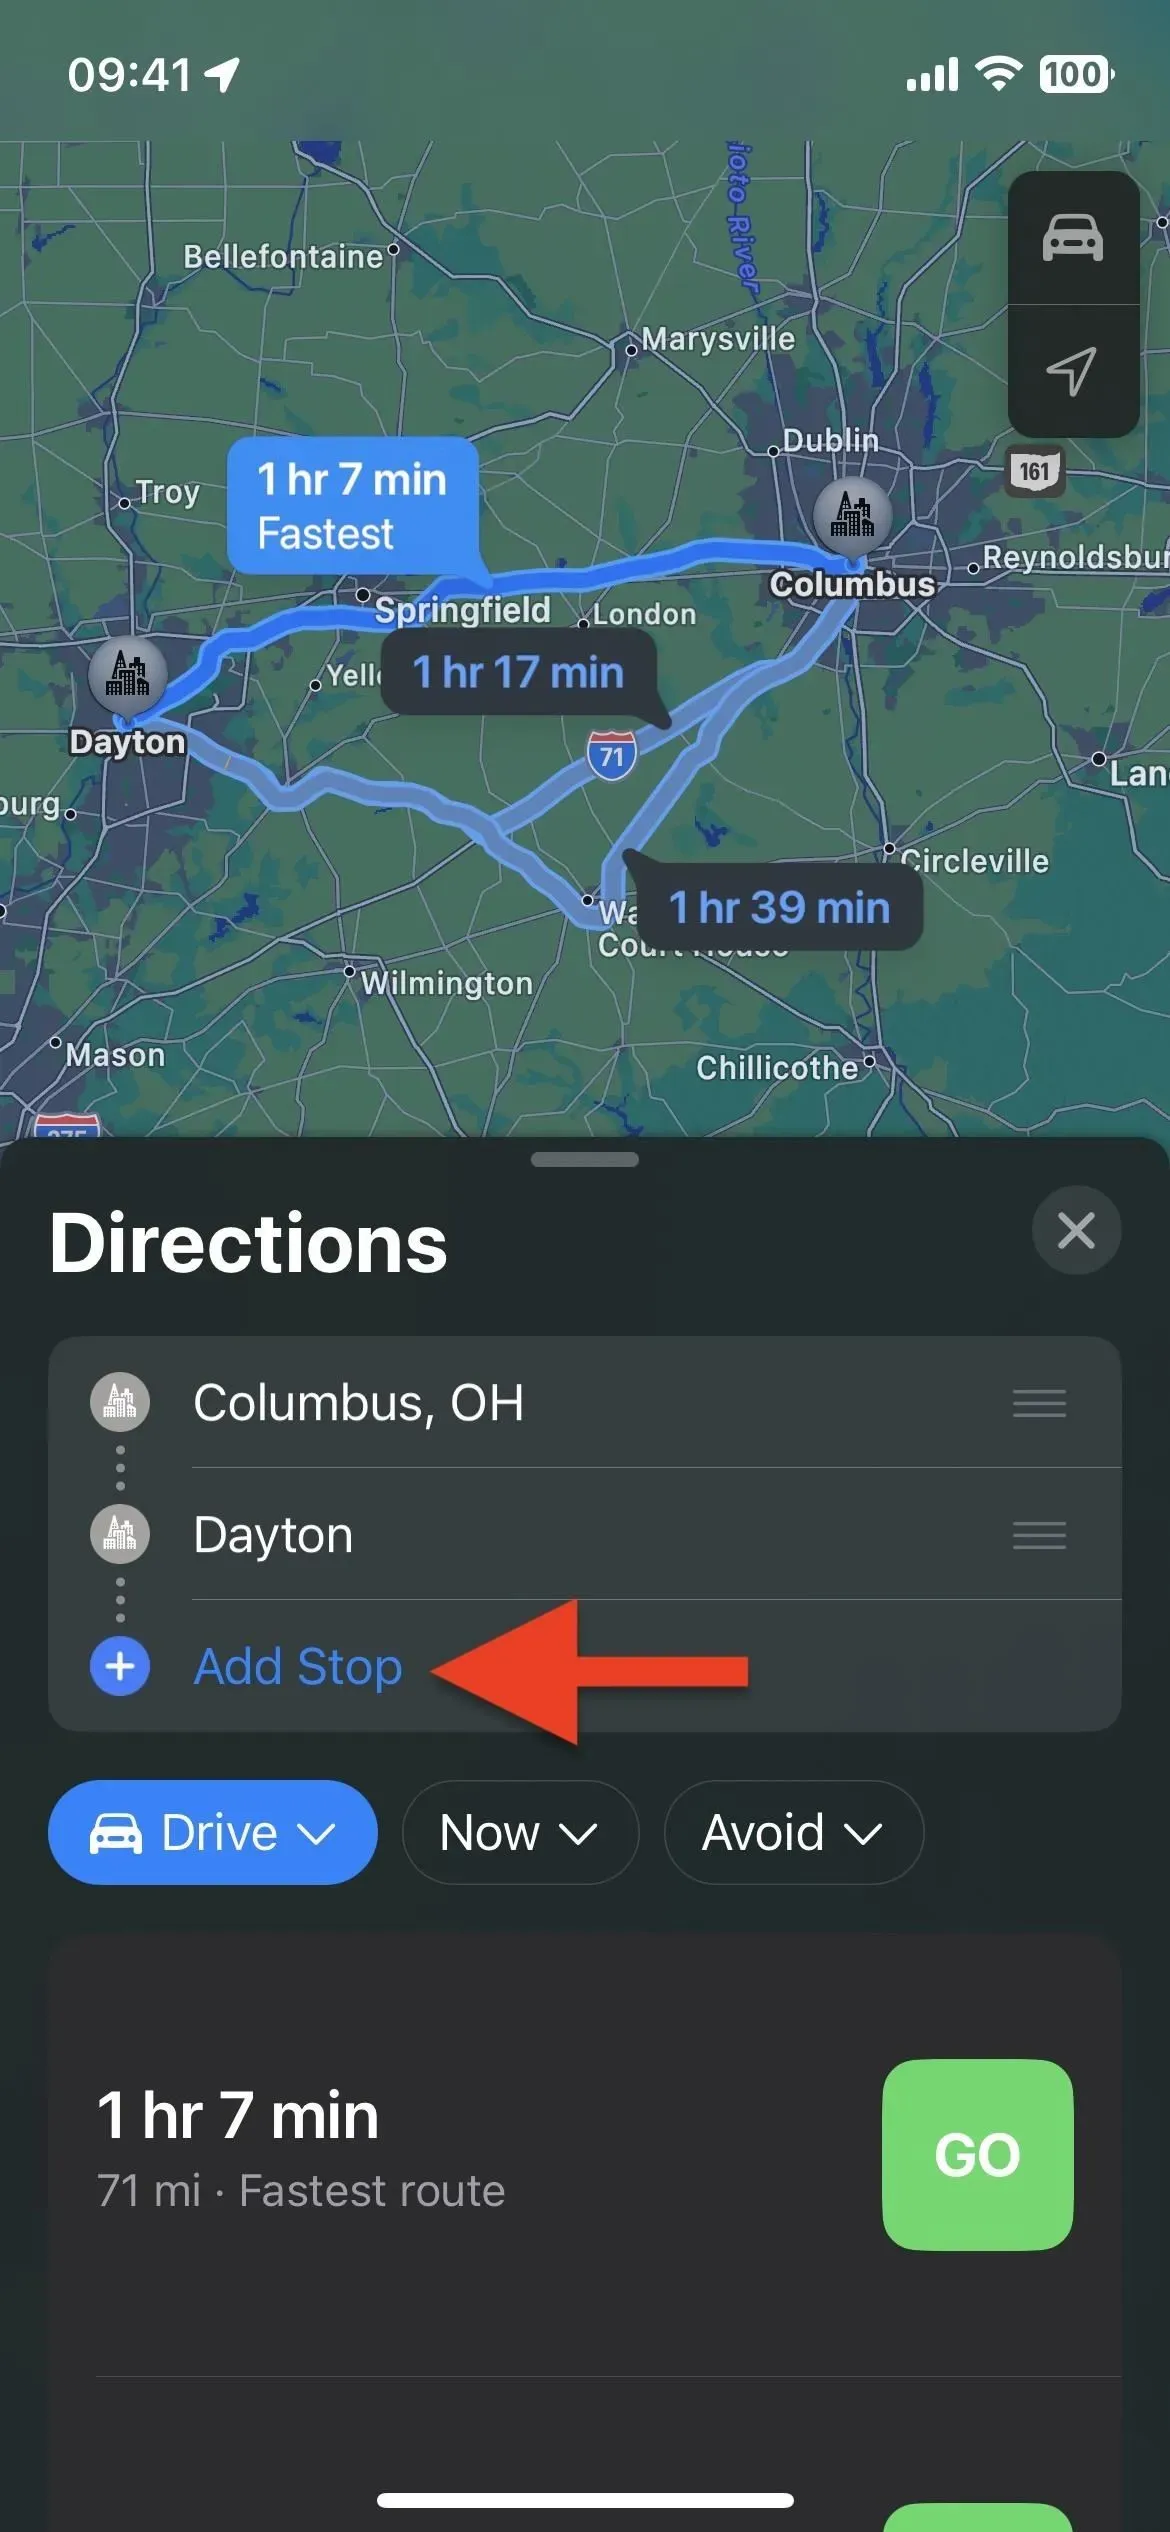
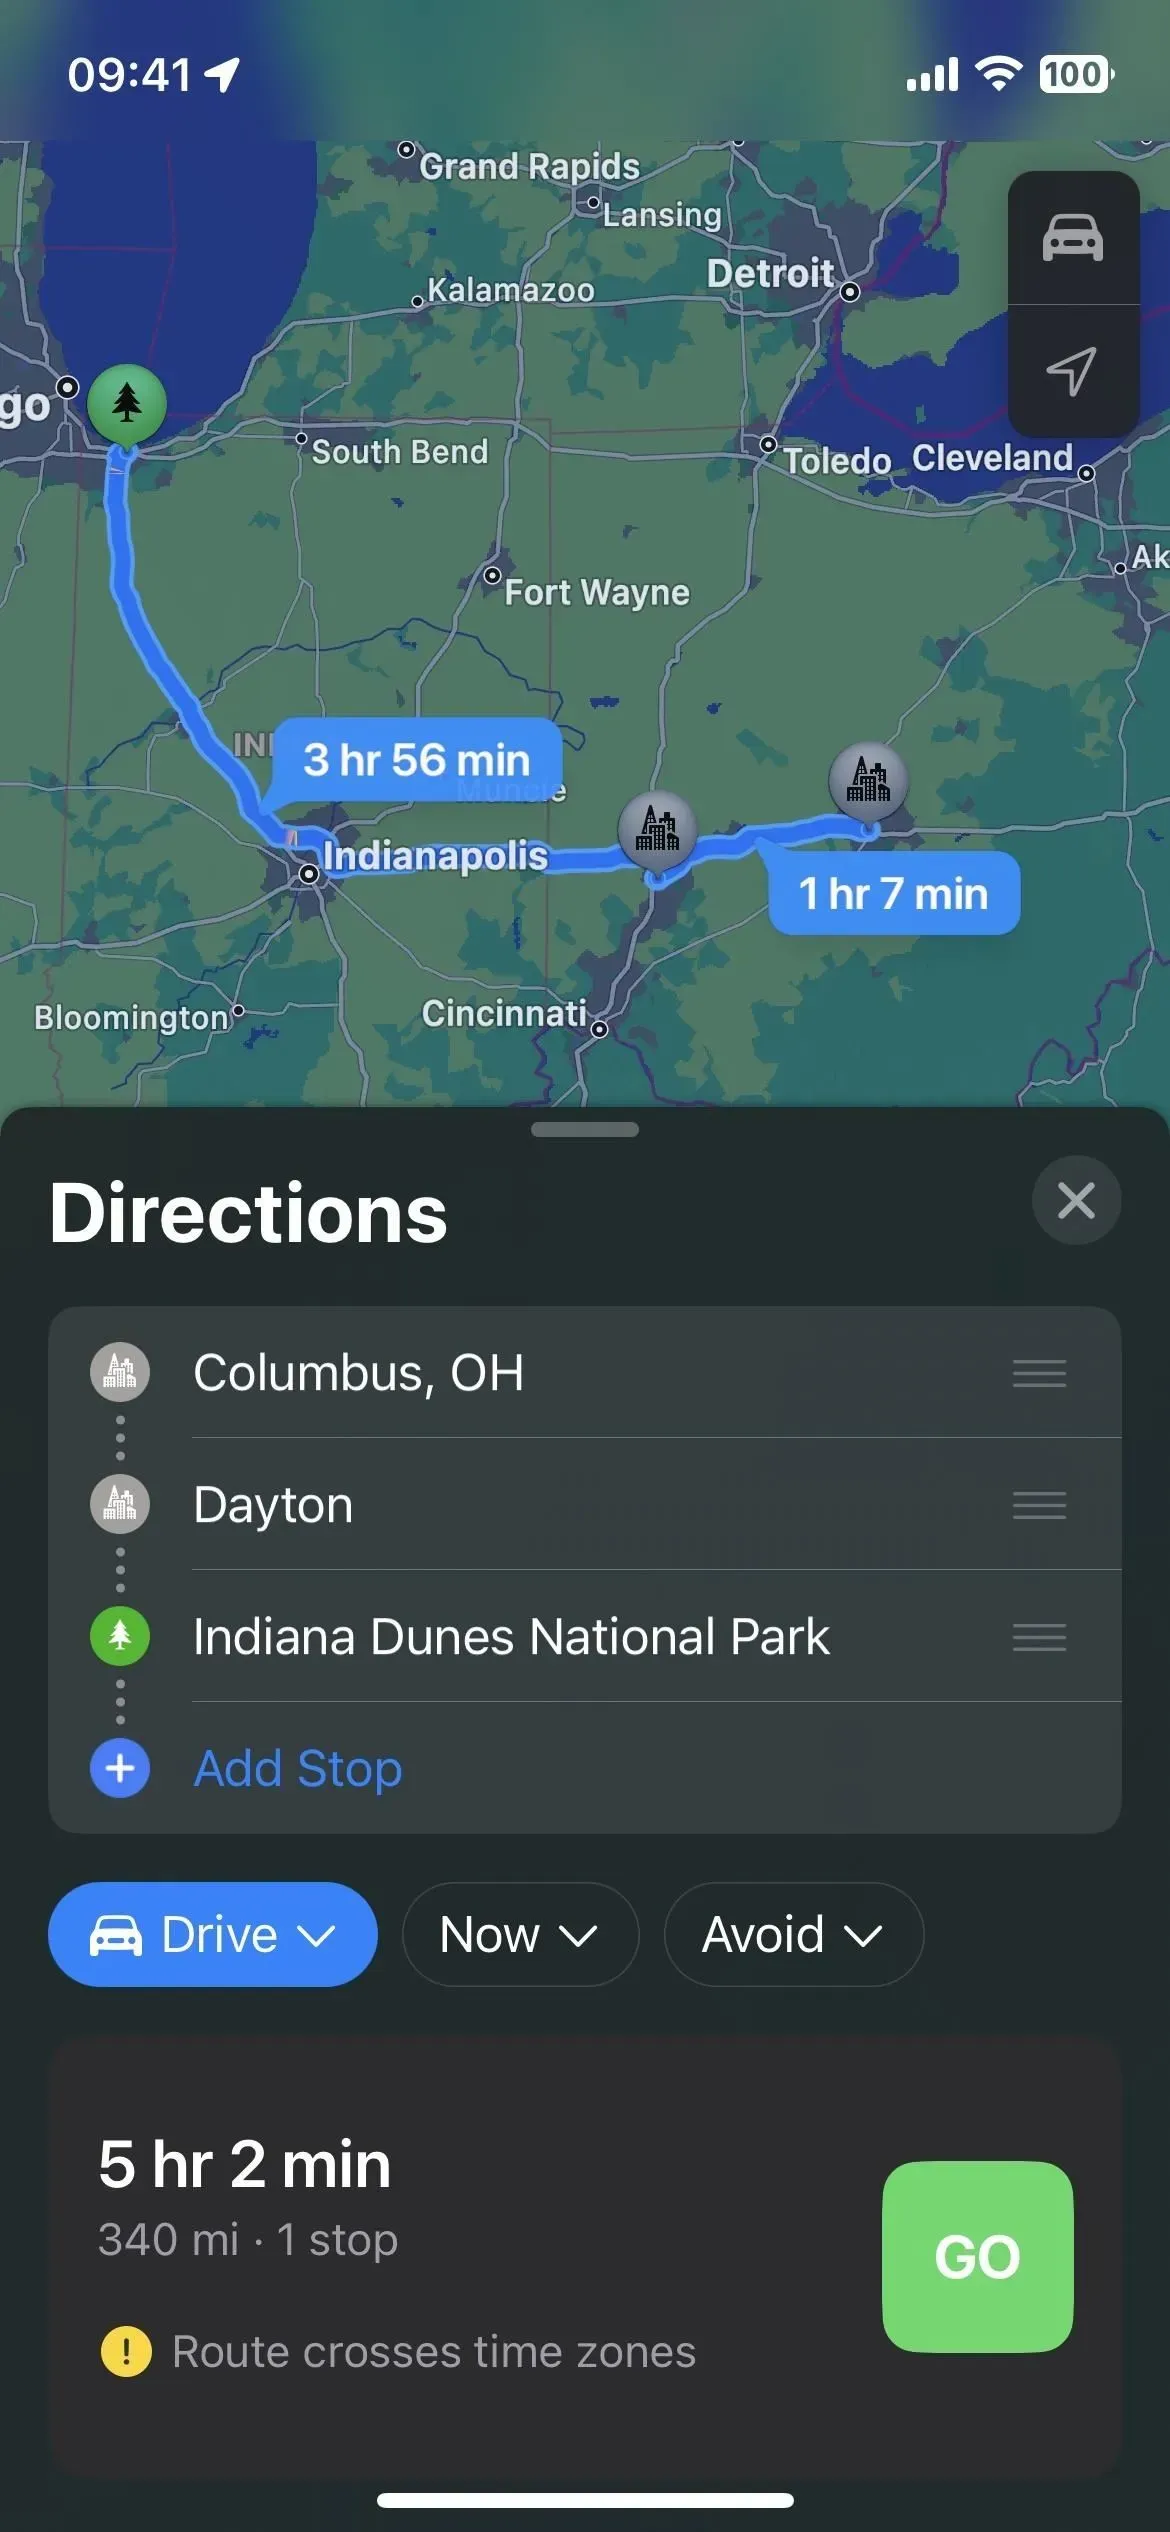
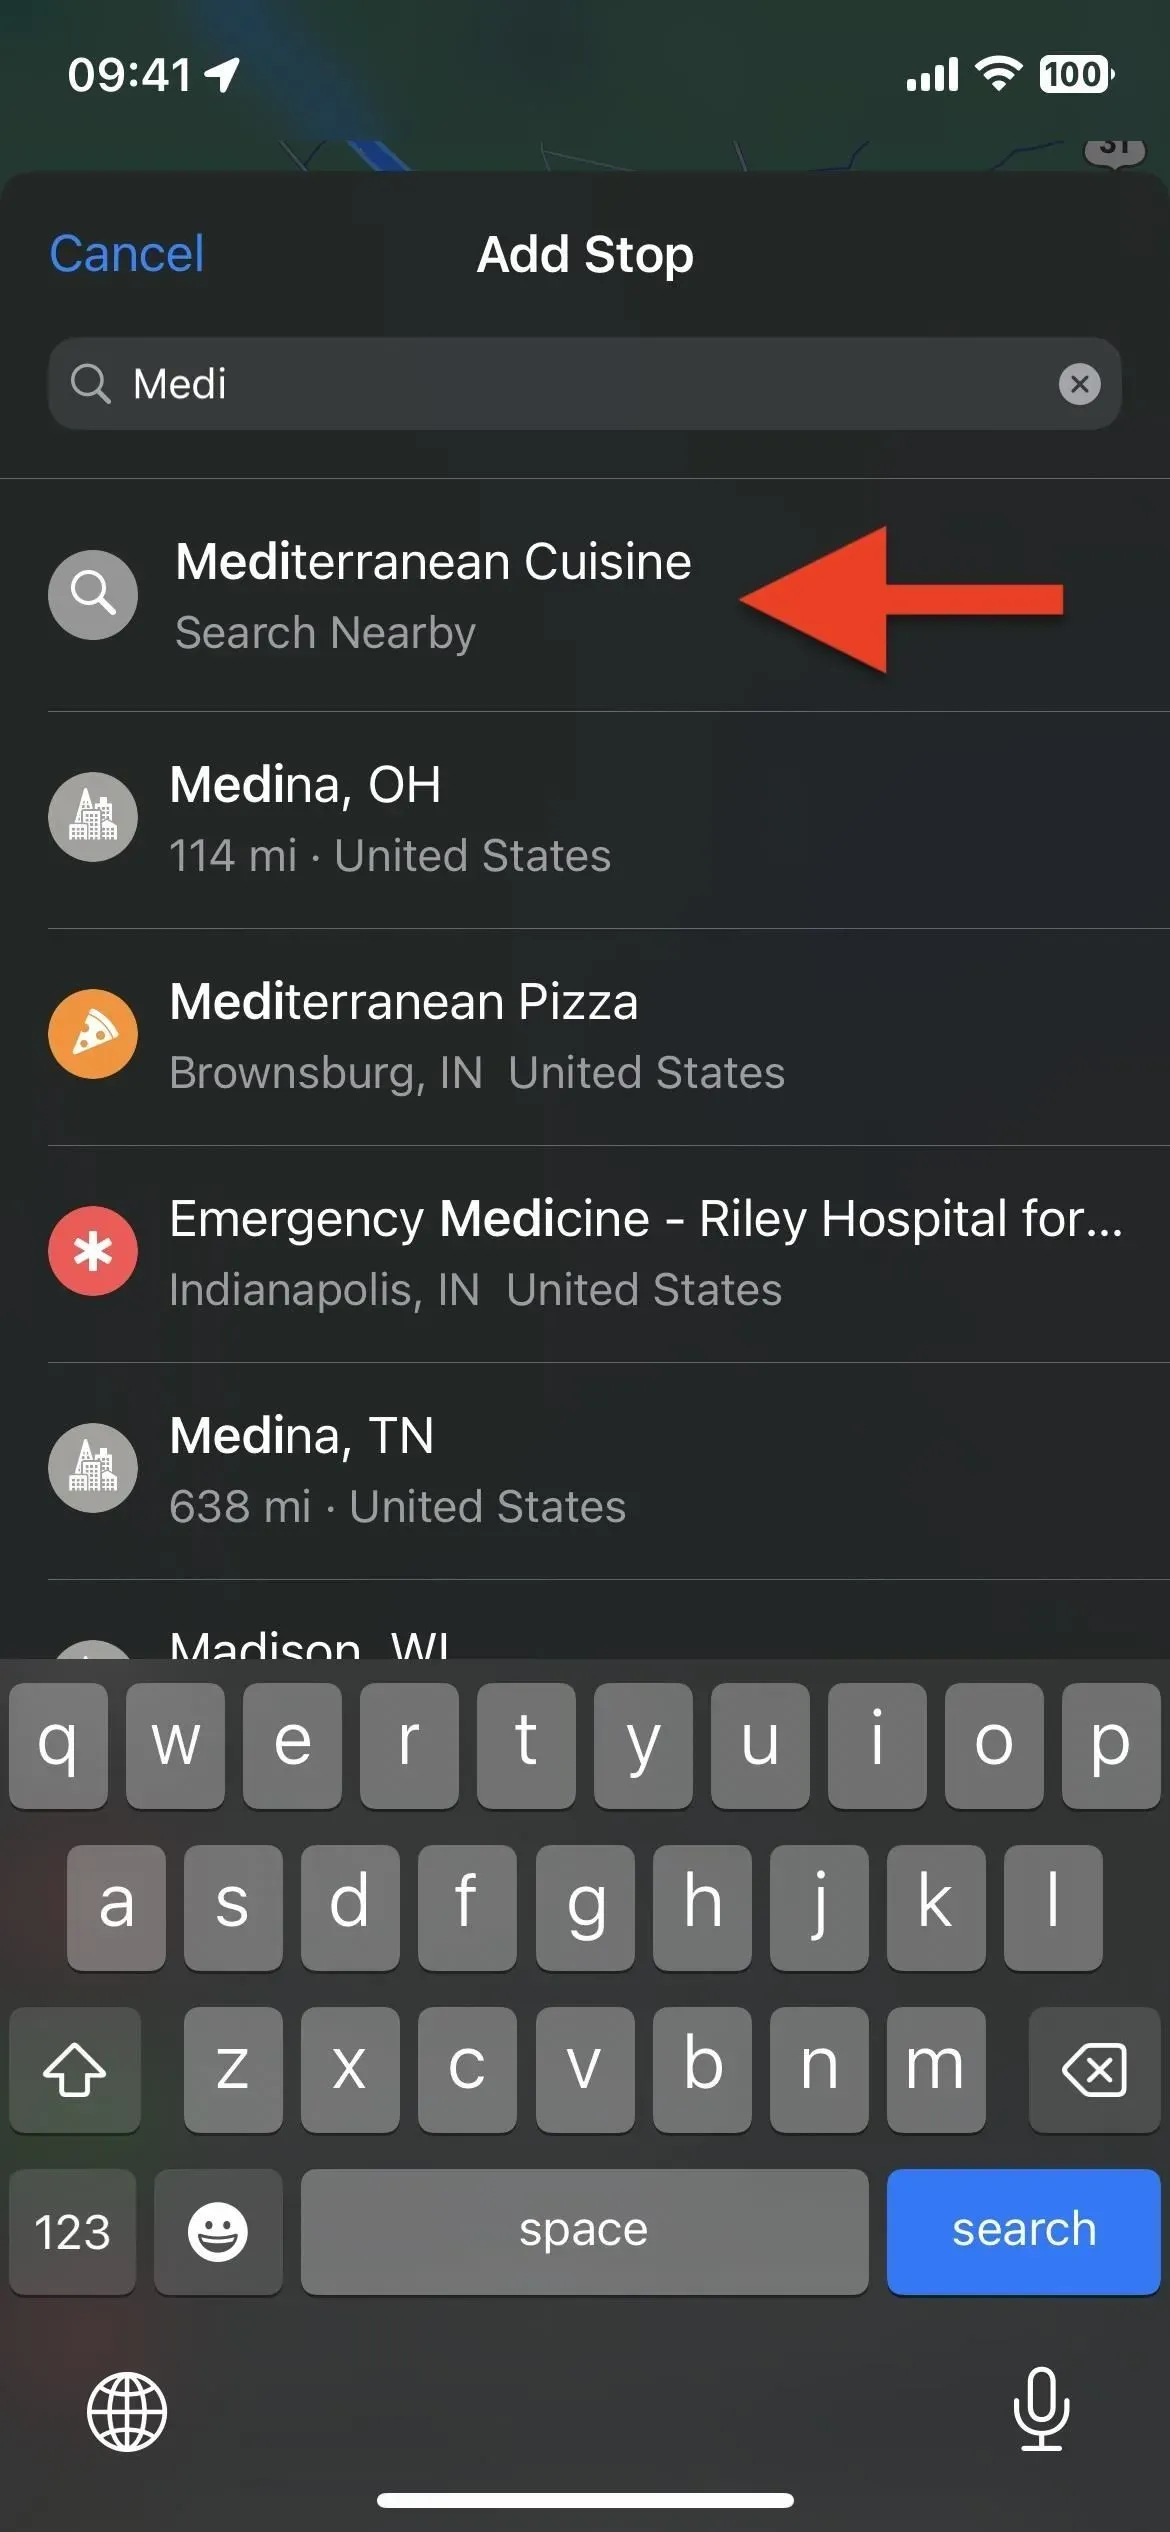
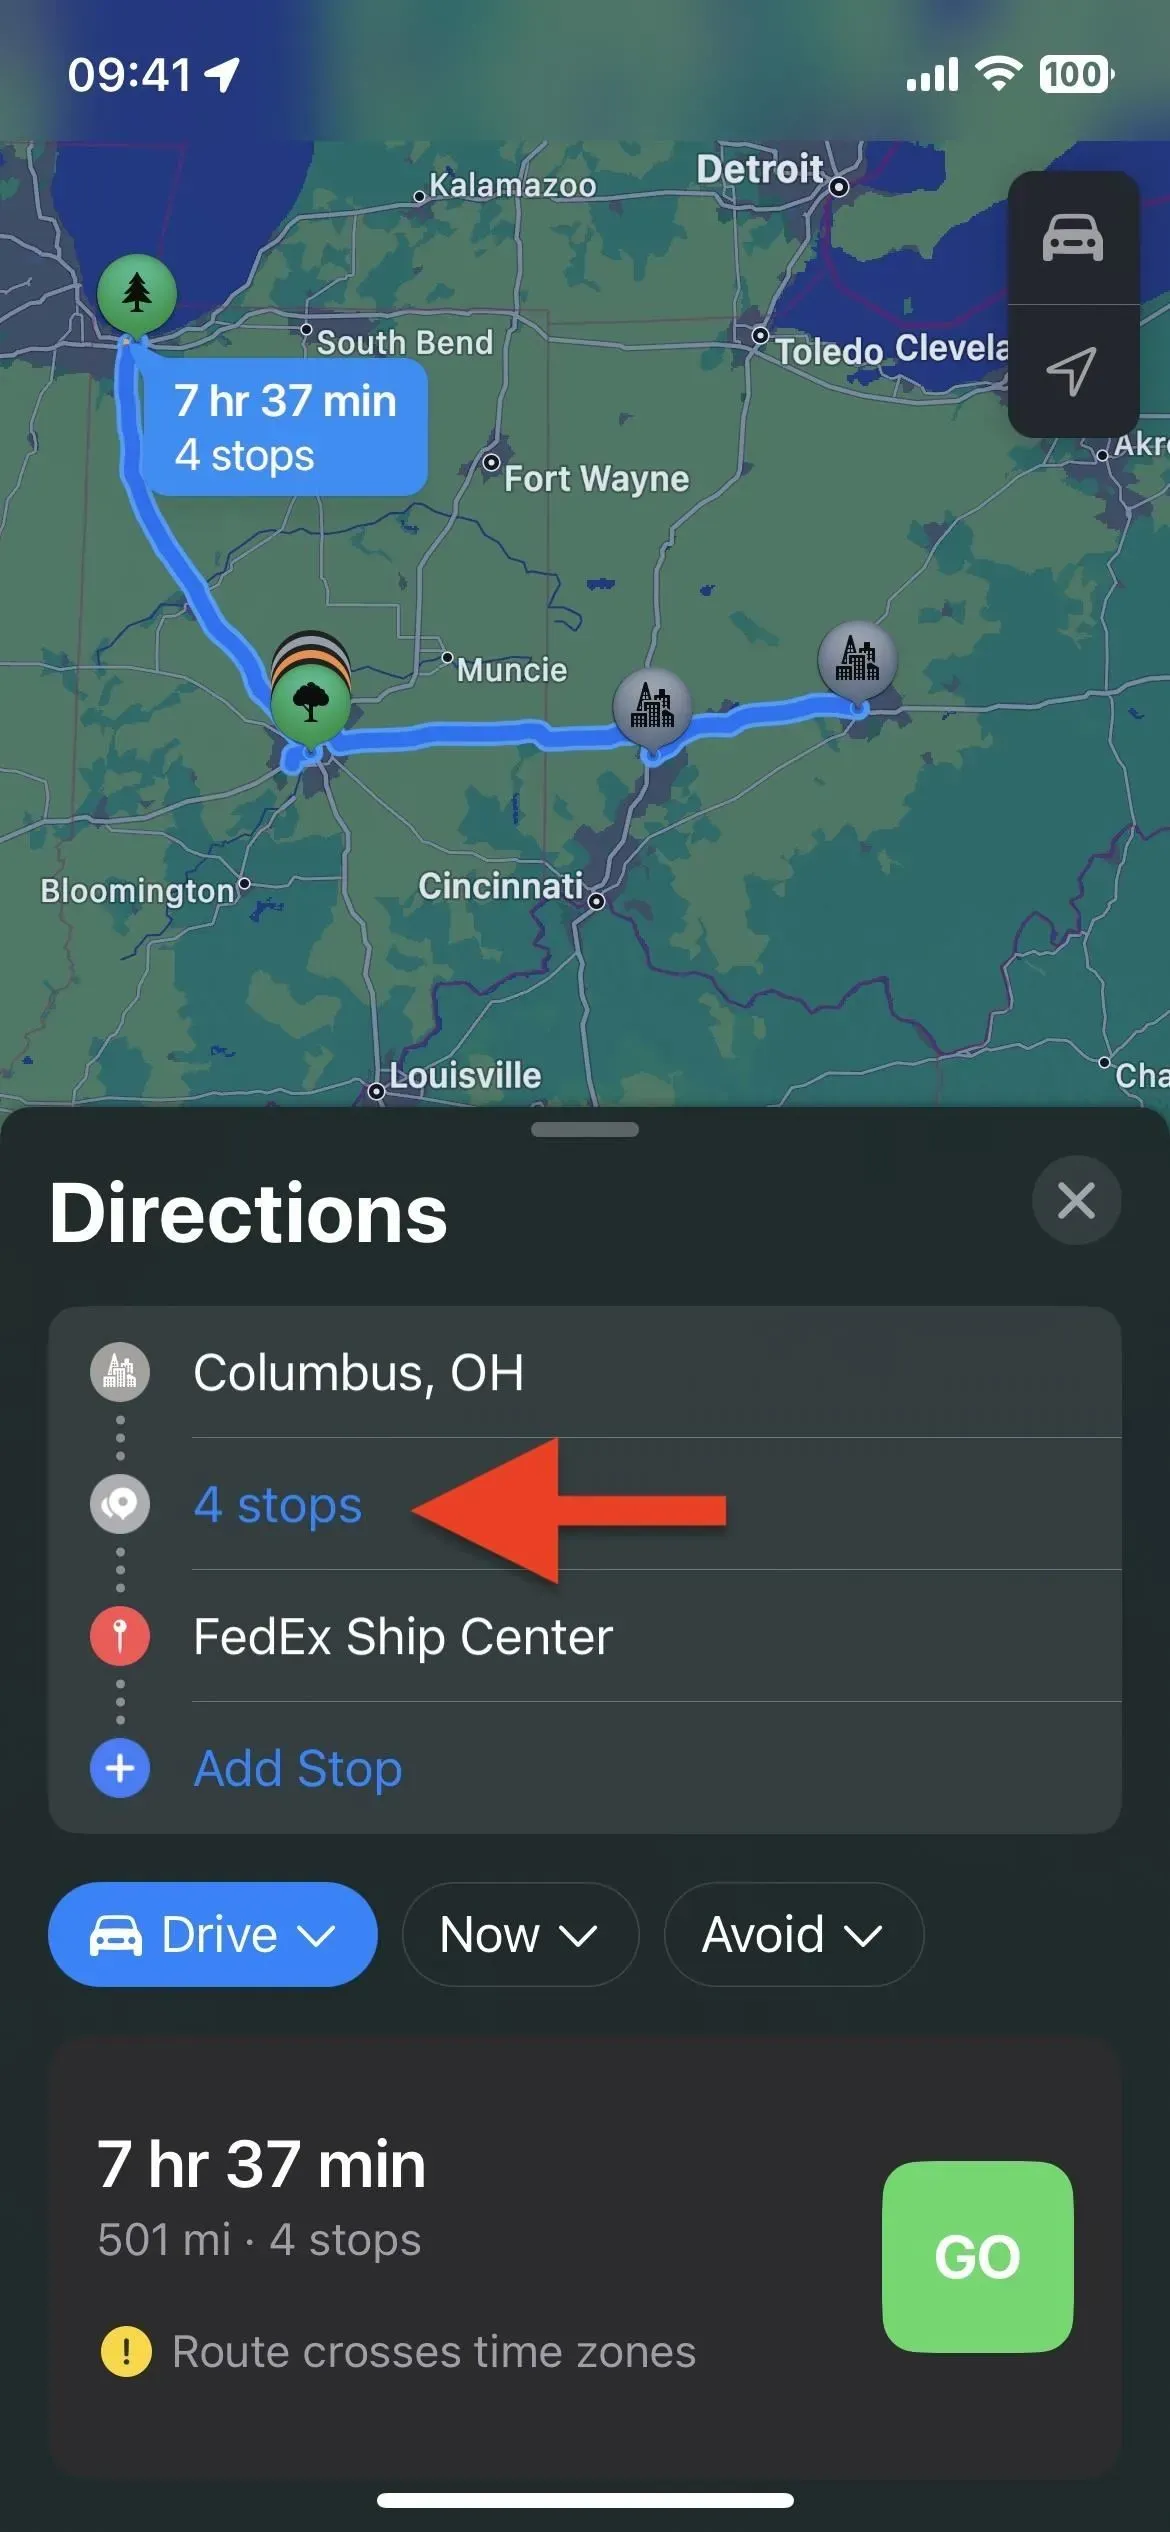
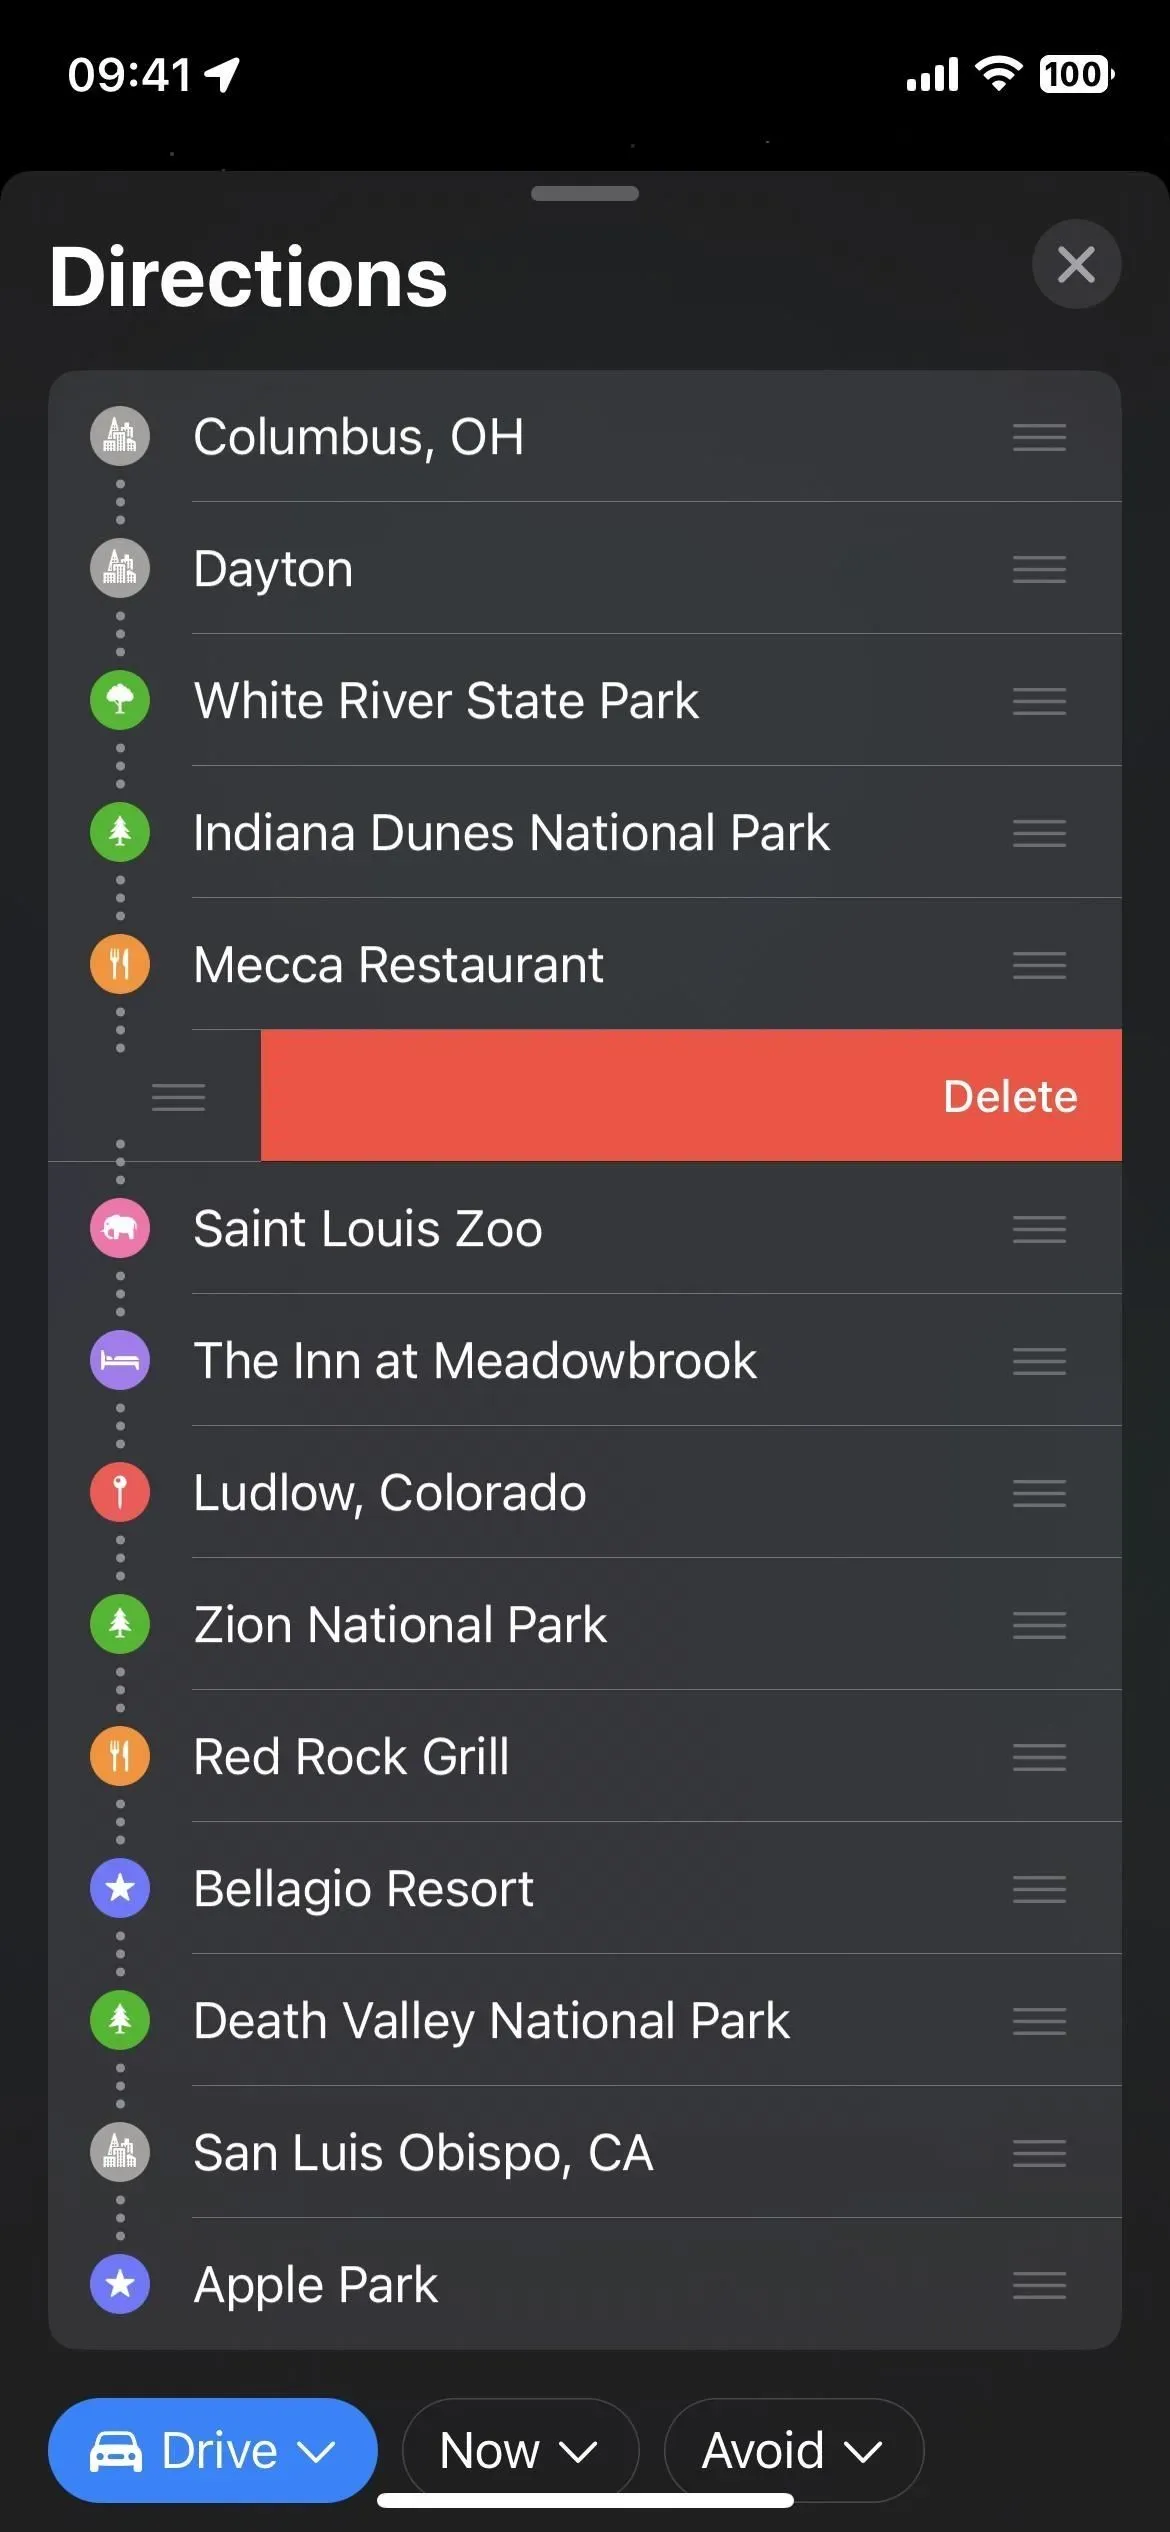
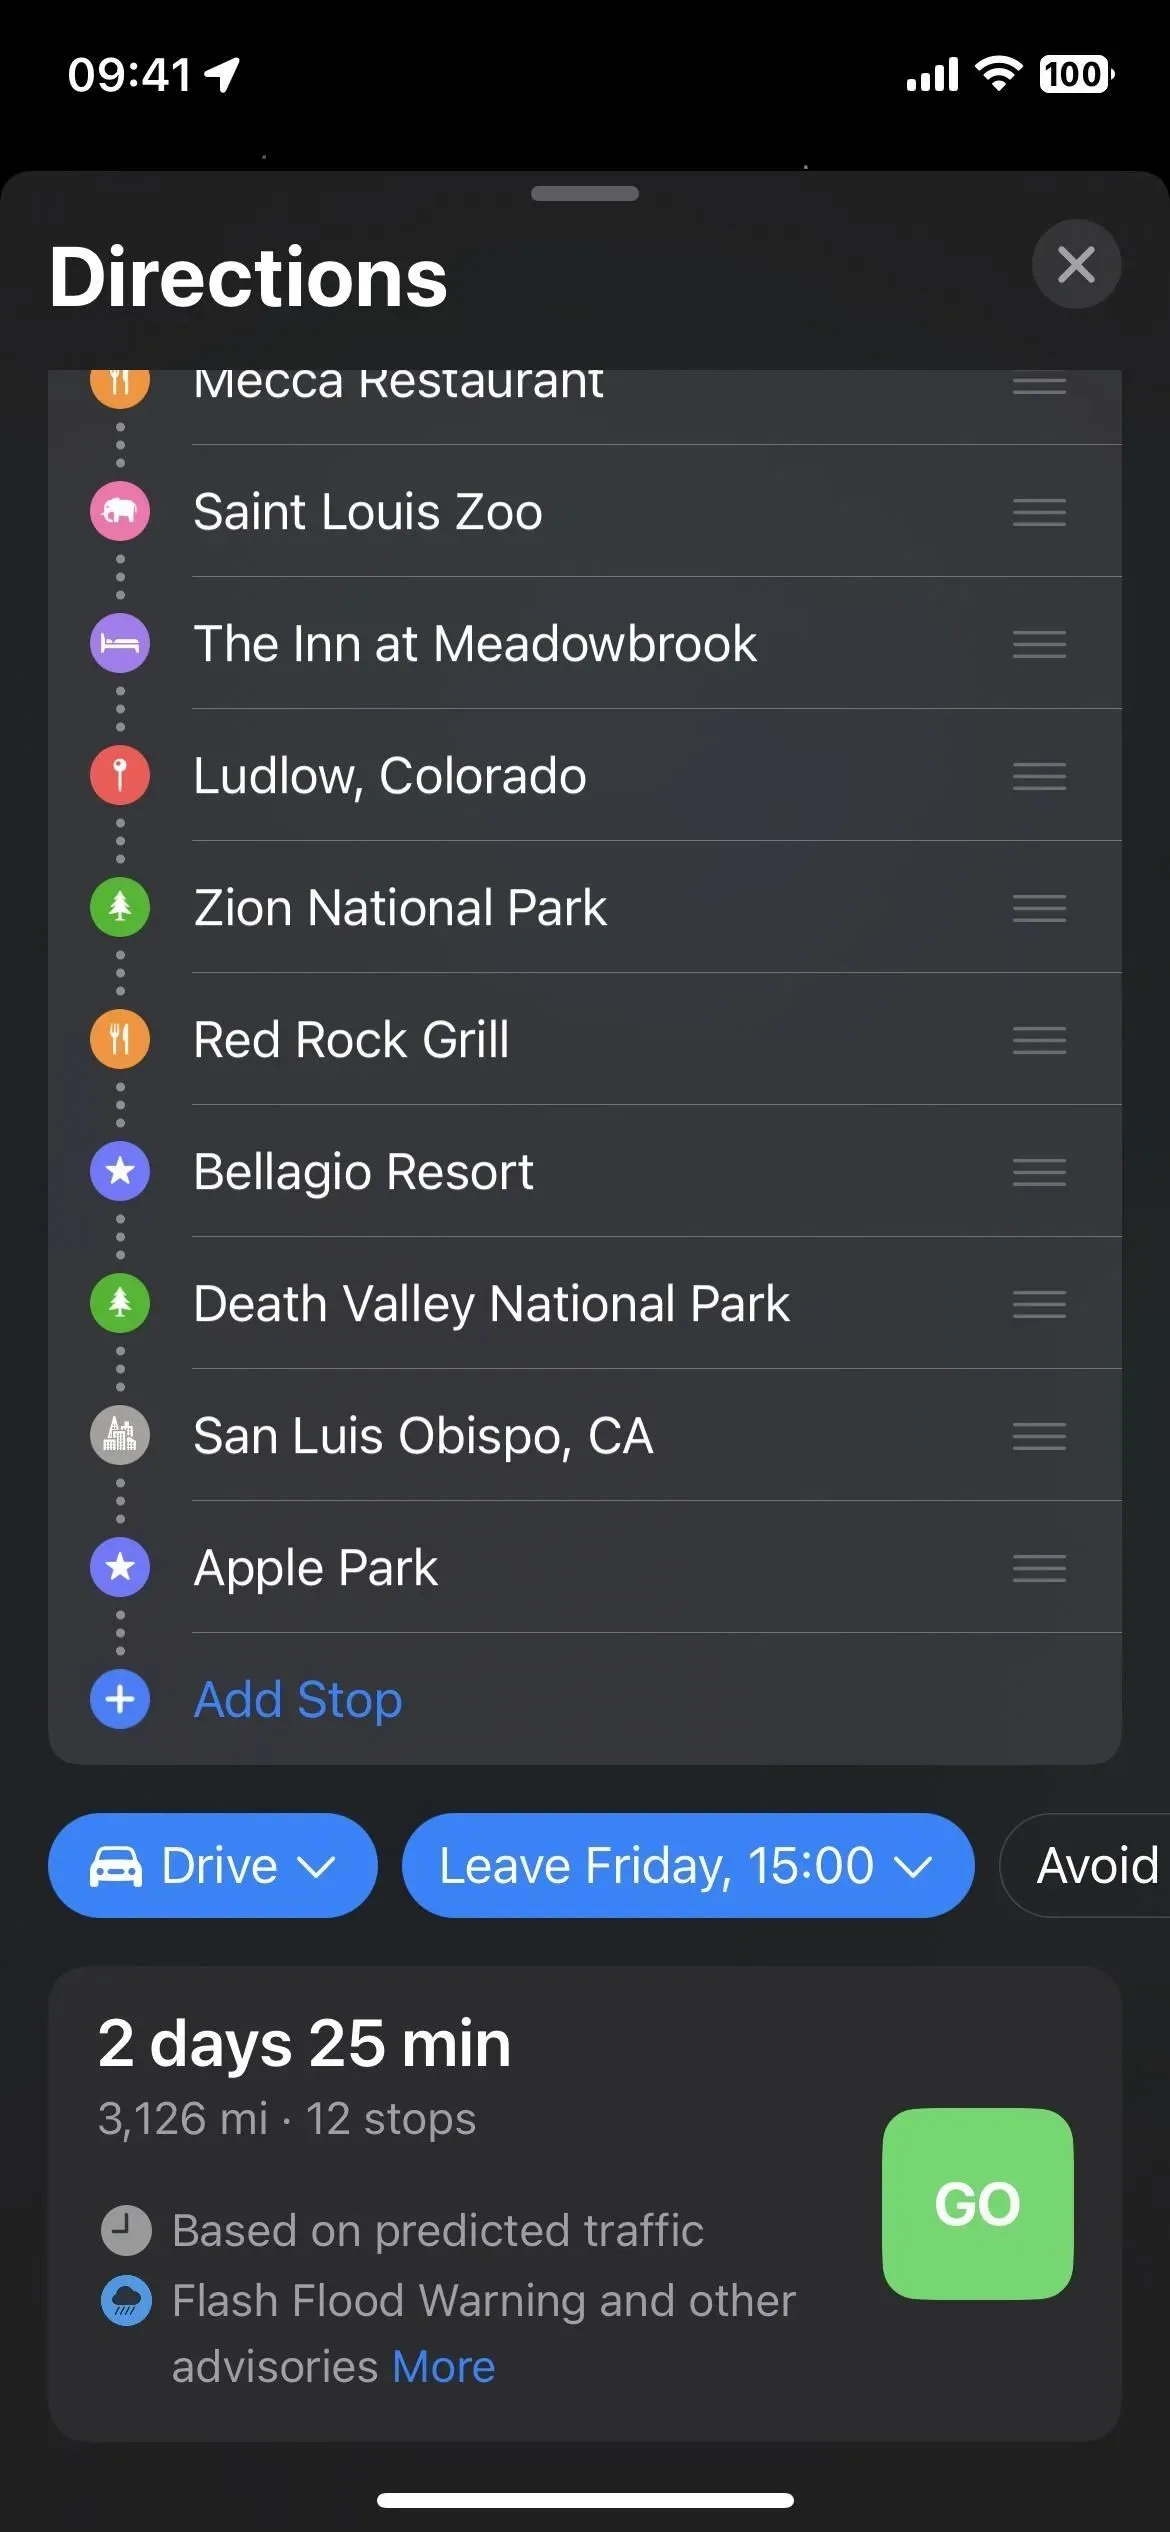
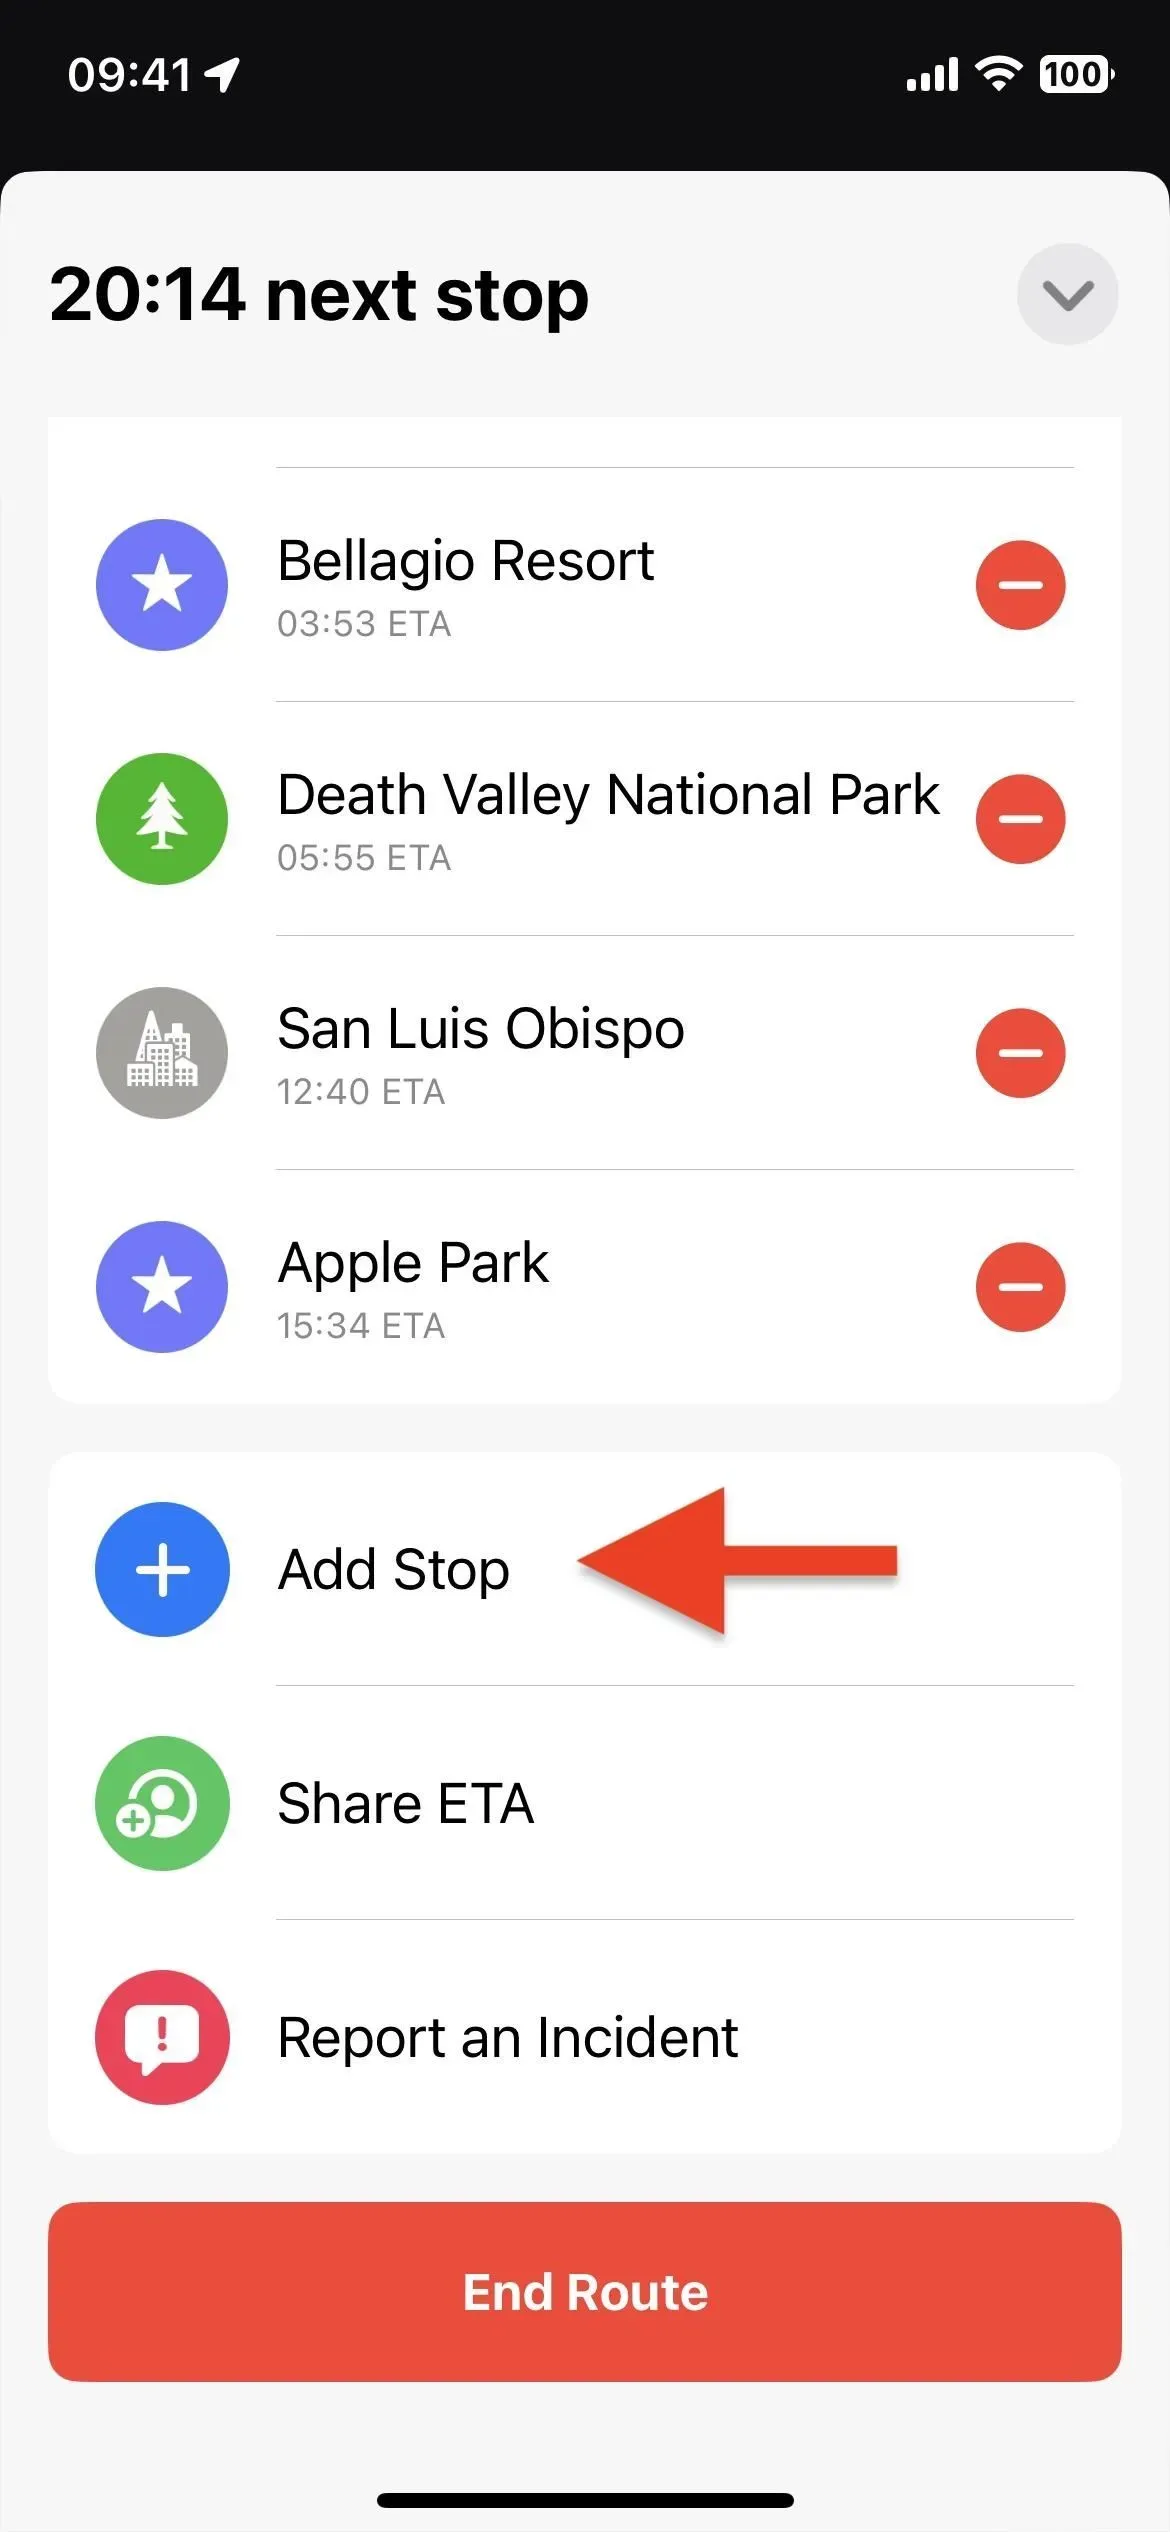
Step 3: Add Stops to Your Route
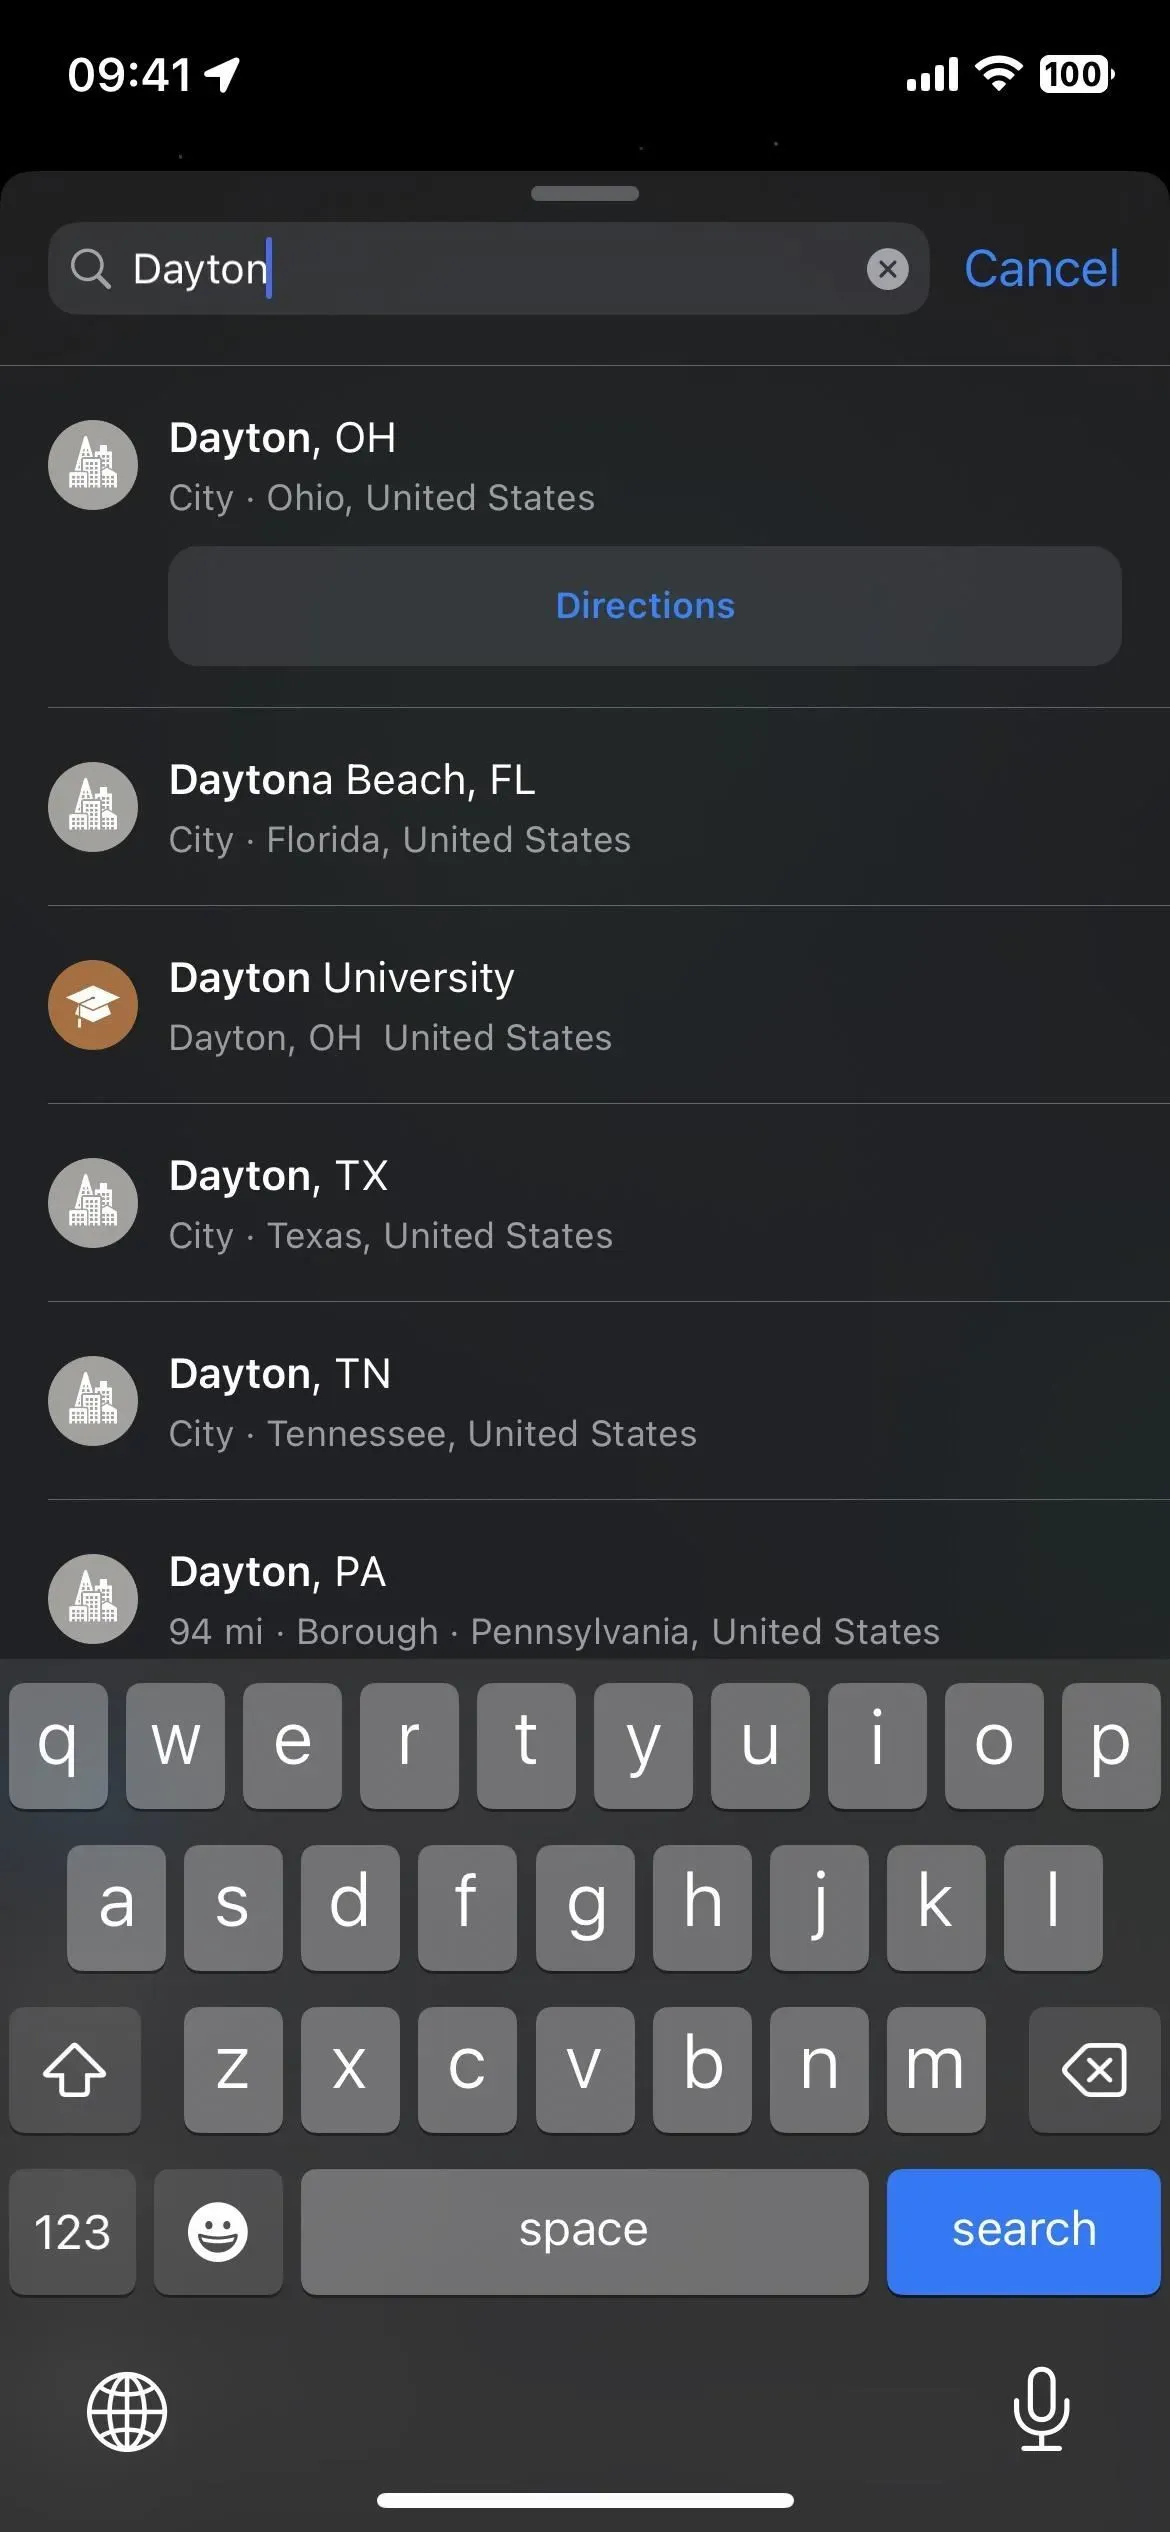
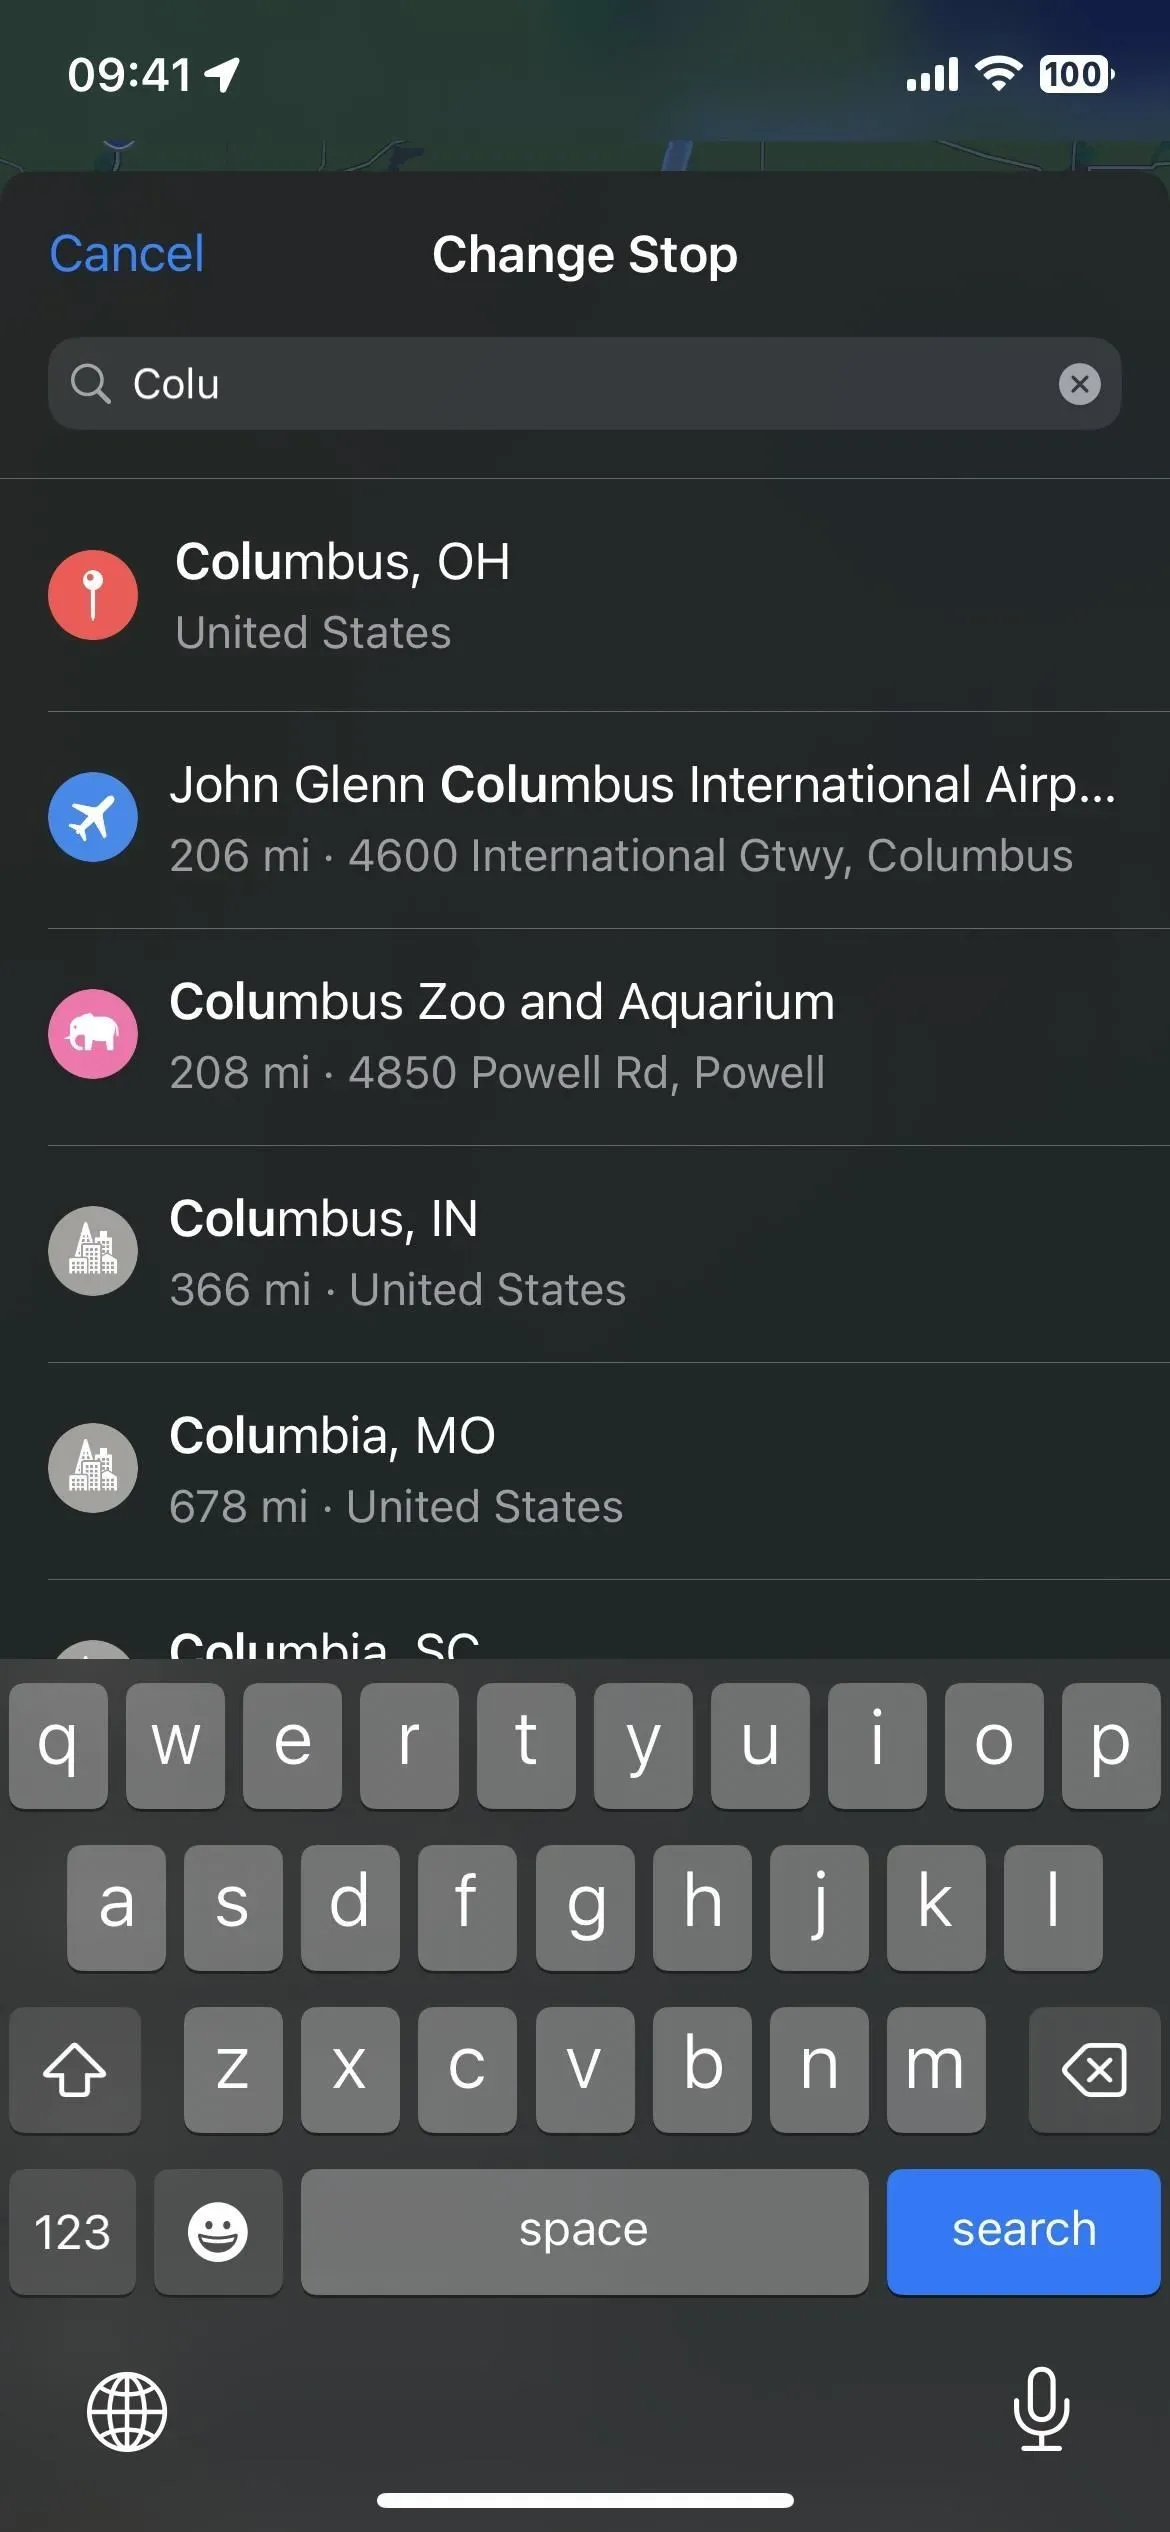
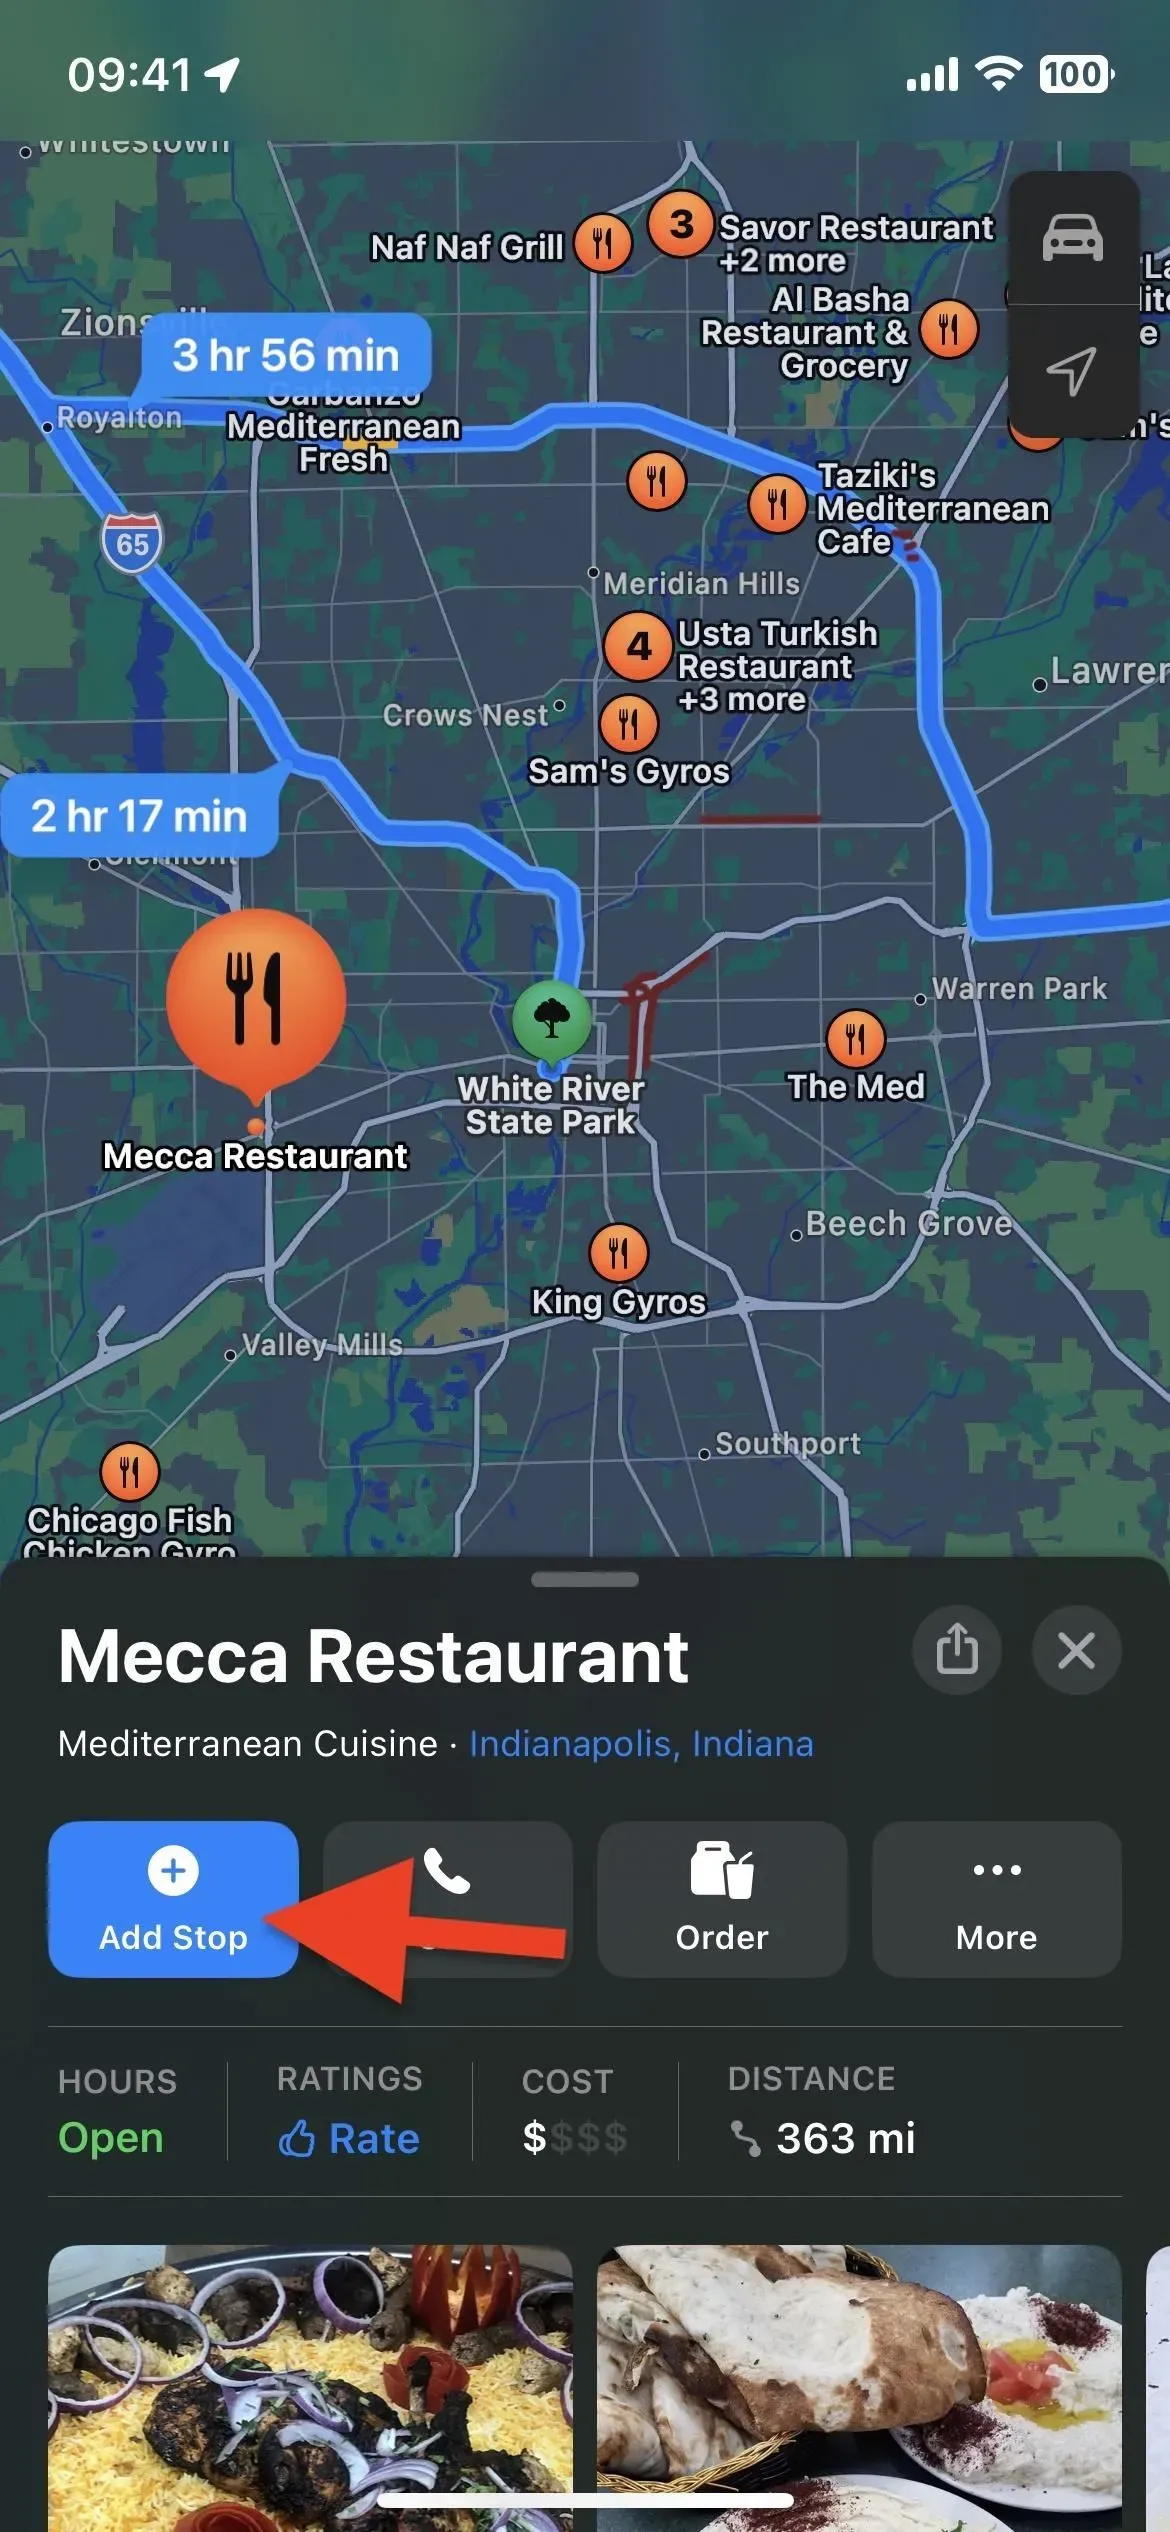
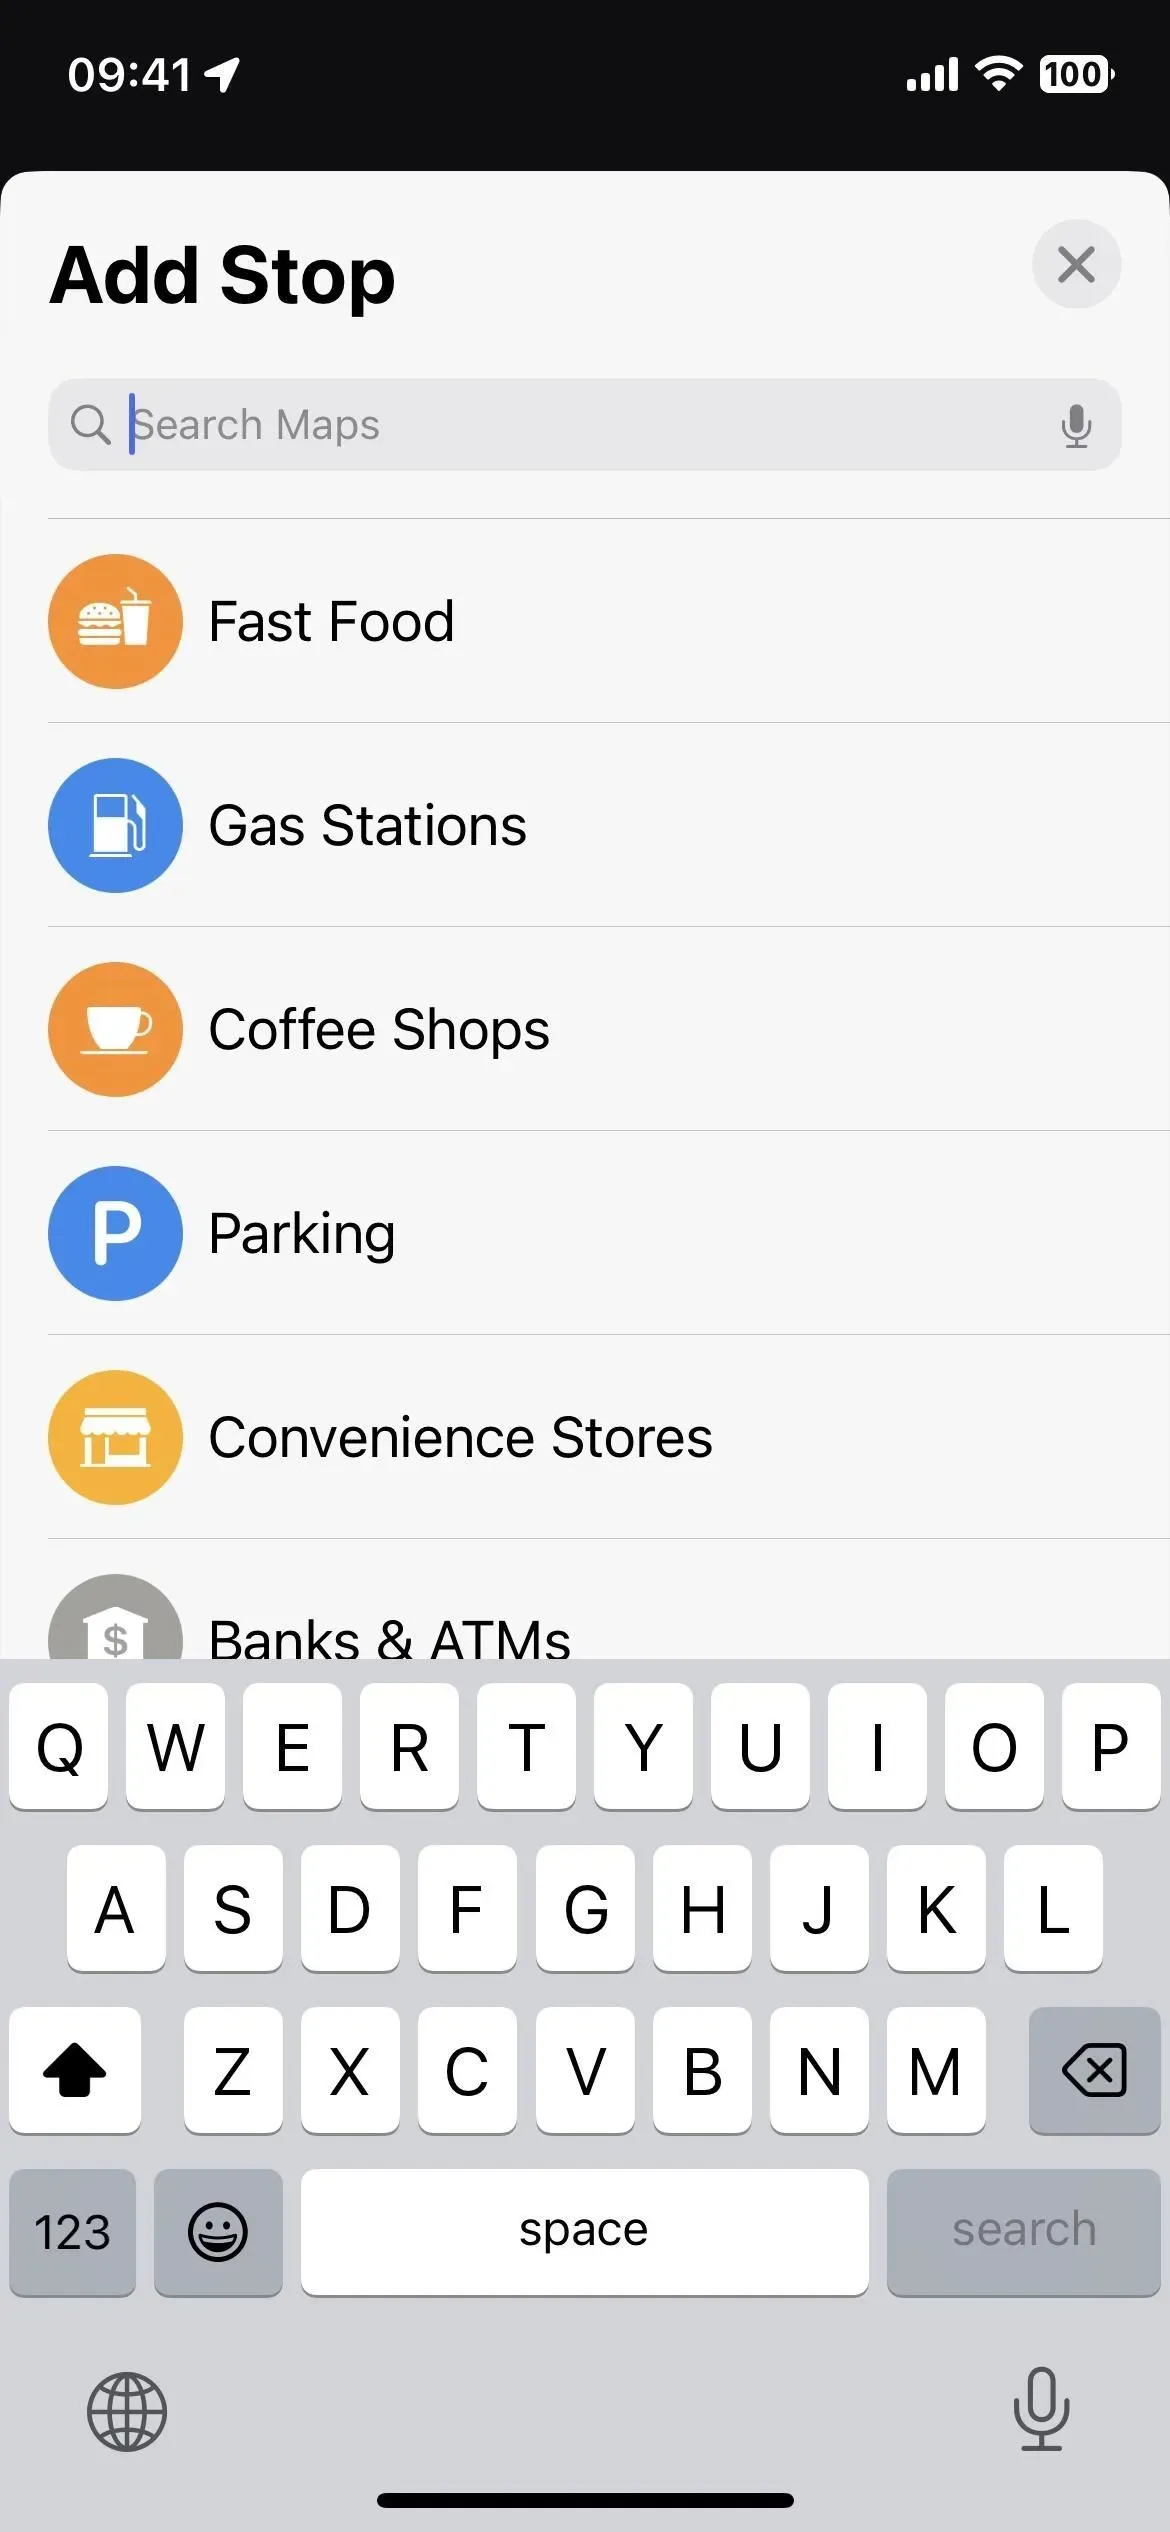
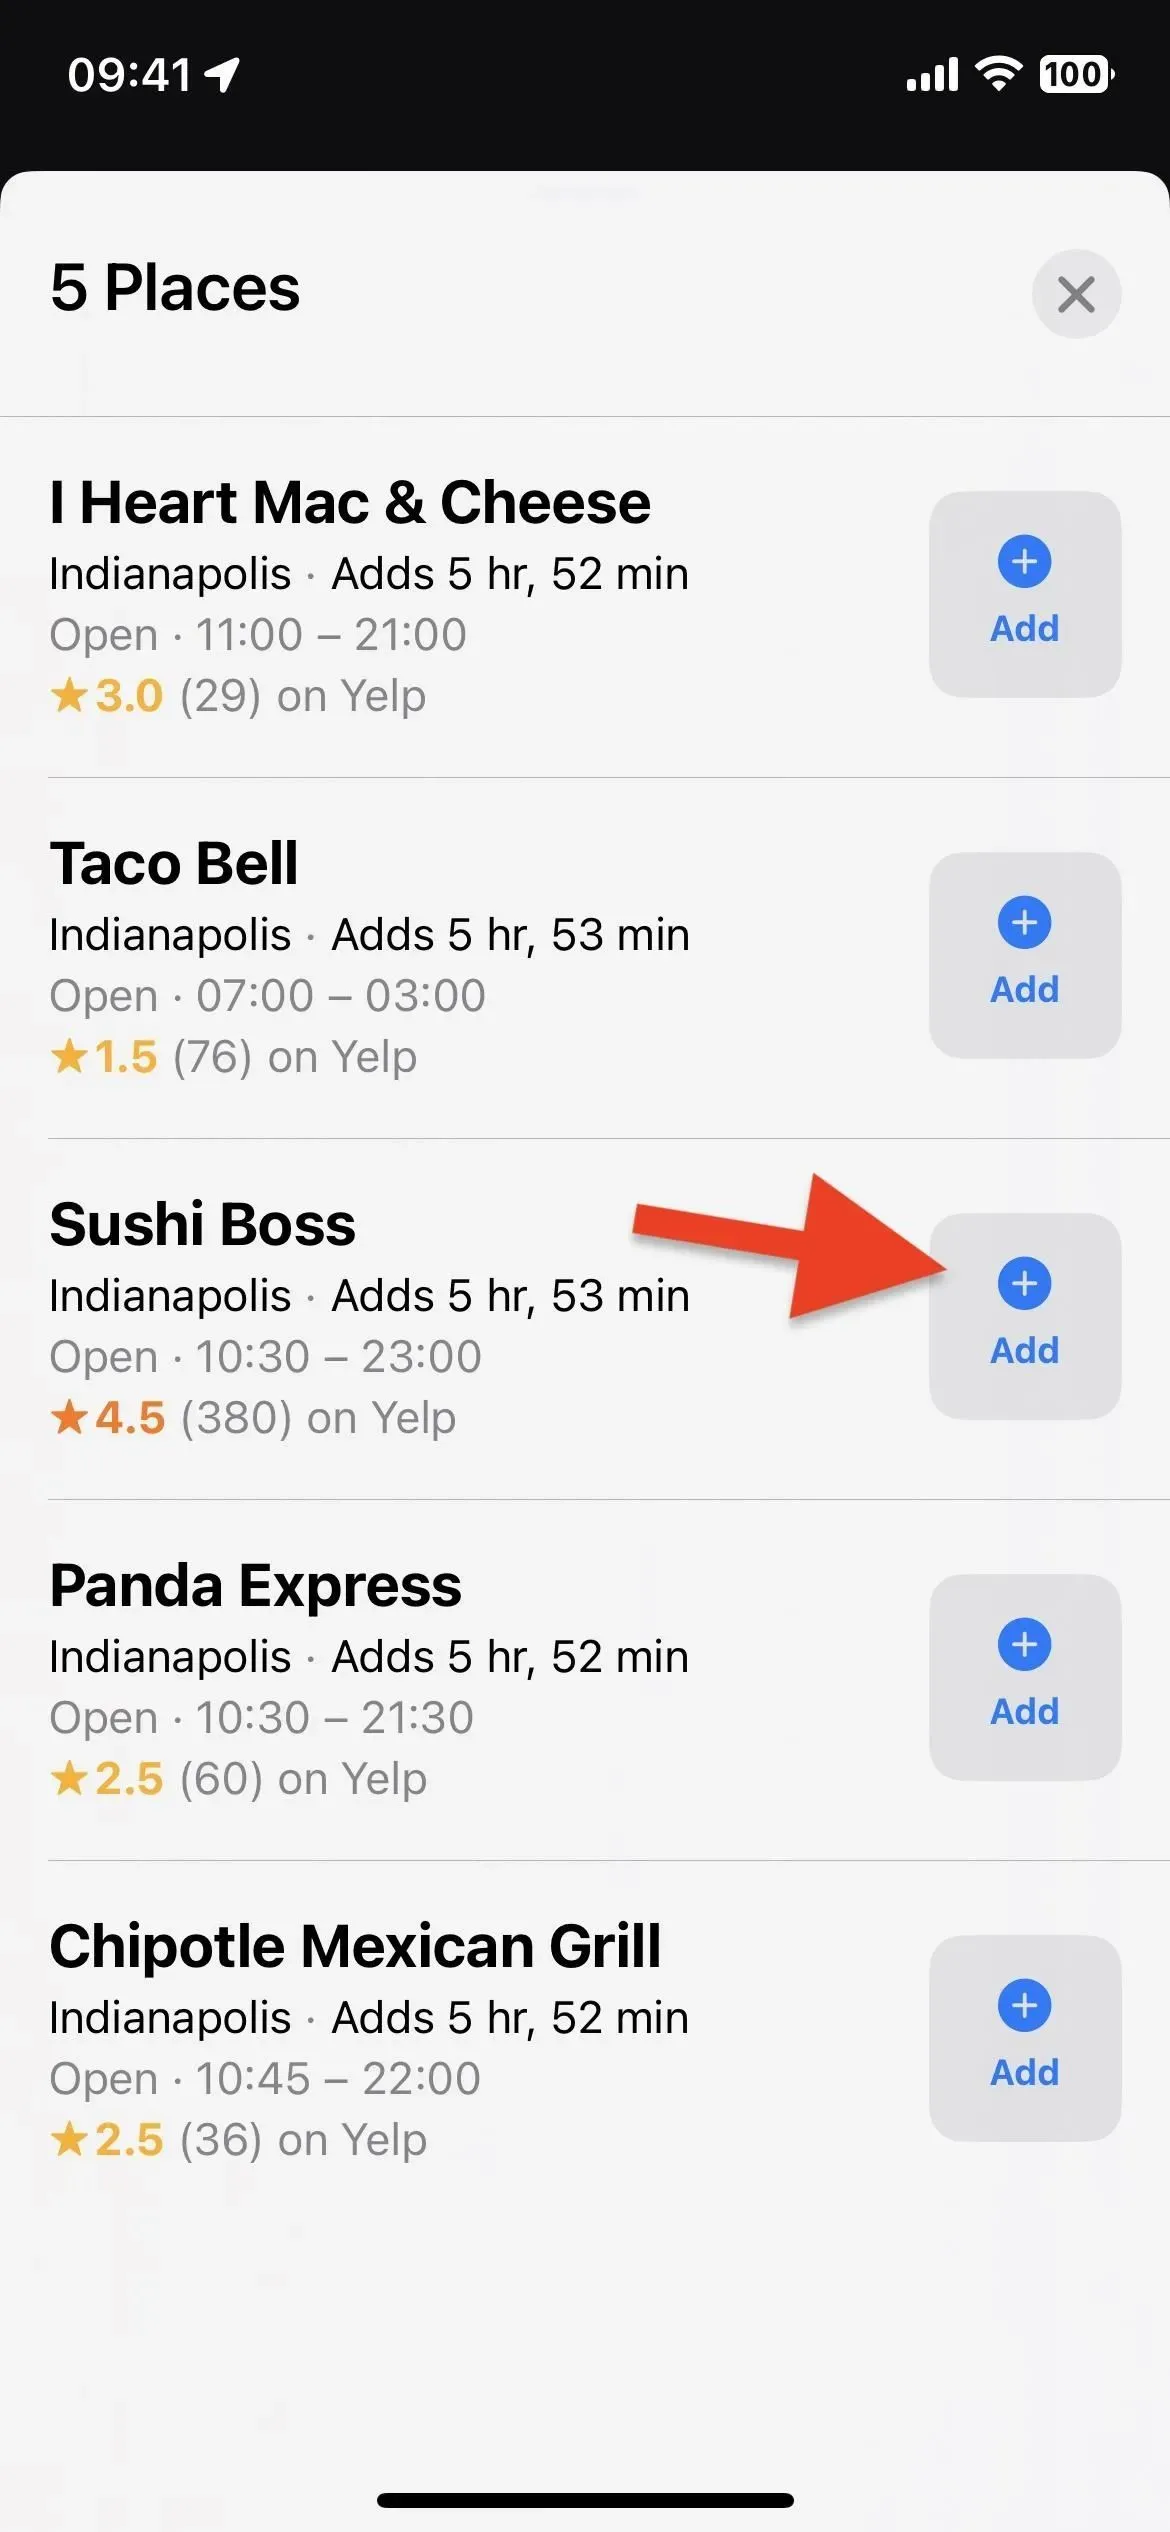
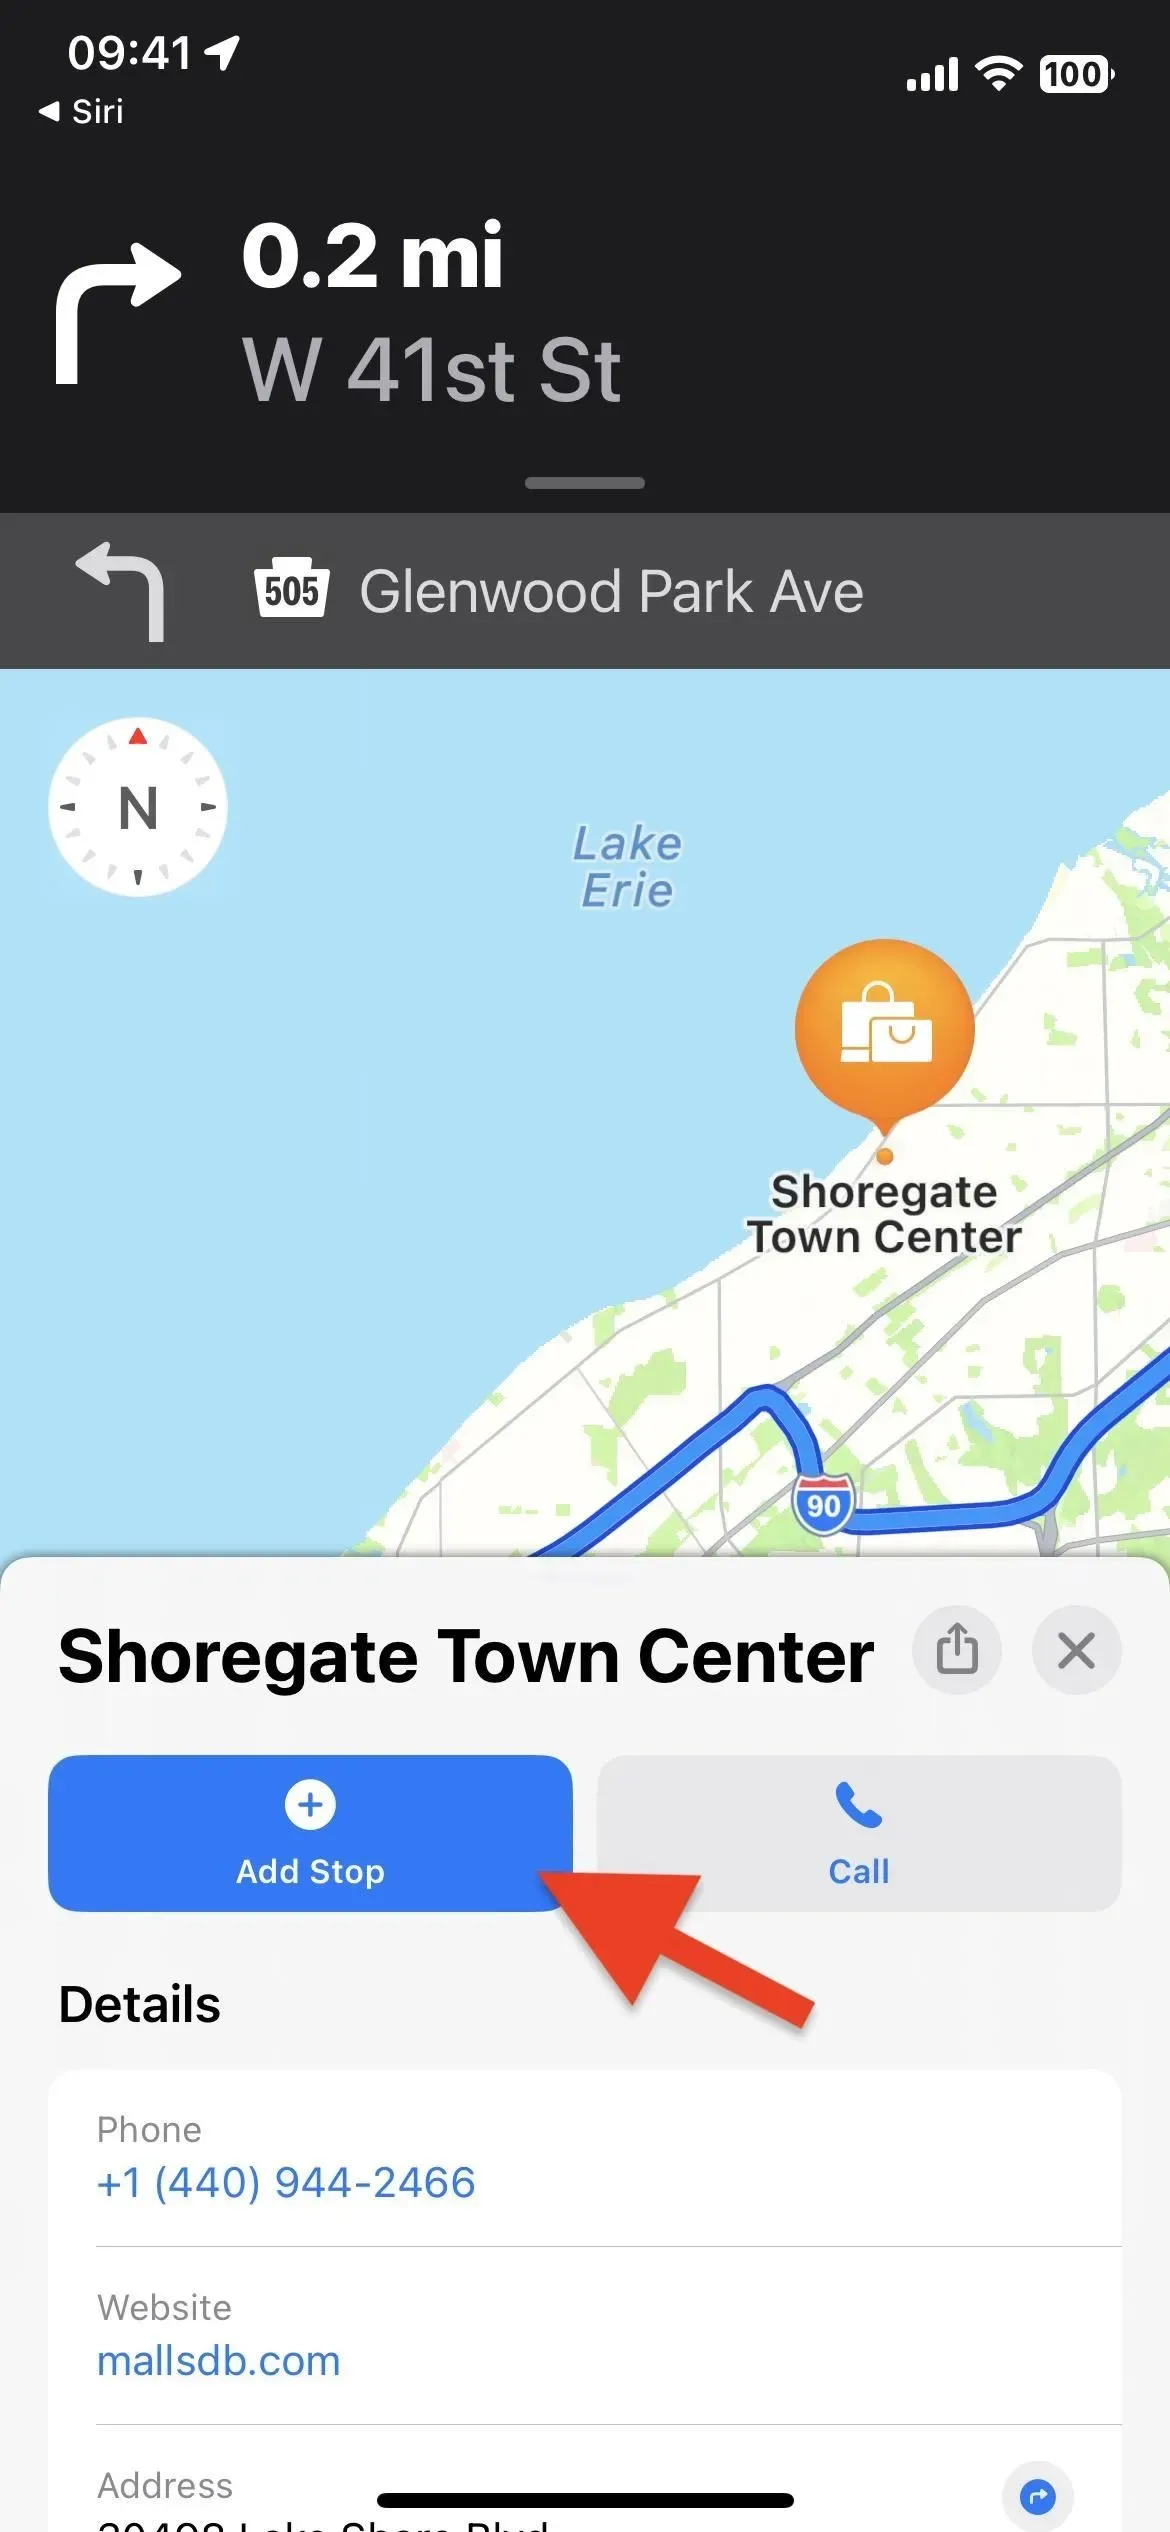
To add a stop anywhere on your route, whether between or outside of your current scheduled locations, tap Add Stop in the list, then browse and select the location you want.
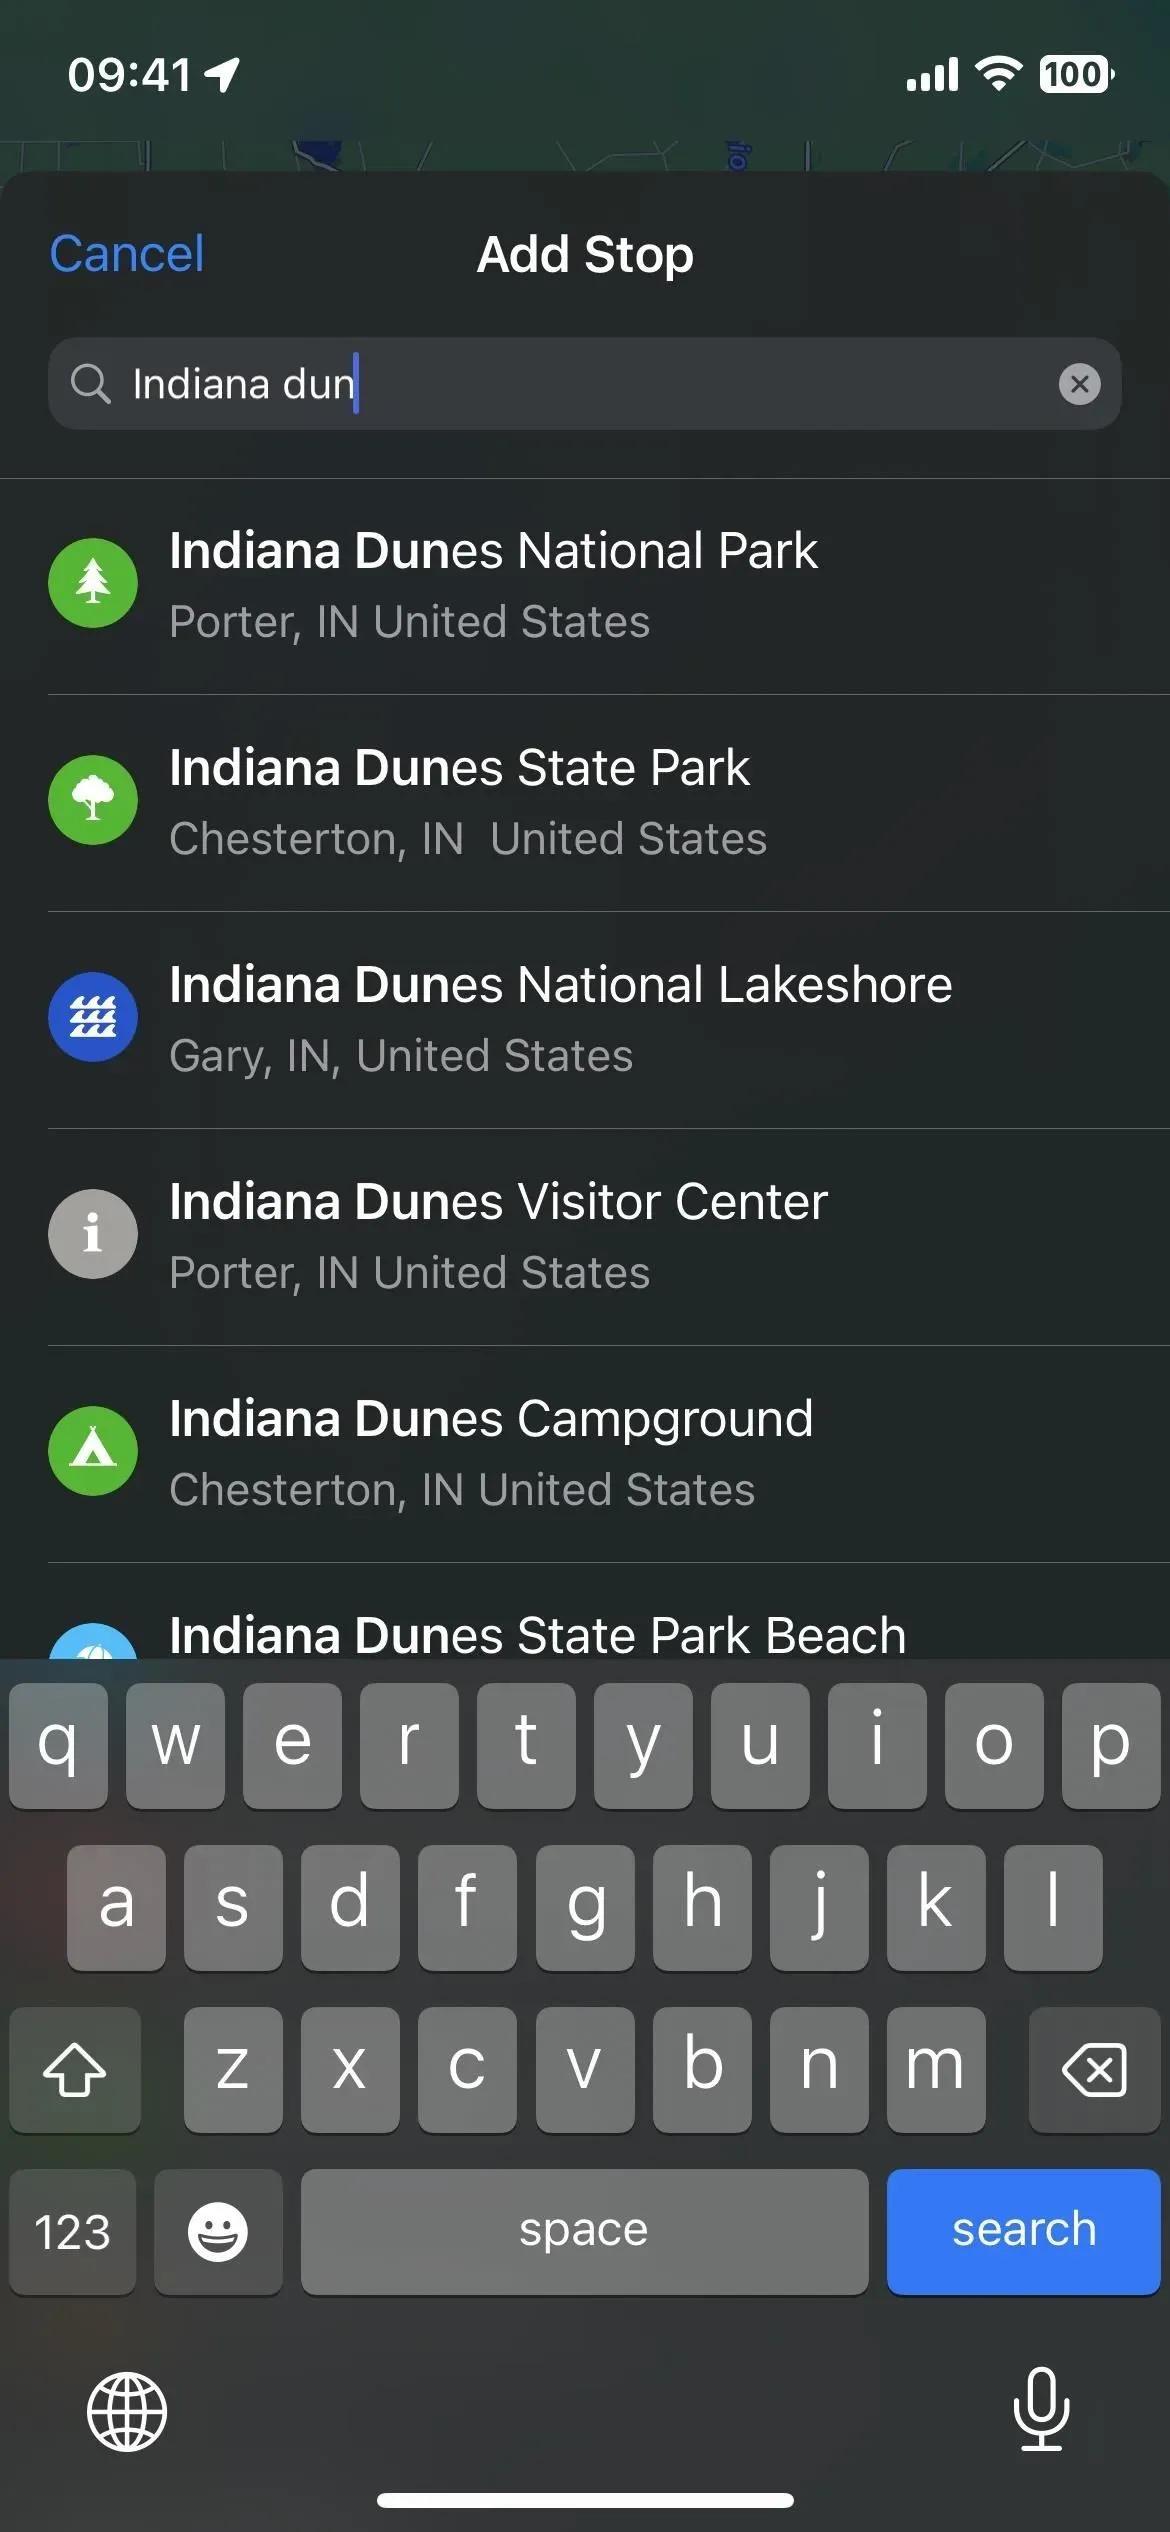
If you’re trying to find a pit stop like FedEx, a Mediterranean restaurant, or a park, you can search for those terms and select the location on the map. When you select a location, click “Add Stop”on its details card, or “Add”in the list view. Alternatively, you can click on a place on the map without using the search tool and then click “Add Stop”in its details.

You can add up to 13 stops along the route, up to 15 places in total, counting the start and end points. When you add five or more locations, Maps will combine the average stops into a section labeled “[#] of stops.”Clicking on this will expand all hidden destinations.
Pressing the minimize button (a pill-shaped pen) or swiping the window down a bit will return you to the minimized view.
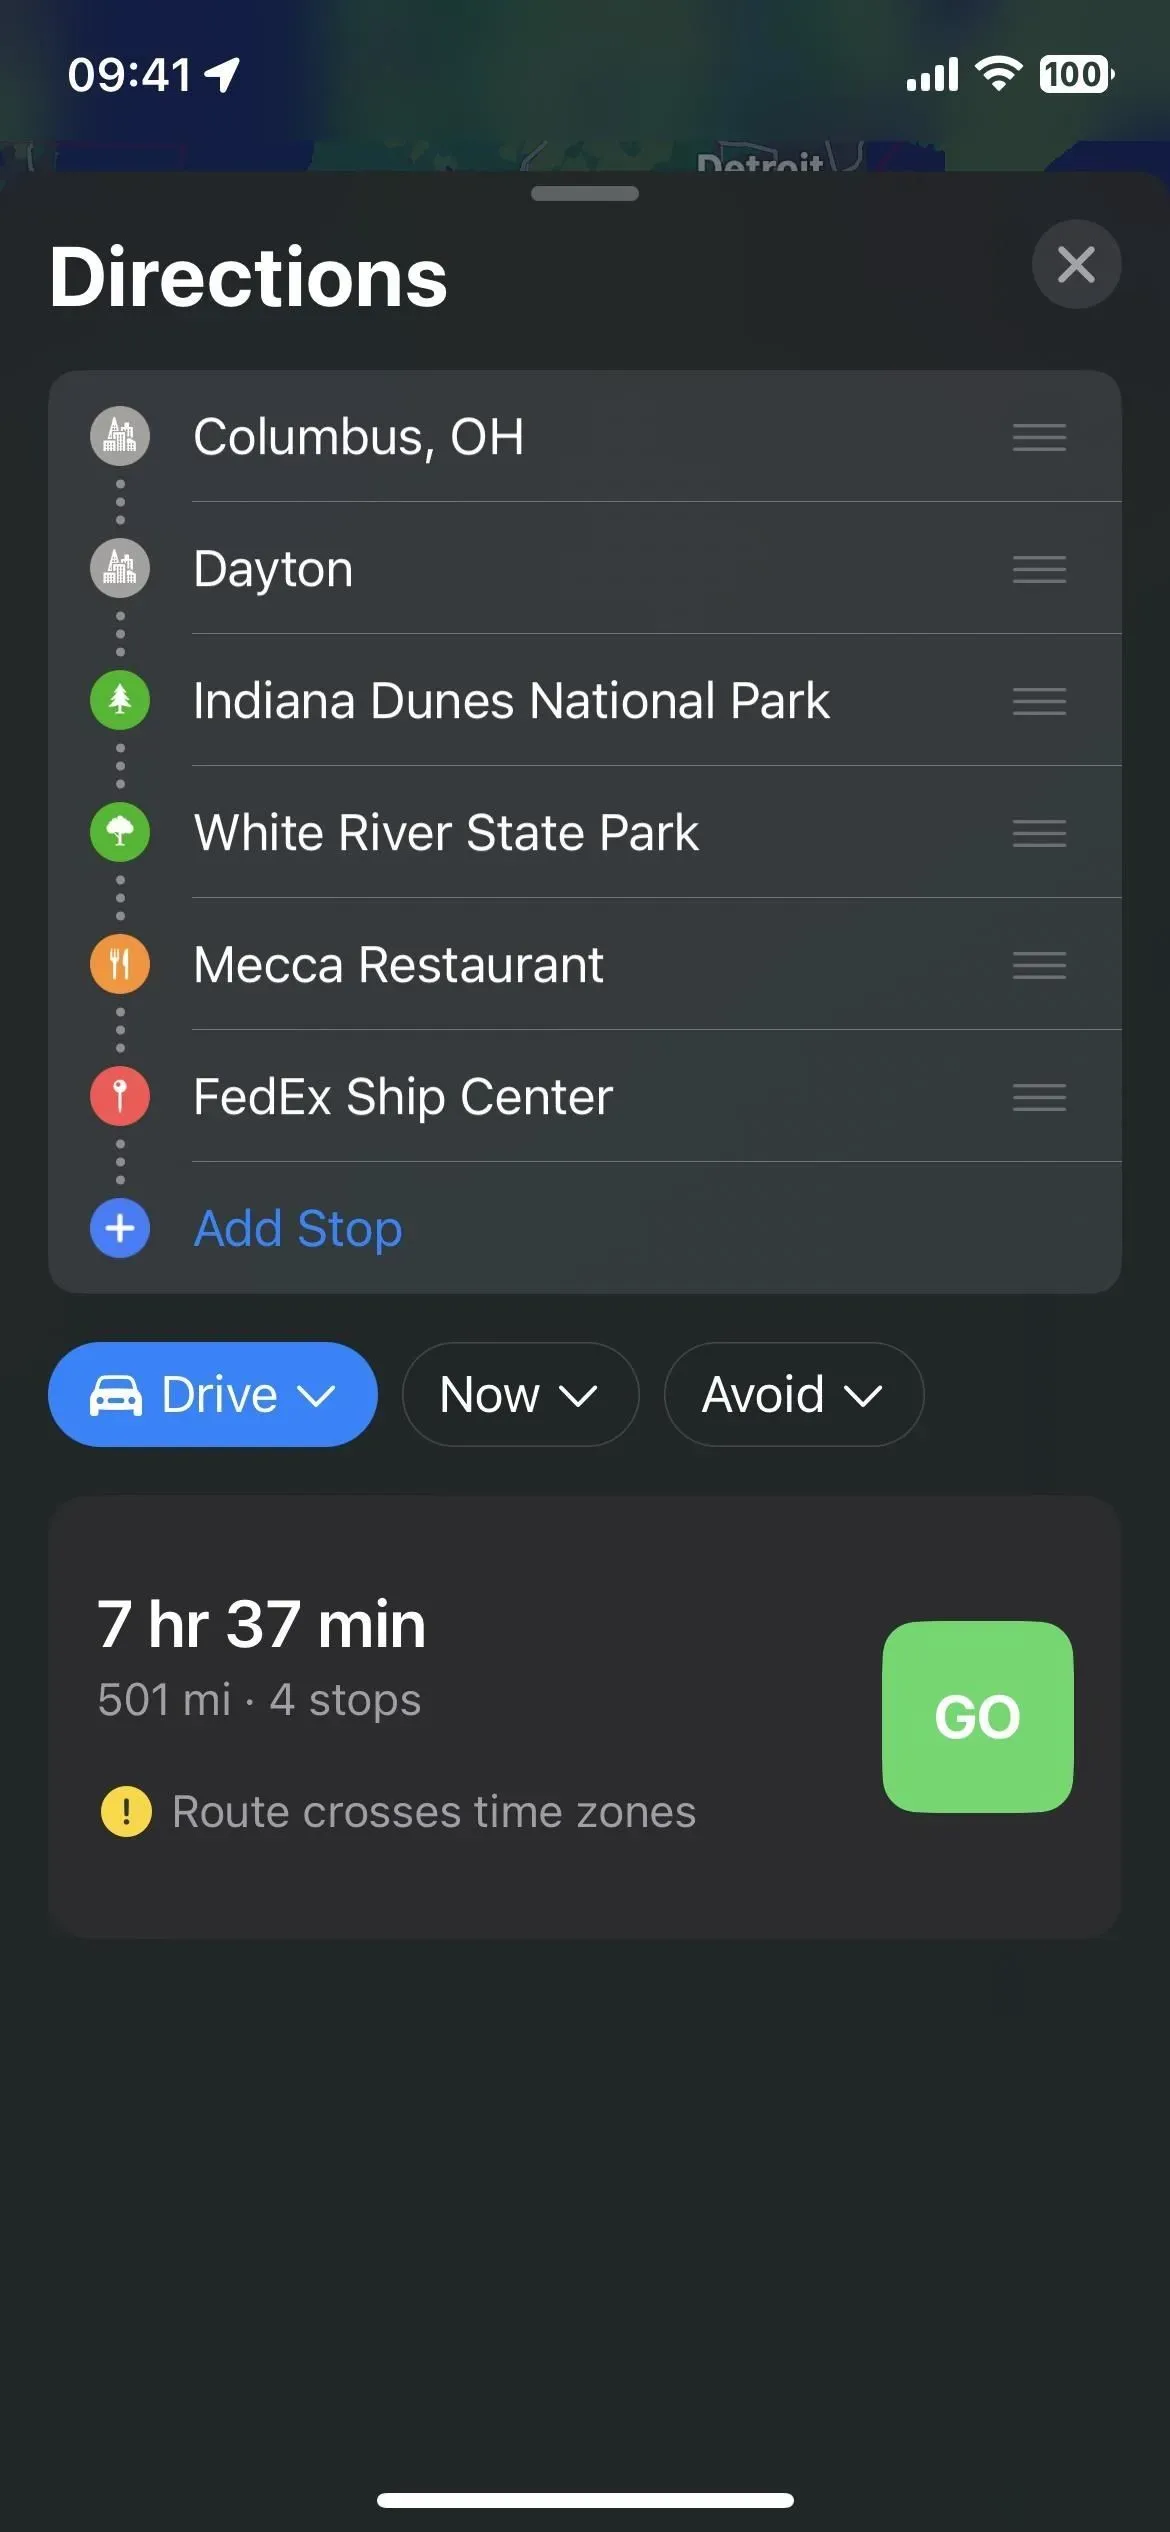
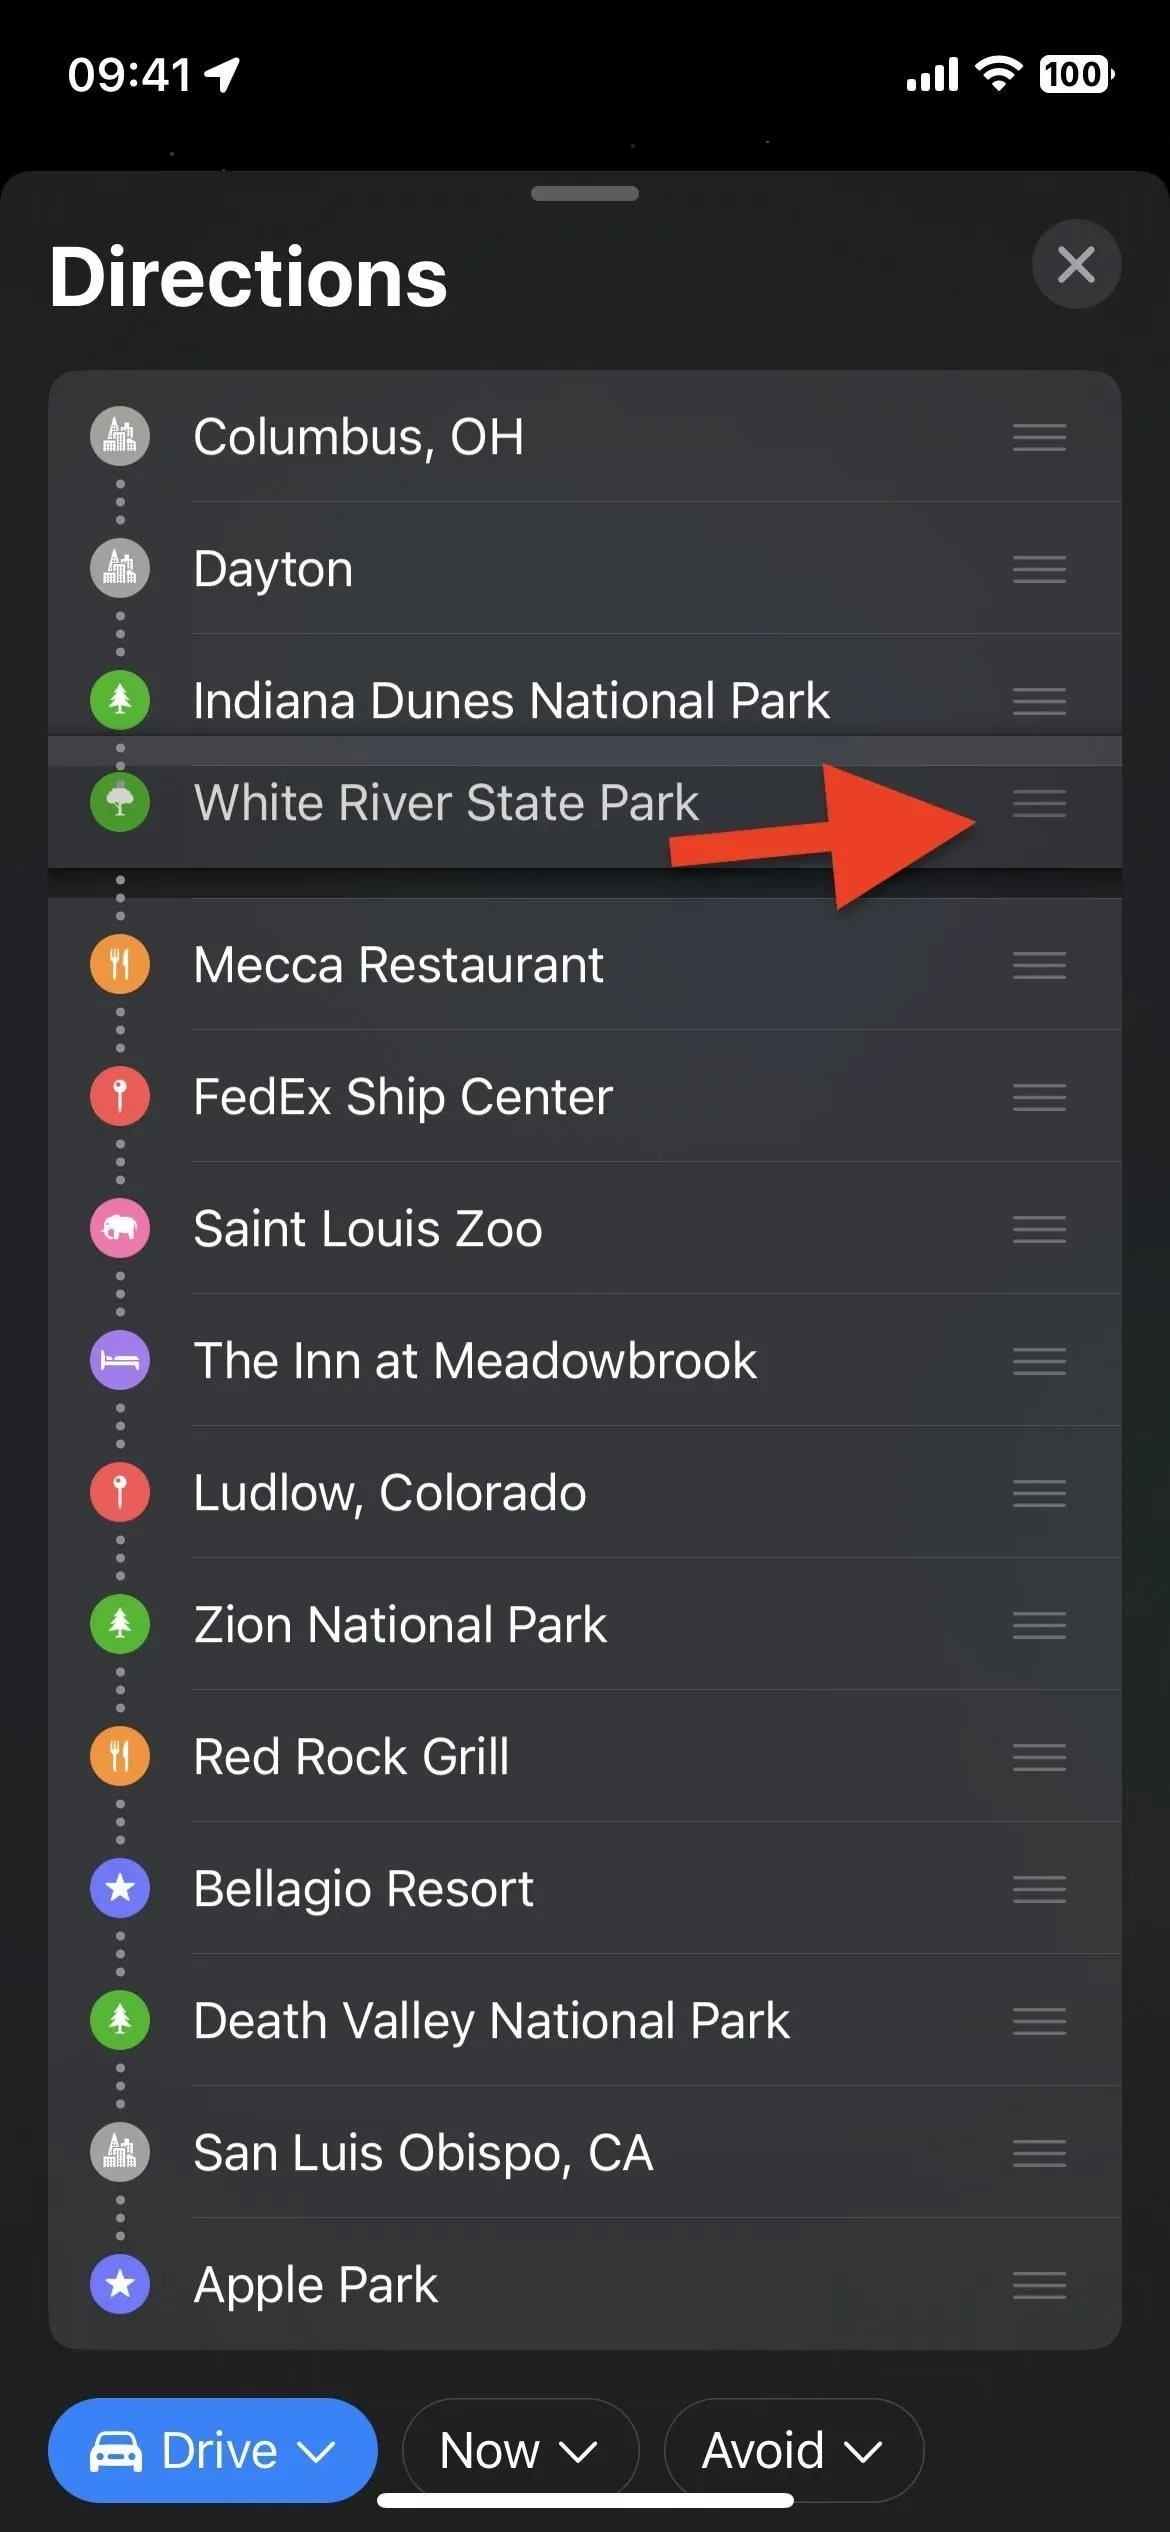
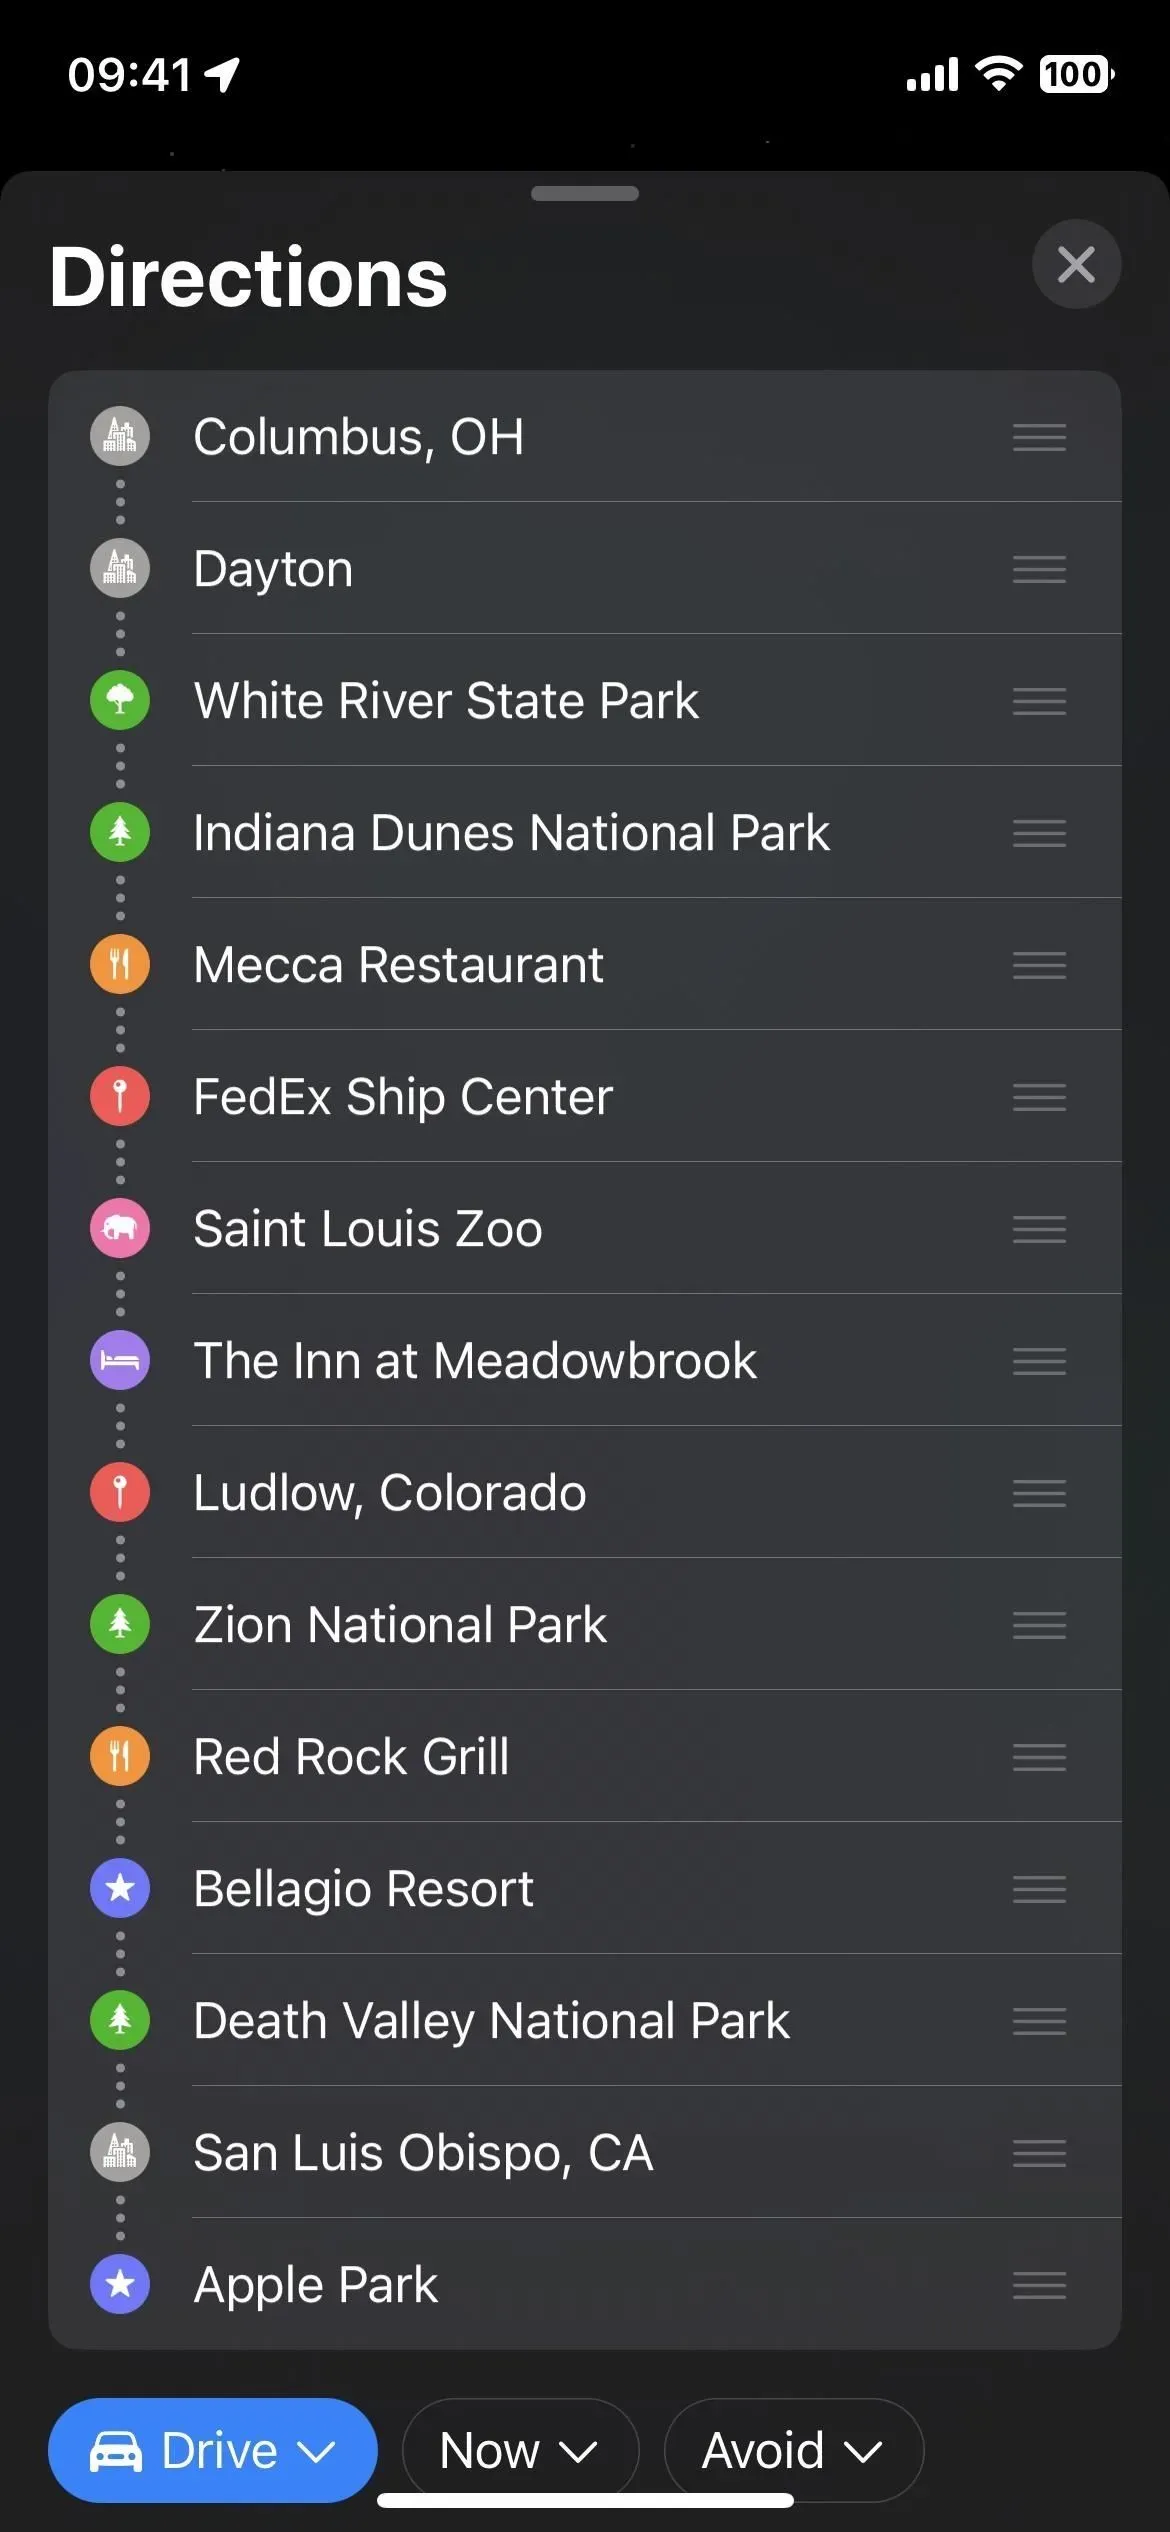
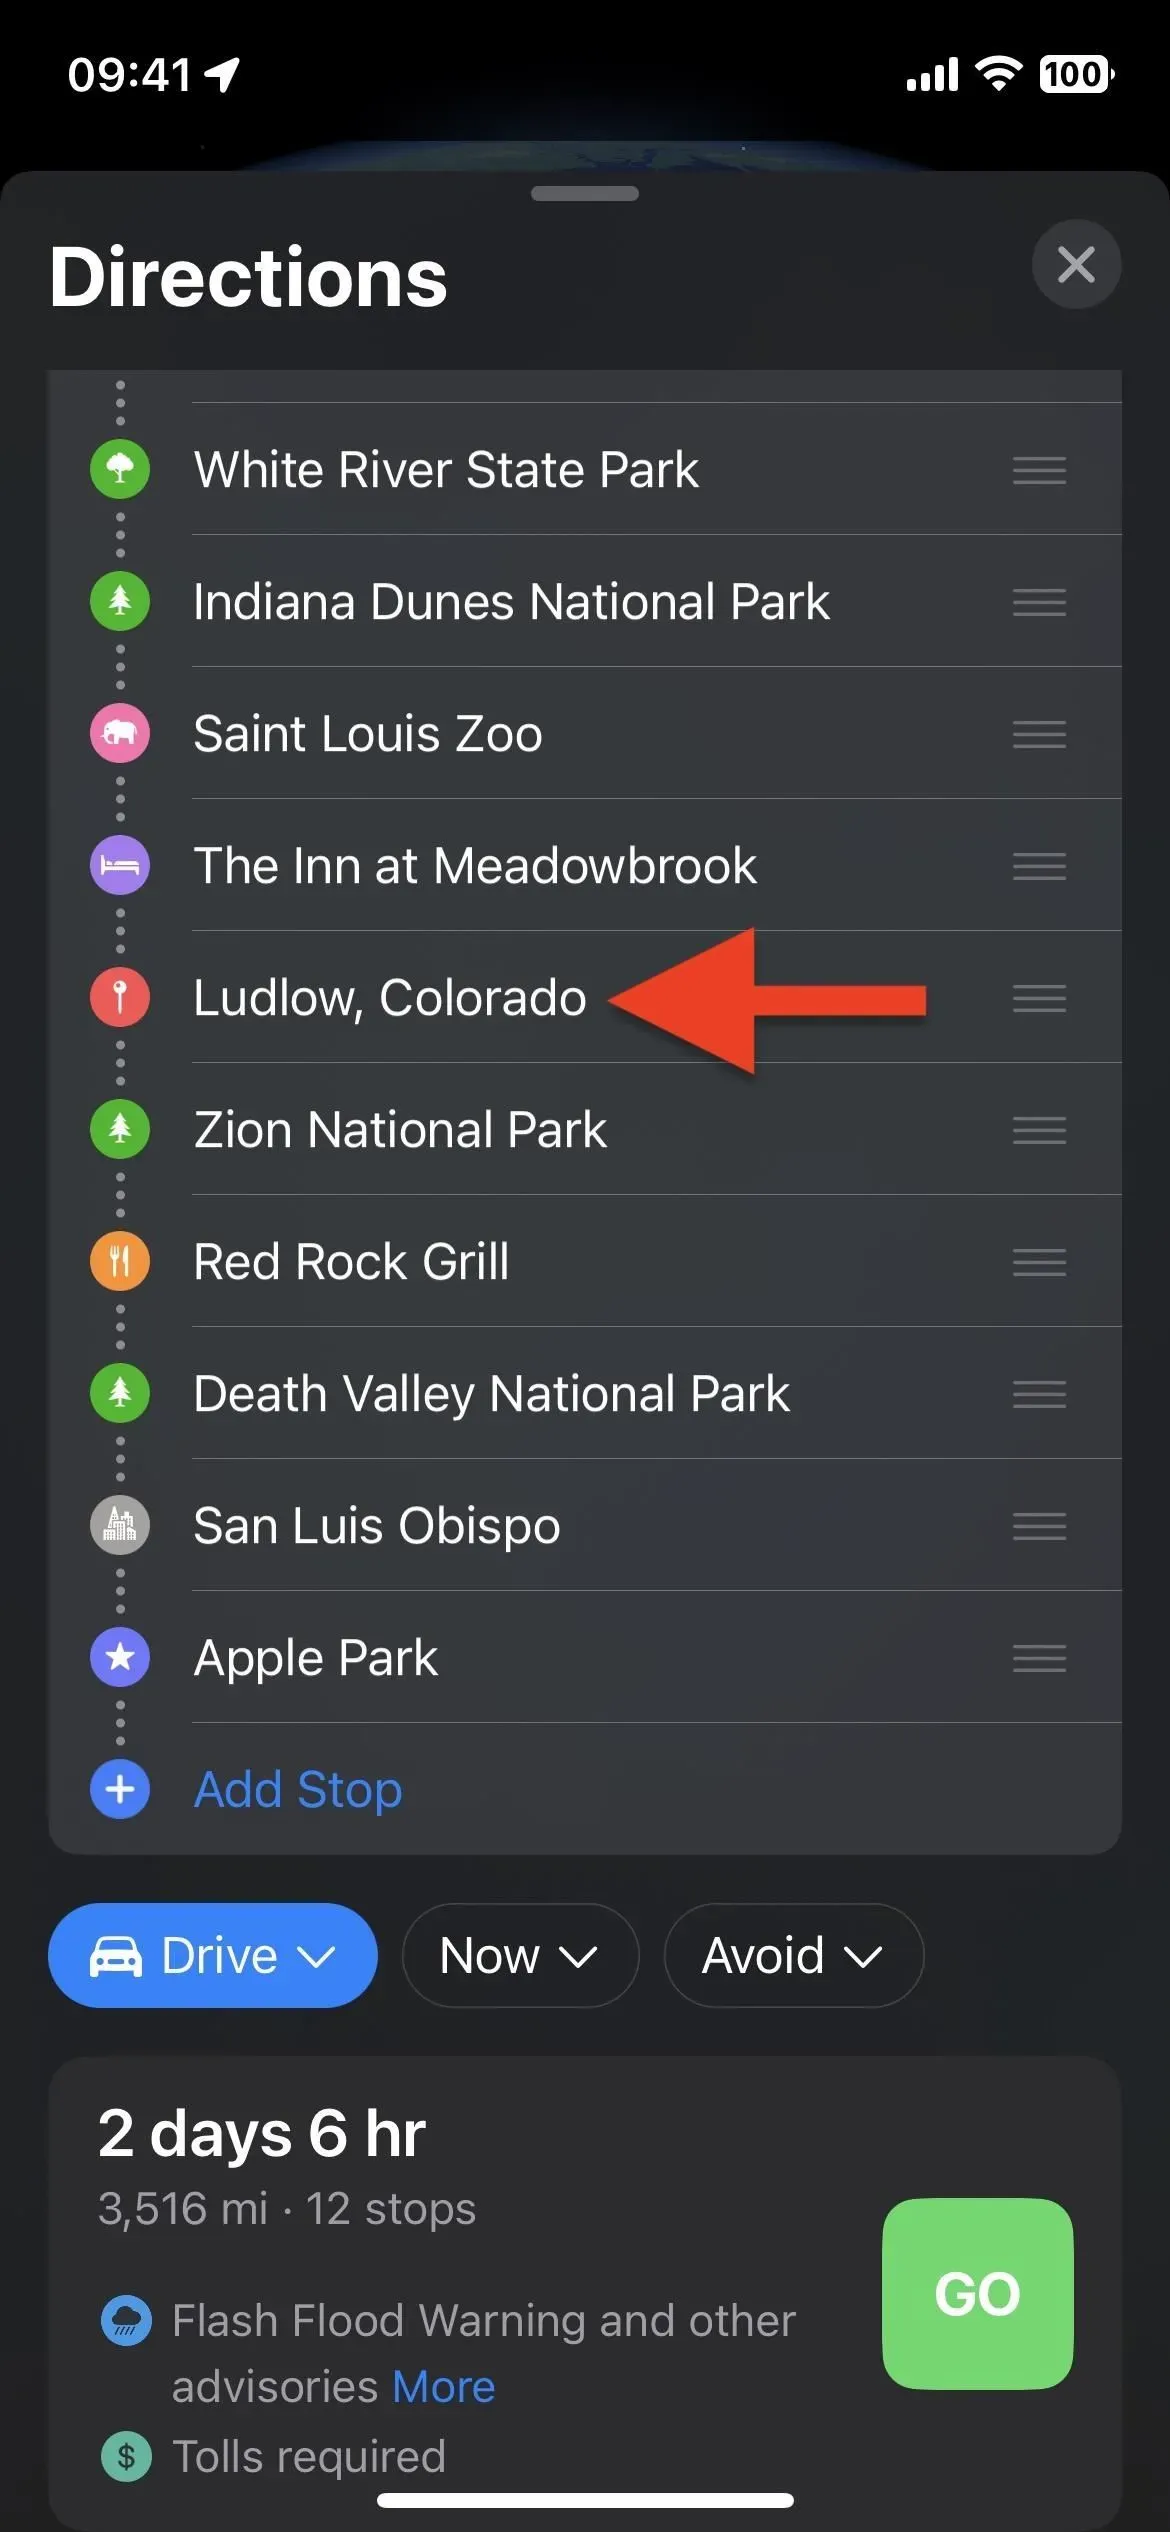
Step 4: Reorder Stops If Needed
If you need to change the order of stops, including start and end points, touch and hold the three bars to the right of a location, then drag it to a new location in the list.

Step 5: Remove Stops If Needed
If you no longer want to visit a stop along your route, it’s easy to remove it from your planned trip. In the ordered list, find the stop you want to skip. Then shortly swipe it to the left and tap Delete, swipe it with a long finger to the left until it disappears from the screen, or press and hold it and select Delete from quick actions.


Step 6: Swap Stops If Needed
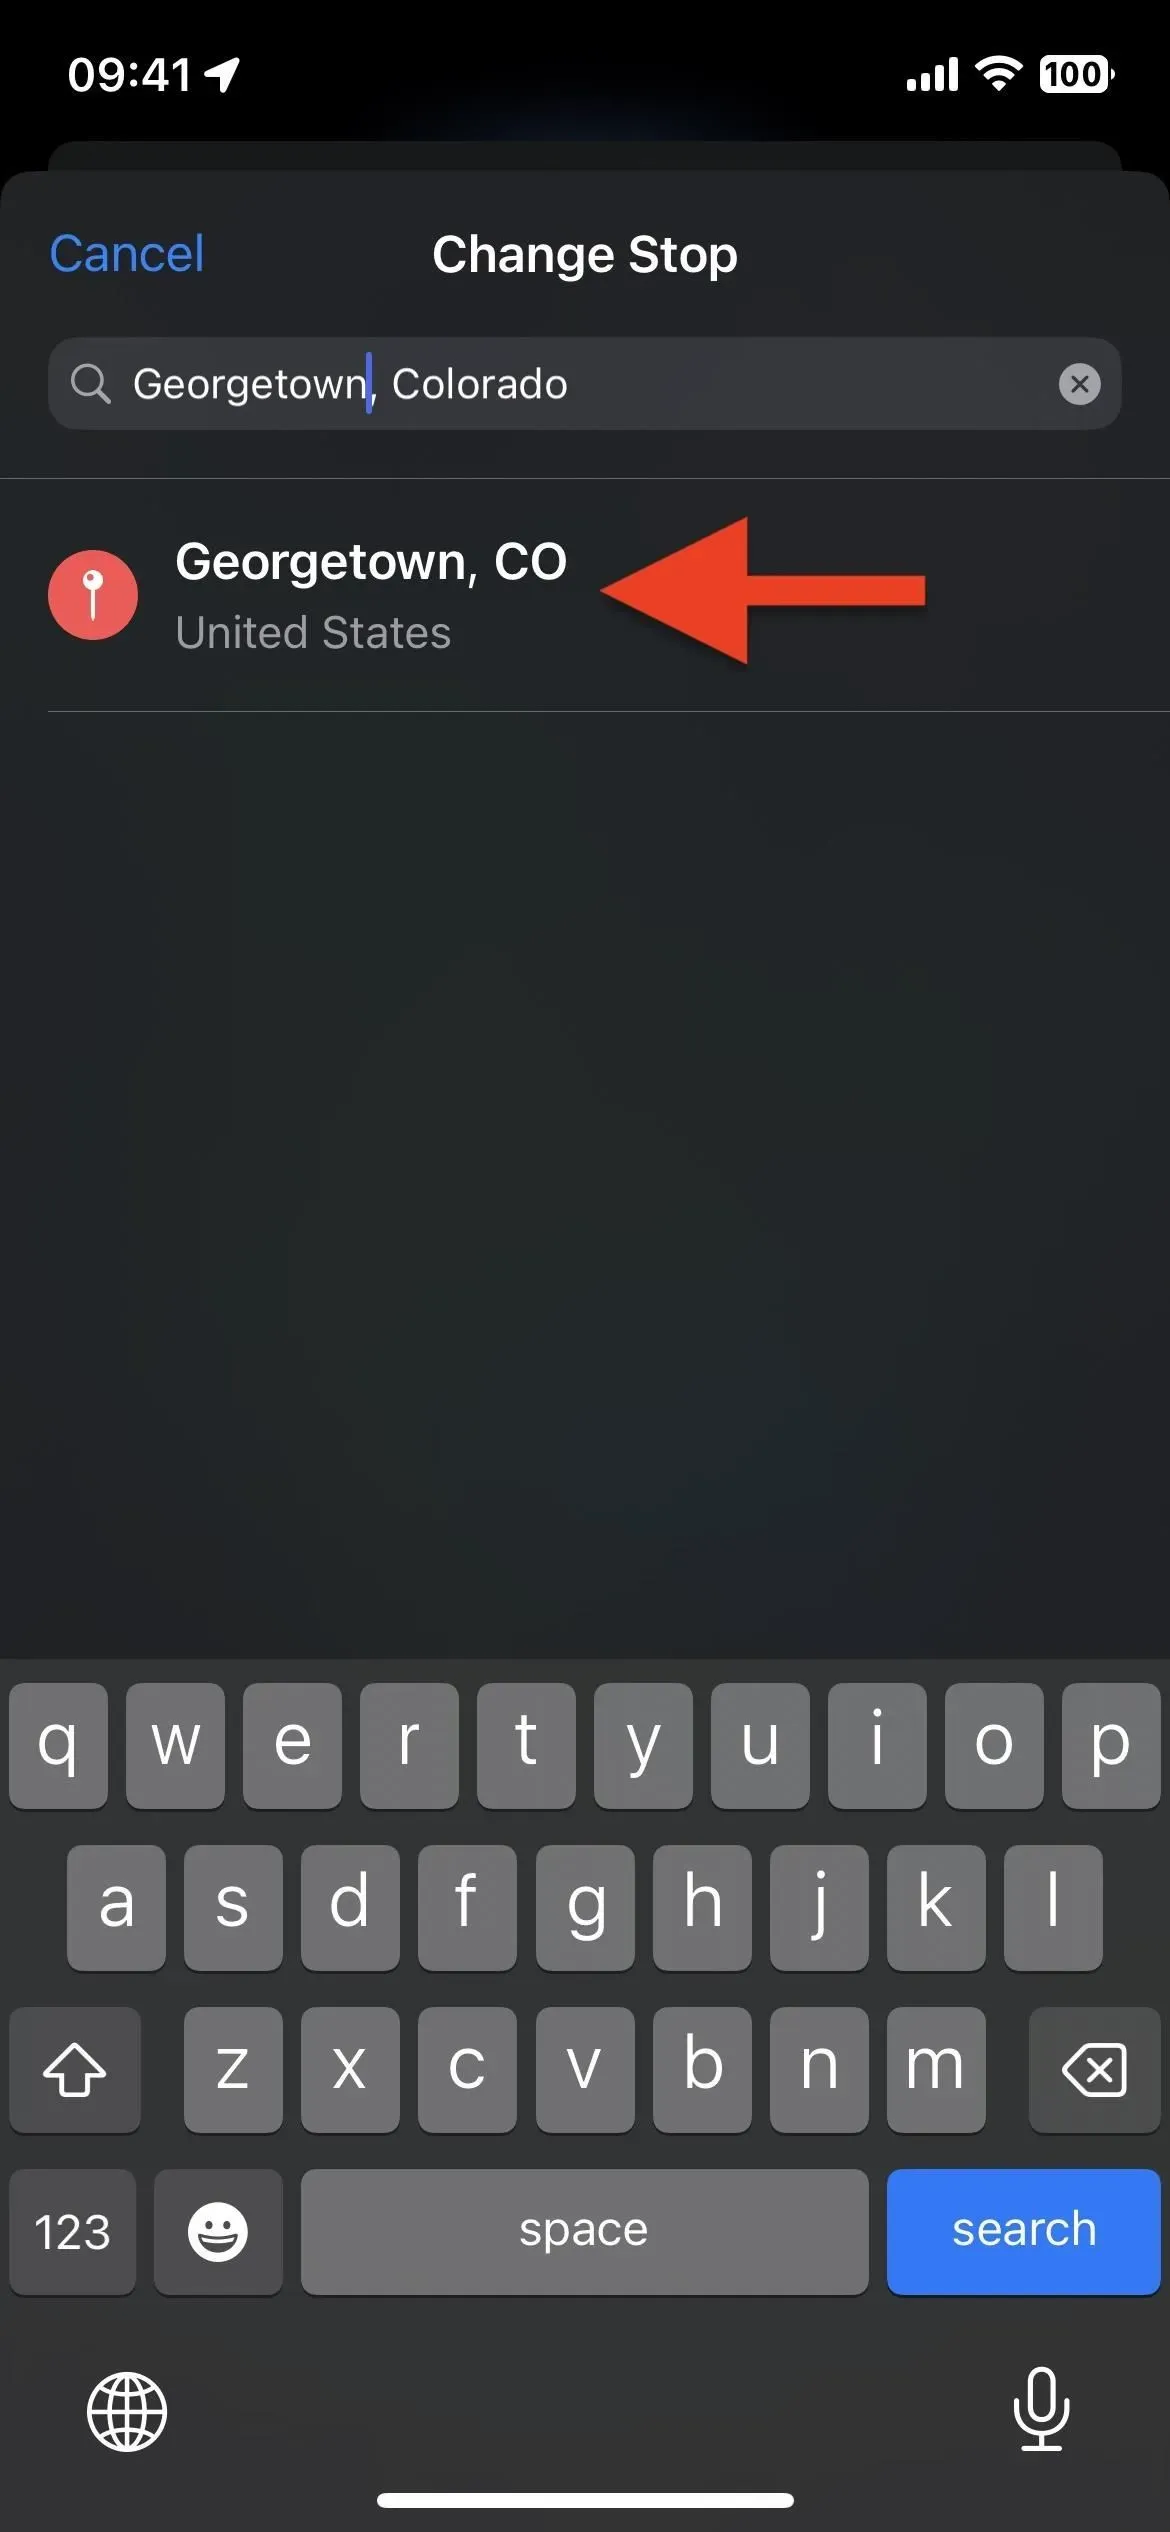
Instead of deleting stops you don’t want to visit and adding new ones, you can simply tap on a place and then find and select a new place using the search tool.

Step 7: Start your planned trip
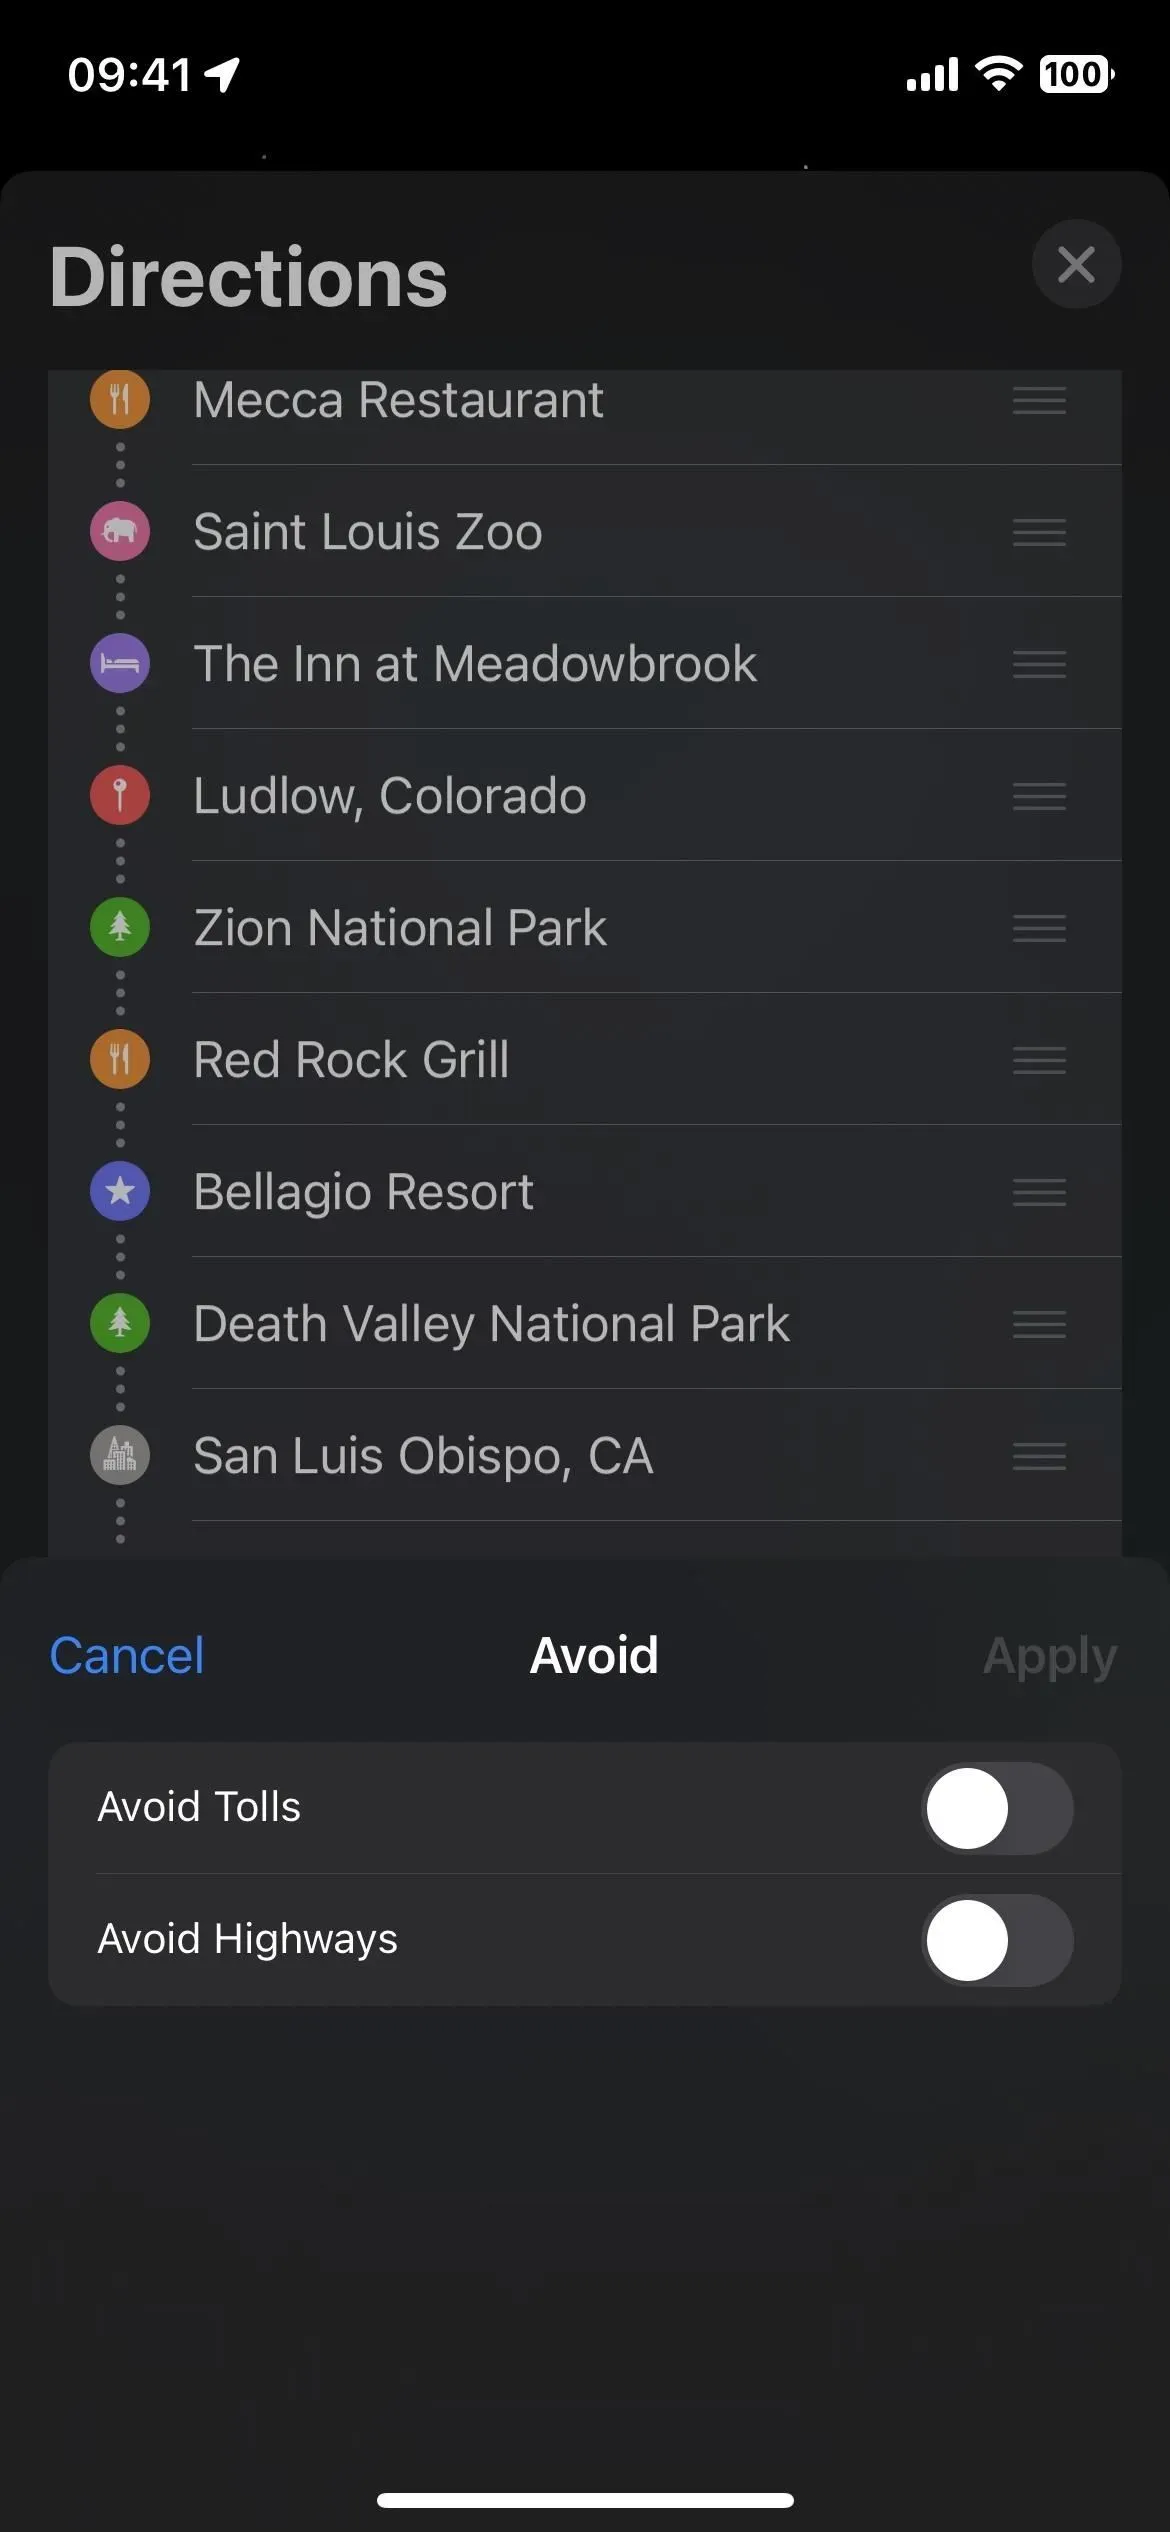
When you’re ready, you can start your journey. You can click “Avoid”and choose to keep toll roads and motorways out of your destinations, or “Now”to set a departure or arrival time, which helps give a more accurate overall travel time based on traffic patterns throughout the day. Finally, click the “GO”button next to the route you want to take if you see multiple options.

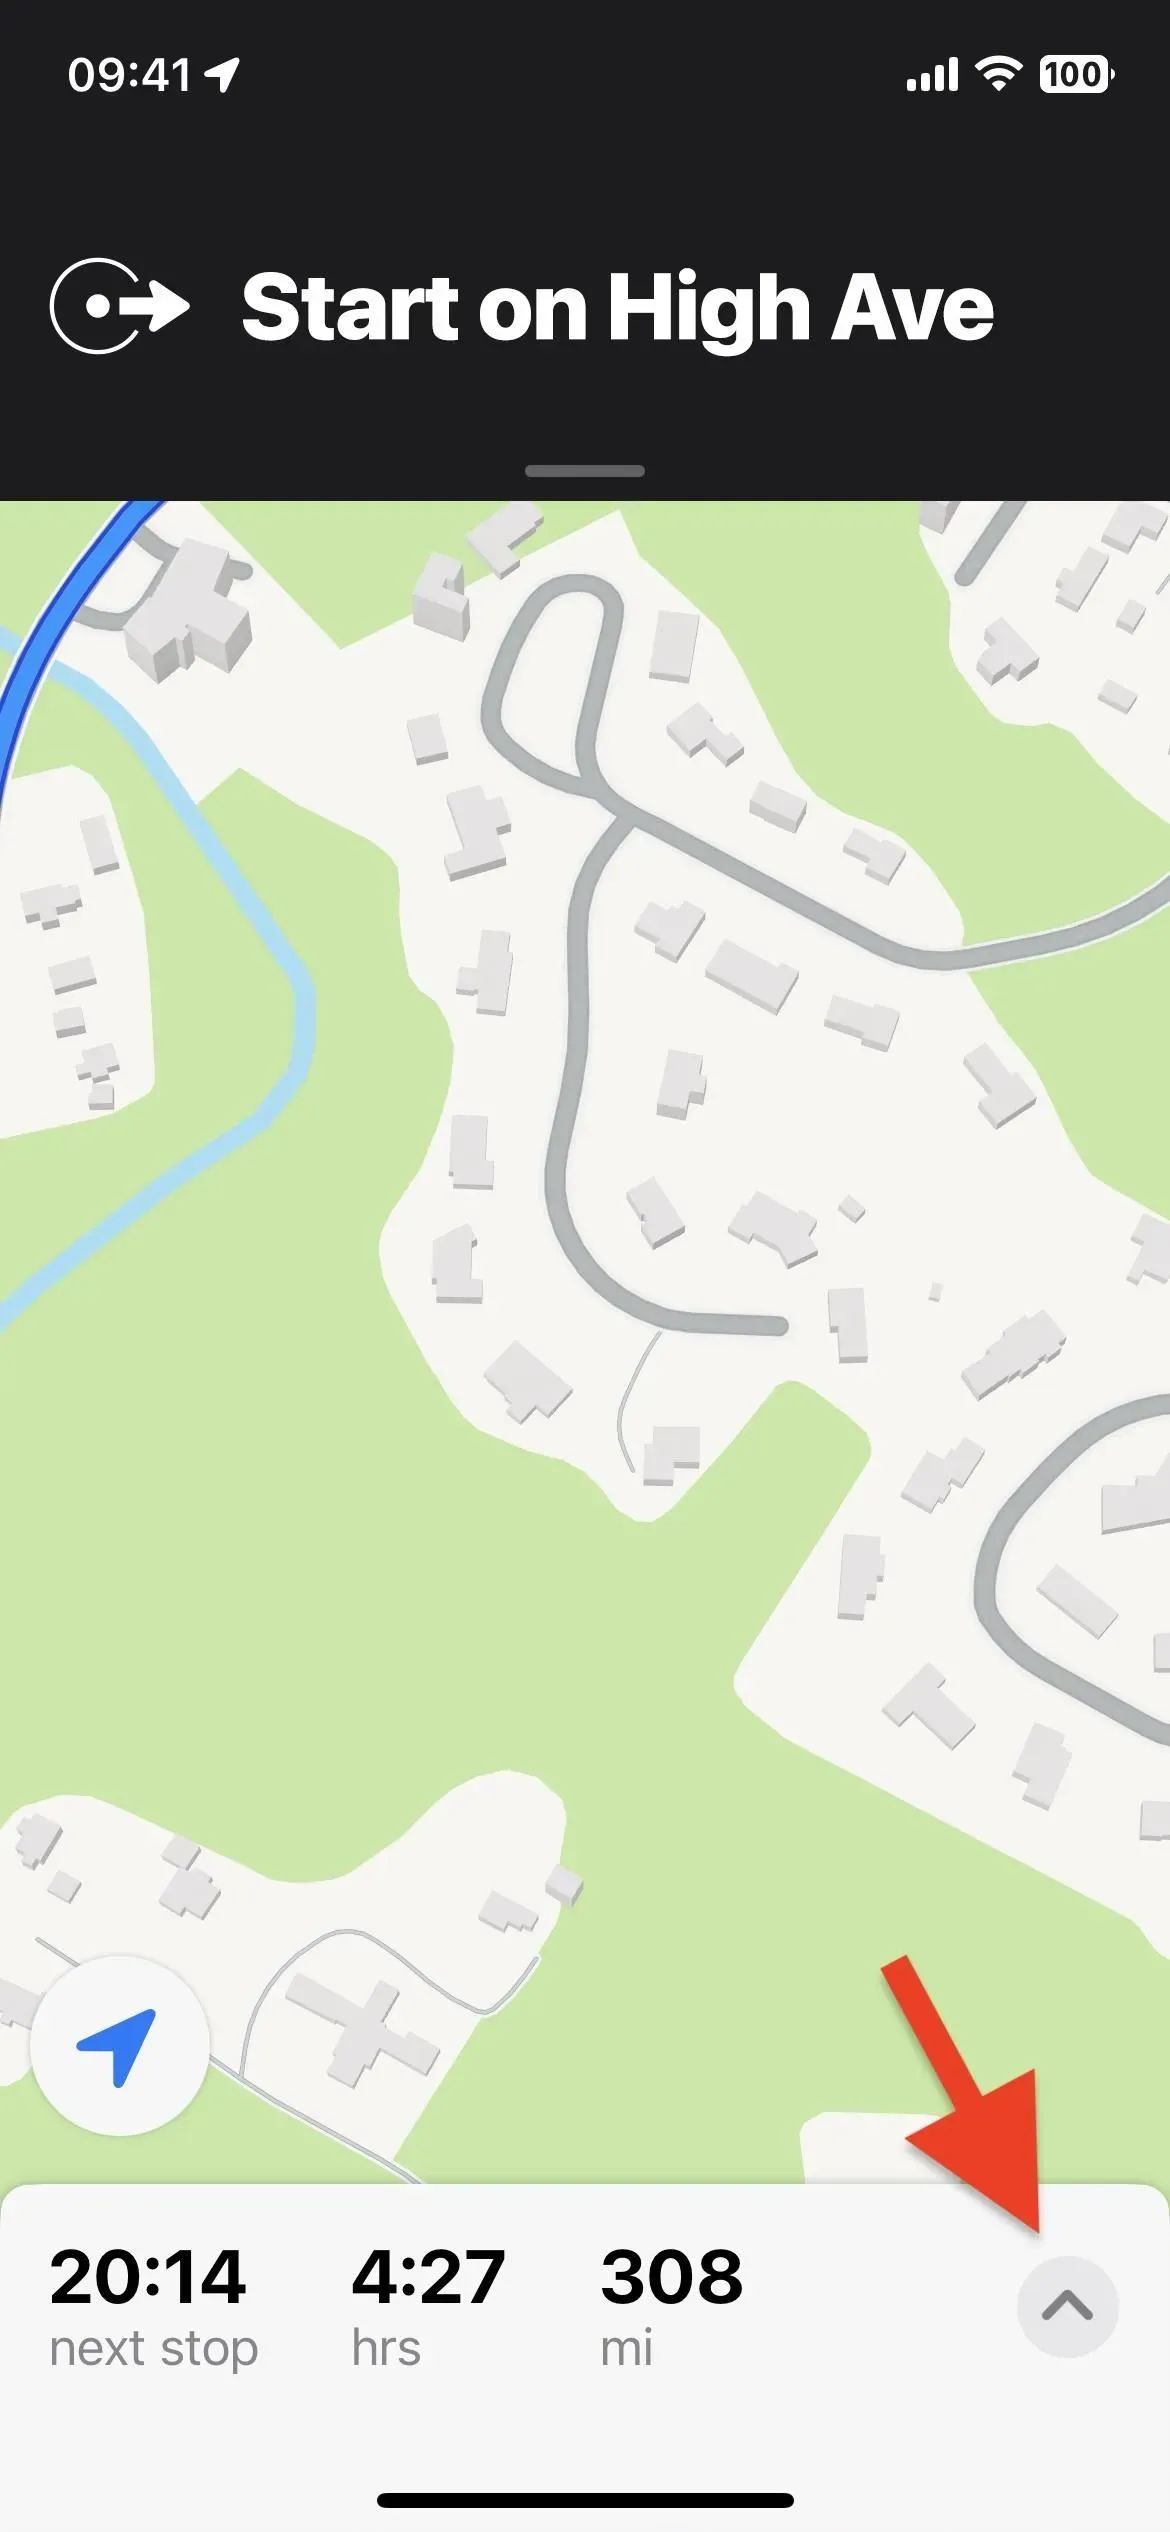
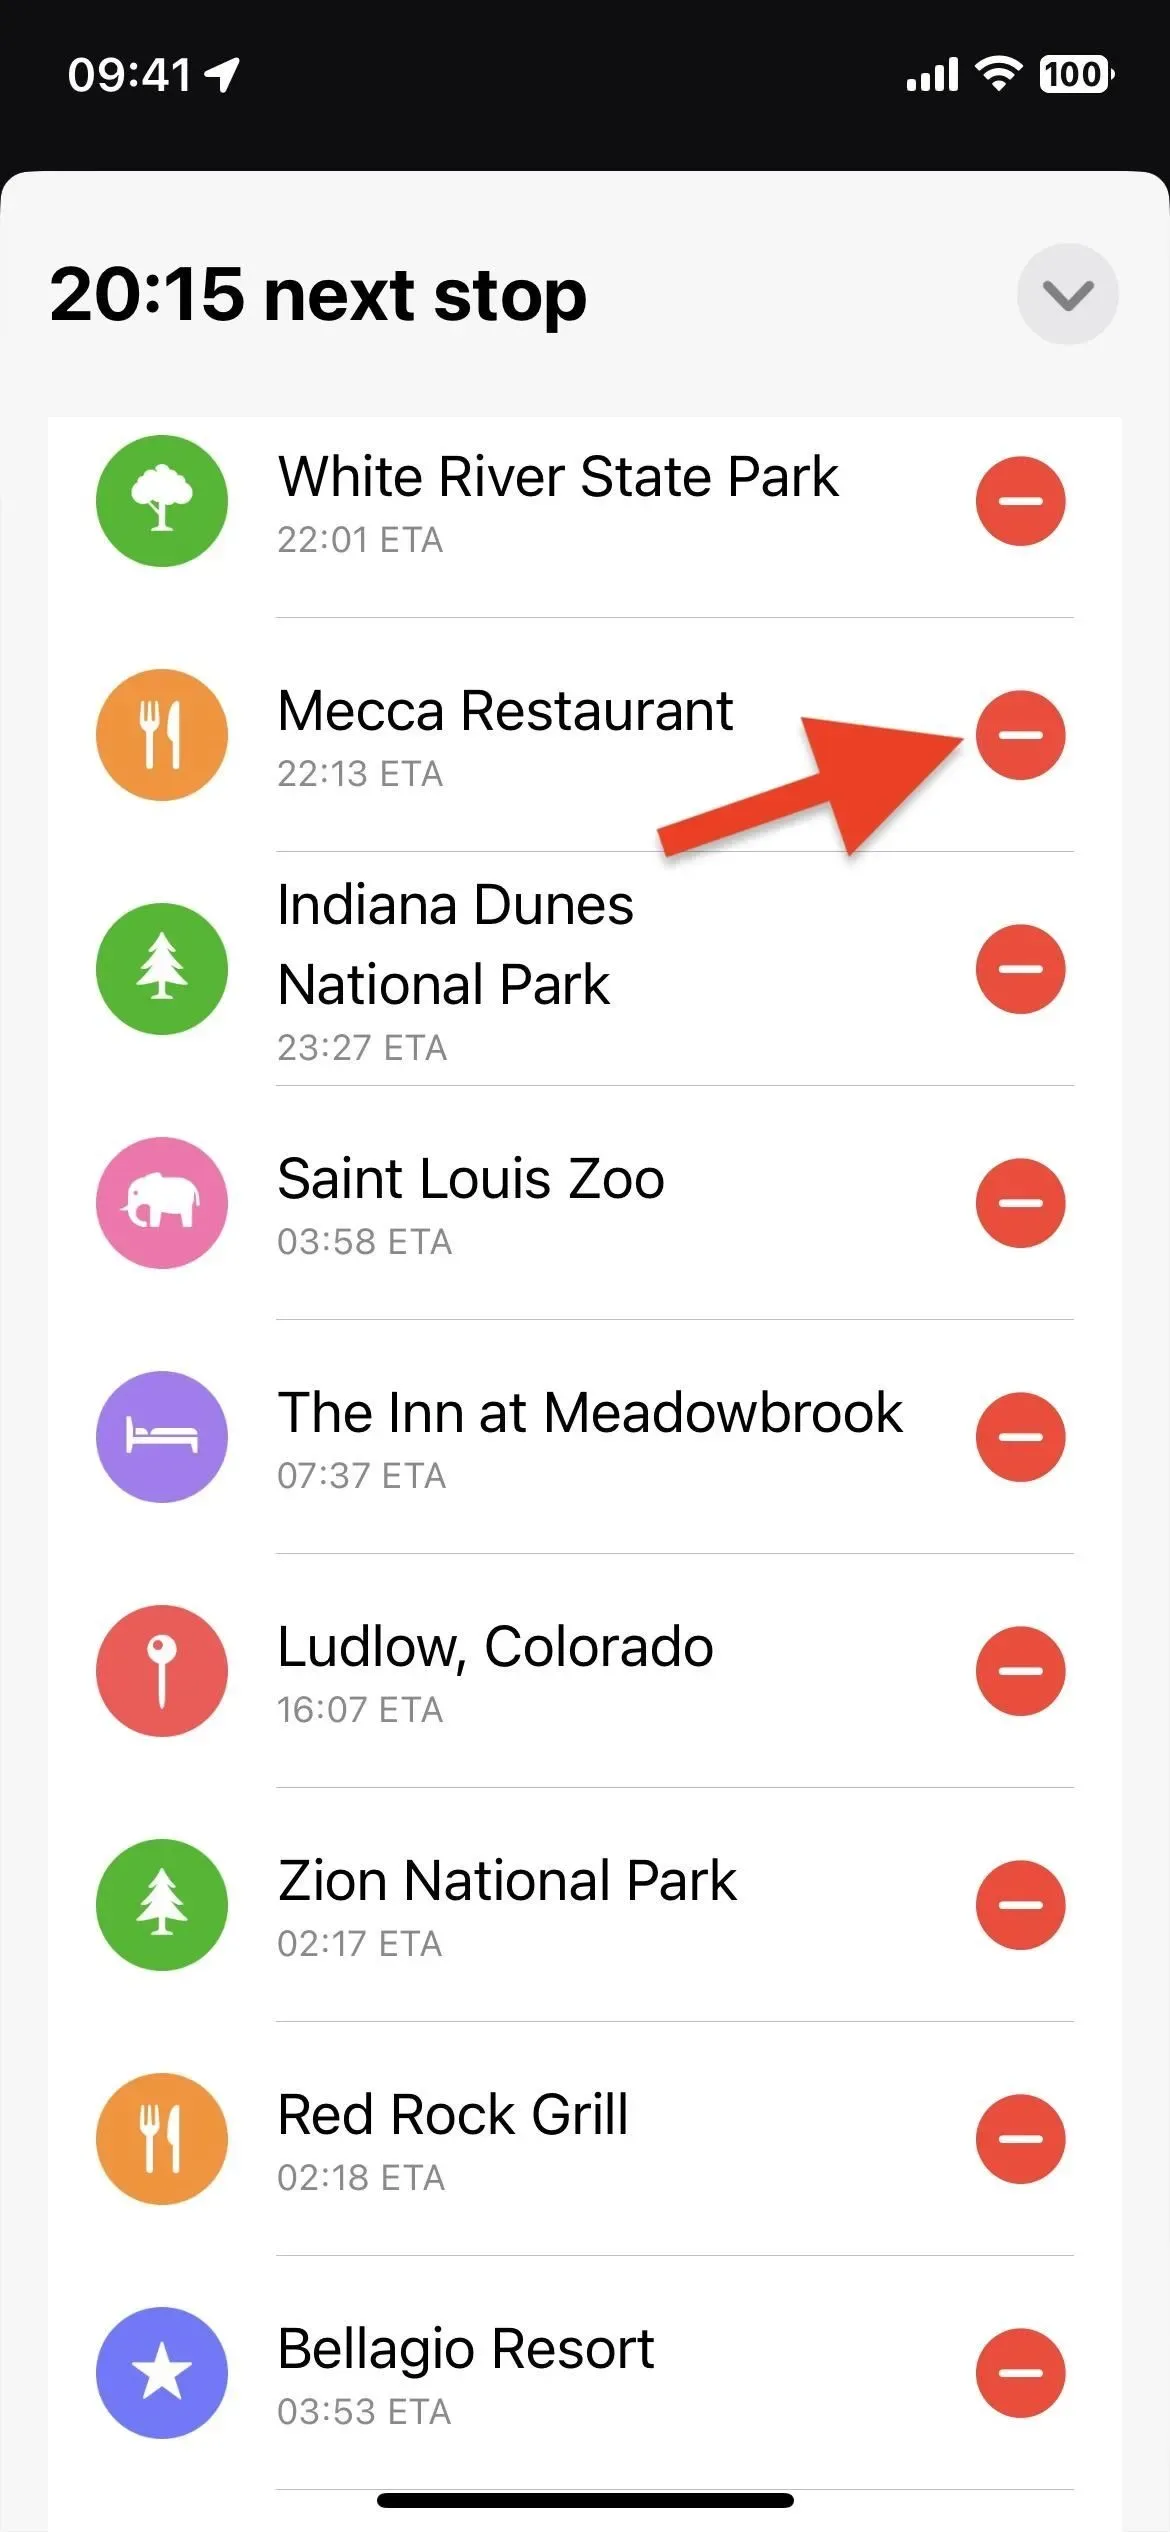
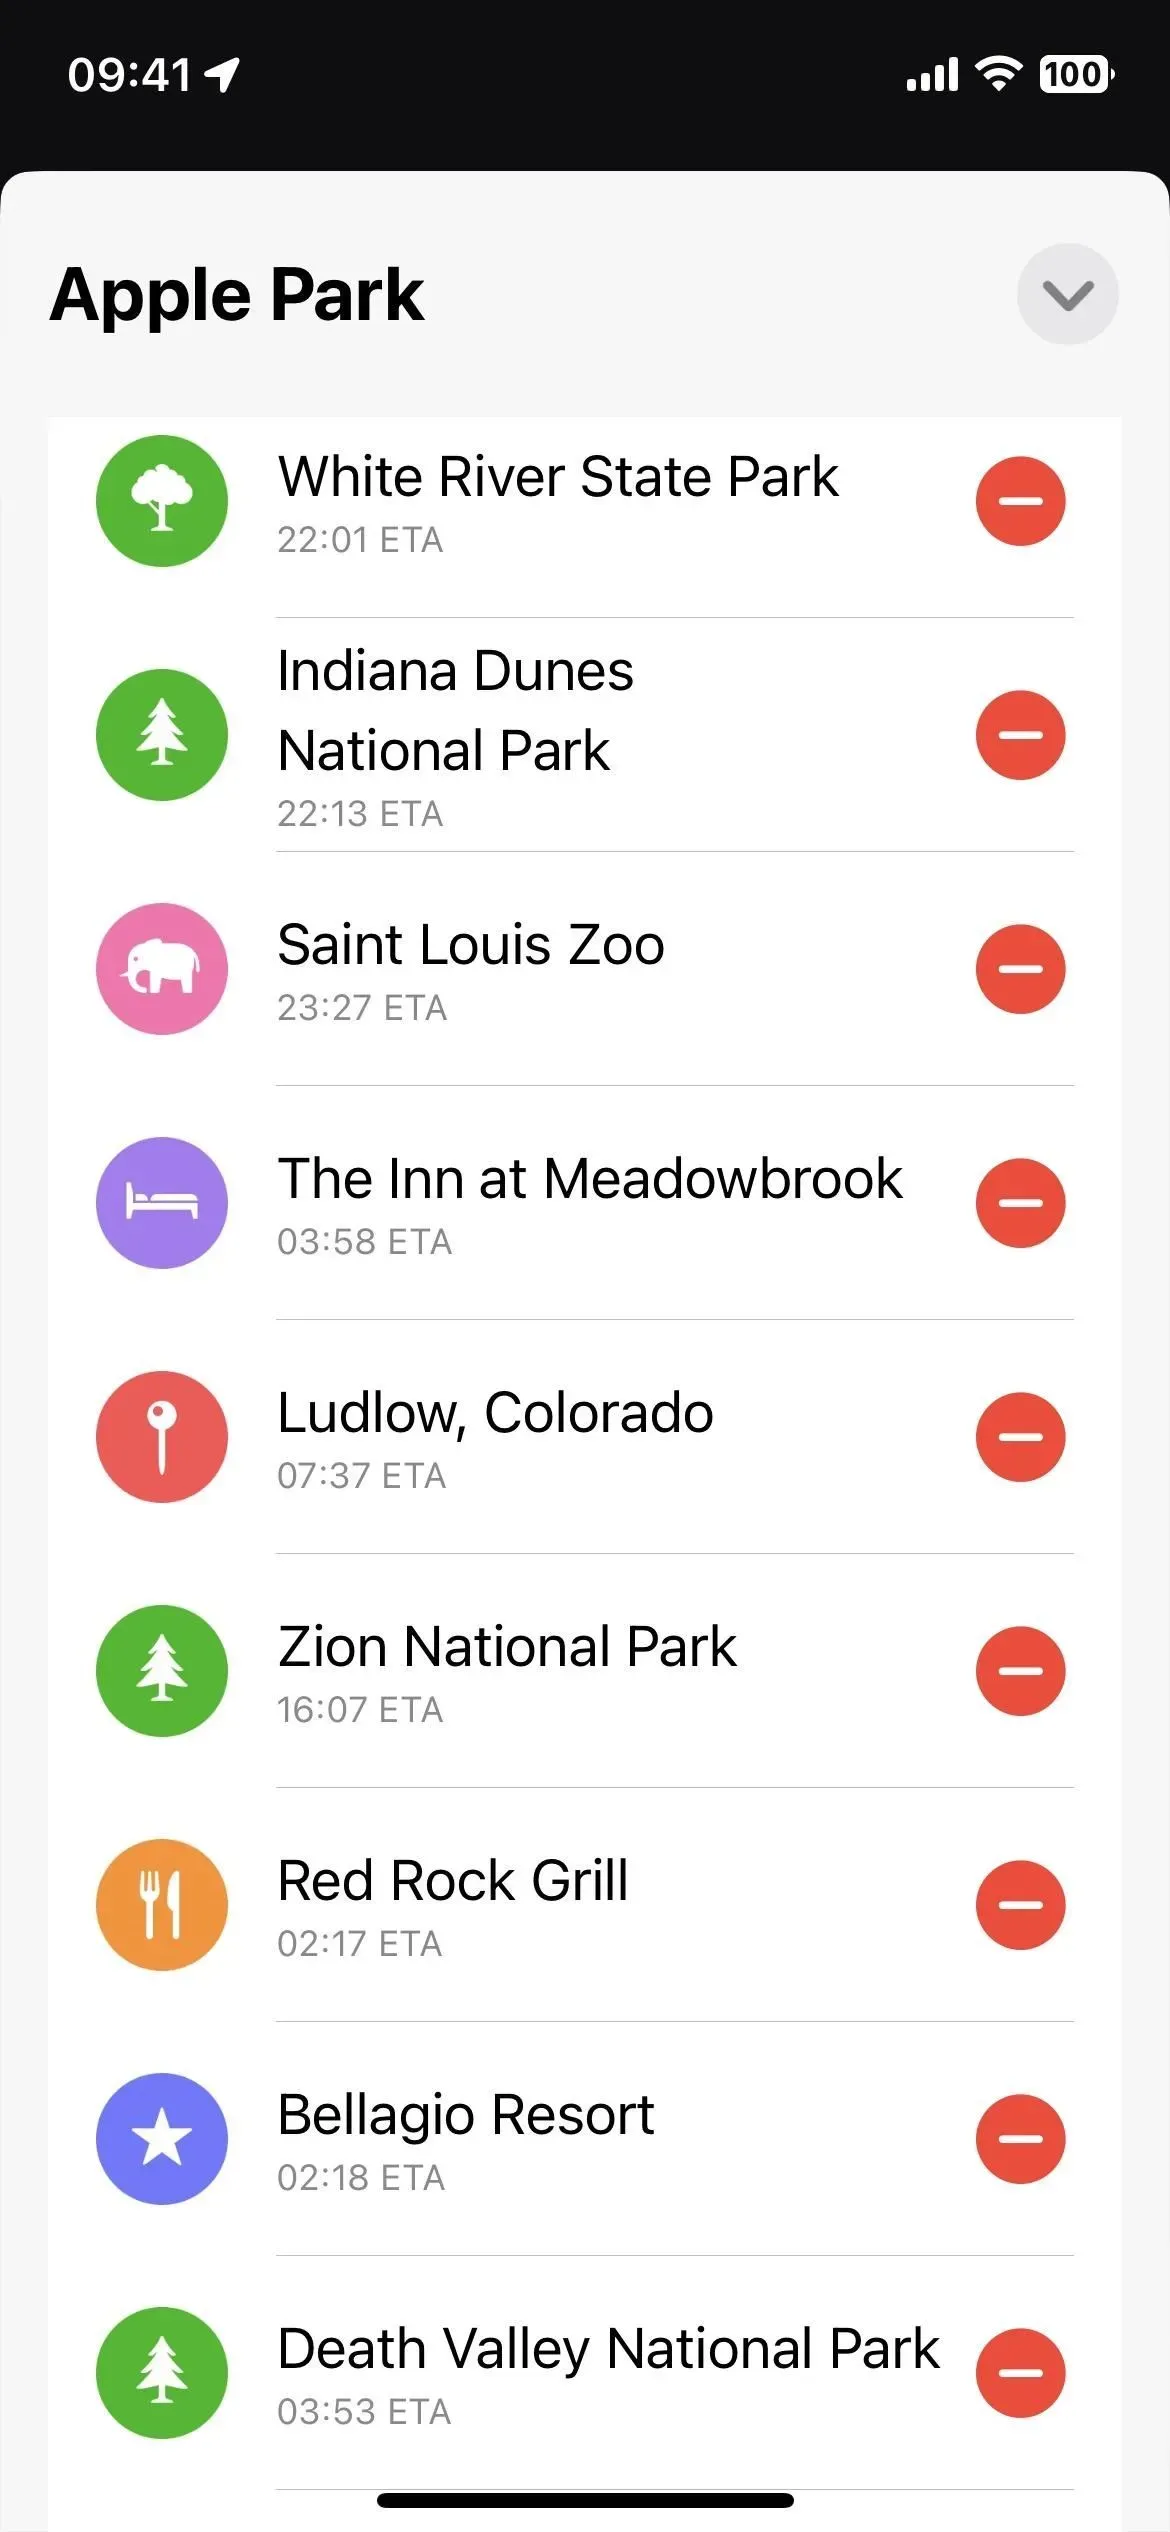
Step 8: Remove stops while navigating if needed
If you no longer want to visit a stop along your route after you start navigating, tap the route card at the bottom, then tap the minus sign (–) next to the place you want to delete.
Step 9: Add Stops During Navigation If Needed
As before, you can still add stops after driving directions have been started. Tap the route card at the bottom, then tap the Add Stop button. As with iOS 15 and earlier, you can select any of the categories – banks and ATMs, coffee shops, convenience stores, eateries, fast food, gas stations, or parking lots – to find and select a stop. But now you can also search and select a specific location that doesn’t fit into any of those categories.
Whatever you choose as a stop, it will be the next point on the route. You cannot change the order of stops while navigating, so only add stops in this way when you know it will be the next stop on your journey.
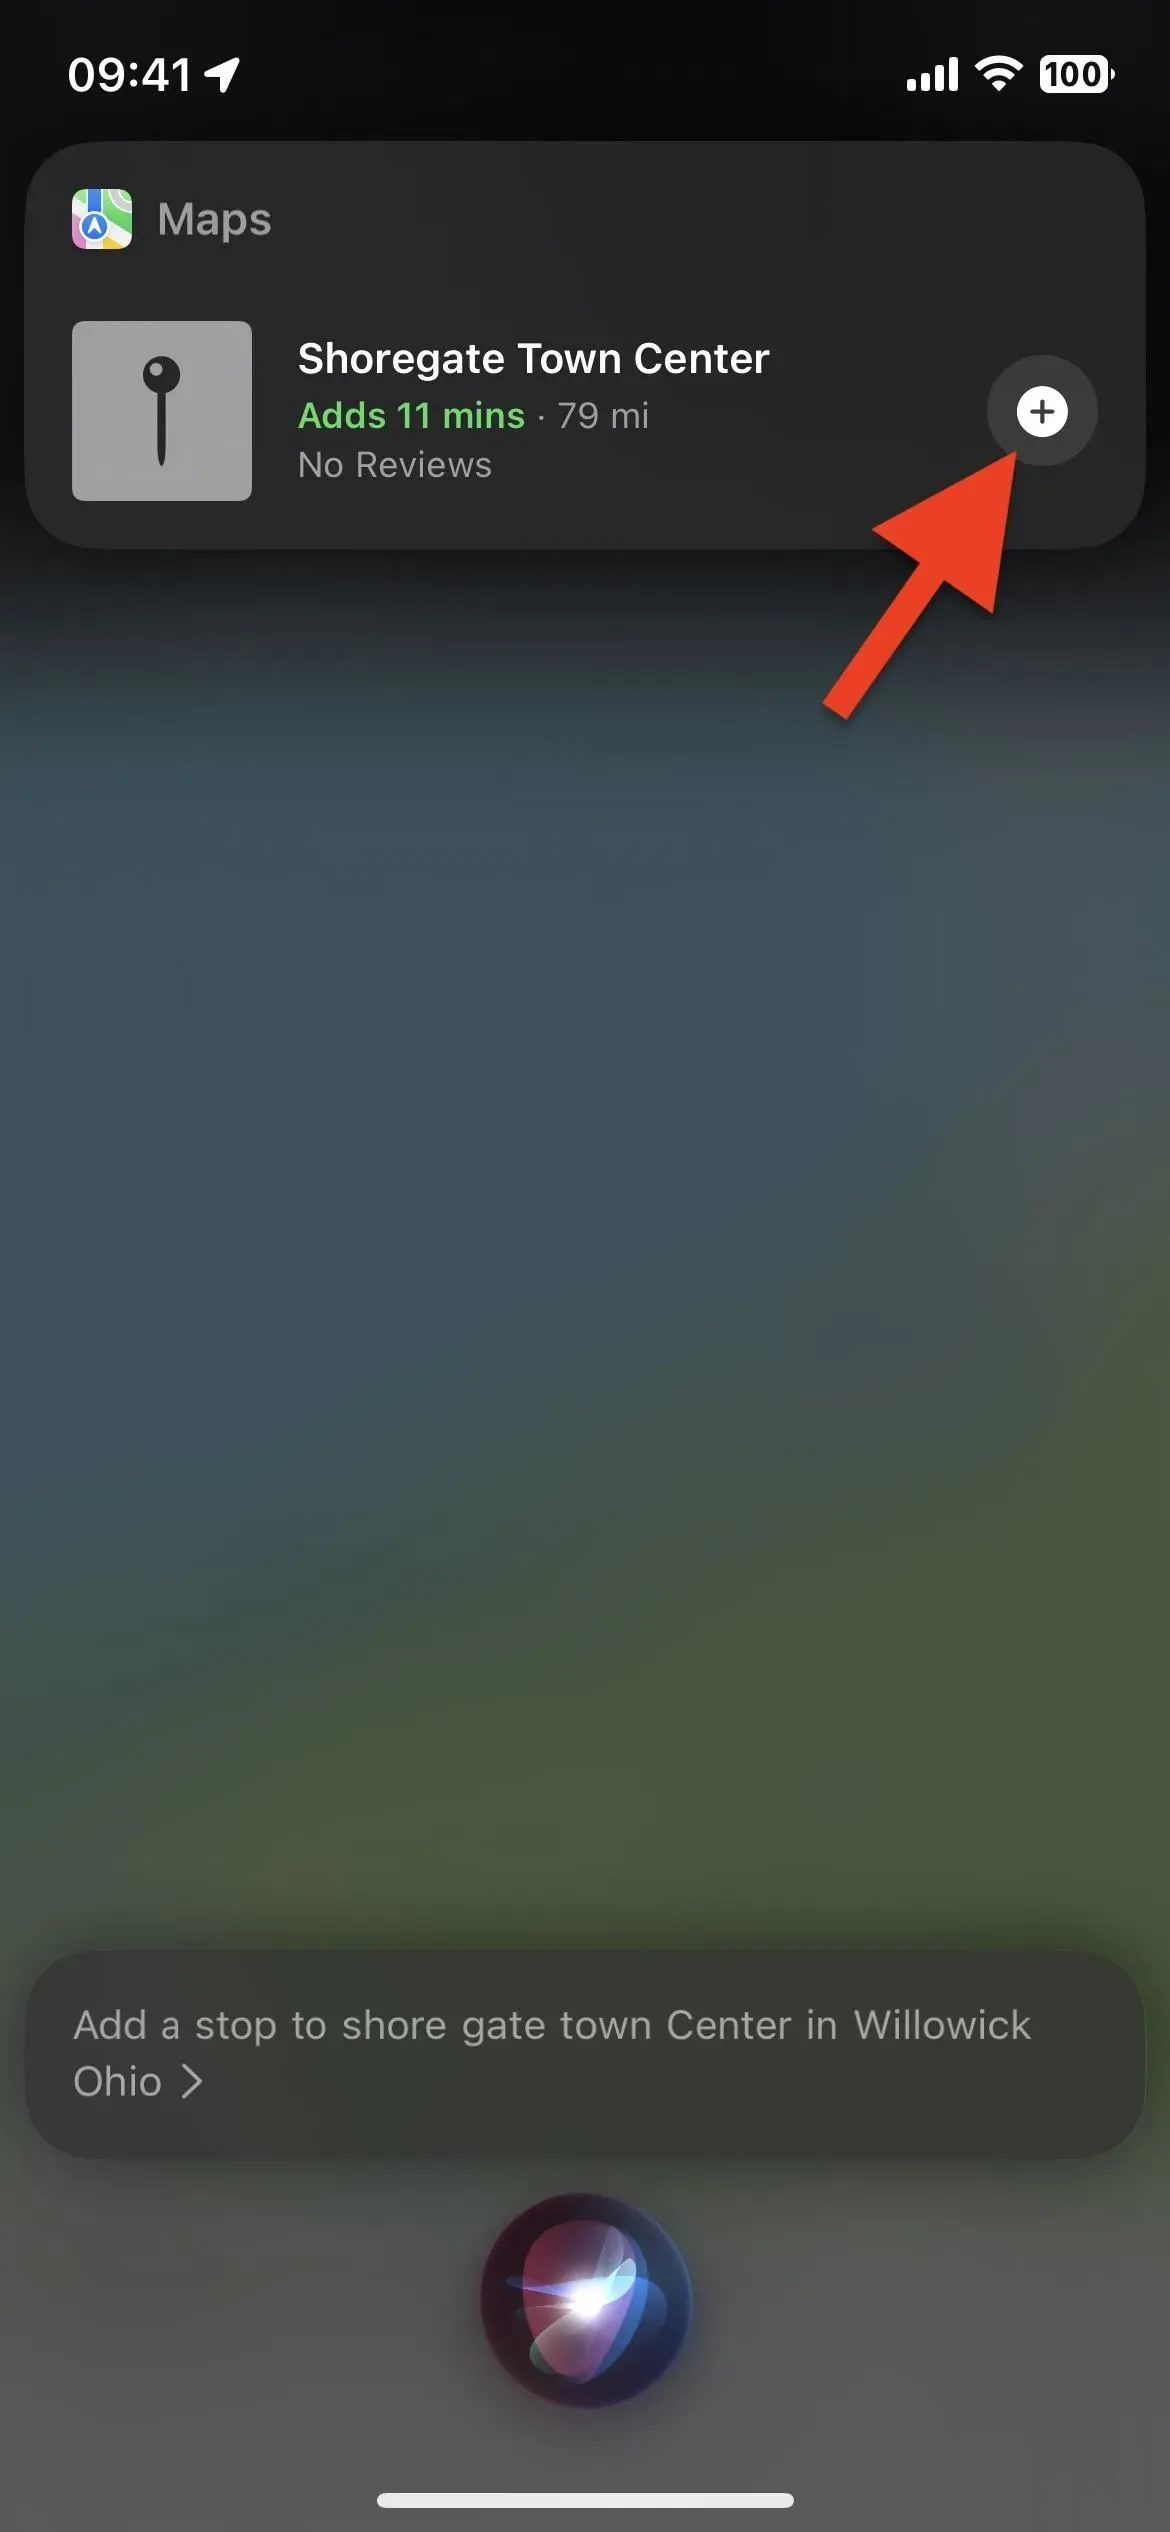
You can also ask Siri to add a stop. Tap the plus sign (+) at the desired location it finds, then “Add Stop”when the location card appears in Maps.
Leave a Reply