Android WiFi Authentication Failed: 10 Easy Fixes
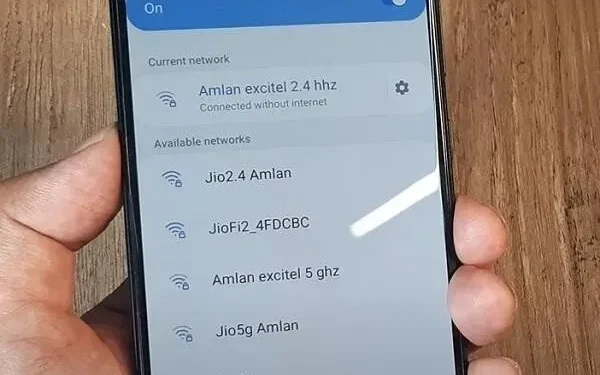
WiFi Authentication Error on Android is a problem that users face while connecting to WiFi. Whether you’re trying to connect to an existing network or add a new one, it doesn’t matter. The error may be related to the wrong Wi-Fi password.
But there may be other reasons for the problem. So, if you are facing a similar error on your Android device, there are various ways to overcome it. You may have already tried Airplane Mode if you’re here.
What causes Android Wi-Fi authentication problem?
There can be many reasons for Wi-Fi authentication problems. When investigating the cause, it was found that the underlying cause may be a weak link. In addition to it, there are others such as:
- Wrong Wi-Fi password. When users are in a hurry, they may enter the wrong password. As a result, they encounter authentication errors. You can be careful when entering the correct password to solve this problem.
- Invalid or unrecognized IP address. The DHCP IP address settings cannot recognize the IP address on your Wi-Fi device. As a result, you may encounter this error. Try using a static IP address in your Wi-Fi network settings to fix this issue.
- Network settings with errors. A network with errors or failures indicates a technical problem. This could be due to a corrupted network. In such cases, you can reset your network settings, which may work. You can also try restarting your router and reconnecting to the internet. If that doesn’t work, you can always reset your settings.
There may be more reasons for this error. Some may include a malfunction in the provided part of your network. However, you can try the fixes below to work around your situation.
Try the WPS button
Before we move on to other solutions, the latest devices come with a WPS setup. This allows you to immediately connect your phone to Wi-Fi. It doesn’t even require a password. You may need to check the WPS settings on your router and see how to allow them.
Be aware that you can expose yourself to a security attack. It’s almost like an open radio frequency. Once you use the WPS button, quickly connect. There will also be no connection requests. So be careful.
If this doesn’t work, go to the other troubleshooting solutions below:
Fix Wi-Fi Authentication Error Occurred on Android
- Check your router
- Check your password or scan the Wi-Fi QR code
- Change the wireless network configuration
- Use Android System Recovery
- Change IP address from DHCP to static
- Check for Duplicate Network Name
- Try resetting your Wi-Fi network
- Change IP settings
- Change network security
- Use the latest Android firmware
1. Check your router
Before starting the long journey of fixing this error, check your router first. Sometimes the router fails or the operation is compromised. As a result, you may encounter WiFi authentication error on Android.
After making sure that everything is in order with your router, try rebooting it. This will eliminate the chance of a system crash. You can also reboot your router before moving on to other options:
- Power off the router first. Disconnect all cables, if any.
- After that, take your router and go to the back side. You will see a reset button. Click on it.
- Once you do this, your Wi-Fi connection will be reset to factory settings. You may then need to provide a new password and security protocol.
- Be sure to check your Wi-Fi connection and move on to other steps.
If you are still getting a Wi-Fi authentication error, try the other steps below:
2. Check the password or scan the Wi-Fi QR code
Sometimes the real problem lies with your keyboard. When entering a password, make sure that your keyboard does not add extra characters.
Another way is to connect to Wi-Fi using a QR code. To scan it with Android, follow these steps:
- Please go to Wi-Fi setting on your Android phone to turn it on.
- Click on the QR code icon. You can find it next to the Add Network option. The scanner will open as soon as you click on it.
- After your device scans the code, you will be prompted to connect to Wi-Fi. Select Connect.
Completing the above steps should connect Wi-Fi to your device. See if this fixes WiFi authentication error on Android. If it doesn’t work, then the problem is not the password. Hence, you will need to move on to the next solution.
3. Change the wireless network configuration
You will never connect if your Android device does not support signal transmission. Router blocking is not the only cause of the error. An unstable connection may be due to the selection of the wrong bandwidth.
- This happens when you don’t have the correct configuration. For example, your phone may support 2.5 GHz bandwidth instead of 5 GHz. There are many other similar reasons.
- If this was on your PC, you can try updating your drivers. But there is no such function for Android device.
- So the best thing you can do is go to your router settings and change the bandwidth from 2.5GHz to 5GHz and vice versa.
- Try several of these configurations until you develop a stable connection.
- You configure these settings by visiting the router’s admin panel.
- First go to a web browser and enter the default IP address.
- After that, you may have to provide a username and password.
- Go ahead and go to Advanced Settings.
- There are many things you can do there. For example, changing the fields of a static IP address.
- But that’s not what you’re here for. You are here to change the bandwidth setting.
- You will see a few steps below if you want to change the IP address field, among other things.
4. Use Android System Recovery
Sometimes system files can get corrupted which causes such errors. You can use Android System Restore to fix this issue as it is the most efficient way to deal with such crashes.
But you might think that you need programming knowledge to repair the system. Well, that’s not entirely true. There are so many third party apps that you can install on your device. After you download the app, you can run the system restore process through it to resolve this issue.
You can always try a system reset if you don’t want to use a third party app. Factory reset is an option that every phone has. Before doing this, you will need to back up your files and user data. This is to avoid problems in the future.
5. Change the IP address from DHCP to static
Double step back, you’ve been told Wi-Fi router configuration. This is one of those options where you change the IP. When the server fails to authenticate with DHCP, it causes an authentication error. So to overcome this, you can switch DHCP with a static IP. To do this, follow these steps:
- Open your Android device and go to its settings.
- Select “Wireless & Networks”and click “WLAN/Wifi”.
- Click on the network where the authentication failed.
- Now go to IP settings and open it.
- Change DHCP to static.
- Write down the static IP address on paper. Clear or delete all fields, and then re-save the static IP address.
Be careful when entering the IP address from the paper you wrote.
6. Check for Duplicate Wi-Fi Names
Sometimes people mistakenly connect to another Wi-Fi network with the same name. So make sure you don’t connect your device to the wrong Wi-Fi network due to duplicate names.
This happens more often when neighbors also have the same service. You and your neighbor may have the same Wi-Fi names. Thus, checking the network can solve this problem.
You can also use the “forget network”option to have the device find your home network again and reconnect to it. If your device already has the maximum number of networks it can store, forget about the network.
7. Try resetting your Wi-Fi network settings
The easiest way to overcome the authentication error is to restart the network. You need to delete the existing one and then try to connect again in order to complete this method. You can follow these instructions to reset your Wi-Fi network settings:
- The first thing you need to do is delete the Wi-Fi network. Go to your phone’s settings.
- Go to Wi-Fi and Network. Here you will find a list of networks that your phone is connected to or has been connected to. Select the Wi-Fi network you want to delete.
- Click on the “Forget”option to confirm your actions.
- A pop-up message will appear on the screen. Click Agree. This will delete all data and information about the selected network that you want to forget.
- Once the network is reset, turn Wi-Fi back on.
- Select the network you want to connect to and provide the required credentials.
- After entering the password, select Connect.
Following these steps will reconnect your device to Wi-Fi.
8. Change your IP settings
If the problem is deeply rooted, a network reset might not work. As a result, you will have to do extra work by resetting or changing the IP settings on your device. You can follow these steps to change the network connection on your phone:
- Go to “Settings”of your mobile phone and select “Wi-Fi settings”.
- In the Wi-Fi settings, you will have access to all the networks that you have saved on your device.
- To change the IP address, press and hold the network where you want to change it.
- Select “Manage network settings”/”Change network settings”in the new pop-up window.
- Now select “Show advanced options”.
- You will get access to the network settings. From there, go to the IP settings menu.
- Switch DHCP to static.
- Selecting static will provide you with additional options.
- Complete all options and select Save to save the changed settings.
Now go back and try connecting Wi-Fi to your device again. This time the error should be gone.
9. Change Network Security Type
Since the previous solutions didn’t work, it’s time to move on to comprehensive solutions. Sometimes your device selects the wrong type of security when connecting to Wi-Fi. As a result, there may be a collision with the security of your router by default.
This in turn causes a Wi-Fi authentication error. So, if this is the case, you can fix this problem by changing the security type. To do this, you will need to follow the following steps:
- Forget the Wi-Fi network that is causing problems.
- Now turn on Wi-Fi and select Add network.
- Specify a network name and select a security type.
- Click on the “Security”option to select your preferred security type.
- You will get many options to choose from. Select WPA/WPA2-PWe and click Save to save your changes.
Connect your device to Wi-Fi again to see if the error persists.
10. Use the latest Android firmware
An outdated version of the system software can cause several malfunctions in your device. As a result, it can also cause network-related errors. Therefore, to overcome this, you should check if your firmware is up to date. If it doesn’t, follow these steps to update it:
- Open “Settings”on your Android and navigate to “About phone”settings.
- Select System Update.
You will get the latest version if your device is out of date. Click “Update”to update the firmware.
Conclusion – Fix Wi-Fi Authentication Issue
WiFi Authentication Error Occurred on Android due to a network authentication error. This error can happen on your end, such as your router, device, IP address, etc.
Or it could very well happen at the end of your service provider. So, contact them if you have checked your device or router and followed all the above solutions.
If they also can’t solve your problem, change your network service provider. After all, it’s useless if you can’t use it.
FAQ
Why am I getting an authentication error on Android smartphones?
There can be various reasons for authentication failures. You may have a weak Wi-Fi network or a failure. Another reason could be the wrong Wi-Fi password. It is also possible that the problem is with your router. If this is not the reason, then something is wrong on the side of your service providers.
How to fix authentication failure in Android OS?
You can fix the authentication error by examining your router. If everything is in order with the router, try entering the password correctly. You can also scan your Wi-Fi QR code to connect to your device. Also, try resetting your Wi-Fi network settings or changing your DHCP IP settings to static.
Why can’t I connect to Wi-Fi even though the password is correct?
You may be trying to connect to a network that has the same name as your network. Most often, neighbors use the same service providers. It is also possible that your service provider’s server is down.
How to fix the authentication problem on my android phone?
There are many solutions to fix authentication issues on your Android phone. Try turning off and then turning on your mobile. Reset your device’s network settings and reconnect. Or use the android system recovery tool which can solve the problem.
Leave a Reply